Laura Kieft   I

If you’re craving a fun, pizza-inspired dish that works as an appetizer, side, or light meal, try these pizza twists! Rolled-out pizza dough gets topped with classic pizza filling, then twisted and baked until golden and irresistible.

Pizza With A Twist!

If you’re a pizza lover, then you’re going to be making these tasty pizza twists on repeat. Much like my pizza croissants, these twists are a fun, flavorful twist on a classic. Here’s why they’re so great:

  • Quick and easy – made with store-bought canned pizza dough for a light lunch or snack
  • Deliciously textured – crispy on the outside, soft on the inside, and packed with melty cheese and savory salami
  • Fully customizable – swap in your favorite pizza toppings or fillings to make them your own
  • Make-ahead – prepare them in advance and reheat easily

Recipe Ingredients

You just need 4 ingredients to make a fresh batch of these delicious pepperoni pizza twists! Be sure to check the recipe card below for full details:

  • pizza dough – I’ve used canned rolled pizza dough for convenience, but you can also make pizza dough by following this recipe for homemade pizza dough.
  • tomato sauce – slathered on the dough for that classic pizza flavor
  • shredded cheese – make sure to shred your cheese from a block for the best flavor and melt. Mozzarella cheese is a great choice for these pizza twists, but you can use another favorite
  • salami – slices are layered as a final topping before the loaded dough is twisted and baked

BAKING TIP: You can slice the pizza dough into thinner strips if you want to make more than 8 strips without doubling the recipe ingredients.

How To Make Pizza Twists

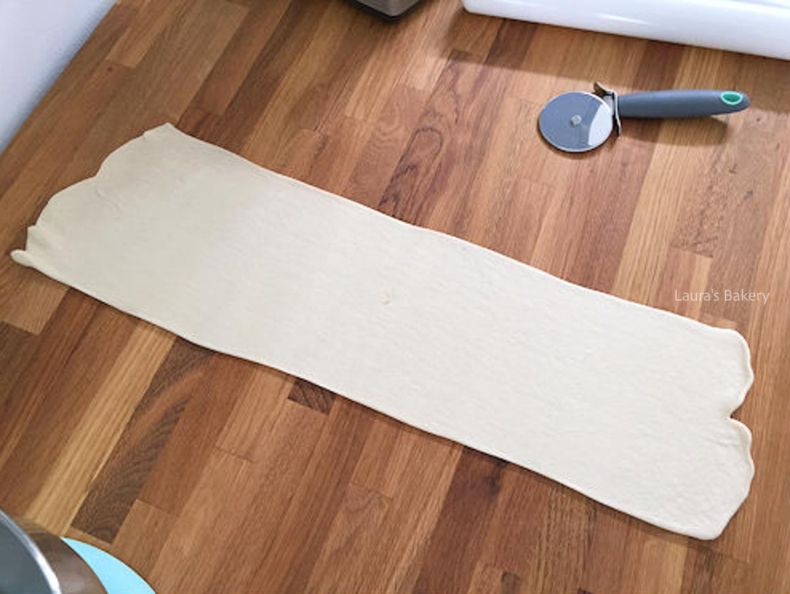
Pizza dough rolled out
1

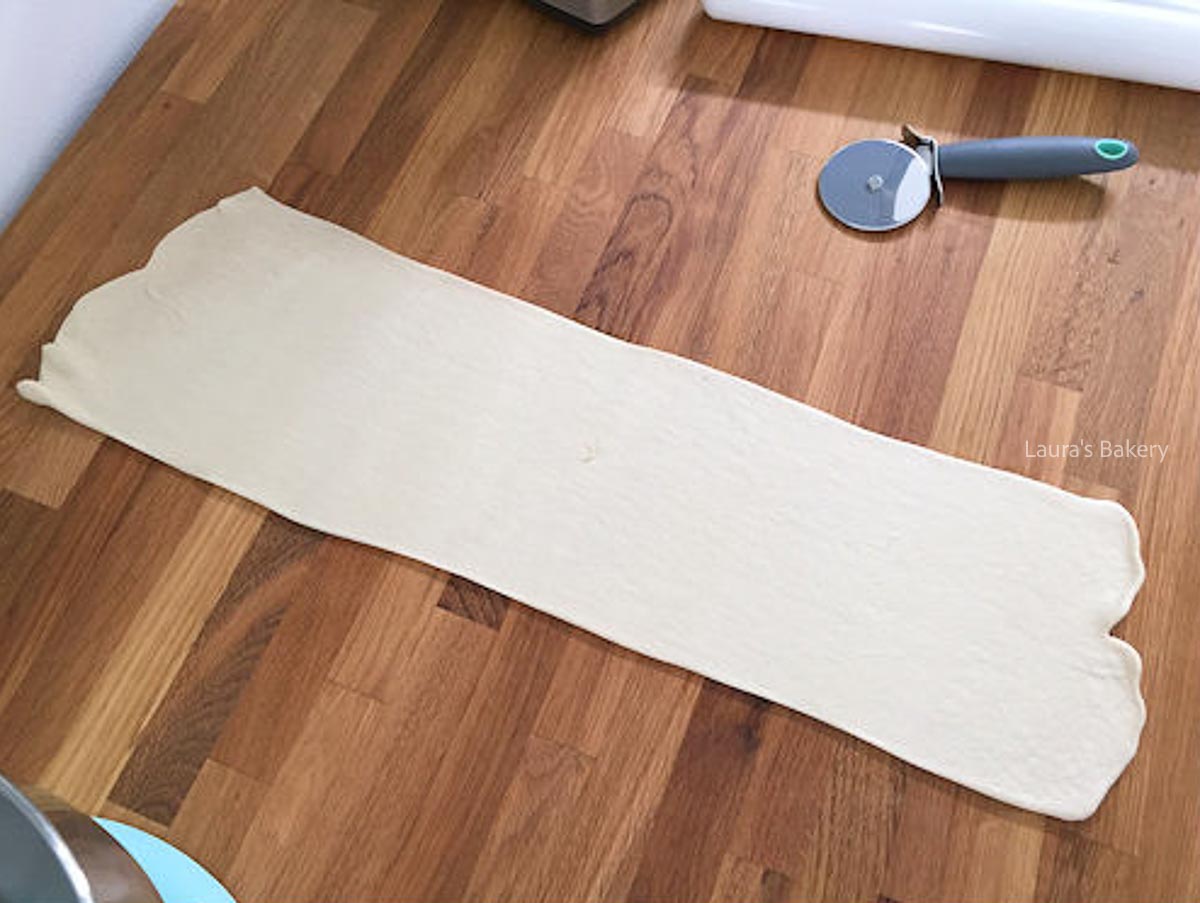
Roll out the canned dough to an even thickness

Open lightbox for image about Roll out the canned dough to an even thickness
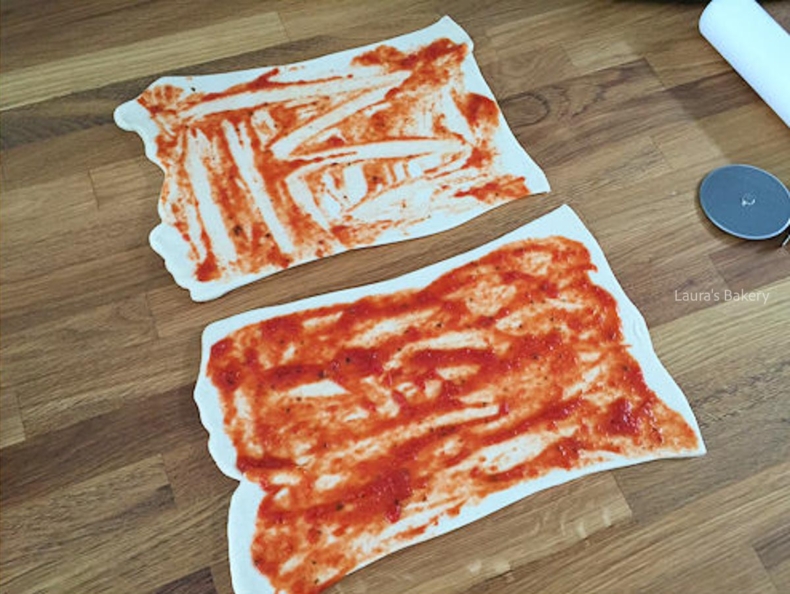
Tomato sauce spread over pizza dough
3

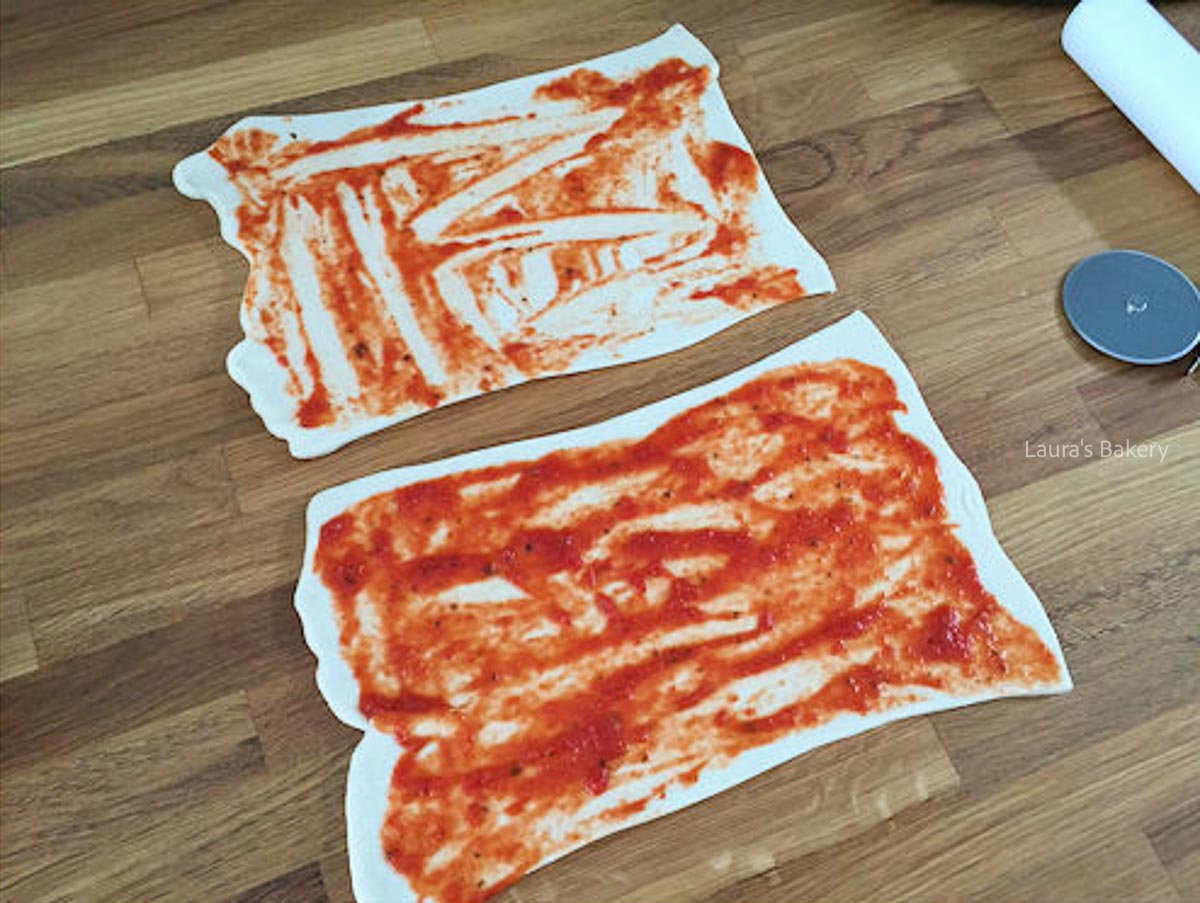
Spread a thin layer of tomato sauce of one piece of dough and a thicker layer on the other piece

Open lightbox for image about Spread a thin layer of tomato sauce of one piece of dough and a thicker layer on the other piece
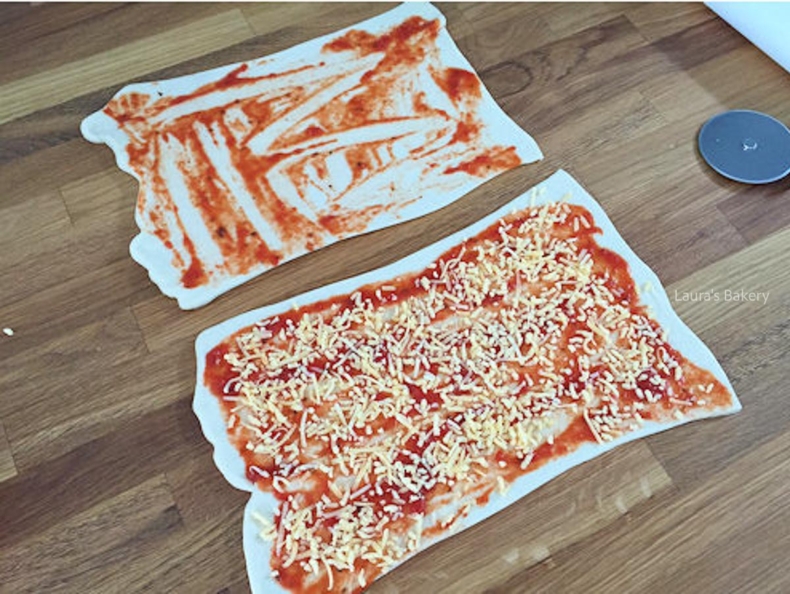
Shredded cheese added to pizza dough
4

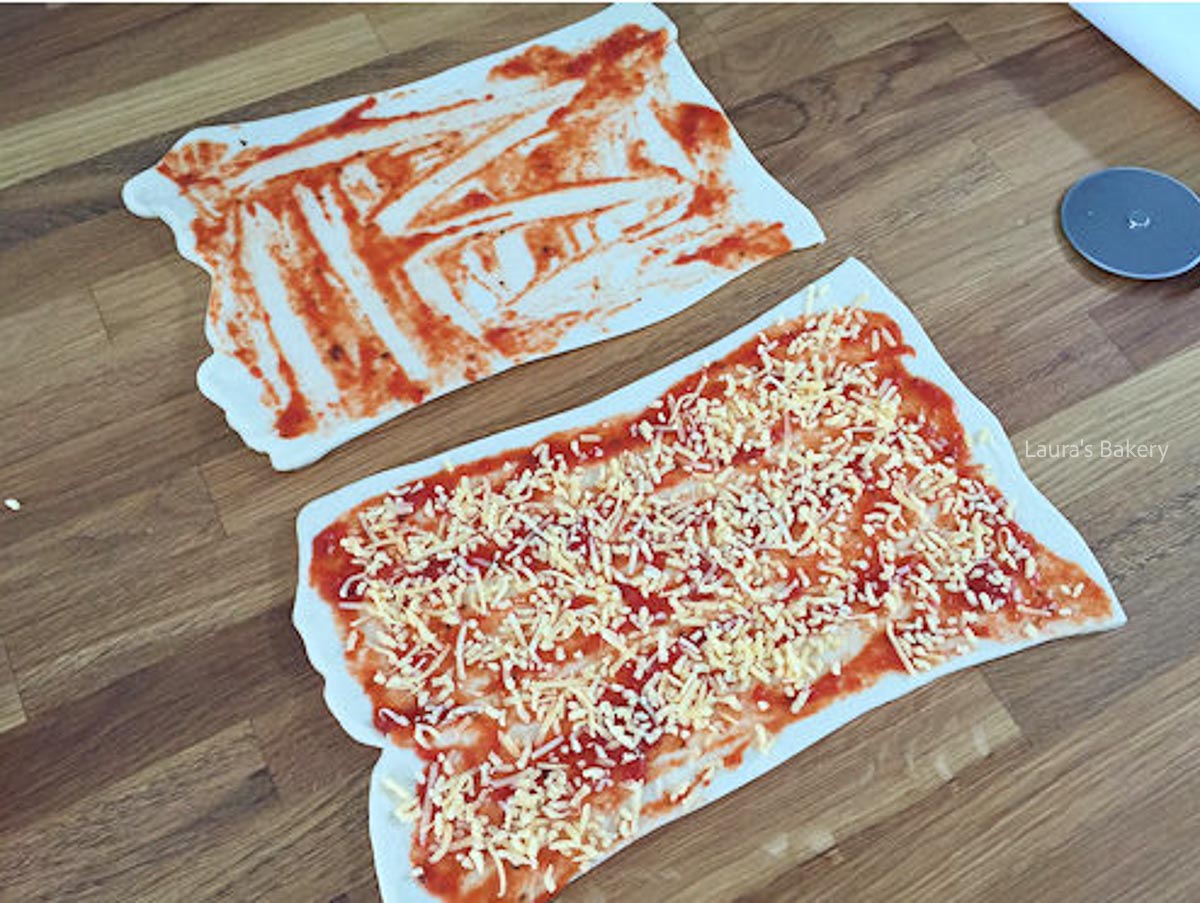
Sprinkle shredded cheese on the piece of dough with the thicker layer of sauce

Open lightbox for image about Sprinkle shredded cheese on the piece of dough with the thicker layer of sauce
Salami slices loaded onto pizza dough
5

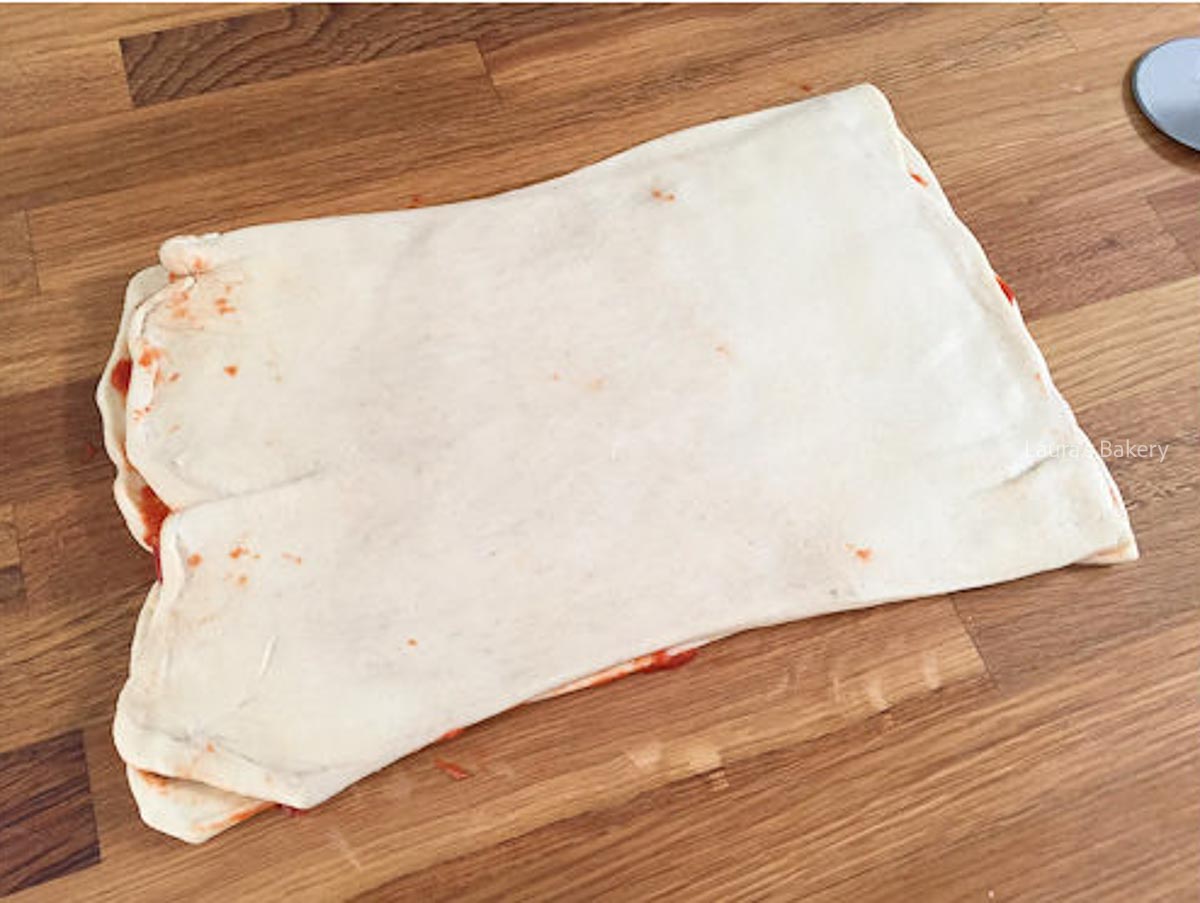
Top the cheese with slices of salami. Top the loaded piece of dough with the other piece

Open lightbox for image about Top the cheese with slices of salami. Top the loaded piece of dough with the other piece
Assembled pizza dough twisted to bake
6

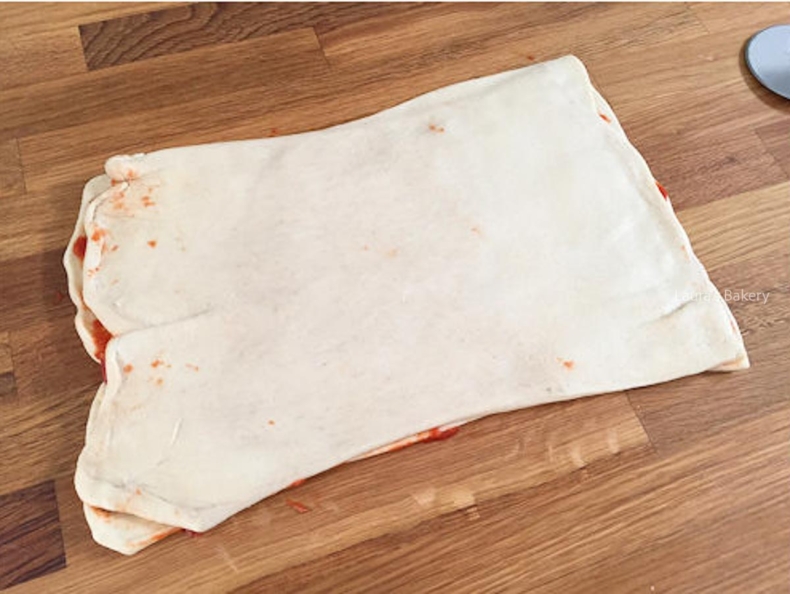
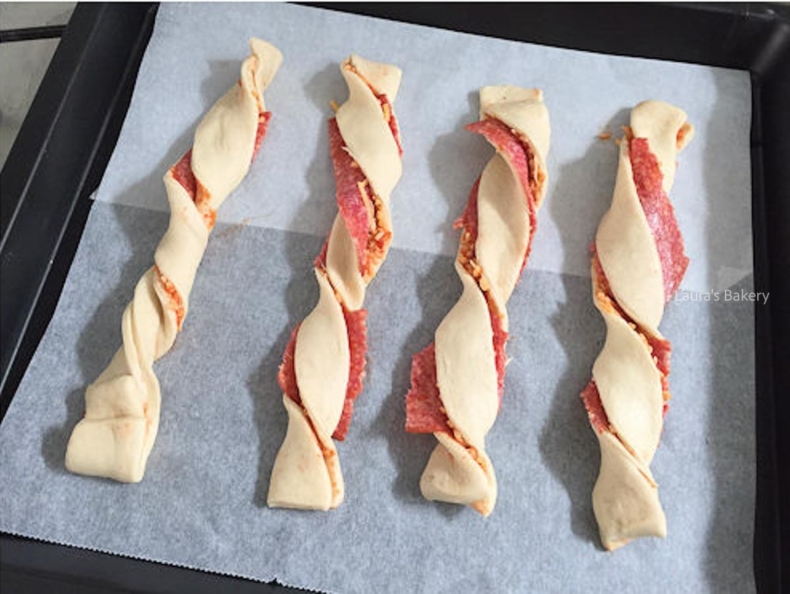
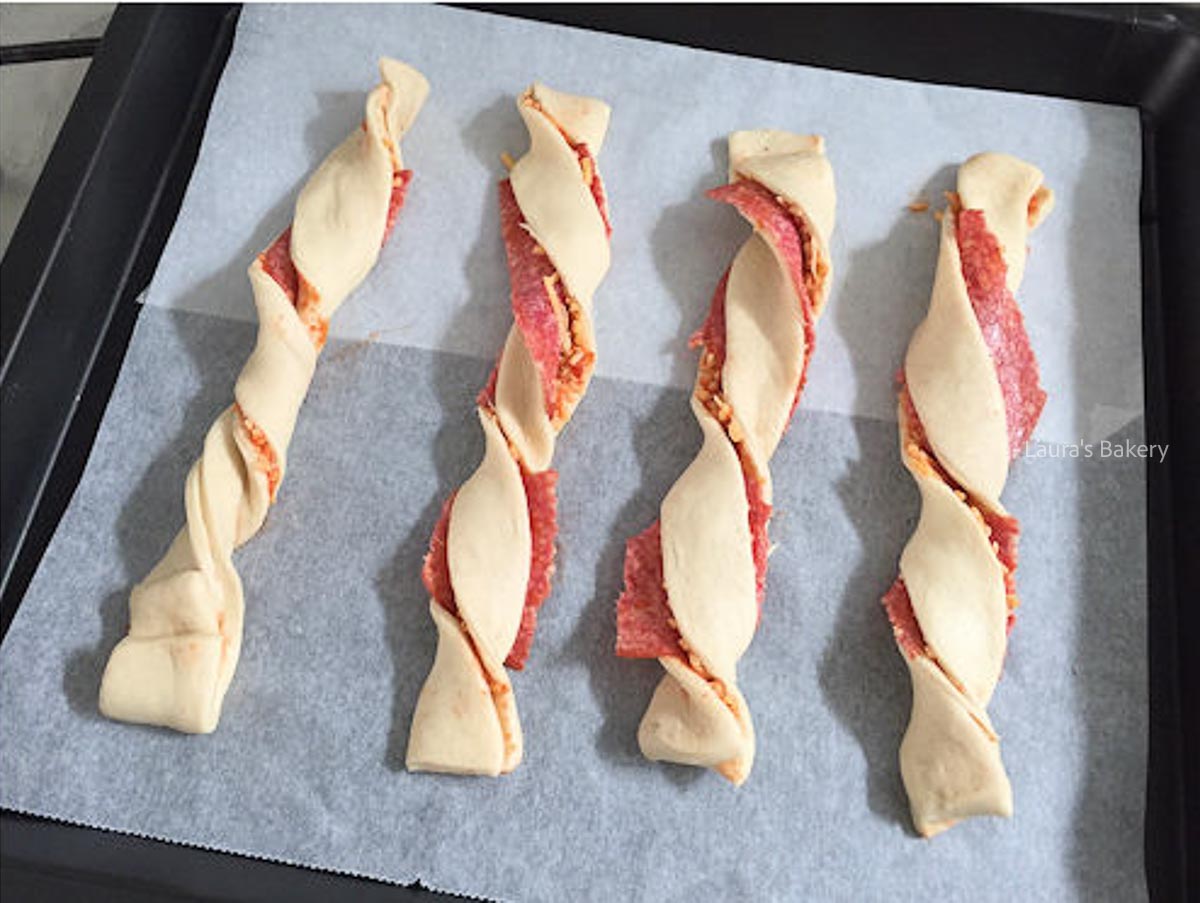
Cut the dough into strips and place on a baking tray. Twist and bake until cooked and golden brown

Open lightbox for image about Cut the dough into strips and place on a baking tray. Twist and bake until cooked and golden brown
1/6

Storing Pizza Twists

Store these pizza twists in an airtight container in the refrigerator for up to 2-3 days.

Can I freeze these pizza twists?

Yes you can also freeze these pizza twists. Make sure to let them cool completely and use a freezer bag or freezer container to store in the freezer for up to three months. You can reheat them frozen right away.

Reheating leftovers

If you want to reheat them, place them in the oven for 8-10 minutes at 350˚F/180˚C (conventional oven), keeping a close watch that they don’t burn.

More Tasty Appetizers and Snacks

There’s just something so satisfying about snacks and appetizers that are soft and doughy inside with crispy golden edges. Here are a few more recipes along the same lines that I know you’ll love:

Laura Kieft   I

FAQ Pizza Twists

What other fillings can I add?

Feel free to add ham instead of the salami slices. You could also experiment with a bit of pesto, fresh herbs (chives, parsley or cilantro), Italian seasoning, garlic powder, or by adding various spices. Keep in mind that larger pizza fillings could fall out of the twisted dough since it is not entirely enclosed. 

Can I make these pizza twists with puff pastry?

Yes, you can use puff pastry instead of pizza dough to make puff pastry pizza twists. I find the sturdy pizza dough is easier to twist when using fillings such as salami.

Are these good served hot and cold?

Absolutely! These pizza twists are delicious both hot and cold which allows you to serve them straight from the oven or make them ahead for convenience.

How should I serve these pizza twists?

Enjoy these pizza twists as is for a satisfying snack alongside pizza sauce and your favorite drinks. They’re also great with a bowl of warm soup or as part of a buffet.


Pizza twists

Print Recipe

No votes yet

Pizza Twists

It’s pizza but with a twist! These pizza twists are super easy to make and absolutely delicious as a party snack.
Preparation10 minutes
Cooking14 minutes
Total24 minutes
Servings: 8 twists

Ingredients

  • 1 can ready-made pizza dough in a roll or make your own using a recipe
  • tomato sauce
  • shredded cheese
  • salami

Instructions

  • Roll out the dough and place it on your work surface. Use a rolling pin to roll the dough out thinner lengthwise. Cut the dough in half and spread tomato sauce over both pieces. On one piece, use just a thin layer, this will act as the “glue.” On the other half, spread a slightly thicker layer, but don’t use too much.
  • Sprinkle a handful of shredded cheese over the side with the most sauce, then distribute the slices of salami on top. Place the other piece of dough on top of the filled half.
  • Using a pizza cutter (or knife), cut the dough into strips. Make them as narrow or wide as you like, I went for slightly wider strips and got a total of 8.
  • Transfer the strips to a baking sheet lined with parchment paper and twist both ends in opposite directions to create a twister shape.
  • Bake the pizza twisters for 12-14 minutes at 400°F/200°C (conventional oven) until cooked through and golden brown.
Homemade granola-3

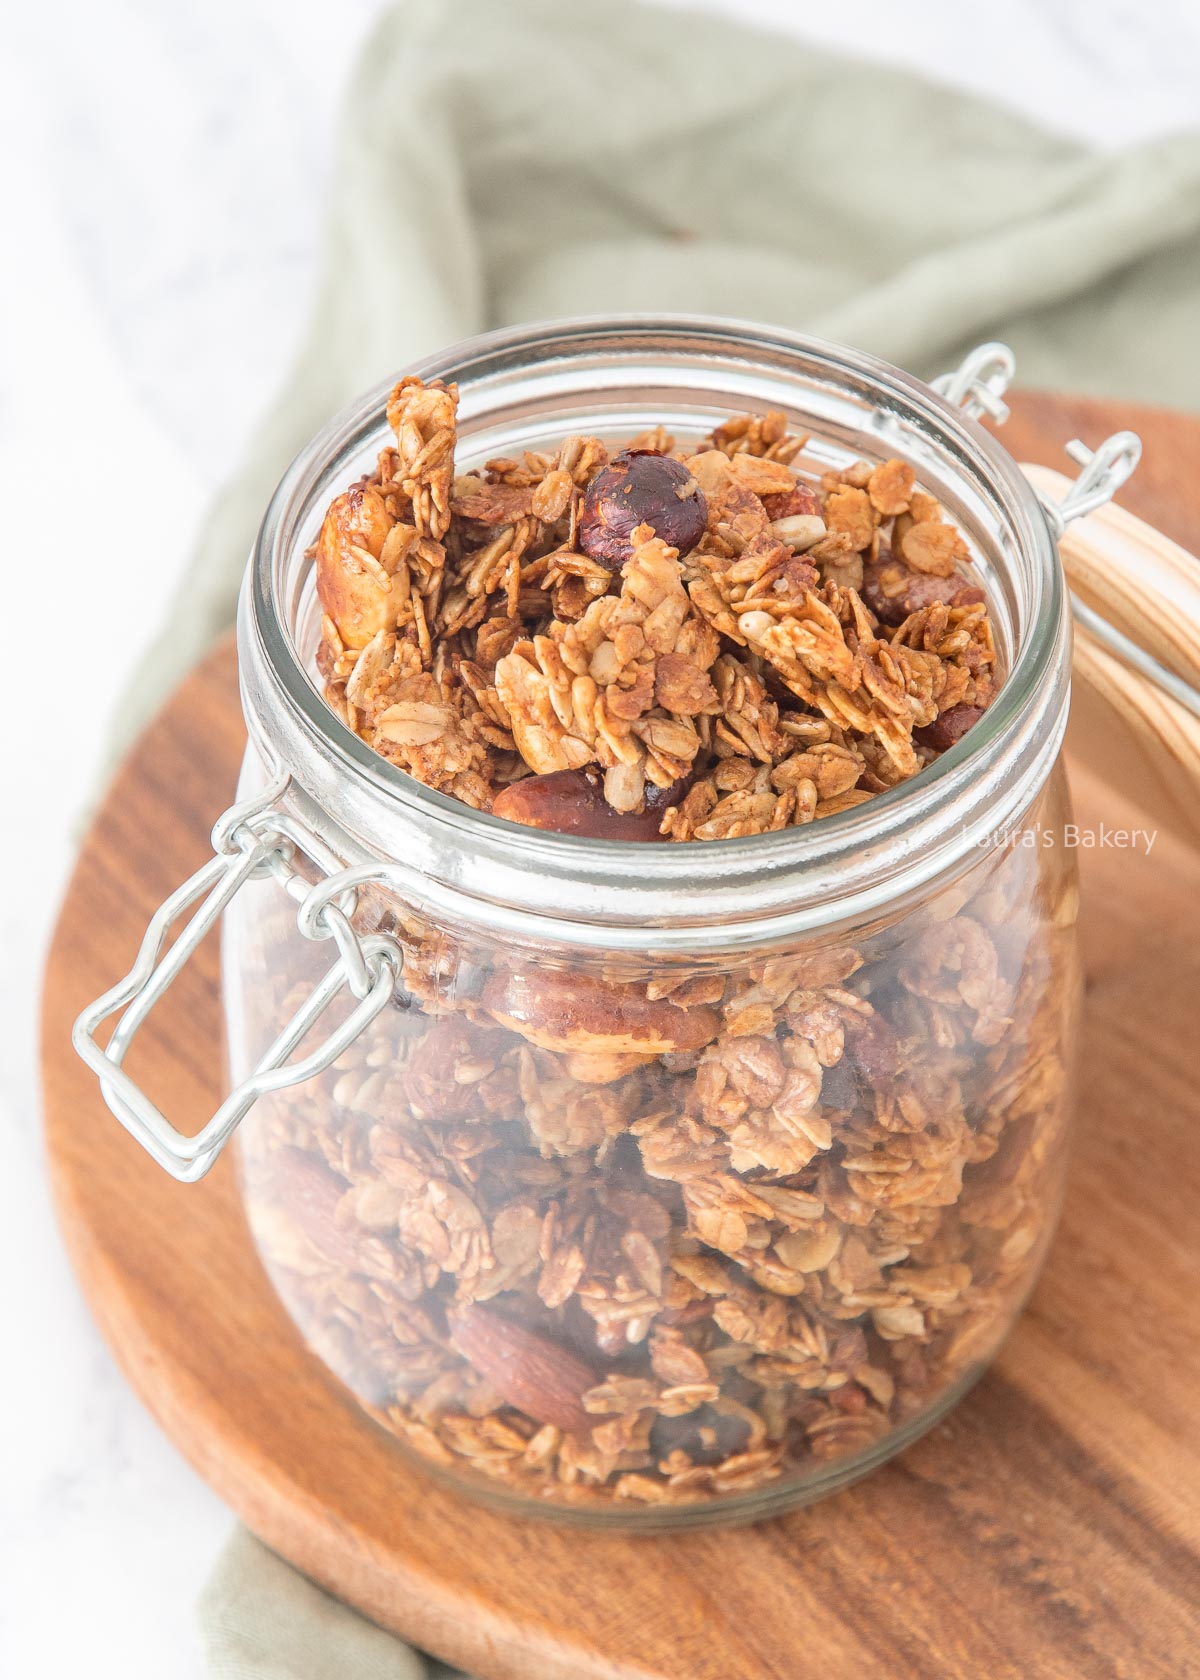
A simple and quick recipe for anyone who loves granola and crunchy cereal in general. The best part? You can make this granola exactly the way you like it. This is the basic recipe but the possibilities are endless, like I already showed in my coffee granola recipe.

This is Why I Stopped Buying Granola

I could honestly eat granola for breakfast, lunch and even for dessert. But store-bought granola tends to have loads of raisins and I am the kind of person who picks out all the raisins. So I decided to create my own granola recipe.

  • Making your own granola means you get to decide what goes in it
  • Love nuts? Just add whichever you like. Want to skip some? Easy too
  • Quicker than you think, smells amazing while it’s baking and you have a perfectly customized jar of homemade granola

Recipe Ingredients

Since granola is so easy to adjust, I’m giving you my base recipe but you will find loads of variations below as well

  • rolled oats – this is sort of my go-to choice for the base recipe. I tend to go for old-fashioned oats with larger flakes because I love the crunchy result they offer
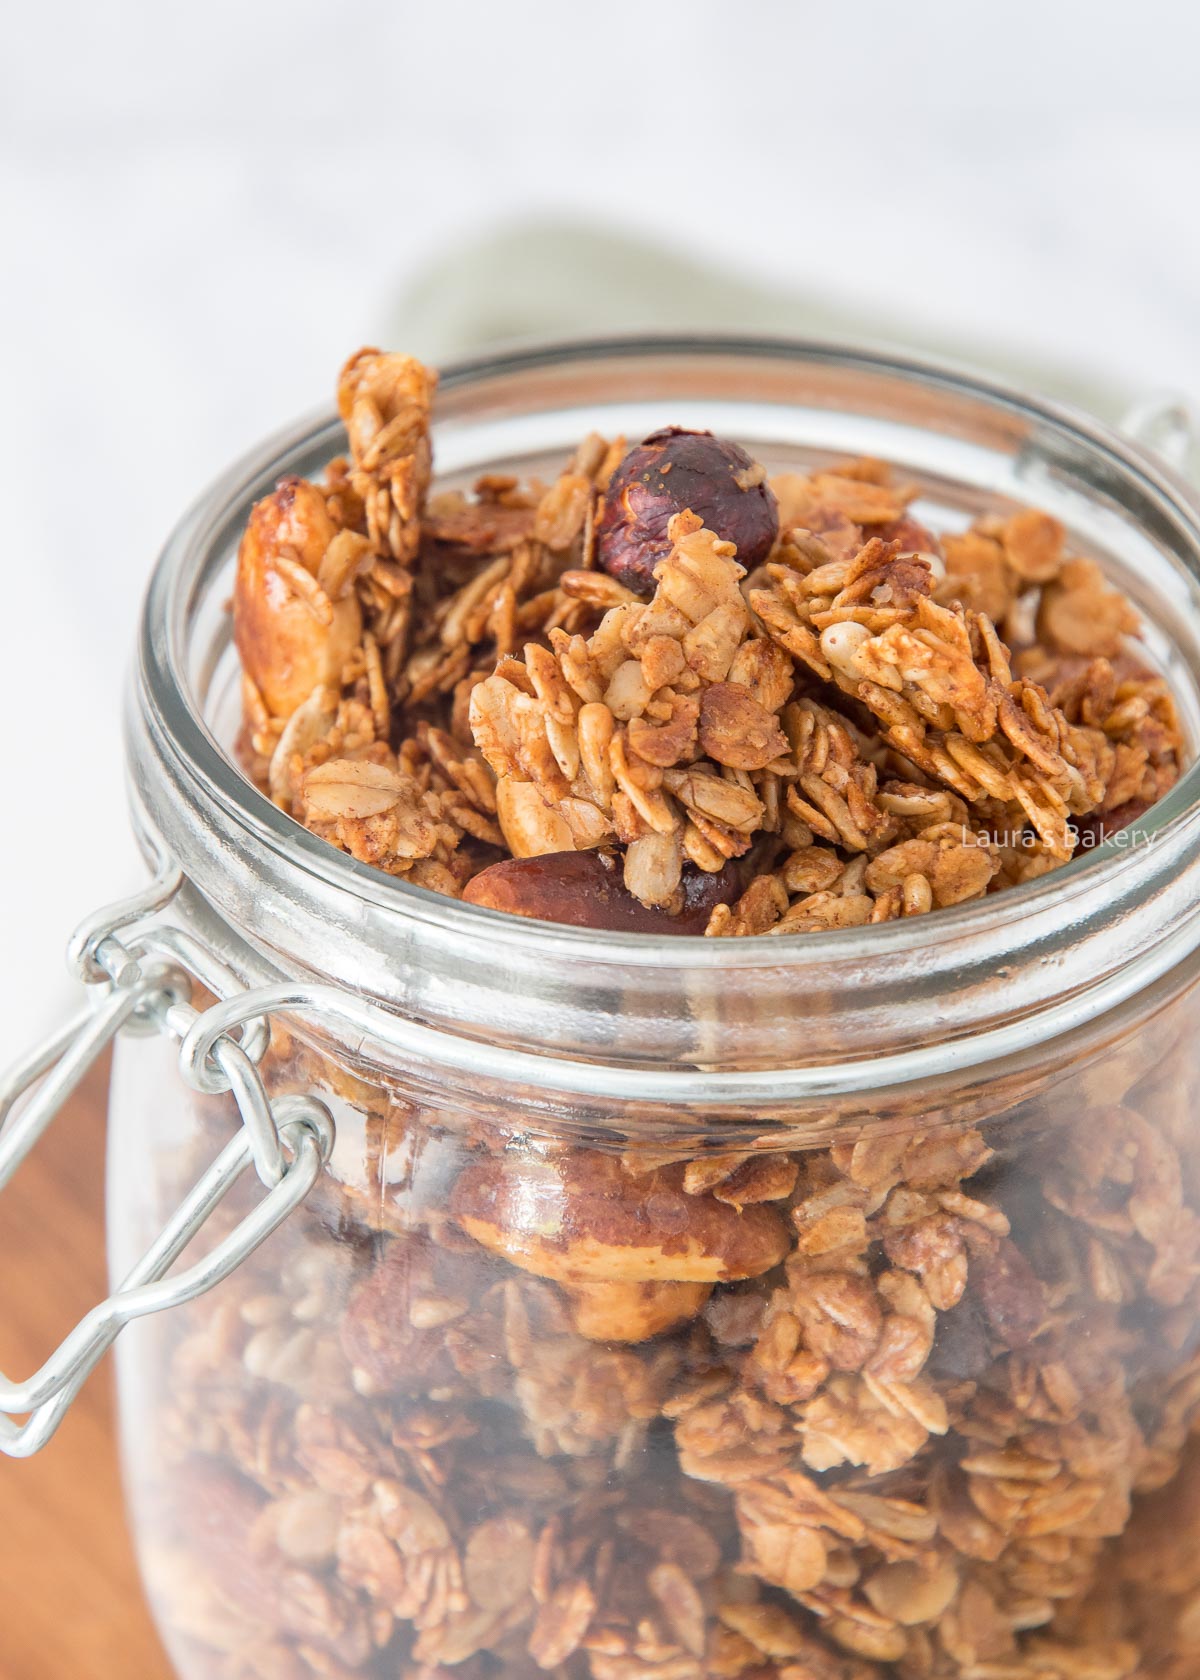
  • nuts – always use unsalted. I use a variety of nuts. Usually something with almonds, but you can absolutely use cashew nuts, hazelnuts, walnuts, pecans or different nuts of choice
  • seeds – I go for pumpkin and sunflower seeds. You can also add some flax seeds, sesame seeds or chia seeds to get more fiber into the granola
  • cinnamon – this is optional but I do highly recommend it. If you really are not a fan of cinnamon, you can replace it with ginger, cardamom or another spice of your choice
  • honey – honey adds sweetness but it also creates that lovely crunchy texture and it binds the elements together into a nice cluster. The more honey you use the more you have a clumpy granola. Your choice. You can also leave it out completely. That works too. Can also be replaced for maple syrup for a vegan alternative
  • oil – I go for a neutral oil like sunflower oil. Avocado oil, coconut oil or another neutral oil works too. You do need oil to get a crispy granola, so don’t skip this part
Homemade granola-1

How To Make Homemade Granola

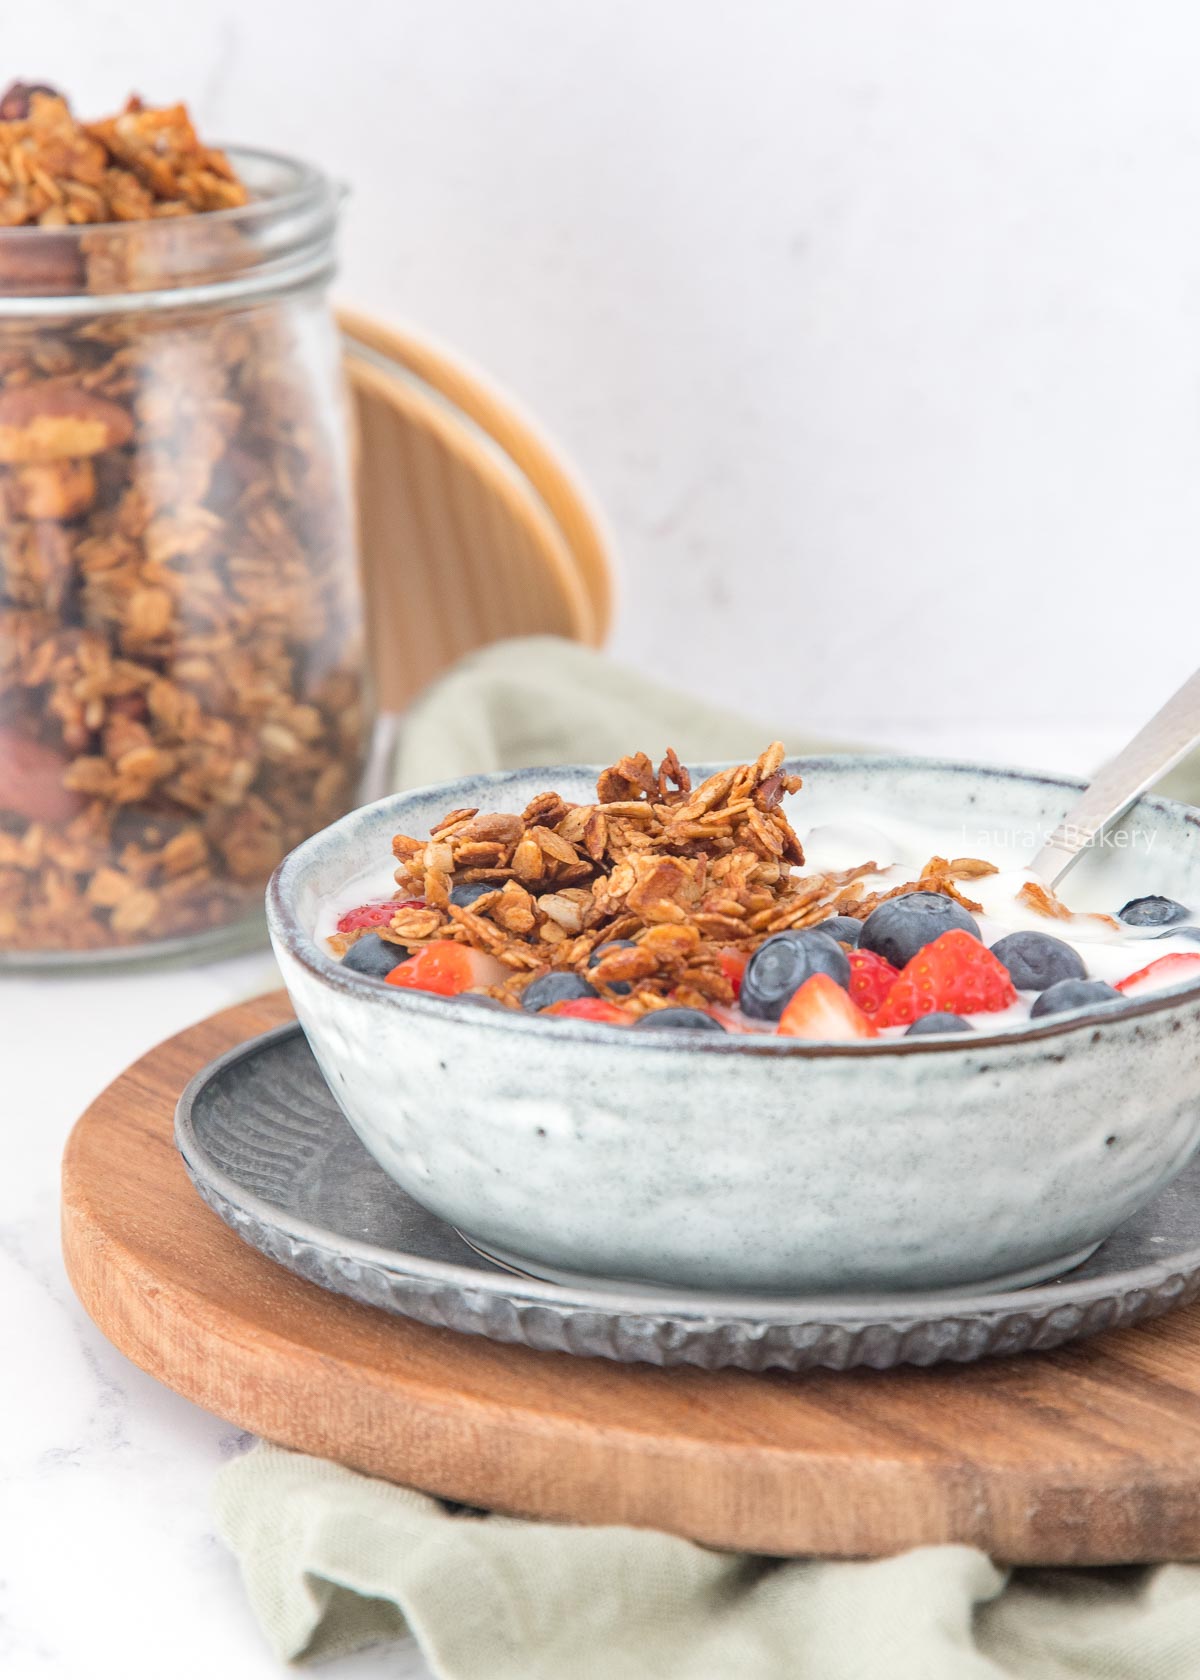
If you love granola in your bowl of Greek yogurt in the morning, this easy granola recipe is for you!

You need a large bowl and a spoon. I start by adding all the dry ingredients into the bowl and mixing this through. Next I add the wet ingredients and give it a good stir to make sure that all the mixture has some honey and oil. That way, I get the best result.

Next, you spread the granola mix on a large baking tray lined with parchment paper in an even layer. Don’t let the layer get too thick or it will bake unevenly. If necessary, you can use two baking trays or bake in batches.

Bake in the preheated oven for about 15-20 minutes at 350˚F/180˚C (conventional oven) or until it’s golden brown. Make sure to stir halfway through.

Once baked, let it cool down completely before you store it in an airtight container. You will never go back to the store-bought versions once you’ve made your own!

Optional add-ins

While this basic recipe is delicious and my go-to favorite granola, you can add different things for extra flavor.

After baking you can add things like dried fruits (and if you do like raisins, you can use those of course too), chocolate chips and I even add some Dutch pepernoten when it’s that season! You can also add unsweetened coconut flakes right before or after baking.

Storing granola

I have to admit: homemade granola rarely lasts more than a week in my house before the jar is empty. But it can last longer.

How long does granola keep?

In a well-sealed container, homemade granola will keep for about 3-4 weeks. Often even longer, especially if stored in a truly airtight container.

Can you freeze granola?

You can, but I wouldn’t recommend it. It already keeps well at room temperature, and freezing can make it lose its crunch after thawing.

More Granola Recipes

Since I love making variations to basic granola check out the below as well!

Homemade granola-2

FAQ Homemade Granola

How do I make my granola extra crunchy?

For extra crunchy granola, don’t stir it too often while baking. Stirring just once halfway through is enough. Also, the combination of honey and oil helps create those delicious crispy clusters.

Why isn’t my granola forming clusters?

Clusters form when the mixture sticks together during baking. Make sure you’re using enough honey (or another liquid sweetener) and press the granola down slightly on the baking sheet before baking. Let it cool completely before breaking it up, that’s when it crisps up.

Can I make this granola without honey?

Yes, you can substitute the honey with maple syrup or agave syrup. Keep in mind that the flavor will change slightly, but it will still be delicious. You can also check out this sugar-free granola.

Can I add dried fruit to this recipe?

Definitely! Just add dried fruit like raisins, cranberries, or apricots after baking. If you add them before baking, they can burn and become hard.

Can I make this granola nut-free?

Yes, you can replace the nuts with extra seeds like pumpkin seeds, sunflower seeds, or even coconut flakes for a nut-free version.


Homemade granola

Print Recipe

No votes yet

Homemade granola

Did you know making your own granola is incredibly easy? The fun part is that you can customize it however you like. This version is my personal favorite.
Preparation5 minutes
Cooking20 minutes
Total25 minutes
Servings: 1 large jar

Ingredients

  • 150 grams rolled oats
  • 100 grams mixed unsalted nuts
  • 25 grams pumpkin seeds
  • 25 grams sunflower seeds
  • 1 tsp cinnamon
  • 4 tbsp honey
  • 3 tbsp sunflower oil

Instructions

  • Add everything to a bowl and mix well.
  • Spread the mixture evenly onto a baking sheet lined with parchment paper.
  • Bake for 15-20 minutes at 350°F/180˚C (conventional oven), stirring halfway through.
  • Let the granola cool completely before transferring it to a jar.
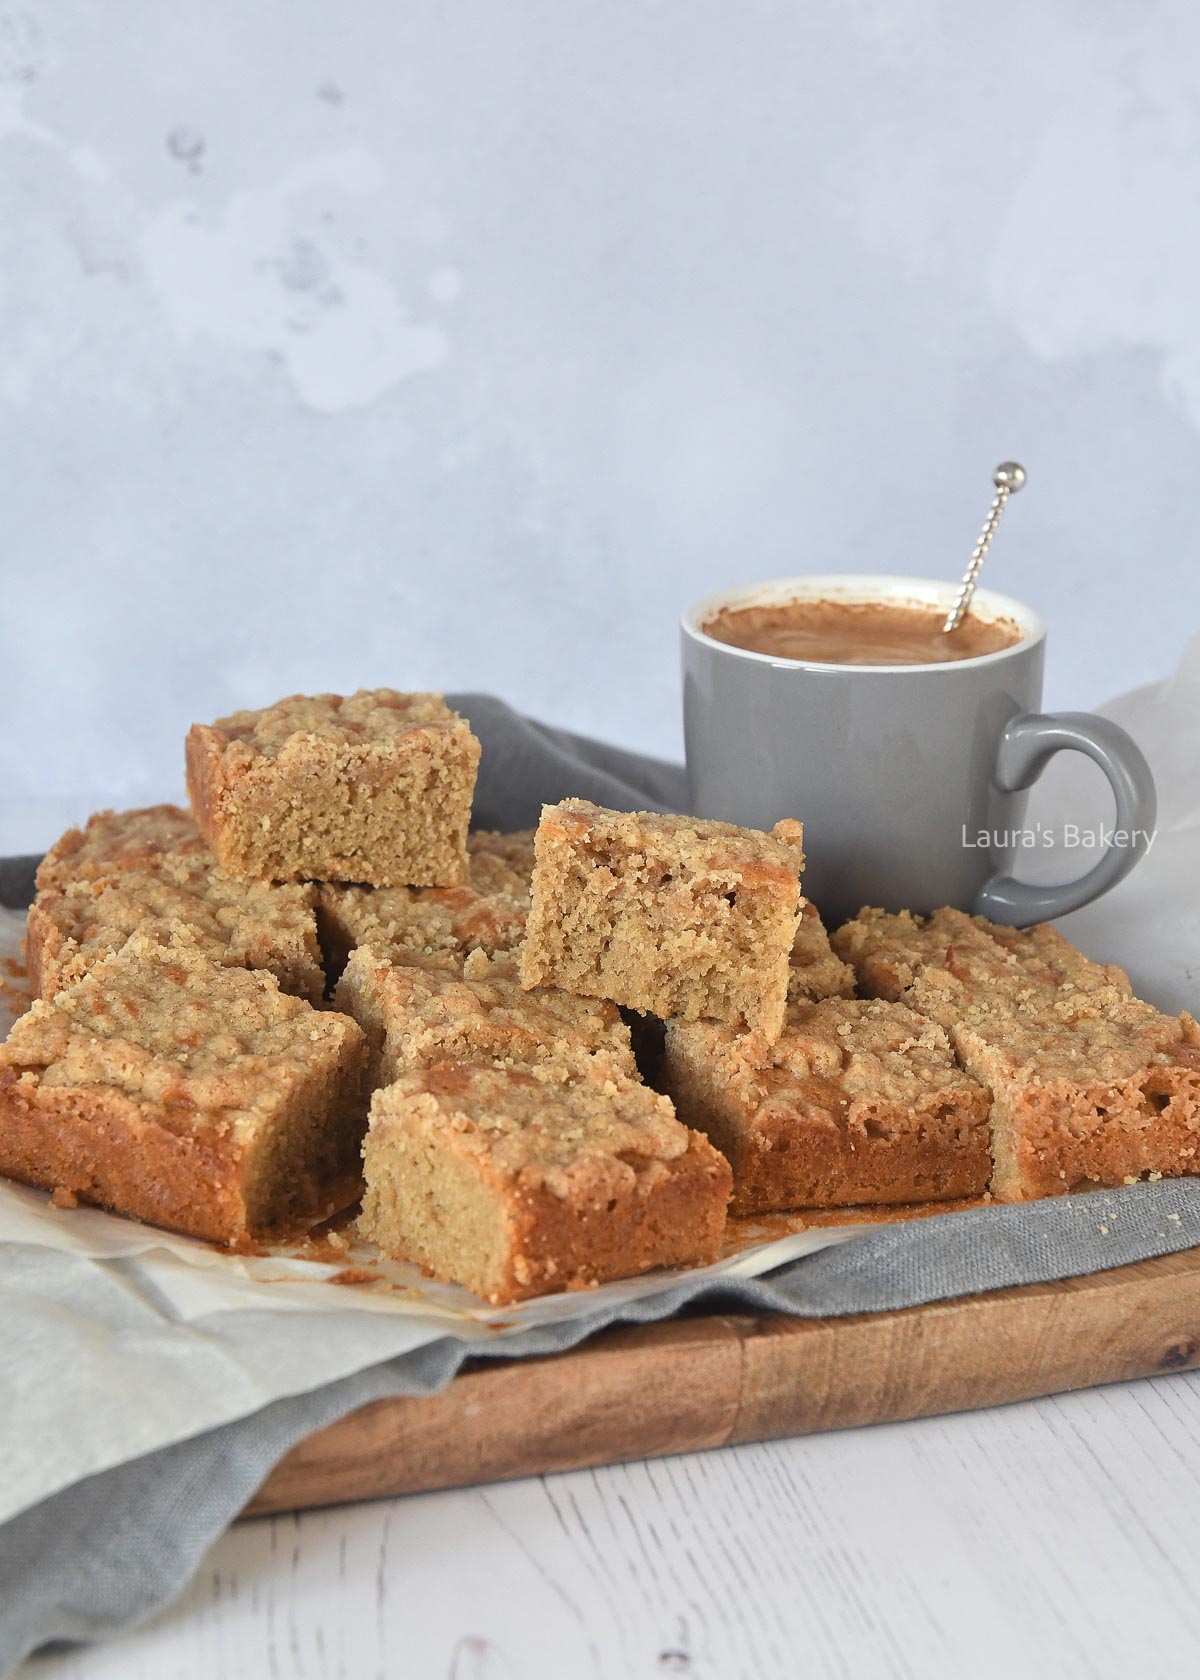
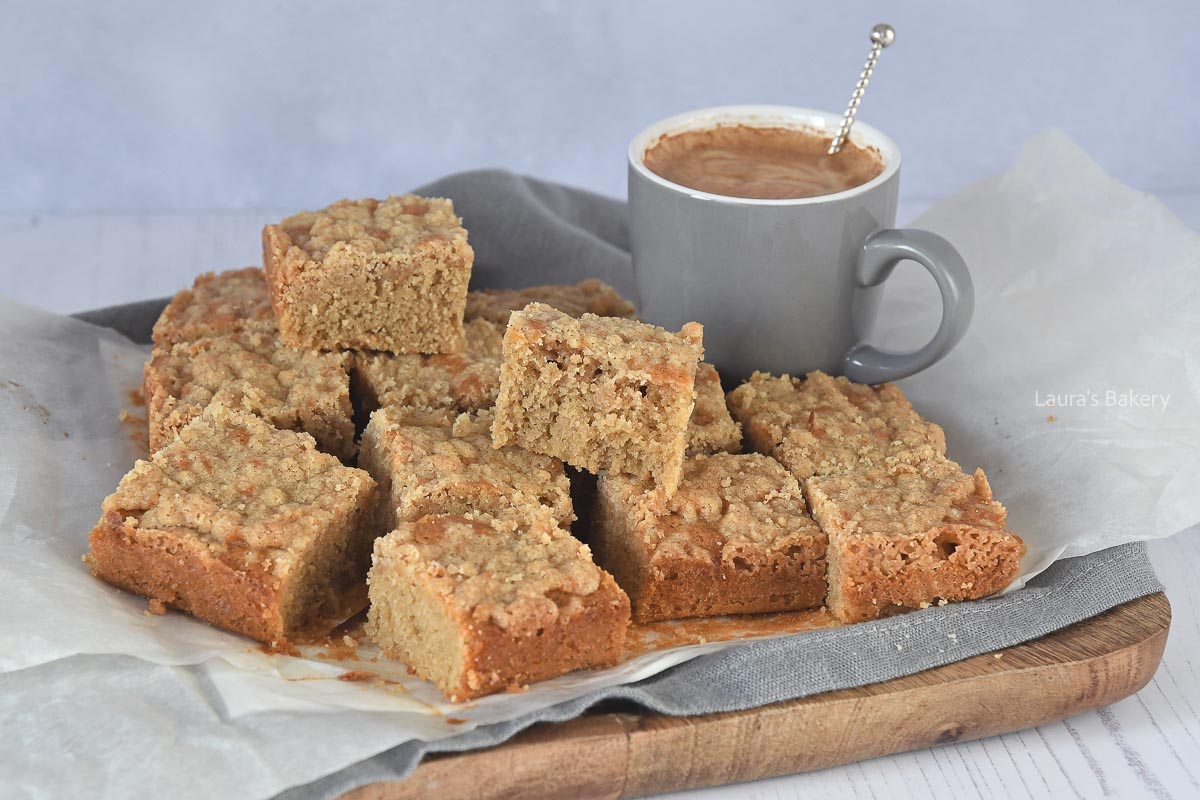
Coffee crumble cake-1

Soft, buttery cake meets a golden, crisp crumble in this irresistible coffee crumble cake. It’s the kind of cozy, all-day treat that feels just as right with your morning coffee as it does for dessert!

The Coziest Way to Get Your Coffee Fix!

Crumb coffee cake is one of those cakes that somehow feels suitable to indulge in any time of day. Here’s why I think you’ll also love it:

  • Perfect with coffee or tea, whether you’re celebrating a birthday breakfast, catching up with friends, or serving it for dessert
  • The generous crumble topping adds a delicious crunch and rich flavor to every slice
  • Easily customize this cake by adding spices, oatmeal, or nuts to the batter or topping.

Recipe Ingredients

This coffee crumble cake checks all the right boxes. Even better, it calls for simple pantry staples that you likely already have. Be sure to check out the recipe card below for full details:

  • unsalted butter – soften for easy creaming with the sugar. I prefer unsalted butter for better control of the salt content in my baked goods
  • granulated sugar
  • vanilla extract – try this easy 2-ingredient homemade vanilla extract when making this moist vanilla cake base
  • eggs – bring to room temperature for easy mixing
  • self-rising flour – this flour already contains baking powder, so your cake rises without needing to add separate leavening. This helps create a light, airy crumb
  • salt – enhances the flavors of the cake
  • instant coffee powder – I prefer a subtle coffee flavor in my baked goods, but you may want to taste the batter and increase it for a more prominent flavor. Keep in mind that the coffee flavor will fade slightly in the oven
  • crumble – similar to this homemade shortcrust pastry recipe, this crumble topping combines butter, sugar, flour, and salt. The coffee flavor of this delicious cake is carried through to the crumble topping by the addition of instant coffee powder

What is a coffee cake?

“Coffee cake” gets its name not (only) from its ingredients, but from how it’s served. This lightly sweet, crumble-topped treat was created as a social snack to enjoy alongside a cup of coffee.

It’s believed to have originated in Europe, with the tradition carried over to various parts of the world. The name has stuck, even though the classic coffee cake contains no coffee at all.

As you can tell, I have included coffee in this coffee cake recipe. The flavor is delicious but not overpowering. Perfect for coffee and non-coffee lovers alike. And if you love coffee flavors make sure to also check out the coffee granola recipe,  which is a twist on my normal granola recipe.

Coffee crumble cake-2

How To Make Coffee Breakfast Cake

Start by creaming the sugar and butter. Add the eggs and extract and mix until combined.

Mix in the dry ingredients (flour, salt, and instant coffee powder). Don’t overmix the batter as this can result in an overly dense cake.

Pour the batter into a parchment-lined baking pan and spread evenly so that you don’t get any underbaked spots in the cake.

Now for the crumble topping. Add all of the ingredients in a bowl and use your hands to work it into a crumbly dough.

Sprinkle the crumbs over the cake and bake for 25 minutes at 320°F/160°C (conventional oven) until cooked through and golden brown.

BAKING TIP: I love to use a 20×20 cm/8×8-inch square cake pan for this coffee crumb cake to create uniform cake squares. Leave some parchment paper overhang on either sides as a simple way to remove the baked cake from the pan for cutting.

Storing Coffee Crumble Cake

Wrap leftover coffee crumble cake in aluminum foil and store in an airtight container at room temperature for up to 4-5 days.

Can I freeze coffee crumble cake?

Absolutely! Wrap individual slices of the cake with foil and plastic wrap. Transfer the cake slices to a freezer-safe bag or airtight container and freeze for up to 3 months.

Thaw the exact number of cake slices you desire at room temperature when ready to enjoy again.

Reheating

While leftover coffee crumble cake is delicious at room temperature, you can heat it in the oven for a few minutes to warm it through and to regain some crispy texture.

More Crumble Baked Treats

If you love the contrast of soft, moist cake and a crisp, buttery crumb topping, you’ll want to try these irresistible crumble-inspired treats too:

FAQ Coffee Crumble Cake

How do I stop the crumble topping from sinking into the batter or melting while baking?

To prevent the crumble topping from sinking into the batter, chill the batter in the fridge for a short time. This is particularly helpful if you have a warm kitchen.

For a crisp crumble that won’t melt while baking, make sure that the butter isn’t too warm when mixing it with the rest of the crumble ingredients.

Can I add oatmeal to the crumble topping?

Absolutely! Oatmeal not only gives extra flavor to the crumble topping, but also an extra tasty texture. Make sure to reduce the amount of flour when adding oatmeal to prevent an overly dry crumble topping. For example, you could add 40 grams of oatmeal and reduce the all-purpose flour to an equal amount of 40 grams.

Is the coffee flavor strong in this crumble cake recipe?

No, not at all. The coffee flavor, while present in both the cake batter and crumble topping, fades as the cake bakes in the oven. It’s a lovely subtle flavor which you can intensify with additional instant coffee powder, if you like.

Can I use brown sugar to make the crumble?

Yes, brown sugar works too. Keep in mind that brown sugar adds more moisture which will result in a softer crumble texture while white sugar will provide a more crispy texture.

I don't like coffee! What else can I use?

Feel free to leave the instant coffee powder out and add cinnamon powder into the batter and crumble for a touch of warmth.

Will this recipe work in a round springform pan?

It depends on the size of the round springform pan. I recommend a round 24 cm/9-inch springform pan. You will not need to adjust the bake time.


Coffee crumble cake

Print Recipe

No votes yet

Coffee Crumble Cake

This cake is guaranteed to delight every coffee lover! A soft, moist coffee cake topped with a golden crumble for the coziest treat.
Preparation15 minutes
Cooking25 minutes
Total40 minutes
Servings: 16 people

Equipment

  • 8 x 8 inch (20 x 20 cm) square pan

Ingredients

Cake batter

  • 100 grams unsalted butter
  • 100 grams granulated sugar
  • 1 tsp vanilla extract
  • 2 eggs
  • 100 grams self-rising flour
  • pinch of salt
  • 1 1/2 tsp instant coffee powder

Crumb topping

  • 60 grams unsalted butter
  • 80 grams granulated sugar
  • 80 grams all-purpose flour
  • pinch of salt
  • 1 tsp instant coffee powder

Instructions

  • Cream the butter and sugar together until light and fluffy. Add the eggs and vanilla extract and mix until fully incorporated.
  • Add the self-rising flour, salt, and instant coffee powder. Mix until combined.
  • Pour the batter into a parchment-lined baking pan and spread it evenly.
  • For the crumb topping, combine all ingredients in a bowl and use your hands to work it into a crumbly dough. Sprinkle the crumbs over the batter.
  • Bake for about 25 minutes at 320°F/160°C (conventional oven) until cooked through and golden brown.
Laura Kieft   I

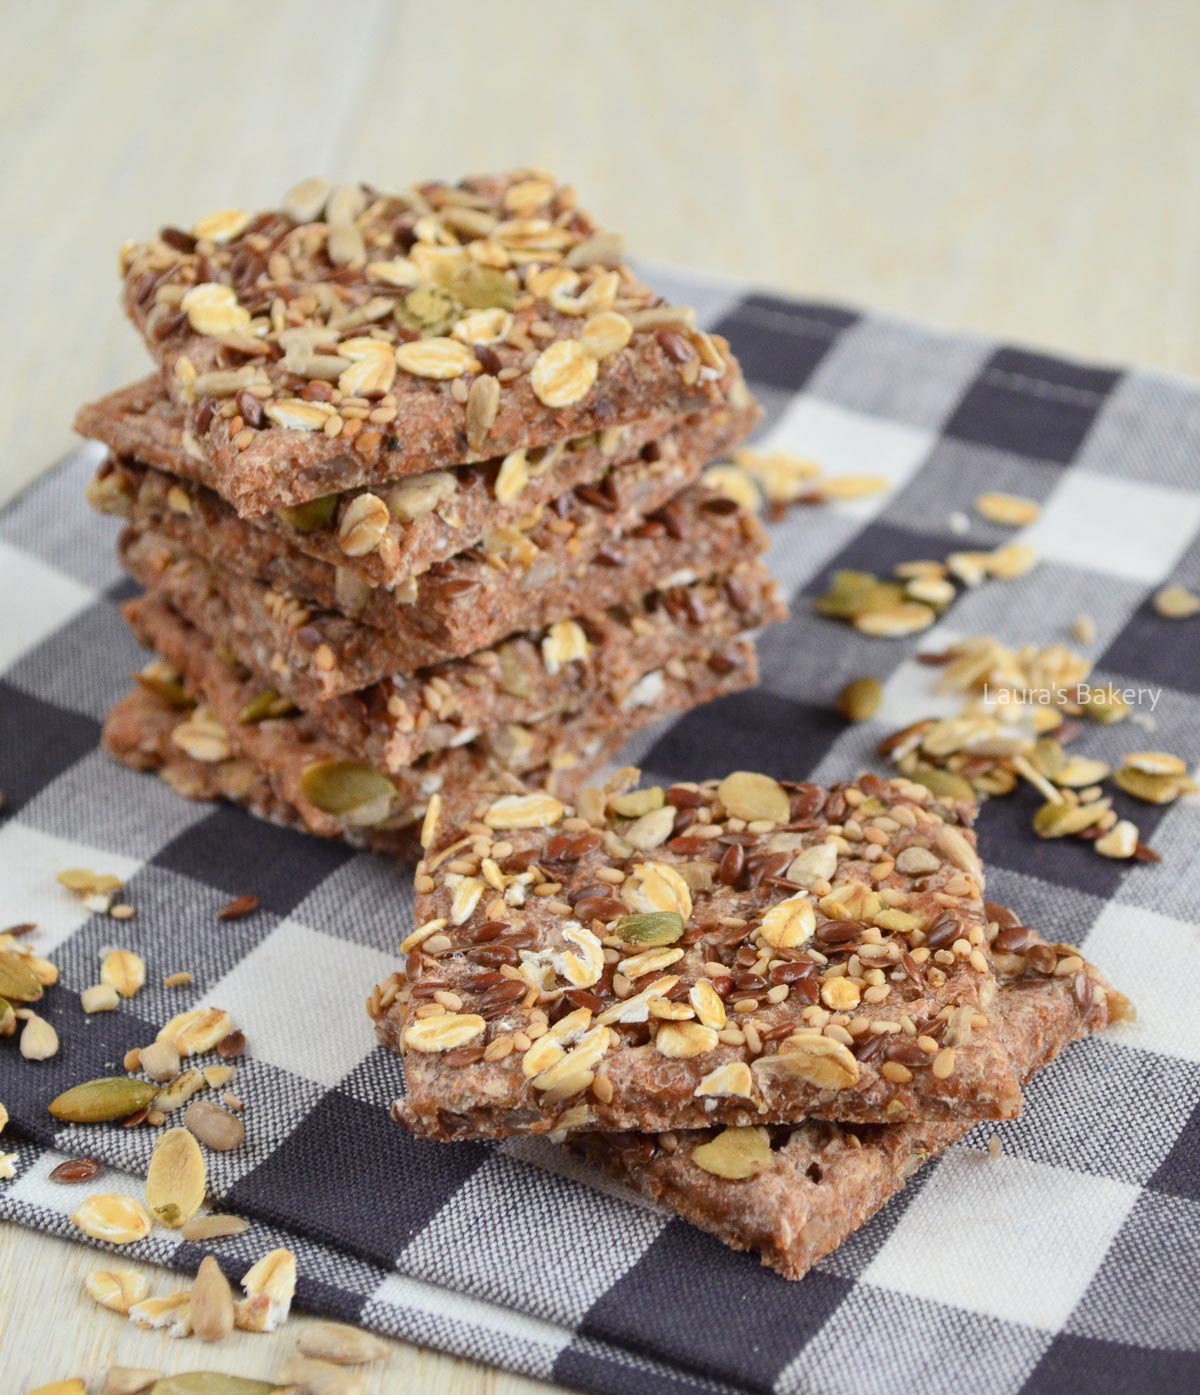
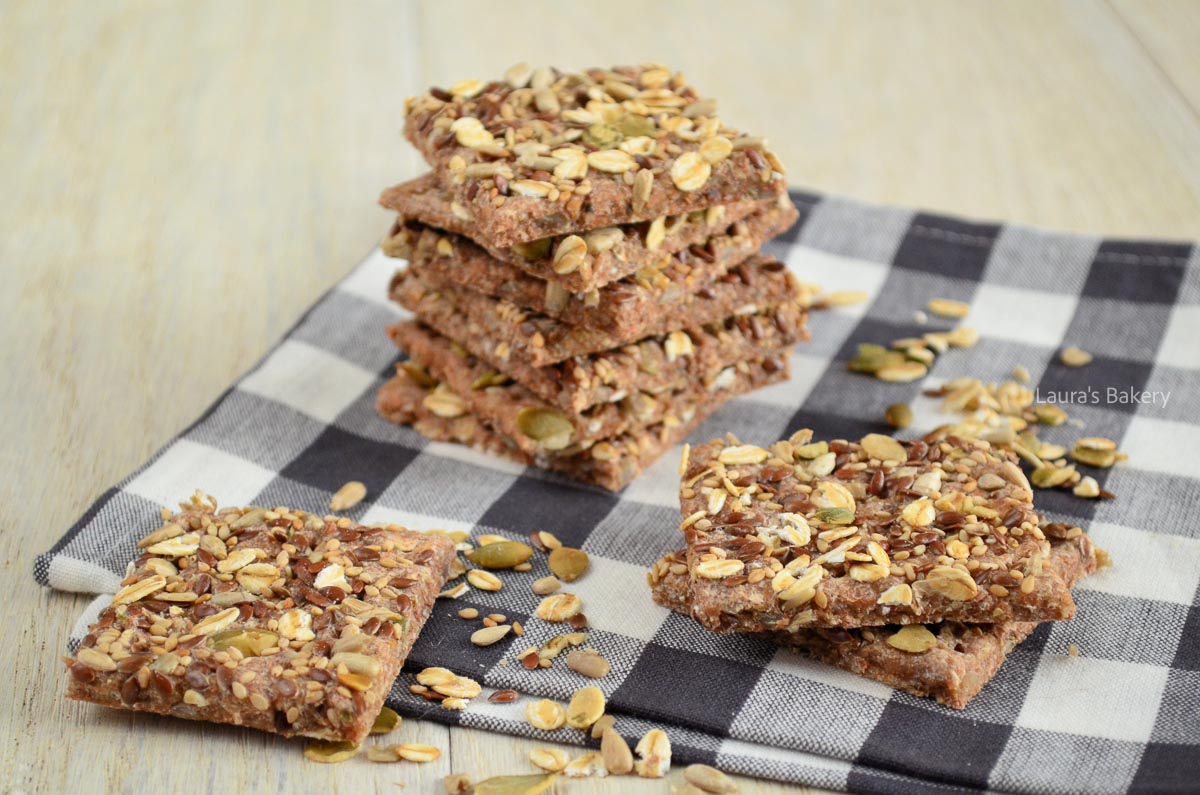
Crunchy, delicious, and wholesome, these spelt crackers with seeds are the guilt-free snack you’ve been waiting for. Enjoy them plain or piled high with your favorite spread. Once you taste the nutty crunch of roasted seeds in every bite, you’ll never reach for store-bought crackers again!

Guilt-Free Wholesome Snacking

Think homemade crackers require skill and patience? Think again! Here’s why these spelt seed crackers will become a kitchen staple in no time:

  • Nutritious and delicious, these spelt seed crackers are all about crunchy texture and savory flavor with zero lingering guilt
  • Versatile enjoyment – perfect as a snack with your favorite spread or dip, while just as compatible with a bowl of soup, chili, or salad
  • Make-ahead and freeze for up to 3 months! Simply thaw and crisp up in the oven for a quick and easy snack

What Is Spelt Flour?

Spelt flour is a type of flour made from spelt (an ancient grain) that has a slightly nutty, sweet flavor and a softer texture than whole wheat flour,. While spelt does contain gluten, the gluten present is more fragile and water-soluble, making baked goods like crackers, breads, and pastries tender and easier to digest for some people.

Recipe Ingredients

With just 4 ingredients and no fancy technique required, you can whip up a batch of these crisp spelt seed crackers for wholesome snacking any time you want. Check out the full details in the recipe card below:

  • whole spelt flour – the ideal choice of flour for making tender and more easily digestible baked treats and snacks, like crackers, breads, and pastries
  • water – also brushed over the rolled out dough to help the remaining roasted seeds to stick to the top
  • sea salt
  • mixed seeds – I like to use a combination of pumpkin seeds, sunflower seeds, and sesame seeds, but feel free to experiment with other seeds too


How To Make Spelt Crackers

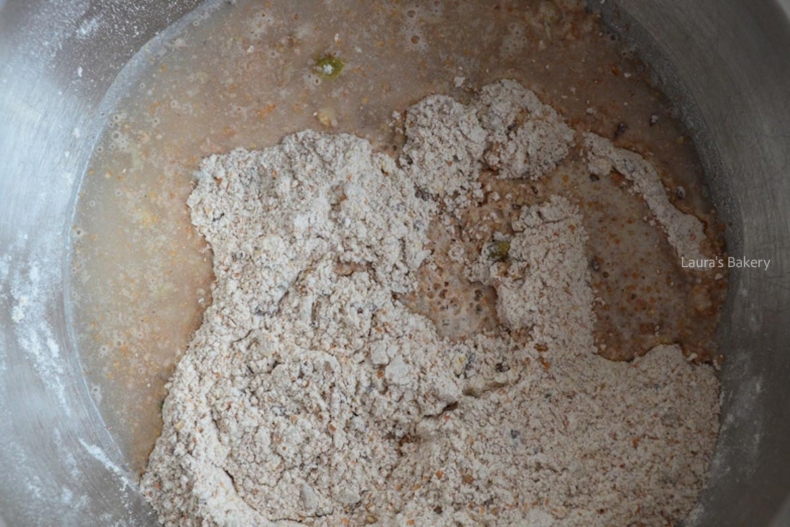
Spelt seed cracker ingredients in a mixing bowl
1

Roast the seeds in the oven. Take half and combine with the rest of the ingredients in a bowl

Open lightbox for image about Roast the seeds in the oven. Take half and combine with the rest of the ingredients in a bowl
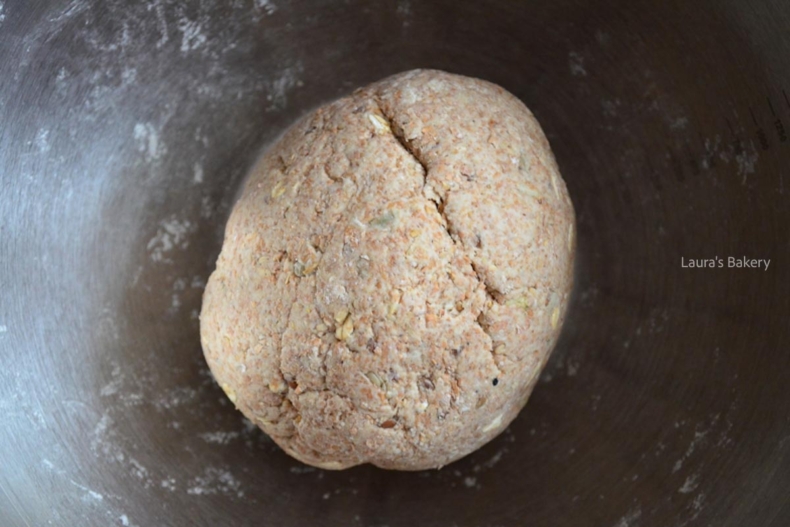
Spelt seed cracker dough ball
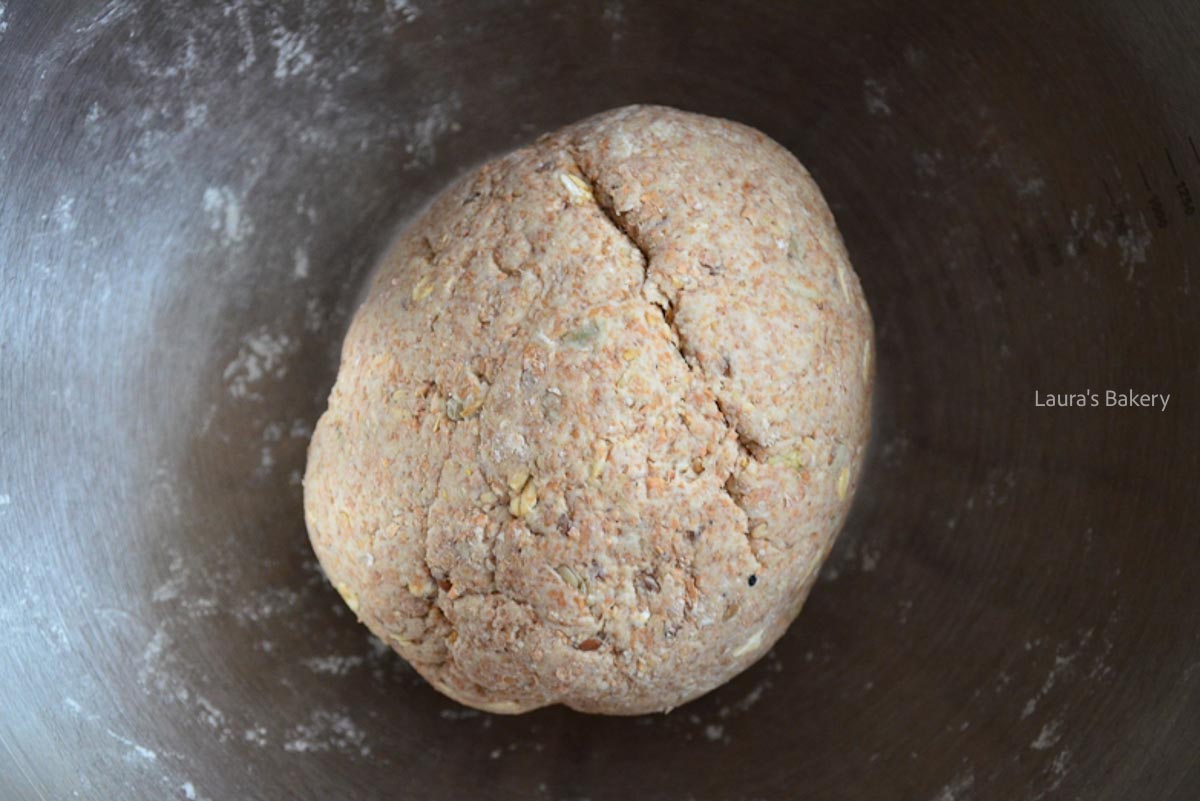
2

Knead into a smooth dough ball. This won't take long

Open lightbox for image about Knead into a smooth dough ball. This won't take long
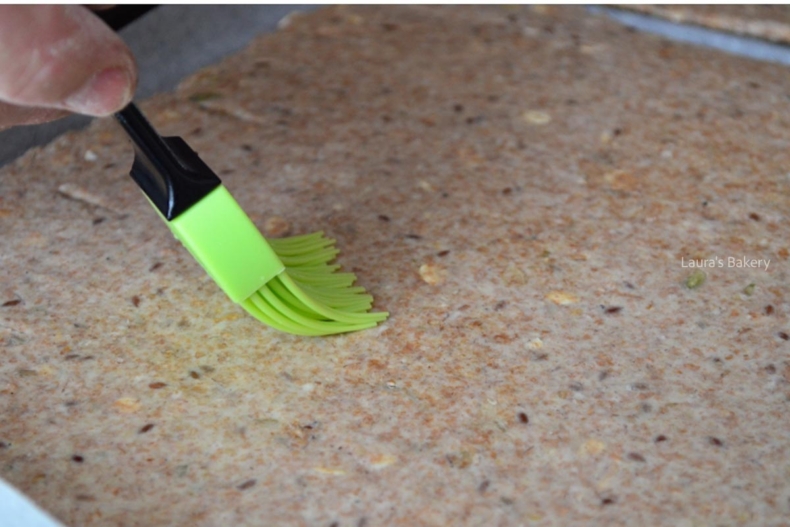
Spelt seed cracker dough rolled out on a parchment-lined baking sheet
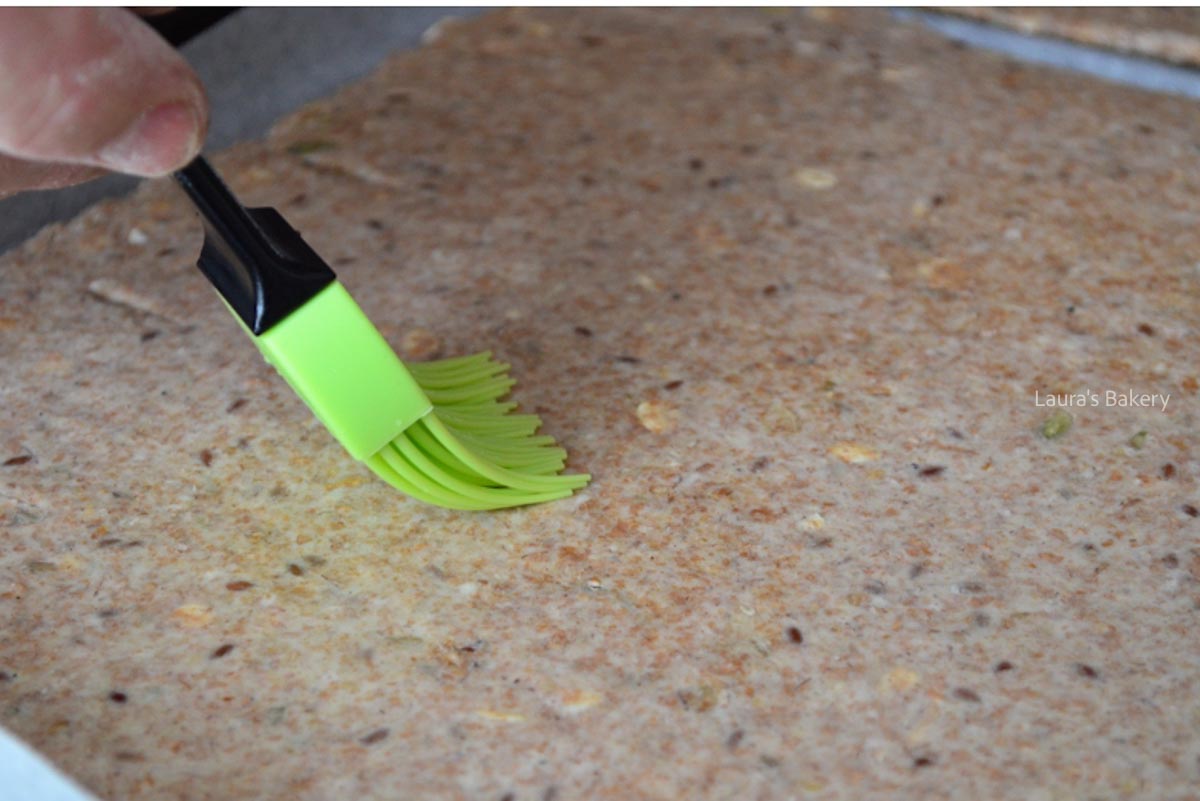
3

Roll the dough out onto a parchment-lined baking sheet. Brush with water

Open lightbox for image about Roll the dough out onto a parchment-lined baking sheet. Brush with water
Pressing toasted seeds onto the top of the spelt cracker dough before baking
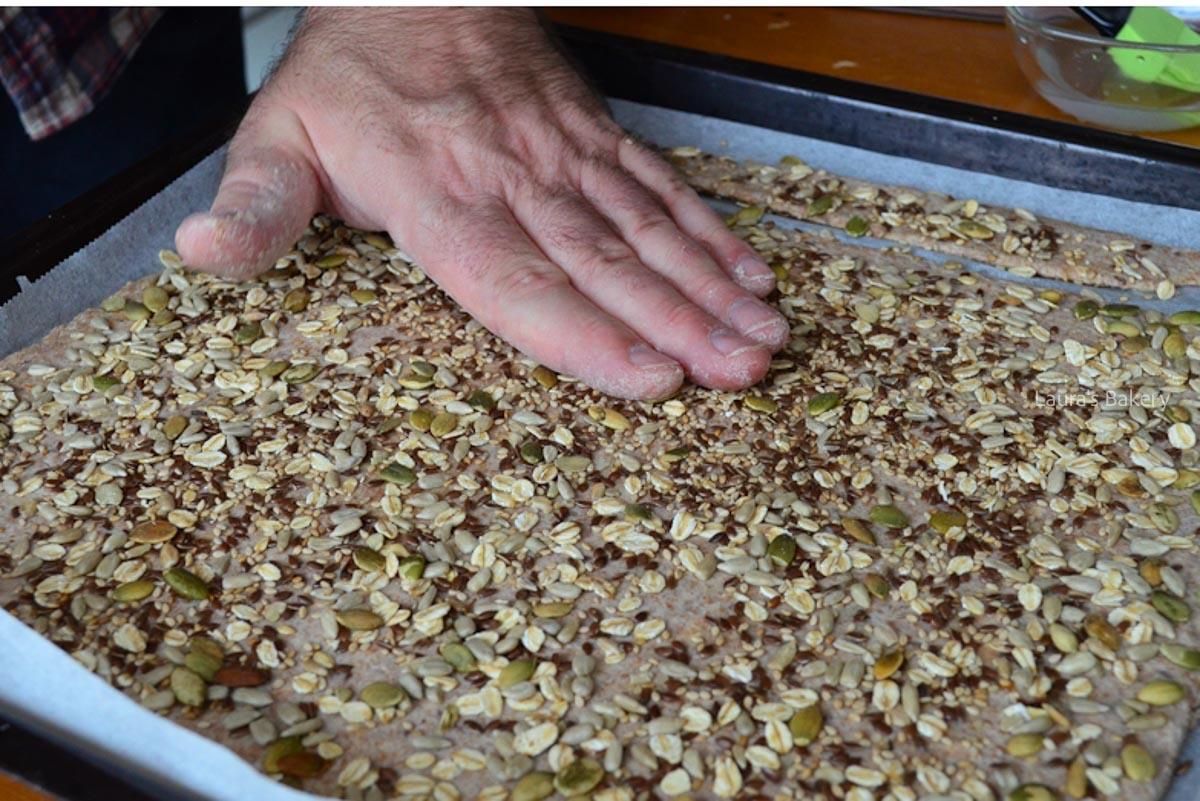
4

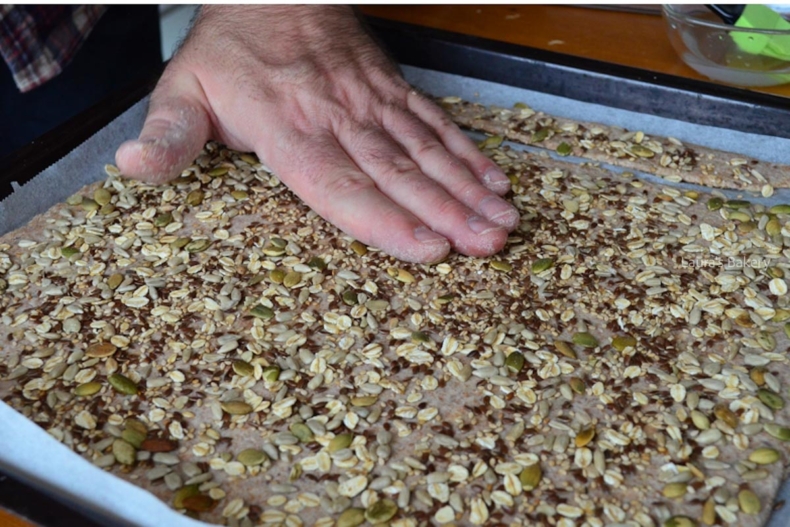
Press the remaining seeds down firmly on top. Cut into squares, then poke holes. Bake for 20 minutes

Open lightbox for image about Press the remaining seeds down firmly on top. Cut into squares, then poke holes. Bake for 20 minutes
1/4

Storing Spelt Crackers with Seeds

Once cool, store these homemade crackers in an airtight container at room temperature for up to a week.

Can you freeze homemade spelt crackers?

Absolutely! Transfer your spelt crackers to an airtight container or freezer-safe bag and store for up to 3 months. Thaw at room temperature when ready to enjoy again.

Reheating Spelt Flour Crackers

It’s totally normal for these crackers to soften a bit after thawing from freezing. If you’d prefer, pop them into the oven for 5-10 minutes. Then, let cool before serving. This will help to crisp up the crackers again.

More Simple Savory Snacks

Get ready to elevate your snacking game with these simple yet incredibly satisfying snacks, all made with less than a handful of ingredients!

Laura Kieft   I

FAQ Spelt Crackers with Seeds

Can I cut the crackers after baking?

Cutting the dough into uniform squares before baking is the easiest, especially if you want good-looking crackers. If you’re after a more rustic look, then go ahead and break the crackers into varying sized pieces once baked.

Should I rest the dough?

No need. This dough is easiest to roll out into an even layer immediately after the ingredients have been kneaded into a smooth ball. If you let the dough rest, it can become tricky to spread it evenly on the baking sheet.

What kind of seeds work the best for this basic cracker recipe?

I’ve used a combination of pumpkin seeds, sunflower seeds, and sesame seeds in this recipe. Flax seeds, poppy seeds, and chia seeds would also be great!

Why roast the seeds?

Roasting the mixed seeds in the oven before adding them to cracker dough enhances their nutty flavor while removing excess moisture, which helps the crackers bake up crisper.

It also improves the texture by making the seeds firmer and crunchier, and prevents any raw or bitter tastes from affecting the baked crackers.

Why are my crackers brown on the edges but under-baked in the center?

To achieve a golden brown finish, crispy texture, and no under-baked sections, make sure to roll out an even layer of the dough on the baking sheet.

What add-ins can I include?

Feel free to stir in a little garlic combined with dried herbs, or any other seasonings or spices you enjoy. It’s an easy way to adjust the flavor of these crackers.


Spelt seed crackers

Print Recipe

No votes yet

Spelt Crackers with Seeds

Spelt crackers with seeds are a healthy and delicious snack. Perfect for when you’re craving something crunchy, but still want a wholesome option.
Preparation25 minutes
Cooking20 minutes
Total45 minutes
Servings: 30 small crackers

Ingredients

  • 350 grams whole spelt flour
  • 200 ml water approximate
  • 1 teaspoon sea salt
  • 150 grams mixed seeds pumpkin seeds, sunflower seeds, and 1 tablespoon sesame seeds

Instructions

  • Preheat the oven to 300°F/150°C (conventional oven). Spread the seeds out on a baking sheet and toast them for about 15 minutes.
  • Take half of the toasted seeds and combine them in a bowl with the spelt flour, water, and salt. Mix everything together and knead briefly until you have a smooth dough. You don’t need to knead it for long.
  • Shape the dough into a ball and roll it out on a parchment-lined baking sheet.
  • Lightly brush the rolled-out dough with water and sprinkle the remaining seeds over the top. Press them in gently so they stick.
  • Pre-cut the dough into pieces (I made squares). Then use a fork or dough docker to poke lots of small holes across the surface.
  • Bake the crackers for about 20 minutes at 350°F/175°C (conventional oven), or until crisp and lightly golden.
Madeleines recipe-2

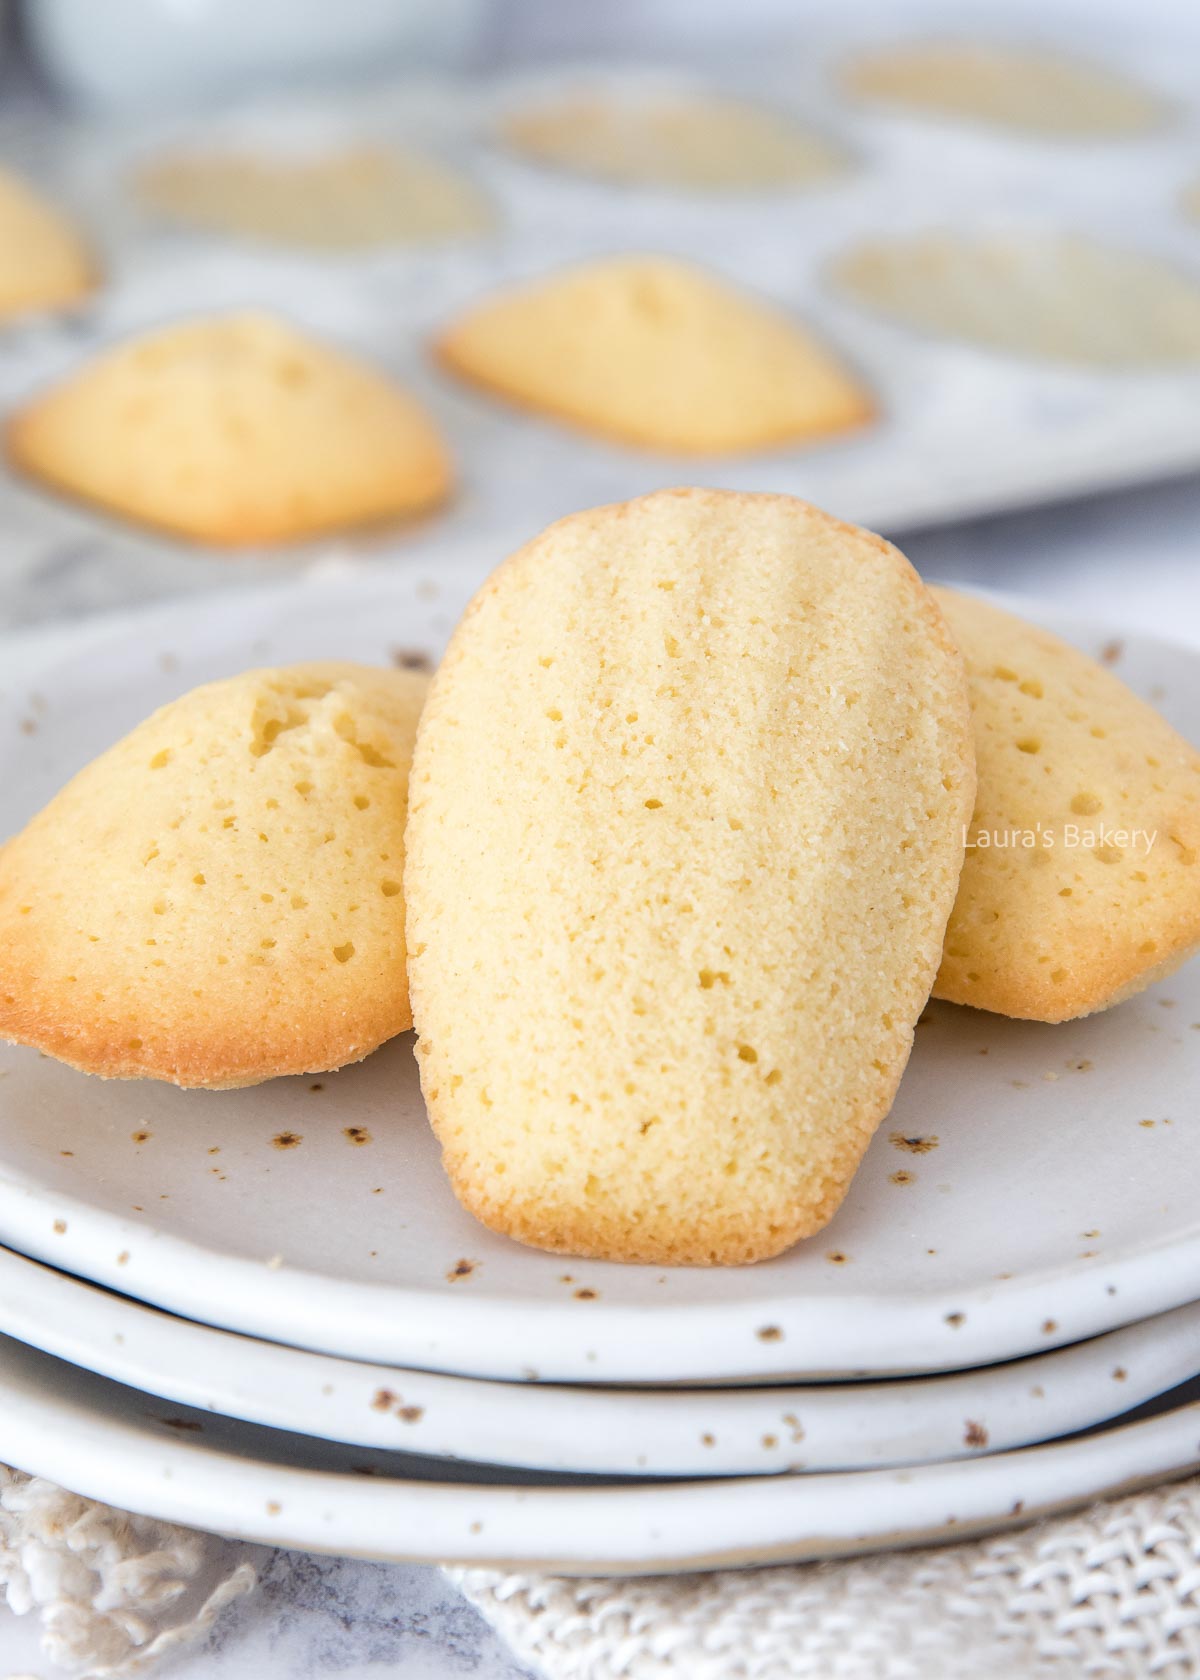
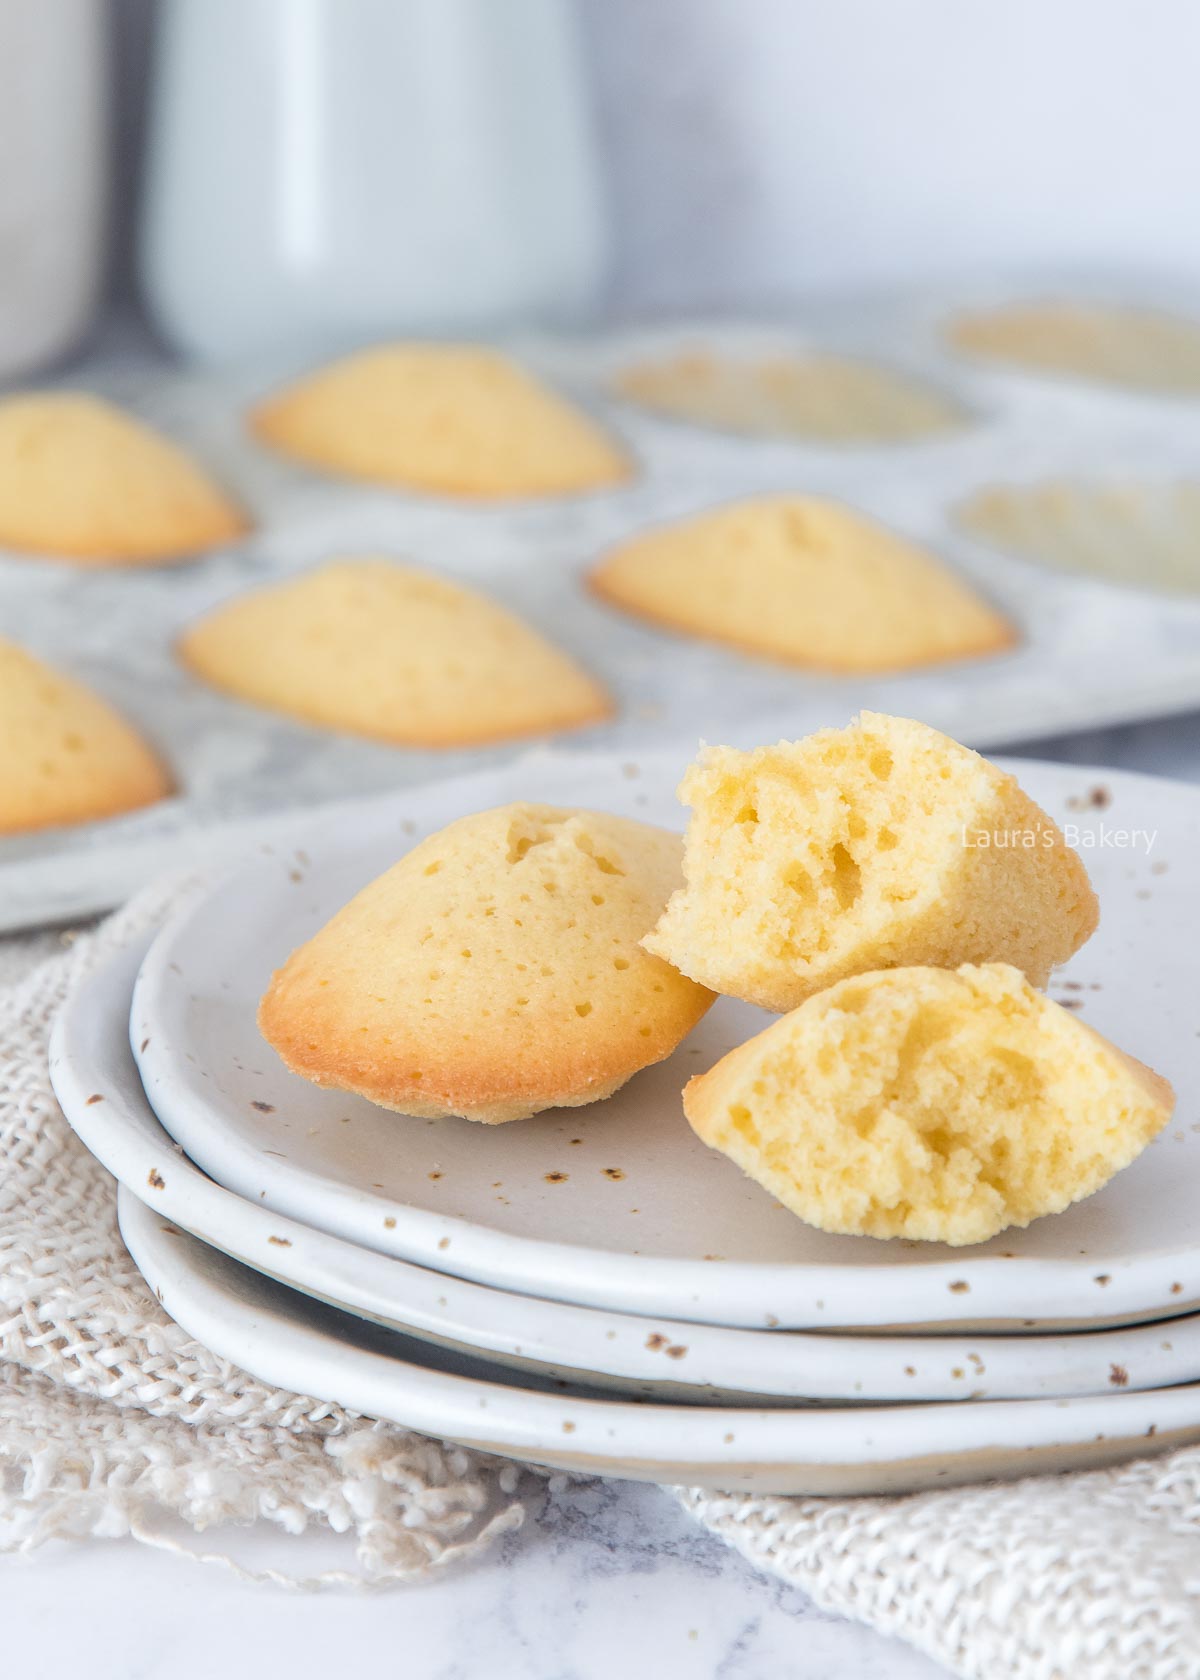
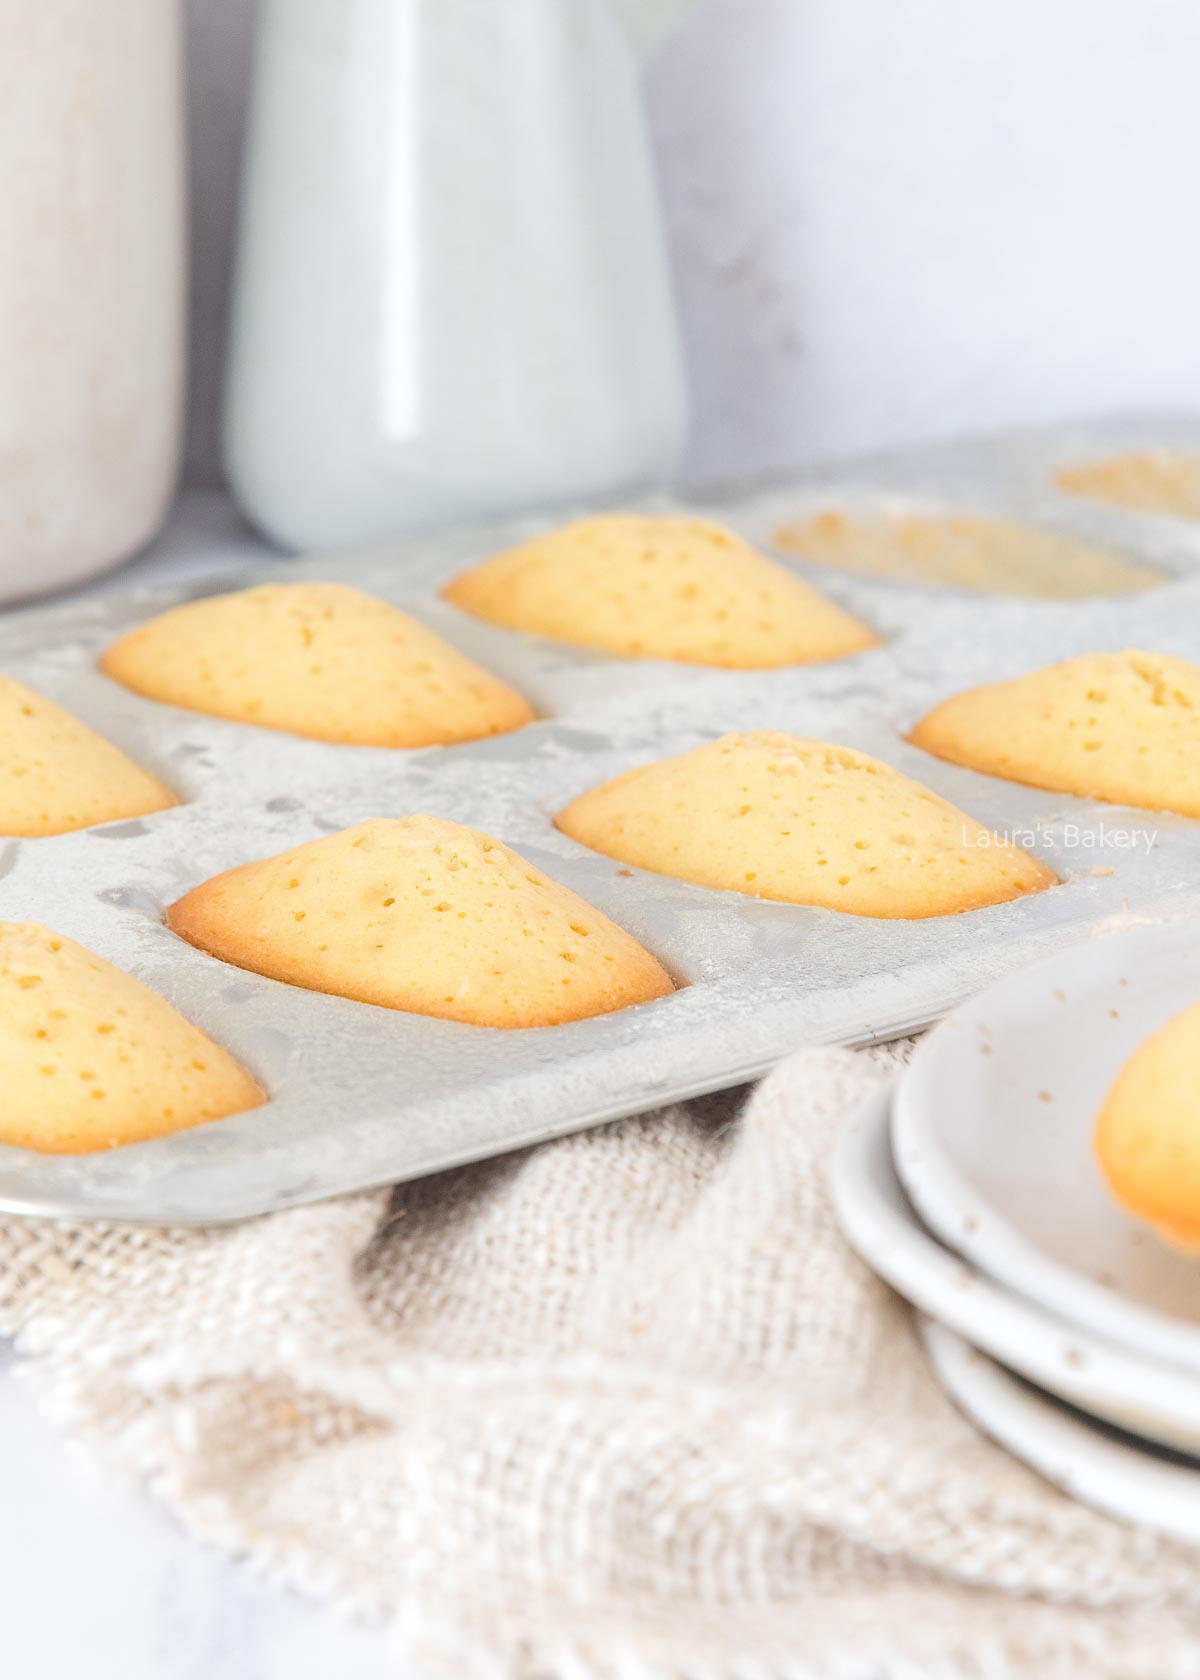
There’s something undeniably charming about madeleines. These delicate, shell-shaped cakes from France look elegant enough for a pâtisserie window, yet they’re surprisingly simple to make at home.

Simple To Make with Impressive Taste!

Madeleines are small sponge cakes baked in a special madeleine pan. Their shape is quite iconic and inspired by the shape of a scallop shell. Why you want to make this recipe?

Recipe Ingredients

While madeleine cookies are different from your average cookie, the ingredients are pretty similar!

  • eggs – the eggs give the madeleine batter the needed rise
  • sugar – I use granulated sugar for this recipe
  • butter – make sure you use unsalted butter so you can decide how much salt goes into the madeleines. Let the butter melt and cool a bit before adding to the batter
  • vanilla extract – you can use store-bought extract or make your own with this easy recipe for vanilla extract

How to Make Madeleines

Making classic French madeleines is not difficult but the one thing you do need is a special madeleine pan. The choice is between metal and silicone. While I personally prefer to use a metal pan, my testing showed that both give great results.

Once you have the pan, the rest is super easy.

Make the batter

Start by making the batter. Beat the eggs and sugar until they are light and fluffy and tripled in volume. This takes around 5 minutes, so give it enough time. Using a rubber spatula, you can now fold in the flour and the melted butter in batches.

Make sure the butter is not too hot. Add the vanilla and a pinch of salt as the last step.

Chill the batter in the refrigerator for about 2 hours. Once that is done, you bake the madeleines.  Grease the madeleine pan and dust lightly with flour.

Tap out any excess flour and spoon the batter into the form. You can use spoons or even use a piping bag if you prefer. I like to use two teaspoons.

Bake the little cakes for 8 to 10 minutes at 400˚F/200˚C (conventional oven) or until lightly golden brown and cooked through.

Madeleines recipe-5

Storing Madeleines

You can store madeleines in an airtight container for up to three days. Keep them outside of the fridge so they do not dry out.

Can you freeze madeleines?

Yes, you can absolutely freeze your baked madeleines. Just wrap them properly or store in a freezer bag and you can keep them for 3 months.

The Signature Madeleine Hump

One thing that really defines a madeleine is its “hump” and it’s signature shell shape. This might sound like a strange term if you’re not familiar with it (my sister definitely gave me a puzzled look when I mentioned it!), so let me explain.

The “hump” or “bump” refers to the domed top of the cake. It forms because the batter goes into the pan cold and then into a hot oven, where it bakes quickly at a high temperature. The batter touching the pan cooks first, while the center, being slightly deeper, rises upward as it bakes. Et voilà: that perfect little hump.

Madeleines recipe-4

Madeleines: Cake or Cookie?

Have you ever made madeleines before? Then you’ll know they taste like cake, and you’re working with a batter, not a dough. Still, their size is similar to a cookie (okay, a generously sized one), which can be a bit confusing.

In my opinion, you can call them either mini cakes or cookies but officially, madeleines are small cakes.

If you look at the photos for this recipe, you’ll clearly see their cake-like texture. Just like regular cake, you can add all kinds of delicious flavors to the batter. Take a look at the recipes below for inspiration.

Thanks to their small size, they’re perfect as individual treats and great to serve with coffee or as a dessert.

More madeleine recipes

FAQ Madeleine Recipe

Why do my madeleines stick to the pan?

This shouldn’t happen of course. Follow the two tips below and you’ll be fine.

Grease the pan well and dust it lightly with flour. You can use a pastry brush with butter or a baking spray.

Remove them from the pan immediately after baking. With my metal pan, I give it a firm tap on the counter and they release right away. Then let them cool on a wire rack. It does help if you use a non-stick pan.

My humps are too small! What went wrong?
If your madeleines didn’t develop much of a hump, a few things could be the cause:

  • You may not have filled the molds enough, about 2/3 full is ideal
  • The batter may not have chilled long enough
  • The oven might not have been fully preheated

You can also pipe the batter directly into the molds and chill it that way. For an extra pronounced hump, you can add a teaspoon of baking powder to the batter.

Why do I need to chill the batter?

Chilling the batter is key for that signature hump. The cold batter hitting a hot oven creates steam and lift, which helps the madeleines rise in the center

Can I flavor madeleines?

Absolutely! Lemon zest, orange zest, vanilla, chocolate chips, or even a swirl of melted chocolate all work beautifully.

Can I make savory madeleines?

Yes, and they’re delicious! Try adding ingredients like grated cheese, herbs, or sun-dried tomatoes for a savory twist.


Madeleines recipe

Print Recipe

No votes yet

Madeleine recipe

The classic French madeleine recipe is easy to make and looks so pretty! With this base recipe you can make endless variations too.
Preparation15 minutes
Cooking10 minutes
Chilling2 hours
Total2 hours 25 minutes
Servings: 24 madeleines

Equipment

  • Madeleine pan

Ingredients

  • 2 large eggs
  • 150 grams granulated sugar
  • 150 grams all-purpose flour sifted
  • 125 grams unsalted butter melted and cooled
  • teaspoons vanilla extract
  • Pinch of salt

Instructions

  • Beat the eggs and sugar until light and fluffy, and tripled in volume (this takes about 5 minutes).
  • Gently fold in the flour and melted butter in batches.
  • Add the vanilla extract and salt last.
  • Chill the batter in the refrigerator for 2 hours.
  • Grease the pan and dust with flour. Spoon the batter into the molds (using two teaspoons works well).
  • Bake for 8-10 minutes at 400°F /200°C (conventional oven) until light golden brown and cooked through.
Ginger lemon oatmeal cookies-2

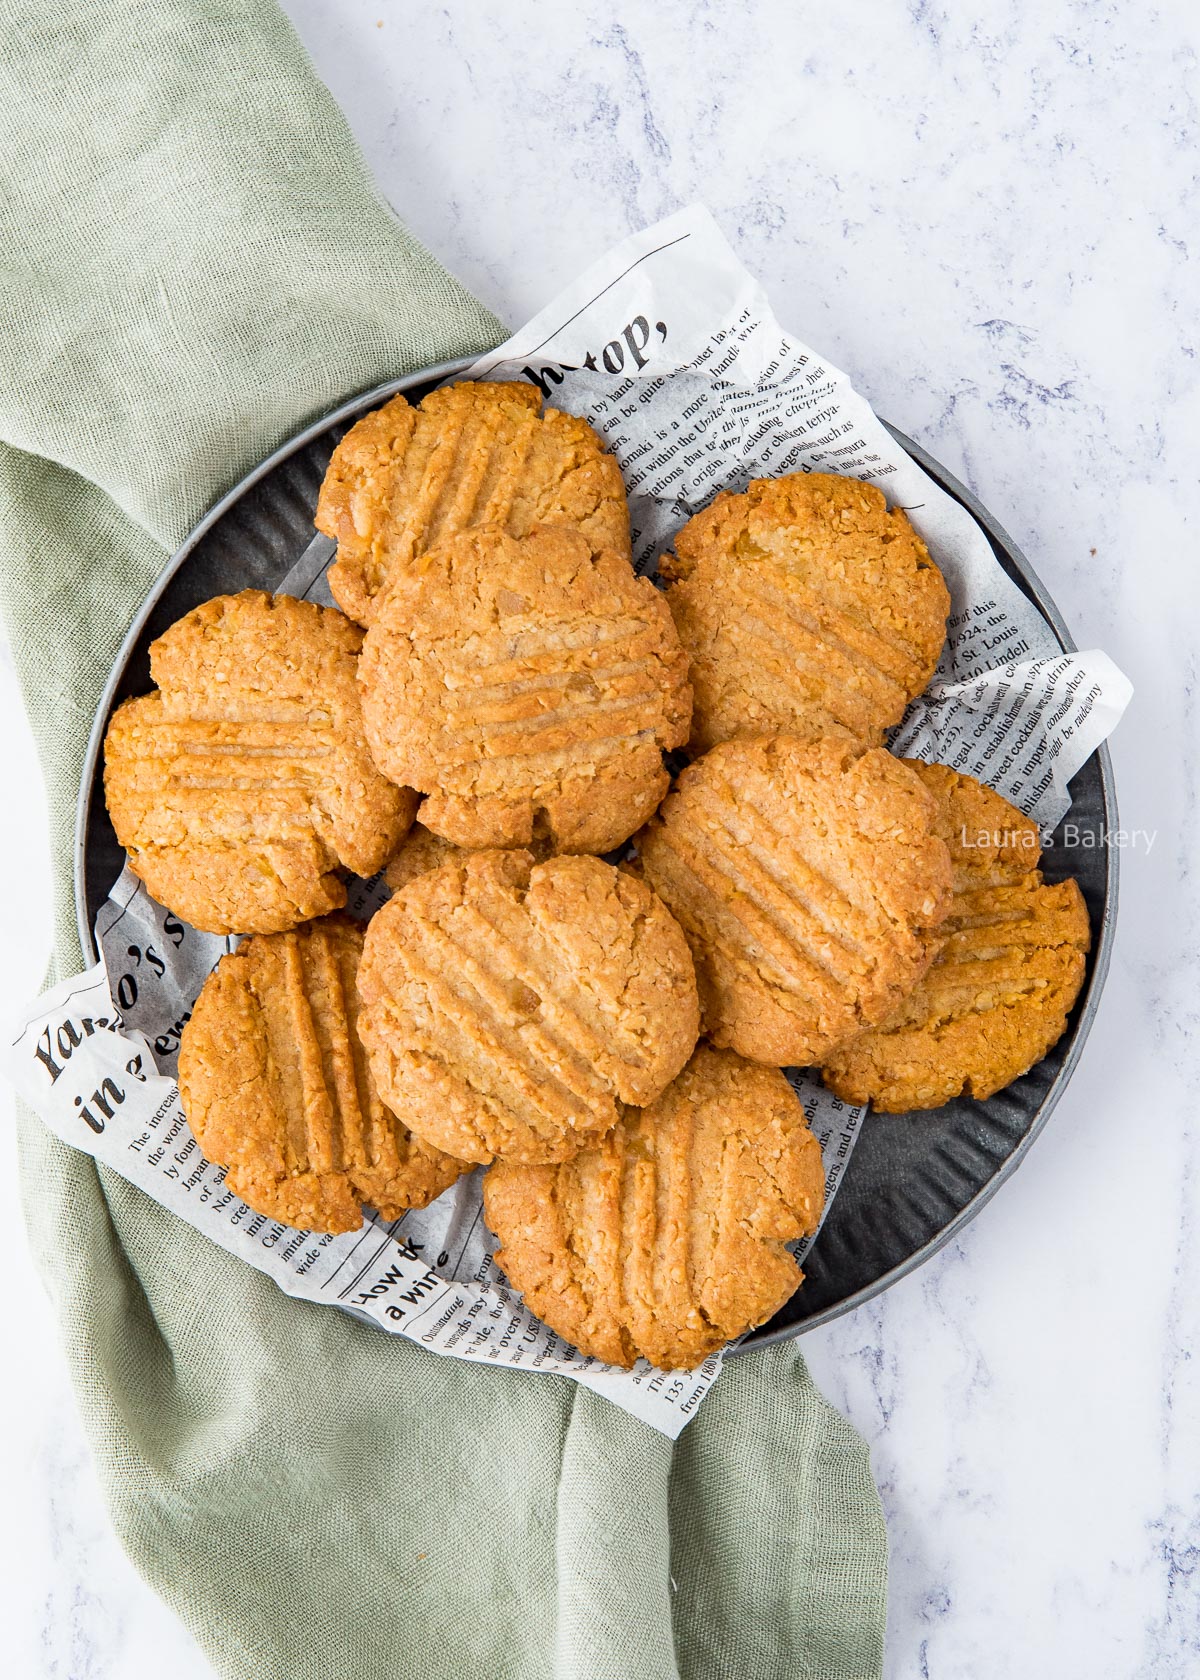
Get ready for another scrumptious oatmeal cookie recipe. This time I’ve combined bright lemon zest and spicy candied ginger with wholesome oats to make super flavorful and chewy Ginger Lemon Oatmeal Cookies. It’s one of my favorite twists to my ever-growing list of oatmeal cookies!

Give the Classic Oatmeal Cookie a Zesty, Spicy Twist

Regular readers of Laura’s Bakery know how much I enjoy tweaking a classic oatmeal cookie base. Just check out my apple oatmeal cookies for proof! Well, if you thought those cookies were delicious, wait until you try these ginger lemon oatmeal cookies:

  • quick and easy – you don’t have to chill the dough, allowing you to whip up a batch in just 30 minutes
  • customize as you please – add white chocolate chips, chopped nuts, shredded coconut, or a pinch of nutmeg to make this ginger lemon oatmeal cookie recipe completely your own
  • perfect texture – crispy golden edges with a tender, chewy center is what you’ll get. But now it’s brightened with lemon and spiced with candied ginger
  • irresistible twist – tangy lemon zest and spicy candied ginger turn a humble oatmeal cookie into something far more tantalizing for your taste buds!
Ginger lemon oatmeal cookies-1

Recipe Ingredients

Even though you can add all sorts of mix-ins to these chewy oatmeal cookies, the base ingredients themselves are quite simple. Just be sure to check the full ingredient list in the recipe card below.

  • unsalted butter – any brand of butter will work. Make sure the butter is at room temperature before starting so it’s soft enough and easy to cream
  • granulated sugar – I’ve used white sugar which adds sweetness and crispy outer edges. If you need to use brown sugar, make sure that it’s light brown
  • all-purpose flour
  • oats – I used old fashioned rolled oats for this recipe. Quick oats would be ok to use too but will make softer cookies
  • baking powder – to provide lift while the lemon ginger cookies bake
  • salt – enhances the flavors. Omit if you use salted butter in this cookie recipe
  • lemon zest – adds delicious lemon flavor and brightness
  • candied ginger – also referred to as crystalized ginger or “stem ginger”, depending on where you’re located. It adds a delicious sweet and spicy kick

How To Make Lemon Oatmeal Cookies

Start by combining the butter with the sugar. This is easiest to do in a food processor. Cream them together until you have a smooth and light mixture.

Add the rest of the ingredients and knead into a firm dough.

Roll into balls

Divide the dough into 10 equal portions and roll them into balls. Place them on a baking sheet lined with parchment paper. You can flatten the dough balls slightly if necessary.

Bake them in the preheated oven for about 15 minutes or until the edges start to turn golden brown. Take them out of the oven and let them cool for a few minutes on the baking sheet before cooling them completely on a wire rack. This will help them to keep their structure.

Ginger lemon oatmeal cookies-4

Storing Ginger Lemon Oatmeal Cookies

You can store these chewy oatmeal cookies in an airtight container outside of the fridge for up to 2 weeks.

Can you freeze lemon oatmeal cookies?

Absolutely! They freeze perfectly for up to 3 months. You can even freeze the dough balls and bake them straight from the freezer (just add a few minutes to the baking time).

To freeze the dough balls, first freeze them on a tray and then transfer to a freezer bag. That way you’ll be able to bake fresh oatmeal cookies whenever the craving hits.

More Oatmeal Recipes

Including oats in your baking is a fabulous way of adding incredible texture, bulk, and nutritious fiber too! Here are a couple of ways I love to incorporate them in my baked treats:

FAQ Ginger Lemon Oatmeal Cookies

Can I use other kinds of oats in this cookie recipe?

Quick oats or instant oats can be used, but these types of oats absorb more moisture, so the cookies will be softer and less structured.

Avoid steel-cut oats as they’re too hard for this recipe.

Without a doubt, you can’t go wrong by using old-fashioned rolled oats when making chewy oatmeal cookies. They give the cookies the perfect texture!

What else can I add to the cookie dough?

For mix-ins, consider adding chopped nuts, coconut flakes, or white chocolate chips. Just keep the total amount of add-ins about the same. You can also experiment with vanilla extract for added depth of flavor.

Can I add lemon juice for extra tangy flavor?

Lemon juice will add too much moisture in the dough which will affect the texture of the cookies. Trust me, there is plenty of tangy lemon zest for all the lemon lovers out there!

Should I chill the dough?

No, that isn’t necessary. That said, you can wrap the dough tightly in plastic wrap to store in the fridge a day ahead of baking these ginger lemon cookies, if needed. You may need to add a few minutes to the baking time.

Chilling the dough may be a good idea if your kitchen is warm or the dough feels too sticky to handle. In that case, I suggest chilling it for about 20-30 minutes in the fridge before rolling the cookie dough balls.

What is stem ginger?

Stem ginger comes from tender young ginger roots that are preserved by peeling, slicing, and gently cooking them in a sugar syrup. This process gives it a unique flavor which is both fiery and sweet. It’s a wonderful addition to ginger-based treats, such as Gingerbread Cookies, Gingerbread Bundt Cake, or these Gingerbread Scones, but it can also go beyond sweet treats to enhance homemade chutney, curry, and stir-fry.


Ginger lemon oatmeal cookies

Print Recipe

No votes yet

Ginger Lemon Oatmeal Cookies

The fresh yet slightly spicy combination of lemon and ginger works perfectly in these delicious oatmeal cookies.
Preparation15 minutes
Cooking15 minutes
Total30 minutes
Servings: 10 cookies

Ingredients

  • 70 grams unsalted butter
  • 50 grams granulated sugar
  • 100 grams all-purpose flour
  • 65 grams rolled oats
  • 1 tsp baking powder
  • Pinch of salt
  • Zest of 1 small lemon
  • 50 grams candied ginger stem ginger, finely chopped

Instructions

  • Cream the butter and sugar together until light and smooth.
  • Add the remaining ingredients and knead until you have a firm dough.
  • Divide the dough into 10 portions. Roll each portion into a ball and place on a baking sheet lined with parchment paper. Slightly flatten the balls.
  • Use a fork to press the cookies down a bit more. These cookies don’t spread much, so don’t leave them too thick.
  • Bake for about 15 minutes at 375°F/180 °C (conventional oven), or until the edges turn golden brown.
  • Let the cookies cool on the baking sheet for a few minutes before transferring them to a wire rack to cool completely.
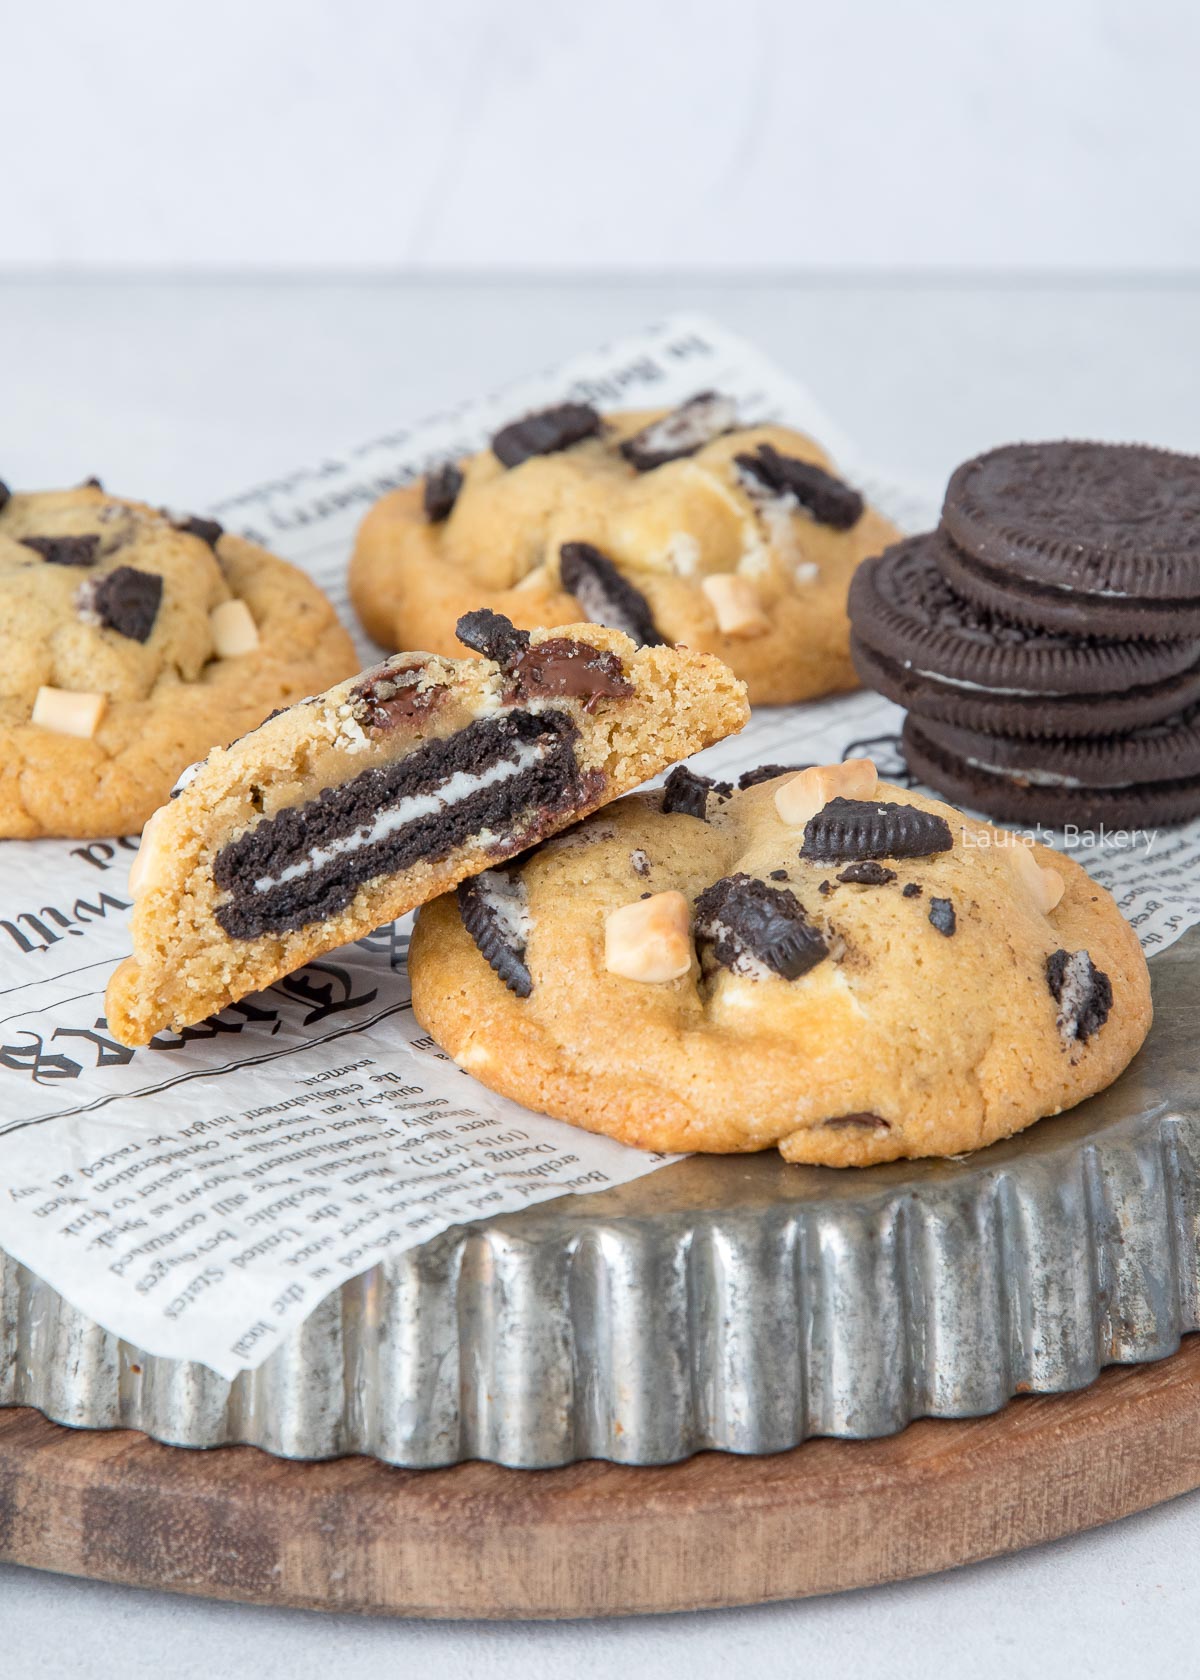
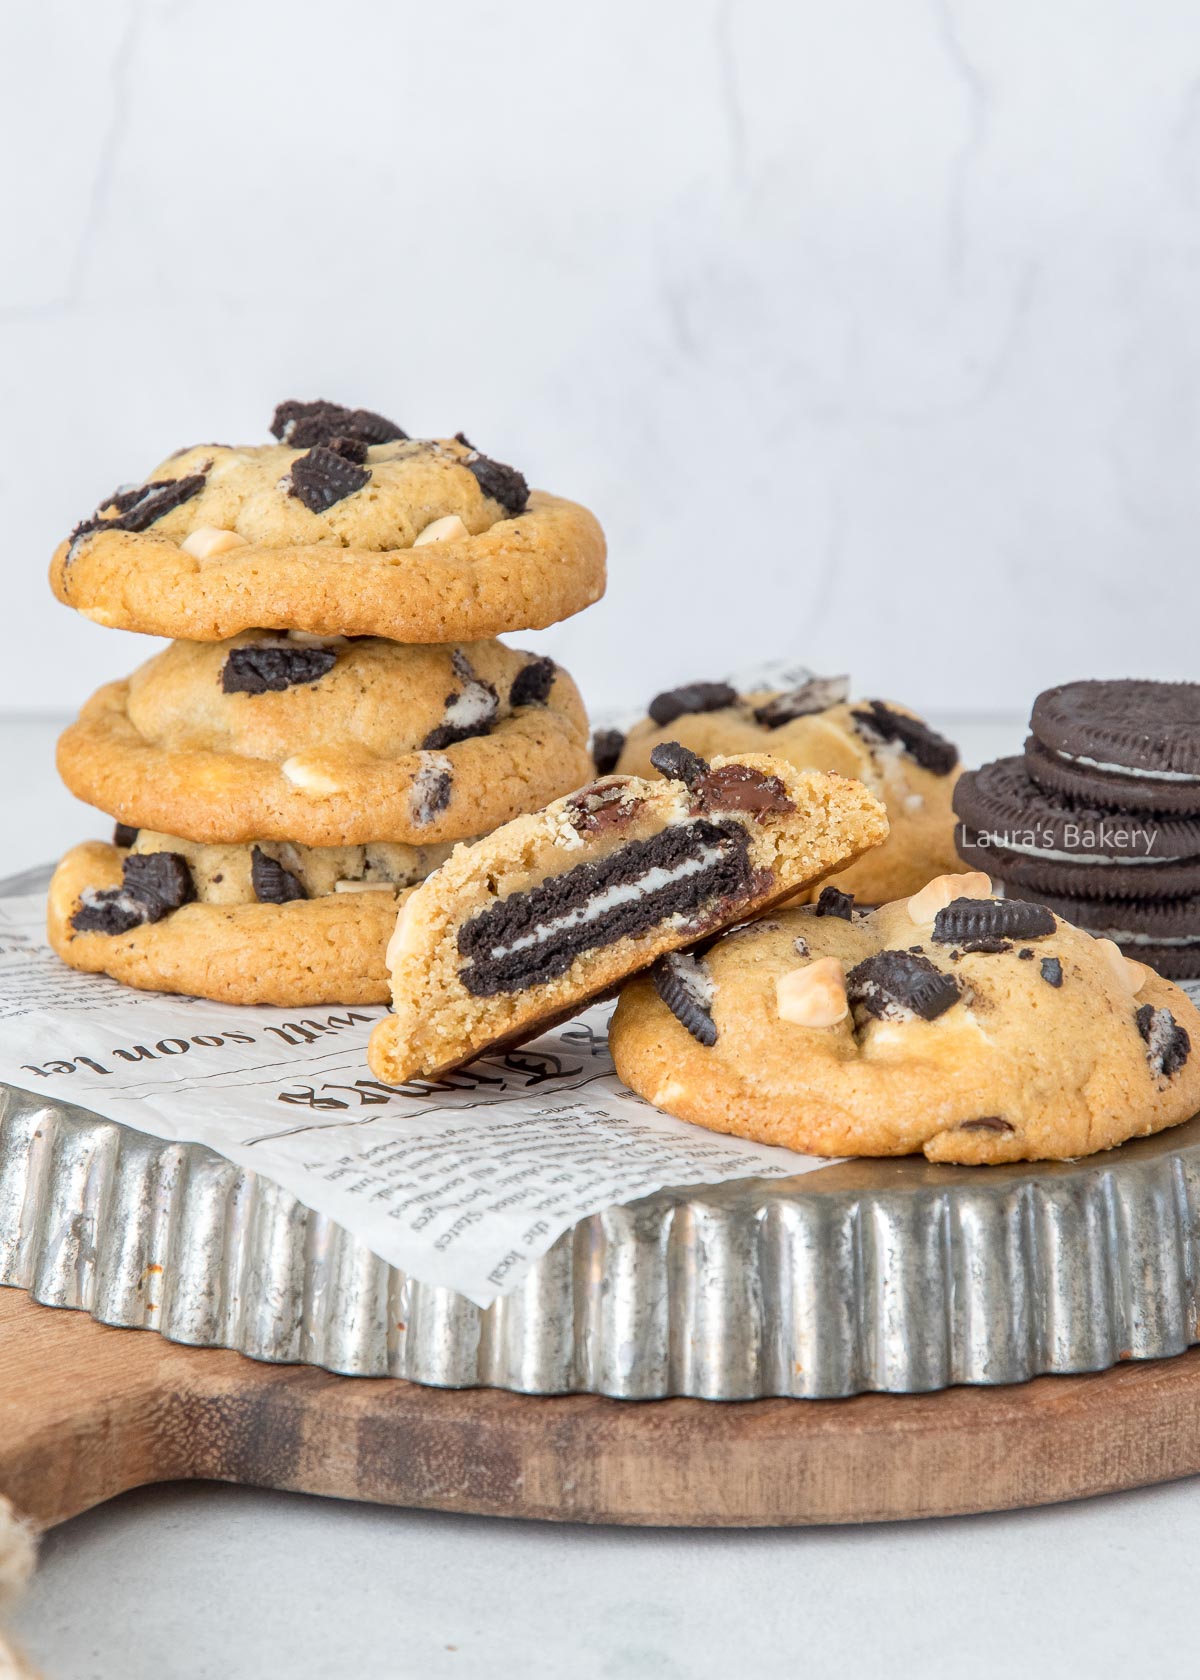
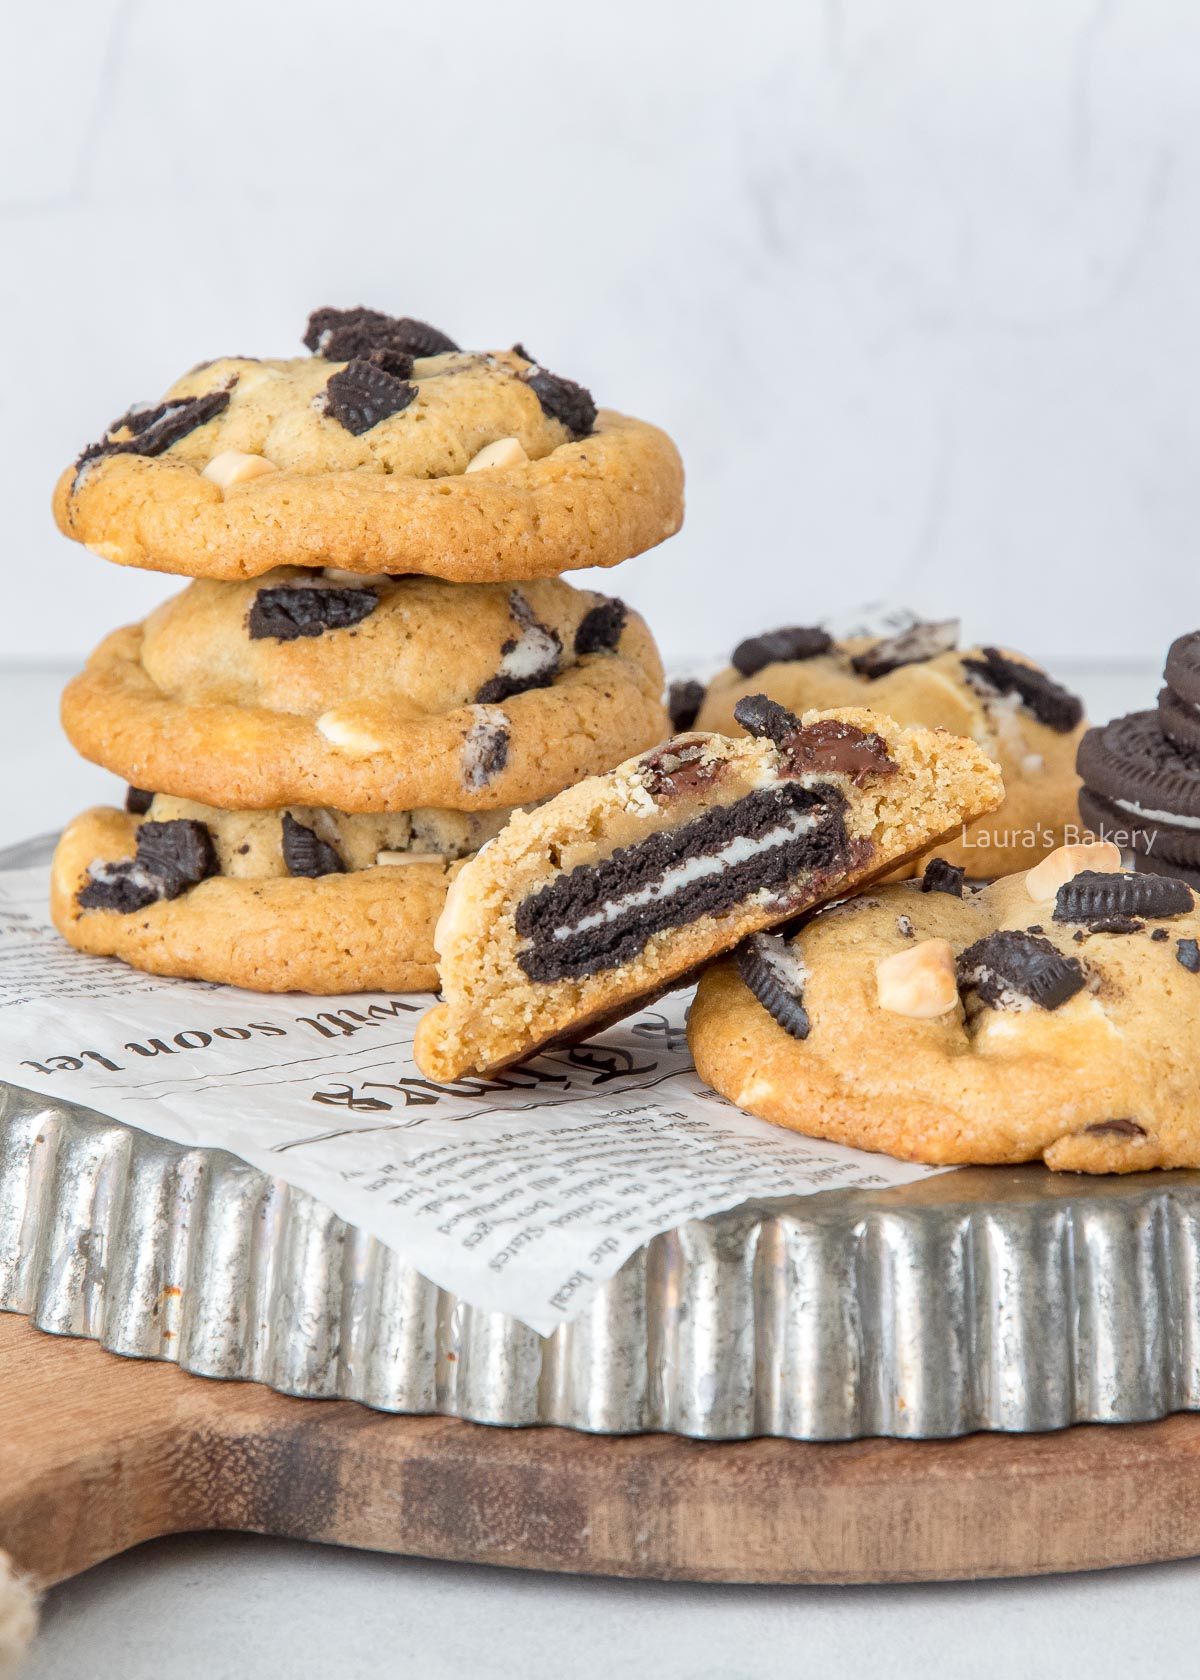
Stuffed Oreo Chocolate Chip Cookies-2

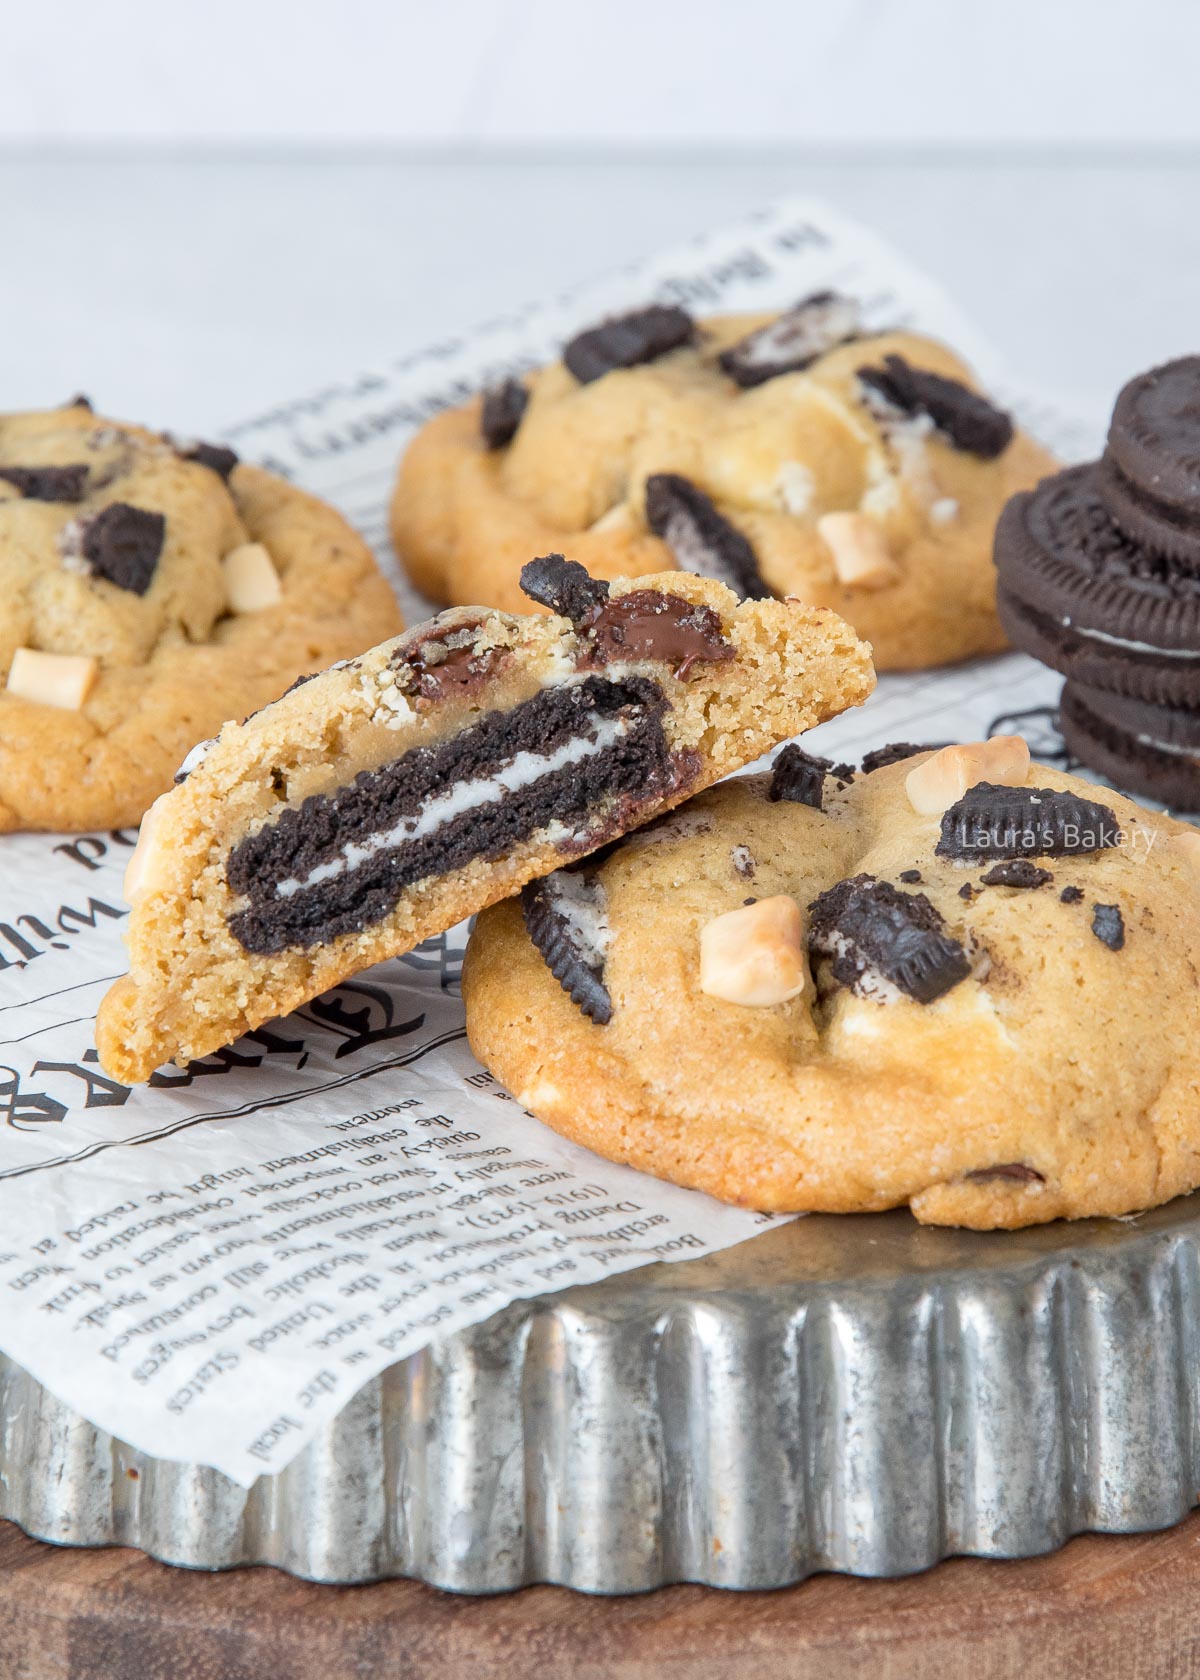
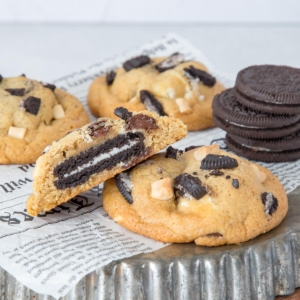
Crunchy, delicious, and heavenly chocolatey. It’s a cookie stuffed inside a cookie. These Oreo stuffed chocolate chip cookies sound a bit over the top, and they really are, but in the best kind of way!

Why These Cookies are Dangerously Good

This regular chocolate chip cookie recipe is an absolute favorite on Laura’s Bakery, so you can just imagine how this stuffed Oreo chocolate chip cookie takes it to the next level.

  • It’s all about the contrast between the crispy outside and soft and chewy inside with that creamy and chocolatey Oreo center
  • Letting the cookie dough chill gives these cookies more flavor and the perfect thick texture
  • The mix of dark and white chocolate adds extra depth of flavor
  • You get that bakery-style cookie quality from the comfort of your home

In other words: one is never enough… and that’s exactly why they are dangerously good! And if you love thick cookies than these thick chocolate chip cookies are a must try too! Or try these chocolate chip oatmeal cookies!

Stuffed Oreo Chocolate Chip Cookies-1

Recipe Ingredients

Big, thick chocolate chip cookies are a new trend. They pop-up everywhere and I get multiple requests for recipes such as the Chocolate chip cookies stuffed with Nutella.

The good news is that these stuffed Oreo chocolate chip cookies are another one of those easy recipes.

  • butter – make sure you use the unsalted butter, so you can regulate the amount of salt that goes into the cookies yourself
  • sugar – for the best texture, I use a mixture of light brown sugar and some granulated sugar
  • egg – the egg provides a bit of rise and gives that lovely chewy inside
  • chocolate – for the best results you mix both white and dark chocolate. The combination together with the Oreo cookies is delicious. Of course, if you prefer, you can use any kind of chocolate you want
  • Oreo cookies – I used around 12 Oreo cookies (regular Oreos) for making 12 big cookies

How To Make Stuffed Oreo Chocolate Chip Cookies

Start by making the chocolate chip cookie dough. Add the butter, brown sugar and the granulated sugar together in a large bowl and mix it until creamy. Add the egg and the vanilla and mix it until you have a smooth consistency.

At this point you add the flour, salt and the baking soda. As soon as the flour is incorporated, stop mixing. This is important so the cookies don’t get tough. Fold the chocolate chips into the dough.

Wrap the dough in plastic wrap and let it chill in the refrigerator for at least 2 to 3 hours but preferably overnight.

Shape the cookies

Now comes the fun part; divide the dough into 12 equal pieces. Each piece is then divided into two and slightly flattened. Keep in mind that an Oreo cookie needs to be added in the center so make sure to have the right size.

Place on Oreo cookie in the center of your first dough piece and cover it with the second part. Seal the edges properly and roll the cookie into a semi ball. It won’t be perfectly round since there is an Oreo inside.

Place the dough balls on a baking sheet with enough space between them. They will spread more than your average cookie due to the filling. Press a few extra chocolate chips and Oreo crumbles into the top of each cookie.

​Bake the cookies in a preheated oven at 340˚F/170˚C (conventional oven) for about 14 to 16 minutes or until they are golden brown. Keep in mind that the cookies will still be slightly soft when they come out of the oven.

Let them cool on a baking sheet for a few minutes, then transfer to a wire rack or cooling rack to cool down completely.

Stuffed Oreo Chocolate Chip Cookies-3

Storing Stuffed Oreo Chocolate Chip Cookies

You can store these insanely good cookies for about 1-2 weeks in an airtight container at room temperature. Keep in mind that they will get a little bit softer after some time, but they will still be delicious!

Can you freeze chocolate chip cookies stuffed with Oreo?

Yes you can! You can freeze the cookie dough or freeze the baked cookies. If freezing the cookie dough, I suggest that you shape them and roll them into balls before freezing. Any additional toppings are best added just before baking.

Do You Love Oreo Cookies as Much as I do?

I love to bake cookies and adding Oreos to my favorite recipes is a fun way to add extra crunch and flavor. I’ve already made quite a few recipes featuring Oreos. You can find some of them below!

Stuffed Oreo Chocolate Chip Cookies-4

FAQ Stuffed Oreo Chocolate Chip Cookies

Can I skip chilling the dough?

I wouldn’t recommend it. Chilling the dough helps the cookies keep their shape and gives you that thick, bakery-style texture. It also improves the flavor. If you’re short on time, chill for at least 1 hour, but overnight is best. Check out why you should always chill your dough.

Why are my cookies spreading too much?

This usually happens if the dough isn’t chilled long enough or if the butter was too warm. Make sure your dough is firm before baking and don’t skip the resting time.

Can I use only one type of chocolate chips?

Feel free to use whatever kind of chocolate chips you prefer most. You can use all dark, all milk, or all white chocolate chips. Mixing them just adds a bit more depth of flavor and decadence.

Can I use chopped chocolate instead of chocolate chips?

Bake-stable chocolate chips are convenient because they hold their shape in the oven. They soften with the heat, but once cooled, they turn back into small, firm pieces without losing their shape.

An alternative is to chop up a chocolate bar and mix it into the dough. These aren’t bake-stable, so they won’t hold their shape as well, but they work just fine. After baking, they take a bit longer to firm up again, and whether they become crisp depends on the type of chocolate you use.

Do I have to use whole Oreos?

No, you can also chop the Oreos and mix them into the dough. Using a whole Oreo in the center just gives that fun surprise effect.


Stuffed Oreo Chocolate Chip Cookies

Print Recipe

No votes yet

Oreo Stuffed Chocolate Chip Cookies

A soft, chewy chocolate chip cookie with a whole Oreo hidden inside for an irresistible surprise!
Preparation15 minutes
Cooking15 minutes
Chilling2 hours
Total2 hours 30 minutes
Servings: 12 cookies

Ingredients

  • 100 grams unsalted butter
  • 120 grams light brown sugar
  • 30 grams granulated sugar
  • 1 large egg
  • 1 tsp vanilla extract
  • 220 grams all-purpose flour
  • Pinch of salt
  • 1 teaspoon baking soda
  • 50 grams white chocolate chips
  • 50 grams dark chocolate chips
  • 12 Oreos
  • Extra chocolate chips for decorating
  • Extra Oreo pieces for decorating

Instructions

  • Add the butter, brown sugar, and granulated sugar to a bowl and mix until creamy. Add the egg and vanilla extract and mix until smooth.
  • Add the flour, salt, and baking soda. Stop mixing as soon as the flour is incorporated. Fold the chocolate chips evenly into the dough.
  • Wrap the dough in plastic wrap and let it chill in the refrigerator for at least 2-3 hours (preferably overnight). Then divide the dough into 12 equal portions.
  • Divide each portion into two pieces and flatten them slightly. Place an Oreo in the center of one piece, then cover with the second piece. Seal the edges well and gently roll it into a ball. It won’t be perfectly round because of the Oreo inside.
  • Place the dough balls on a baking sheet with enough space between them,they spread more due to the filling. Press a few extra chocolate chips and Oreo pieces into the tops.
  • Bake in a preheated oven at 340°F/170˚C (conventional oven) for 14-16 minutes, or until golden brown. The cookies will still be slightly soft when they come out of the oven. Let them cool on the baking sheet for a few minutes, then transfer to a wire rack to cool completely.
Laura Kieft   I

If you’re craving a fun, pizza-inspired dish (much like my loaded sweet potato pizza fries) that works as an appetizer or light main meal, try these pizza croissants! Made with refrigerated crescent roll dough, they come together in just 30 minutes.

Croissants For Pizza Lovers

Love pizza? Then you’re going to get a ton of satisfaction making your own pizza croissants! Apart from being a fun twist on a classic, they’re also:

  • A quick and easy lunch or snack using store-bought crescent roll dough
  • Flaky and buttery, filled with salami and cheese
  • Easily customizable by filling them with your favorite pizza toppings!
  • The perfect make-ahead option and easy to reheat

And if you love pizza flavor make sure to also check the sweet potato loaded fries with pizza topping or these super easy pizza twists. Looking for an easy recipe to make your own pizza dough?

Recipe Ingredients

These simple ingredients provide rich pizza flavor without fuss. The perfect addition to a busy weeknight the whole family will love. Here’s what you need:

  • refrigerated crescent roll dough – I use the type you can buy on a roll in a can for convenience
  • tomato paste – just as you would add a base of this to pizza dough, it gets spread on the crescent roll dough for that iconic pizza flavor
  • salami – you’ll need 1-2 slices per croissant
  • shredded cheese – mozzarella cheese is a great choice, but you could use another type of cheese that melts easily. Always use freshly shredded cheese from a block as pre-shredded cheese contains anti-caking agents that dull the flavor and make it more difficult to melt
  • egg – beaten to brush on the top of each assembled pizza croissant which helps the seasoned cheese topping to stick and for the croissants to turn golden brown
  • Italian seasoning – plus extra shredded cheese for this seasoned topping
Laura Kieft   I

How To Make Crescent Pizza Rolls

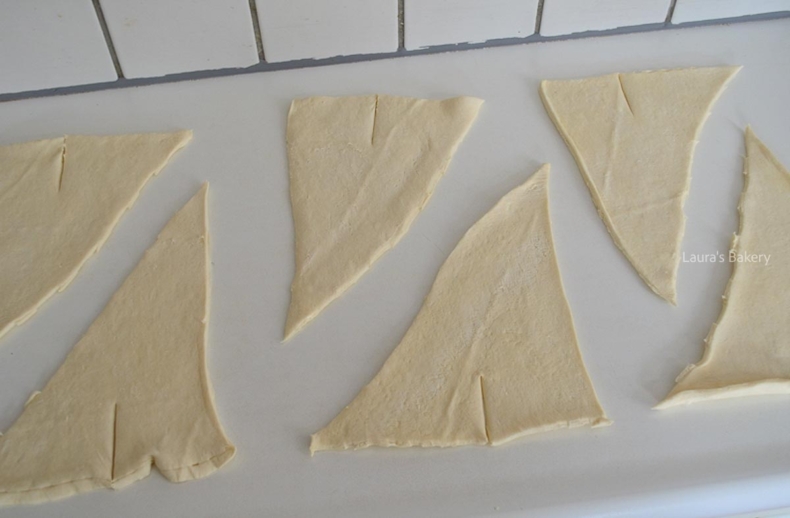
Unrolled crescent dough to make pizza croisants
1

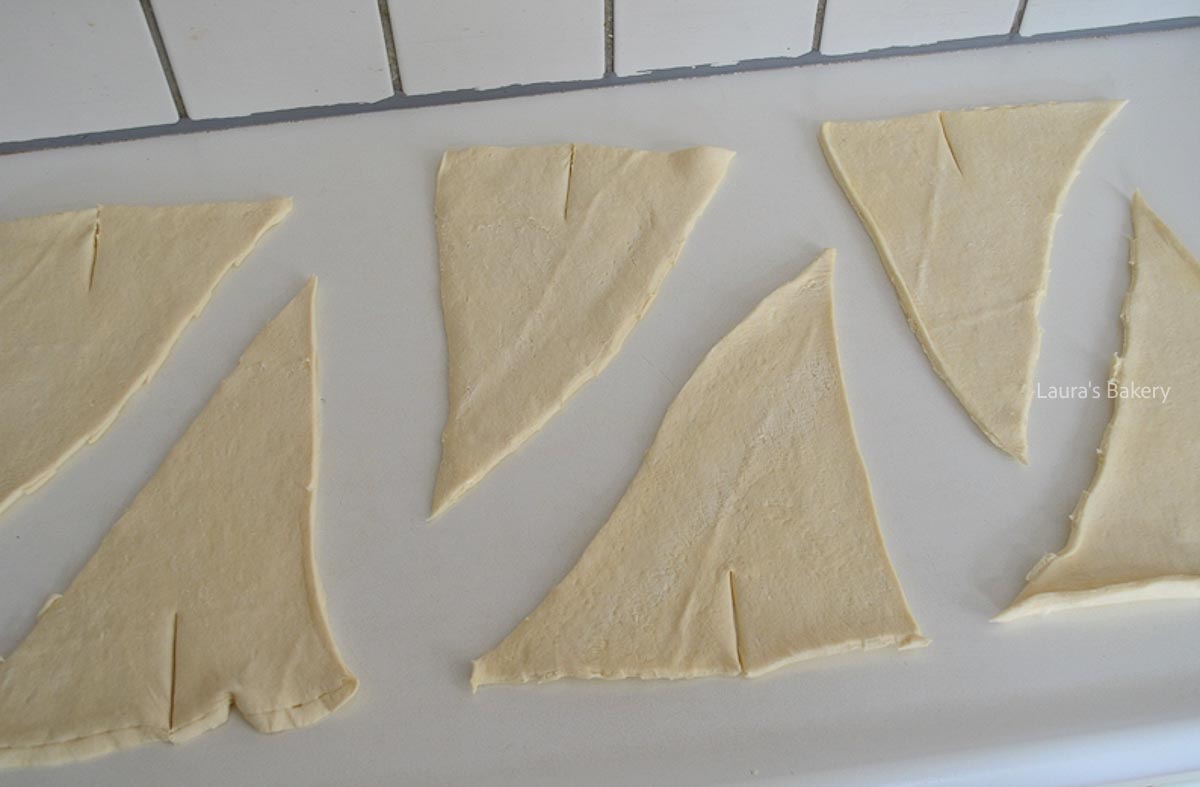
Preheat oven and unroll the dough. Make a slit in dough for easy rolling

Open lightbox for image about Preheat oven and unroll the dough. Make a slit in dough for easy rolling
Tomato paste spread on each pizza dough triangle
2

Spread tomato paste over the crescent dough triangles

Open lightbox for image about Spread tomato paste over the crescent dough triangles
Shredded cheese and Italian seasoning added to the crescent dough
4

Top with Italian seasoning and shredded cheese

Open lightbox for image about Top with Italian seasoning and shredded cheese
How to roll pizza crescent rolls
5

Roll the crescents up, brush with beaten egg, and top with more cheese

Open lightbox for image about Roll the crescents up, brush with beaten egg, and top with more cheese
Pizza croissants
6

Bake for 15-20 minutes, then let them cool slightly before serving

Open lightbox for image about Bake for 15-20 minutes, then let them cool slightly before serving
1/6

Storing Pizza Crescent Rolls

Store these flaky crescent rolls in an airtight container in the refrigerator for up to 2-3 days. 

Can I freeze crescent pizza rolls?

Yes you can also freeze these pizza crescent rolls. Make sure to let them cool completely and use a freezer bag or freezer container to store in the freezer for up to three months. You can reheat them from frozen right away.

Reheating leftovers

If you want to reheat them, place them in the oven for 8-10 minutes at 350˚F/180˚C (conventional oven), keeping a close watch that they don’t burn.

Tasty Ways To Use Crescent Rolls

Whether you prefer sweet or savory, canned crescent rolls are here to save the day, making mouth-watering appetizers, snacks, sweet treats, and more. Here are some other recipes where I use crescent rolls:

FAQ Pizza Croissants

What other fillings work in this recipe?

Feel free to add ham or thinly sliced sausage instead of salami. You could also experiment with a bit of pesto, sun dried tomatoes, fresh herbs (chives, parsley or cilantro), mushrooms, crumbled soft cheese, or by adding various spices. Think of your favorite pizza for inspiration!

Can I make these pizza croissants with puff pastry?

Yes, you can used refrigerated puff pastry instead of crescent rolls. You will end up with more flaky rolls, but they are still just as delicious.

Must I seal the sides of the rolled croissants if they open?

No, that’s not necessary. It’s fine if the sides are open slightly. Of course, you can gently press them closed, if you prefer.

Are these good served cold?

Definitely! While they taste great a few minutes after baking, they’re just as delicious cold.


Easy pizza crescent rolls

Print Recipe

No votes yet

Pizza Croissants

Making croissants has never been this easy! With just a few ingredients, you can turn a can of dough into delicious pizza croissants. Perfect for lunch or a quick snack.
Preparation10 minutes
Cooking20 minutes
Total30 minutes
Servings: 6 croissants

Ingredients

  • 1 can refrigerated crescent roll dough 8 oz / 6 large crescents
  • 35 grams tomato paste
  • 6-12 slices Salami about 1–2 slices per croissant
  • Shredded cheese mozzarella works great
  • 1 egg beaten
  • Italian seasoning + extra shredded cheese

Instructions

  • Preheat your oven to 400°F/(200°C (conventional oven).
  • Unroll the crescent dough and separate it into triangles along the perforated lines.
  • Cut a small slit (about 1 inch/2.5 cm) in the center of the short side of each triangle. This helps when rolling them up.
  • Spread a thin layer of tomato paste over each triangle.
  • Top with slices of salami and sprinkle with shredded cheese.
  • Roll up the croissants, starting from the wide end and rolling toward the tip.
  • Place them on a lined baking sheet. It’s okay if the sides open slightly – you can gently press them closed if you prefer, but it’s not necessary.
  • Brush the croissants with the beaten egg and sprinkle with extra cheese and Italian seasoning.
  • Bake for about 15 to 20 minutes, or until golden brown and cooked through.
  • Let them cool slightly before serving, they taste even better once they’ve had a minute to set. They’re also delicious cold!

Notes

Don’t add too much filling to the crescent roll dough or the croissants won’t roll up properly.
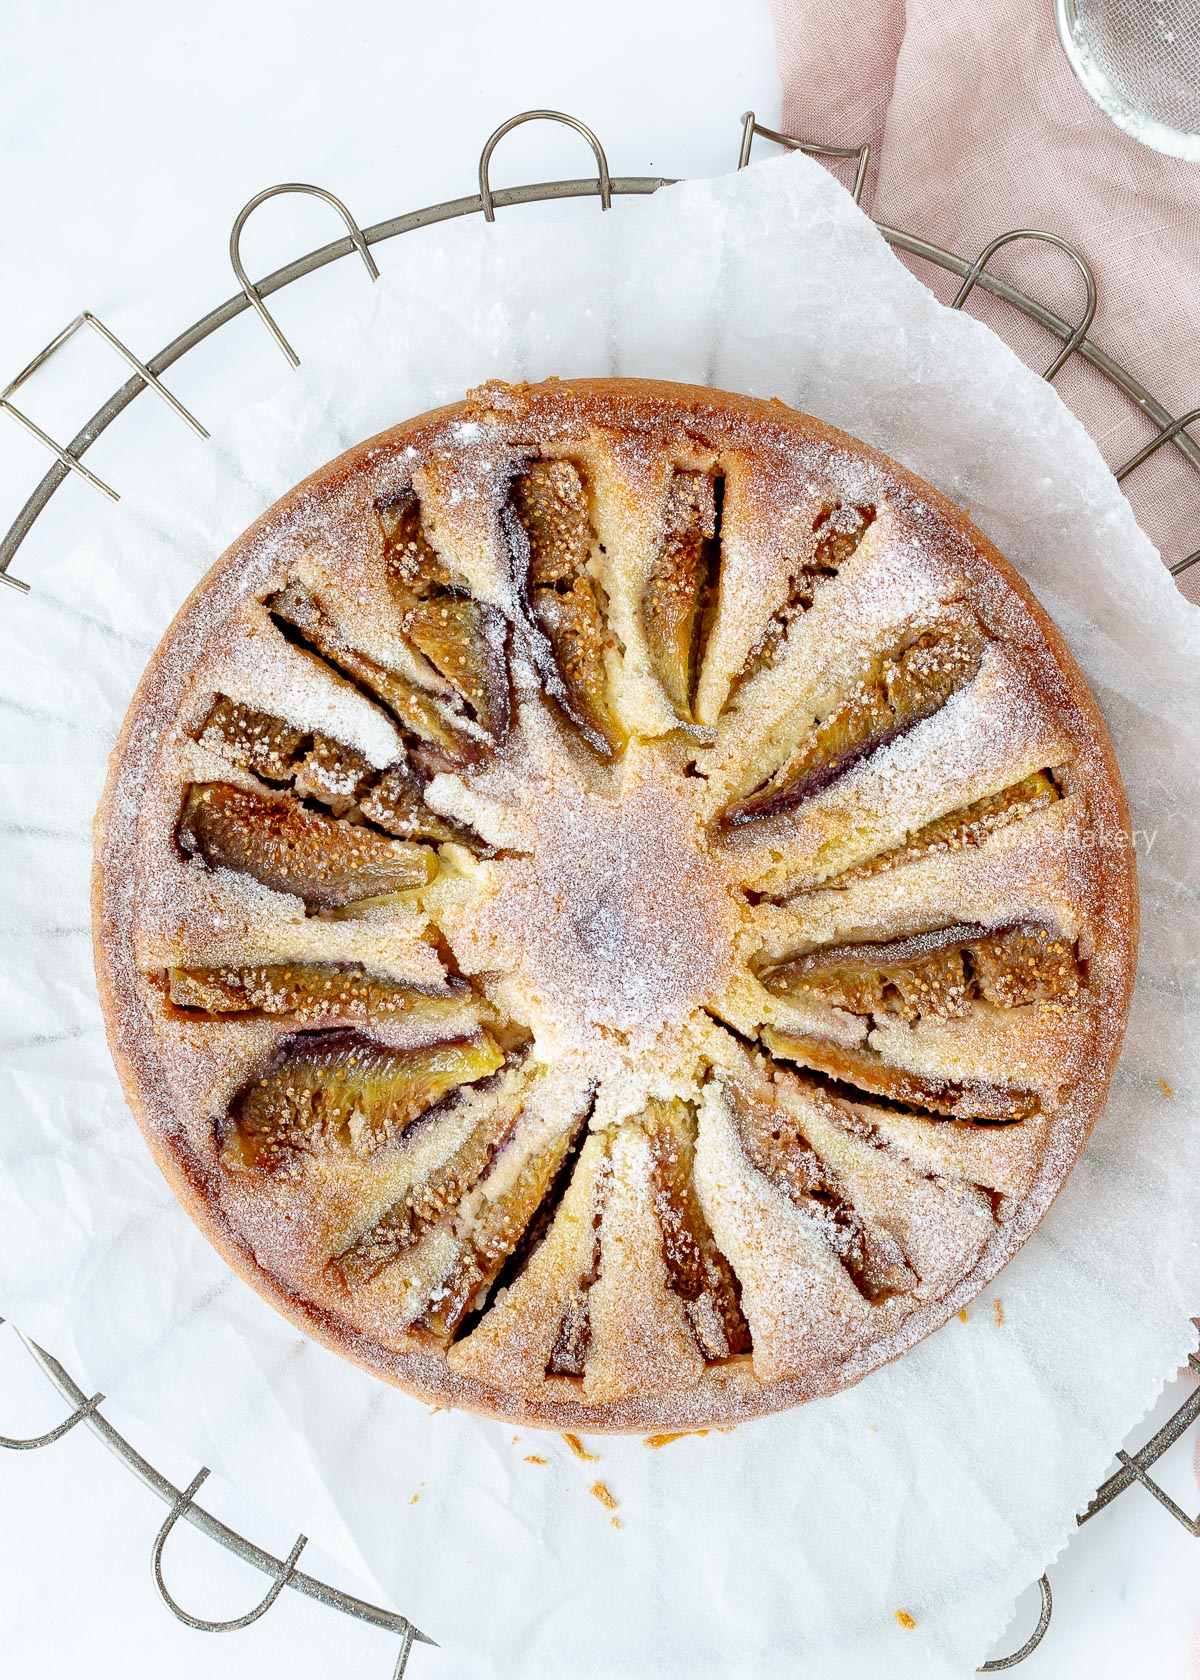
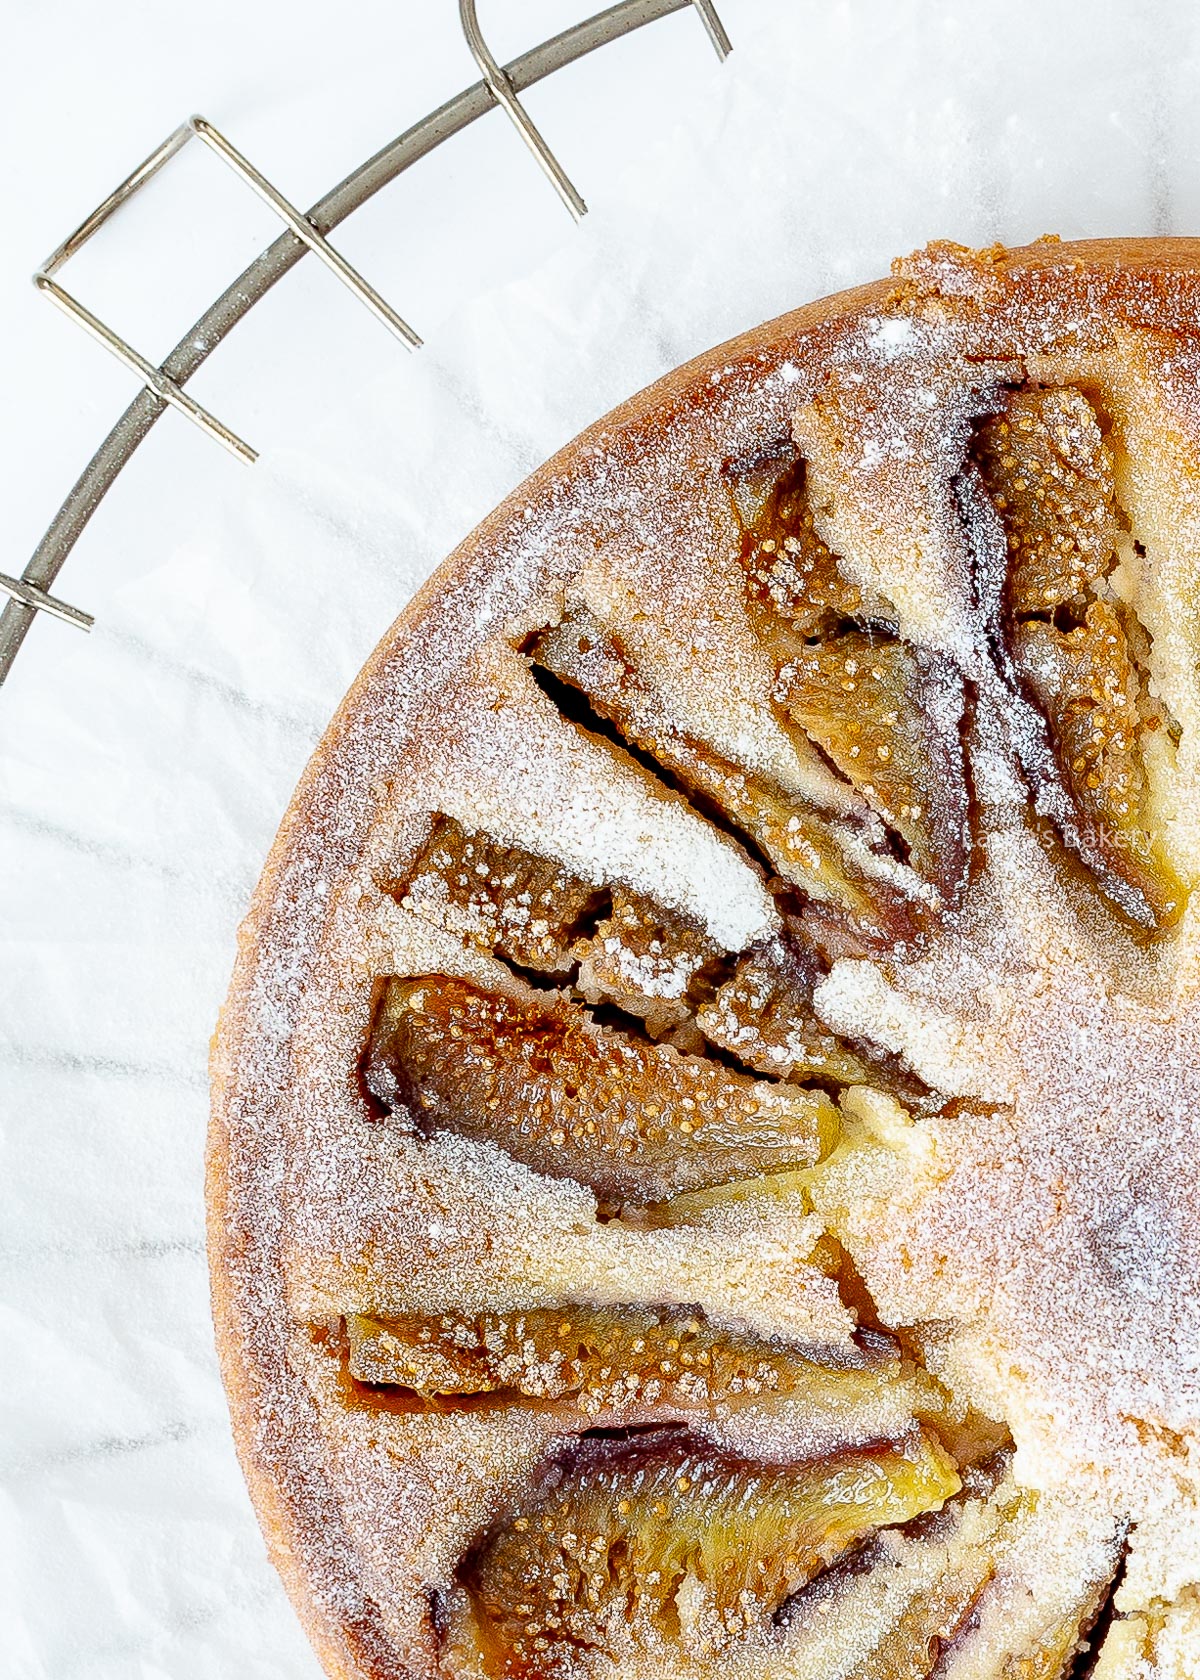
Easy fig tart-5

This is an absolutely delicious recipe for fig tart. It has a buttery shortcrust base, a rich frangipane filling, and, of course, fresh figs. This French fig tart with almond flour in the filling is one you really have to try!

Buttery, Soft and with a Rich Almond Filling

If you ask me, this is the most irresistible fig tart out there.

  • sweet shortcrust pastry base
  • filling with frangipane (luxurious almond paste)
  • crispy crust
  • juicy figs
Easy fig tart-6

Recipe Ingredients

Making this delicious fig tart recipe is incredibly easy. You just need a few simple ingredients, plus, of course, fresh figs!

  • sugar – I use granulated sugar for the crust and you will need a little bit of powdered sugar for dusting (optional)
  • butter – always go for unsalted butter to keep the amount of salt in check
  • egg – you only need a third of an egg. In order to measure this, whisk the egg and divide in three parts
  • frangipane – use this recipe for frangipane. Frangipane is a delicious almond cream and makes all the difference in this recipe
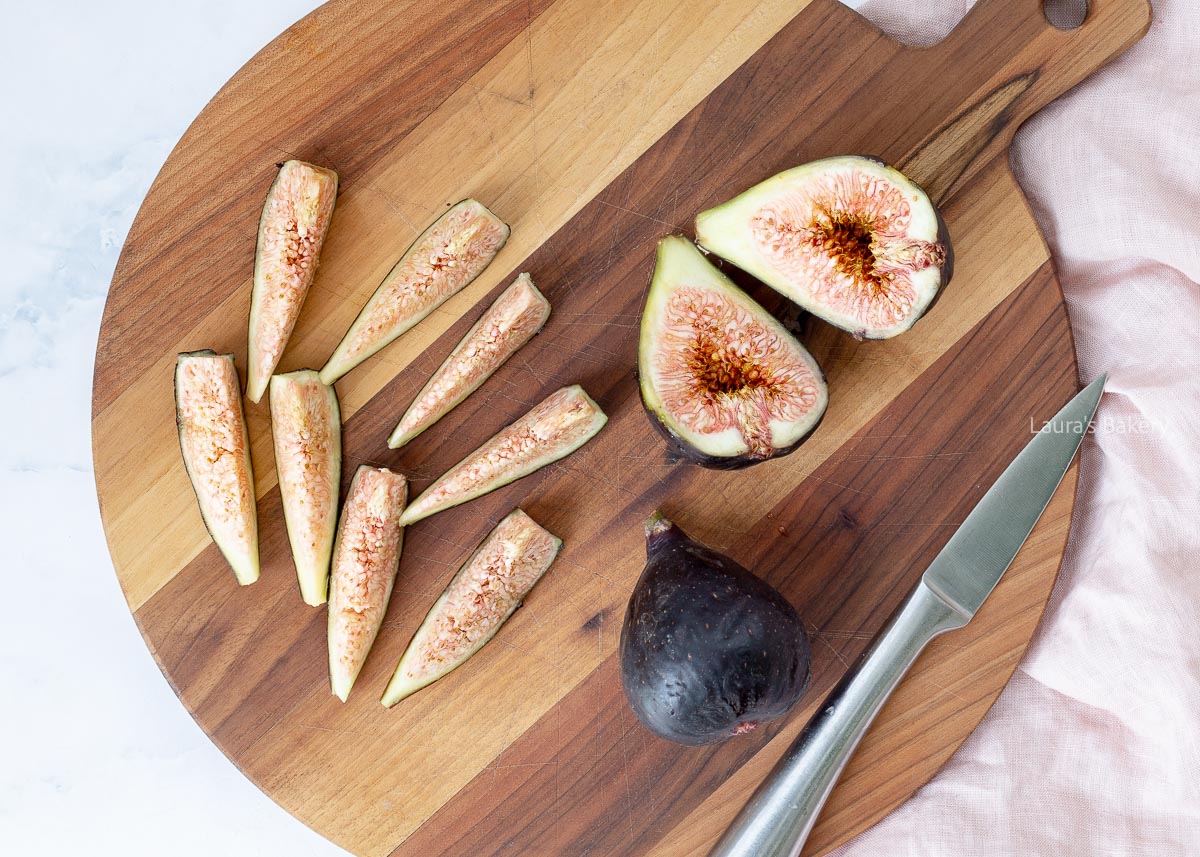
  • figs – depending on the size of your figs, you will need about 4 to 6. Don’t swap fresh for dried figs as that is a totally different flavor and will make this fig tart too sweet

How To Make Fresh Fig Tart

Slice your figs
1

Slice the fresh figs in small parts (remove stem and bottom if needed)

Open lightbox for image about Slice the fresh figs in small parts (remove stem and bottom if needed)
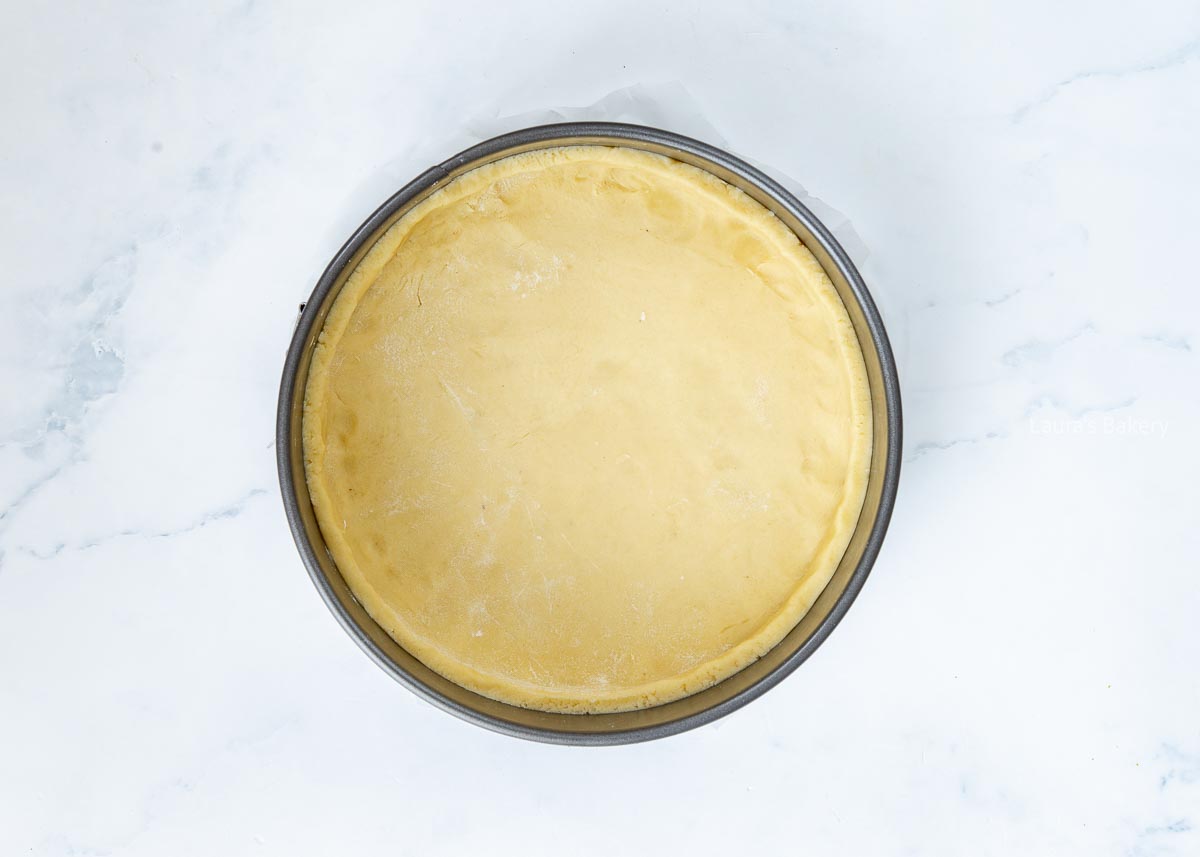
Press the crust into the prepared tin
2

Press the crust into the prepared tin and trim the edges

Open lightbox for image about Press the crust into the prepared tin and trim the edges
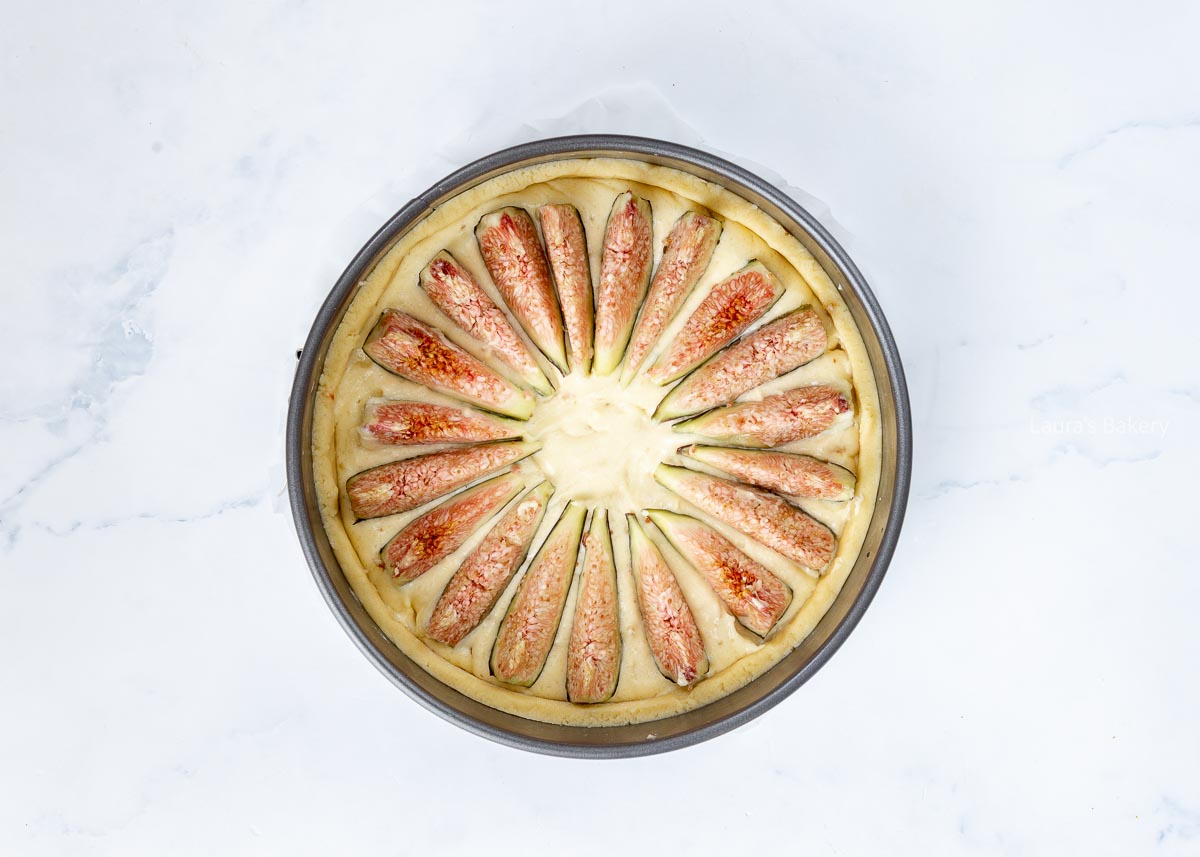
Divide the fresh figs over the frangipane filling
4

Divide the fresh figs over the frangipane filling in a nice pattern and bake

Open lightbox for image about Divide the fresh figs over the frangipane filling in a nice pattern and bake
1/4
Easy fig tart-7

Storing Fig Tart

If you’ve made this delicious fig tart, I can hardly imagine it lasting more than a day. But if you’re wondering how to store it, here are your options:

How long does fig tart keep?

You can store the fig tart at room temperature for 1 day (well wrapped). If you want to keep it longer, store it in the refrigerator. It will stay fresh for 3 to 4 days.

Can you freeze this French fig tart?

I haven’t personally tried it, but in theory you can freeze a frangipane fig tart. Wrap it airtight (whole or in slices, and whichever is more practical) and let it thaw at room temperature.

For best results, warm the thawed tart briefly so the crust becomes crisp again. Depending on the size of the piece of tart, reheat for 5-10 minutes at 350°F/180°C (conventional oven), optionally covered with foil to prevent over-browning.

More French Recipes

Love French tarts? Totally understandable! After all, France is the ultimate destination for refined and delicious patisserie. Here are some favorites:

FAQ Fig Tart

Can I replace the figs with other fruit?

Absolutely! You can substitute figs with fruit like plums, apples, or pears.

Can I omit or replace the frangipane?

Frangipane is a key component of this tart, but here are two options:

If you don’t like almonds or have an allergy, you can make a similar filling using other nuts or coconut.

You can skip the frangipane and use a no-bake filling instead. In that case, blind bake the crust and don’t bake the figs. After cooling, fill the crust with pastry cream, diplomat cream, or mascarpone cream, then top with fresh figs. This creates a completely different, but still delicious, tart.

Can I bake this in a larger pan?

Yes! You can easily scale the recipe up or down depending on your pan size.


Easy fig tart recipe

Print Recipe

No votes yet

Fig Tart Recipe

This easy fig tart recipe is absolutely delicious, and with the buttery crust in combination with the almond filling, it’s a winner!
Preparation15 minutes
Cooking50 minutes
Chilling1 hour
Total2 hours 5 minutes
Servings: 12 people

Equipment

  • 8-inch (20 cm) springform pan or tart ring
  • piping bag

Ingredients

Crust (pâte sablée):

  • 55 grams granulated sugar
  • 110 grams unsalted butter
  • 155 grams all-purpose flour
  • 1/3 egg beaten
  • Pinch of salt

Filling:

  • 1 batch frangipane
  • 4-6 fresh figs depending on size
  • Powdered sugar for dusting

Instructions

Make the crust:

  • Combine all ingredients in a bowl and knead into a firm dough. If it’s still crumbly, knead it further by hand.
  • Wrap in plastic wrap and refrigerate for at least 1 hour.
  • Roll out the dough on a floured surface to about 1/5 inch (5 mm) thick.
  • Line your pan with the dough and trim the edges. If using a springform pan, keep the sides about 1-1.2 inches (2-3 cm) high.

Fill the tart:

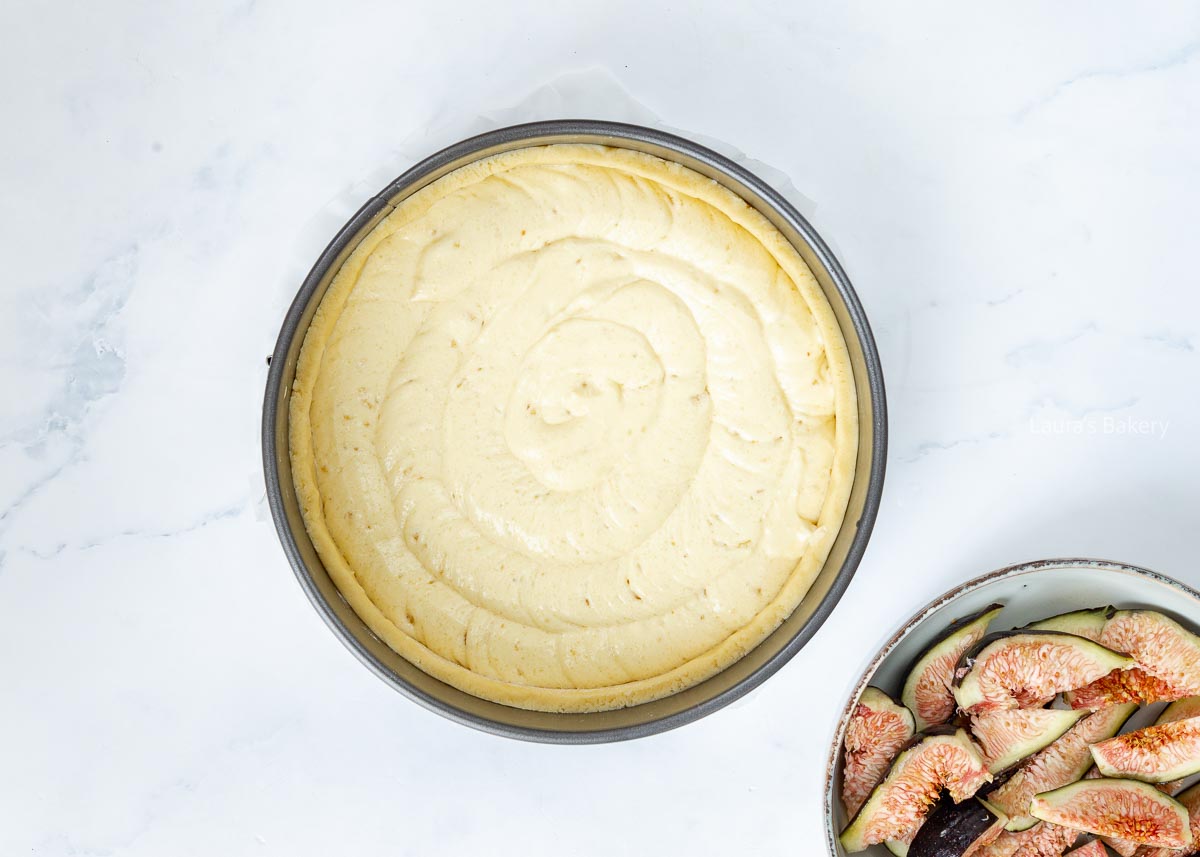
  • Prepare the frangipane according to the recipe.
  • Transfer it to a piping bag and pipe it evenly over the crust (or spread with a spoon/spatula).
  • Wash the figs, trim the tops and bottoms, and cut into wedges.
  • Arrange the figs over the frangipane, either randomly or in a circular pattern. Press them in slightly.

Bake:

  • Bake for 45-50 minutes at 350°F/180°C (conventional oven).
  • After 30 minutes, check if the top is browning too quickly. If so, cover loosely with foil and add about 5 extra minutes to the baking time.
Chocolate chip oatmeal cookies-1

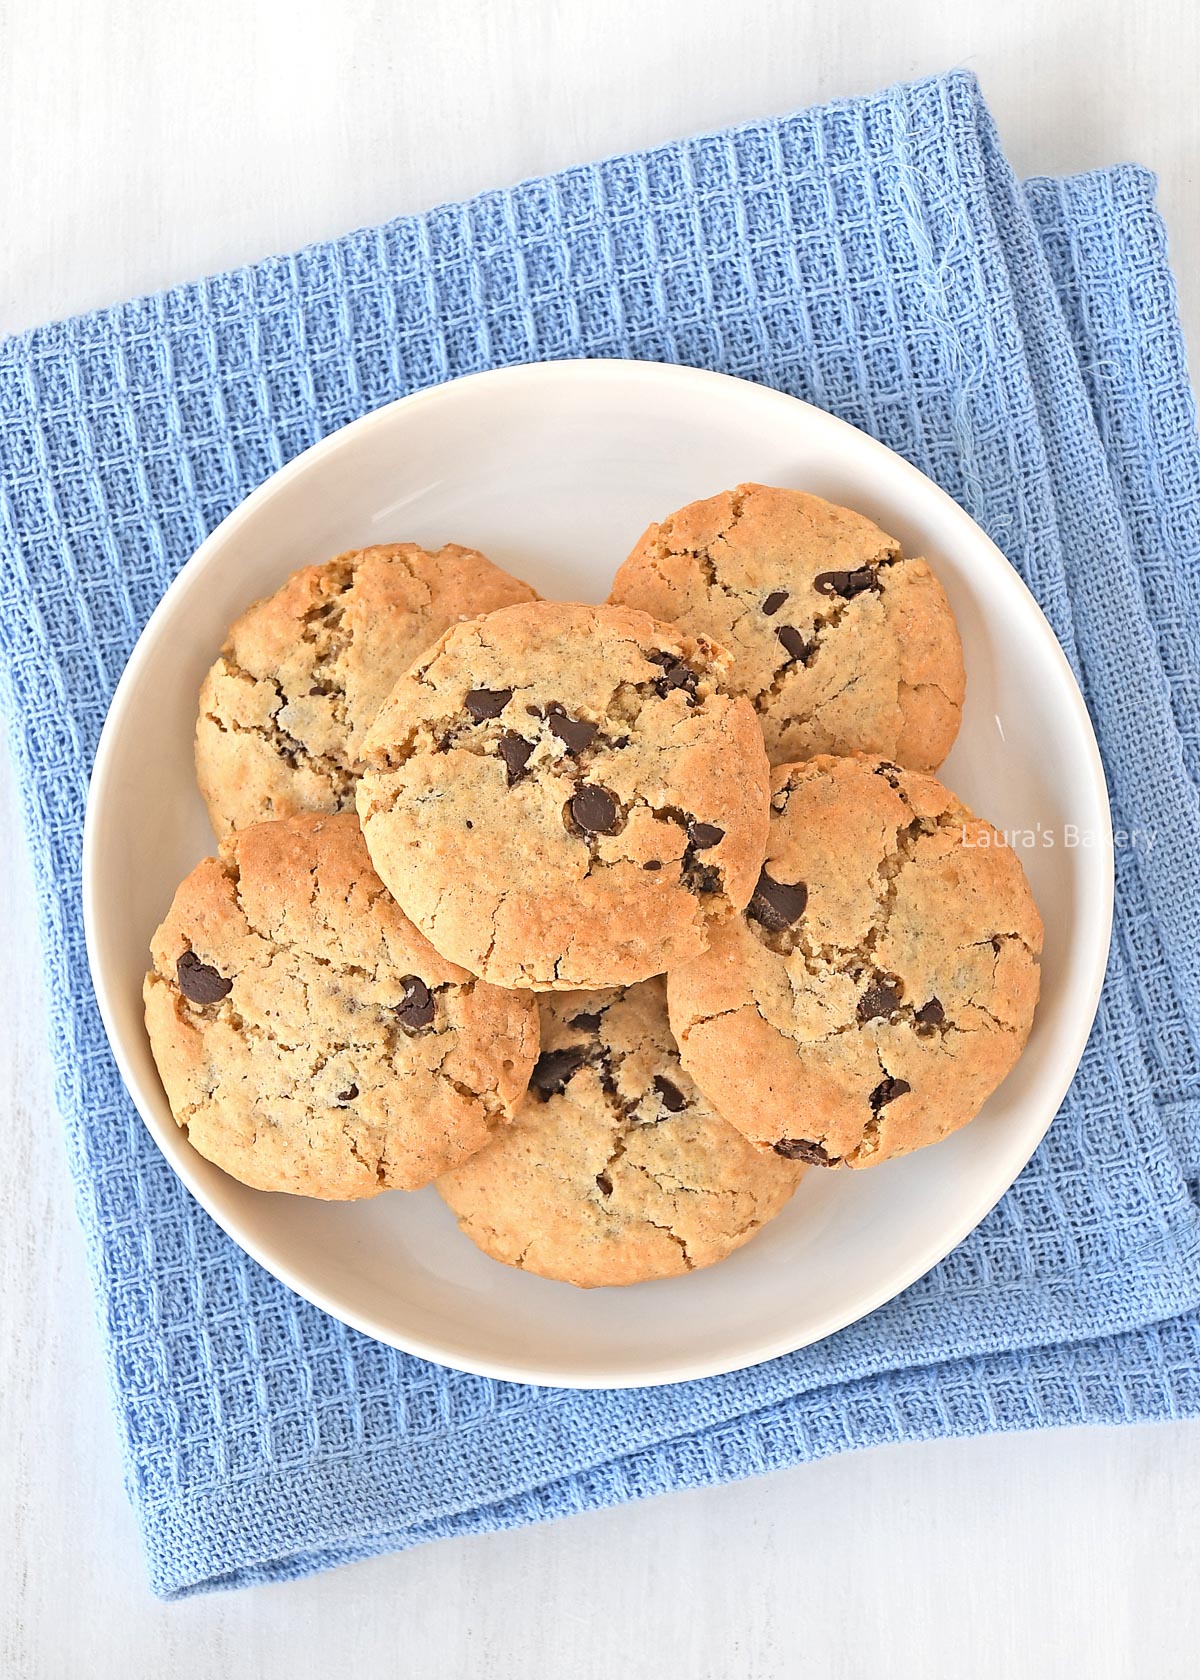
Today I am sharing yet another delicious and easy chocolate chip cookie. This time I combined it with oatmeal, creating a super chewy and fun cookie: chocolate chip oatmeal cookies. It’s my favorite twist on my regular oatmeal cookies, which I love to vary!

Classic Oatmeal Cookie Gets a Chocolatey Twist

If you’ve checked the recipes I have featuring oats, like this apple oatmeal cookie, you know how much I love to play around with a base recipe. This chocolate chip oatmeal cookie has it all:

  • perfect texture – crispy edges and a slightly chewy center. That’s what you want from oatmeal cookies!
  • quick and easy to make – there is no chilling required for this recipe (but you can if you want to) and so it’s ready in under 30 minutes
  • classic twist – chocolate chips turn a simple oatmeal cookie into something a bit more indulgent
  • easy to customize – add raisins, nuts, white chocolate or extra spices to make it completely your own
Chocolate chip oatmeal cookies-3

Recipe Ingredients

While you can add lots of different things to these chewy oatmeal cookies, the base ingredients are pretty simple. Do make sure to double check the full ingredients in the recipe card below.

  • unsalted butter – any brand of butter will work. Make sure the butter is at room temperature before starting so it’s soft enough and easy to cream
  • sugar – for this recipe I use a mix of both regular granulated sugar and light brown sugar which give the cookies a lovely texture
  • egg – one large egg will be enough
  • vanilla extract – you can use store-bought or make your own vanilla extract. Using vanilla paste or vanilla powder is also an option
  • all-purpose flour
  • oats – for this recipe I used old fashioned rolled oats. Quick oats would be ok to use too but will change the texture of the cookies
  • chocolate chips – you can use any kind of chocolate you like. White chocolate, dark or milk chocolate all work

How To Make Chocolate Chip Oatmeal Cookies

Making these chocolate chip and oatmeal cookies is pretty straightforward. You start by combining the butter together with the two sugars. This is easiest to do in a food processor. Cream them together until you have a smooth mixture.

Add the egg and vanilla, and mix it until smooth. Add the flour, oats, baking powder and the salt all at the same time and mix this into a dough.

At this point the dough will be slightly sticky, which is what you want and perfectly fine. Add the chocolate chips into the dough quickly. If the dough feels too sticky to handle you can chill it in the fridge but it is not a must for this recipe.

Roll into balls

You can scoop the dough into balls (using spoons or a cookie scoop) like you would do for regular chocolate chip cookies and place them on a baking sheet lined with parchment paper. You can flatten the dough balls slightly if necessary.

Bake them in the preheated oven for about 12 to 15 minutes or until the edges start to turn golden brown. Take them out of the oven and let them cool down on a wire rack.

Chocolate chip oatmeal cookies-2

Storing Chocolate Chip Oatmeal Cookies

You can store these oatmeal chocolate chip cookies in an airtight container outside of the fridge for up to a week.

Can you freeze chocolate chip oatmeal cookies?

Absolutely! They freeze perfectly. You can even freeze the dough balls and bake them straight from the freezer (just add a few minutes to the baking time). To freeze the dough balls, first freeze them on a tray and then transfer to a freezer bag. That way you’ll always have a fresh cookie on hand.

More Chocolate Chip Cookie Recipes

If you haven’t noticed yet, I have a great love for all things related to chocolate chip cookies, and varying them is one of the things I love to do. So the ever growing list of chocolate chip cookie recipes is expanding, but you can start with a few favorites below:

FAQ Chocolate Chip Oatmeal Cookies

Are chocolate chip oatmeal cookies healthy?

I wouldn’t necessarily call these cookies healthy. Yes, they do contain more fiber due to the oatmeal, but they also contain quite a bit of sugar.

What kind of oats should I use?

Old-fashioned rolled oats work best for this recipe. They give the cookies a nice texture. Quick oats can be used, but the cookies will be softer and less chewy. Avoid steel-cut oats as they’re too hard for this recipe.

Can I use instant oats instead of rolled oats?

You can, but the texture will be different. Instant oats absorb more moisture, resulting in softer, less structured cookies.

Do I need to chill the dough?

No, chilling isn’t necessary for this recipe. However, if your dough feels too sticky or your kitchen is warm, chilling it for 20-30 minutes can make it easier to handle and help prevent spreading.

Can I use only one type of sugar?

You can, but using both granulated sugar and brown sugar gives the best balance of sweetness and chewiness. Brown sugar adds moisture and a deeper flavor.

Can I add other mix-ins?

Absolutely! Try chopped nuts, raisins, dried cranberries, coconut flakes, or white chocolate chips. Just keep the total amount of add-ins about the same.


Chocolate chip oatmeal cookie

Print Recipe

No votes yet

Chocolate Chip Oatmeal Cookies Recipe

This chocolate chip and oatmeal cookie is a delicious variation on the classic chocolate chip cookie!
Preparation15 minutes
Cooking15 minutes
Total30 minutes
Servings: 12 cookies

Ingredients

  • 30 grams unsalted butter
  • 50 grams granulated sugar
  • 50 grams light brown sugar
  • 1 egg large
  • 1 tsp vanilla extract
  • 100 grams all-purpose flour
  • 65 grams old-fashioned oats
  • 1 tsp baking powder
  • pinch of salt
  • 50 grams chocolate chips milk or semi-sweet

Instructions

  • Cream together the butter and both sugars until combined.
  • Add the egg and vanilla extract, and mix until smooth.
  • Add the flour, oats, baking powder, and salt all at once, and mix into a dough.
  • Fold the chocolate chips into the dough. The dough will be slightly sticky, that’s perfectly fine. If it feels too sticky, you can chill it briefly in the refrigerator, but this isn’t necessary for this recipe.
  • Scoop the dough into balls and place them on a baking sheet lined with parchment paper. Slightly flatten the dough balls if needed.
  • Bake for 12-15 minutes at 375°F/180˚C (conventional oven), or until the edges turn golden brown.
Strawberry jam new-4

Making strawberry jam is surprisingly simple and absolutely delicious! With just three basic ingredients, this easy recipe lets you stock your pantry with a homemade spread bursting with fresh fruit flavor. It’s the perfect way to make the most of strawberry season.

15 Minutes to Your New Favorite Spread

Making jam from scratch doesn’t have to be technical, time consuming, or require a long list of ingredients, which is exactly why I love this easy strawberry jam. It’s also:

  • Quick and easy – just 3 simple ingredients
  • An ‘any time of year’ recipe – with fresh or frozen fruit
  • More than a spread – delicious as a sweet topping or to elevate baked treats

Recipe Ingredients

Making your own strawberry jam is not difficult at all. In fact, you only need three ingredients! Make sure to check out the recipe card below for full details:

  • fresh strawberries – get good deals during strawberry season. You can also use frozen strawberries, thawed and drained
  • gelling sugar – this is basically a granulated sugar with pectin. In the Netherlands, it’s called “Geleisuiker” and this jam sugar is readily available, while it may be harder to find in other locations. If you struggle to source this, simply use a brand of powdered pectin, like Sure-Jell
  • lemon juice – this contains a lot of natural pectin to help the gelling effect. It will also add a lovely tart flavor, making this easy homemade strawberry jam recipe a little fresher

How To Make Simple Strawberry Jam

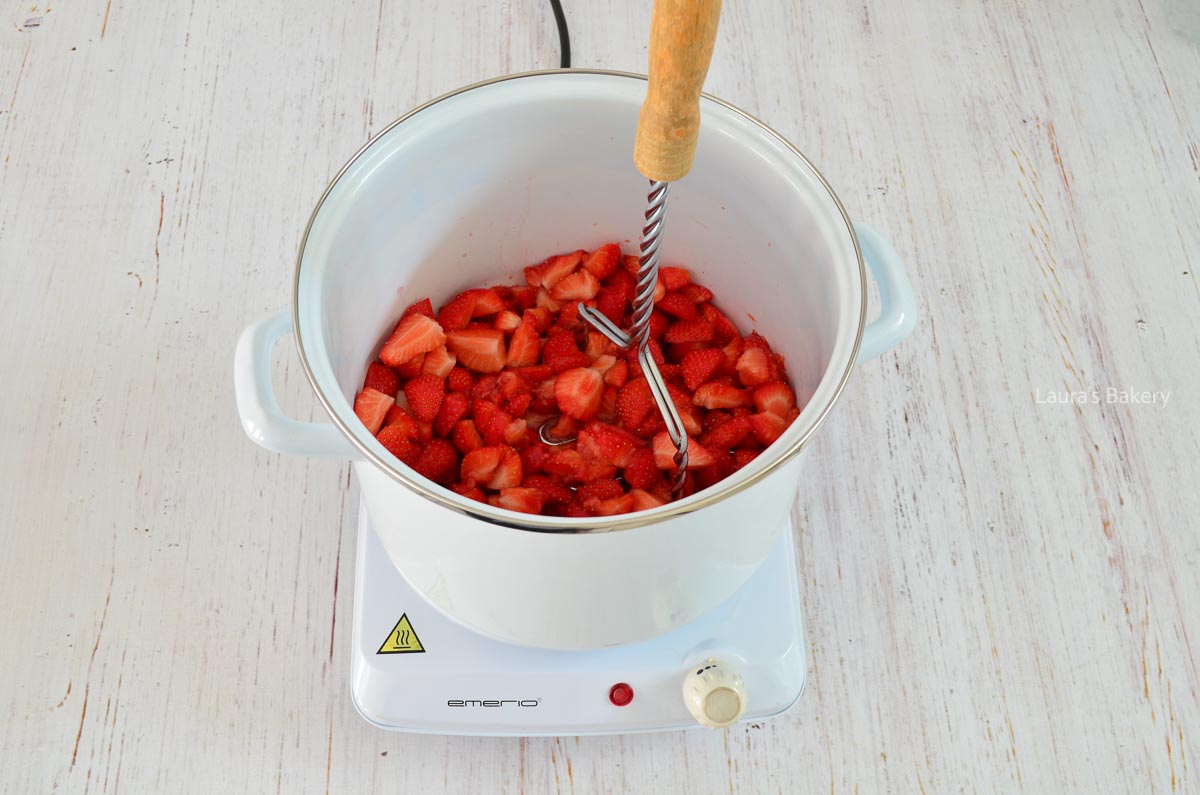
Mashing fresh strawberries with a potato masher
1

Sterilize jam jars. Cut the strawberries to desired size or mash them for a smooth jam

Open lightbox for image about Sterilize jam jars. Cut the strawberries to desired size or mash them for a smooth jam
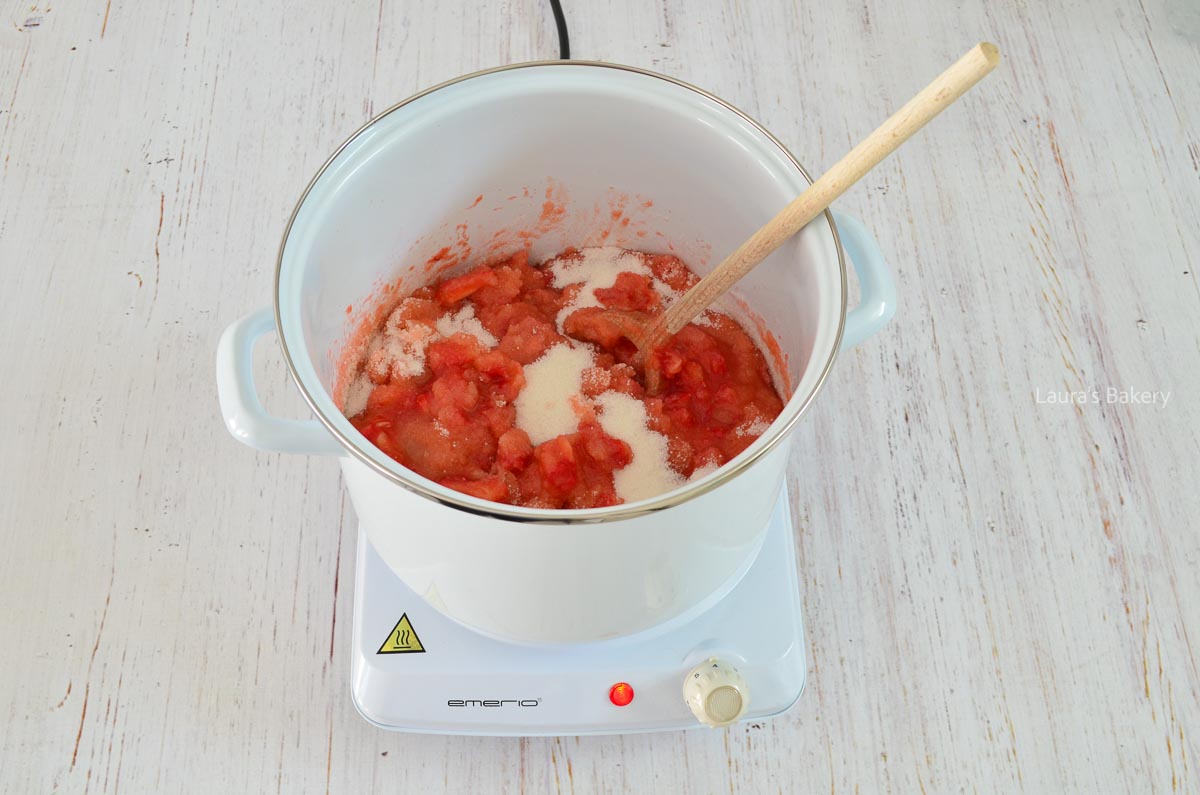
Strawberries, lemon juice, and sugar in a large pot
2

Add the lemon juice and sugar to the large pot with the strawberries

Open lightbox for image about Add the lemon juice and sugar to the large pot with the strawberries
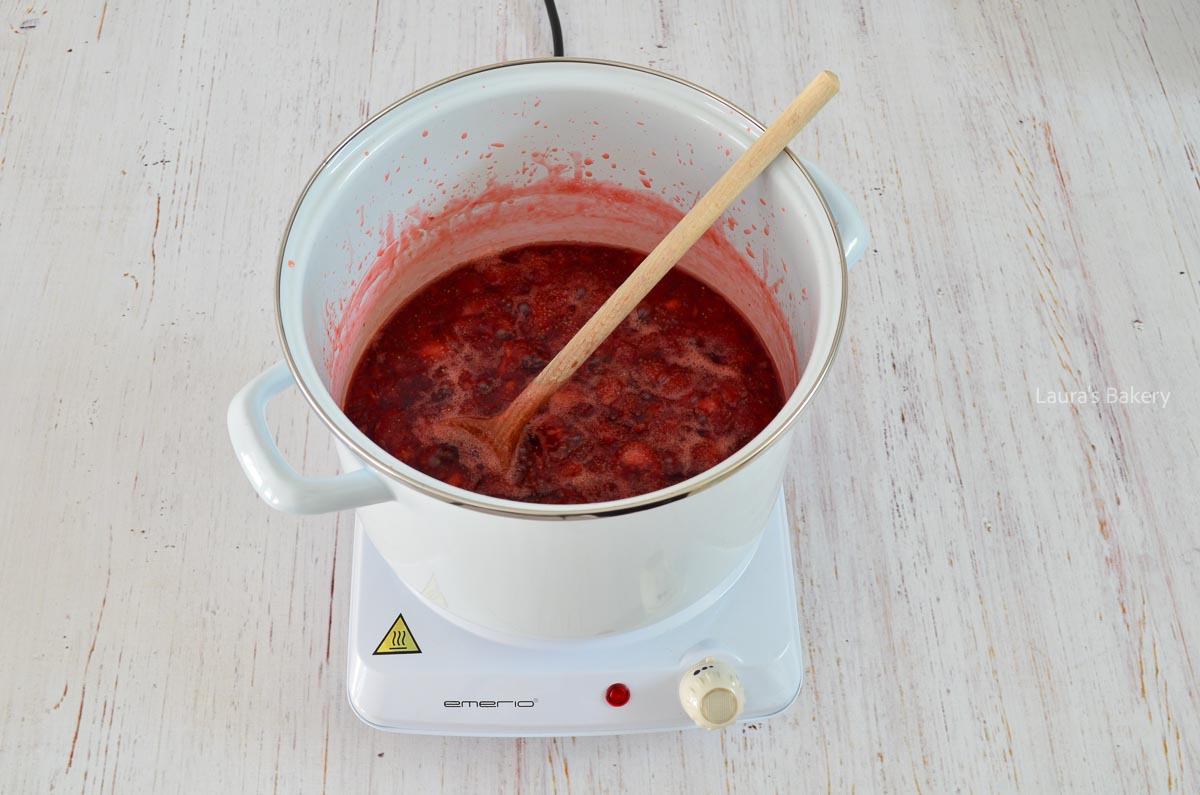
Strawberry jam mixture at a full boil
3

Bring to a boil while stirring. Cook for 1-2 minutes more, turn off heat and let it settle briefly

Open lightbox for image about Bring to a boil while stirring. Cook for 1-2 minutes more, turn off heat and let it settle briefly
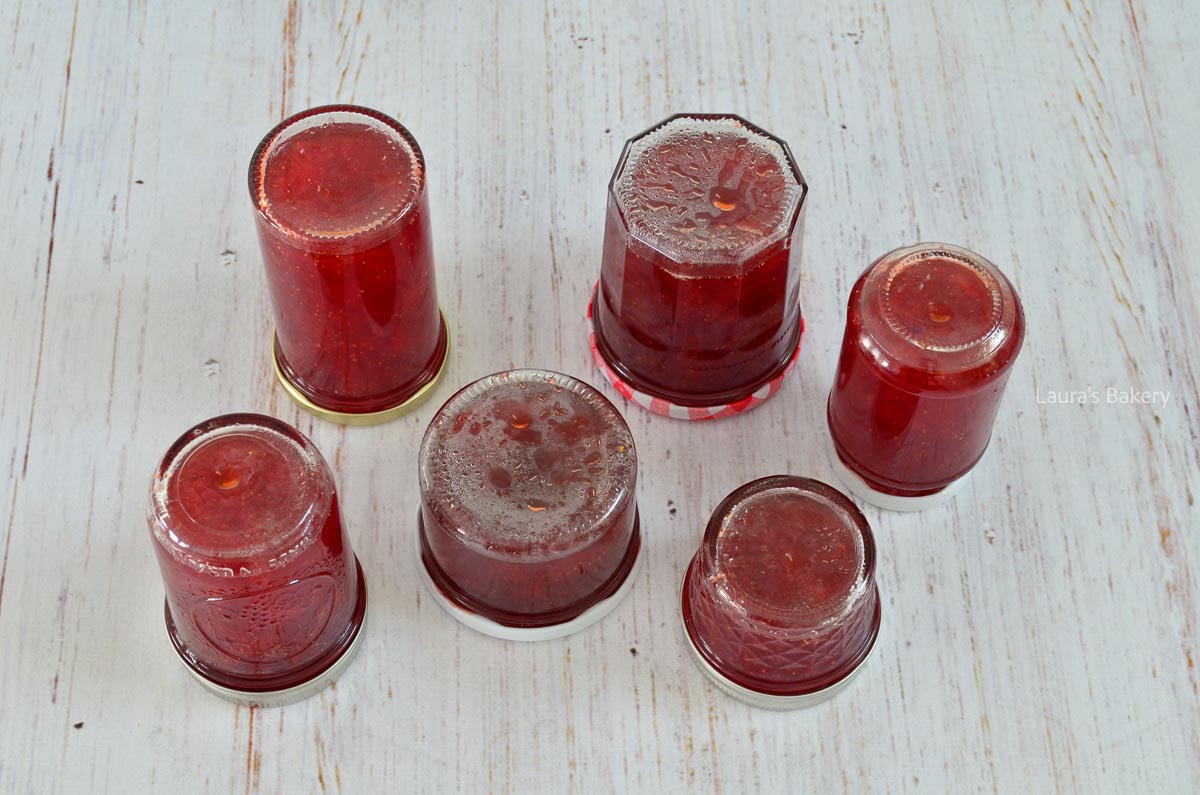
Clean jars filled with strawberry jam and resting upside down
4

Pour hot jam into the jars, seal, turn upside down for 5 minutes, then cool completely upright

Open lightbox for image about Pour hot jam into the jars, seal, turn upside down for 5 minutes, then cool completely upright
1/4

More Homemade Jam Recipes

Once you start, you’ll find the process of making jam quite addictive. But why stop here? Go on and try these other delicious jam recipes:

Strawberry jam new-3

Storing Homemade Jam

Once cooled, you can store your jam-filled jars in a dry and cool place. Unopened jars of this strawberry jam will keep for up to a year!

Opened jars must be stored in the refrigerator and used within a few weeks.

Can you freeze this easy strawberry jam?

Absolutely! Store it in an airtight container for up to 3 months. Freezing your jam in small portions makes it easier to thaw only what you need.

Strawberry jam new-5

FAQ Easy Strawberry Jam

Can I use frozen strawberries?

While possible, I do recommend making this simple strawberry jam with fresh seasonal strawberries. The advantage of frozen strawberries is that you can make this jam all year round.

If you do use frozen strawberries, make sure to thaw and drain them properly before use, otherwise the jam may not set.

What is "gelling sugar"?

In the Netherlands, we use gelling sugar or jam sugar (geleisuiker) to make jam because it gives the jam a firmer consistency. It also makes the jam last longer. It’s basically granulated sugar with added pectin and citric acid.

If you don’t have this, use a powdered pectin instead. Follow the proportions and cooking instructions on the package of your choice.

How do I test for doneness?

It’s quite easy to test if your jam is ready. Run a spoon through the jam and draw a line across the back of the spoon. If the line remains visible, your jam is ready. If the jam runs directly over the line, it needs to boil down a bit longer.

What's the point of labelling the jars?

Labelling the jars with the date of preparation will help you to know how much shelf-life they have left so that you can enjoy your homemade jam before it expires. Feel free to use a stick-on label and marker or a label-maker machine for added convenience.

Can I make strawberry jam without added pectin?

Yes, you can make perfect strawberry jam without the added pectin in liquid or powder form and also without adding gelling sugar. It’s essentially how old-fashioned jams are made.

Strawberries are naturally low in pectin, so the quickest way to thicken the jam is by adding a fruit that is naturally high in pectin. Since lemons are high in pectin, adding the juice of an extra lemon to this small-batch strawberry jam recipe works great. You should also let the jam simmer for half an hour longer.

In addition to the extra lemon juice, I also soak the strawberries in sugar for several hours (or overnight), and then use these soaked strawberries and the liquid they release to make the jam. And that’s it!

How do I make strawberry jam without chunks?

If you, like me, prefer a smooth jam, simply mash the strawberries beforehand with a potato masher or an immersion blender.


Strawberry jam

Print Recipe

No votes yet

Strawberry Jam

Just fresh strawberries, sugar, and lemon juice makes the easiest, most delicious jam ever! Once you’ve tried it, you’ll never go back to store-bought.
Preparation5 minutes
Cooking10 minutes
Total15 minutes
Servings: 3 jars

Equipment

  • Sterilized jars
  • Immersion blender or potato masher If you want a smooth jam

Ingredients

  • 600 grams strawberries washed and hulled
  • 240 grams gelling sugar or granulated sugar with added pectin
  • 1 tbsp lemon juice

Instructions

  • Place the jam jars in a large pot of water. Bring to a boil and let them boil for a few minutes. Remove them with tongs and place on a clean kitchen towel. Do not dry them, the heat will evaporate any remaining moisture.

Make the strawberry jam

  • Cut the strawberries into pieces or, if you prefer a smooth jam, mash them using a potato masher or an immersion blender.
  • Place the strawberries, sugar, and lemon juice in a large, deep saucepan. Bring the mixture to a boil over medium-high heat, stirring continuously. Once it reaches a full boil, continue cooking for another 1-2 minutes while stirring.
  • Turn off the heat and let the mixture settle briefly.
  • Pour the hot jam into the sterilized jars and seal them immediately. Turn the jars upside down to create a vacuum seal, which helps preserve the jam longer.
  • Leave the jars upside down for about 5 minutes, then turn them upright and let the jam cool completely.
Classic stuffed mushrooms-2

These delicious and easy to make classic stuffed mushrooms are fun to make and my taste testers absolutely loved them too! They just need a little time in the oven but are really quite simple to make.

A Yummy Appetizer

Even though I am not a big fan of mushrooms, all my taste testers kept raving about this classic stuffed mushroom recipe!

  • Simple, yet classic flavors with mushrooms, garlic, parsley and parmesan
  • Great vegetarian appetizer or snack
  • Easy to make ahead
  • Endlessly adaptable too!

Recipe Ingredients

You can really make this recipe your own as it’s simple to vary with the ingredients, but for the classic experience you will need the following:

  • mushrooms – you can use white mushrooms, cremini mushrooms or portobello mushrooms. Whichever you prefer
  • bread – I used one slice of stale bread to soak up the mushrooms moisture. You can also use something like Japanese breadcrumbs
  • parsley – parsley is the classic choice but you can also go for basil, oregano or thyme for a change in flavor
  • Parmesan cheese – if you want to use other cheese that is also an option. I like the texture and flavor of Parmesan

BAKING TIP: Don’t rinse mushrooms under running water, they’ll absorb too much moisture and lose flavor. Instead, use a mushroom brush or a damp paper towel to clean them.

Classic stuffed mushrooms-1

How To Make Classic Stuffed Mushrooms

Making these delicious classic stuffed mushrooms is easy. You start by cleaning the mushrooms.

Use a mushroom brush or a piece of paper to clean the tender mushroom caps, but don’t use water as they will soak up the water and loose their flavor. Remove the mushroom stems and chop them up.

Chop the slice of bread and toast this in a large skillet until crispy. Set aside while you prepare the rest of the filling.

Sauté the chopped shallot, garlic, mushroom stems and season with some salt and pepper. Turn off the heat.

Fill the mushrooms

Add the bread, chopped parsley and the cheese and mix it all together well. Now fill each mushroom with the mixture. Press it down firmly so the mushrooms are perfectly filled and add a bit on top so you have a nice little mound.

Prepare a baking sheet with parchment paper and place the stuffed mushrooms on it. Bake in the oven for about 25 minutes or until golden and cooked. It’s a delicious appetizer and best served warm.

Storing Easy Stuffed Mushrooms

Once baked it is best to eat this mushrooms recipe right away. Mushrooms contain a lot of moisture so keeping them will not be the best if you want to serve a perfect appetizer.

You can prepare the mushrooms and the filling separately and once ready to serve, finish the preparation in the oven. If you have leftovers, you can keep them in the fridge for up to two days.

Can you freeze stuffed mushrooms?

No, freezing is not recommended due to the amount of moisture the mushrooms have. The texture will change and they will become soggy.

More Easy Appetizers

My collection of delicious and easy appetizers is ever expanding, but be sure to check out some favorites below:

FAQ Classic Stuffed Mushrooms

Can I make stuffed mushrooms ahead of time?

Yes! You can prepare the filling a day in advance and store it in the fridge. Fill the mushrooms just before baking so they stay fresh and don’t become soggy.

How do I keep stuffed mushrooms from getting watery?

Avoid washing mushrooms under running water, clean them with a brush or damp paper towel instead. Also, don’t overfill the baking dish, and bake them at a high enough temperature so excess moisture can evaporate.

Can I use different types of mushrooms?

Absolutely. White button mushrooms work great, but cremini (baby bella) mushrooms are a bit more flavorful. Just make sure they’re large enough to hold the filling.

Can I make this recipe gluten-free?

Yes, simply replace the bread with gluten-free bread or use gluten-free breadcrumbs.

What can I use instead of Parmesan cheese?

You can substitute Pecorino Romano for a sharper flavor, or use a vegetarian hard cheese alternative if needed. But really any kind of cheese you like will work. I think this will also be great with blue cheese.

Can I add extra ingredients to the filling?

Definitely! Try adding finely chopped nuts, sun-dried tomatoes, spinach, or even a bit of cream cheese for a richer filling.


Classic stuffed mushrooms

Print Recipe

No votes yet

Classic Stuffed Mushrooms

These classic stuffed mushrooms are a delicious vegetarian appetizer and really easy to make.
Preparation10 minutes
Cooking10 minutes
Total20 minutes
Servings: 16 pieces

Ingredients

  • 16 mushrooms
  • 1 slice day-old bread
  • 1 shallot finely chopped
  • 1 clove garlic minced
  • 2 tbsp parsley finely chopped
  • 25 grams Parmesan cheese finely grated (about 1/4 cup)
  • olive oil

Instructions

  • Clean the mushrooms, remove the stems, and finely chop the stems.
  • Cut the slice of bread into small cubes and toast them in a skillet with a little olive oil for a few minutes until crispy. Remove from the pan and set aside.
  • Heat the skillet again with a bit of olive oil and sauté the chopped shallot, garlic, and mushroom stems. Season with a little salt and pepper.
  • Turn off the heat. Add the toasted bread cubes, chopped parsley, and grated Parmesan cheese. Mix everything together well. Fill the mushroom caps with the mixture, pressing it down firmly, then add a small extra spoonful on top.
  • Grease a baking dish with a little olive oil and place the stuffed mushrooms inside. Bake for 25 minutes at 350°F /180°C (conventional oven).
  • Best served warm, so enjoy them right away! Optionally, sprinkle with some fresh parsley on top for a fresh finish.