

Can I make this recipe into a vegan vanilla cake?
I have not tried this myself but I have heard from readers that it’s easy to do by replacing the milk with a plant-based milk and the butter with a (hard) margarine.
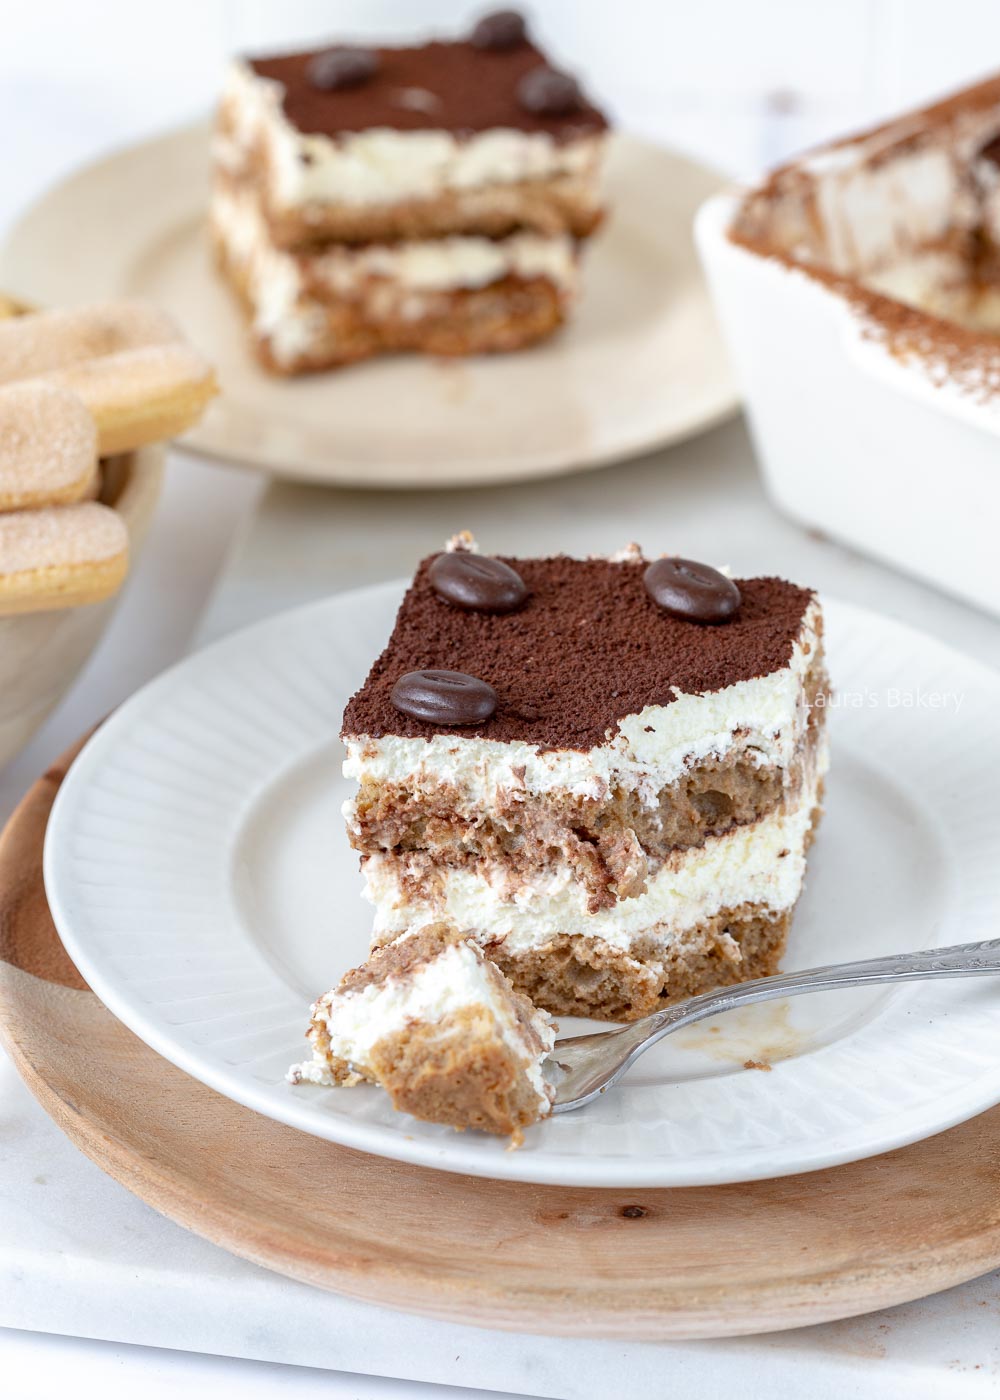
All the tiramisu recipes on Laura’s Bakery do not use raw eggs (although eggs are an ingredient in the lady fingers). And while I recently posted a delicious limoncello tiramisu recipe, this classic tiramisu was still missing from the site. So today I am sharing this easy tiramisu recipe! It is one of my favorite desserts and perfect for almost any kind of gathering.
Making tiramisu without eggs is super easy to do. When I say eggless tiramisu recipe, I mean that there are no raw eggs in the dish itself. There are still eggs used for the lady fingers as that is a normal component of these particular cookies.
If you have an egg allergy make sure to check if you can find eggless ladyfingers.
Officially, tiramisu is made with raw egg, so Italians will not be happy with my non traditional recipe. In the past, it seemed that tiramisu could even be made with raw egg yolks alone (without egg whites), but over time, egg whites have been added to the recipe to make it lighter and airy.

The yolk adds fat and creaminess, and the raw whipped egg whites adds volume and lightness. For this reason, I find heavy whipping cream to be the ideal eggless substitute. It is rich and creamy and can be whipped to a wonderfully light consistency.
I’ve read in many recipes that adding whipped egg whites to the mascarpone mixture can be quite a challenge for many people; with heavy cream, you don’t have that problem. For me, there is nothing better than this eggless version of tiramisu.
For this ‘classic’ tiramisu, I used a 30 x 15 cm (12 x 6 inch) baking dish. I have made a mini version of this recipe before, in small jars with portions just right for one person. Or you can use one or more small baking dishes and present it that way.
Today, it is time for a bowl of eggless tiramisu that you can serve to your whole family. No problem if you have young kids, elderly people, pregnant people or otherwise people that can’t tolerate raw eggs.
One of the most important ingredients for tiramisu is a good, strong coffee mixture. Coffee flavor is the taste of tiramisu. Perfect for any coffee lover.
So if you choose to use it, make sure you use it well. Not only is the strength of the coffee important, but make sure the coffee is completely cold before using it.
Otherwise, your coffee-soaked ladyfingers will become too soggy, they will not hold the coffee properly, and there is a chance that your mascarpone cheese mixture will be too thin and runny.

Dip the lady fingers in the coffee with the sugary side down and place them in the serving dish with the sugary side down. This will reduce the chance of the cookies breaking or the sugar dissolving in the mascarpone.
This is also true if you bake the lady fingers yourself. Italians prefer the Italian version of lady fingers, savoiardi biscuits, which you can buy in certain deli shops. Place the lady fingers in a single layer in the bowl before adding the mascarpone cream.
Sprinkle cocoa powder generously not only on the top of the tiramisu, but also between the layers.
Some Italian cooks swear by sprinkling chocolate shavings over the mixture halfway through the filling instead of cocoa powder. Try whatever works best for you.
Officially, a classic tiramisu recipe needs to be refrigerated for at least three hours. It is even better if the tiramisu has been in the refrigerator overnight. The flavors and textures will have melted into a delicious, creamy dessert.
After a night in the fridge the end result will also be firmer, so if you want to serve it in slices it is best to leave it for a longer time. And that makes it even more perfect for a dinner party as you can prepare it a day in advance and still serve a perfect dessert to your guests.

Contrary to what many people think, a traditional tiramisu recipe does not contain alcohol. Personally, I prefer an alcohol-free tiramisu, but I noticed that my team had different opinions. So I decided to include the option in the recipe, as some people find it a very tasty addition.
For example, you can choose from coffee liqueur, dark rum, amaretto, or marsala wine (a fortified Italian wine with a nutty flavor). These are the preferences of the team at Laura’s Bakery.
Baileys, in particular, is a big favorite and is referred to as the “secret ingredient”. What is the secret ingredient in your tiramisu?

If you’re a coffee lover and if you love a bit of granola in your bowl of yogurt, you’re going to love this coffee granola recipe. It’s easy to make and so tasty!
My daily bowl of yogurt for breakfast includes some cereal or granola and fresh fruit. I regularly try different store-bought granola packages, but I also often make my own granola mixture. I have made quite a few different granola flavors (like this sugar-free granola!) and this is my latest granola addition which is absolutely delicious.
The fun part about any granola recipe is that you can mix and match and add whatever you like. With boxes from the grocery stores it’s maybe not exactly what you would like. I’ll give a few options below of things that would work really well with this coffee granola.
To begin with the things that I added to my batch of homemade granola:
In addition to the above you could add different kinds of nuts. Sometimes I use mixed nuts and sometimes I go for just one type of nut. Like I did here.
Coconut flakes are also great to add, as well as flax seeds or chia seeds. Once the granola is baked you can add other things like cacao nibs or chocolate chips. Love adding some chocolate in!
You could even sprinkle some cocoa powder through the mix prior to baking. If you do, keep in mind that the end result will be a bit darker.
In terms of the coffee flavor taste a bit of your mix to find out if you like the flavor or if you want a more intense coffee flavor. Keep in mind that once baked it will not be as strong. If you love coffee flavored recipes make sure to also check out the coffee crumble cake.

Once you’ve gathered all your ingredients it’s time to mix it all together. Take a large bowl to add all the dry ingredients in. Give it a good mix and pour in the wet ingredients. All contents of the bowl should have come in contact with the oil and honey.
Now spread your mixture over a sheet pan or baking sheet and make sure the layer is not too thick. If necessary, you can use two trays. Halfway through the baking time mix it through with a spoon so all the contents of the tray get golden brown.
Now it’s important to let the granola cool completely before you add it to an airtight container.
Of course I have more delicious granola recipes for you to choose from!

With the current prices of eggs, baking is expensive! So I thought it was time for a vanilla cake recipe without eggs! I made this eggless cake a few years ago and many people have enjoyed it since.
I started testing this recipe a while ago and two failed attempts ended up in the bin. Because I wanted something really special! In the end, I kept the base from this food blog and made my own version for you. The cake turned out to be delicious!
As with any cake usually the eggs make sure that the cake rises and becomes light and fluffy. Obviously in an eggless vanilla cake recipe that needs to come from something else.
In this case it’s vinegar and baking powder that make sure the cake does not become too dense and still has a lovely moist texture. I will also soon start working on a recipe for a vegan vanilla cake, but that might take some time to get right too.
So, what do you need to make this basic vanilla cake without eggs? The ingredients are pretty simple so you’re likely to have everything in your cupboard already.
Make sure to check the full details in the recipe card below. As always make sure the ingredients are at room temperature before you start working on the cake batter.

It’s good to know that I used a square baking tin of 20 x 20 cm/8 x 8 inch. If you want to use a more classic baking tin for this cake you can, but you might have to increase the time in the oven.
The first step is to cream the sugar and butter in a bowl. Use either an electric hand mixer or a stand mixer if you have one.
Using another large mixing bowl add the dry ingredients and mix those through. In yet another large bowl you add the wet ingredients.
Now both these bowls will need to be added to the butter mixture in three parts. Starting and ending with the flour mixture. Continue until all is incorporated and don’t mix the cake for too long.
Pour the batter in the prepared baking pan, lined with parchment paper.
Bake the cake for 45 minutes in the preheated oven (or until an inserted skewer comes out clean) and once cooked, first let it cool in the oven for 15 minutes. Turn the oven off and let the oven door slightly ajar. Let it sit for 15 minutes before you take it off and let it cool down completely on a wire rack.
The cake is already delicious without any extra’s but you can add something like chocolate chips to the batter easily. You can serve it as is or add fresh fruits or whipped cream frosting.
Although they do have eggs in the recipe, they are too good not to share:

I have not tried this myself but I have heard from readers that it’s easy to do by replacing the milk with a plant-based milk and the butter with a (hard) margarine.
You can store the cake for the same amount of time as any other ‘normal’ cake. So that means you can keep it in an airtight container for a week.
Make sure to keep it outside of the fridge. Placing it in the fridge dries out the cake. That works the same for an egg-free cake as for a regular cake.
Yes, if you do not want to use a square baking pan to make a sheet cake, you can use a 10 inch cake pan. Do keep in mind that a different pan will likely be a different baking time. So make sure to double check if the cake is cooked through.
Sure you can. Just add a few tablespoons of cocoa powder to the batter for a chocolate version.
Yes. If you want to make cake layers it is best to bake three separate layers in an 18-20 cm/7-8 inch tin.

This is a great recipe for all those coffee lovers out there. Even better if they also love classic chocolate chip cookies as this is the best of both worlds. These coffee chocolate chip cookies (or call them espresso chocolate chip cookies for a stronger result!) have the best of both worlds.
Delicious coffee taste within a delicious cookie. What more could you want?
It’s still the case that I rarely drink coffee at home and regularly opt for cappuccino when I go out. So while I don’t drink a lot of coffee, I still absolutely love incorporating coffee into baked goods.
My latest in cookie recipes are these chocolate chip coffee cookies. I took my favorite recipe for chocolate chip cookies and made a version with coffee. Super easy, but SO delicious and even better served with a cup of coffee. Will you make them this weekend?
BAKING TIP: This recipe is also very nice to give as a gift in a glass mason jar for a birthday or another celebration.

Making these espresso cookies you will need the following ingredients at room temperature:
In addition you will need a stand mixer or electric mixer, parchment paper, cookie scoop (optional) and for best results I always recommend using a kitchen scale.

You start by creaming the butter and the sugar together. Add the egg in and the vanilla extract and mix it well. You add the dry ingredients together and add the flour mixture to the butter mixture.
Knead this into a firm dough. Taste to check if you like more coffee flavor and keep it mind that the flavor will mellow down once the cookies are baked. For extra coffee flavor you can add a bit more of the instant coffee powder.
The final step is to add the chocolate chips and knead them through the dough. Let it chill in the fridge for at least an hour for the best cookies (Find out why that is important here).
Once the dough is chilled enough form it into cookie dough balls. I like to use a cookie scoop or ice cream scoop for doing this so I get evenly sized cookies. But a spoon will also do the trick! Place them on a cookie sheet and flatten them slightly if necessary.
Bake in the preheated oven for 10-12 minutes or until the edges are golden brown and let them cool down on a cooling rack.
The cookies will keep in an airtight container for 1-2 weeks.
These cookies also freeze very well. You can freeze both the unbaked cookies as well as the baked cookies.
If you love chocolate chip as much as I do, make sure to check out the below recipes as well!

One of my all time favorite cheesecake recipes is this blueberry crumble cheesecake. It’s a golden oldie but I make it quite often and I’ve been known to eat three slices in one day. It is just that good! I’m not the only one who likes it either as my visitors tend to rave over this blueberry cheesecake all the time too!
It’s also a great cheesecake to freeze any leftovers but I’ll get to that later. Let me first tell you what you need to make this blueberry crumble cheesecake: (always check the recipe card for full details)
And of course, you’ll need the ingredients for the crumble as well: butter, sugar, flour, oatmeal and a pinch of salt.

Making the cheesecake starts with making the buttery crumble for the base layer. You first crumble all the cookies. This is easiest to do in a food processor. Mix it with the melted butter and press it firmly into your springform pan or cheesecake pan. Of course the baking pan is first prepared with a lining of parchment paper and make sure to also butter the sides of the pan. Nothing worse than a cheesecake that sticks to the pan after you’ve baked it.
Once that is done you move on to the creamy cheesecake filling. You can do this in a large bowl but it helps to make this in the bowl of a stand mixer with the paddle attachment or whisk attachment. First mix the cream and sugar together until smooth. Add the eggs one by one until fully incorporated.
Mix vanilla extract and sour cream in and finish with the flour. It’s just a little bit but it helps to stabilize the filling. The remaining flour you mix in with the juicy blueberries. This will help them stay in the batter without all sinking to the bottom. It also helps to pick blueberries that are not too big. Small ones tend to ‘float’ better. Mix the blueberries with the rest of the batter and fold it through.
Pour the mixture on top of your buttery crust and smooth the top with a spatula.
The only thing you need for making the crumble are your hands. You add butter, sugar, flour, oatmeal and a little pinch of salt into a medium bowl and use your fingers to make a crumble with this. Sprinkle this over the top of the cheesecake batter and place in the oven for about an hour or until golden brown.
I generally don’t use a hot water bath for this recipe as I find it works fine without. Check all my tips for baking the perfect cheesecake here. It’s all about controlling the temperature of the oven for the best result. Once the hour has past turn the oven off and set the oven door open slightly so the heat can escape.
Once cooled down this is really the perfect dessert for all and any special occasion.
Or try these delicious blueberry and lemon cookies!

If it is not blueberry season you can also make this with frozen blueberries. But do make sure to defrost the berries first and drain any excess moisture as that will have an effect on the texture of the filling.
You can store the cheesecake in an airtight container in the fridge for 3-4 days or freeze in slices. For slicing make sure to use a sharp knife and it also helps to warm the knife under hot water before slicing.
You can use just about any kind of cookie you prefer. It helps to use a cookie that doesn’t have additional ingredients like chocolate chip cookies. Plain cookies like digestive biscuits, ginger cookies or something similar are ideal.

It’s tartlet time lately. I have already given you a base recipe for making your own tartlet shell and today I am sharing one of my all time favorites (I do have many favorites!) and that is these lemon meringue tartlets. The combination of the tangy lemon curd with the whipped egg white…. So good! And these mini lemon meringue tarts were long overdue to make an appearance here.
BAKING TIP: For these tarts, it is very handy if you have a sugar thermometer at home to make the Italian meringue. You can then finish the lemon tart with a kitchen torch to add golden brown details to the meringue.

Now I haven’t written down the entire recipe for the shells below as you can already find that in the post on how to make a basic tart shell. So you start by making the tart shells or go for store-bought tartlet shells. That’s another option although making your own is so worth it!
Next step is to make the lemon curd and the last step is making the fluffy meringue. I am making Italian meringue here but you can use Swiss meringue or French meringue if you prefer. I outline how to make the meringue below in the recipe card and I have some handy tips in this article as well. You whip the meringue to stiff peaks and generously add it on top of the lemon curd filling. And the last step is to use the kitchen torch on the meringue topping for the finished result. Tart heaven!

If you love carrot cake, you’re going to adore these delicious carrot cake truffles. The idea of these truffles was more or less spontaneous as during carrot cake testing a couple failed (yes that happens sometimes!) and we were left with lots of carrot cakes in pieces. And so we turned them into truffles!
I am a big fan of homemade carrot cake. I bake it quite often (and I cannot believe it is not even on the site yet! Will rectify this soon!) and so there are always a few slices that I can use to make these delicious truffles. It’s super easy to do and you can turn them into cake pops as well, if you prefer.
When you want to make these carrot cake truffles you will need the following simple ingredients and tools. Also make sure to check the full details in the recipe card below:
In terms of tools you don’t need much but a food processor always comes in handy. A baking sheet and parchment paper for placing the truffles on once coated. A cookie scoop to make evenly sized truffles. A large bowl for the melted chocolate.

Making the truffles starts by making the carrot cake. Now if you happen to have carrot cake left overs you can obviously use that. If not, bake the carrot cake first and let it cool down completely before moving on to the next step. Crumble the cake into a bowl and add the cream cheese (at room temperature). A tip: adding cream cheese frosting instead of plain cream cheese is absolutely delicious!
Mix it through so it becomes a sticky mixture. Form into balls using a small cookie dough scoop and place in the fridge so they can firm up and cool down. You don’t need much carrot cake for making the carrot cake truffles, so the recipe below is not for a full carrot cake.
Place the chocolate in a heat safe bowl and melt it using the double boiler method. Dip the cold carrot cake balls into the melted white chocolate and place them on a sheet of parchment paper to set. If you would want to make these into a cake pop, now is the time to place the stick in the balls but if not just let the white chocolate coating set.
Once made you can keep them in an airtight container for 3-4 days (in the fridge).
Now if you don’t feel like making your own carrot cake (as that is most of the work) you can go for a carrot cake mix or buy ready made carrot cake. That would make your truffles as easy as mixing the crumbs and then dipping them into chocolate. Mission accomplished in less time!
I do love creating super fun and easy truffle recipes. Check out the below as well:

Irresistibly delicious: a thin slice of Indonesian Thousand Layer cake (lapis legit) that melts on the tongue. This spicy and vanilla version is my favorite.
Thousand layer cake (‘Spekkoek’ in Dutch) is a typical Indonesian cake made up of many thin layers. There are two varieties, the classic thousand layer cake (shown in the photos accompanying this recipe) and the pandan layer cake. The classic recipe has alternating layers of light and dark dough.
The light cake/yellow layer is flavored with vanilla and the dark cake layer with a mixture of spices. The pandan thousand layer cake also has green layers of pandan batter in addition to the layers of vanilla batter. This cake tends to have a softer taste, although you can still taste a subtle pandan flavor.
This thinly layered Indonesian cake originated in the Dutch East Indies during the colonial era. You can find this delicacy in almost all Asian markets or Asian grocery store.
Originally, spekkoek seems to have been made only occasionally, for festive occasions, like Chinese new year. Not something you would find in every Asian supermarket. Making a lapis legit is so much work, that the cake is cut into thin slices. This is a token of respect to the baker, who put in all the work.

Now one funny story as the name in Dutch is spekkoek, which – literally translated – means bacon cake. I always thought the name had something to do with the amount of butter in the cake and creamy texture maybe, but nothing could be further from the truth.
Bacon cake owes its name to the beautiful layers of cake that resemble marbled bacon. It is also called spekuk or kueh lapis legit in Indonesian and kek lapis in Malay. But the most common name in other parts of the world would be thousand layer cake.
I have not been able to find specific information on this in authentic recipes, but the thinner the layers, the better. Also, the more layers, the longer you bake it. You will usually see a cake with between 15 and 25 layers. And no, that is obviously not a thousand layers!
For this recipe, I used a 20 cm springform tin, but if you want to make a larger cake with more layers, I recommend using an 18 cm springform tin or cake pan.
Making your own thousand layer cake is not difficult, but it is a laborious process. The cake is characterized by its many layers and these layers are baked one by one under the grill of the oven. As a result, it takes a pretty long time to finish.

Although making a thousand layer cake is a big job, you don’t need any fancy ingredients. The basic ingredients are eggs, butter, sugar and flour. From these, you make a batter according to the exact recipe and flavour it with vanilla and spices. Here are all the ingredients you need to make this classic Indian bacon cake.
This Indonesian cake takes a while to make, but then you can get a lot of servings out of it if you cut it into nice thin slices. It will keep for a long time if you keep it well wrapped in cling wrap.

Always wrap your cake well, preferably first in plastic wrap and then in aluminium foil or a plastic bag. This will ensure that the cake is well wrapped and airtight and will not dry out. You can store the cake for 3-4 days at room temperature or up to 5 weeks in the refrigerator.
Freezing lapis legit is not a problem. Wrap each slice well and airtight: first in cling film and then in aluminium foil. This will keep the slices in the freezer for up to three months.
I would love to try more Indonesian recipes, so if you have any suggestions, please let me know in the comments below the recipe. For example, the pandan version of this Indonesian layer cake sounds incredibly delicious.
At the moment, I have been trying out some Indonesian recipes that I am very excited about and will be sharing here shortly!:
Make sure that the first thing you do is get all your ingredients at room temperature. This applies to all my recipes (unless otherwise stated), but it is really important for this one. If the unsalted butter is at room temperature, you can mix it until it is nice and creamy and then spread the batter evenly in the cake tin.
Try to make the layers as thin as possible and make sure you bake them well before moving on to the second layer. This takes a little more patience and precision, but it is the most delicious. Would you like your thousand layer cake taller than in my photos? If so, use an 18cm springform pan and the cake will automatically be taller (and you will have to bake more layers!).
The layers of this Indonesian cake are baked under the oven grill. This is often set at the maximum temperature and cannot always be adjusted. In my case, I was able to set the grill to 200°C, where a baking time of 5 minutes per layer worked perfectly. Remember that this time is only a guide and be careful not to burn your layer. It is sometimes necessary to test the ideal baking time for each layer before moving on to the next. Make sure to start with a preheated oven.
Spekkoek tastes even better the day after it is baked. The flavor of the spices is richer and comes out better. But don’t get me wrong, there is nothing wrong with eating it straight away 😉
Cut the cake into thin slices. As far as I know, 1 – 2 cm thick slices are common and it also allows you to enjoy your cake for a longer period of time.
Serve your freshly baked thousand layer cake at room temperature. A large part of the cake is butter and this will set in the fridge or at cooler temperatures. The flavors of the layers really come into their own at room temperature.

I love to bake little muffins as a treat for myself. These whole wheat chocolate chip muffins are one of my favorites! They do have some sugar with the added honey (and chocolate of course), but overall are pretty healthy.
At first glance, chocolate chip muffins sound like a recipe that can’t possibly be healthy. I’m not saying that these whole wheat chocolate chip muffins are the most healthy muffins out there, but using a whole grain batter as the base makes them much more nutritious.
Whole wheat flour fills you up quicker and keeps you fuller for longer. As a result, you are less likely to reach for a second muffin after the first. In terms of taste they are still absolutely delicious so using whole wheat flour is simply a way to make them a little better for you.
To make them even more healthy, you could switch the milk chocolate chips to (sugar free) dark chocolate. And the honey could be substituted with another sweetener.
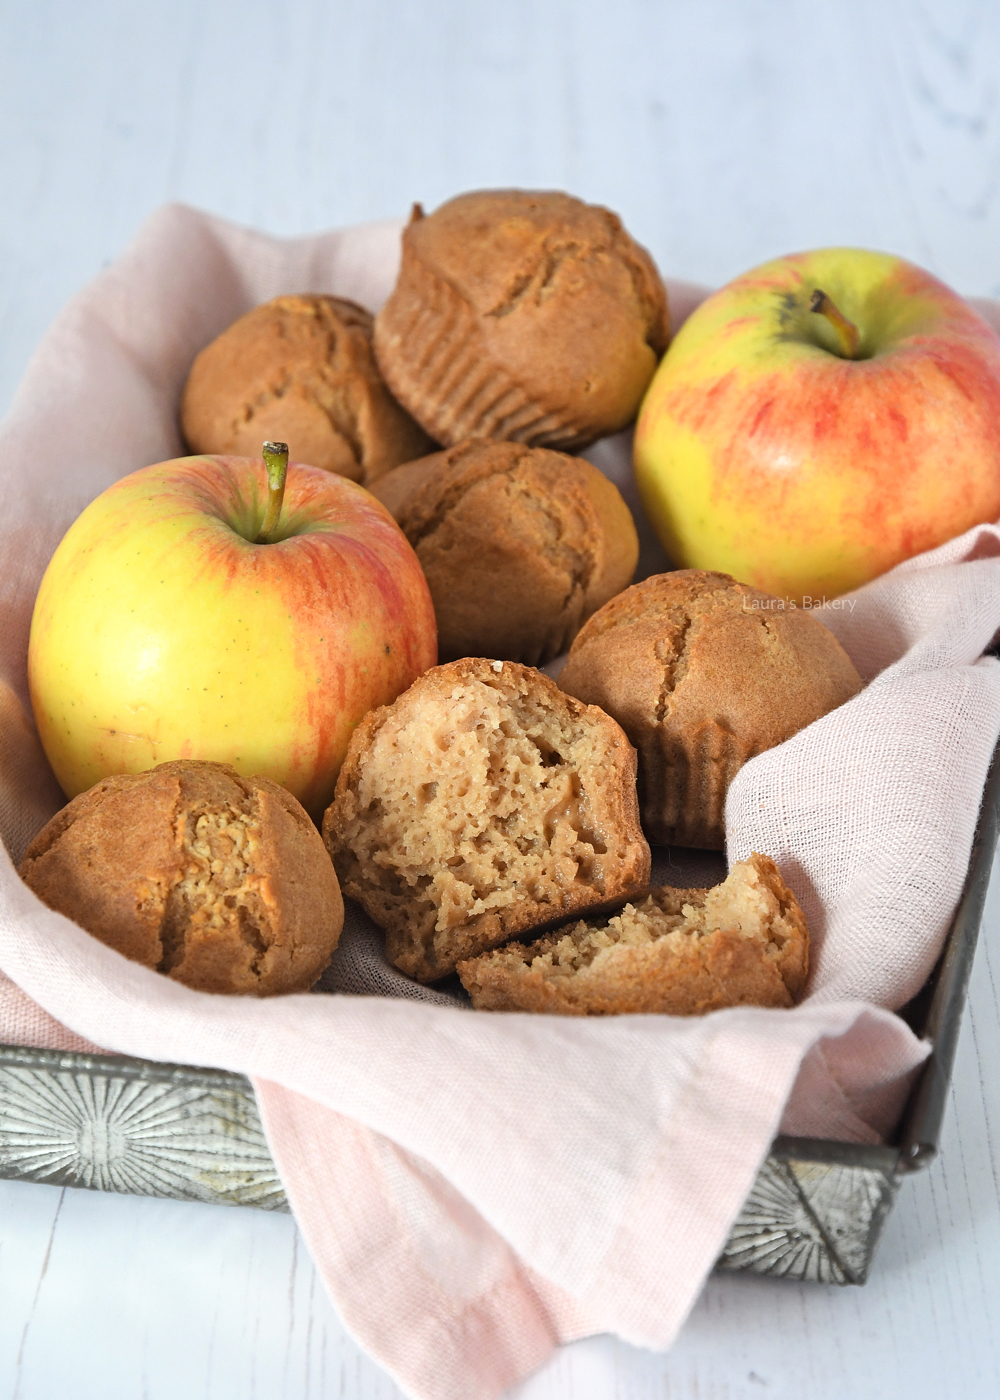
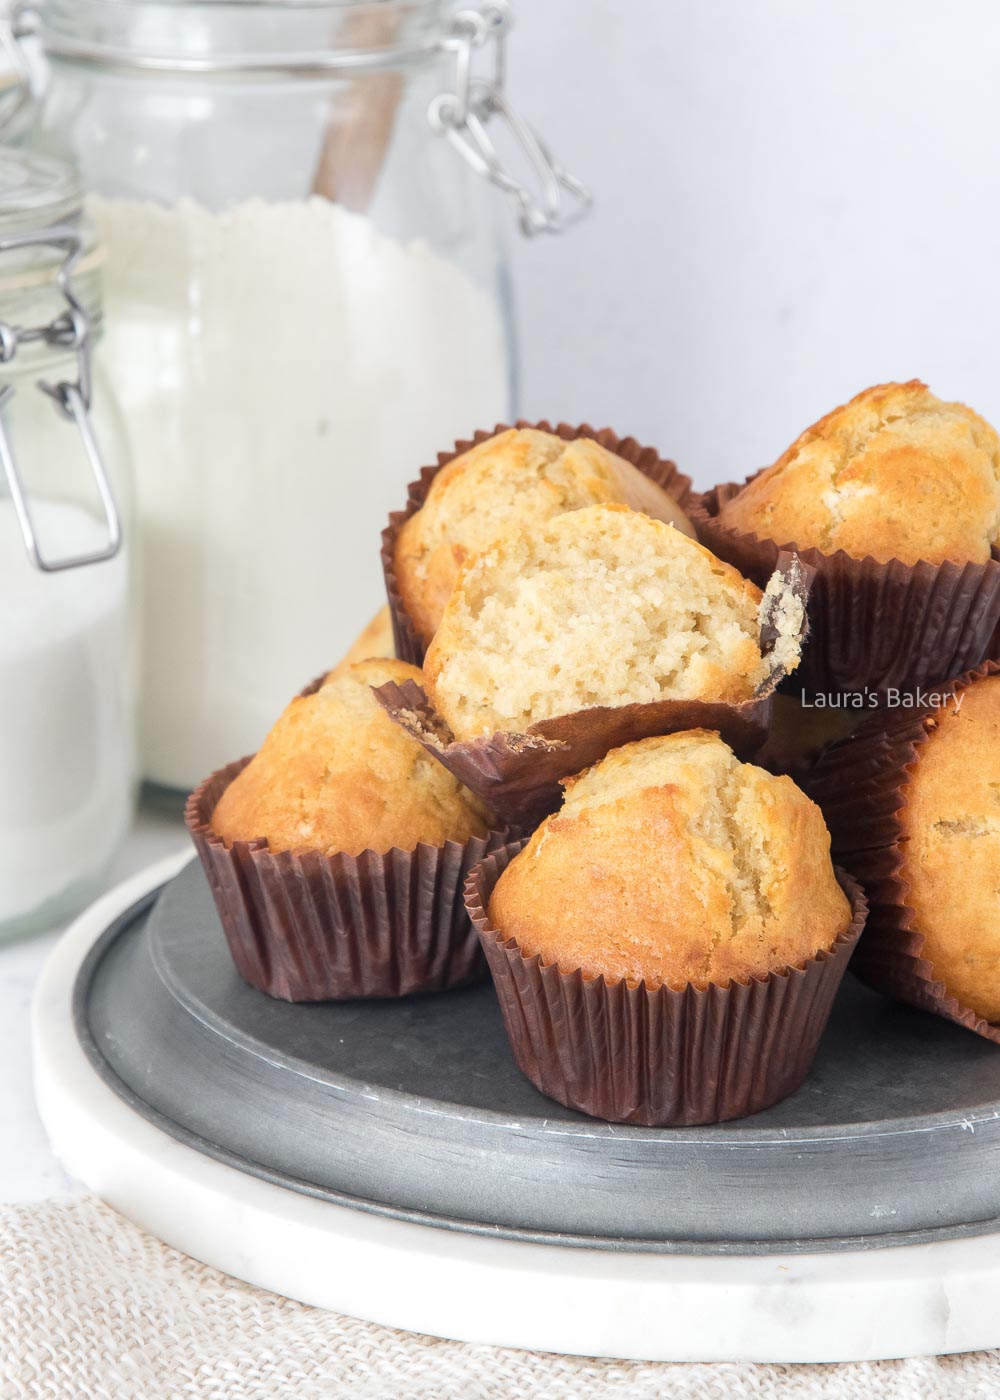
Do you prefer to make muffins without whole grain flour? Try these vanilla muffins or these delicious apple cinnamon muffins.
Have you ever made whole grain muffins? I’ve got the hang of them now and can’t get enough. Maybe I should also try to make a recipe for whole wheat cupcakes, but for now you can start with these whole wheat chocolate chip muffins.
There is much less sugar in these muffins and the only sweetness comes from the chocolate and the honey. No refined sugar is added to the muffin batter.
Not sure what the difference is between muffins and cupcakes?

Other than those ingredients you will need a muffin tin to make these healthy chocolate muffins. You don’t really need a food processor for this recipe as the mixing of the wet ingredients and the dry ingredients is super easy and doesn’t require long mixing.
You first mix the dry ingredients in a large bowl and mix the wet ones in another bowl. Combine the two together and you’re done.
Divide the batter over the muffin pan (lined with paper liners) and bake in the oven in around 15-18 minutes or until golden brown. Place them on a wire rack to cool completely
Now if you want to make some variations or go for a dairy free muffin you can replace the whole milk with a plant based alternative.
If you want you can replace the honey for coconut sugar or brown sugar as the amount is not that big and it should be possible without too much trouble with the batter. Keep in mind that I have not tested the recipe with the coconut sugar. But maple syrup should be an easy swap.
I find that these delicious healthy chocolate chip muffins make for easy healthy snacks. Perfect for a lunch break or snack in between meals.
I like to freeze them in single pieces in a ziplock bag so I always have a perfect snack ready to go.

Ready to bake some chocolate chip madeleines? I love these little French cakes and love to make them in different kind of flavors. And since it is the month of Valentine’s I figured I share one of my all time favorites.
you guessed it, that is a recipe for perfect madeleines. This time it is a twist on chocolate chip cookies; chocolate chip madeleines! Perfect with a cup of tea and a great gift for Valentine’s!
I’ve already shared a recipe for chocolate dipped madeleines, pistachio madeleines and red velvet madeleines and of course the basic madeleine recipe, but this one is very different as it has chocolate in the batter before baking. Although you could make chocolate-dipped chocolate chip madeleines too if you wanted to go all out!
Needless to say that you can also find loads of chocolate chip recipes on the site like these thick chocolate chip cookies or chocolate chip blondies.
First thing you need to have is a madeleine pan for baking them. If you’ve never made madeleines before it’s good to know that they require a special pan. Something like this although there are various models available.
Other than that you need the following ingredients at room temperature:

Now the first step is to whisk the eggs and the sugar together. The easiest way to do this is with a stand mixer but you can also use a large bowl and a hand mixer. You want the mixture to triplicate in volume. And then keep whisking for another 5 minutes.
Now carefully fold in the melted butter and the flour. Do this in batches and try and keep the air in as much as possible. Once everything is mixed you add the chocolate chips as the last step. Fill one large piping bag or two if it doesn’t fit.
If you don’t have a piping bag you can do this with two teaspoons. Now before you finish the chocolate madeleines you need to chill the dough in the fridge for at least two hours before moving on to the next step. That will enhance the flavor of the madeleines.
Now the last step is baking the madeleines and giving them that classic bump on top. You start by greasing the madeleine pan and dusting it with flour to ensure that they will release from the pan easily.
You bake the madeleines at 400˚F for just 8-10 minutes. You want them to be lightly golden brown but still quite pale in the middle.
Once baked the chocolate chip madeleines will keep in an airtight container for 3-4 days.
These madeleines are best when enjoyed right after baking, but they also keep really well!
Stored in an airtight container at room temperature they will be delicious for 3-4 days.
Yes, freezing them works really well. Properly wrap in a freezer bag or airtight container and freeze for a maximum of three months. Let them defrost at room temperature before serving.
Cooling the batter will create that classic hump on top of the madeleines.
If you’re looking to create that classic madeleine shape, than a madeleine tin is a must. You will not get the same end result with another pan.
Absolutely. Use whatever chocolate you want.
Grease the pan properly and dust lightly with a bit of flour. That should make sure the madeleines release easily.

I’ve got the perfect Valentine’s day recipe for you today! Delicious and beautifully red velvet madeleines. The biggest difference with classic madeleines is of course the bright red color. Which makes these the perfect gift for Valentine.
Making these red velvet madeleines is not very different from making a traditional madeleine. You need a madeleine pan (something like this one) and it is easiest to make them with a stand mixer or electric mixer.

For making these pretty madeleines you will need the following ingredients:
You start the proces by adding the eggs and the sugar together in a large bowl and whipping them until they are very light. In the meantime melt the butter in a small saucepan.
Add the dry ingredients to the wet ingredients and mix them together until smooth. At that point it is time to add the food coloring. If you’re unsure of how much you need add a little bit at a time until the batter has the desired color.
Chill the batter in the fridge for at least two hours.
Once the batter is chilled properly divide it over the prepared madeleine pan. This is easiest if you use a piping bag for easy distribution but two teaspoons or a small cookie scoop also work.

Once the edges of the red velvet madeleines are golden brown but not too brown (you still want to be able to see the beautiful red color) you take them out of the oven and place them on a cooling rack.
Melt the white chocolate in a double boiler and pipe some of the melted chocolate over the madeleines for a pretty effect and so the sprinkles will stick.
I have a nice little baking tip for you! When I need a small amount of chocolate for piping details or a drizzle, I like to melt the chocolate in a piping bag!
Put the chocolate in a disposable icing bag and hang it in a glass of warm water. Make sure water can’t get into the bag. Wait until the chocolate has completely melted. Then cut off the tip of the piping bag and use as you like.
In this case: drizzle the chocolate over the madeleines.
Want to give your Valentine more delicious Valentine treats? I have some cute and yummy options:

I love tartlets. Both to eat them and to make them. I’ve got lots of delicious recipes for making tartlets but it seemed a good idea to start with how to make a tartlet shell recipe from scratch. It’s my favorite base recipe which I use all the time. Now, for baking tartlets you can use tart pans or – as I did here – you can use tart rings or baking rings. Something similar like the ones here.
Important to note is that you need to remove the rings right away after baking for the best result. Since there is no bottom, place them on a baking sheet lined with parchment paper to prevent sticking. You can also use a metal cookie cutter or something similar. Of course also depending wether you’re making mini tarts or a big tart.
There are multiple ways to bake tartlets. You can bake them first and fill with a cold filling afterwards, like for instance pastry cream or this delicious cherry pie filling. But you can also bake the tartlets with the filling inside. Think about something like frangipane for instance. Now this is the first of many tart recipes to come and as I said it’s always a good idea to start with the basics!
Keep in mind that I will always give you any special instructions (if there are any) in the recipe card for each separate recipe.

The rings I linked to above are pretty regularly used but if you don’t want to buy something extra you can use a cupcake liner or muffin tin to do the same. Do make sure to carefully line them with parchment paper. It won’t be as pretty as straight baking rings but it will do if you don’t have those.
For making this basic recipe for tartlet shells you will need the following:
In addition to that and the aforementioned tart tins you also need a food processor, plastic wrap and a rolling pin.

Now in order to make the tart shells you first mix everything except the egg. Once the other ingredients form a crumbly mix you add the egg and make sure that you end up with a smooth dough. Wrap in plastic wrap and place in the fridge for at least half an hour.
Once the dough is chilled dust your working surface with a bit of flour and roll out the dough to about 4-5mm (0.15 inch) thickness. Now use a cutter that is a few sizes larger than your tart molds or tartlet rings. Line the molds with the circles of dough and cut of the excess dough. Use a fork to make some holes in the dough or use a sharp knife to do the same. You won’t need pie weights for this particular recipe.
Bake your shells for about 12-15 minutes or until light golden brown.
They make for the perfect base for so many delicious things! I love to make them into mini fruit tarts or my favorite lemon tart. So delicious!
A tartlet base is the pie crust for almost all kinds of tartlets. You can fill them with ganache (mini chocolate tarts!), fruit, jam or whatever else strikes your fancy. It’s an easy recipe for the perfect tartlet shells and will beat pre-made tart shells you might be able to buy in the grocery store for sure. What is your favorite tart filling?

Yes you can make them in advance and store the baked tart shells in an airtight container for up to a week.
If your tartlets are shrinking while they bake that can have a couple of reasons. The first one is that you might have overworked the dough. It’s not necessary to endlessly knead the dough. Another – more common – reason is that the dough is not chilled enough. You can also chill the dough again after placing it in the rings to make sure they are cold enough. Another reason could be that you overstretched the dough when placing it into the tart rings. It could also help to use cold butter for mixing. This is essentially a sweet shortcrust pastry and should be handled as such.
But keep in mind: it is normal that they shrink a little bit in the oven.
That depends on the filling. In general the cooking time will be shorter ensuring they do not get too brown when baked again. Always follow the steps in the appropriate recipe for the details on that.


