Red Velvet marble loaf cake recipe

Posted: February 4, 2025 Last modified: February 6, 2025
Red Velvet marble loaf cake recipe

There is something so very satisfying about a marble cake. It looks so pretty and is a perfect treat. Since it is getting close to Valentine’s day I figured I share my favorite red velvet marble cake recipe. Isn’t it funny how everything pink or red is associated with Valentine’s at this time of year?

Red velvet marble cake

The first ever marble cake I made was a vanilla and chocolate flavored one and I shared it in my very first baking book. Can’t believe how long that has been already! And with my 8th book coming out in just a few months it seems like a lifetime ago.

But that first cake is still hugely popular and is shared by my readers almost daily on their instagram posts. I love seeing what you all make with my recipes so if you do please make sure to tag me with @inlaurasbakery on instagram.

red velvet marble cake-1

What do you need to make this loaf cake?

As always it helps to have all the ingredients ready at room temperature.

  • self- rising flour – you can also use all purpose flour combined with baking powder. Read this article to find out how to substitute.
  • unsalted butter
  • granulated sugar
  • vanilla extract
  • cocoa powder – use unsweetened cocoa powder
  • red food coloring 
  • milk – you just need a little bit of whole milk
  • eggs

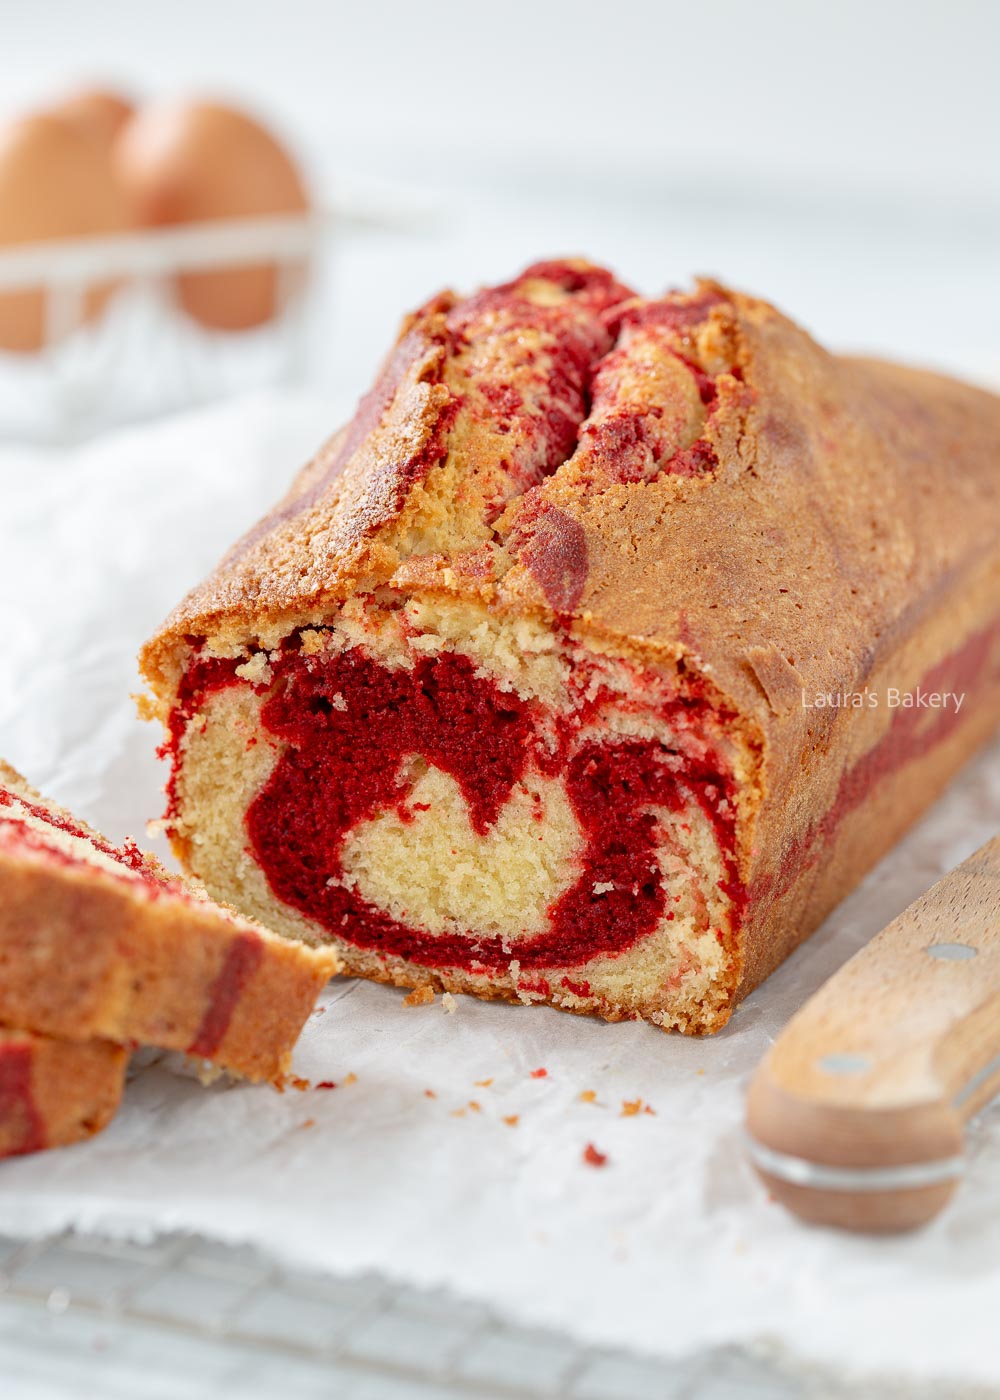
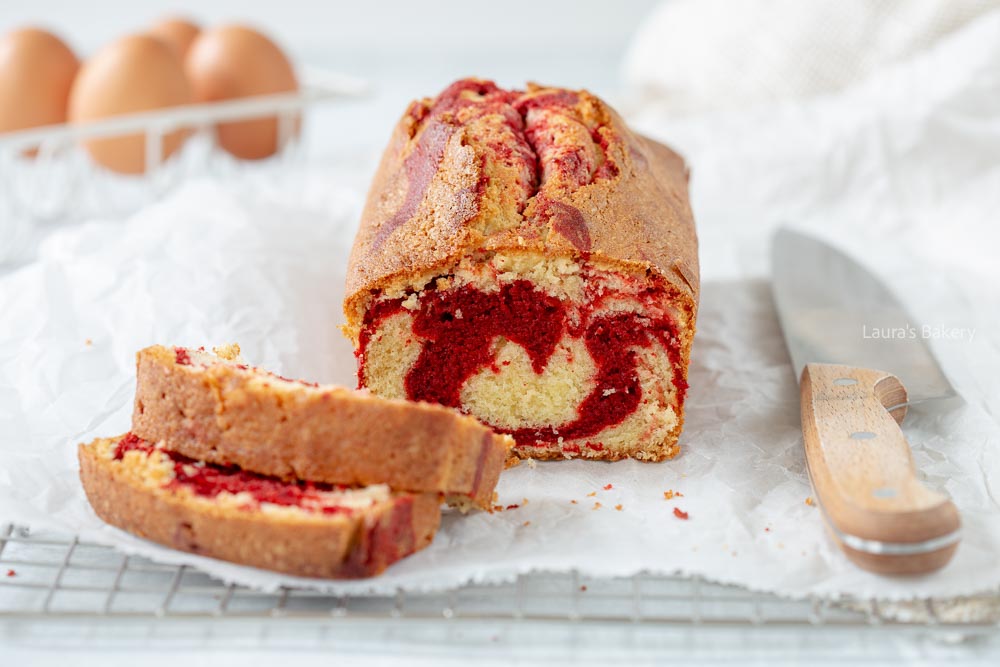
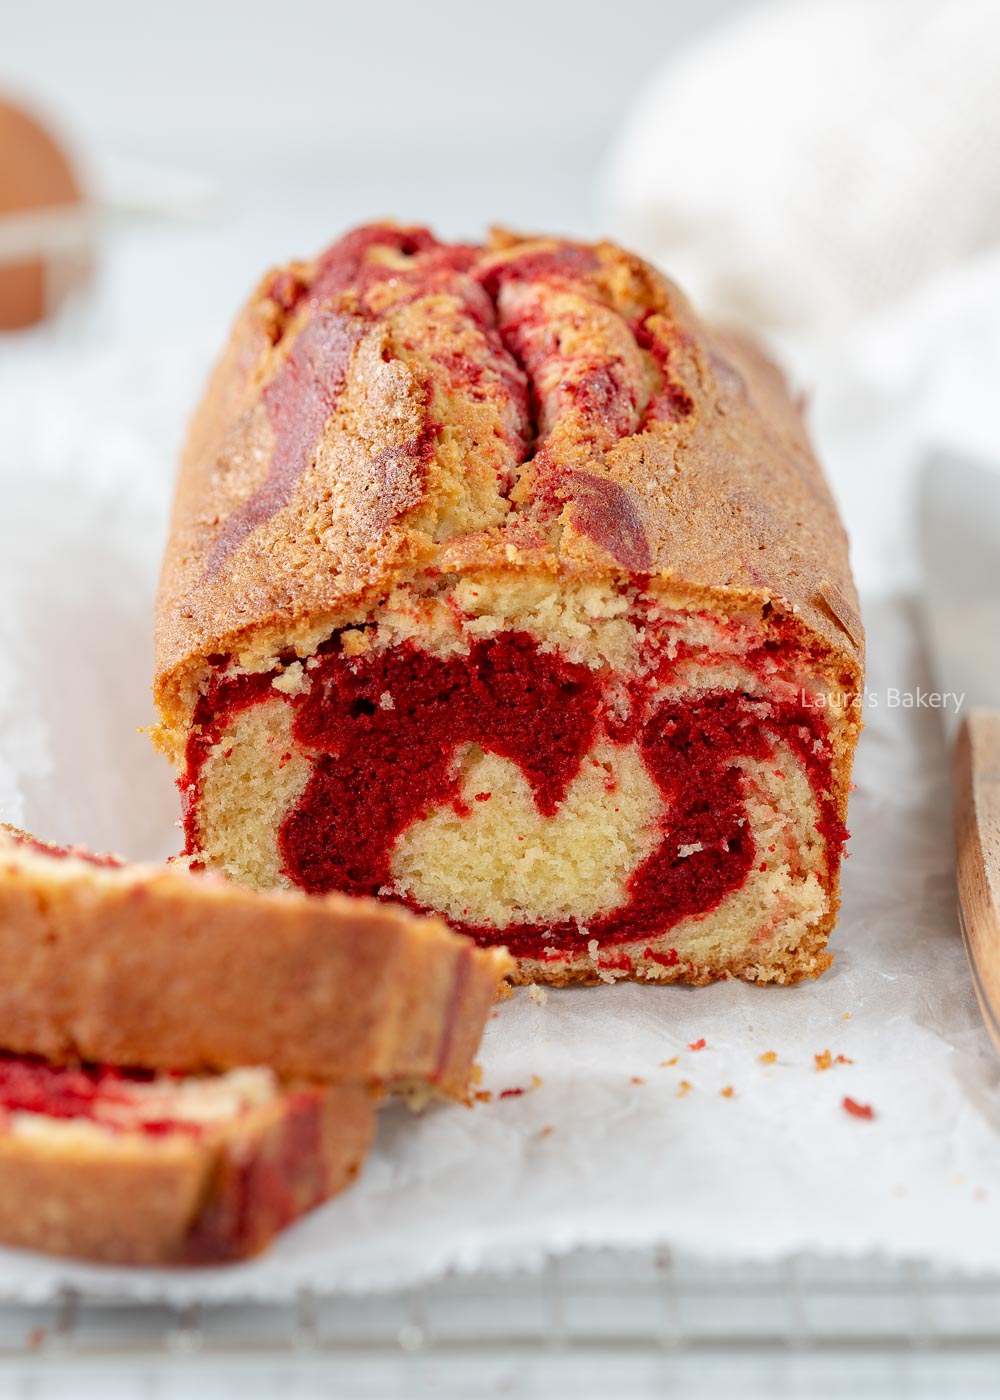
Red velvet has a very slight cocoa flavor which is enhanced by adding the cocoa powder. It is basically a vanilla cake batter but 1/3 of the batter is transformed into a red color. Except the ingredients you will need a loaf pan, a food processor or electric mixer and two mixing bowls.

How to make the marble cake

Making the cake batter is the same as with any other cake, but you separate the batter into 2/3 of the vanilla batter and 1/3 which will be transformed into the red velvet batter. Or you can change that and make more red velvet batter and less vanilla flavor (in that case, multiply milk, cocoa and food coloring by two).

Place each batter in separate bowls. For making the red velvet cake batter you first mix the milk with the cocoa powder and mix this into a paste. This way you won’t get any lumps and it will smoothly mix with the batter.

Once the chocolate batter is complete you add the red food coloring until you have the desired result. Each red colour brand is slightly different so how much you need depends on your personal preference and how strong the color is.

That can be quite a huge difference and it also matters if you use liquid food coloring (I prefer gel coloring) or powder. In upcoming articles I will explore the difference between the various natural and regular food coloring.

red velvet marble cake-2

Swirling

Once both the cake batters are made you pour half of the vanilla batter into the prepared loaf pan. Smooth the top with a spatula and add the red velvet layer on top. Finish with the other half of the white batter.

Once both are in, run through the batter with a butter knife or use a large wooden skewer. There are several ways to make red velvet swirls but whatever marbling technique you use, it will still have a great effect. And more importantly; the resulting marble cake will be delicious!

Do keep in mind to not stir it too much or it will be a even colored pink cake. Which is not the effect you’re looking for. You want a red velvet marble cake.

You bake the cake like you would bake any other cake (check my tips for baking a perfect cake here) and let it cool down completely on a wire rack before slicing the cake. Once completely cooled you can store the cake properly wrapped in plastic wrap or an airtight container for about 5 days (not in the fridge!).

It is delicious served with whipped cream and strawberries but it is already quite delicious served as it is!

More red velvet recipes

Now at the moment there is only one red velvet recipe online which is the red velvet crinkle cookies. But I will soon be sharing many more (starting with red velvet madeleines this week!)


Red velvet marble cake

Save
Print recipe

No votes yet

Red velvet marble cake

This beautiful red velvet marble cake is a sight to behold, but above all it’s a delicious combination of vanilla cake and red velvet.
Prep Time20 minutes
Cook Time1 hour
Total Time1 hour 20 minutes
Servings: 12 slices

Ingredients 

  • 200 grams unsalted butter
  • 200 grams caster sugar
  • 1 tsp vanilla extract or 8g vanilla sugar
  • 4 eggs M
  • 200 grams self-raising flour
  • Pinch of salt
  • 2 tsp cocoa powder
  • 2 tbsp milk
  • red food coloring

Equipment

  • Loaf pan 25 cm/10 inch

Instructions

  • Cream together the butter and sugar. Add the eggs one at a time, mixing briefly before adding the next egg. Add the vanilla extract to the last egg.
  • Add the self-raising flour and salt and mix to a smooth dough. Stop mixing when the flour is fully incorporated.
  • Take two thirds of the mixture out of the bowl and put it in a separate bowl.
  • Make a paste of the cocoa powder and milk, pour this into the bowl with a third of the dough and mix until you have a nice dough. Meanwhile, add the red food coloring until the mixture is the desired colour.
  • Pour half the vanilla mixture into a greased and floured cake tin (or line it with parchment paper). Spread evenly with a spatula.
  • Do the same with the red velvet mixture and finish with the last of the vanilla mixture.
  • Use a knife to briefly cut through the batter to create a nice marble effect.
  • Bake for about 60 minutes at 175°C/345˚F (conventional oven).
  • Let the cake cool for about 10 minutes in the loaf pan before you transfer the cake to a cooling rack.

Tips

  • You can read all my tips for making the perfect cake in this article.
  • I prefer to use a gel color, which is the most concentrated color and gives the best red result.
How to store

Properly wrapped, the cake will keep for about 5 days outside the fridge. It can be frozen for up to 3 months.

Links in this article may be affiliate links. If you purchase something through such a link, I will receive a small commission, without you paying anything extra.

Leave a comment

Your email address will not be published. Required fields are marked *

Recipe Rating