Can I use mini Magnum molds?
You totally can! Just keep in mind they’re a bit smaller — around 35 ml vs. the 50 ml of the heart-shaped ones. You’ll end up with more pops, which honestly isn’t a bad thing.

These Greek yogurt popsicles with mango instantly transport me to a hot sunny day and flip-flop weather — but guess what? They’re just as delicious in the middle of winter. Bright, creamy, and refreshingly fruity, they’re a treat that works all year round.
Best part? These popsicles are a crowd-pleaser! Kids love them, adults will go back for seconds, and everyone agrees: the combination of silky Greek yogurt and juicy mango is pure frozen magic.
Making these Greek yogurt popsicles with mango is a breeze — and bonus: they’re on the healthier side! Just one teaspoon of honey is all it takes.
The mango brings enough natural sweetness that you’ll forget you’re indulging in a “healthy” ice cream. Shhh… we won’t tell. What better treat to serve on a hot summer day?

You really don’t need a lot for making these easy fruity popsicles. Obviously you will need popsicle molds. Any shape will do but these hearts are just the cutest and work really well with the mango popsicle recipe. The list of simple ingredients is:
Get creative with how you fill your molds!


I’m obsessed with these cute little heart shaped popsicles. They turn these yogurt pops into the cutest little hearts. Seriously, who wouldn’t smile seeing these in the freezer? I used the popsicle molds from my own collection but something like these are similar.
If you’re loving these Greek Yogurt & Mango Pops, don’t miss this other favorite. I have a couple more lined up in the coming weeks too!
You totally can! Just keep in mind they’re a bit smaller — around 35 ml vs. the 50 ml of the heart-shaped ones. You’ll end up with more pops, which honestly isn’t a bad thing.
Absolutely! Any fresh fruit that pairs well with Greek yogurt will work. Just remember: mango is naturally sweet and creamy. If you’re using something more watery or tart (like berries), add a little extra honey or sweetener. Especially for the summer season there are many more fruits to choose.
Nope! Honey adds a nice touch of flavor, but you can sub in maple syrup, powdered sugar, or skip the sweetener altogether if you prefer a sugar-free treat.
You absolutely can. You can swap the Greek yogurt for coconut yogurt or another dairy-free yogurt.
Sure. You can make these in small paper cups. Just add in the mango-yogurt mixture and place them in the freezer for a little bit before you insert the popsicle sticks.
The easiest way to unmold the popsicles is to run a bit of warm water over the back of the popsicle mold for a few seconds. That should make them release easily.

These super delicious almond raspberry muffins are very easy to make and the perfect little snack if you’re craving something sweet and simple. They are also great to be served with a nice cup of coffee or tea.
Almond flour is one of my favorite ingredients but it is also rather expensive. It becomes even more expensive if you buy it in the little packages you can find in the grocery store. A much better option is to find it online and buy it in bulk.
I happened to buy a kilo (more than 2 pounds) of almond flour that way, so naturally I keep adding it to different recipes. Also because I think that adding almond flour to batter, like this muffin batter, makes it twice as delicious. It makes for a delicious moist muffin
My current favorite muffins are these almond raspberry muffins. It’s super easy to make and you don’t even need a mixer or food processor. Just a couple of bowls (one large bowl and one small bowl) are all that you need. And some muffin liners of course.

As always: make sure that all ingredients are at room temperature before you start baking. You will also need a muffin tin and paper liners or foil liners to line the muffin pan.

Now making the raspberry almond muffins recipe is easy as I said. You combine the dry ingredients in one bowl, mix it together and use the other bowl to add the wet ingredients together.
Mix it all (not too long). It’s ok if there are still some lumps in the batter, so you can simply do this with a wooden spoon or a whisk.
Now divide the batter over the muffin cups and add a teaspoon of raspberry jam on top of each muffin. Bake in the preheated oven until golden brown and an inserted skewer comes out clean. Let them cool down on a wire rack.
The almond raspberry muffins can be stored in an airtight container for 5 days.
These muffins use a blend of almond flour and all-purpose flour. The almond flour adds a moist, nutty flavor, while the all-purpose flour provides structure and a fluffy texture. If you love almond flour be sure to also check out these almond speculaas muffins or check all muffins recipes here.
You can, but the muffins will lose some of the richness and moistness that almond flour brings. If you do substitute, you may need to adjust the liquid ingredients slightly.
Yes! Just use them straight from the freezer—do not thaw. Toss them in a little flour before folding them into the batter to prevent them from sinking.
Absolutely! Chopped almonds, white chocolate chips, or a dash of lemon zest go really well with the almond-raspberry combo.
That could be due to overmixing or using too much flour. Almond flour also absorbs more moisture than regular flour, so make sure you’re measuring correctly and not packing the flour too tightly. I always recommend using a scale for measuring ingredients.

Delicious crispy chicken bites, that are easy to make in your oven or air fryer. No need for a deep fryer! They’re perfect to serve as an easy snack. Just make sure you have enough, everybody loves these bites!
Who doesn’t love delicious fried chicken bites? I know I do. As a child I could not get enough of them and I wanted to make them myself. Preferably without having to deep fry as I do not own a fryer.
These homemade crispy chicken nuggets are made in an oven. For making the crunchy coating I used cornflakes. That is just perfect for the ultimate crunch!
You can easily serve them as part of a meal or as a weekend snack. They are delicious on their own or served with an easy dip or something like honey mustard.
Here are a couple of my favorite snack recipes:

I kept this chicken recipe very easy to make, but I will also give you a couple of variations if you want to add more flavor or a different flavor to them.
Making these homemade chicken nuggets is super simple to do. So much better than having to use hot oil and a deep fryer!
First step is to slice the boneless chicken breasts into manageable pieces. Don’t make them too small. You will want to make sure that the bites are each roughly 2-3 bites per piece.
Heat the oven to the mentioned temperature and prepare three bowls, with whisked egg, crushed cornflakes and flour.
Now drag each piece of chicken through the flour, then the egg and at last the cornflakes. Line them on a baking sheet with parchment paper in a single layer and bake in the preheated oven until golden brown.
Serve with your favorite dipping sauce!
If you have an air fryer you can use almost the same preparation method for making them. Place them in an air fryer basket in a single layer. You might have to use a little bit of vegetable oil spray to make sure they turn out golden brown. The cooking time is roughly the same as the oven. It depends on the air fryer, so keep an eye on them.
You can store them in an airtight container for 1-2 days but they will get a bit less crispy if you do. I would always advise to make them fresh for the best results. If you did store them you can reheat them in the oven to crisp them back up, but the result might be less satisfying.
Keep in mind that not all cornflakes are naturally gluten free, so look for a gluten free brand. You can replace the flour with a gluten free flour.
If you can’t find gluten free cornflakes: make crispy popcorn chicken by replacing the cornflakes with plain popcorn! Make sure to crush the popcorn or it won’t stick to the coating of the chicken.
If you want to use a meat thermometer for checking if the chicken is properly cooked you can stick to 165˚F (74˚C) for safe consumption.
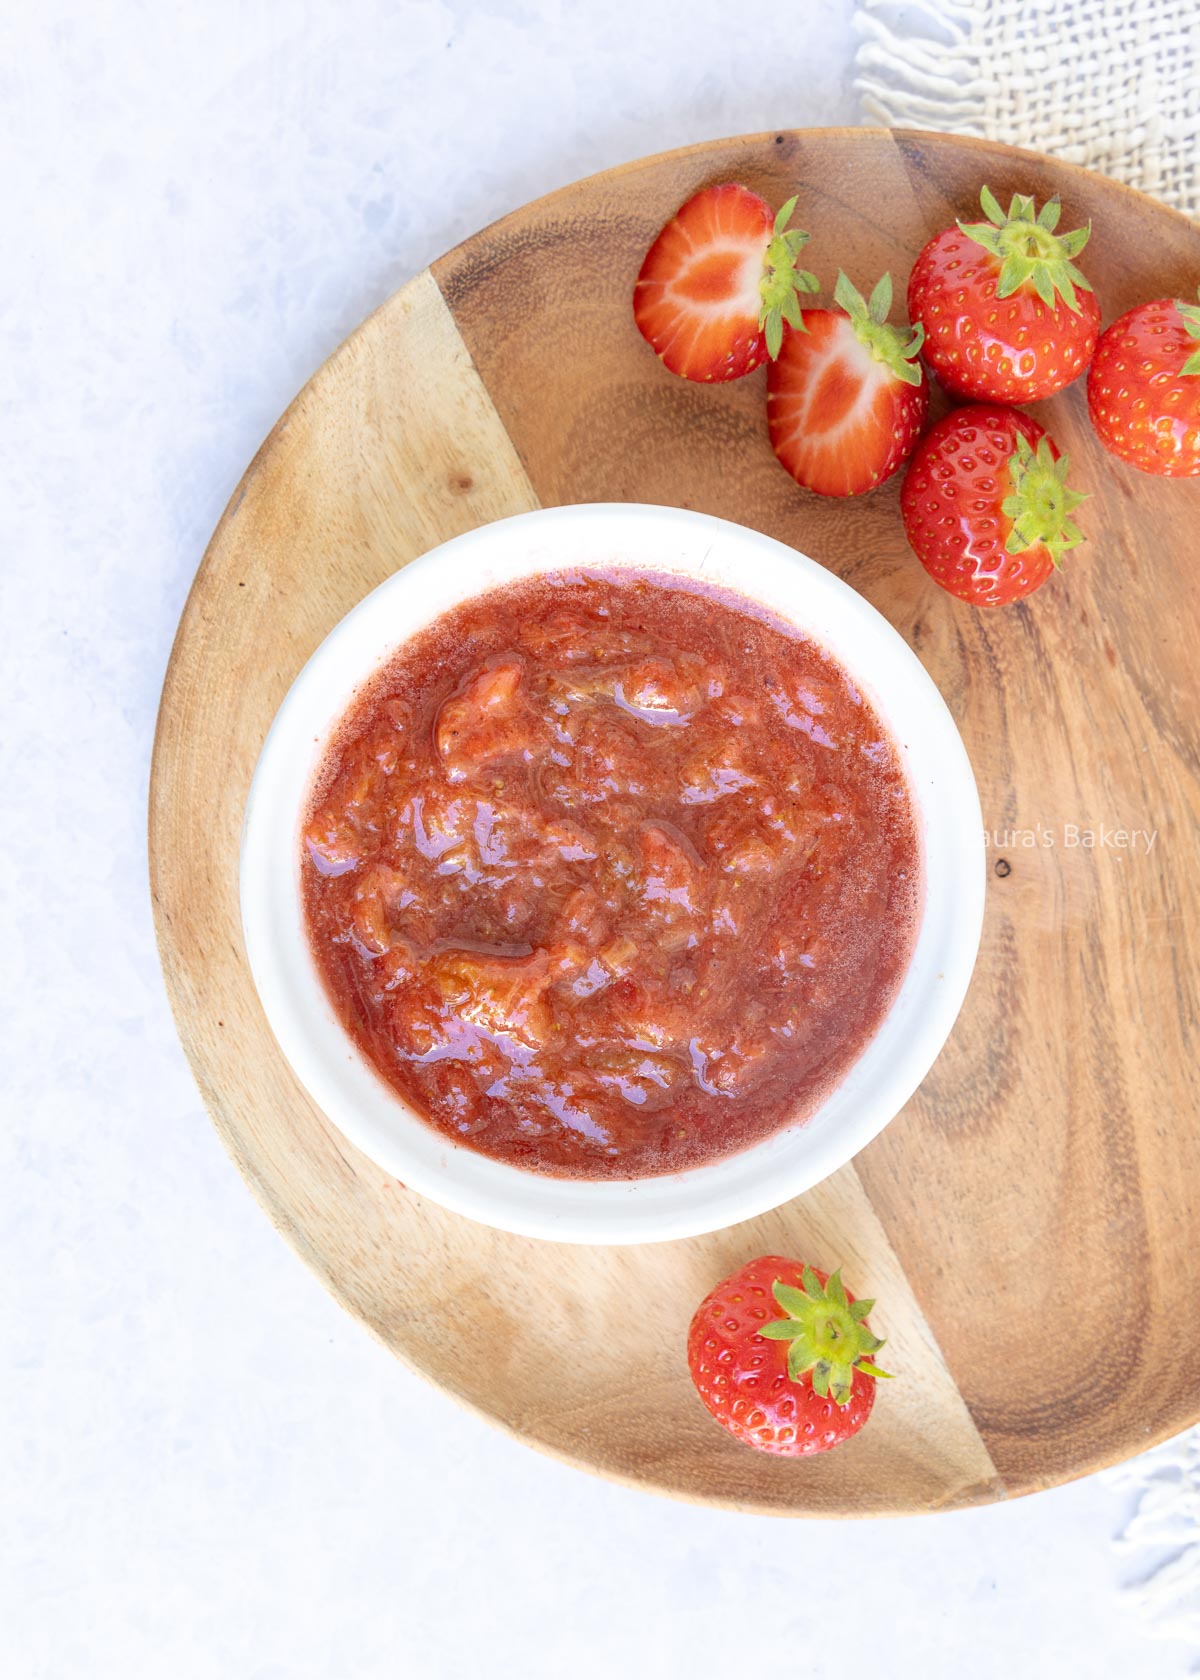
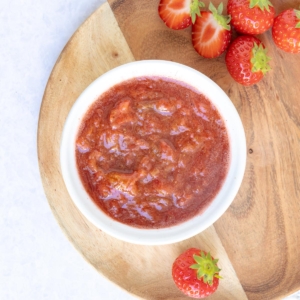
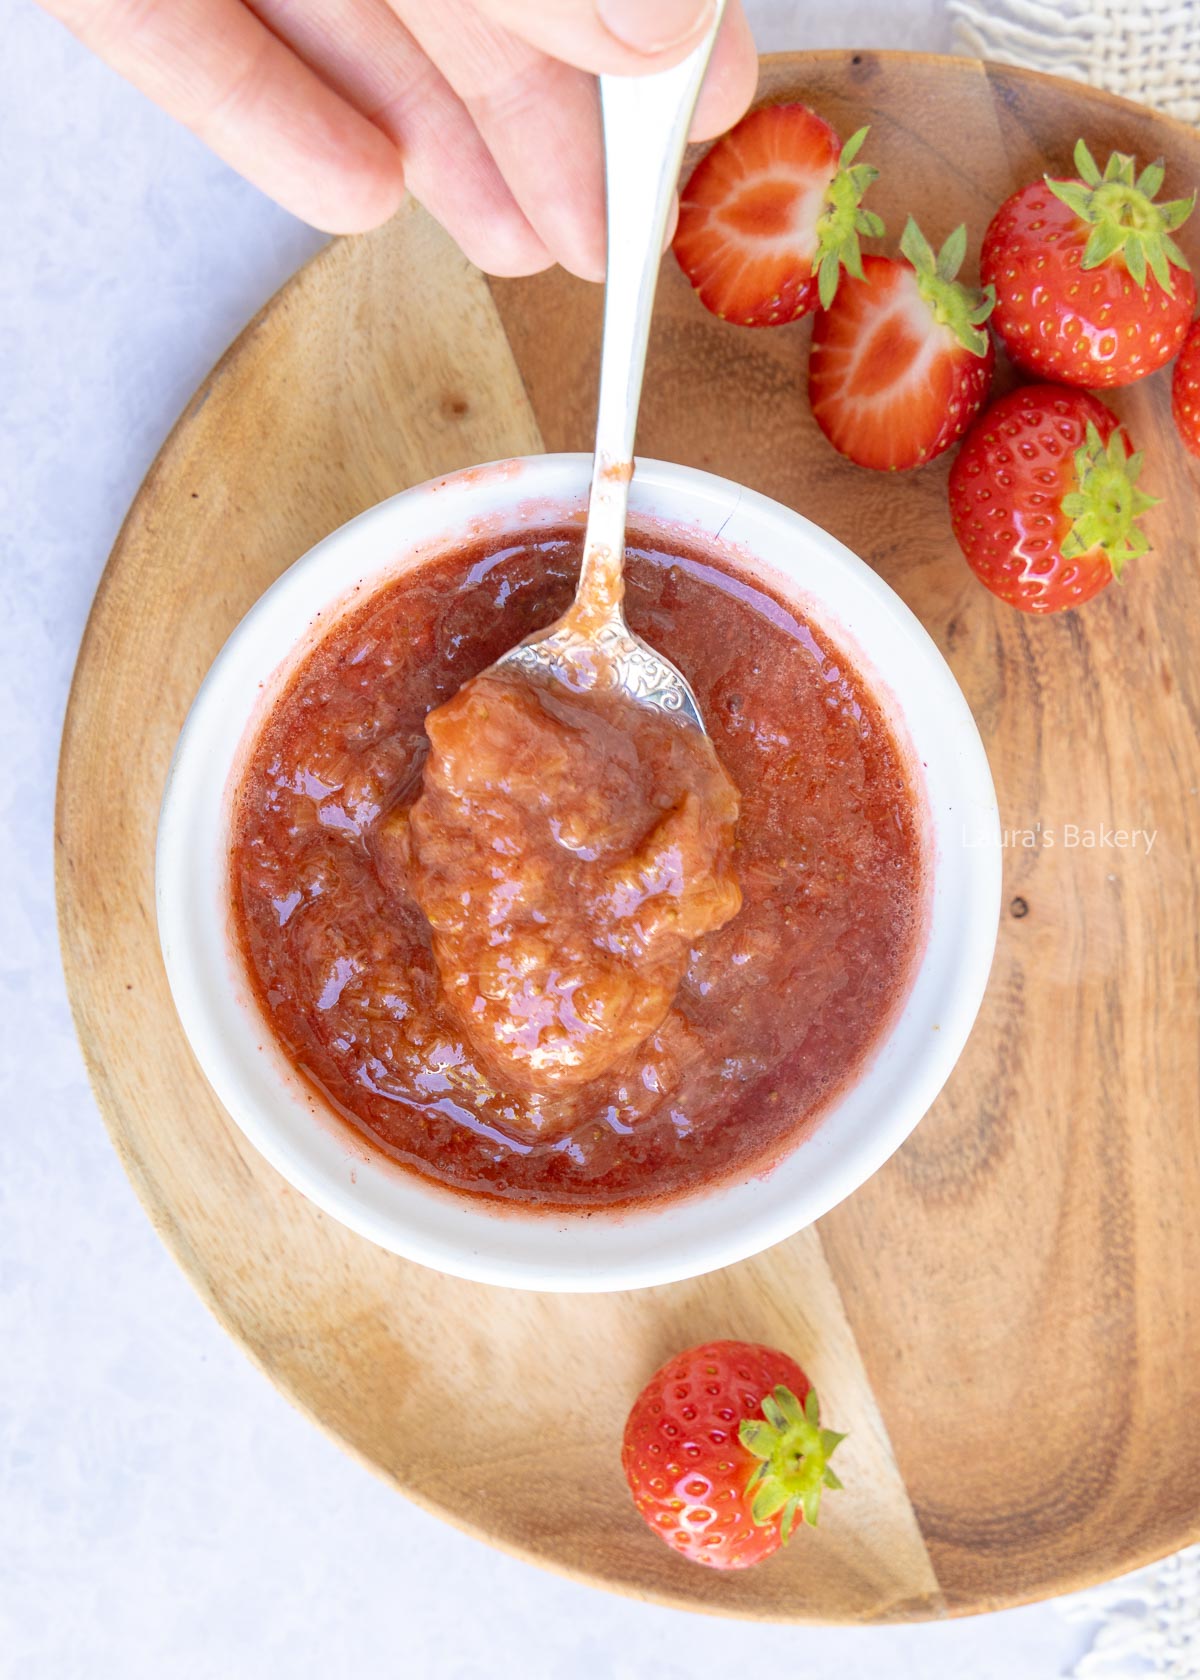
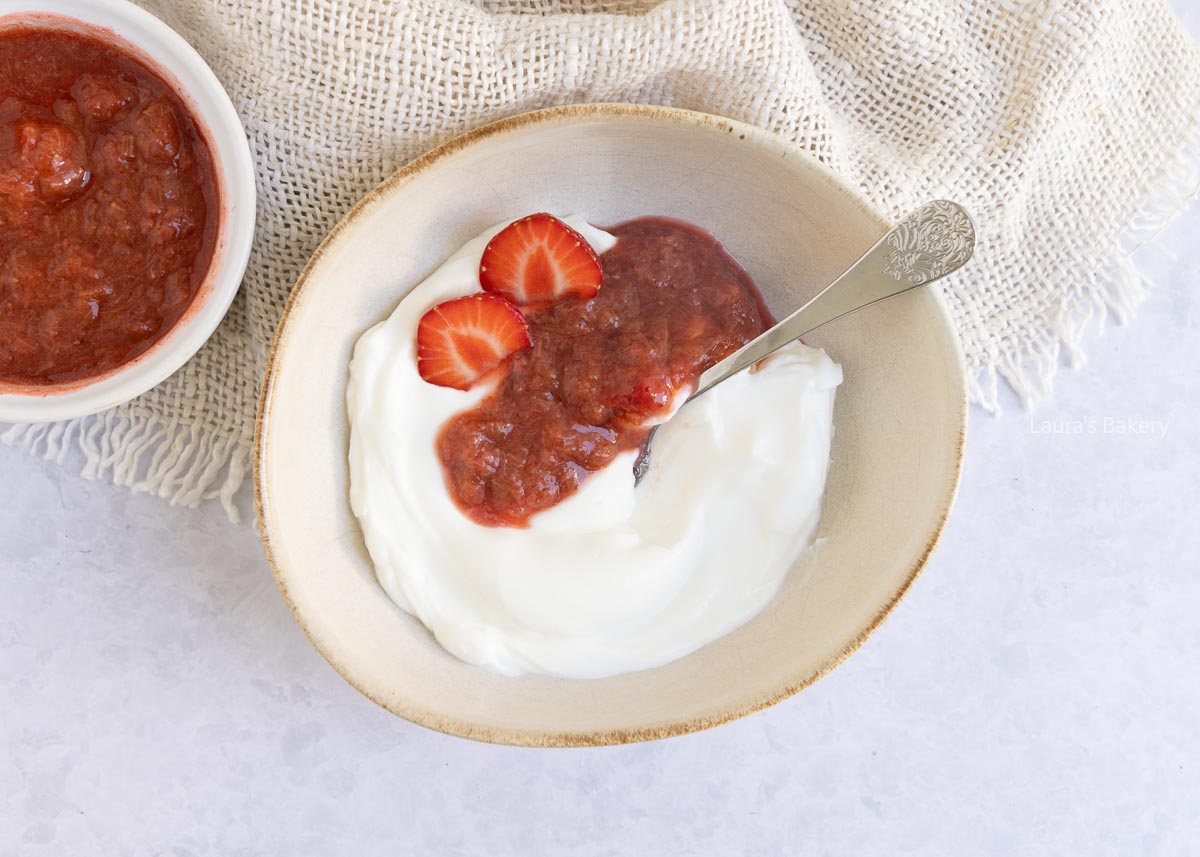
I absolutely love making a strawberry rhubarb compote with fresh ingredients. It’s perfect to add to my yogurt for breakfast and I love to use it in recipes as well!
For my father’s birthday, I made a strawberry crumble cake, but of course I had way more strawberries than I needed for the cake. I decided to make a compote so I wouldn’t have to use it in another recipe within a few days.
And because I also had some rhubarb leftover I decided to add the two together. The strawberry rhubarb compote is now waiting for me to do something delicious with it. I already have some fun ideas that I’m going to try out soon!

I love making compote (like my favorite seasonal cranberry compote) as it is such a great way to use up fruits you have too much off. Every time strawberry season and rhubarb season start I tend to go wild when I visit the farmers market.
The ingredients for making this are pretty simple
This is pretty basic, but you can absolutely change the flavors by adding a cinnamon stick for instance or change the sugar to brown sugar for a slightly different flavor.
Add all the ingredients except the strawberries to a medium saucepan and bring to the boil. Once the fruit starts to fall apart after about 10 minutes you add the strawberries in as well. Cook for another 10 minutes and place in jars.
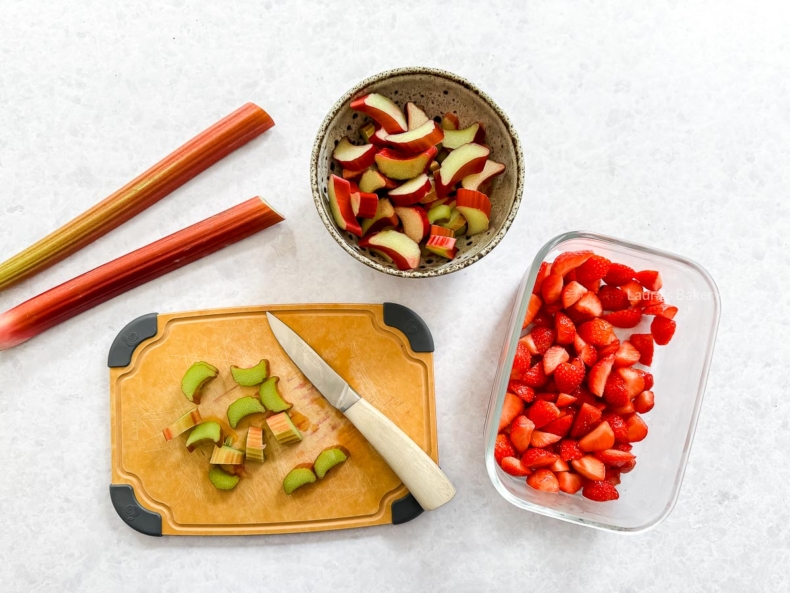
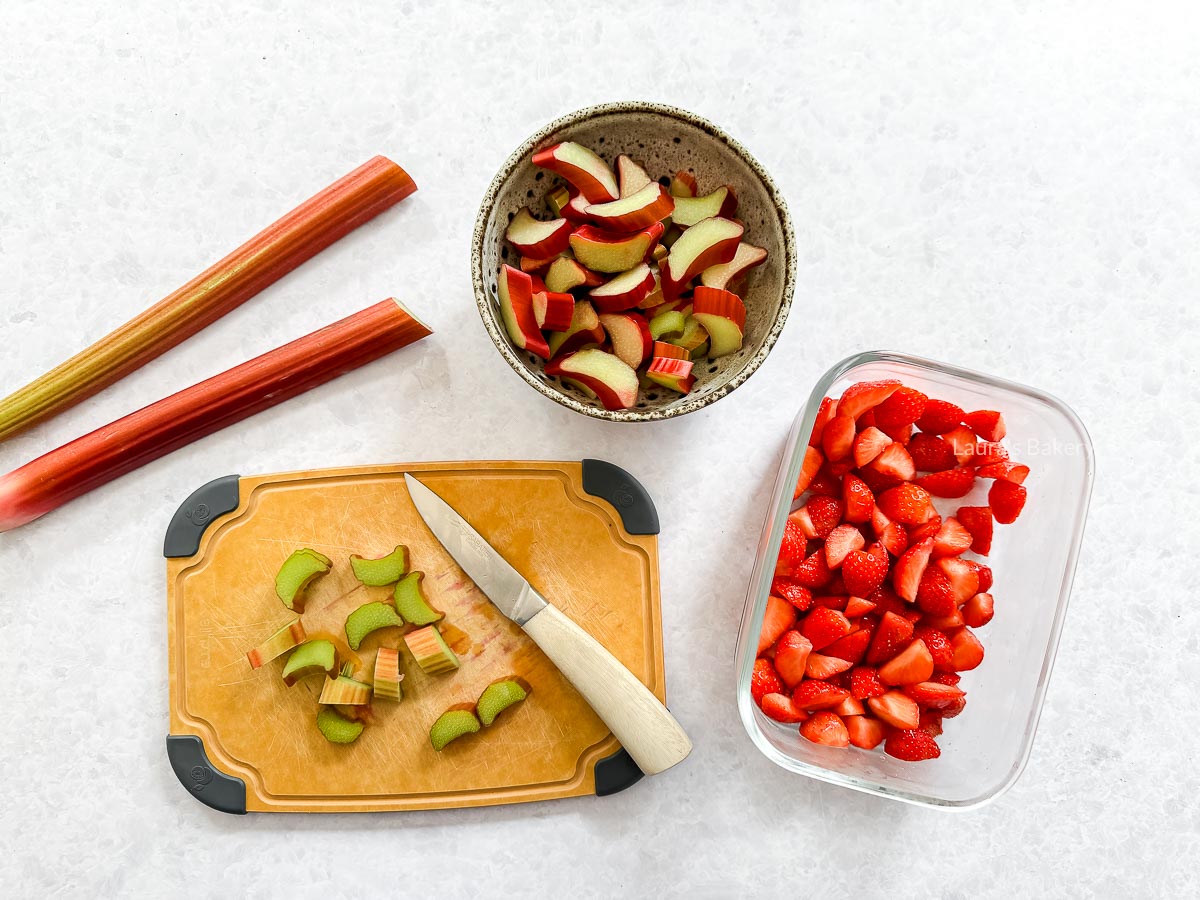
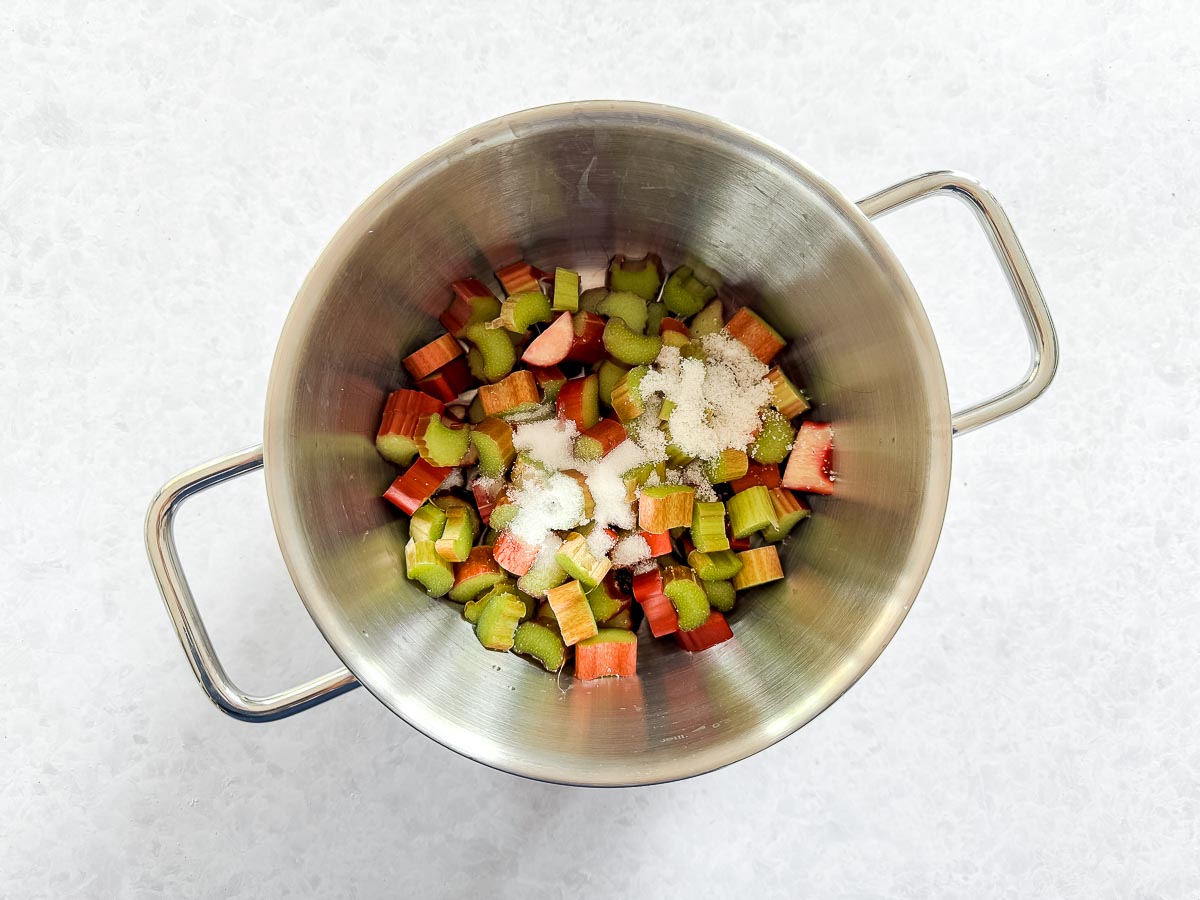
Slice all the fruits into smaller pieces
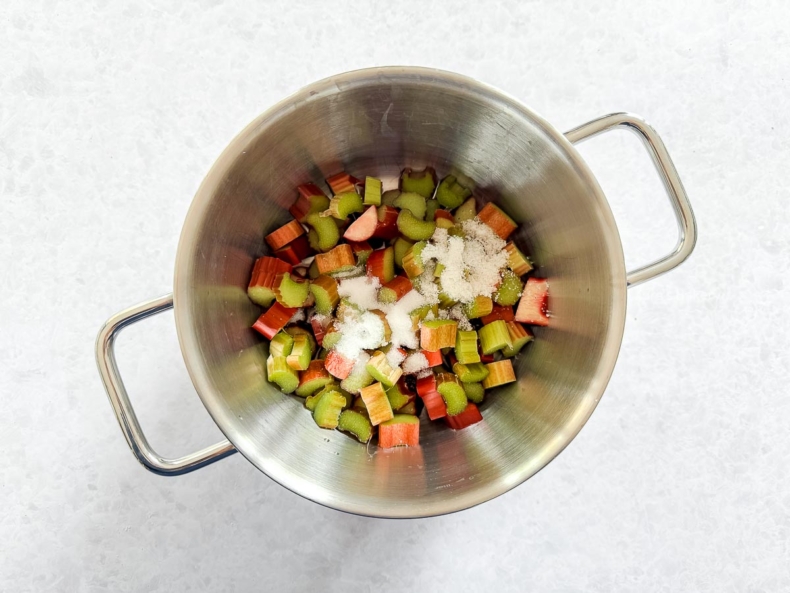
First cook the rhubarb with sugar and vanilla for 10 minutes
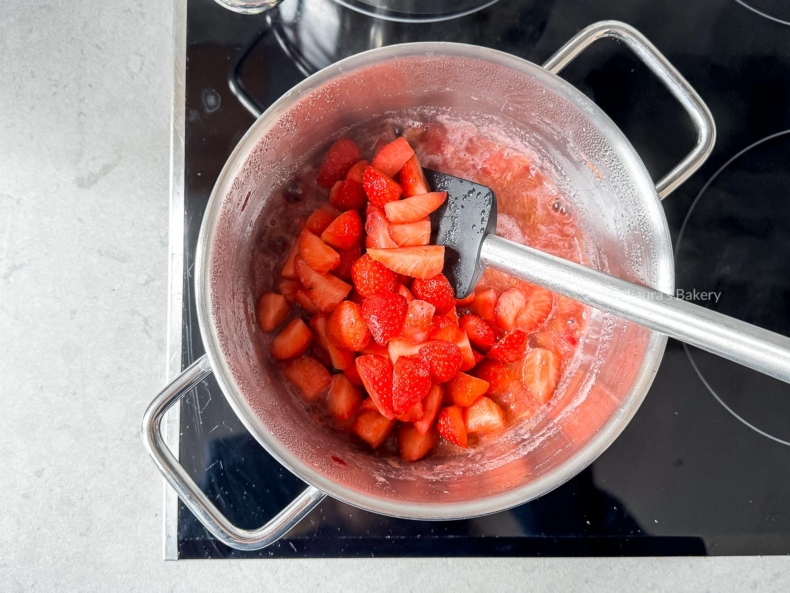
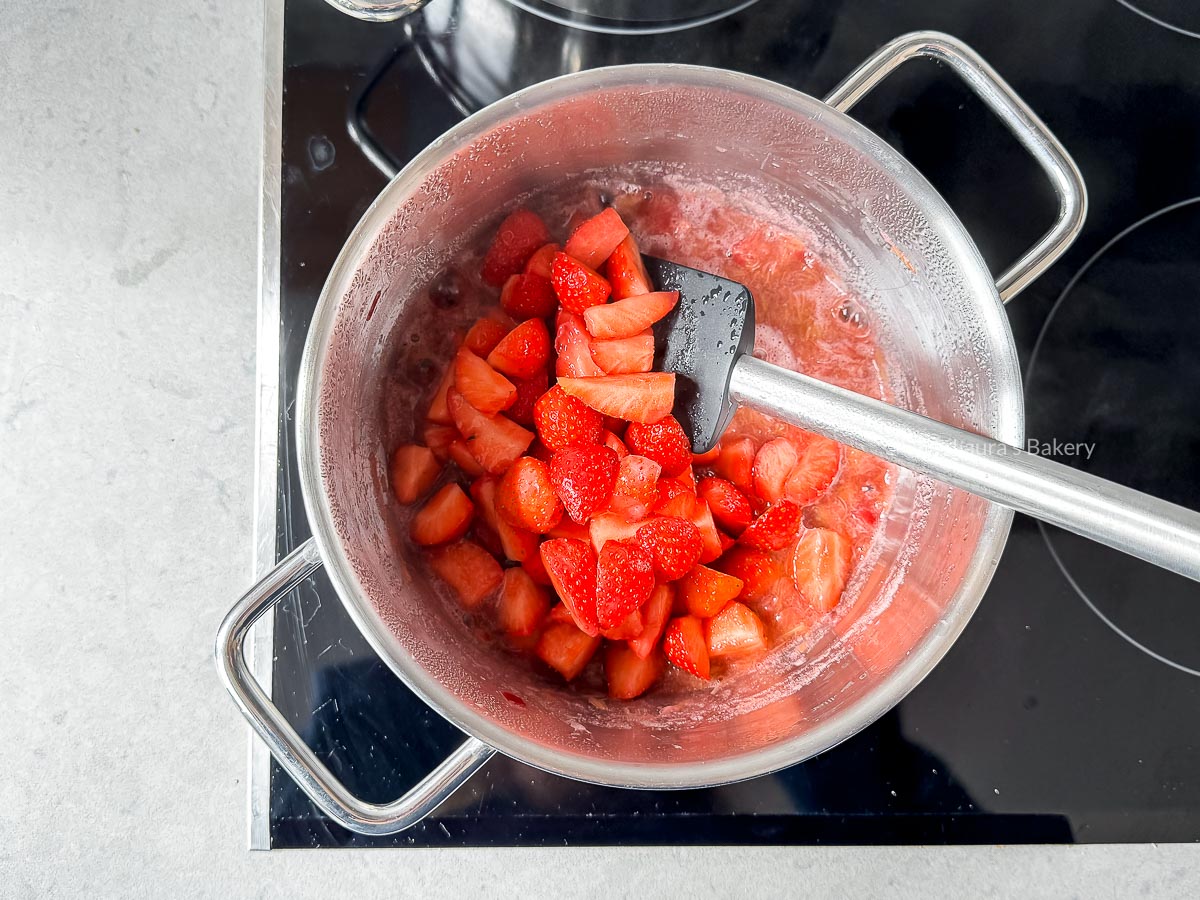
Add the strawberries after 10 minutes. Let it cook for another 10 minutes
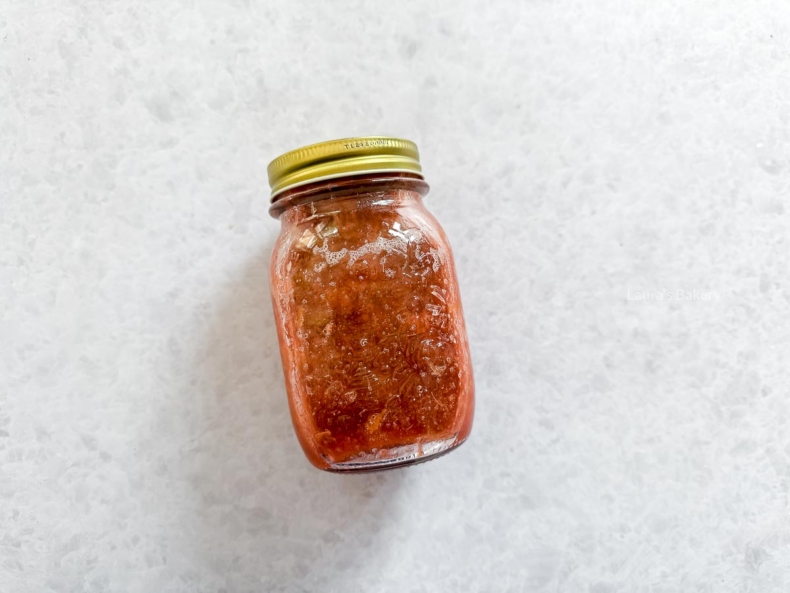
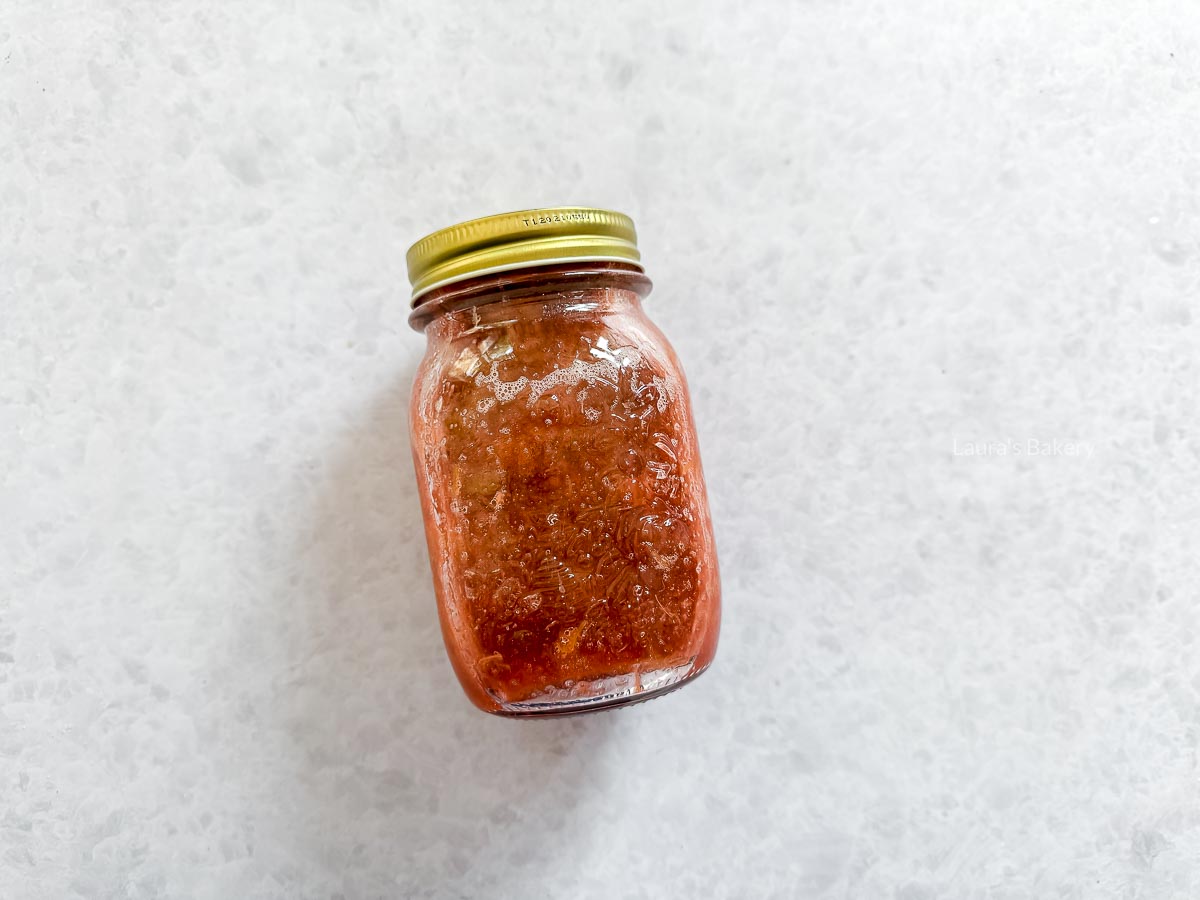
Add the compote into sterilized jars and let it cool down
You can store this strawberry rhubarb compote in different ways, whichever you prefer. You can store it in the fridge or in the freezer, but you can also add it to sterilized jars so you can enjoy it for longer.
In the fridge you can keep it for a few days. If you use clean spoons and jars it will keep for about a week.
If you freeze the compote it will keep for a maximum of three months.
One of the questions most often asked is what is the difference between a jam (like a rhubarb jam) and a compote (like a rhubarb compote). Technically a jam can only be called a jam if the sugar content is 50%. So 50% sugar and 50% fruit. In a compote you can use less sugar if you want, but the biggest difference is the fact that compote tends to be chunkier than a jam. The two are very similar but it’s the texture that is the biggest difference.
When placed in sterilized jars you can store the compote for up to a year in a dark place. Once opened use within two weeks and keep in the refrigerator once opened.

A delicious seasonal tart: rhubarb pie with frangipane. This recipe for a rhubarb tart is not difficult to make and is absolutely delicious when finished. Let’s get the rhubarb season started!
This was the first time I’d used frangipane in a tart, and I hadn’t fully considered that it expands in the oven. Frangipane is similar to almond paste, but slightly richer due to the addition of butter. The main ingredient for frangipane is ground almonds.
Because it expanded, my super neat rhubarb pattern disappeared (I was going for geometric patterns. Can you tell?)
Fortunately, it didn’t affect the flavor at all, and we enjoyed this rhubarb frangipane tart. I took it to a reunion with my South Africa travel buddies and they unanimously approved! You can try and make diamond shapes as well by cutting the rhubarb at an angle.
BAKING TIP: To get the edges nice and golden brown, brush them with egg wash. I prefer to use a silicone pastry brush for this because they are easy to clean and dishwasher safe.

Keep in mind that in order to make this rhubarb pie you need to follow two additional recipes. One for the shortcrust pastry and one for the almond frangipane. I’ve linked the recipes below.
And don’t worry, they’re both incredibly easy recipes! As always make sure to have the ingredients at room temperature unless the recipe tells you not to.
Since I’ve turned this into a free form rhubarb pie you don’t need a tart pan but if you want you can definitely bake it in a tart tin or similar.
The fun part about making a free form is that you can make any shape you like. Want a flower shape? Go crazy or turn the tart shell into whatever pattern you want.

Not using a baking pan makes this recipe super easy to prepare. Just shape the shortcrust pastry on a baking sheet lined with parchment paper. I use the parchment to partially fold the dough over the filling so it doesn’t stick to your hands and you’re less likely to tear it. This makes each pie look a little different, but always nice and rustic.
I made this rhubarb pie inspired by a French recipe for a “galette rhubarbe”: a rhubarb galette. Because of the way you make this rhubarb tart you do not blind bake the crust.
If you do bake this in a tin you can consider blind baking the crust first using pie weights. Make sure to use a tin with a removable bottom to make it easier to remove from the baking pan.
The difference with making this on the parchment paper is that the heat gets to the crust much better than when you use a tin. Making it unnecessary to blind bake.
A galette is a type of round, flat pie where the edges are always folded inward (partly over the filling). A galette is a French recipe, and they can be either savory or sweet, so there are a lot of possibilities.
This rhubarb and frangipane galette is, of course, totally sweet!
In addition to this rhubarb tart, I have made many other rhubarb recipes. From a delicious crumble cake to a simple jam. Rhubarb is very versatile, so you can do a lot with it. Try the recipes below as well and there will be more recipes following now that rhubarb season has started.

Both are possible. The rhubarb galette was delicious both warm and completely cooled. You can serve it with some whipped heavy cream or a scoop of vanilla ice cream too.
It is a richer version of almond paste, making it even softer and creamier than almond paste (which I also like very much). I explain much more in the recipe for frangipane. The base ingredient for making frangipane is almond flour. Frangipane is often used in bakewell tart (traditionally from England) as well.
In theory, you could easily replace the frangipane with my almond paste recipe. It depends on why you want to replace the frangipane. Perhaps you are looking for a filling without almonds, in which case you can use coconut paste (for which I soon will have a recipe up too)

Making your own cheesy garlic bread has never been easier or tastier. You really want to try this recipe with roasted garlic.
Roasting the fresh garlic gives it a whole different flavor and becomes soft and delicious. The cheesy garlic bread is the perfect side dish but can also be used as part of a snack board.
I got the idea to make this garlic bread after seeing a lot of (delicious) videos on TikTok last year. This cheesy garlic bread recipe was all the rage and had been on my to make list for quite some time.
Since I make no secret of the fact that I’m usually way behind on trends, I started working on the recipe a year later. And how unbelievably delicious it was! I could see why this easy recipe for making garlic bread was so popular. Nothing better than a warm slice of cheesy garlic bread.
Now that I was convinced of how good the bread was I quickly wrote down my version of this cheesy bread. You can eat it as an appetizer or serve with a cup of soup or a fresh salad as a main course.
You might immediately think of the store-bought garlic bread. It’s a bit like that, but a lot tastier. That’s because this garlic bread has cheese in it, but also because you make your own delicious herb butter and mix the garlic into it.
There is just nothing better than that and it beats the ones bought at the grocery store every single time.

Roasted garlic is much softer and sweeter in flavor than the fresh (raw) variety. It is not as pungent and “garlicky” as you are used to.
For the best garlic flavor you add two whole heads of garlic to the bread. That might sound like a lot but trust me that it is delicious and the garlic mixture makes the bread absolutely perfect.
If you already know that this roasted garlic is going to steal your heart, prepare an extra head. In fact, you can store the roasted garlic in the refrigerator for up to a week and use it in another dish later. For example, toss a roasted garlic clove into a homemade soup, hummus, or aioli.
This bread is really best enjoyed right after baking. That way it will still be crips and delicious.
Of course if you have leftovers, you can freeze the bread in a freezer bag. Defrost them and reheat in the oven to crisp up again. That is best done at 180˚C and for about 10-15 minutes.
I love making these easy bread recipes and below are a few favorites of mine!
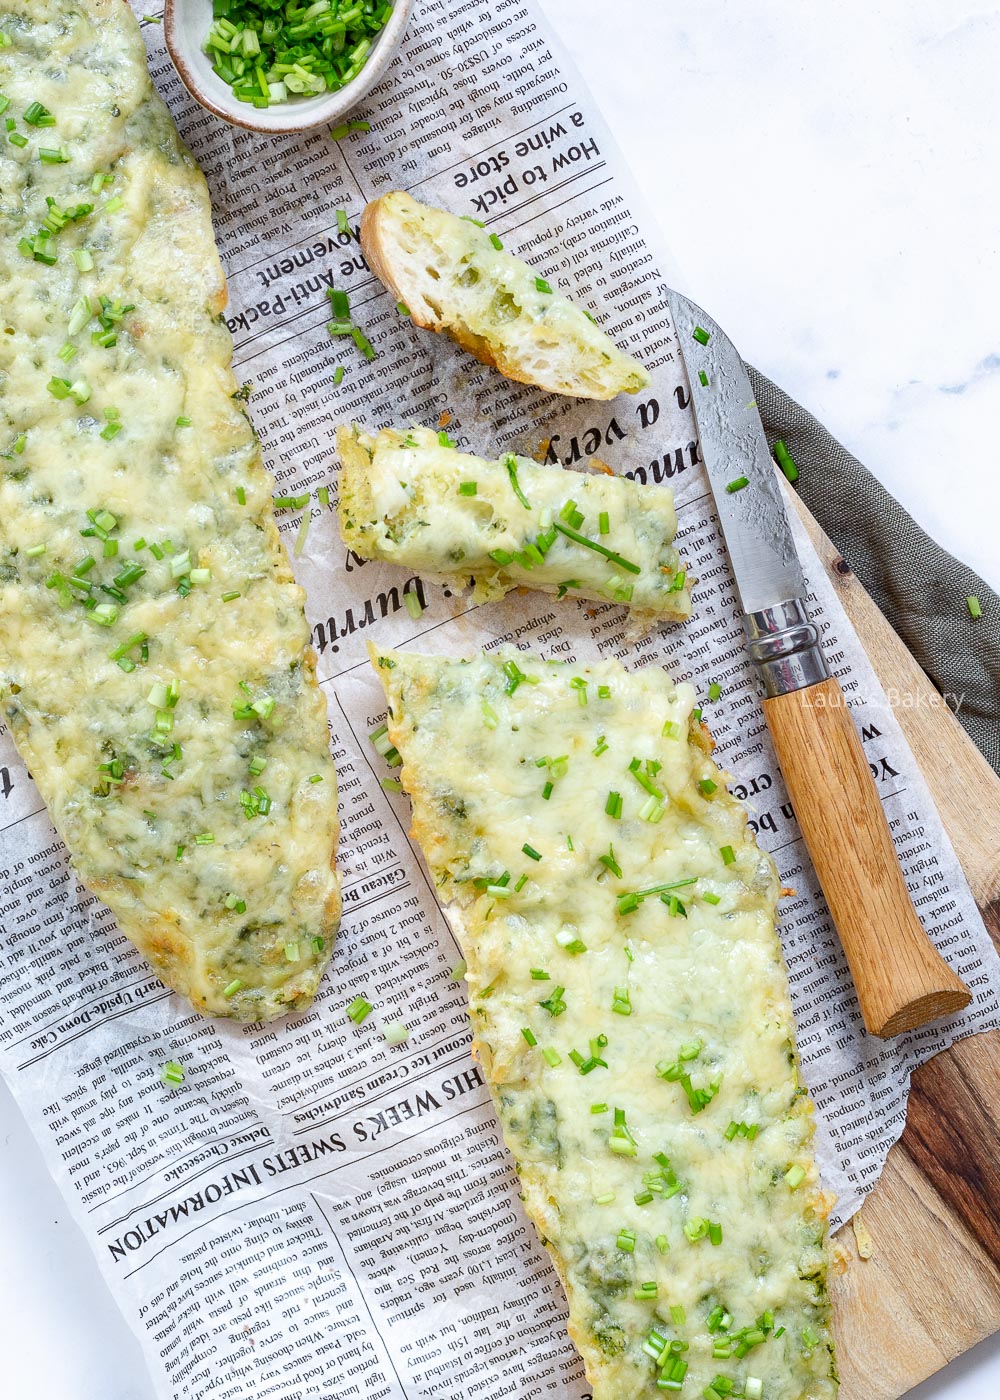
Of course you can. You can also replace the cheese in the recipe with a cheese of your choice, see the tips below the recipe.
I haven’t tested it, but I don’t think it would be a problem. I would wrap it in aluminum foil and keep it in the refrigerator or store in an airtight container until you are ready to bake it (max. 2 days). You should also be able to freeze it this way (up to three months). When baking, be aware that frozen bread takes longer to bake.
No, you cut them open with the skin and everything. After baking in the oven, the garlic will be very soft and you can easily squeeze it out of the skin.
You can use slices of bread, Italian bread or french bread. You can use soft bread or more crunchy bread.
It’s a pretty flexible recipe! If you use slices of bread it would become more of a garlic cheese toast instead of a whole bread. Make sure to use thick slices for best results.
If you want you could use garlic powder for making this although the roasted garlic really does create a totally different flavor.

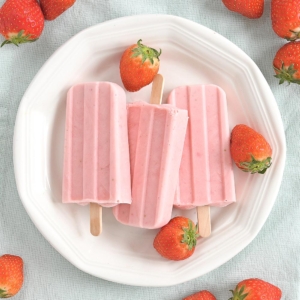
If you love strawberry cheesecake, you’re gonna want to make these strawberry cheesecake popsicles. You make them with fresh strawberries and cream cheese. Absolutely delicious on a hot summer day.
The fun part is that these homemade strawberry popsicles really do taste like cheesecake. The first time I made them I did a little happy dance after tasting them.
The creamy texture in combination with the fresh berries is just the best! No one wants to stand in front of a hot oven in the summer, so this is the perfect replacement!

Apart from the below ingredients you will also need popsicle sticks and silicone popsicle molds for making this strawberry cheesecake popsicle recipe. And once you have all the ingredients it’s the easiest thing to make. Check the recipe card for full details
If you want it to be even more like cheesecake another great option is to add graham cracker crumbs to the ice cream as well. Graham crackers is the logical choice since that is most often used as a crust, but you could absolutely use other cookies as well. I’ll explain how to do that below.
As I mentioned before, making these strawberry cheesecake popsicles is super easy. The hardest part is collection the ingredients (and that’s easy too)!
You just add all the ingredients to a food processor or a blender, blend until smooth and pour into your favorite ice cream mold. You can also turn this into ice cream bars or make ice cream waffles by adding the frozen popsicles on vanilla wafers.
Since the fruit is so soft you don’t really need a high-powered blender for making this, but if you use harder fruits that might be a good choice for the smoothest result.
You can use an ice cream maker if you have one but I usually just pop them in the freezer. They will need about 3 to 4 hours to freeze completely.
Now if you want to add that graham cracker crust to the popsicles you fill the entire mold a little less full and sprinkle the crumbs on top. Making layers is also an option and you can absolutely add your favorite flavors to the mixture. I find it a perfect way to eat a little more fruit during warmer weather.

You can turn this fruity cheesecake into your favorite flavors of cheesecake by changing the strawberries to raspberries, peaches, cherries; you name it. Or check the blackberry popsicle recipe.
If you want a little less cream cheese you can replace half of it with Greek yogurt if you want (or check out these Greek yogurt popsicles with mango!). Since it is mostly very simple ingredients it is also really easy to vary with different fruits. You can change the strawberry mixture by adding additional fruits as well. And for another really easy strawberry ice cream check here.
You can store these popsicles in the freezer for up to three months. It is best to wrap them individually in plastic wrap and store them that way. They do taste best if you eat them within 2-3 weeks. Mine never last that long though!
Yes! Just thaw them first and drain excess liquid before blending to keep the popsicles from getting too icy.
Absolutely. Use a plant-based cream cheese and yogurt or coconut milk for a creamy dairy-free version.
They help with shape and easy removal, but you can also use small paper cups and insert wooden sticks after partially freezing. When ready to serve just tear off the paper.
Run warm water over the outside of the mold for 10–15 seconds. Wiggle the sticks gently and they should slide right out.
They’re best within 2–3 weeks for optimal texture and flavor, though they’ll technically last longer.

This delicious strawberry peach cobbler is the perfect recipe for summer. With the abundance of fresh strawberries and juicy fresh peaches I love making this. Delicious on it’s own but even better with a scoop of vanilla ice cream! The perfect summer dessert.
If you’re not familiar with a cobbler, it is somewhat similar to a crumble, like this apple crumble or rhubarb crumble, but instead of the crunchy crumbles that you’re used to it features a relatively soft batter that is poured over the fruit. I would almost say it is the best of both worlds.
When you take the strawberry peach cobbler out of the oven the top layer is still beautiful golden brown and crispy and the bottom layer is soft and creamy.
I can’t tell you enough how much I love it. Of course it’s perfect for strawberry season and peach season but you could even make it with frozen fruits.
And the fun part is that you can easily turn this into another cobbler using almost all kinds of fresh fruit. Turn it into a cherry cobbler when it’s cherry season for instance. Or use other fresh berries.
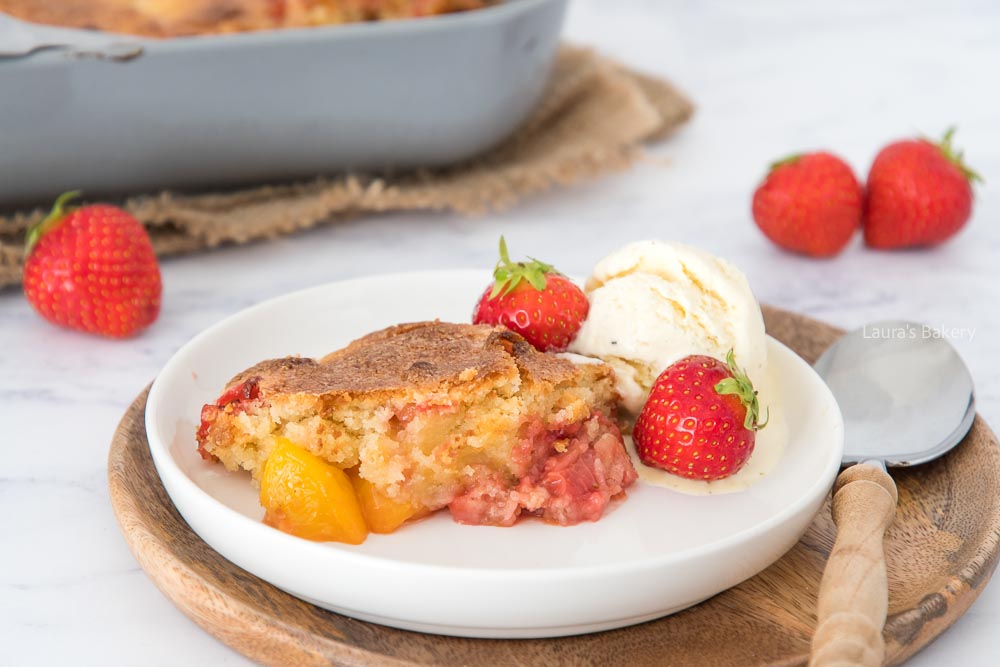
Make sure you have all the ingredients at room temperature before you start making the cobbler. Check the recipe card for full details. I’ve used a pretty basic topping but you could add a bit of cinnamon for next time or other spices.
Now this is a pretty easy recipe so making it takes no time at all. You start by preparing the fruit mixture. Add all the sliced fruit into a large bowl and mix it with the custard powder. Shake the bowl gently to make sure the custard powder is divided equally across all the fruit filling. If you want you can add a little bit of lemon zest to give it a fresher touch. I wouldn’t add lemon juice as that would add too much liquid.
Now for making the cobbler batter you take a separate bowl and whisk the sugar with the butter until light and fluffy. It’s easiest to do this in a food processor but you can also use a hand mixer for this. Once the butter mixture is fluffy you add the egg and the vanilla extract.
The last step is to add the self rising flour and mix it until well combined.
Once all is mixed you add the fruit first to a baking dish. You can use a round baking dish or a square baking dish. That really makes no difference to the end result. You could even bake this in an cast iron skillet. Whatever is oven proof will work. Or make individual portions by dividing it over smaller ramekins.
Now pour the flour mixture over the fruit and smooth the top if necessary.
Bake in the preheated oven for about 30 to 35 minutes or until you have a lovely golden brown and crisp topping. You can serve the strawberry peach cobbler warm or cold. It will be delicious either way. Enjoy!
Yes! You can use frozen strawberries and peaches. Just make sure to thaw and drain them well before using, or your cobbler might end up too watery. Ideal to use when the fruits are not in season.
Peeling is optional. If you prefer a smoother texture, peel them. If you’re okay with a bit of texture and color, leave the skins on — they soften as the cobbler bakes.
Yes. You can cut the sugar in the topping by about 25–30% without affecting the texture too much. Taste your fruit first — if it’s super sweet already, you may not need as much sugar. For this recipe I only added custard powder to the fruit itself. No sugar.
The topping should be golden and slightly crisp, and the filling should be bubbly around the edges — usually around 30-35 minutes at 390°F (200°C).

Appetizers are one of my favorite recipes to make. They can easily serve as a snack for any party and this blooming quesadilla ring is absolutely perfect. It’s a showstopping appetizer that is also a clever way to use up leftover tortillas. Easy to adjust to your liking too.
This quesadilla ring not only looks really good but it’s pretty tasty too. In the center of the ring I place an easy dip which makes it even better.
It would be perfect served – for instance – during the super bowl, but you really can’t go wrong with this simple recipe. Below I will give you some tips on variations to the recipe.

Make sure to check the recipe card for full details on the ingredients needed!
For making the cones you need a tortilla half. Once you’ve made the filling you slice all the tortillas into halves with a sharp knife. Spread some of the mixture on a halved tortilla and roll it up into a cone shape. To prevent the edges of the tortillas to unfold place it on a serving platter (oven proof) and make sure that the points of the cones are pointing inwards. Once it is baked in the oven the melted cheese will make sure everything sticks together.
It’s easiest if you use a dish for serving that can be both in the oven as well as on the table. A large baking sheet will work as well but it will be trickier to place the quesadilla ring from the baking sheet on a serving plate. If you’ve used a baking sheet you can best slide it onto a wooden board and serve it like that
Once you’ve filled all the tortillas sprinkle the top with the rest of the cheddar and place in the preheated oven for about 15-20 minutes until the cheese is melted and the tortillas are lightly golden brown.

Now these cones of soft tortillas are a great appetizer. Perfect for using up leftover chicken and in combination with the melty cheese it is one of the best appetizer recipes. You can add some of your favorite toppings to the dish. Think about adding some fresh cilantro or sliced spring onions on top.
You can add additional fillings to the blooming quesadilla ring as well. For instance some red onion or add some black beans. It’s a fun way to serve tortillas for taco night too!
Any leftover tortillas? Try these tortilla chips as well!
It’s a ring of mini folded quesadillas arranged in a circle, often filled with chicken, cheese, and other fillings, then baked until golden and served with a dip in the center—kind of like a savory, blooming flower made of melty goodness! Super easy to make and fun to serve at parties.
Use flour tortillas, typically 6-inch or taco size. They fold easily and crisp up nicely in the oven without cracking. Slice them in half for easy of use as I did here.
Classic options for a filling would be:
Of course the only limit to the filling is your own imagination!
Absolutely! Go meatless with beans, grilled veggies, corn, and lots of cheese.
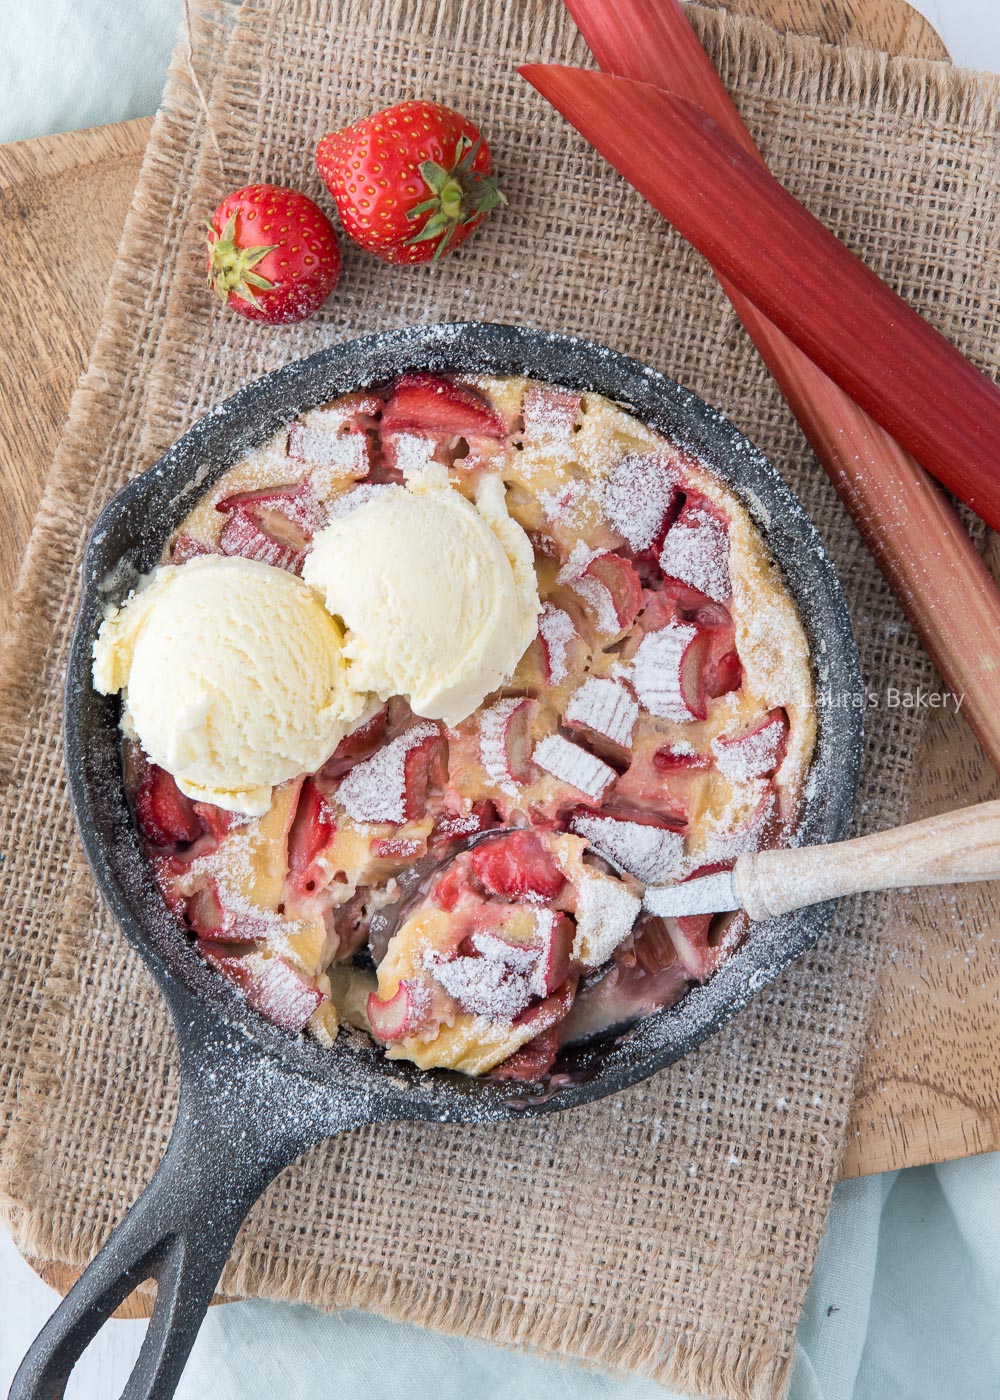
If you love clafoutis, I highly recommend this delicious version with strawberries and rhubarb. Perfect for this time of year!
Maybe you never heard of clafoutis, but it is a classic French dessert featuring fresh fruit. Traditionally the dish is made with a custard batter and black cherries.
The fun part is that you can make this with most fruits. In this case I went with fresh strawberries and fresh rhubarb. But you can use any other kind of red fruit or summer fruit you like.
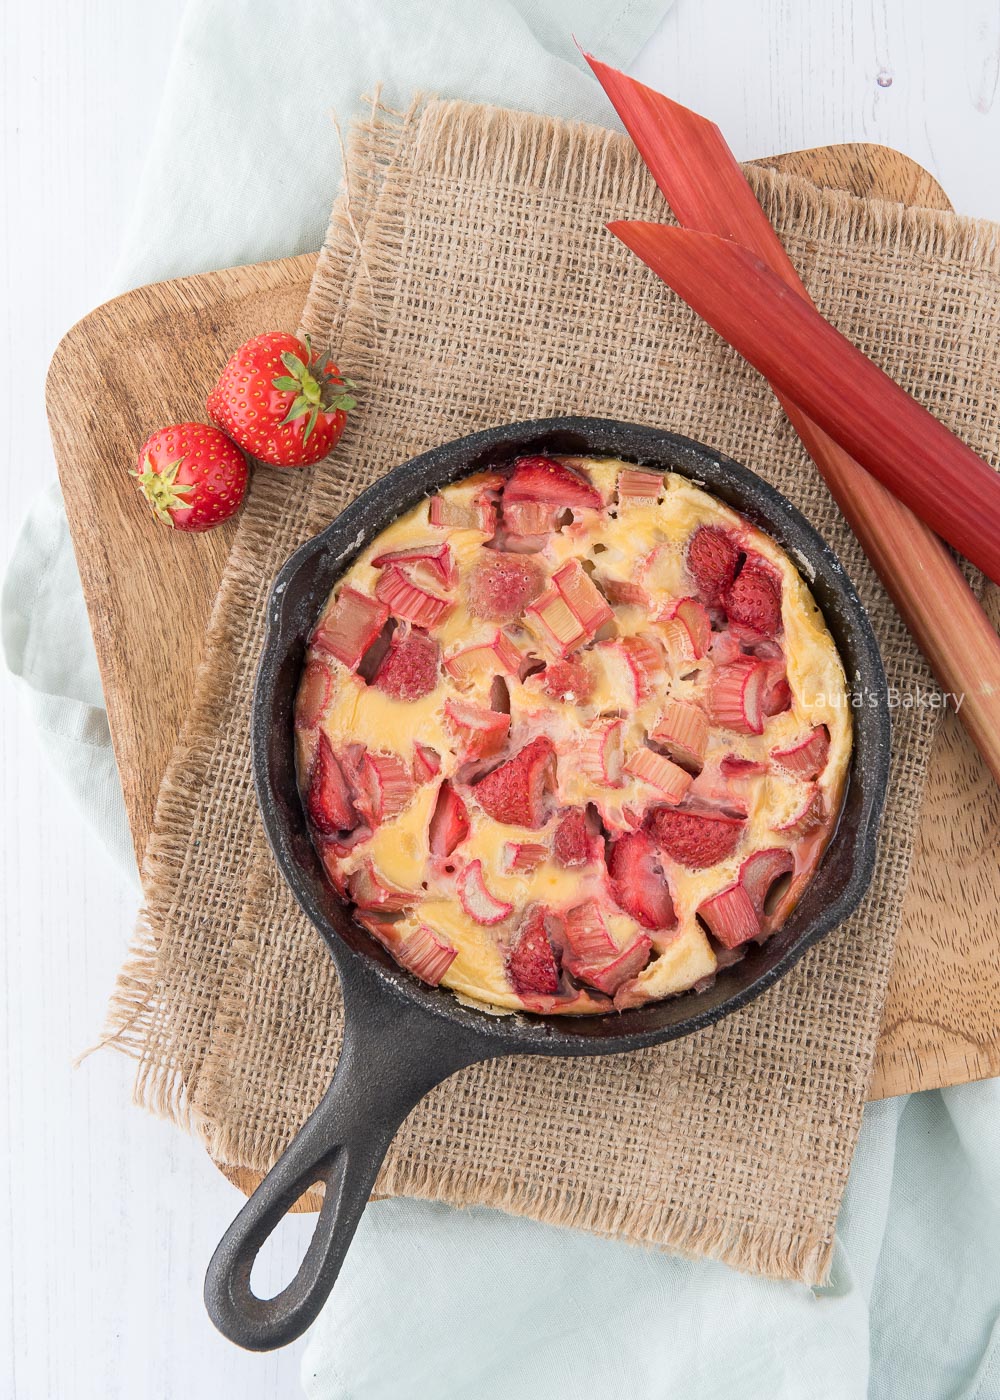
This clafoutis is truly one of the most delicious I have ever made. The classic cherry clafoutis is still a wonderful treat, but this strawberry rhubarb clafoutis is my favorite for this season.
The strawberries provide the sweetness, while the rhubarb makes it a fresh whole. This is enough for two people, but if you serve it with a scoop of ice cream, you could easily make it 3 or even 4 portions.
That is, if you are prepared to share. Definitely recommended now that strawberries and rhubarb are in season. If you love baked fruit desserts, also check out this strawberry peach cobbler.
For making this recipe you will need the following ingredients:

Now making this strawberry rhubarb clafoutis is super easy to do. You need two single serving size ramekins for this or use one larger buttered dish. Now place the rhubarb pieces and the sliced strawberries in a single layer in the bowl.
Take a large bowl and add the milk, eggs, vanilla, flour, salt and sugar to it. Mix it till you have a smooth consistency. You don’t really need a food processor for doing this as the mixture is quite easy. Pour mixture over the fresh fruit and place in a preheated oven.
Bake it until the eggs are set and the top of the clafoutis is golden brown.
You can eat the clafoutis warm or cold. It’s delicious served warm with a scoop of vanilla ice cream. But some whipped heavy cream is also really good.
You can store the baked clafoutis in the fridge for 2-3 days.
Yes you can freeze clafoutis, although the texture might change a bit due to the cream used in the recipe. If you want to freeze it, properly store in a freezer-safe container and let it defrost before using. You can reheat in the oven at 180˚C for about 10 minutes to serve it luke-warm.
You can, but keep in mind that frozen strawberries tend to have more liquid. If using frozen make sure to let them defrost first and drain any excess fluids first.
No, the rhubarb will cook while in the oven and will be delicious and soft when you take it out. No need to precook!
Usually, no! Young, tender rhubarb doesn’t need peeling. But if the stalks are really thick or stringy, peeling off the tough outer layer with a paring knife or vegetable peeler can help improve texture.
Yes absolutely! Clafoutis is great warm or at room temp. Bake it a few hours ahead, let it cool, and rewarm it gently in the oven if you want to serve it warm.
Dust with powdered sugar and add a dollop of whipped cream, crème fraîche, or a big scoop of vanilla ice cream.
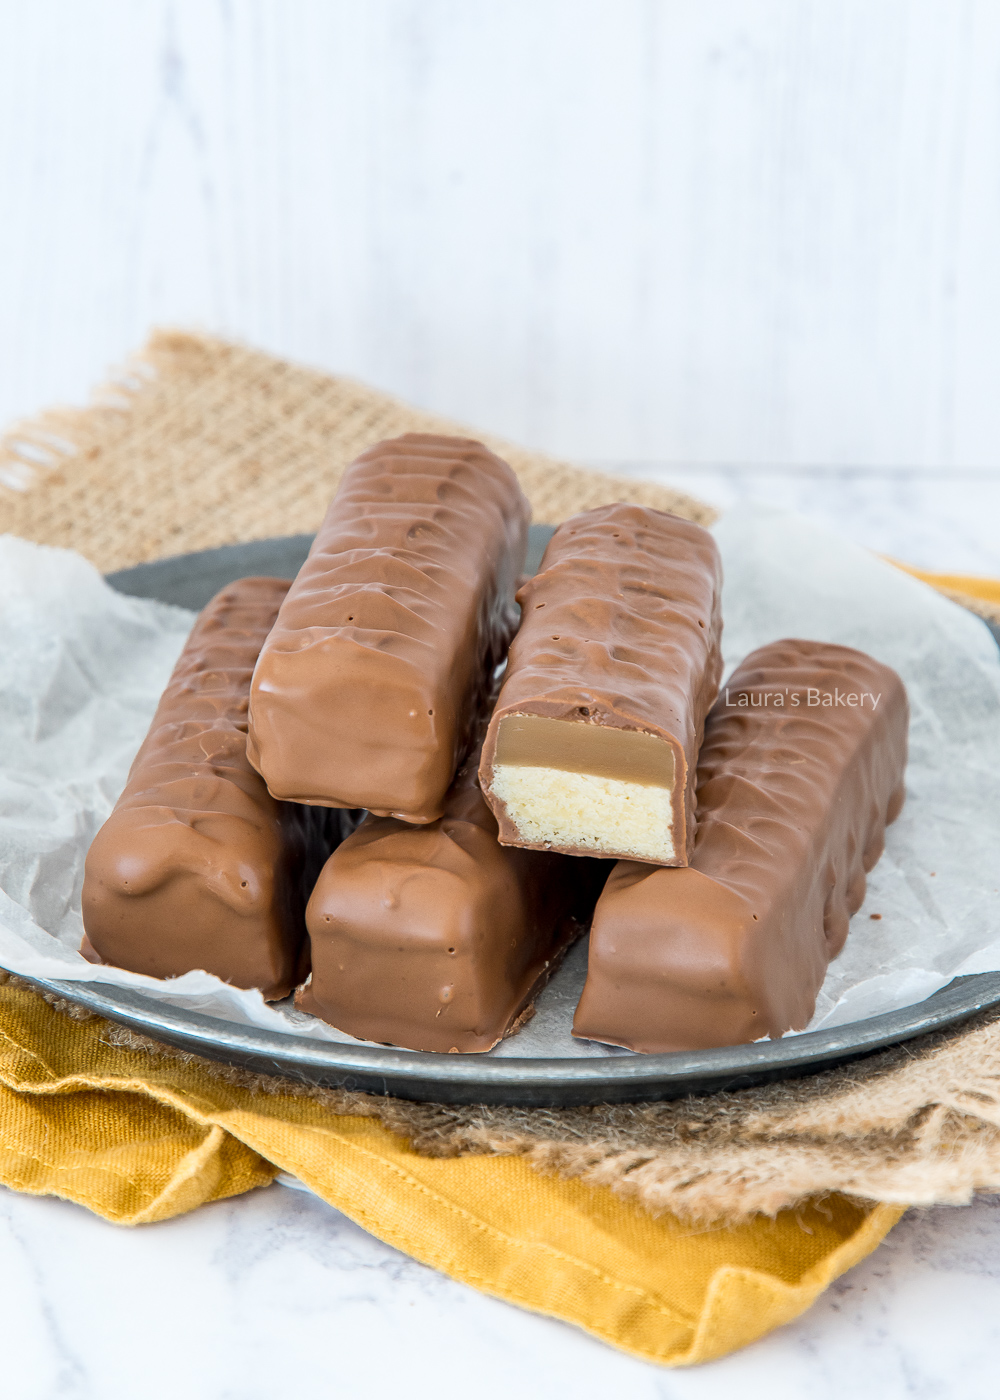
Ever wanted to make your own homemade twix bars? This easy recipe will teach you just how to do it. The good news is, it is super simple. I made this recipe for one of my cookbooks. This one was specifically aimed at kids, so making my favorite candy bars was a no-brainer!
Whenever I eat something I like, I almost always want to try to make it myself. Making my own Twix has been on my baking list for a while now. It is so much fun!
First you bake the crispy cookie layer, then you start working on the caramel layer. Finally, a nice chocolate dip for the final chocolate layer and your homemade Twix bars are done.
The recipe has a few parts, but all of them are easy to make. So don’t be alarmed by the steps as anyone can make these homemade candy bars! Or try these super easy Twix cookies.
BAKING TIP: When you make your own Twix bars, you can make them just the way you like them. Use white chocolate instead of milk chocolate, or dark chocolate if you prefer. You can also add a pinch of salt to the caramel sauce for a salted caramel filling.

Since the recipe is made up of three steps you do need a bit more ingredients but all of them are pretty simple. As always make sure to have all the ingredients at room temperature before you start making the recipe.
And lastly you will need milk chocolate for the final layer.
Start by making the cookie base for the bars. This is essentially a bit similar to a shortbread crust. You bake the cookie crust in the oven and once baked and lightly golden brown you take it out of the oven to cool down.
You need the cooled crust for the next step. For making the layer of caramel I used condensed milk which makes it extra delicious.
Place condensed milk, butter and sugar in a small saucepan and bring to the boil. Now while you normally don’t stir caramel, in this case you can and you do.
Keep stirring constantly until the mixture has the right consistency. You want it to resemble something like a thick chocolate spread. Be aware that this is extremely hot, so if you’re working with kids make sure to not let them get too close to the caramel.
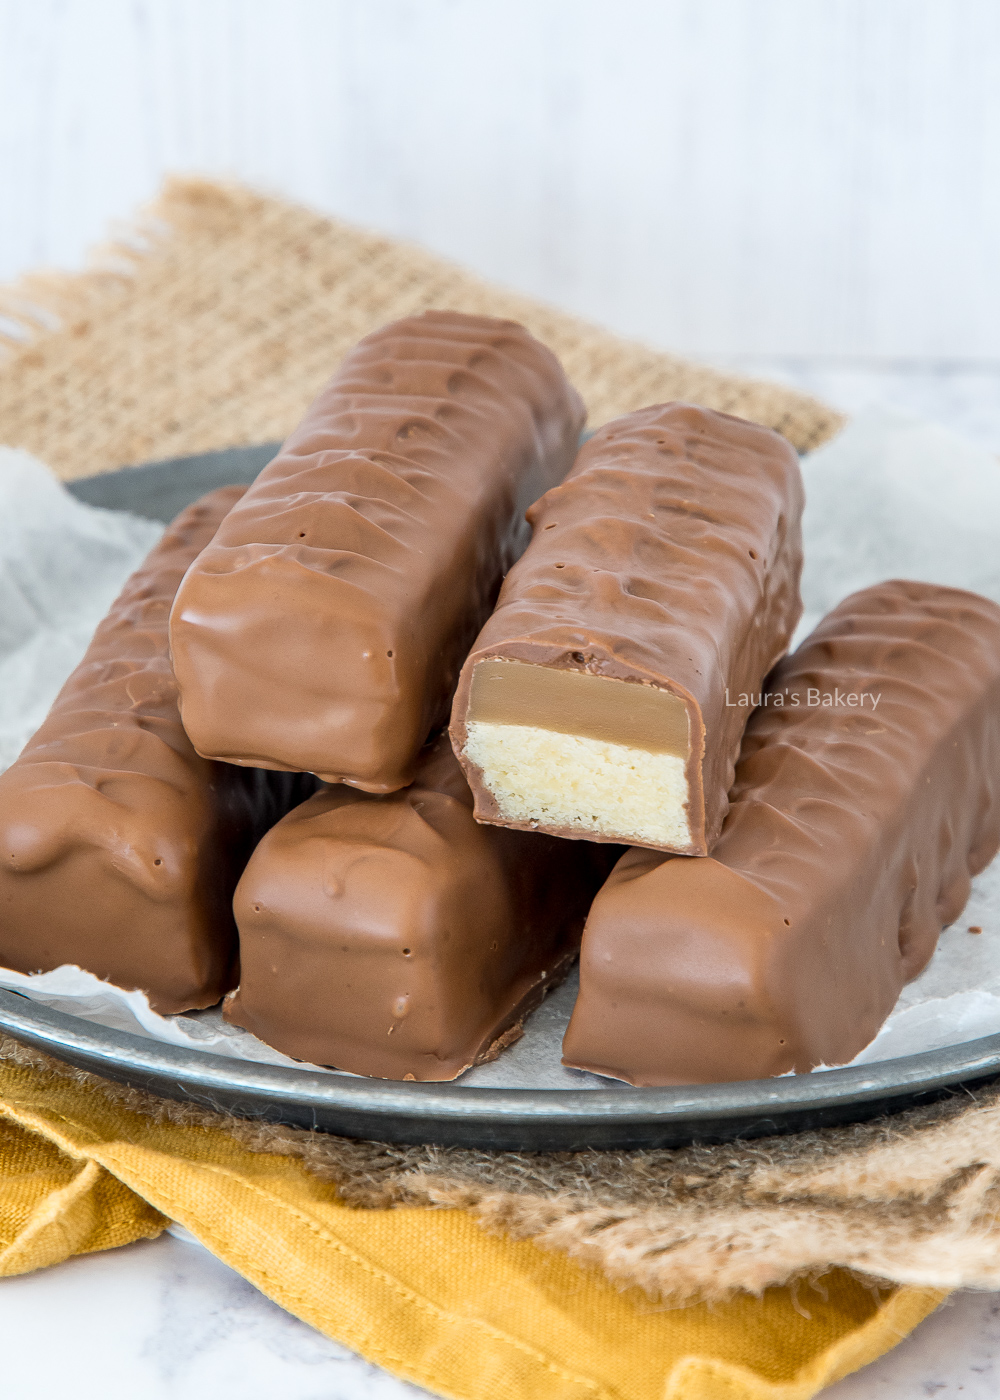
Pour the caramel over the chilled crust, spread it with an offset spatula and let it chill completely in the fridge.
Once you have the chilled caramel layer it is time for the final step. First to slice the bars into small strips, resembling the size of an original twix bar (although you can make them as big or as small as you like).
Once everything is chilled you move on to make the chocolate coating. Take a large bowl and make a double boiler.
Melt two third of the chocolate, once melted you remove the bowl from the pan and add the other one third of the chocolate.
You will essentially be tempering the chocolate that way. (Check how to temper chocolate without a candy thermometer here) Dip each bar into the chocolate, place on a sheet of parchment paper and let it set completely.
TIP: If you want to make the classic texture on top of the Twix bars, you can make it with a fork. While the chocolade is still soft, press a fork on the bar gently en pull up. Repeat this until you are happy with the texture of the chocolate.
If you love the flavor of Twix bars, make sure to check out the following recipes as well:
You can use a store-bought caramel sauce as long as it is firm enough (not runny). Or you can use dulce de leche as a gooey caramel spread. This is even easier to make, but tastes a little different.
Yes, you can basically use any chocolate you like. For example, you can make Twix White by replacing the milk chocolate with white chocolate chips. Or you can make a combination of milk and white chocolate, or milk and dark chocolate. Whatever you like.
When you use chocolate to make pralines, chocolate bars, or candy bars (like a Twix), the chocolate needs to be tempered. Tempering the chocolate hardens it nicely and doesn’t give it a white haze, but it does give it a crunchy bite. Just what you want! To learn more, check out this article on tempering without a thermometer.
Take a sheet of baking paper and scoop out the leftover chocolate in mounds. Sprinkle some nuts, caramel bits, or raisins on top. When the chocolate hardens, you will have little homemade chocolates. Or try and make a chocolate letter!
I use a 20 x 20 cm (8 x 8 inch) square baking pan to make these Twix bars. If you want to make a round Twix cake without converting the recipe below, use a Ø22 (8.5 inch) round springform pan. Be sure to read the tips below the recipe first.
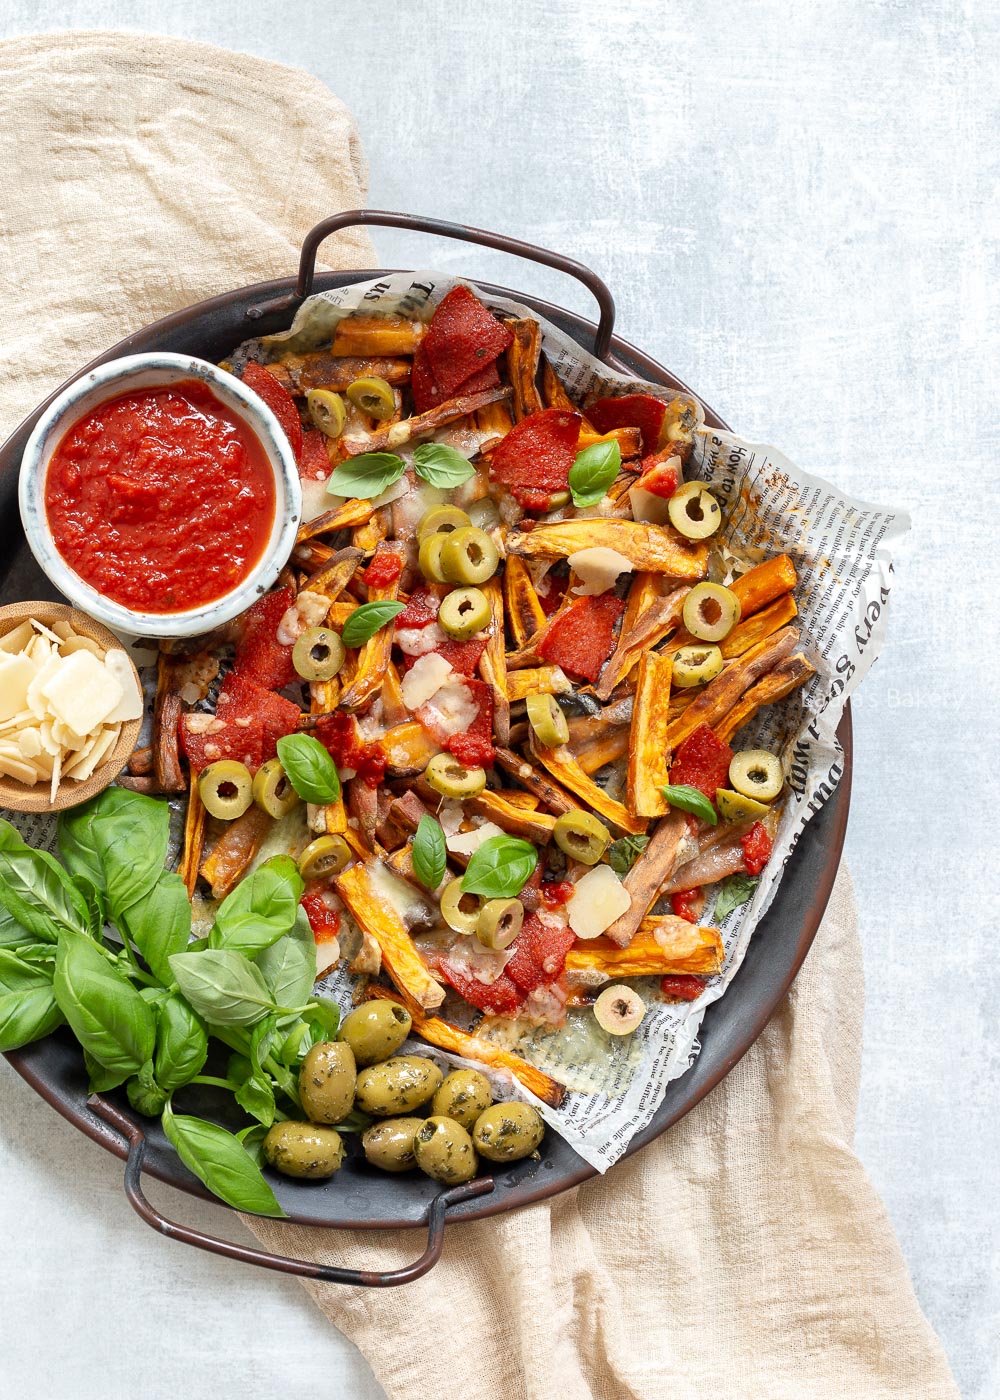
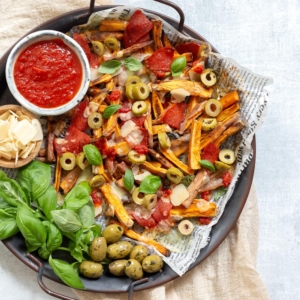
If you’re already thinking about Friday afternoon drinks this weekend, this recipe for Loaded Sweet Potato Pizza fries will be music to your ears. When you put these on the table, it’s definitely party time!
It’s also a great choice if you can’t decide if you or your guests are more in the mood for fries or for pizza. Enter the loaded pizza fries! It’s a pretty fun meal, that can work as a side dish, appetizer or as a full meal as well.
The recipe for these loaded fries came from the book of one of my blogger friends. I changed it a tiny bit by adding sweet potato instead of regular french fries but you can absolutely use either of the two.
I personally think that the best way to serve these hot fries is over drinks. It’s a fun food and you can use whatever toppings you like. I love pizza flavor as also in these delicious pizza twists or these pizza croissants.
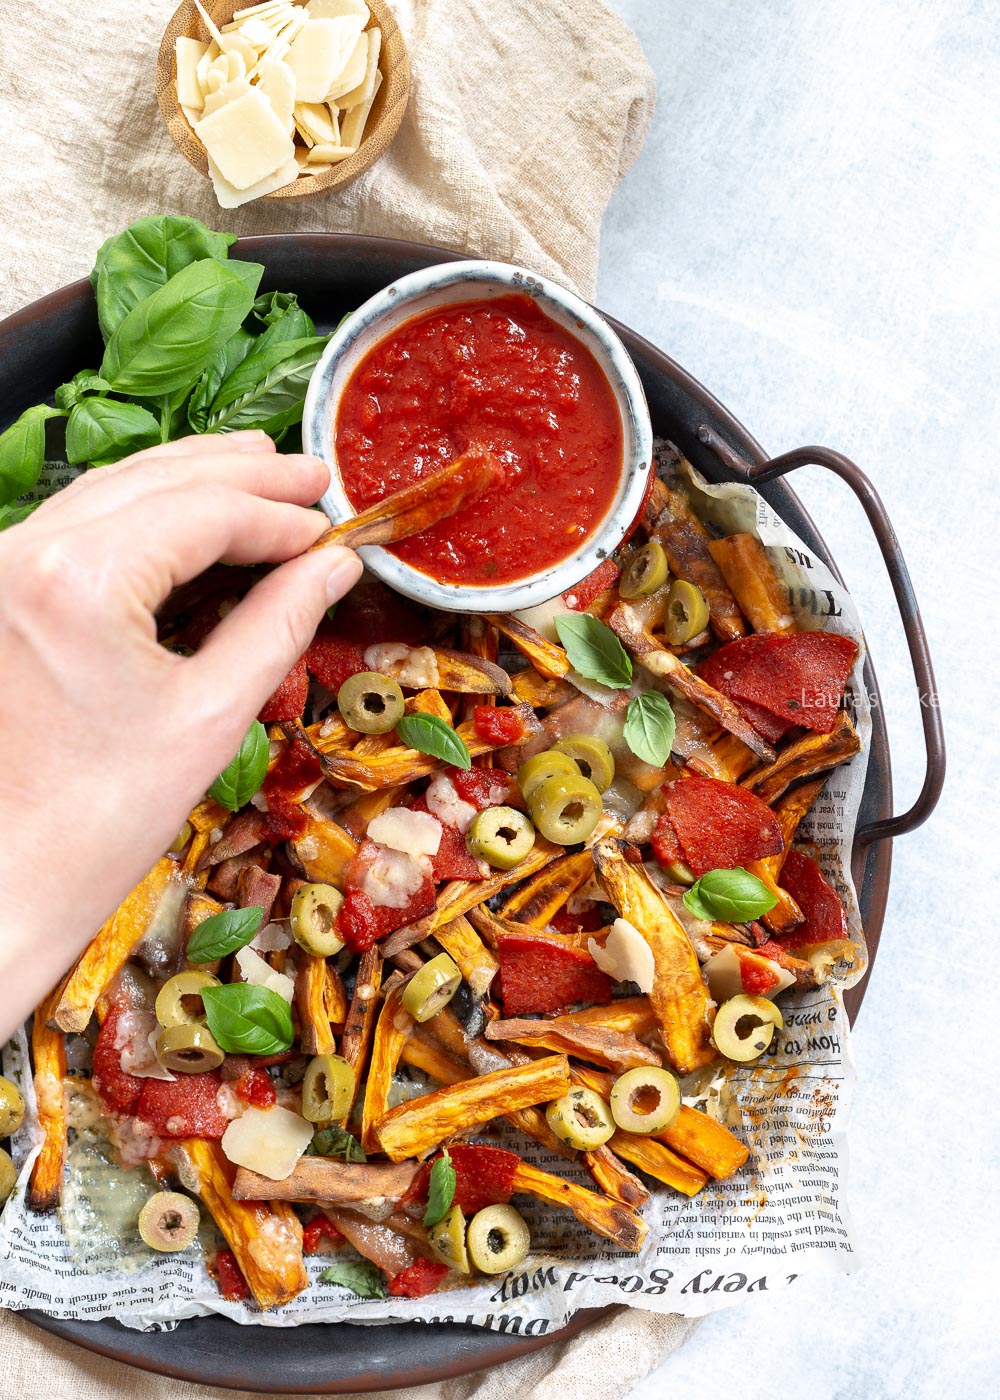
Now in this recipe I assumed you already know how to make sweet potato fries or you use ready made sweet potato fries from the grocery store.
You can find easy sweet potato fries that are made in the air fryer. Whatever you choose will work fine. On top of the sweet potato I used the following:
You could even load more onto the loaded fries. Think black beans, green onions, red onion, red peppers or make sweet potato cheese fries (my next favorite loaded fries!!) by adding a whole lot more cheese. But like I said you can use your favorite toppings.
For making the loaded fries you need a large baking sheet or a sheet pan. You start by baking the sweet potato in the preheated oven or in the air fryer.
Once that is done it is time to pile up the toppings. I like to start with the mozzarella. Just spread it over the fries. Add the peperoni if using and sprinkle the parmesan over it as well. Place back in the oven for about 5 minutes.
Remove from the oven and finish with the other toppings, like the olives and fresh herbs. Enjoy!
Appetizer tip: Enjoy your fries with some homemade cheese croquettes!
I would advise against doing that. They will become soggy and just not very appealing. Always best to make these fresh!
If you want to add a protein to the loaded fries you can add something like pulled chicken for an easy addition.
You can. Replace the mozzarella and the pepperoni in that case with your choice of vegan alternatives. You can add more vegetables or go for a vegan cheese.