Keftedes - Greek Meatballs-1

I only have been in Greece a few time, but I clearly remember the Greek food I ate there. Like keftedes, they’re Greek meatballs, but slightly different from the ones (like these Dutch meatballs) I usually make at home.

They’re extra tasty thanks to the addition of mint. Eating keftedes transported me back to Greece for a moment, and I’ll definitely be making them again. They go together really well with a Greek salad or some pita bread. And if you love meatballs you might want to check these meatballs in apricot chipotle sauce too!

Why You’ll Love This Recipe

  • all the flavors of Greece without needing to bring your passport!
  • easy – making these delicious meatballs is super easy and very tasty as a snack or as part of a meal focused on greek cuisine.

Recipe Ingredients

  • ground meat – you can use ground lamb, ground pork, or whatever meatball mixture you prefer. I’ve gone with a beef and pork mixture as I find that gives the best juicy meatballs
  • herbs – for making the keftedes, you will need fresh mint and fresh parsley
  • shallot – you can replace this with red onion instead or regular yellow onion if you prefer

For full recipe ingredients and quantities, make sure to check the recipe card below. Another fun twist on these keftedes is to add some feta cheese through the meat. Not traditional, but so tasty!

Keftedes - Greek Meatballs-2

How To Make Keftedes

Start by slicing the shallot, garlic, and the fresh herbs. Then mix it all together using your hands. I use a large bowl and start with two tablespoons of the bread crumbs. I add more if needed. Depending on how wet the meat mixture is. Instead of breadcrumbs, you can also use stale bread for this.

Now form small balls of around 4 cm in diameter (about 1.5 inches). Using a large skillet fry the meatballs in a pan with a little oil or butter. Cook for about 10 minutes or until they’re fully cooked. Serve with homemade tzatziki.

FAQ Keftedes

What kind of meat should I use for keftedes?

Traditionally, keftedes are made with ground beef, ground lamb, or a mix of both. You can also use pork or turkey, but the flavor will be milder.

How do I keep keftedes juicy?

The secret is adding soaked bread or breadcrumbs to the mix, along with finely chopped or grated onion. Don’t overmix the meat, and don’t overcook it.

What’s the purpose of mint in the recipe?

Fresh mint is a signature flavor in Greek keftedes – it brightens the meatballs and balances the richness. You can substitute parsley if you’re not a mint fan, but it won’t be as traditional.

Do I have to fry them, or can I bake them?

Frying is the traditional method, giving them a crispy outside and tender inside. Baking works too – just brush them with olive oil and bake at 200°C/400°F for 18-20 minutes.

Can I prepare keftedes ahead of time?

Yes! You can shape them and refrigerate for up to 24 hours before cooking, or freeze them raw for up to 3 months.


Keftedes greek meatballs

Print Recipe

No votes yet

Keftedes (Greek Meatballs)

Keftedes are simply the Greek version of meatballs. The mint and parsley give them a unique flavor, and they are traditionally served with tzatziki sauce on the side.
Preparation10 minutes
Cooking20 minutes
Total30 minutes
Servings: 18 meatballs

Ingredients

  • 300 grams half-and-half ground beef
  • 1 shallot very finely chopped or grated
  • 1 egg
  • 2-3 tbsp breadcrumbs
  • 1 clove garlic
  • 1 tbsp finely chopped mint
  • 1 tbsp finely chopped parsley
  • Salt and pepper

Extra

  • Serving of Tzatziki

Instructions

  • Combine all the keftedes ingredients, starting with two tablespoons of breadcrumbs, in a bowl. If the mixture is still wet, add a third tablespoon of breadcrumbs. Form small balls, about 4 cm/1.5 inch in diameter.
  • Fry the meatballs in a pan with a little oil or butter. Turn them regularly and cook for about 10 minutes.
  • Serve with homemade tzatziki.
Homemade oreo cookies-3

Lately, I’ve been busy checking recipes off my baking list. First, it was the red velvet marble cake, then the no-knead bread, and now I’m making my own Oreos.

Those chocolate cookies had been on my list for over three years, waiting to be made. I knew exactly how I wanted to make them, and the process isn’t that complicated. No idea why I never got around to it before, but the moment has finally arrived!

These homemade Oreo cookies are not exactly the same as store bought, but we thought they were very close to the original. We also had a lot of fun with the photography. I planned to build the tallest possible Oreo tower that would disappear from the frame.

The tower fell over a few times, but we finally succeeded! Okay, it probably helped that Lian was holding her finger on top of the tower, but you can’t see that in the photo. You can see the photo of our tallest Oreo tower at the bottom of this article.

Why You’ll Love This Recipe

  • what’s not to love? – If you love Oreo Cookies, this is an absolute must try! Easy and so tasty!
  • variations – the fun part about making your own homemade Oreo cookies is that you can make endless variations! They’re essentially sandwich cookies, so you can sandwich whatever you like in between.

Recipe Ingredients

  • butter – I used unsalted butter at room temperature
  • sugar – I used a mixture of white and dark brown caster sugar.
  • all-purpose flour – don’t use self-rising flour for these
  • cocoa powder – I used the unsweetened Dutch cocoa powder. Find out what the difference is between using chocolate or cocoa powder.

Oreo cookies are dark chocolate cookies with just a bit of a different flavor. Check full ingredients and instructions in the recipe card below.

Homemade oreo cookies-1

How To Make Homemade Oreo Cookies

The first step is to cream the butter and the two sugars together. Add the egg and mix until it is fully combined. Add the flour and cocoa powder until you have a firm cookie dough. Roll into two parts of dough and wrap in plastic wrap.

Make sure to chill the dough for about an hour before proceeding to the next step. Check why you want to chill your dough.

After cooling roll out the dough on a work surface sprinkled with a bit of cocoa powder. Cut out a total of 60 circles with each measuring around 5 cm/2 inches in diameter and place them on a with parchment paper lined baking sheet.  Bake them at 180˚C/350˚F for about 10-12 minutes.

Allow the cookies to cool down on the baking tray and let them cool on a wire rack completely.

Now the best part is finishing the cookies with the cream filling. I used a mixture of butter with icing sugar and just a bit of vanilla and heavy cream. This is one of my favorite fillings for sandwich cookies.

You first mix the butter with the icing sugar and once that starts to blend together you add the heavy cream and the vanilla. Continue mixing until you have a smooth firm cream.

For best results it is easiest to use a piping bag to add just the perfect amount of cream to the Oreo cookies. Pipe on 30 of the cookies and place the remaining 30 cookies on top. Press down gently until the filling is spread across the cookie.

More Oreo Recipes

Once you’ve made these cookies you can go wild with all the Oreo recipes on the site!

Homemade Oreos

Homemade Oreos

FAQ Homemade Oreo Cookies

What kind of cocoa powder should I use?

For that deep Oreo color and flavor, use Dutch-process cocoa powder or black cocoa powder. Natural cocoa will work, but the cookies will be lighter in color and slightly tangier.

Do I have to chill the dough?

Yes, chilling for at least 30 minutes (but preferably an hour) helps the cookies keep their shape and get that crisp texture.

How thin should I roll the dough?

Aim for about ⅛ inch (3 mm) thickness. Thicker cookies will be softer, thinner ones will be crispier.

How do I make the filling taste like real Oreos?

Use shortening for a more authentic flavor and texture, or butter for a richer taste. Beat with powdered sugar and a splash of vanilla until fluffy.

How do I stop my cookies from spreading?

Make sure the dough is chilled, the oven is preheated, and you’re not over-creaming the butter and sugar in the dough.
 

Homemade oreo cookies

Print Recipe

5 of 1 vote

Homemade Oreos

Oreos are one of the most popular (and tastiest) cookies. Did you know that you can make them yourself? It’s easy and fun! You’ll end up with 60 cookies (=30 sandwich cookies).
Preparation15 minutes
Cooking12 minutes
Chilling1 hour
Total1 hour 27 minutes
Servings: 30 cookies

Ingredients

  • 75 grams caster sugar
  • 75 grams dark brown sugar
  • 200 grams unsalted butter
  • 1 egg
  • 300 grams flour
  • 50 grams cocoa

For the filling:

  • 50 grams unsalted butter
  • 240 grams powdered sugar
  • 4 tbsp heavy cream
  • 1 tsp vanilla extract

Instructions

  • Cream the butter and sugars together. Add the egg and mix until fully incorporated. Add the flour and cocoa powder to the mixture, mixing until a firm cookie dough forms.
  • Form two slabs of dough and wrap them in foil. Read here for an easy method.
  • Let the dough rest in the fridge for an hour.
  • After cooling, roll the dough out to 1/2 cm thickness on a surface sprinkled with cocoa powder. Cut out 60 circles, each 5 cm (2 inch) in diameter, and place them on a baking sheet lined with parchment paper.
  • Bake the cookies for 10-12 minutes at 180˚C/350°F with conventional oven.
  • Allow the cookies to cool on the baking sheet, then transfer them to a wire rack to cool completely.
  • For the filling, mix the butter with the powdered sugar. Once the powdered sugar begins to blend with the butter, add the whipping cream and vanilla. Continue mixing until you have a smooth, firm cream.
  • Fill a piping bag with the buttercream and pipe a small dollop of filling onto 30 cookies. Place the remaining 30 unfilled cookies on top and press down until the filling is pushed out.
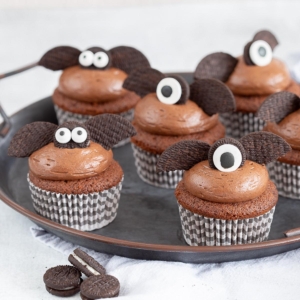
Halloween bat cupcakes-1

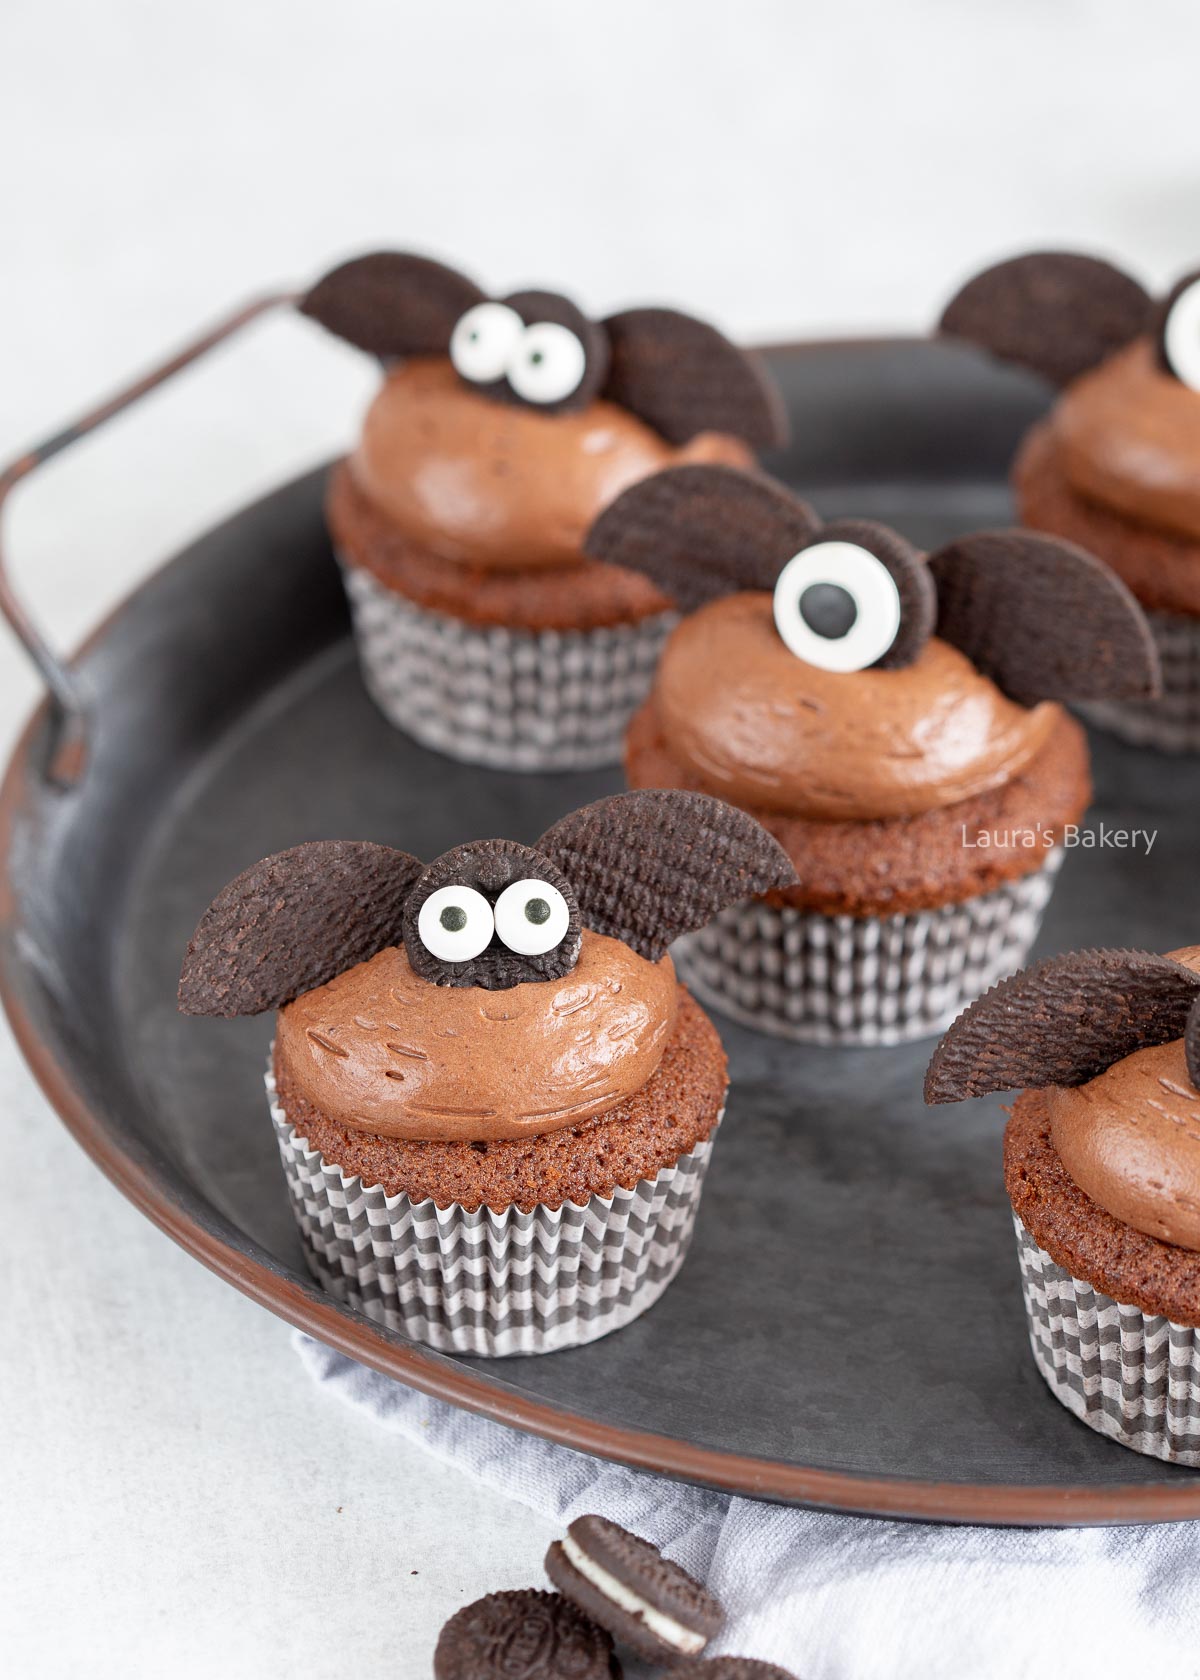
The spooky season isn’t really celebrated here in the Netherlands, although it does seem to have become more popular in recent years. But regardless of that, I love getting into the kitchen and whipping up some cute Halloween treats.

These chocolate bat cupcakes are made from delicious chocolate cupcakes. The only kind of bat that’s actually a good idea to snack on.  And honestly, my Halloween creations aren’t all that scary, I prefer to whip up cute, spooky treats with a playful twist.

Why You’ll Love This Halloween Recipe

Not so scary, but perfect for baking with kids. They’re fun and most importantly: delicious too! Will you be making these easy Halloween bat cupcakes?

Recipe Ingredients

  • all-purpose flour – you can replace flour and baking powder with self-rising flour. Check how to do that here.
  • butter – make sure to use unsalted butter
  • eggs – I use medium sized eggs
  • buttercream – I use ermine frosting here (which is a flour based buttercream)
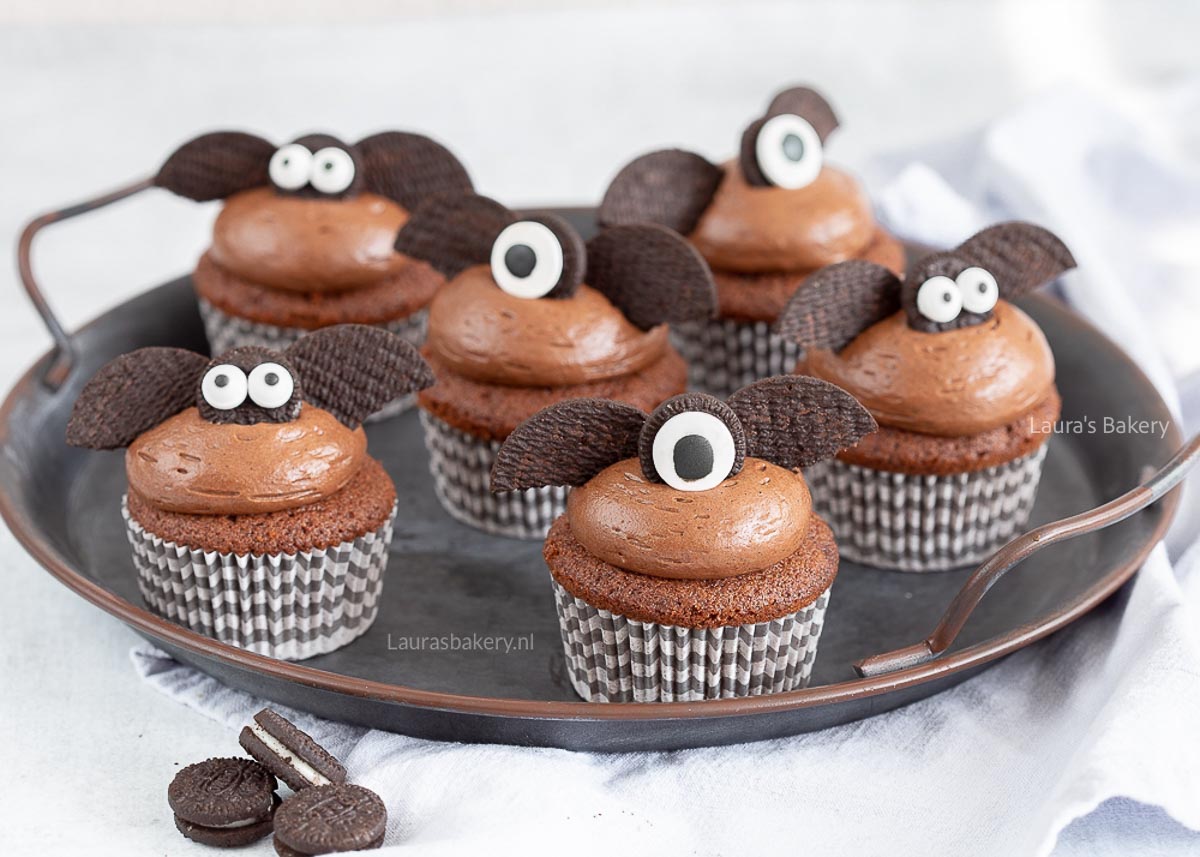
  • Oreo cookies – the bat wings are made with regular sized Oreo cookies and the eye is made with mini Oreo’s.
  • candy eyes – candy eyes are the things that make these easy cupcakes come to life!

Make sure to check all the ingredients and the quantities in the recipe card below.
Halloween bat cupcakes-2

How To Make Halloween Bat Cupcakes

The first step for making these sweet treats is to bake the chocolate cupcakes. That’s just a regular cupcake so nothing special is required here. The second step is making the ermine frosting and adding the hazelnut spread (Nutella or similar) to it. Make sure the cupcakes are cooled completely before you start decorating.

Now comes the fun part, and that is decorating the adorable bat cupcakes. Pipe a generous swirl of the buttercream on top of each cupcake. Split the Oreo cookies in half and remove the filling. Break them neatly into two halves. These halves are going to be your Oreo wings.

Stick the wings into the buttercream and place one mini Oreo in the middle. The eye can be attached by adding a bit of the Oreo filling, or a little bit of buttercream works too. You can give them one eye or two eyes. You can see in the photos how it looks!

And that’s it! Perfect for Halloween parties!

You can also make these with different flavored cupcakes like the vanilla cupcakes or even with strawberry cupcakes, but they will be even less spooky!

FAQ Halloween Bat Cupcakes

Can I make these cupcakes ahead of time?

Yes! You can bake the cupcakes a day or two in advance. Store them undecorated in an airtight container at room temperature. Add the buttercream and decorations right before serving for the best look and texture.

How should I store decorated cupcakes?

Once decorated, it’s best to eat them the same day. If needed, store them in a covered container at room temperature for up to 1 day. Longer than that and the Oreo “wings” may soften.

Can I freeze these cupcakes?

You can freeze the plain, undecorated cupcakes. Wrap them well in plastic wrap and place them in a freezer bag or airtight container. They’ll keep for up to 3 months. Let them thaw at room temperature before decorating.

Do I have to use hazelnut spread in the buttercream?

No – if you don’t like hazelnut spread, simply replace it with extra cocoa powder or melted chocolate to flavor the buttercream.

My Oreos keep breaking when I try to split them - any tips?

Twist gently to open them, or use a thin knife to help separate the cookies. Having a few extra Oreos on hand is always a good idea in case some break.


Halloween bat cupcakes

Print Recipe

No votes yet

Chocolate Halloween Bat Cupcakes

These chocolate bat cupcakes aren’t really scary, but they are delicious – and just a little bit cute.
Preparation15 minutes
Cooking20 minutes
Total35 minutes
Servings: 12 pieces

Ingredients

CHOCOLATE CUPCAKES

  • 180 grams unsalted butter
  • 135 grams granulated sugar
  • 1 tbsp vanilla extract
  • 4 medium eggs
  • 160 grams all-purpose flour
  • 20 grams cocoa powder
  • 2 tsp baking powder
  • pinch of salt

CHOCOLATE BUTTERCREAM

  • ½ batch ermine frosting according to recipe
  • 5 tbsp hazelnut spread
  • 1 ½ tbsp cocoa powder

EXTRAS

  • candy eyes large and small
  • at least 6 Oreo cookies preferably more
  • 6 mini Oreos

Instructions

  • Beat the butter and sugar until creamy. Add the vanilla extract and then the eggs, one at a time. Wait until each egg is fully incorporated before adding the next.
  • Finally, add the flour, cocoa powder, baking powder, and salt. Mix until the dry ingredients are just combined.
  • Line a muffin tin with cupcake liners and divide the batter evenly among them. I like to use an ice cream scoop – it makes portioning neat and easy.
  • Bake the cupcakes at 180 °C/350 °F (conventional oven) for about 18 minutes.
  • Let the cupcakes rest in the pan for a few minutes before transferring them to a wire rack to cool completely.
  • Prepare the buttercream according to the recipe. At the last step, mix in the hazelnut spread and cocoa powder. Taste and adjust with more cocoa powder if you want a stronger chocolate flavor.
  • Separate the Oreos from their filling – do this for both the mini and regular Oreos. Break the regular Oreos neatly in half.
  • Fill a piping bag fitted with a round tip and pipe a generous swirl of buttercream onto each cupcake. Insert two Oreo halves into the swirl to look like bat wings, placing them slightly behind the center.
  • Attach candy eyes to each mini Oreo (I used the leftover Oreo filling as glue, but buttercream works too), then press them onto the front of the swirl to make the bat faces.
Lemon ricotta cake-1

Baking a lemon ricotta cake had been on my list for a long time. It’s a moist, soft cake with a hint of lemon. It sounded delicious, but it turned out even better than expected. You really must try this easy lemon ricotta cake!

What Does A Lemon Ricotta Cake Taste Like?

It’s a specialty of Italian dessert cuisine. Ricotta cakes are soft and slightly airy, yet deliciously moist. Add a hint of lemon, and you have a delicious cake. That’s exactly what you want in a cake, right? It was high time I gave it a try.

Since it’s a classic Italian recipe, I drew inspiration from several Italian recipes and created my own Lemon Ricotta Cake. I reduced the amount of sugar and adjusted the recipe so the end result would be a fluffy, creamy cake. It’s almost a cross between a cheesecake and a regular cake.

Recipe Ingredients

  • Ricotta – an important thing to keep in mind is that some ricotta brands can be a bit watery. If that is the case, make sure to drain the ricotta to prevent the cake becoming too wet. Ideally let it drain for 24 hours in the fridge.
  • Fresh lemons – I use the juice and zest of 1 lemon. If you want to add more lemon flavor use only extra zest. Not extra juice.
  • Sugar – I like to use fine granulated sugar for this recipe.
  • Self-Rising flour – you can also use all-purpose flour in combination with baking powder. Make sure to double check the article on how to substitute flour for self-rising flour and vice versa.

Check for full quantities and ingredients in the recipe card below.

Lemon ricotta cake-5

How To Make Lemon Ricotta Cake

This easy ricotta cake is not complicated to make. You start by mixing the butter and part of the sugar until you have a creamy consistency. Add the ricotta and mix for about 5 minutes until light and creamy. You can use a hand mixer and a large mixing bowl or use the bowl of a stand mixer. Since you need to whisk for quite a few minutes, a stand mixer is easier than an electric hand mixer.

Now, separate the eggs and add the yolks one by one while you keep the machine on medium speed. Add vanilla, fresh lemon juice of half a lemon, zest of the whole lemon, baking soda, and salt. The last part is to mix in the self-rising flour until it is incorporated.

Beat the egg whites in a grease-free bowl with the remaining sugar until you have stiff peaks. Now, first add a bit of the batter to the egg whites and fold them in. Once that is absorbed, you add the remaining egg whites to the batter and try and keep it light and airy. You want a cake with that fluffy texture.

Now add the batter into a springform pan or cake pan lined with parchment paper. Bake in the preheated oven for about 50-55 minutes or until the cake is done.

If the cake is getting too brown, cover the top of the cake with aluminum foil. Make sure to let the cake cool in the form for the first 15 minutes before taking it out. Let it cool completely on a cooling rack before slicing.

You can serve it as is or with a little dusting of icing sugar. Of course, adding fresh berries is always a good idea. Alternatively, you can also make a lemon glaze for this lemon ricotta cake recipe.

Lemon ricotta cake-2

Lemon Ricotta Cake Toppings

This cake goes well with all kinds of toppings. This means you can make a different cake every time. Fancy some variety? Then try this:

  • decorate the cake with heavy cream and red berries
  • replace the lemon in the recipe with fresh orange zest
  • top the cake with mascarpone cream mixed with lemon juice and zest (Check what the difference is between various kind of creams). Serve with fresh fruit to complete the dish.

Lemon Recipes

I love using lemon in baked goods. That’s why you’ll find plenty of lemon recipes on Laura’s Bakery. I’ve listed some of your favorites below:

Lemon ricotta cake-4

FAQ Lemon Ricotta Cake

My ricotta cake batter is a little grainy.

Ricotta is naturally slightly grainy, so that’s probably why. It could also be that your ingredients were at different temperatures, causing your batter to curdle.

My lemon ricotta cake is dense and wet, not soft and moist. Why is that?

It may be because the ricotta was too wet, which made the batter wet as well. It could also be because the cake was not fully cooked yet and needed to bake longer. Follow my tips above, and your cake will turn out great.

Help! My ricotta cake has collapsed!

The cake wasn’t fully cooked yet. Next time, bake the cake for five more minutes. And make sure to test the cake before taking it out of the oven to prevent collapsing.

 

Lemon ricotta cake

Print Recipe

No votes yet

Lemon Ricotta Cake

A creamy, soft cake with a hint of lemon. Delicious!
Preparation20 minutes
Cooking55 minutes
Total1 hour 15 minutes
Servings: 12 people

Equipment

  • Baking tin 22 or 24 cm/8.5 to 9.5 inches

Ingredients

  • 150 grams unsalted butter
  • 225 grams fine granulated sugar
  • 300 grams ricotta
  • 3 eggs L
  • 1 tsp vanilla extract
  • 1 large lemon juice and zest
  • 1/2 tsp baking soda
  • Generous pinch of salt
  • 180 grams self-rising flour

Instructions

  • Mix the butter and 150 grams/5.29 oz of sugar until creamy. Then, mix in the ricotta for about 5 minutes until the mixture is light and creamy.
  • Separate the eggs, adding the yolks one by one to the ricotta batter. Add the vanilla extract, juice of half a lemon, zest of one whole lemon, baking soda, and salt. Mix well. Finally, briefly mix in the self-rising flour until it is incorporated.
  • In a second, grease-free bowl, beat the egg whites with the remaining 75 grams/2.6 oz of sugar until stiff. Once the sugar has been absorbed and stiff peaks have formed, fold a little batter into the egg whites. Once absorbed, fold in the remaining egg whites, trying to keep the batter light and airy.
  • Pour the batter into a baking pan lined with parchment paper. Bake in a preheated oven at 180°C/350˚F (conventional oven) for 50–55 minutes, or until the cake is done. Test it with a skewer in the center of the cake, before removing the cake from the oven. If the skewer comes out clean, the cake is done.
  • Is the cake turning brown? Cover it halfway through baking with aluminum foil.
  • Leave the cake in the baking pan to cool for 15 minutes, then transfer it to a wire rack to cool completely. Sprinkle with powdered sugar before serving!
Meatballs in chipotle apricots sauce-1

Today, I’m sharing a fantastic recipe from one of my cookbooks: Meatballs in apricot chipotle sauce. While I usually lean toward sweet bakes, I truly love a good savory snack too – and the cookbook this recipe comes from is filled with them.

This particular meatball recipe is one of my favorites. The book is currently only available in Dutch, but I love sharing bits and pieces here, so let’s dive in!

Why You’ll Love This Recipe

  • A Flavor Twist – If you’re a meatball fan, this unique variation will surprise and delight you.
  • Sweet & Spicy – The smoky heat of chipotle paired with the sweet tang of apricot jam? It’s simply irresistible.
  • Quick & Easy – No complicated steps – just simple pantry staples and a one-pan finish.

Recipe Ingredients

  • Minced Chicken – I used chicken for a lighter twist, but you can use any meatball recipe you love (like my classic Dutch meatballs)
  • Chipotle Sauce – I used a ready-made chipotle sauce for convenience, but feel free to use chipotle peppers in adobo – just mince them finely.
  • Apricot Jam – I used apricot jam for the perfect balance of sweet and tangy, but other apricot preserves will work just fine too.

How To Make Meatballs with Apricot-Chipotle Sauce

The real star here is the sauce – it’s bold, sweet, and smoky with just the right amount of heat.

  • Start with your meatballs. Use homemade or store-bought, whatever suits your time and taste.
  • Make the sauce. Combine chipotle sauce and apricot jam in a small bowl – yes, it’s that simple.
  • Simmer together. Add the sauce to the meatballs in a pan and let everything simmer gently. The sauce will thicken slightly as it cooks and coat the meatballs beautifully.

Serve warm and enjoy every sticky, flavorful bite.

Storing Meatballs with Apricot Chipotle Sauce

These meatballs store well and taste just as delicious the next day!

Fridge: Store in an airtight container for up to 3-4 days.

Reheating tip: Warm gently on the stovetop to bring the sauce back to a glossy, fresh-from-the-pan shine.

For a different twist on meatballs also check this recipe for Greek meatballs: keftedes.

FAQ Meatballs with Apricot- Chipotle Sauce

Can I make this recipe ahead of time?

Yes! These meatballs reheat great. You can make them a day or two in advance and store them in the fridge. Just reheat them gently in a pan or microwave, and the sauce will become glossy and delicious again. Or enjoy them as a cold appetizer.

Can I use frozen meatballs?

Definitely. While I prefer homemade for the best texture and flavor, frozen meatballs are a great time-saver. Just make sure they’re fully cooked before adding them to the sauce.

What can I use instead of apricot jam?

If you don’t have apricot jam on hand, peach or mango preserves work well too. You want something fruity and slightly tangy to balance the smoky chipotle.

Is this dish spicy?

It has a mild to medium kick, depending on the chipotle sauce you use. If you’re sensitive to heat, start with a small amount of chipotle and taste as you go. You can always add more!

I don’t like my food too spicy and I love this recipe, just the perfect amount of spice.
 

Meatballs in chipotle apricot sauce

Print Recipe

No votes yet

Meatballs in chipotle-apricot sauce

Chicken meatballs in a sweet and spicy sauce. Perfect with any drink!
Preparation10 minutes
Cooking20 minutes
Total30 minutes
Servings: 18 pieces

Ingredients

  • 300 grams ground chicken
  • 1 egg
  • 5-6 tbsp breadcrumbs
  • handful parsley finely chopped
  • Salt and pepper
  • 100 grams apricot jam
  • 50 grams chipotle sauce

Instructions

  • Mix the minced chicken, egg, breadcrumbs, parsley, salt, and pepper thoroughly. Roll the mixture into small balls.
  • Melt a knob of butter in a frying pan and fry the meatballs on all sides.
  • Add the apricot jam and chipotle sauce, then simmer on medium heat until the meatballs are cooked through.
Alfajores WM-2

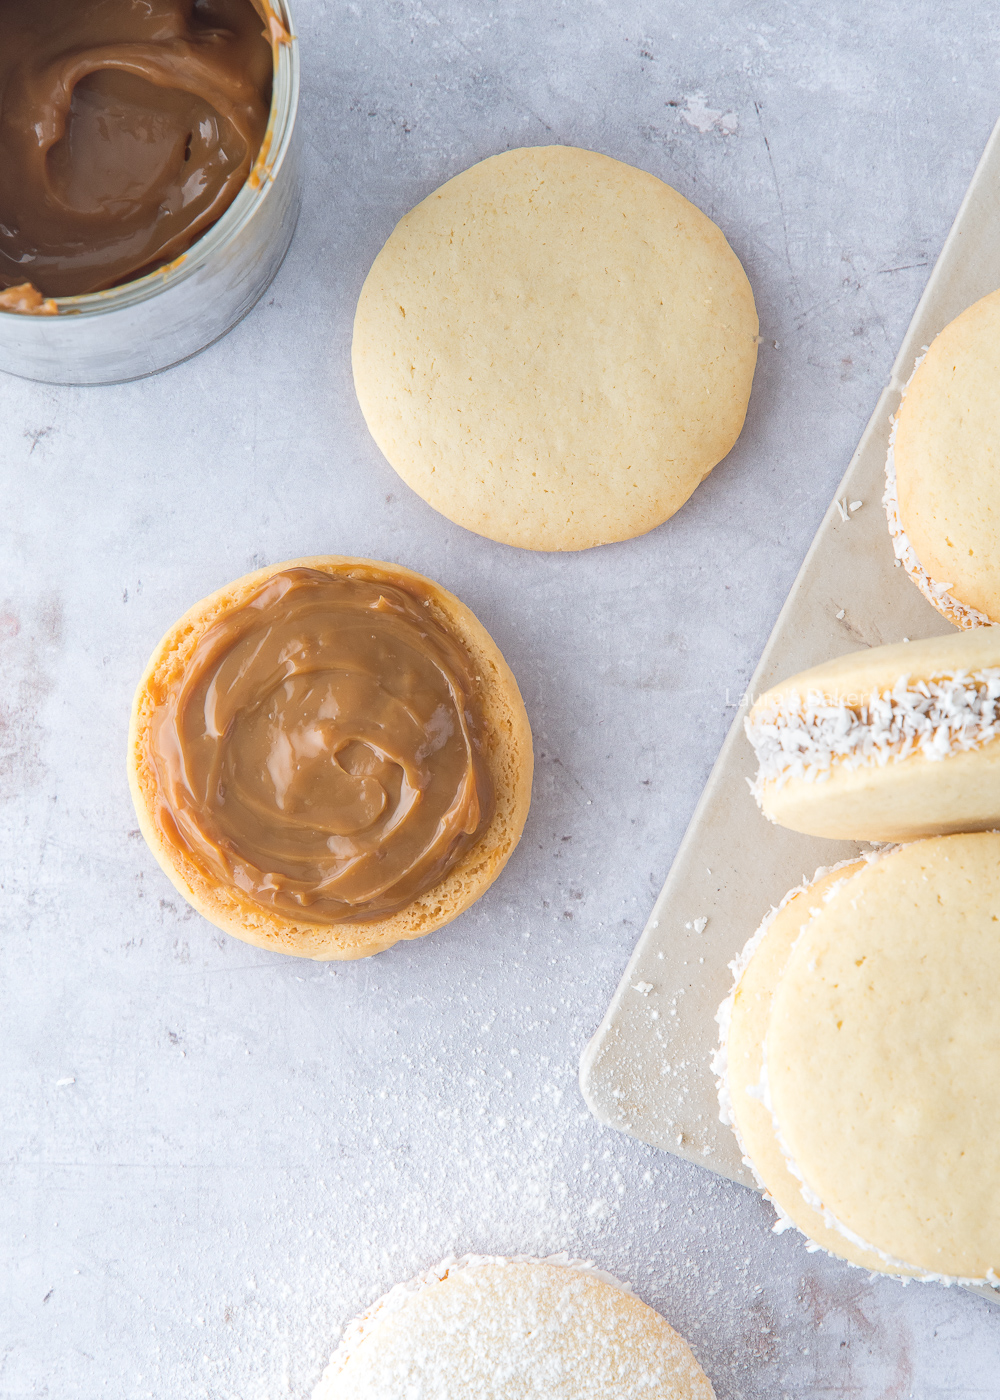
This biscuit always reminds me of my trip to Peru. It was there that I first tasted alfajores, which are delicious soft sandwich biscuits with a layer of dulce de leche in between.

What Are Alfajores?

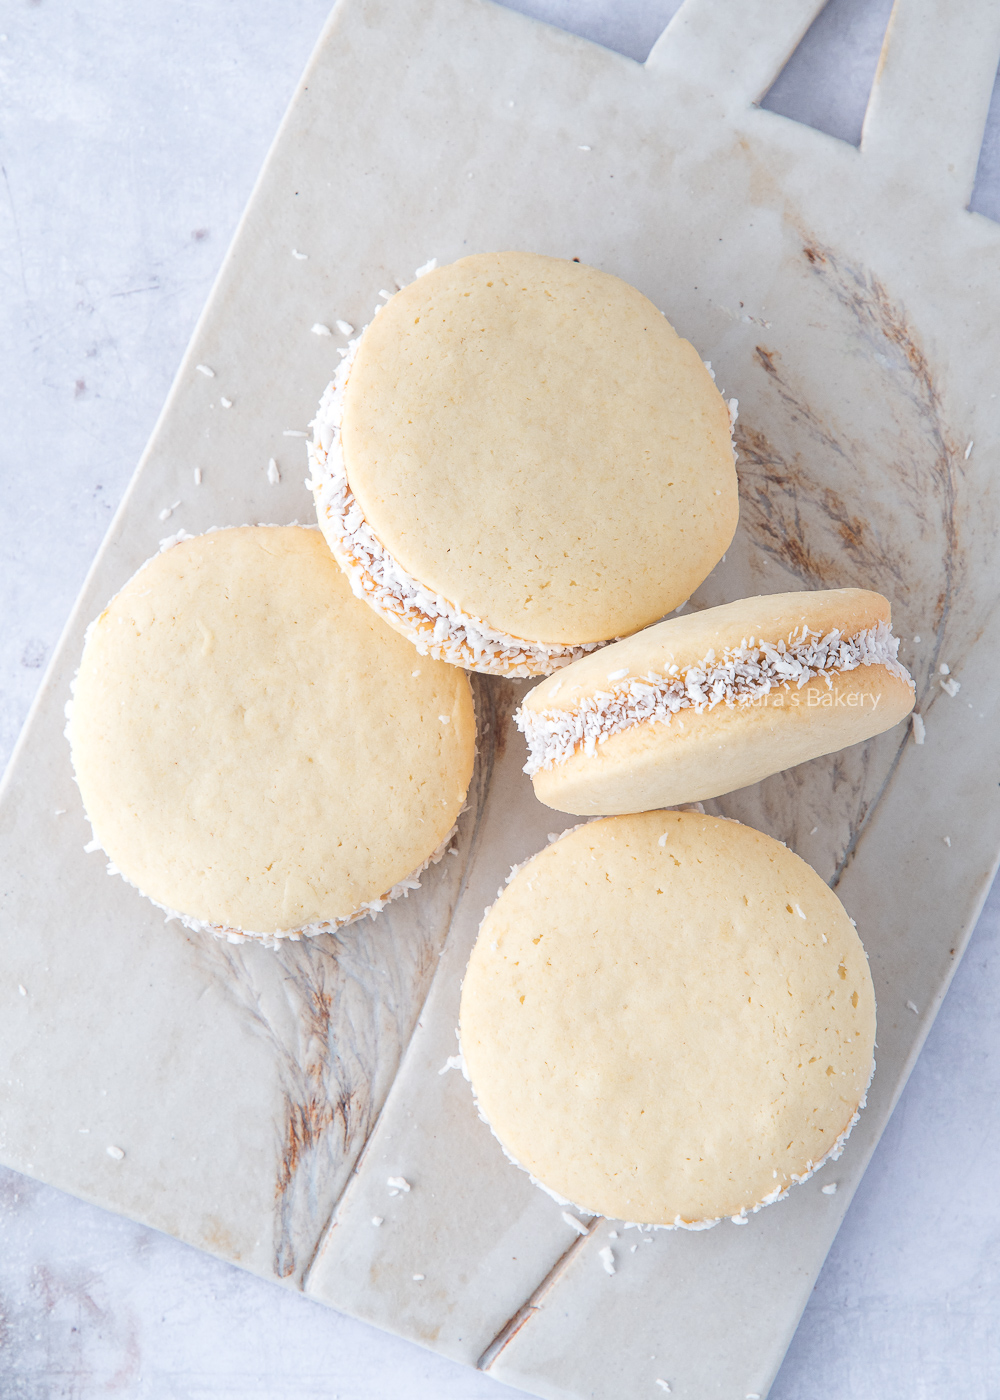
They are an Argentine specialty consisting of two round cornflour biscuits with a rich layer of dulce de leche in between.

The biscuits are often rolled in grated coconut and sprinkled with powdered sugar. They suddenly became popular in the Netherlands when Queen Máxima made them for her 49th birthday in 2020 and shared the recipe.

They are not only popular in Argentina, but also in the rest of Latin America and most South American countries. I tried them during my trip through Peru, after a pisco tasting. The baker was a kindred spirit (I don’t like coconut!) because she had left out the grated coconut. These kinds of details differ by country and region.

Recipe Ingredients

  • cornstarch – a typical ingredient for alfajores is cornstarch. They’re also sometimes referred to as cornstarch cookies. The combination of regular flour with the cornstarch gives them a lovely crumbly texture.
  • butter – I used unsalted butter
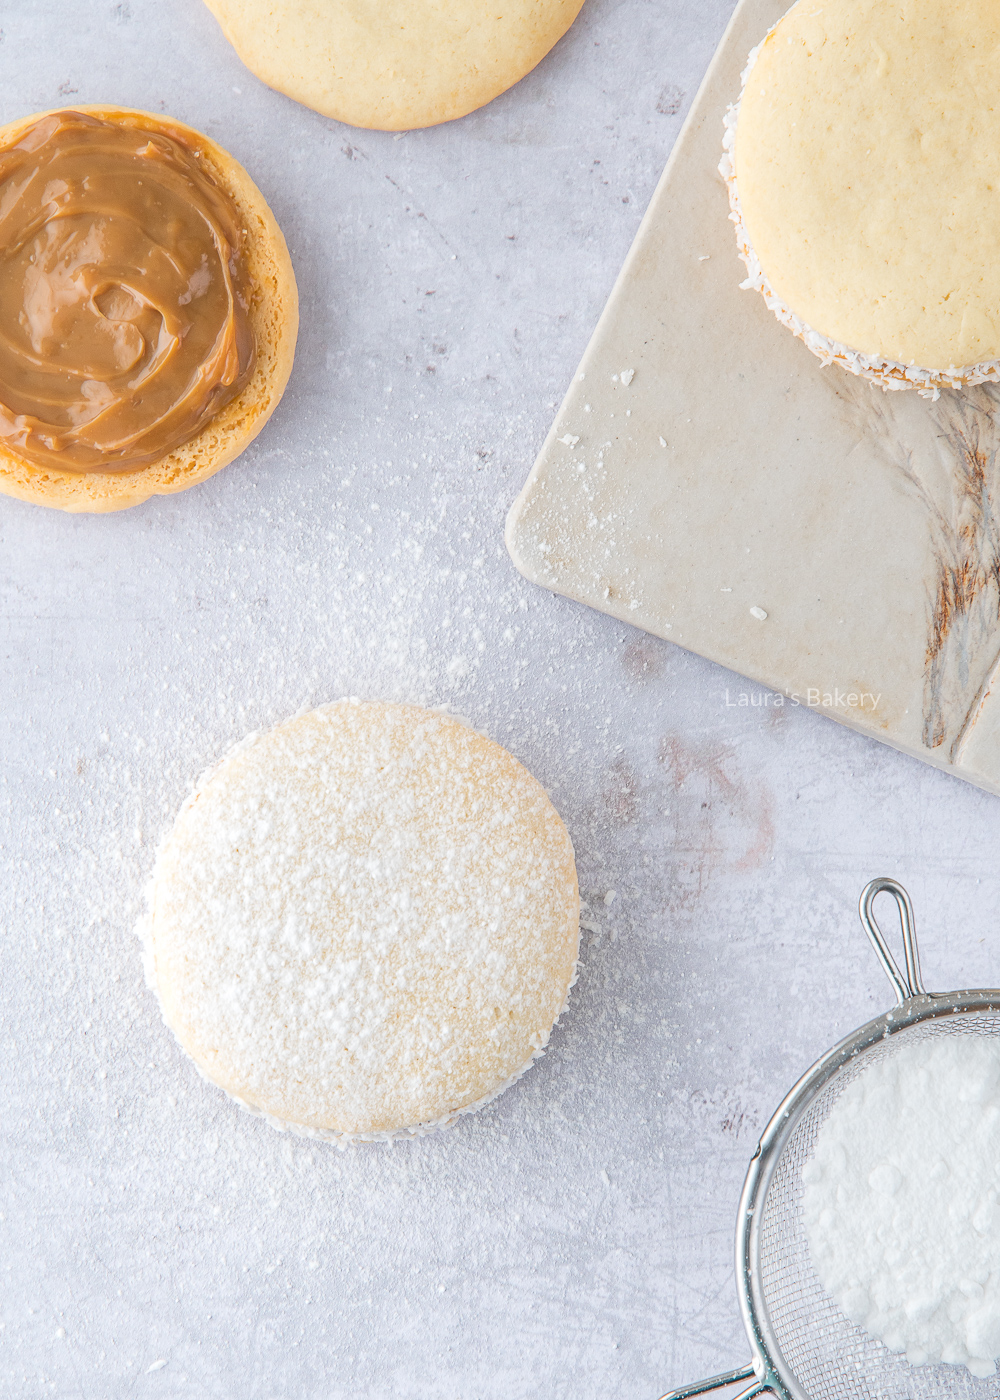
  • icing sugar – you need some in the dough as well as for decorating the cookies
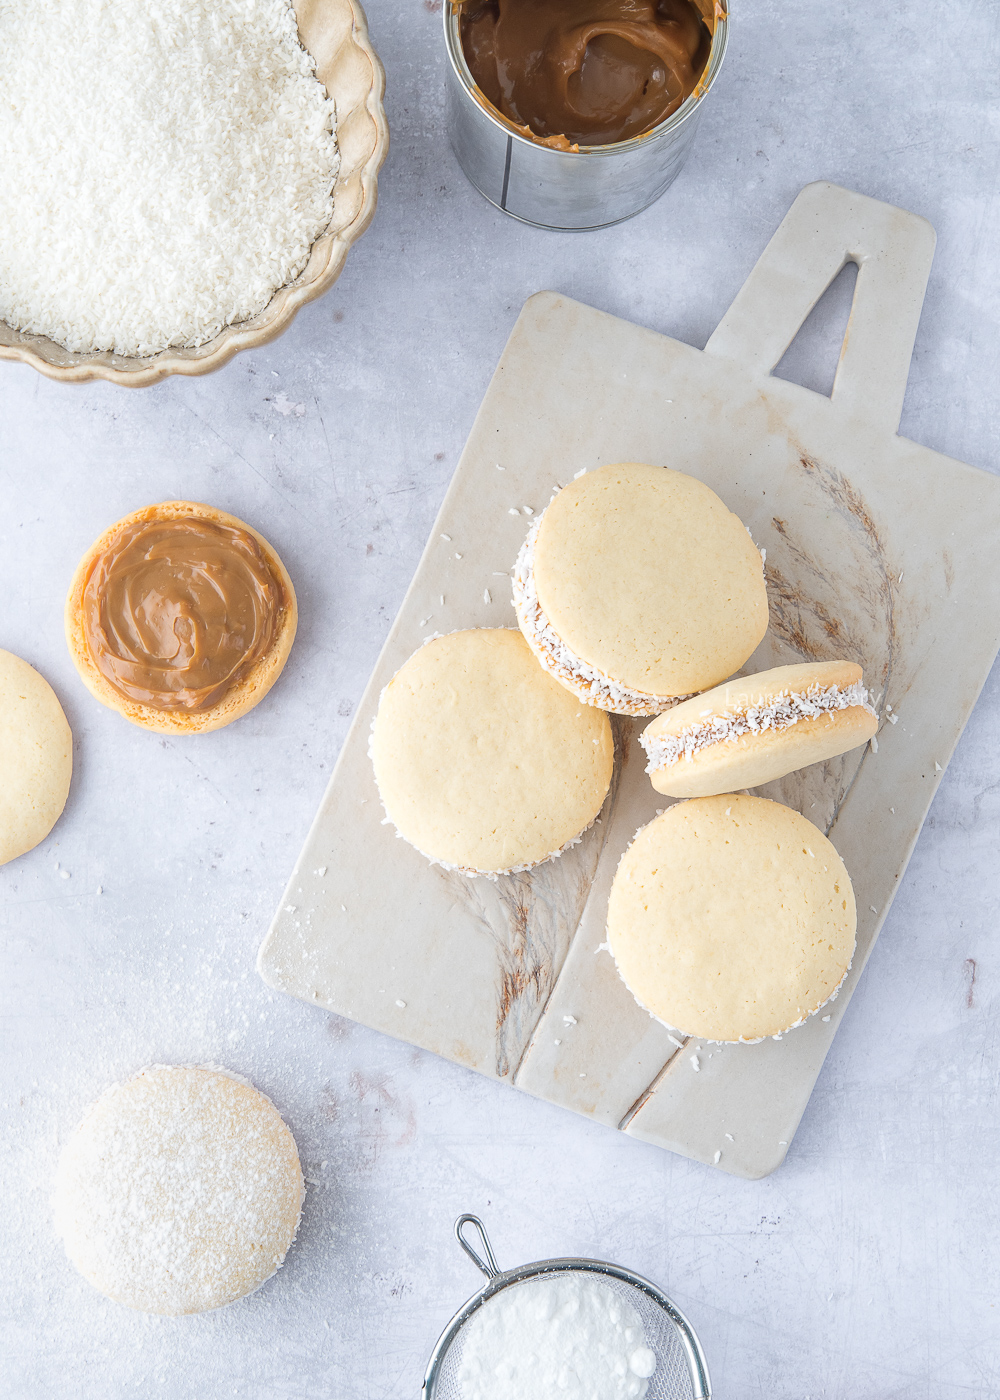
  • coconut – while I don’t particularly like grated coconut, it is traditional for these dulce de leche sandwich cookies to be rolled in coconut. If you like coconut, feel free to do so! And if you don’t: you can leave it out.
  • dulce de leche – This insanely delicious caramel sauce is easy to make yourself. I’ll be sharing a recipe for this soon as well! Of course you can use store-bought dulce de leche as well.

You can find the full ingredient list and quantities in the recipe card below.
Alfajores WM-1

How To Make Alfajores

Making this traditional cookie is not complicated at all. You start by creaming the butter and the sugar together. You can do this in the bowl of a stand mixer or use an electric mixer.

Add the egg and vanilla extract and mix. Now add the dry ingredients (flour, cornstarch and baking powder) all at once. Knead until it is firm. Wrap the dough in plastic wrap and let it refrigerate for at least an hour.

Once it is chilled, roll out and cut circles of around 5 cm (roughly 2 inches), and keep in mind that you will need 40 biscuits to make 20 alfajores.

Now bake on prepared baking sheets or a cookie sheet for about 10-12 minutes at 175˚C/340˚F until the edges start to brown slightly. You do not want these cookies to come out golden brown. Let them cool on a wire rack until completely cooled down to room temperature before filling with a dollop of dulce de leche.

They’re my favorite cookie to serve on special occasions. Or just because I feel like making them.

Storing Alfajores

In general, cookies can be stored for quite a long time, but this depends on the type of cookie. Because alfajores have a creamy dulce de leche center between them, these sandwich cookies do not keep as long as most. I recommend storing them in a cookie jar.

How long do alfajores keep?

You can store them in an airtight container for up to a week. After a few days, the biscuits may become slightly softer due to the caramel filling. which is delicious if you ask me.

Can you freeze alfajores?

Freezing them is a good idea because it allows you to keep them for longer. Storing them in an airtight container will keep them fresh in the freezer for up to three months.
Alfajores WM-3

More recipes with dulce de leche

I had discovered this South American caramel sauce, dulce de leche, long before my trip to Peru. It’s incredibly delicious, yet the taste is very different from regular caramel sauce.

The preparation method for homemade dulce de leche alone is unusual: you boil a can of sweetened condensed milk for several hours, and then it’s ready!

Dulce de leche is perfect for all kinds of sweet baked goods.

You could even use it to make my favorite Dutch stroopwafel cookies or drizzle the caramel over stroopwafel ice cream.

Also if you have a soft spot for sandwich cookies, be sure to check out the Italian peach cookies and the raspberry whoopie pies! All cookie recipes can be found here!
Alfajores WM-4

Tips: Alfajores Cookies

Can I replace the cornflour with regular flour?

Yes, but I don’t recommend it. The cornflour gives the biscuit its characteristic flavor and texture.

Why is my dulce de leche runny?

In this case, the dulce de leche should have been cooked for a longer time.

Can I leave out the grated coconut?

Yes, you can. It is purely for flavor, and it looks nice, too.

I'm missing the cognac/brandy in the recipe

As a Dutchie, you may have seen the recipe from Queen Máxima, who adds a teaspoon of cognac to the dough. There are many versions of these biscuits, and mine does not include cognac or brandy. However, you are free to try it.


Alfajores

Print Recipe

No votes yet

Alfajores Recipe

These deliciously crumbly, refined biscuits have a layer of dulce de leche in between. It’s Queen Máxima’s favorite for a reason!
Preparation20 minutes
Cooking30 minutes
Total50 minutes
Servings: 20 cookies

Equipment

  • Round cookie cutters (set)
  • piping bag

Ingredients

Cookie dough:

  • 150 grams unsalted butter
  • 80 grams icing sugar
  • 1 egg
  • 1 teaspoon vanilla extract
  • 150 grams all purpose flour
  • 150 grams cornstarch
  • 1 teaspoon baking powder

Filling and decoration:

  • 200 grams dulce de leche
  • Shredded coconut
  • Icing sugar

Instructions

  • Mix the butter and icing sugar together until creamy. Add the egg and vanilla extract, mixing until incorporated.
  • Add the flour, cornstarch, and baking powder all at once. Knead the dough until it is firm. Wrap the dough in plastic wrap and refrigerate for at least one hour.
  • Roll the dough out on a floured work surface to a thickness of 5 mm. Cut out 5 cm/2 inches circles. You will need 40 biscuits for 20 alfajores. Place the biscuits on a baking sheet lined with parchment paper.
  • Bake for 10-12 minutes at 175 °C/340˚F (conventional oven), or until the edges start to brown slightly. Allow the biscuits to cool completely before filling them.
  • You can either spread the dulce de leche on the biscuits or pipe it on using a piping bag. Spread or pipe the dulce de leche on half of the biscuits, then place the other half on top. Gently press them together, as they are fragile and break easily.
  • Make sure the filling reaches the edges. Place some grated coconut in a small bowl and roll the edges of the cookies in it. You can also sprinkle some powdered sugar over the cookies.
Laura Kieft   I

Royal icing makes your cookies so much more cheerful and appealing. The best part? You only need a few simple ingredients to make it!

Why I Love Making Royal Icing

Baking cookies is always fun right? But making them look extra pretty with this easy royal icing recipe is even more fun.

You can keep it simple or go for really intricate designs. The choice is yours. This recipe is easy to make and can even be used to build and decorate gingerbread houses.

Recipe Ingredients

  • confectioners’ sugar – also known as icing sugar or powdered sugar
  • water – you can also use something like lemon juice to give your icing a flavor other than sugar
  • egg white powder – you can replace the egg white powder with meringue powder but the ratio might be slightly different. Check below for more details on that.
Royal Icing-1

How To Make Royal Icing

Making royal icing is quite easy. You just add all the ingredients to the bowl of a food processor or mixer and on low speed mix it together.

With this recipe you will get a thick consistency that will hold up well for making outlines on your cookies.

If you want something a bit thinner to fill in the lines, you simply add more water to the mixture. Do this a little bit at a time to get the right consistency.

Difference Egg White Powder vs Meringue Powder

They’re very similar, but not quite the same:

  • Egg white powder is simply dehydrated egg whites. When rehydrated with water, it behaves like fresh egg whites. I always use egg white powder for my royal icing.
  • Meringue powder usually contains dried egg whites plus other ingredients such as sugar, cornstarch, stabilizers, and sometimes flavorings or acids. It’s designed specifically for making meringues and icings more stable and shelf-stable.

In most royal icing recipes, you can substitute meringue powder for egg white powder. Just keep in mind that the ratio may differ slightly depending on the brand.

For example, Wilton recommends about 4 teaspoons of meringue powder + 4 teaspoons of water to equal 1 egg white.

Because meringue powder has added sugar/starch, the texture may be a little different compared to pure egg white powder.

Laura Kieft   I

Which Piping Tips

If you’re going to decorate cookies with royal icing, you’ll need piping tips. In the photo above I used Wilton tips #1 and #3. Since I often get questions about which tips I use, here’s a quick overview of my favorites:

  • Wilton #2: for outlining and filling cookies
  • Wilton #1: for fine lines or writing (not suitable for thick icing)
  • Wilton #3: for filling in larger areas more quickly
  • Wilton #129: for drop flowers (only with thick icing)
  • PME ST51: for piping leaves
  • Wilton #102: for ruffled edges

Of course, there are many more tips you can try, but these are the ones I reach for most often when decorating cookies. If you’re looking for an easy recipe for cookies that are perfect for decorating, try my sugar cookies or these chocolate sugar cookies.

Royal Icing Without Egg White Powder

A common question I get: Can I make royal icing without egg white powder? Usually, this comes up because egg white powder isn’t always available in supermarkets or grocery stores. You can, however, easily buy it online or at specialty cooking shops.

Technically, you can replace it with fresh egg whites – but I don’t recommend using raw egg whites because of the risk of salmonella. These days, pasteurized egg whites are widely available in grocery stores, and that’s a great option.

For reference: the amount of egg white powder in the recipe below is equal to about 2 egg whites. If you’re using actual egg whites, you’ll need little to no extra water (since 10 g/0.35 oz egg white powder + 60 ml/4 tbsp liquid = about 2 egg whites).

FAQ Royal Icing

Can I make royal icing without egg white powder?

Yes! You can replace the egg white powder with pasteurized egg whites (about 2 egg whites for this recipe). Avoid raw egg whites because of the risk of salmonella.

Is meringue powder the same as egg white powder?

Not exactly. Egg white powder is pure dried egg whites, while meringue powder also contains sugar, cornstarch, and stabilizers. You can substitute meringue powder, but check the package for conversion ratios.

How do I know if my icing has the right consistency?

Do the “spoon test”: let a spoonful of icing fall back into the bowl. If the surface smooths out in about 10 seconds, it’s “10-second icing.” Around 20 seconds means “20-second icing,” which is great for both outlining and flooding. It takes some practice to learn what you prefer.

How can I color royal icing?

Use gel or paste food coloring – these give vibrant colors without thinning the icing (too much). Add a little at a time until you reach the shade you want. Keep in mind that some colors will get more intense after you let it rest for a while.

How long does royal icing last?

Royal icing keeps for up to 1 week in an airtight container at room temperature. Stir before using, as it may separate a little. If you use fresh egg whites, store the icing in the fridge.

Can I freeze royal icing?

Yes, you can freeze royal icing for up to 3 months. Store in an airtight container or piping bags. Thaw in the fridge overnight and stir well before using.

My icing is too runny - what can I do?

Add more powdered sugar, a little at a time, until you reach the right thickness.

My icing is too stiff - how do I fix it?

Mix in a few drops of water at a time until it loosens to the desired consistency.
 

Royal Icing recipe

Print Recipe

No votes yet

Royal Icing Recipe

This royal icing recipe is perfect for making all sorts of different icings. Add color, make it thinner or thicker easily.
Preparation5 minutes
Cooking5 minutes
Total10 minutes
Servings: 1 batch

Equipment

  • piping bag
  • Wilton tip #2

Ingredients

  • 400 grams powdered sugar
  • 60 ml water
  • 10 grams egg white powder

Instructions

Before you begin

  • With these quantities, you’ll get a thick royal icing, perfect for outlining cookies and making shapes that need to hold their form.

Making the icing

  • Place all the ingredients in a mixing bowl and beat until smooth.

Adjusting consistency

  • For a thinner icing to flood (fill) inside outlines, add a little extra water. To check: scoop up a spoonful of icing and let it fall back into the bowl. If the surface smooths out in about 10 seconds, you have “10-second icing.” If it smooths out in 20 seconds, you have “20-second icing.”
  • I prefer the 20-second version because it works for both outlining and flooding. Since the edges aren’t fully set yet, the outlines blend seamlessly with the filling, leaving no visible borders.
  • In the photo of the cookies, you can see what I mean by the piped outlines – those were done with Wilton tip #2.

Notes

  • Avoid raw egg whites because of salmonella risk.
  • If you’re using two different consistencies of icing: pipe the outlines first, let them dry for a few minutes, then fill in with the thinner icing. I like to put the thinner icing in a small squeeze bottle (like one for salad dressings). Snip the tip a little wider and the icing will flow out easily. You can also spoon icing directly into the outlined areas, but that tends to get messy more quickly.
  • Now your sugar cookies are ready to turn into little works of art!
Mini cheesecake recipe-4

I knew a classic mini cheesecake base recipe was a must, they are such a huge hit at parties! So, a little while ago, I got back in the kitchen to perfect it, and even made a few flavor variations, which I’ll be sharing with you soon.

Over the years, I’ve made all kinds of cheesecakes. I think my very first one was a regular cheesecake. I’ve baked many more in a springform pan since, but eventually I started experimenting with different formats. These easy mini cheesecakes are some of my favorite mini desserts.

Why You’ll Love This Recipe

  • Bite-Sized Bliss: These mini cheesecakes are the perfect portion and great for parties, birthdays, or as a sweet treat to share.
  • Endlessly Customizable: Once you have the base recipe, you can make all your favorite flavors in mini form!
  • Great for Gifting: They look adorable, are easy to transport, and always a crowd-pleaser.

Recipe Ingredients

Use individual silicone cupcake liners for best results.

  • crushed biscuits or graham cracker crumbs: you can use any kind of digestive biscuits you like. I love a buttery graham cracker crust.
  • unsalted butter: melted
  • cream cheese: use a firm natural flavored type.
  • fine granulated sugar 
  • eggs: you will need about 3 eggs for this recipe.
  • sour cream: I love adding a bit of sour cream to the creamy mini cheesecakes as it gives them a slightly fresher flavor.
  • all-purpose flour: the flour stabilizes the cream cheese mixture.
Mini cheesecake recipe-1

How to Make Mini Cheesecakes

  1. Prepare the crust: Crush the graham crackers finely and mix with melted butter. Divide the mixture among the silicone cupcake molds or muffins cups placed in a muffin tin. Use a cocktail muddler or the bottom of a small glass to press the crumbs down firmly.
  2. Make the filling: In a bowl, beat the cream cheese and sugar until smooth. I like to do this in a stand mixer. Add the eggs, sour cream, and flour. Mix until the batter is creamy and uniform.
  3. Fill the molds: Spoon the batter into the molds, filling them almost to the top. Leave just 1-2 mm of space from the edge. The batter doesn’t rise much in the oven.
  4. Bake: Bake in a preheated oven at 150°C (300°F) for about 20 minutes (conventional oven). Once done, let them cool in the oven with the door slightly open. Then refrigerate for at least 6 hours or overnight.
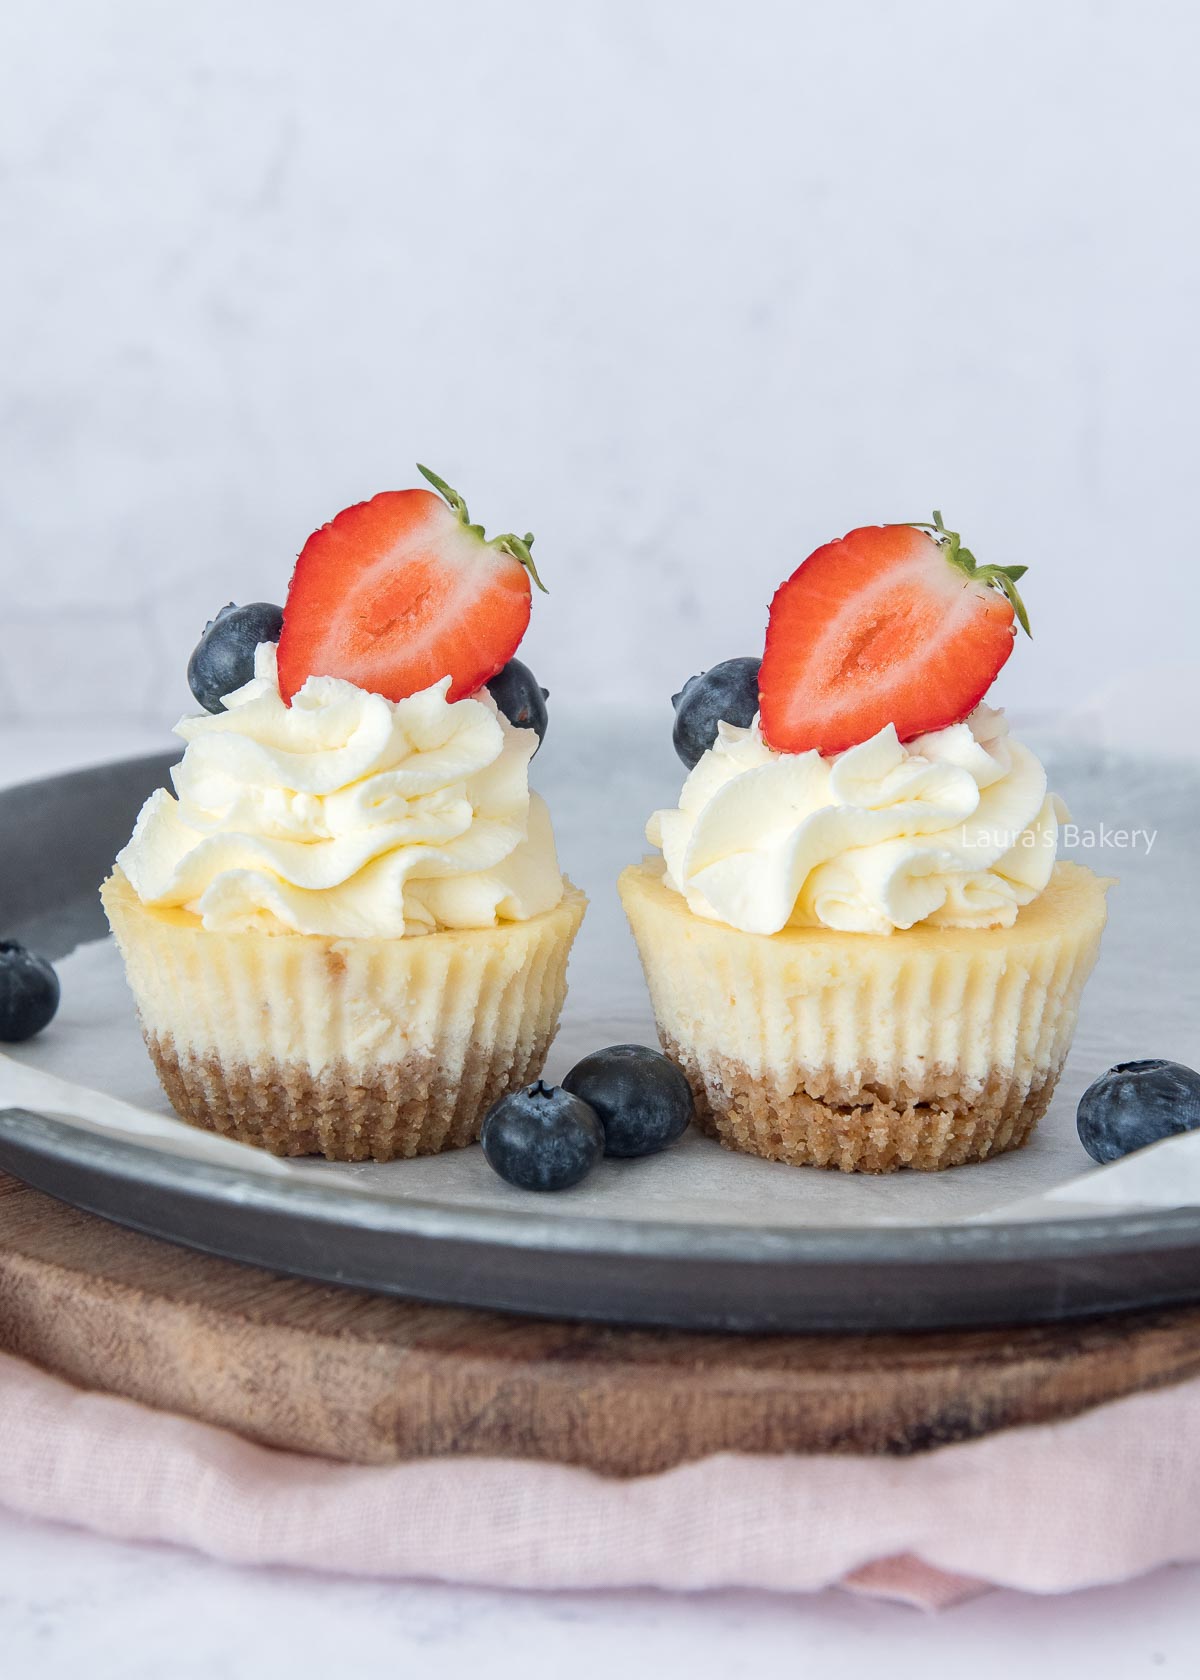
  5. Decorate: Once fully chilled, pipe a swirl of mascarpone whipped cream on top of each cheesecake and finish with fresh berries or fresh fruit of choice. Or use your favorite toppings.
Mini cheesecake recipe-2

Tips for the Best Mini Cheesecakes

  • Use individual silicone molds: They make it much easier to remove the cheesecakes cleanly and keep their perfect shape.
  • Bake ahead: Like all cheesecakes, these need time to chill and set properly. Make them a day in advance for the best texture and flavor.
  • No waste: If you only make 12 cheesecakes (one tray), you’ll have a little batter left. Pour it into a small baking dish and bake it alongside the others – nothing goes to waste!

Storage

Store the mini cheesecakes in an airtight container in the fridge for up to 2–3 days. They’re perfect for making ahead of time! In the freezer they will keep for up to 3 months.

More Cheesecake Recipes

Did I already mention I love to bake cheesecakes? Here are some of my favorites.

Also make sure to check out my article on how to make the best cheesecake.

Mini cheesecake recipe-3

FAQ Mini cheesecakes

Can I use a metal or paper cupcake liner instead of silicone molds?

You can, but silicone molds give the best results because they release the cheesecakes cleanly without tearing or sticking. If using paper liners, be sure to chill the cheesecakes thoroughly before unwrapping to help them hold their shape.

Do mini cheesecakes need a water bath?

Nope! Because they’re so small, mini cheesecakes don’t require a water bath like full-sized versions. Just bake at a lower temperature and let them cool slowly in the oven with the door ajar to prevent cracking.

How do I know when mini cheesecakes are done baking?

They’re ready when the centers are just set and still have a slight jiggle. The edges should be firm, but not browned. Overbaking can lead to a dry texture, so keep an eye on them around the 20-minute mark.

Can I freeze mini cheesecakes?

Yes! Once fully cooled and chilled, you can freeze them (without toppings) in an airtight container or freezer bag for up to 3 months. Thaw in the fridge overnight, then add your toppings before serving.

 

Mini cheesecake recipe

Print Recipe

No votes yet

Mini Cheesecake Recipe

With this basic recipe, you can make endless variations of cheesecake in a small format.
Preparation15 minutes
Cooking20 minutes
Total35 minutes
Servings: 16 pieces

Equipment

  • (silicone) cupcake molds

Ingredients

Cheesecakes:

  • 120 grams graham crackers
  • 80 grams unsalted butter
  • 450 grams cream cheese
  • 130 grams granulated sugar
  • 3 eggs
  • 90 grams sour cream
  • 15 grams all-purpose flour

Topping:

Mascarpone cream

Instructions

  • Crush the biscuits into fine crumbs and melt the butter.
  • Add the melted butter to the biscuit crumbs. Stir well, then divide the mixture between the cupcake cases. Place the silicone cases in a cupcake tray. Use a cocktail muddler to press the mixture firmly into the cases. A small jar or cup also works well for this.
  • In a bowl, mix the cream cheese and sugar until creamy.
  • Add the eggs, sour cream, and flour. Mix until you have a smooth cheesecake batter.
  • Divide the batter between the cases, filling them almost to the top. I filled mine to 1-2 mm below the rim.
  • Bake the mini cheesecakes for 20 minutes at 150°C/302˚F (conventional oven). Leave them to cool in the oven with the door slightly ajar. Then, place them in the refrigerator for at least six hours.
  • Once cooled, prepare the mascarpone cream according to the recipe. Top each mini cheesecake with a dollop of cream and garnish with red fruit.

Mascarpone cream

  • Add heavy cream, mascarpone and the sugar together in a bowl. Whip first at low speed until the mascarpone is smooth and then turn it higher and whip until you have stiff peaks. Pipe the mascarpone cream on top of the cheesecakes.
Pumpkin feta bruschetta-2

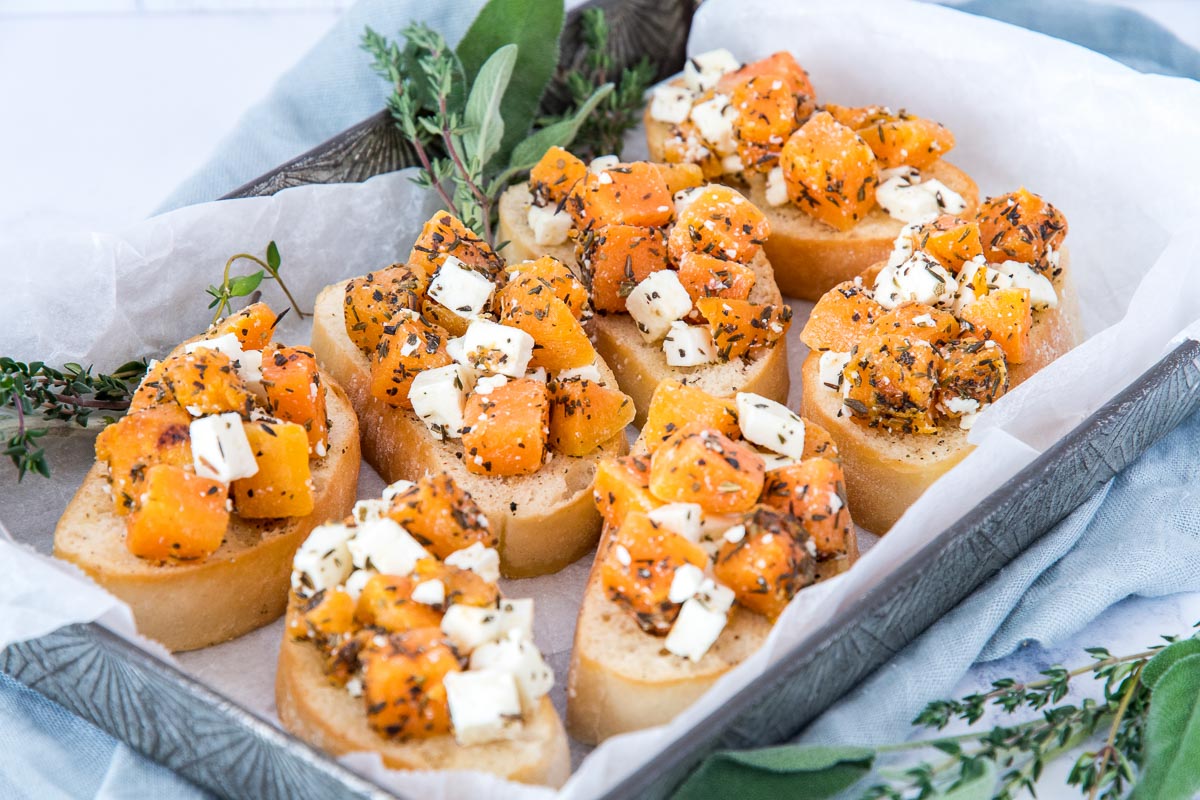
Bruschetta holds a special place in my heart, so much so that one of my books (all about appetizers) features nine different bruschetta recipes! While the base stays the same, the toppings are where creativity takes over. One of my latest favorites? Pumpkin and Feta Bruschetta.

Lately, I’ve been on a bit of a pumpkin kick, tossing it into everything from pumpkin muffins, pumpkin pie to a basic like making your own pumpkin puree. Right now, there’s even a pumpkin sitting on my countertop, just waiting to be turned into something delicious. But for this recipe, I used a bag of pre-cut pumpkin cubes  – a super convenient shortcut that still tastes great.

Although bruschetta is typically served as an appetizer, I love presenting it as a stylish starter. This pumpkin and feta version is both comforting and unexpected – ideal for impressing guests or simply treating yourself.

Why You’ll Love This Recipe

  • Perfect Pairing: Pumpkin and feta are an unexpectedly perfect match: creamy, tangy, and slightly sweet.
  • A Unique Twist: You won’t find many bruschetta recipes with this combo, making it a standout at any dinner party.
  • Quick & Convenient: With simple ingredients and minimal prep, this is an easy yet elegant dish.

Recipe Ingredients

  • Pumpkin: Butternut or any firm variety works well. You can stir-fry the cubes or roast them for extra flavor.
  • Feta: Opt for authentic feta for the best taste and texture.

  • Garlic: Used to infuse the olive oil mixture that’s brushed over the bread before toasting. You can also rub a cut garlic clove directly onto the toast for a stronger hit.

And of course: the bread for the bruschetta base! I used a ciabatta bread.
Pumpkin feta bruschetta-1

How To Make Pumpkin and Feta Bruschetta

  1. Prepare the Bread: Slice ciabatta and brush it with a mixture of olive oil, minced garlic (or garlic rubbed directly on the bread), sea salt, and black pepper. Place on a baking tray and toast in the oven at 180°C (350°F) for about 10 minutes, or until golden and crisp.
  2. Cook the Pumpkin: While the bread is toasting, cook the pumpkin cubes in a pan with a little olive oil, thyme, sage, salt, and pepper. Cook until soft, test a piece to be sure.
  3. Assemble the Topping: Once the pumpkin is tender, transfer it to a bowl and gently fold in crumbled feta.
  4. Serve: Spoon the pumpkin-feta mixture over the toasted ciabatta. Serve warm or at room temperature.

Storing Pumpkin Bruschetta

  • Topping: Store the pumpkin-feta mixture in an airtight container in the fridge for 2-3 days.
  • Bread base: Toasted ciabatta can be kept in an airtight container for up to a week.

Note: Once assembled, bruschetta is best eaten right away for the best texture and flavor.

FAQ Pumpkin Bruschetta

Can I use canned pumpkin instead of fresh or cubed pumpkin?

Canned pumpkin isn’t ideal for this recipe, as the texture is too soft for bruschetta. You want cubes that hold their shape and offer a bit of bite. Stick with fresh pumpkin or pre-cut cubes.

What kind of bread works best for bruschetta?

Ciabatta is my go-to because it toasts beautifully and has a nice open crumb, but baguette slices or sourdough also work well. Just make sure it’s sturdy enough to hold the topping without going soggy.

Can I make this recipe vegan?

Absolutely! Simply swap the feta for a good vegan feta alternative or use marinated tofu cubes for a similar salty, creamy vibe.

What herbs can I use if I don’t have thyme or sage?

Rosemary or oregano are great alternatives and pair nicely with pumpkin. Even a sprinkle of chili flakes can add a little warmth if you want a kick.
 

Pumpkin and feta bruschetta

Print Recipe

No votes yet

Pumpkin and Feta Bruschetta

The slightly sweet pumpkin pairs well with salty feta and fresh herbs on toasted bread. It’s an easy recipe for delicious bruschetta.
Preparation15 minutes
Cooking5 minutes
Total20 minutes
Servings: 16 pieces

Ingredients

Bruschetta

  • 1 ciabatta loaf
  • 1 clove garlic
  • Generous dash of olive oil
  • Salt and pepper

Topping

  • 300 grams pumpkin diced into small cubes
  • 150 grams feta cheese diced into small cubes
  • Thyme
  • Sage
  • Salt and pepper

Instructions

  • Crush one garlic clove and place it in a small bowl with a dash of olive oil, salt, and pepper. Stir and let sit for a few minutes. Cut the ciabatta into 2 centimeter (0.8 inch) thick slices and place them on a baking tray. Brush the slices with the olive oil mixture using a pastry brush.
  • Bake the ciabatta slices at 180°C/350˚F (conventional oven) for about 10 minutes, or until they are crispy.
  • Let them cool while you prepare the topping.
  • Stir-fry the pumpkin cubes for a few minutes until cooked through. Halfway through, add the thyme, sage, salt, and pepper. The herbs can be fresh or dried. Add them to taste.
  • When the pumpkin is cooked, remove the pan from the heat. Add the feta and stir.
  • Divide the mixture between the bruschetta and serve immediately. These snacks are also delicious when cooled.
Laura Kieft   I

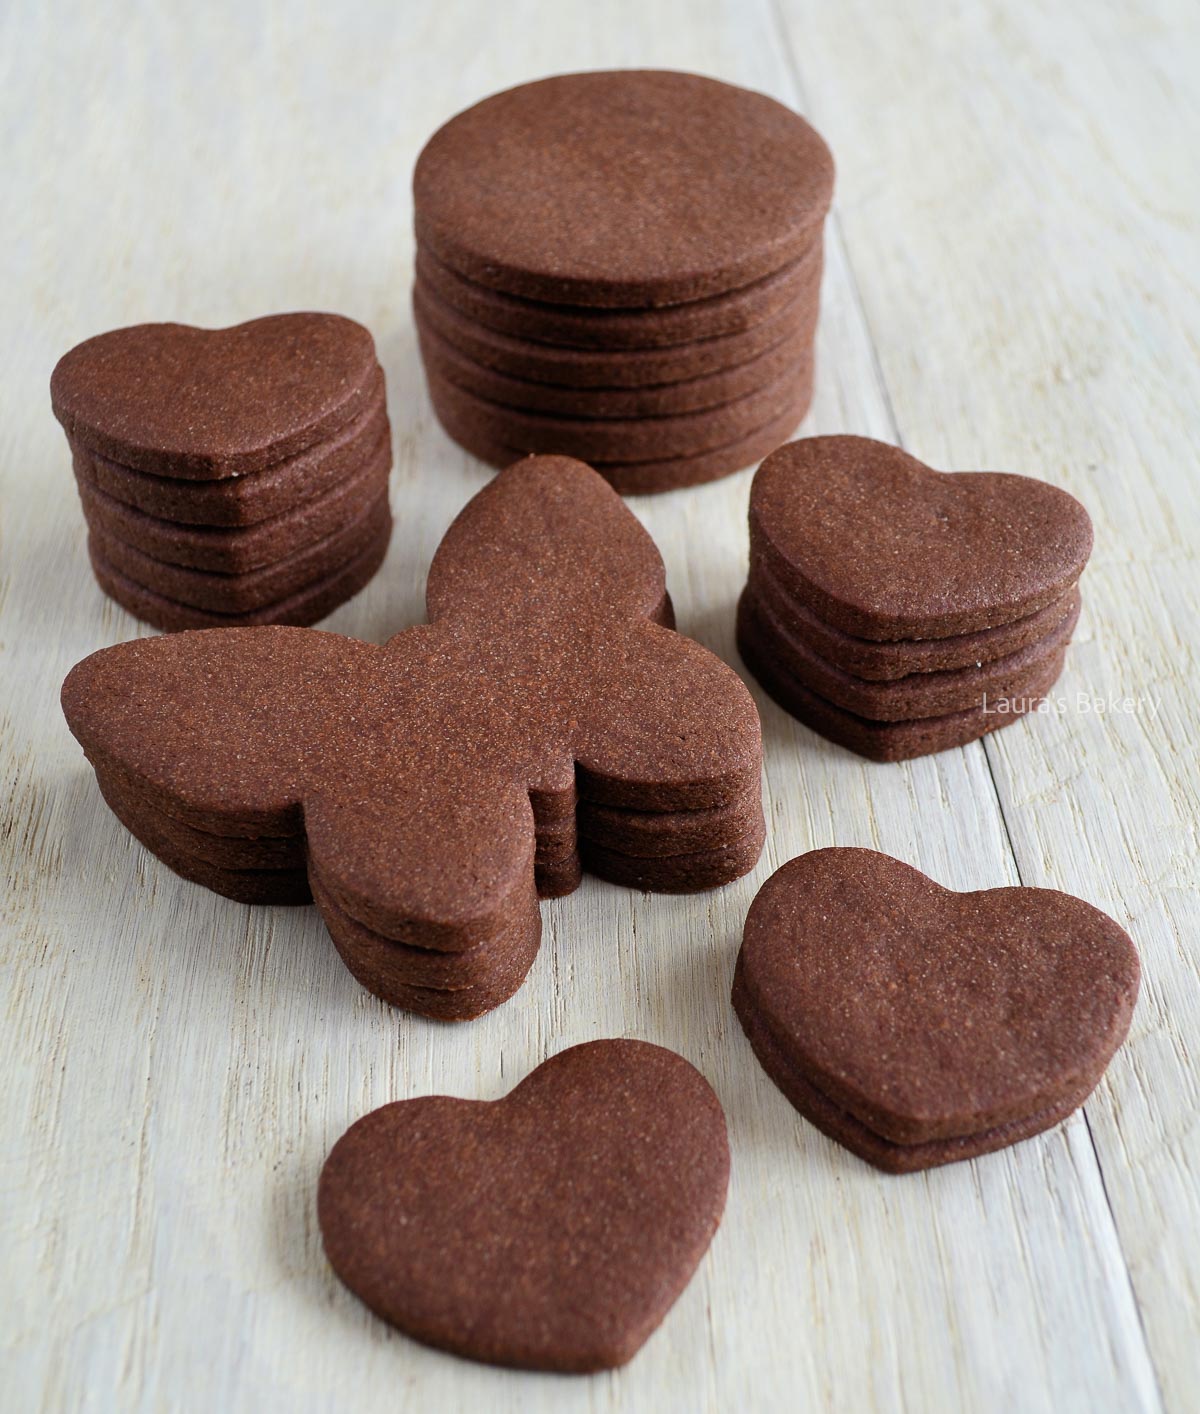
In the article below, you’ll find a simple recipe for chocolate sugar cookies. These chocolate cookies hold their shape beautifully while baking, which makes them perfect for decorating with royal icing – or just for using your favorite cookie cutters!

Why You’ll Love This Recipe

  • Easy – I use this recipe for just about any cut-out cookies I’m making. Sometimes in chocolate version such as these or in the plain version such as these cut out sugar cookies. Or if you love lemon flavor I also have this delicious recipe for lemon cut out sugar cookies.
  • Adjustable – you can use the recipe as it is or ad spices to make a gingerbread version or keep them plain. There is so much you can do.
  • Fun shapes – I love making cookies in all sorts of different shapes and like to vary this with the season. These chocolate cut out cookies can be any shape you want them to be!

Recipe Ingredients

  • White caster sugar – depending on how you want your cookies to taste you can use different kinds of sugar, but the best results are with plain caster sugar.
  • Vanilla sugar – this gives the cookies an extra delicious flavor
  • Unsalted butter – softened
  • Egg
  • All-purpose flour
  • Unsweetened natural cocoa powder – check what is the difference between using chocolate or cocoa powder

Make sure to check the recipe card below for full instructions on exact quantities. Other than that you will also need to use cookie cutters to make the shapes.
Chocolate cut out sugar cookies-4

Making Chocolate Sugar Cookies

These chocolate sugar cookies are a twist on the classic sugar cookie recipe I shared earlier. I always use that base recipe when decorating with royal icing, since the cookies need to keep their shape in the oven.

Because the recipe uses a relatively high amount of flour, I find the plain sugar cookies taste best with a layer of icing. But this chocolate version? It’s absolutely delicious even without icing! They hold their shape in the oven and smell amazing while baking, also important!

So whether you’re spending the afternoon baking cookies in all shapes and sizes with the kids, or you’re planning to decorate with royal icing (like in this gingerbread cookie version), this recipe is a must-try.

How To Make Chocolate Cut Out Sugar Cookies

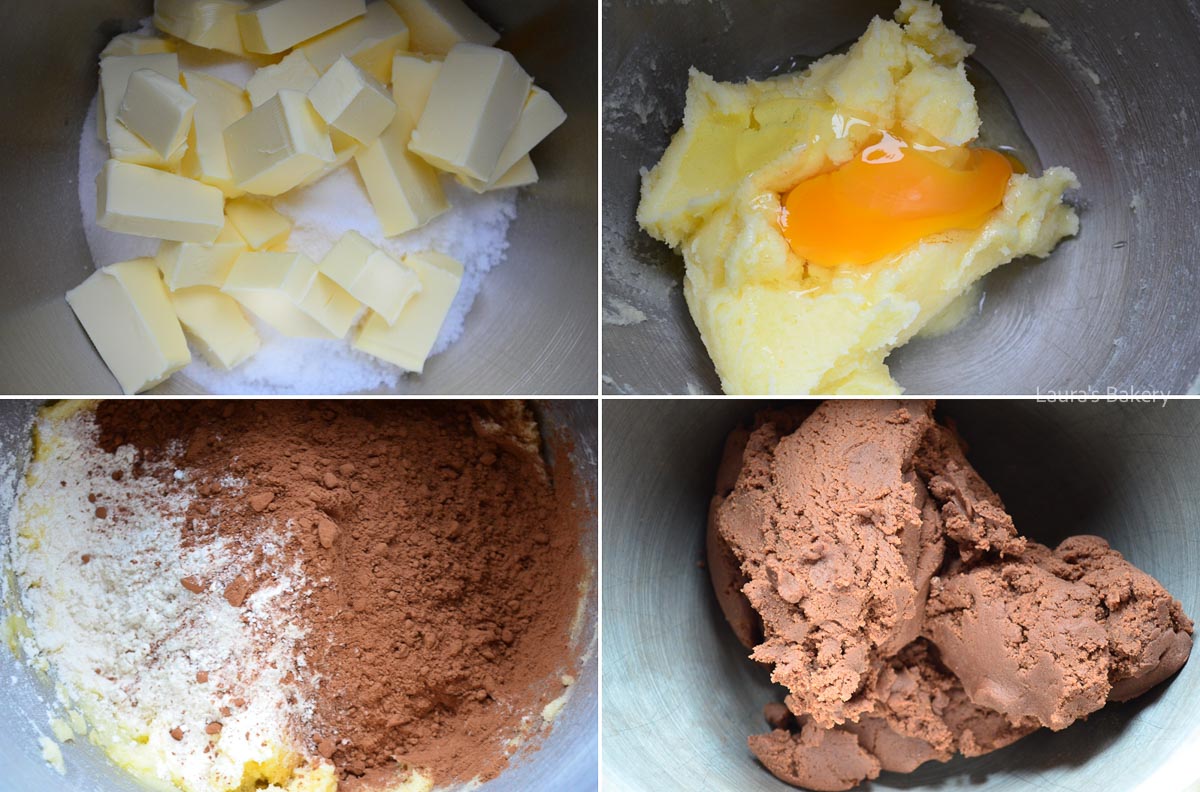
For making these delicious buttery cookies, I like to use a paddle attachment and a stand mixer. That said, you can also use a large bowl and a hand mixer. You start by creaming the butter with the sugar and the vanilla sugar. Mix until creamy and fluffy at which stage you add the egg.

The last step is to add the flour and the cocoa powder. Mix until combined and wrap the dough in plastic wrap and let it chill in the fridge for an hour at least.

Roll out the dough

Next step is roll out the dough to about 1/4 inch/5mm thickness. This is best done on a work surface dusted with a bit of flour or even cocoa powder in the case of chocolate cookies.

Use your favorite cookie cutter to make the shapes and place the cookies on sheets of parchment paper on a baking tray and bake in the oven until golden brown (which might be hard to see as the cookies are already brown in this case). They will need about 10-12 minutes, depending on the size of your cookie cutter.

Keep in mind that the baked cookies will still be soft when they come out of the oven. They will firm up as soon as they cool down.

Laura Kieft   I

Decorating Chocolate Sugar Cookies

Sugar cookie recipes are ideal when you want your cookies to keep their shape. Many types of cookie dough spread quite a bit in the oven, but not this one.

You’ll see that the cut-out shape remains perfectly intact after baking. That makes them perfect for decorating with icing or royal icing. I love to decorate these cookies with melted chocolate too!

I will soon be sharing my top tips for royal icing but for now make sure to check out these articles on the best cookies.

Chocolate Cookies: Baking FAQs

How do I know when the cookies are done?

Cookies usually come out of the oven still soft. So don’t rely on touch alone! It’s best to trust the recipe and get to know your own oven.

How long can I store cookie dough?

Wrapped airtight, you can store sugar cookie dough in the fridge for up to two days. In the freezer, it keeps even longer – up to three months (again, airtight).

Can I use any type of cookie cutter?

Yes! Just be sure to bake cookies of similar sizes on the same baking sheet. Smaller cookies bake a few minutes faster than larger ones.

I love using a set of round cutters in various sizes.

Can I mix chocolate into the dough?

Absolutely. I’ve done this before with my basic sugar cookie recipe – it’s listed under chocolate chip sugar cookies. For the recipe below, use 150 grams (about 1 cup) of mini chocolate chips or finely chopped chocolate. Knead it into the dough at the end of step 1, then continue with step 2 as normal.

Storing the cookies

These cookies will keep for about 2 weeks in an airtight container at room temperature. When frozen, they will keep for up to 3 months in that same airtight container.

More questions about chocolate cookies?

Wondering about your dough, how to roll or store it, or how to make your cookies crispier? I wrote a detailed blog post with all my top tips for perfect cookies – definitely worth a read if you love baking cookies as much as I do!
 

Chocolate cut out sugar cookies

Print Recipe

No votes yet

Chocolate Sugar Cookie Recipe

With this chocolate sugar cookie recipe, you can go in all directions! These cookies hold their shape during baking, making them ideal for decorating with royal icing.
Preparation10 minutes
Cooking12 minutes
Resting1 hour
Total1 hour 22 minutes
Servings: 30 cookies

Equipment

  • Cookie cutters

Ingredients

  • 150 grams white caster sugar
  • 50 grams vanilla sugar
  • 200 grams unsalted butter, softened
  • 1 egg
  • 350 grams all-purpose flour
  • 50 grams unsweetened cocoa powder

Instructions

  • Cream the caster sugar, vanilla sugar, and butter until light and fluffy. Add the egg and mix until fully incorporated.
  • Add the flour and cocoa powder and mix until a firm dough forms.
  • Wrap the dough in plastic wrap and chill in the fridge for at least 1 hour.
  • Roll out the dough on a lightly floured surface to about 0.5 cm (¼ inch) thickness. Don’t use too much flour, since this recipe already contains a lot, too much extra can affect the flavor.
  • Cut out cookies with your favorite cutters.
  • Place cookies on a baking sheet and bake for about 10-12 minutes at 180 °C (350 °F), using a conventional oven. Smaller cookies bake a bit faster, so it’s best to bake similar sizes together.
  • Cookies will still be soft when they come out of the oven. Let them cool slightly before transferring to a wire rack. Once fully cooled, decorate with royal icing or melted chocolate if you like.
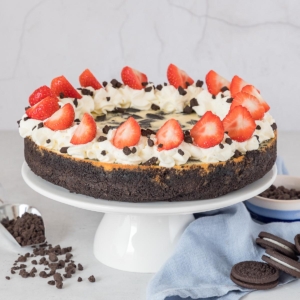
Oreo cheesecake-1

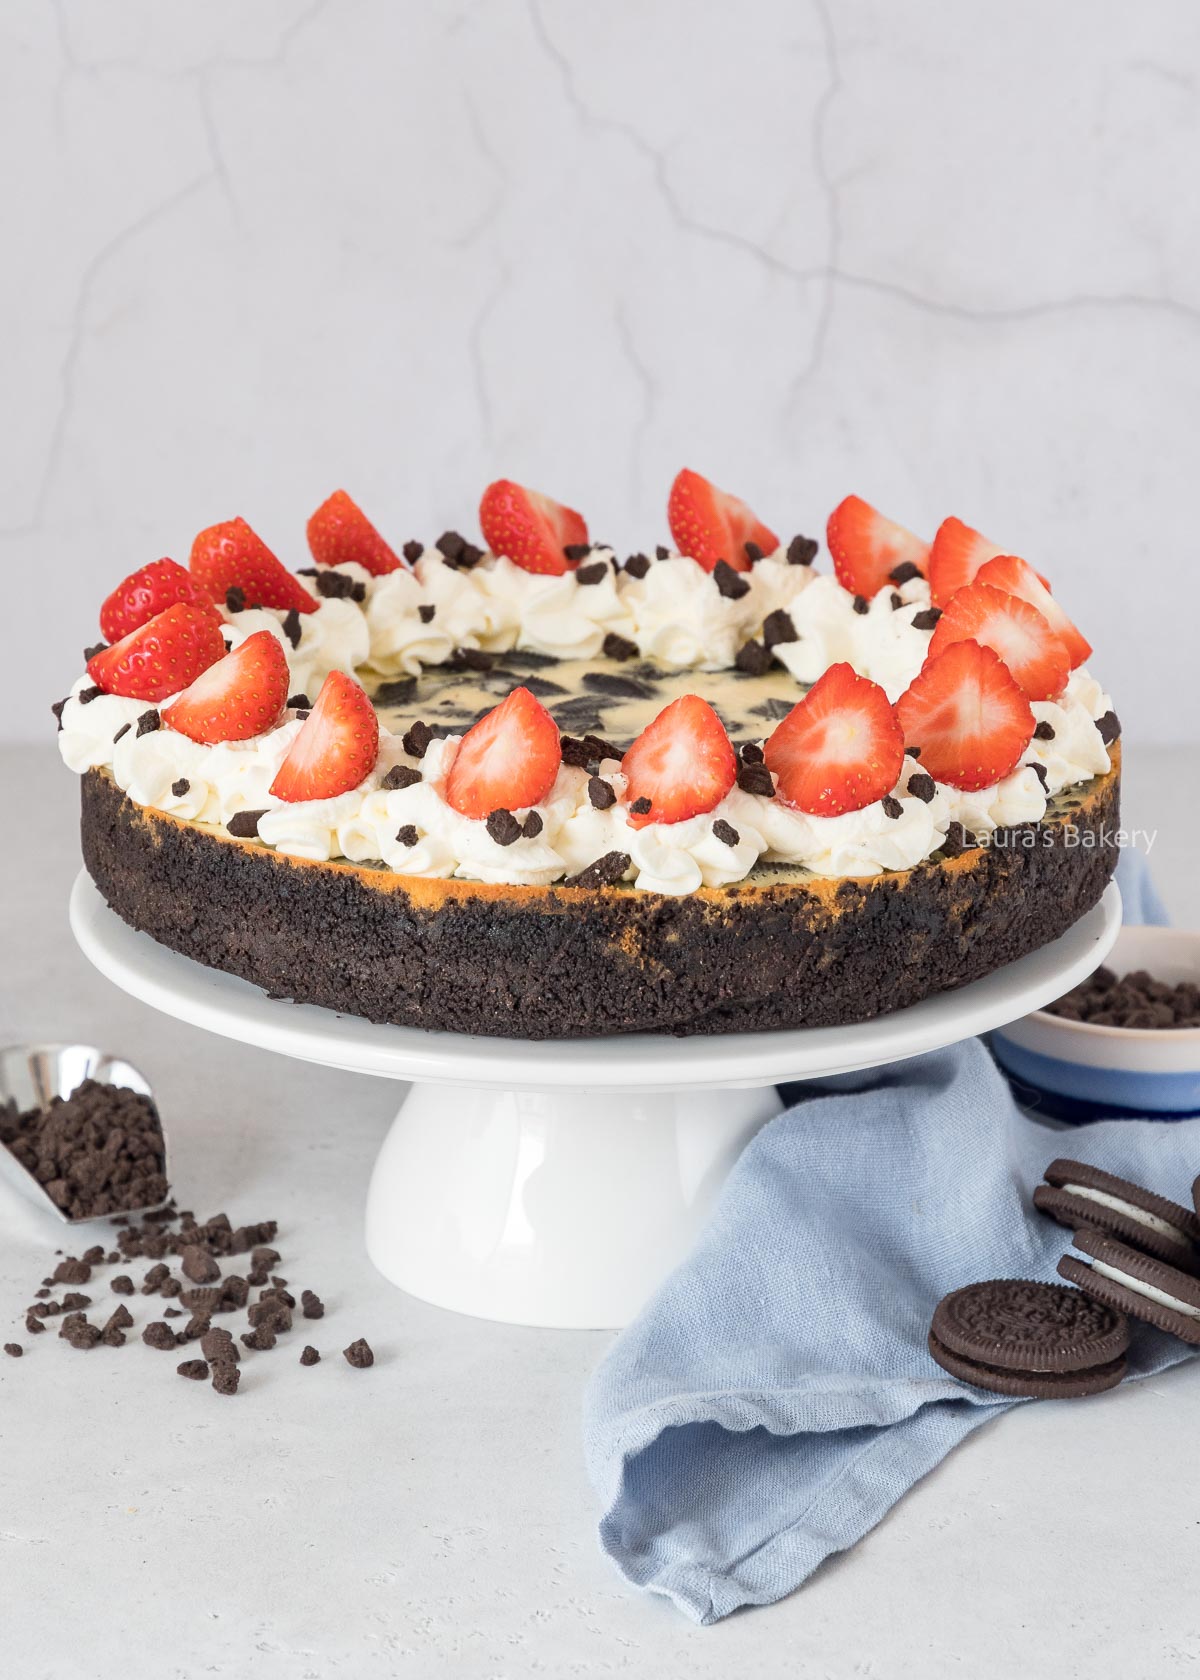
This Oreo cheesecake is always a crowd-pleaser – especially at kids’ parties and birthday celebrations! It’s creamy, rich, and loaded with Oreo flavor, making it a hit with both children and adults alike.

Best of all? The recipe is surprisingly easy to follow, so even if you’re not an experienced baker, you can still create this decadent dessert with confidence.

Topped with whipped cream and fresh strawberries, it looks festive and tastes even better. Want to mix things up? Feel free to swap in other red fruits like raspberries or red currants for a burst of fresh flavor.

Why You’ll Love This Oreo Cheesecake

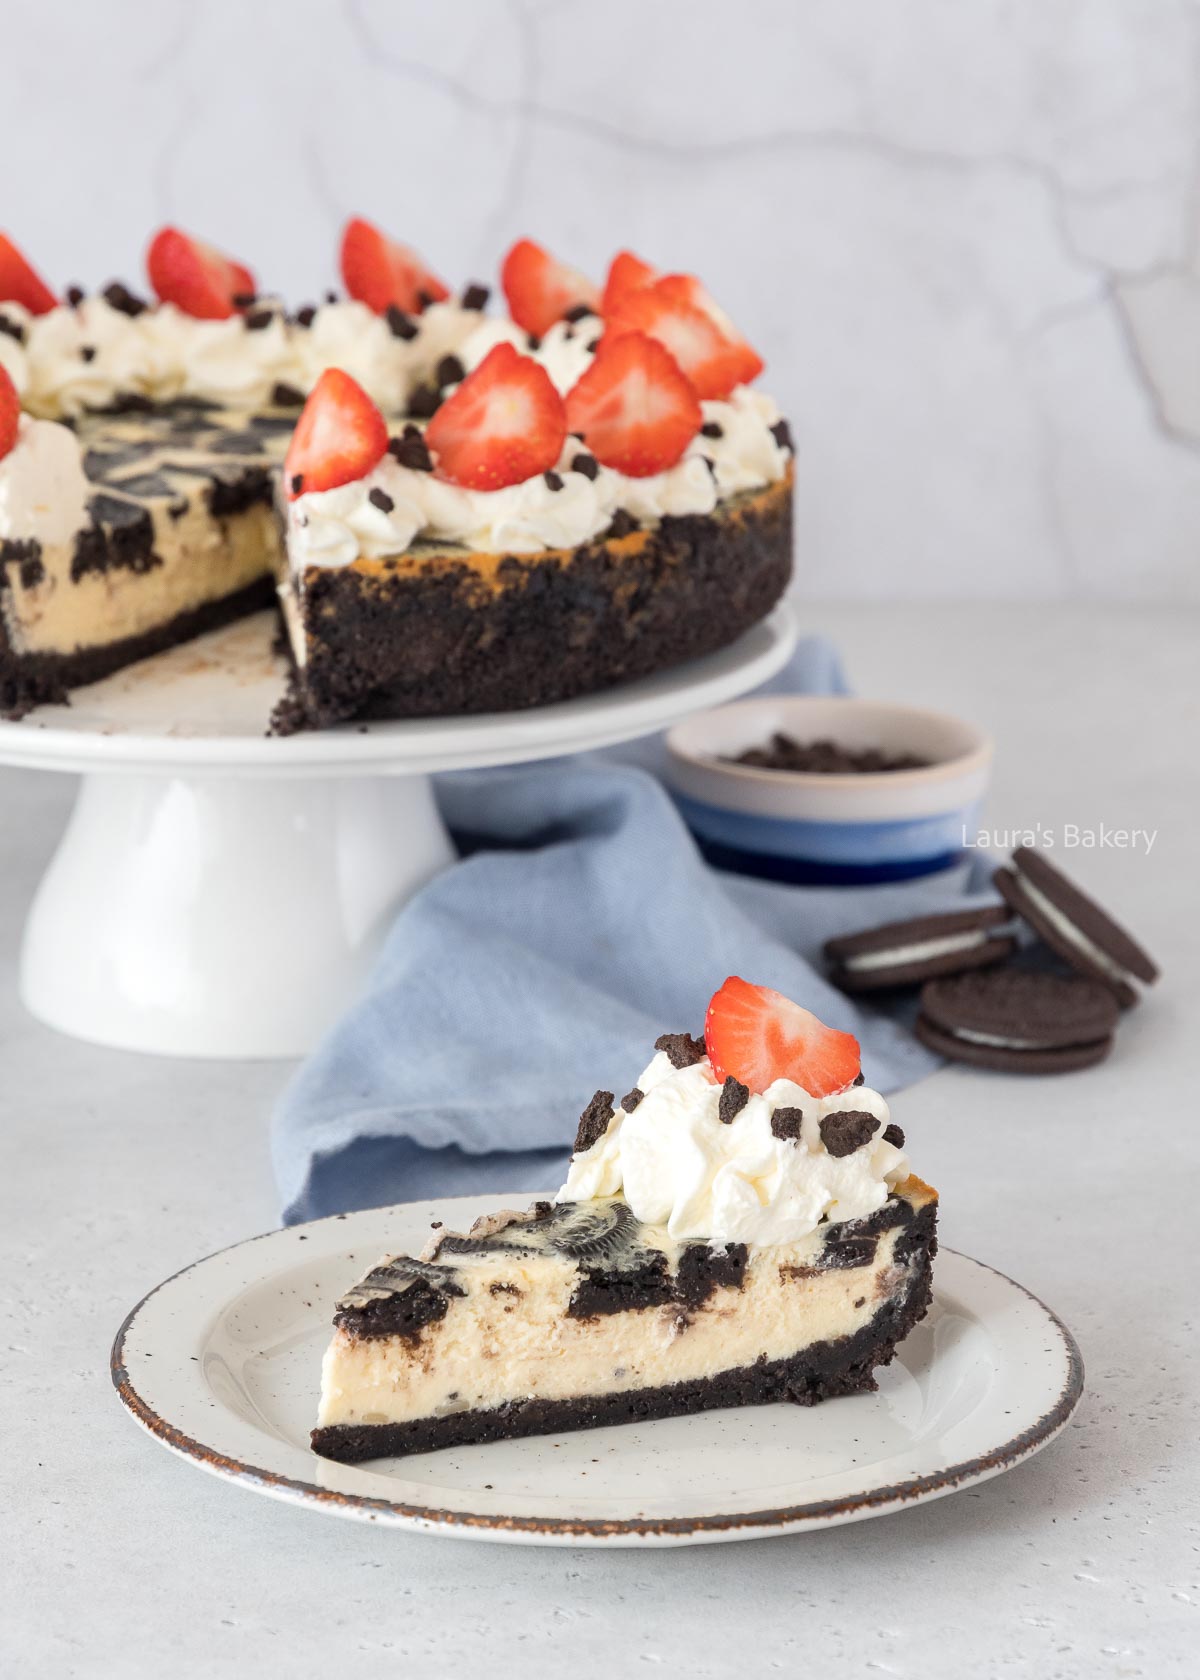
  • Perfect for Oreo Lovers. Packed with crushed Oreos in both the crust and filling.
  • Simple to Make. Don’t be intimidated by the ingredient list, this cheesecake is easier than it looks!
  • Festive & Customizable. Strawberries, whipped cream, ganache – decorate it however you like.

Recipe Ingredients

Here are a few key ingredients you’ll need. Be sure to check the full recipe card for exact quantities, and bring everything to room temperature before starting:
  • Oreo Cookies. Crushed, for both the crust and the filling. You can substitute with other cookies if needed, but Oreos deliver the best flavor. You can also make your own oreo cookies!
  • Cream Cheese. Use a smooth, firm, and neutral-flavored brand.
  • Heavy Cream. Adds richness and creaminess to the filling.
  • Sour Cream. A secret ingredient that brightens and balances the flavor.
  • Eggs. Help set the cheesecake and give it structure.
Oreo cheesecake-2

How to Make Oreo Cheesecake

Step 1: Prepare the Crust

Crush the Oreos and combine them with melted butter. Press the mixture into the bottom and up the sides of your springform pan to form a firm base.

Step 2: Make the Filling

In a large bowl, mix the cream cheese and sugar until smooth using a stand mixer or hand mixer. Then add the sour cream, heavy cream, and eggs one at a time. Once well combined, fold in the flour and additional crushed Oreos.

Step 3: Bake the Cheesecake

Pour the batter into your crust-lined pan. Bake at 150°C/300℉ for about 60 minutes. The cheesecake should be slightly wobbly in the center but set around the edges. Turn off the oven and let it cool inside with the door ajar. Then chill it in the refrigerator overnight, covered.

Step 4: Decorate

Once the cheesecake has chilled and set, decorate the top with whipped cream and fresh strawberries. For an extra indulgent touch, you can add chocolate ganache, white chocolate drizzle, or whole Oreos.

Storage Tips

Refrigerator

The cheesecake will keep for 3 to 4 days in the fridge. Let it cool completely before covering and refrigerating.

Freezer

You can freeze the cheesecake, just be sure to add toppings after thawing. Slice it before freezing, wrap each piece in plastic wrap, and then place in an airtight freezer bag. Cheesecake (slices) can be frozen for up to 3 months. To serve, thaw in the fridge overnight.

Recipes with Oreo cookies

Oreos aren’t just for snacking – they’re one of my favorite ingredients for baking, too! From quick no-bake treats to showstopping desserts, they’re endlessly versatile. Here are a few more of my go-to Oreo creations:

FAQ Oreo Cheesecake

Can I replace the whipped cream and strawberry topping?

Simply leave out this topping. The strawberries can easily be replaced with any type of red fruit. Instead of whipped cream, you could try Italian meringue.

Can I use low-fat cream cheese?

You can, but the cheesecake may not be as rich or creamy. For best results, stick with full-fat cream cheese.

Do I need to use a water bath when baking?

No, this recipe works without a water bath. While some bakers swear by it for avoiding cracks, this cheesecake still turns out beautifully with a slightly jiggly center and firm edges. Just be sure to let it cool gradually.

My cheesecake cracked, what went wrong?

Cracks can happen if the batter is overmixed, the oven temperature fluctuates, or the cheesecake cools too quickly. Don’t worry – toppings like whipped cream or ganache will easily cover up any imperfections! Make sure to check my post on making the perfect cheesecake.

Can I make this gluten-free?

Yes. Simply use gluten-free chocolate (sandwich) cookies instead of Oreos and ensure all other ingredients (like the flour) are gluten-free.
 

Oreo cheesecake

Print Recipe

No votes yet

Oreo Cheesecake Recipe

This recipe will make everyone happy! It’s the ultimate cake for children’s birthdays and parties.
Preparation30 minutes
Cooking1 hour
Chilling8 hours
Total9 hours 30 minutes
Servings: 12 people

Equipment

  • 24 cm springform pan
  • Food processor

Ingredients

Base:

  • 340 grams Oreos
  • 30 grams unsalted butter

Filling:

  • 600 grams cream cheese
  • 180 grams fine granulated sugar
  • 4 eggs
  • 125 grams sour cream
  • 2 tsp vanilla extract
  • 15 grams flour
  • 100 grams chopped Oreos

Decoration:

  • 250 ml heavy cream or heavy whipping cream
  • 2 tbsp fine granulated sugar
  • 8 strawberries approximately
  • Oreo crumbs

Instructions

Base:

  • Line the bottom of the springform pan with baking paper. Grease the edges (optional: line with parchment paper too), then set the pan aside.
  • In a food processor, grind 340 grams of Oreos until you have fine crumbs
  • Melt the butter in a saucepan, then add the melted butter to the cookie crumbs. Stir well, then pour the mixture into the springform pan.
  • Spread the mixture over the cookie base and press the crumbs against the edges. Create a raised edge about 1.2 inches/3 cm high. Use the rounded side of a spoon to press the crumbs firmly into place. Set the base aside while you work on the filling.

Filling:

  • In a mixing bowl, mix the cream cheese and sugar together. Add the eggs, sour cream, and vanilla extract, mixing until the ingredients are fully incorporated.
  • Fold the flour into the mixture until it is no longer visible. Then, fold in the 100 grams of Oreo pieces.
  • Pour the mixture into the springform pan over the base. The Oreo pieces will float to the top, so spread them evenly over the cheesecake.
  • Bake the cheesecake for 60 minutes at 150 °C/300℉. The cheesecake is done when it jiggles slightly when shaken gently from side to side.
  • Leave the cheesecake to cool in the oven with the door slightly ajar. Cover the cheesecake and refrigerate it overnight.

Decoration:

  • Whip the cream with sugar until stiff, then fill a piping bag with the cream. Pipe swirls around the cake.
  • Decorate the swirls with half a strawberry and Oreo crumbs.
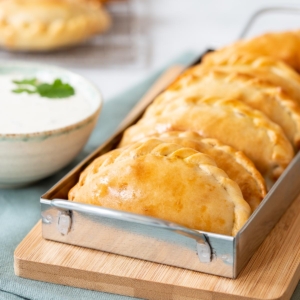
shredded chicken empanadas-2

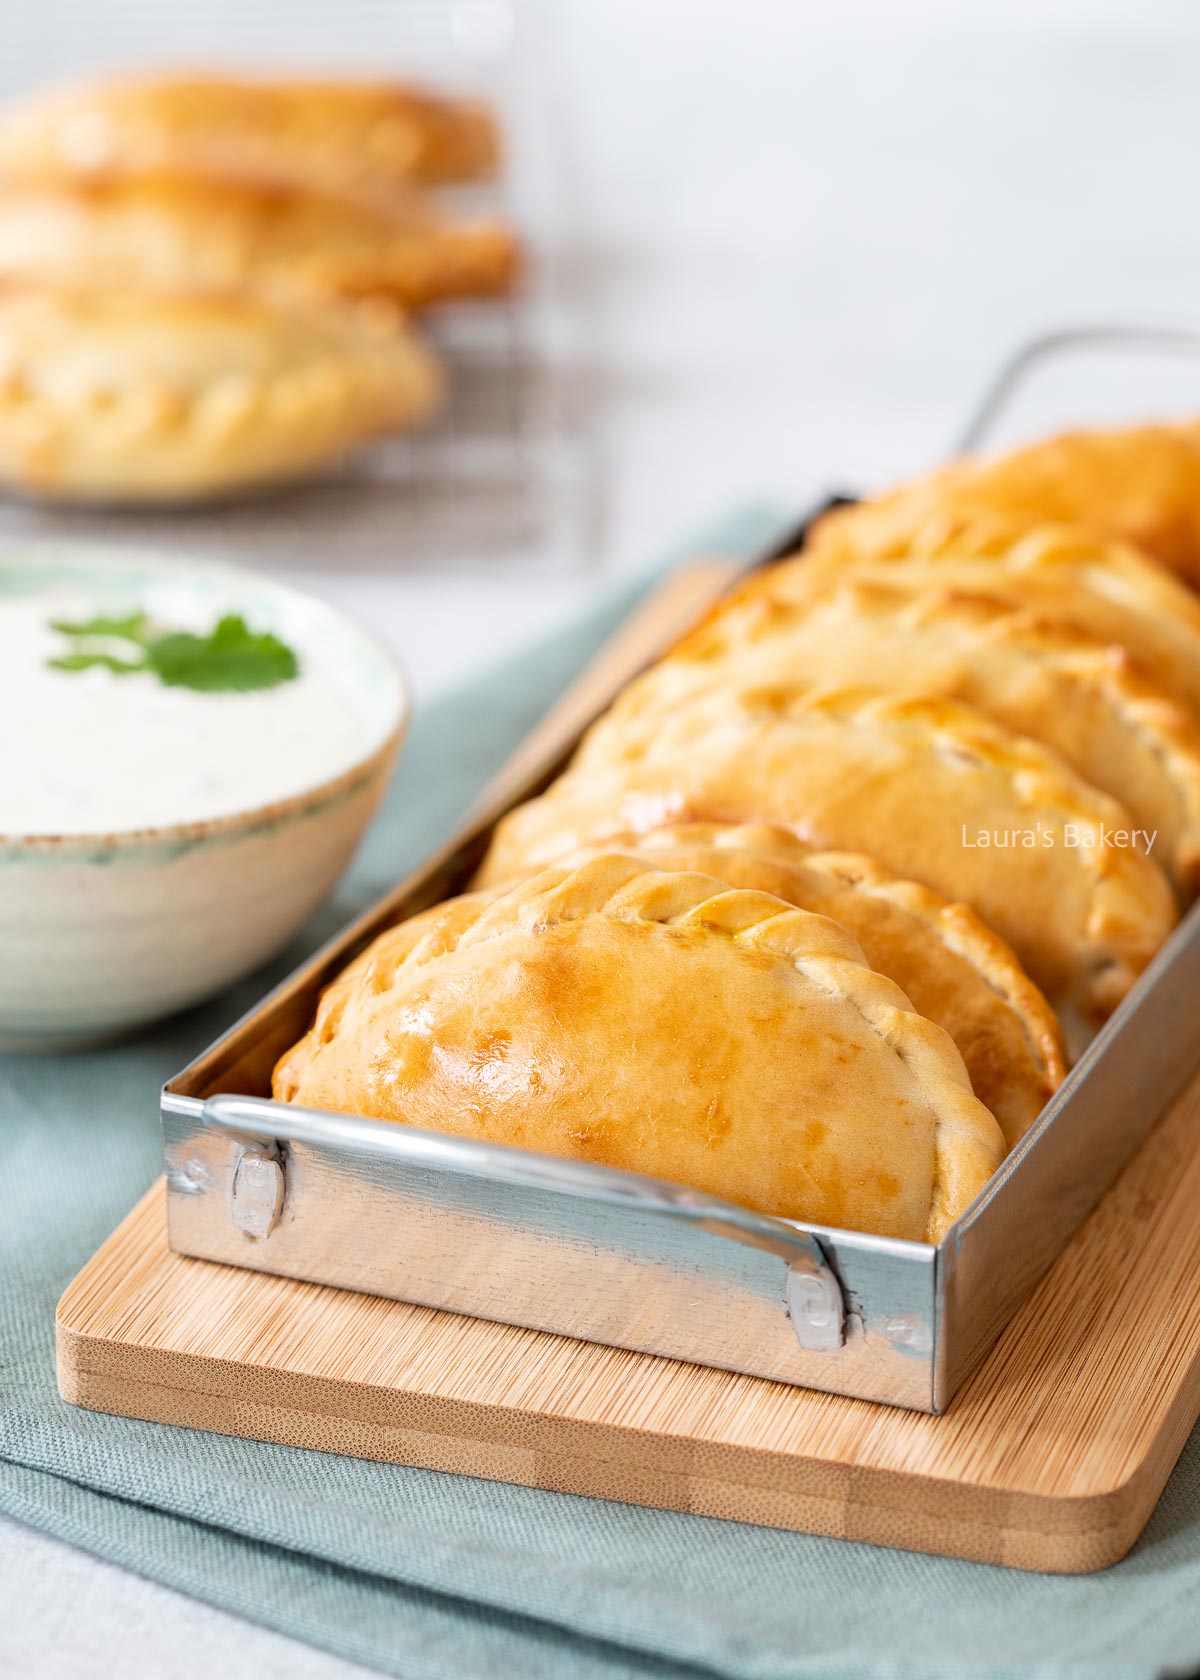
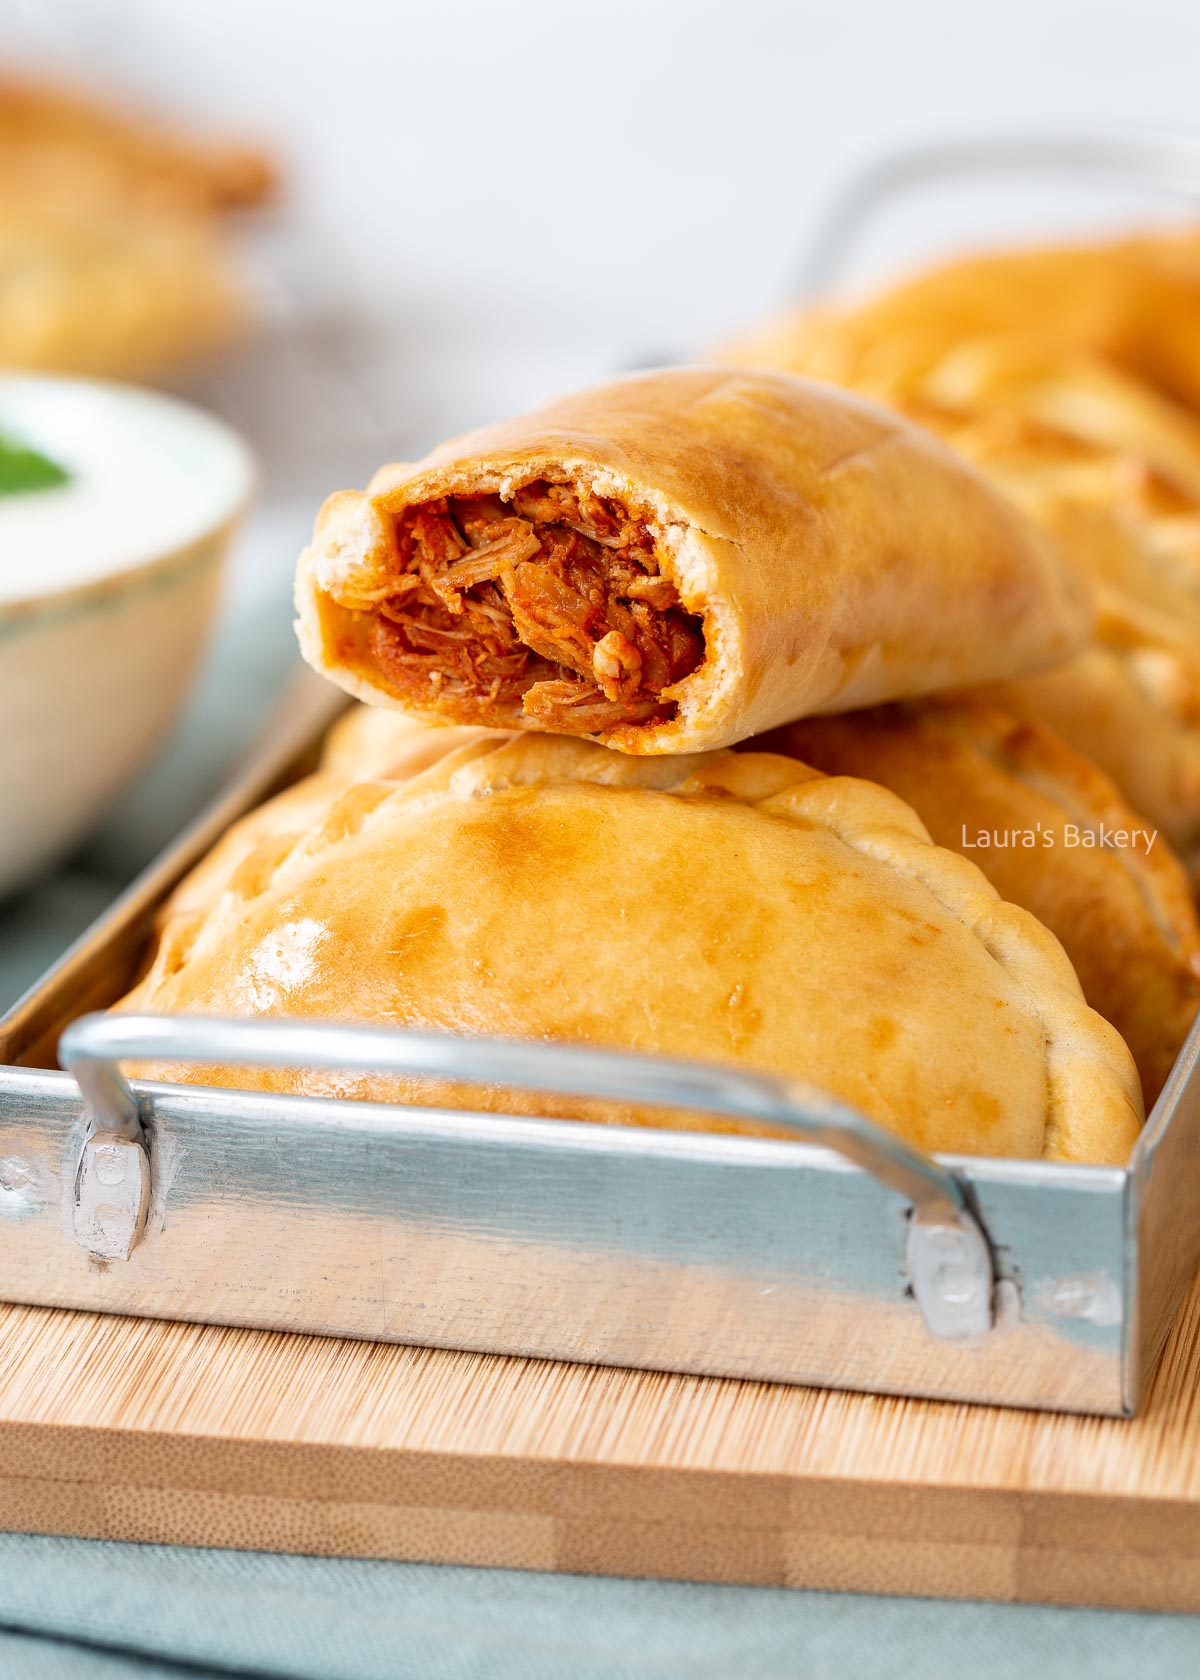
These delicious and easy to make pulled chicken empanadas are my favorite go-to snack when I have leftover chicken. Of course you can make this with regular chicken breasts if you don’t have any leftover shredded chicken.

Why I Love This Recipe

For making this chicken empanada recipe, I use ready-made pie crust, which makes these empanadas super easy and quick.

Of course, you can make homemade empanada dough if you prefer, but that would make the recipe much more extensive.

It is a delicious snack but can also be served as part of a Mexican-themed meal.

What Are Empanadas?

Empanadas are small pastries wrapped in dough with a tasty filling. They are especially popular in Spain, Portugal, and South America.

They vary in size; in Spain, the small, single-serving version is called “empanadillas,” the diminutive form of “empanada”.

This recipe for pulled chicken empanadas falls into the smaller category, but since the term “empanadillas” is not widely known in the Netherlands, I decided just to call them empanadas.
Pulled chicken empanadas-3

Recipe Ingredients

  • Shredded chicken – I used my recipe for Mexican shredded chicken. You can also use leftovers from rotisserie chicken or maybe you’ve prepared a whole chicken on the barbecue.
  • Corn – this is optional but I love the added crunch of the corn in the chicken filling. Alternatively you can add things like a little bit of tomato paste, bell peppers or black beans for example.
  • Pie crust – as mentioned, I have used store-bought pie crust. You could also buy empanada wrappers, which you can find in grocery stores as well (depending on the store, obviously).
  • Egg – you will need the egg for making an egg wash.

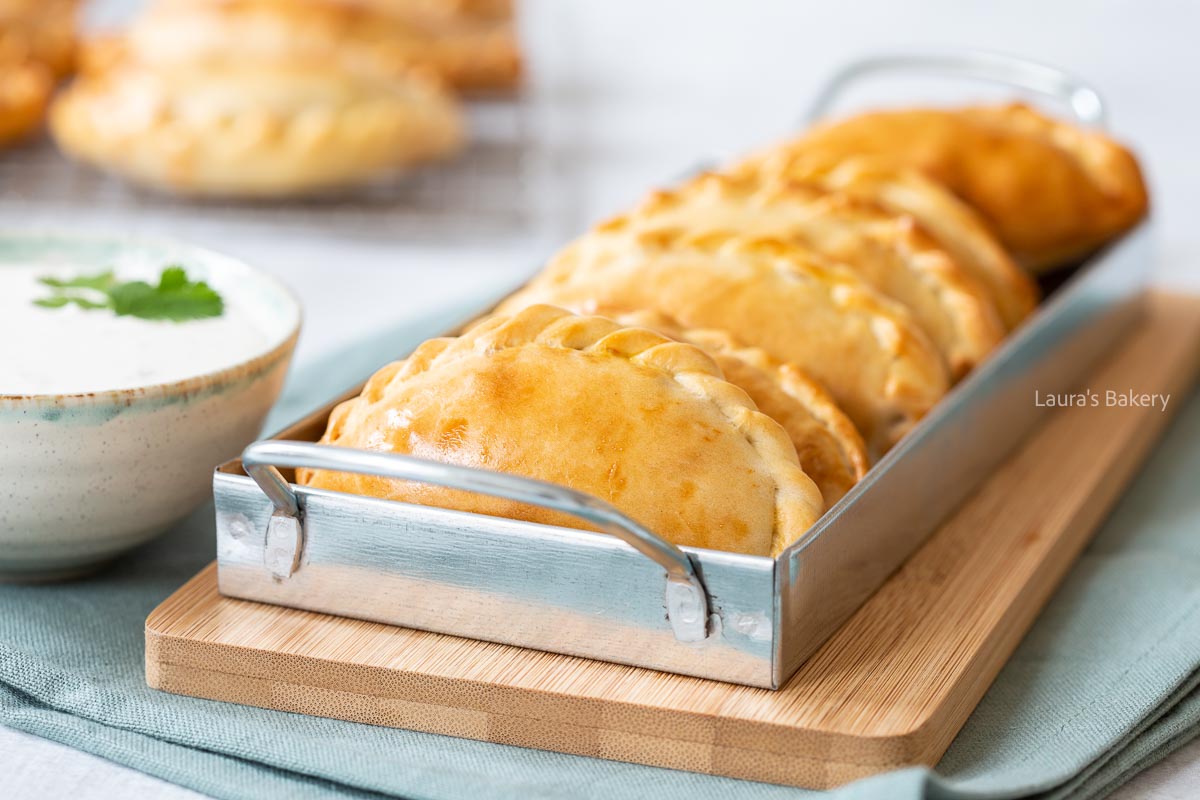
For the dip I used a mixture of crème fraîche, with onion powder, lemon and fresh cilantro, but you can make (or buy) any kind of dip you like. The savory filling of the pulled chicken empanadas go together with a lot of different flavors!

How To Make Chicken Empanadas

Once you have your chicken empanada filling, the rest is super easy. The first thing you will need to do is to make rounds for the empanada.

Forming the dough

That half-moon shape of empanadas is easy but if you use squares of dough, as I did, you will need to cut them into a circle. Using a pastry cutter or cookie cutter will work just fine. Or if you don’t have those a sharp knife will do the trick as well.

Now, just add a spoonful of your chicken in the middle of the dough. Make sure you leave about 1.5 cm (0.5 inch) of space on the edges of the empanada discs.

Fold the empanada

Fold the empanadas in half and press the edges together firmly. Use your fingers to twist the folded edge inward so that everything is sealed properly. Or use the tines of a fork to firmly press them so they close. Alternatively, you can also use an empanada press if you have one.

Brush generously with the egg wash and place them on a baking sheet lined with parchment paper. Bake for about 25-30 minutes or until golden brown. Let them cool slightly before serving with the dip.

Storing The Empanadas

You can store the pulled chicken empanadas in the fridge for up to two days or freeze them for up to three months.

You can also freeze them in a freezer bag, in their unbaked version and bake them fresh out of the freezer. If you bake them frozen, they will need a couple of extra minutes.

Reheating

If you want to reheat the empanadas (at room temperature), place them onto a baking sheet and bake them for 8-10 minutes at 180°C/350˚F.

Love Chicken?

Check out the below chicken recipes as well! I know you will love them
Pulled chicken empanadas-1

FAQ Pulled Chicken Empanadas

Can I use store-bought dough or do I have to make it from scratch?

Yes, you can use store-bought empanada dough, puff pastry, or even pie crust. Homemade dough is great for customization, but store-bought is a great time-saver and works well for baking.

What’s the best type of chicken to use for the filling?

Boneless, skinless chicken thighs are ideal. They stay juicy after shredding. Chicken breast works too, but it can be a bit drier if overcooked.

How do I make the chicken “Mexican-flavored”?

Sauté the shredded chicken with ingredients like garlic, onions, cumin, chili powder, smoked paprika, oregano, tomato paste or salsa, and optionally chipotle in adobo. Add lime juice and fresh cilantro for extra flavor.

Can I make these empanadas ahead of time?

Yes! You can assemble and refrigerate them (uncooked) up to 24 hours in advance, or freeze them for up to 3 months. Bake directly from frozen—just add a few extra minutes to the cook time.

Can I add cheese to the filling?

Definitely! Monterey Jack, cheddar, or a Mexican blend cheese adds creaminess. Just don’t overfill to avoid leaks during baking.


Pulled chicken empanadas

Print Recipe

No votes yet

Shredded Chicken Empanadas

Planning a Mexican-themed snack? Then these pulled chicken empanadas with a fresh dip are the perfect choice.
Preparation15 minutes
Cooking25 minutes
Total40 minutes
Servings: 10 pieces

Ingredients

Empanadas

Dip

  • 250 grams crème fraîche
  • 1 tsp onion powder
  • 1 small lemon zest and juice
  • 2 tbsp finely chopped fresh cilantro
  • salt and pepper

Instructions

  • Preheat the oven to 200°C/390˚F (conventional oven) and line a baking sheet with parchment paper.
  • Remove the slices of savory pie dough from the freezer and allow them to thaw briefly. Roll them out slightly, then use a 9-10 cm (3.5-4 inch) bowl to cut circles from the dough.
  • Mix the Mexican shredded chicken and corn together. Place a spoonful of the mixture on one side of each pastry circle. Leave about 1.5 cm (0.6 inch) of space around the edge.
  • Fold the empanadas in half and press the edges together firmly. Use your fingers to twist the folded edge inward so that everything is sealed tightly.
  • Brush with a generous layer of beaten egg, then bake for 25 to 30 minutes, or until golden brown. Allow the empanadas to cool slightly before serving.
  • Meanwhile, mix all the ingredients for the dip together, and season with salt and pepper. Serve the dip with the empanadas.