Strawberry milkshake 1a

A strawberry milkshake, a vanilla milkshake or a chocolate milkshake, I think that sums up the three favorite milkshake flavors. My favorite is the strawberry milkshake, so I am sharing that with you today.

Easy strawberry milkshake recipe

Briefly, you make a strawberry milkshake by mixing ice cream, milk and strawberries. You can use either fresh or frozen strawberries for this milkshake.

I remember well that we used to have a milkshake maker at home; it was one I had won at bingo. I think we used it a couple of times before it disappeared into a bag and sat gathering dust in the shed. Of course, a special milkshake maker is not necessary. A blender or food processor also work perfectly. For this strawberry milkshake recipe, I used the blender.

Of course, a special milkshake maker is not necessary. A blender or food processor also work perfectly. For this strawberry milkshake, I used the blender.

Once you have blended all the ingredients into a smooth consistency, pour the milkshake into pretty glasses and decorate the milkshakes with whipped cream, a fresh strawberry and possibly some sprinkles. You can go as far as you want and make it a real freak shake.

Strawberry milkshake without ice cream

Nowadays many people are looking for a slightly healthier version of their beloved milkshake. Sure, you make a real milkshake with ice cream, but you can still make a tasty strawberry milkshake without ice cream. Just replace the ice cream with milk (preferably whole milk).

Optionally, you can add some extra sugar or sweetener to replace some of the sweetness of the missing ice cream, or replace the sugar with a ripe banana. The banana will make your milkshake a little firmer.

Strawberry milkshake 2a

How do you thicken a milkshake?

I used strawberries from the freezer for this milkshake. This makes your milkshake nice and cold and also a little thicker. If you use fresh strawberries, you can adjust the ice cream to milk ratio a bit. Use more ice cream and less milk. You can also cut out some of the sugar if you add more ice.

Scroll down for the full recipe of my favorite strawberry milkshake with my ideal thickness.

How to make the best milkshake

Can you save a milkshake for later?

I don’t recommend it, but it can be done. Covered in the refrigerator, the milkshake stays good for about 2 – 3 days. But the milkshake is really much tastier if you enjoy it right away.

Can you replace the strawberries with other fruit?

Absolutely! Just keep in mind that some fruits are a little sweeter or waterier than others. You might also want to experiment with the other ingredients, but that’s totally up to you.

Can you also use an immersion blender?

I haven’t tested this, but I’m sure it can be done. However, I do think you will not be able to blend the strawberries as smoothly.


milkshake with strawberries

Print Recipe

4.30 from 10 votes

Strawberry milkshake recipe

You make a deliciously thick milkshake at home with your own blender. This recipe for my favorite strawberry milkshake proves it!
Prep Time5 minutes
Total Time5 minutes
Servings: 2 glasses

Ingredients

  • 100 grams of vanilla ice cream About 3 scoops of ice cream
  • 200 grams of frozen strawberries
  • 300 ml milk
  • 2 tbsp granulated sugar
  • whipped cream Optional

Instructions

  • Place all ingredients, except the whipped cream, in a blender and pulse until the largest pieces of strawberries are smaller. Then blend until the milkshake is smooth and creamy.
  • Pour into two glasses and finish with a swirl of whipped cream and decorate as desired.
Hazelnut bresilienne 1

Hazelnut bresilienne is nothing more than a delicious caramelized hazelnut crunch which is very easy to make. In The Netherlands this hazelnut crunch is also known as ‘nougatine’. It is used for cake decorating, ice cream topping and more.

What’s it called?

To be honest, I had to do some research on the name of this recipe. I’m Dutch and in The Netherlands these candied hazelnut pieces are called ‘nougatine’. I soon found out that this name is not very common in other countries. Nougatine is also a nut-based bark made with caramel (in The Netherlands as well). But: we like to chop those bars into small pieces and use the crispy caramel nuts in other recipes as a tasty texture.

A more common name is hazelnut bresilienne, but in the end it doesn’t really matter how you call this caramelized hazelnut crunch. It’s delicious and perfect to use in all sorts of recipes.

Hazelnut bresilienne

How to use hazelnut bresilienne?

There are many uses for this recipe, but cake decorating is the most common one for me. It’s used for almost every Dutch ‘slagroomtaart’ (cream cake), it’s added on the sides of the cream cake. The crispy nut addition makes the cake so good!

You also see nougatine as an ice cream topping for soft serve here in The Netherlands. But you could add it at home to a scoop of ice cream as well. The crunchy touch to the ice cream is delicious. One last idea: roll your homemade chocolate truffles in some caramelized hazelnut pieces.

There are many more uses for hazelnut bresilienne, like on top of desserts. It’s a perfect crunchy base for a lot of pastries.

Fun fact: If you grind the caramelized hazelnuts completely, you will have homemade hazelnut praline.

Hazelnut bresilienne 3

Making your own candied hazelnut crunch

Nougatine is very easy to make and, most importantly, incredibly delicious. It is best to make a large batch right away, as it will keep for a long time. This way, you can regularly brighten up a dessert with a wonderfully delightful crunch.

The advantage of homemade hazelnut bresilienne is that you control the ratio of sugar to hazelnuts. I often find that store-bought nougatine contains too much sugar, while you really want the fresh taste of hazelnut. Another advantage of making your own nougatine is that you can use any kind of nut!

Of course, the classic hazelnut nougatine tastes best with a cream cake, hazelnut meringue or mocha cake, but you can think of many other cakes or desserts where a variation with pistachios or pecans, for example, would taste delicious.

hazelnut bresilienne recipe

Print Recipe

5 from 8 votes

Crunchy hazelnut bresilienne recipe

Hazelnut bresilienne is nothing more than a delicious caramelized hazelnut crunch which is very easy to make. In The Netherlands this hazelnut crunch is also known as ‘nougatine’. It is used for cake decorating, ice cream topping and more.
Prep Time5 minutes
Cook Time10 minutes
Total Time15 minutes
Servings: 200 grams

Ingredients

  • 100 grams hazelnuts shelled and unroasted
  • 80 grams granulated sugar
  • 30 ml water

Instructions

  • Toast the hazelnuts in a preheated oven at 175°C/345°F (convention oven) until golden brown, it will need about 8 minutes.
  • Combine sugar and water in a saucepan and heat over low to medium heat. The sugar should be completely covered by the water. Let the mixture heat until it gradually changes color. Do not stir during this process!
  • When the caramel is fully browned, turn off the heat and quickly add the oven toasted hazelnuts. Stir them into the caramel and pour onto a baking sheet lined with parchment paper. Leave to cool.
  • Finely chop the nougatine pieces in a food processor.
Easy puff pastry-1

Making my own puff pastry had been on my bucket list for years. It wasn’t until my 3th book that was all about making delicious snacks and appetizers that I got started making my own rough puff pastry.

In my head making puff pastry dough was really complicated but in fact it was absolutely not complicated. And the good thing is you really only need four ingredients. Flour, butter, water and salt.

Easy puff pastry (rough puff pastry)

Let me first start by explaining what the difference is between rough puff and regular or classic puff pastry:

  • the classic version of making puff pastry is by adding an entire block of butter to the dough which you then start laminating and making turns to create the flaky layers.
  • Rough puff is different as you add the butter already to the flour. So essentially it is a butter-rich dough that behaves like actual puff pastry.

In terms of flavor both are equally delicious and you will still get a very flaky pastry. So that’s what the difference between the two is. And the easy version is of course less work.

As you might have guessed the method we are highlighting here today is the rough puff pastry. It’s absolutely perfect for making loads of puff pastry recipes!

Easy puff pastry

Easy puff pastry

The process

Now making this quick puff pastry I have already given you the pretty simple ingredients. A few things that are really important when making sheets of puff pastry.

First is that the butter and the water that you’re going to be using need to be cold and not just cold from the tap. It needs to be ice-cold water. Set the water in the fridge prior to using or add a couple of ice cubes to a bowl of water and let it sit for a bit so the water gets really cold. That’s step one.

Step two is to make sure the butter is also really cold. That works best if you already make little cubes of the butter and place those in the fridge again to cool down.

Now you first mix the dry ingredients (flour and salt) together and add the cubes of butter. Add the ice cold water and mix it briefly. The flour mixture should be absorbed into the dough but you still want to be able to see the butter cubes. So don’t knead it for too long!

Form a disk of the dough, wrap it in plastic wrap and place in the fridge for at least 30 minutes.

Folding or laminating

Once the dough is chilled it is time to start folding it by making turns. You start by placing the dough on a lightly floured surface and – using a rolling pin – roll it out into a long rectangle.

Now fold the dough into thirds. Almost like folding a letter for an enveloppe. The picture shows you how it should look when you’ve folded it properly.

Now turn the dough a quarter of the way and roll out again to repeat the folding. This is now called a turn. So by rolling it out twice you’ve created one turn. Wrap the dough again and place back in the fridge.

You repeat this process two more times. So in total you will have three turns.

After the last turn you can cover and refrigerate the dough until you’re ready to use it. Or continue by making for instance these saucijzenbroodjes or a banketstaaf. These are both Dutch recipes but there is so much more you can make with this easy puff pastry recipe.


Easy puff pastry

Print Recipe

No votes yet

Easy Puff Pastry Recipe (rough puff pastry)

Making your own puff pastry is not difficult and gives you the perfect base for all kinds of sweet and savory puff pastry snacks.
Prep Time15 minutes
Resting time1 hour 30 minutes
Total Time1 hour 45 minutes
Servings: 1 sheet

Ingredients

  • 250 grams all purpose flour
  • generous pinch of salt
  • 250 grams unsalted butter diced and ice cold
  • 125 ml ice water

Instructions

  • Put the water in the fridge well in advance so that it is really cold when you add it. Cold water from the tap is not cold enough and makes it difficult to make puff pastry.
  • Mix the flour and salt in a bowl. Add the cubed (cold) butter and mix well. Add the water and knead briefly. The flour should be absorbed, but the butter cubes should still be visible. Form a disk, wrap in plastic wrap and refrigerate for at least 30 minutes.
  • You are now going to make a turn: Dust your work surface generously with flour and roll out the dough into a rectangle. Fold in thirds, turn a quarter of the way around and roll out again into a rectangle. Fold in thirds again. This is called a turn.
  • Wrap the dough in plastic wrap and refrigerate for at least 30 minutes. Then repeat this process (one full turn) two more times for a total of 3 full turns.
  • After the last round, leave the dough in the refrigerator until you need it.
Rhubarb crumble 1a

Fresh tart rhubarb topped with a tasty crumble. With this recipe for rhubarb crumble you can serve your guests a delicious dessert. Also delicious with a scoop of ice cream on top.

Homemade rhubarb crumble

Rhubarb, it’s something you either love or hate, a taste that takes a while to get used to. At least that’s what I’ve found. Rhubarb is sour on its own, and a bit bitter. So it needs a sweet counterpart to that familiar sour taste you’re used to in rhubarb recipes.

So for this rhubarb crumble, I added the necessary sugar. And lemon, too, because I like the tang. By the way, you can leave it out if it’s too much for you.

BAKING TIP: I like to use ramekins for crumble recipes

Rhubarb crumble with almond flour

I made the crumble with almond flour and small pieces of almonds, in part because I was reminded of the rhubarb galette that tasted so incredibly good with the almonds. This almond crumble turned out to be another success when combined with rhubarb!

Rhubarb crumble 2a

Tips for rhubarb crumble

Can I make the crumble without almonds?

You absolutely can. Just leave out the almonds and replace the almond flour with all purpose flour. However, you will have slightly less crumble.

Can I make a Strawberry Rhubarb Crumble?

Absolutely, strawberries and rhubarb are a great combination. To make a strawberry rhubarb crumble, replace half the rhubarb with strawberry pieces and reduce the sugar by 50 grams. You don’t have to cook the strawberries with the rhubarb, but you can add them to the rhubarb mixture after it’s cooked and then divide them among the ramekins.

And if you’re looking for other flavors, try this amazing apple crumble!

Can I use less sugar?

Rhubarb is quite acidic on its own, so it is necessary to balance it by cooking the rhubarb with sugar. Depending on the variety of rhubarb, your rhubarb may be less acidic and you can use less sugar. You can always start with half the sugar and add more after cooking (step 2) to taste. If combining with strawberries (see tip above), you can also use a little less sugar because of the sweetness of the strawberries.

I do not recommend adjusting or reducing the sugar in the crumble topping.

Can I make gluten-free rhubarb crumble?

Yes, you can, just replace the all purpose flour with a gluten-free flour or almond flour. If you use only almond flour for the crumble, the texture will be slightly different.


rhubarb crumble with almond flour

Print Recipe

5 from 3 votes

rhubarb crumble recipe

A delicious fresh crumble made with rhubarb and an almond crumble.
Prep Time10 minutes
Cook Time20 minutes
Total Time30 minutes
Servings: 6 servings

Equipment

Ingredients

  • 500 grams of rhubarb
  • 1 tsp vanilla extract
  • 100 grams of fine granulated sugar
  • zest of 1 lemon
  • 1 tbsp lemon juice

Crumble topping

  • 40 grams of unsalted butter
  • 50 grams of brown sugar
  • 1 tsp vanilla extract
  • 50 grams of all purpose flour
  • 50 grams of almond flour
  • pinch of salt
  • 50 grams of almonds finely chopped

Instructions

  • Wash the rhubarb and cut the stalks into pieces.
  • Combine rhubarb, vanilla extract, sugar, lemon zest and juice in a saucepan. Cook over medium heat, stirring frequently, for about 5 minutes.
  • Divide the rhubarb mixture among 6 ramekins (or 1 large baking dish), leaving the excess liquid in the pan.
  • Place all the crumble ingredients in a bowl and knead with your fingers until crumbly. Divide the crumble over the ramekins.
  • Bake the rhubarb crumble at 200℃/390℉ (conventional) for about 20 minutes. This time and temperature will work for both small and large baking pans.
  • The crumble is delicious hot or cold. Also very tasty as a dessert with a scoop of ice cream.
Chocolate sauce -1

Anyone can make this recipe: chocolate sauce. With just 3 ingredients and a few minutes of your time, you can make this easy chocolate sauce recipe in no time. Pour it over a cake or use it as a dessert sauce. You can use it to make any baked goods extra tasty. And it is also delicious to just lick off the spoonful of sauce. Not that I would suggest you should make the sauce just to lick the spoon…. but you could if you wanted to!

Once the sauce has cooled, it will no longer be liquid, but this can easily be remedied by reheating the desired amount.

What do you need to make the chocolate sauce

The good news is that you really don’t need a lot of ingredients to make this simple chocolate sauce. The simple ingredients are probably also already in your house making this is an great recipe to whip up if you have guests and want to serve them some delicious chocolate sauce over an ice cream sundae for instance.

  • good quality chocolate – you can use milk chocolate or dark chocolate
  • whipping cream
  • unsalted butter

Other than that you will need a small saucepan, a spoon and if you’re saving it for later also an airtight container.

Keep in mind that this is not a recipe for a chocolate ganache. That has a slightly different ratio but you can check here how to make different kinds of ganache.

Chocolate sauce -2

How to make the chocolate sauce

Start by breaking up the chocolate into smaller pieces. This will make it easier for the chocolate to melt. Then you heat the heavy cream until it is boiling. Remove from the heat and add the chocolate. Stir until the chocolate is melted and add the butter as the last step. Your sauce will now be rich and shiny. And ready to use. Delicious poured over a chocolate cake or a vanilla ice cream!

Making chocolate sauce

Making chocolate sauce

Questions about chocolate sauce

Can I use coconut milk for making this chocolate sauce?

Yes you can use another cream/milk for making the chocolate sauce. Go for the full fat coconut milk version for the best results. You can also use heavy whipping cream instead of regular whipping cream.

How long can I keep the chocolate sauce?

You can store it in the fridge for about a week or 3 months when stored in the freezer.

Can I use this recipe to make hot chocolate?

You could do that but in that case use less chocolate and instead of the heavy cream go for something like almond milk or regular milk. Otherwise your chocolate milk will be too heavy. And leave out the butter as well. So it’s basically a different recipe, but you know what I mean 😉 .


chocolate sauce

Print Recipe

No votes yet

Chocolate sauce

Pour over your cake or a scoop of ice cream. This chocolate sauce is perfect for pouring over all your favorite desserts
Prep Time5 minutes
Cook Time5 minutes
Total Time10 minutes
Servings: 1 jar

Ingredients

  • 200 grams chocolate
  • 150 ml whipping cream
  • 15 grams unsalted butter

Instructions

  • Bring the cream to the boil. Remove from the heat and add the chocolate. Stir until the chocolate has melted.
  • Finally add the butter. Stir again until it has melted and the sauce has a nice even colour.
  • The sauce is now ready! You can use it straight away, or you can save it.
Apple crumble-2

Do you know how to make apple crumble? This apple and cinnamon crumble is a delicious dessert served hot or cold. Add a scoop of ice cream or a dollop of whipped cream on top of the crumble topping for a real treat! It’s the perfect fall dessert and I’ll share my recipe.

What is apple crumble?

Apple crumble is a quintessentially British recipe that originated during the Second World War. Due to food shortages, ingredients for apple pie, such as flour and butter, were in short supply. As a result, a simple crumble was devised to cover a dish of apple pieces, using less dough than a pie.

The result was a blissful crumble mixture with apple pieces. I always make it into a cinnamon apple crumble by simply adding some cinnamon, which is a fantastic combination with fresh apples. You can also add sultanas or pieces of nuts. Nuts taste really good when mixed through the crumb topping.

Apple crumble-4

Making apple crumble

You will find that this recipe for apple crumble with cinnamon is incredibly easy to make. That’s the great thing about it, it’s a delicious dish and really quick to make. You just need a large bowl in which you add the white sugar and the cinnamon. Mix it together and that is your apple filling done.

For the crumble topping I like to use cold butter, all purpose flour and regular sugar. I use my fingers to turn this into a crumble. When it almost comes together the crumble is ready to be added on top of the apples. The only step left is to bake it until golden brown in the oven.

Apple crumble is very tasty on its own as a dessert recipe, but it can be made even better if you serve it with a big scoop of vanilla ice cream or a topping of whipped cream. You could also add a scoop of Greek yogurt or a drizzle of caramel sauce. It is really one of my favorite dessert recipes.

Originally, crumble is made with apples, but of course there are many other possibilities. In fact, you can use any kind of fruit or combine different fruits!

This easy apple crumble recipe can be turned into any kind of fruit crumble you like. Choose whatever fruits are in season and you can make yourself a different crumble every weekend!

ovendish with apple crumble

homemade apple crumble

More crumble recipes

To give you some examples of what can be done with different fruits, I have listed two of my favorite crumble recipes (and more to come soon!):

Personally, I make the apple crumble most often, but I love it with other fruits too. Which fruit crumble recipe do you use?

Making apple crumble

What kind of apples do you use?

I prefer to use firm, sweet and sour hand apples rather than sweet apples, basically like apple pie. I prefer granny smith apples, pink lady, honeycrisp apples or choose your favorite apple. There is no right or wrong here. If you prefer sweet apples or tart apples? Go for it. Just make sure to double check the amount of sugar you use as tart apples might need just a bit more.

What kind of baking tin do you use?

I rarely use the same baking tin twice to make a crumble. You can use a large baking dish, a round baking dish, a couple of smaller ones or whatever you feel is most appropriate. It doesn’t really matter as long as the tin or dish is oven proof.

Can I use small cake tins?

Yes, you can! That way you can give everyone their own portion. It’s the perfect dessert for that purpose. The oven dishes or ramekins should be about 8 or 9 cm (3.5 inch) in diameter. The baking time will be slightly shorter if you use small ramekins. Reduce the baking time to 20 minutes if the oven temperature is the same.

Can I freeze apple crumble and reheat it later?

If you have any crumble left over, you can store it in the fridge. This may make the topping less crispy. You can reheat the crumble in a pre-heated oven at 180°C/350˚F (conventional oven) for about 10 minutes. This will make it nice and crispy and warm again! Was your crumble already quite brown on top? Cover it with aluminum foil when you’re reheating it in the oven.

Can I eat the crumble cold?

Yes, you can! It is delicious both cold, at room temperature and hot. Personally, I always warm it up in the oven, but just like apple pie, this crumble is delicious cold (with a dollop of whipped cream)!

Can I make the dough and apple mixture separately?

You can make the dough and the apple mixture separately and bake them in the evening or the next day. The crumbly topping is best kept in the fridge on a sheet of baking paper, covered with foil. However, I would add some lemon juice to the apple mixture and keep it in the fridge in an airtight container (this will prevent the apples from browning). I prefer to make the apple crumble ahead of time and reheat it in the oven in the evening, which is just as good and the best way if you ask me. Definitely one of my favorite apple desserts!


delicious apple crumble

Print Recipe

No votes yet

Apple crumble recipe

Making apple crumble? Delicious! With this easy recipe, you’ll have a delicious apple and cinnamon crumble on the table in no time.
Prep Time15 minutes
Cook Time30 minutes
Total Time45 minutes
Servings: 5 portions

Equipment

  • 20 x 20 cm square baking tin (8 x 8 inch)

Ingredients

Apple Filling

  • 3 large apples
  • 50 grams sugar
  • 2 teaspoons cinnamon

Crumble

  • 75 grams unsalted butter
  • 100 grams flour
  • 100 grams sugar
  • Pinch of salt

Instructions

  • Peel and chop the apples in small cubes. Mix the sugar and cinnamon with the apples and pour into the baking tin.

Making the crumble

  • I like to make the crumble with my hands. Put all the ingredients in a bowl at once. Rub the butter between your fingers and knead into a firm but crumbly dough.
  • The dough will eventually (or just about) form a firm, cohesive dough. Then it is good. Sprinkle the crumble over the apple mixture.

Baking the crumble

  • Bake the crumble for 30 minutes at 200°C/400˚F (conventional oven).
Dutch eggnog-3

Make your own Dutch eggnog with this easy recipe. It is delicious served in little glasses with whipped cream or incorporated into baked goods for Easter or any other festive occasion.

Vodka-based eggnog

It’s not often that I make a baked good that I don’t like. I started with coconut macaroons for my dad, and now I made my own eggnog, which went straight to my sister who loves advocaat.

When you buy Dutch eggnog from the grocery store it is usually brandy based. I don’t particularly like the burning aftertaste, so when I read about making eggnog with vodka I knew that was a sign!

Fair is fair, I am still not particularly fond of eggnog, but I find this version much tastier. So here it is: this recipe lets you make your own Dutch eggnog, with vodka of course. The recipe has been a request from my readers for years and it will work great in all sorts of Easter and Christmas recipes.

Dutch eggnog-2

What’s the difference between regular eggnog and Dutch eggnog?

While both drinks use roughly the same ingredients, the eggnog made in the US is very different. It is usually much more liquid and can be poured rather than scooped which is the case for Dutch eggnog. It is also made with fresh dairy cream, while Dutch eggnog is made without dairy.

The American version is usually made with whipped egg whites (and the Dutch one with egg yolks) giving it a frothy appearance and is served during Christmas times most often. Advocaat is popular around Easter and Christmas.

American eggnog is served with cinnamon and ground nutmeg. Dutch eggnog is often served with whipped cream, but can also be used in other baking recipes. So same name, but a very different end result.

Dutch eggnog (Advocaat) : the recipe

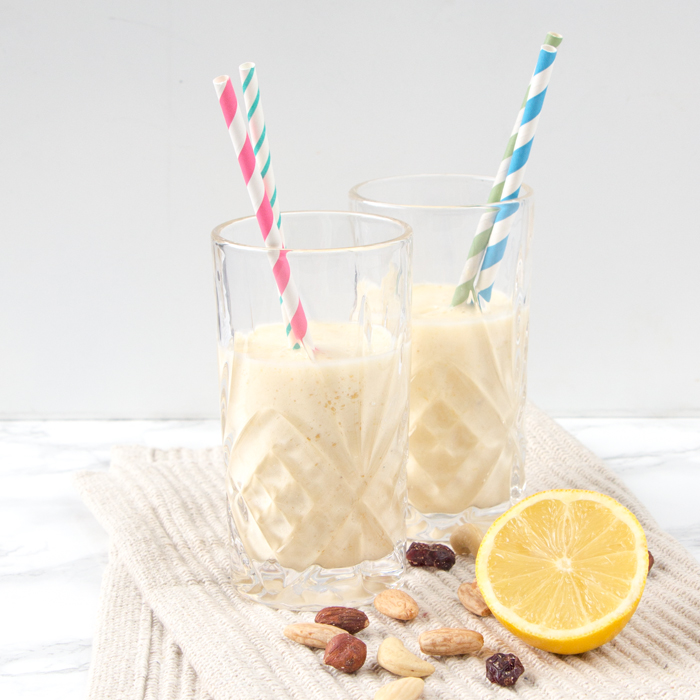
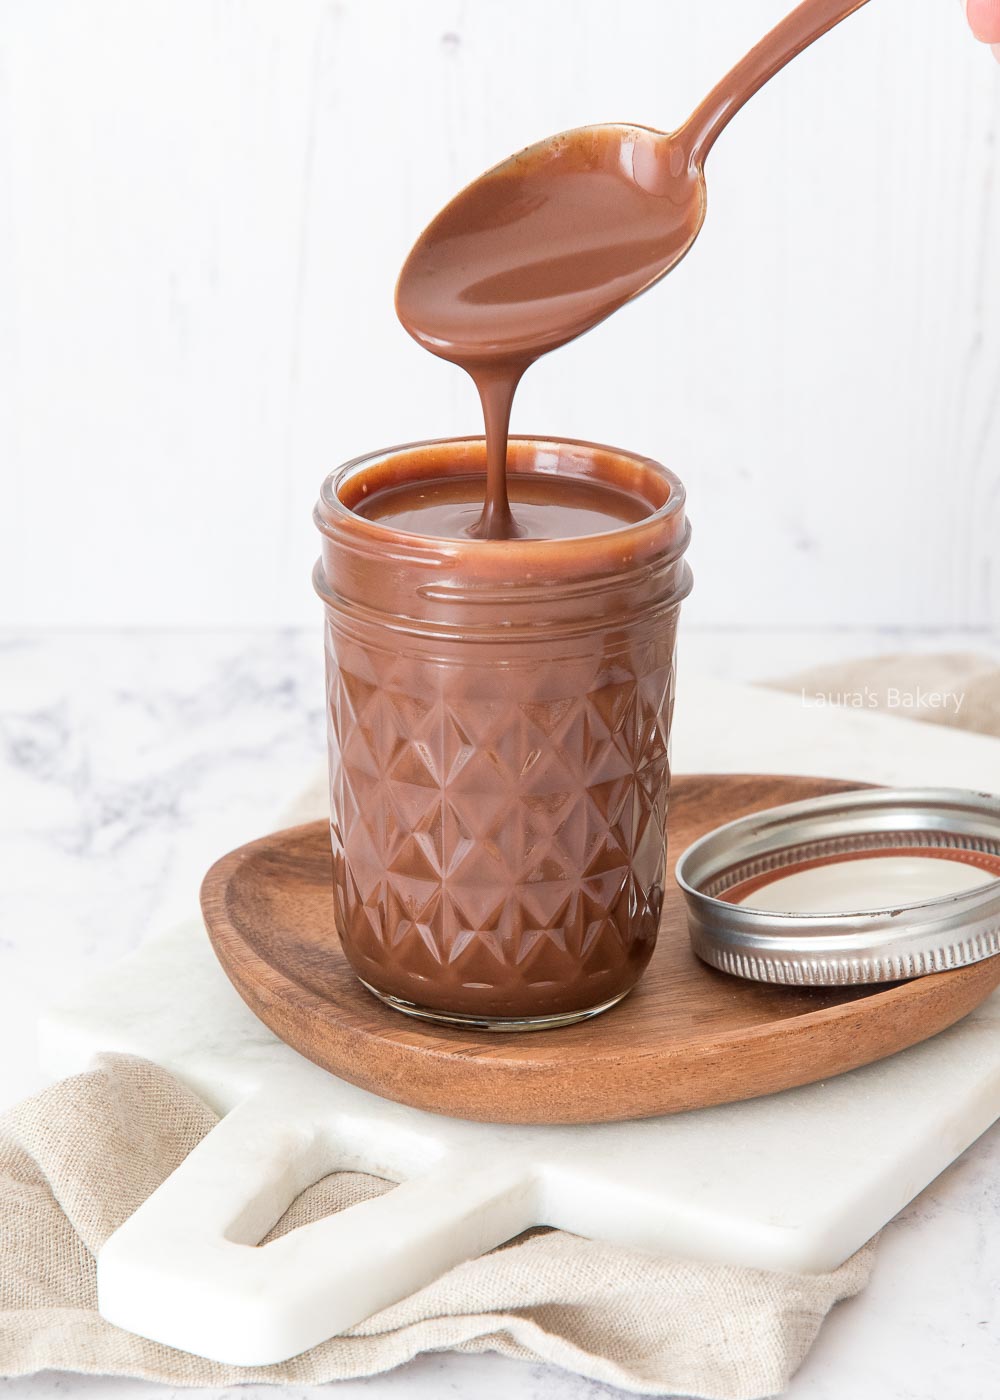
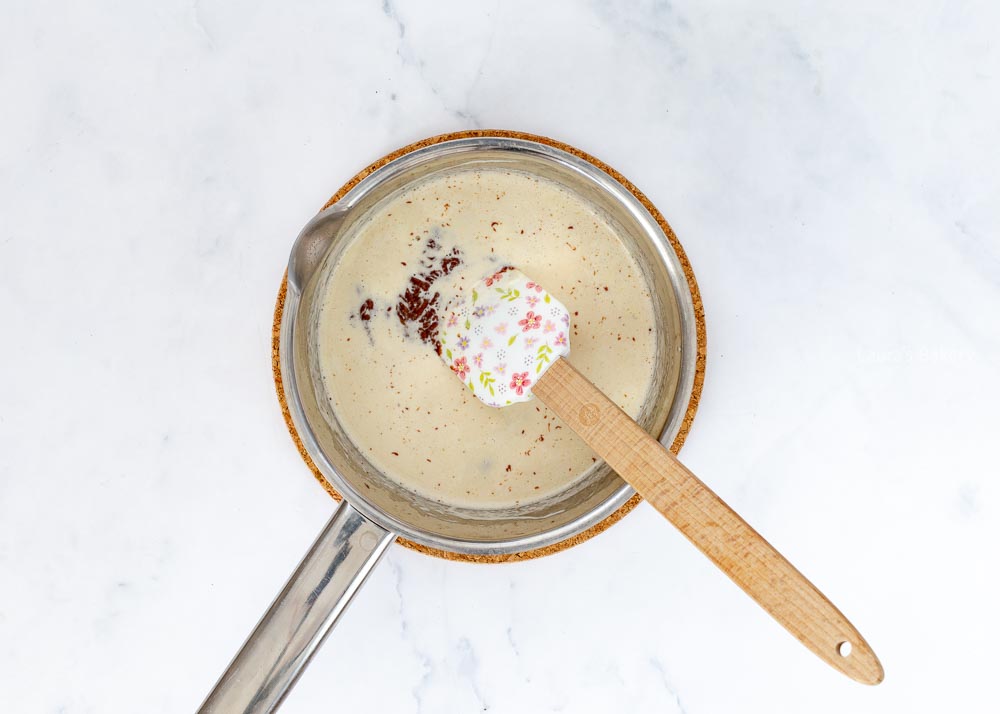
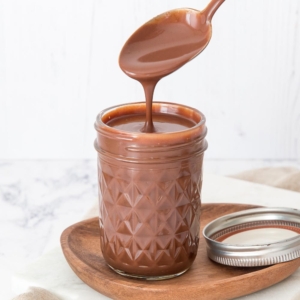
While eggnog is quite famous in the states a funny thing is that we Dutch like to call our eggnog ‘advocaat’ which literally translated means “lawyer”. Funny right? Eggnog is one of those alcoholic beverages that is popular for its use in other dishes. You make it with fresh egg yolks, sugar and brandy or gin. It’s a holiday favorite in the Netherlands.

The combination of these ingredients creates a creamy texture, a sweet taste all its own, but also a slightly bitter, burning aftertaste due to the brandy.

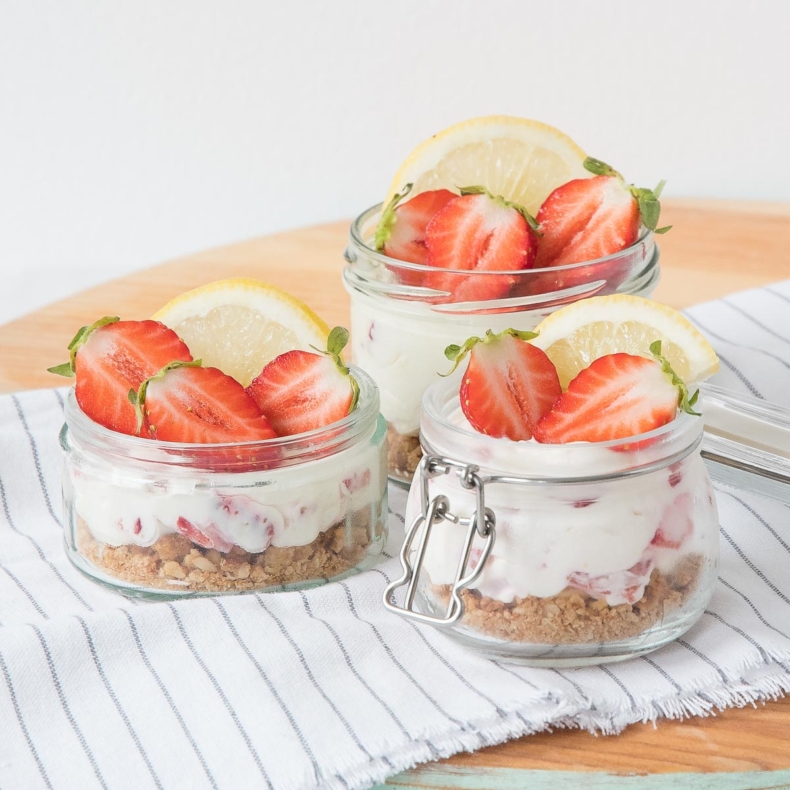
This creamy drink has a high alcohol content, which is why advocaat is often served as an aperitif, a dessert, or simply as a little Sunday afternoon treat. There is a good reason why it is served in very small glasses and is often topped with some delicious dollop of whipped cream. You eat it with a small spoon. It’s like a pudding but with a lot of alcohol in it.

Advocaat or Dutch eggnog has been drunk/eaten in the Netherlands and Belgium for hundreds of years. The earliest known mention dates back to the 17th century, when it was described as an egg and brandy drink consumed by the Dutch elite. It makes for a wonderful holiday cocktail for sure!

Recipes with advocaat

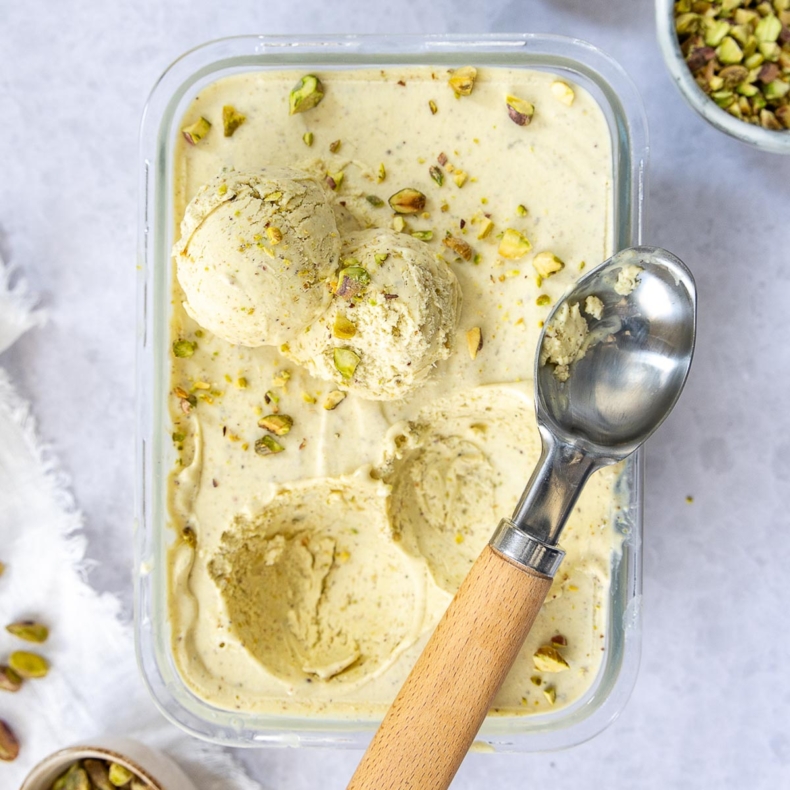
While Dutch eggnog can be used all on its own, it is also delicious used in cakes and desserts.

For example, it worked really well as a filling for the Snow Star Cake (a very Dutch cake!) shown in the picture below.

Dutch eggnog-1

The creaminess of eggnog is also delicious in sponge cake, chocolate cake, on a shortcrust base, or with a scoop of vanilla ice cream. And let’s not forget the whipped cream. Dutch eggnog and whipped cream are best friends.

In my opinion, it hasn’t been very popular as a drink (it was mainly something elderly people would enjoy) in recent years, but I think that’s starting to change as it can really give a sweet cake or dessert a special twist.

TIP: When making this, heat the mixture to 62˚C (144˚F) at some point. This is where a candy thermometer comes in handy.

Tips: Making a Dutch eggnog Recipe

Can I substitute gin or brandy for the vodka?

You absolutely can. One of my readers also mentioned that you can make it with liqor 43. Lots of fun variations to think of! Adding a little cinnamon is also delicious.

How do I make the eggnog creamier?

You could make an eggnog cream by very carefully whisking 100 ml of real dairy cream through the final mixture. However, I haven’t tried this myself.

Is it safe to eat because of the raw egg yolks?

They are still raw eggs, so there is always a risk. If you are making this recipe for a high-risk group, see if you can find pasteurized egg yolks at a grocery stores and use those to make the eggnog.

My eggnog is slightly runny

To fix this, you can dissolve some gelatin in it if necessary (if it’s still lukewarm), but it shouldn’t be necessary if you followed the sugar thermometer process properly.


Dutch eggnog

Print Recipe

No votes yet

Dutch eggnog recipe

Enjoy it in glasses with whipped cream or incorporate the homemade eggnog into a delicious cake.
Prep Time5 minutes
Cook Time20 minutes
Total Time25 minutes

Ingredients

  • 80 grams egg yolks that’s 4-5 egg yolks
  • 80 grams caster sugar
  • Pinch of salt
  • ½ vanilla pod
  • 100 ml vodka brandy will work too

Instructions

  • Start by putting a bowl of water in the fridge; you will be cooling the eggnog in it later. Do this well in advance. If you like, you can also add ice cubes (at the time of cooling).
  • Cut open half of the vanilla pod and scrape out the marrow.
  • Put the egg yolks, sugar, salt and vanilla in a bowl and stir.
  • Heat this mixture in a double boiler. Continue stirring, add the vodka and continue stirring.
  • You should heat the mixture to 62˚C (144˚F) (while still stirring) using a candy thermometer. Once the mixture has reached the correct temperature, remove the bowl from the pan and place it in a bowl of ice water.
  • Continue stirring to cool the mixture. When it is lukewarm, you can strain it and pour it into a jar.
healthy banana bread mug cake 1

Fan of mug cakes, but craving a more healthy afternoon snack? This recipe for a healthy banana bread mug cake is the one you’re looking for! You can make this recipe in the oven and in the microwave.

Healthy mug cake

I used my favorite banana bread recipe and made that into a mug cake recipe. My banana bread is made without sugar, oil or butter and is a pretty healthy (and delicious!) snack. Perfect for a healthy mug cake and an easy and quick alternative to a slice of banana bread.

I like eating it for breakfast, but I made it the other night as a late-night dessert with a scoop of ice cream and that’s probably going to happen more often as I enjoyed that dessert a lot.

​Use a microwave-safe mug, those are often also oven safe. But make sure to check that before baking. I like to use a coffee mug or other large mug. You want to make sure there is plenty of room for the mug cake as it rises in the oven.

The recipe calls for two bananas to make 2 mug cakes. But if you only have 1 overripe banana, just halve all the ingredients for 1 mug cake. You will also need to use halve an egg. The other half could be used with some extra eggs for an omelet or something.

healthy banana bread mug cake 2

Mug cake ingredients

You just need a few simple ingredients to make this delicious banana mug cake. I like to put them together in a small bowl and stir the ingredients with a spatula before putting the batter in the mug.

  • Bananas. The most important ingredient. Make sure they are very ripe before you start. I prefer overripe bananas for baking.
  • Egg. I like to make mug cakes without an egg (like this chocolate mug cake), but this banana bread mug cake turns out best if you do use an egg. Because I think 1 egg is too much for just 1 mug cake, I developed a recipe for 2 mug cakes.
  • Vanilla extract. My bottle of homemade vanilla extract is used for every baking recipe I make. It just adds that amazing vanilla flavor. The recipe calls for 0.5 tsp vanilla, but I often just add a whole teaspoon of vanilla extract.
  • Almond flour.​ I love using almond flour in banana bread, It makes the bread moist and had a delicious flavor.
  • Whole wheat flour.​ I chose whole wheat because it’s a bit healthier than all purpose flour. But if you don’t have whole wheat flour in stock, all purpose flour is just fine.
  • Baking powder.​ Just a little bit is needed for this recipe. But don’t leave it our, because it makes sure the result is light and fluffy.

And that’s all you need to make your own little banana cake! As you can see, I don’t use sugar, the banana add enough sweetness. But if you’re a sweet tooth, you could add some brown sugar or maple syrup to the batter.

To make the batter, you start with the banana, egg and vanilla extract. After those wet ingredients are combined, you can add all the dry ingredients at once. Just mix it up until incorporated and your cake batter is done.

healthy banana bread mug cake 3

Microwave or oven?

At first, I wanted to develop a recipe for a mug cake you could make in the oven as that was something I got asked for a lot. But I decided to try and make this recipe for the microwave as well.

​I’m happy to say this recipe can be made in the microwave and in the oven, I’ll share the directions for both options.

Microwave banana mug cake

If you have a microwave on hand, this is the quickest way to make your mug cake. I baked it for 140 seconds (2 minutes and 20 seconds) at 800 watts. The cooking time may vary due to the strength of your microwave.

Oven banana mug cake

Bake the mug cakes for 20-25 minutes at 180 °C/350 °F. Don’t bake them too long, as you want a moist cake and baking it too long may result in a dry banana cake.

Here you can see my mug cake, made in the microwave:

healthy banana bread mug cake 4

Questions about banana bread mug cake

Which mugs should I use?

The most important thing is to choose a microwave-safe mug that is large enough (250-300 ml/8,5-10 oz). The cake rises in the oven, so make sure there is enough room for the batter to rise.

How to serve this healthy mug cake?

​While the mug cake tastes amazing just as it is, I like to add a scoop of (Greek) yogurt and some banana slices for breakfast. If I make a dessert out of it, a scoop of ice cream is a great addition

How to store a mug cake?

The mug cake is best when it comes out of the microwave and is still warm. As it cools, it dries out and is not nearly as tasty.

healthy mug cake

Print Recipe

5 from 4 votes

Healthy banana bread mug cake recipe

The most delicious healthy mug cake for breakfast: the banana bread mug cake. Quick and easy to make.
Prep Time2 minutes
Cook Time3 minutes
Total Time5 minutes
Servings: 2 servings

Ingredients

  • 2 small bananas or 200 grams of banana
  • 1 egg L
  • 0.5 tsp vanilla extract
  • 25 grams almond flour
  • 45 grams whole wheat flour
  • 0.5 tsp baking powder

Instructions

  • Mash the bananas (I used a hand blender, but you can also mash with a fork) and mix together with the egg.
  • Mix the rest of the ingredients and a pinch of salt into the banana-egg mixture and mix with a whisk or spatula until combined. Divide between two oven-proof/microwave safe mugs.
  • OVEN: Bake for 20-25 minutes at 180 °C/350 °F (convention).
  • MICROWAVE: Bake for 140 seconds (2 minutes and 20 seconds) at 800 watts.
  • If desired, serve with a scoop of yogurt and some slices of banana or other fresh fruit.
Best thin Dutch pancakes recipe 2

In the Netherlands we love our classic thin Dutch pancakes, or as we call them: pannenkoeken. Do you love pancakes? Then you need a good basic recipe! With this recipe you can make a whole stack of delicious pancakes in no time.

American pancakes versus thin Dutch pancakes

Where American pancakes are thick and fluffy, classic Dutch pancakes are very thin. Think crepe like thin.

Dutch pancakes are also large, they usually have the same size of a dinner plate. And when you visit a Dutch pancake house or restaurant (yes, they exist!), they are even bigger and are being served on very large plates. You can order all kinds of flavors, sweet pancakes and savory pancakes.

Difference between French crepes and thin Dutch pancakes

When I bake Dutch pancakes, they are very thin. I like that best. Most people bake their pancakes a bit thicker. A French crepe is generally thinner than a Dutch pancake. But I’ll have to say mine are very close.

Another difference is that crepes are usually a bit smaller than Dutch pancakes.

Best thin Dutch pancakes recipe 3

Dutch baby pancakes versus thin Dutch pancakes

The final comparison, I promise. Although Dutch baby pancakes sound very Dutch, you’ll barely see them in the Netherlands. They actually origin from Germany. Somewhere a long time ago, the German word ‘deutsch’ was turned into Dutch.

But is a Dutch baby pancake recipe anything like the traditional Dutch pancakes? No, they are not. Dutch babies are a mix of a pancakes and a souffle, very light and fluffy. Dutch thin pancakes are as flat as can be.

Another recipe in the pancake category that is Dutch: Dutch mini pancakes. They are similar to these classic thin pancakes. I can really recommend my recipe for Dutch mini pancakes (poffertjes).

How to flavor the pancake batter

It is an easy recipe to vary and make all kinds of different flavors of pancakes. You can flavor the thin batter yourself, but it’s also great for making your pancakes luxurious with toppings. The recipe card below just shows the basic ingredients to make plain pancakes. I mostly make those and add flavor by adding toppings. But you could also add flavors in the beginning, by change up the batter a bit.

If you want to flavor the batter, there are multiple options. I name a few of my favorites:

  • Adding some extract to the batter. You can use vanilla, almond, lemon or anything else you like. Instead of lemon extract, lemon juice is possible as well.
  • Add some cinnamon to the batter, it’s delicious.
  • You could also swap out the milk for almond milk for example. This way, the pancakes are dairy free as well.

Baking Tip: I prefer to use a pancake pan with a little butter in it. I have something similar like this crepe pan that works on all heat sources. You could also use a cast iron skillet or frying pan.

Best thin Dutch pancakes recipe 4

Different pancake toppings

The most popular toppings for pancakes are ‘stroop’ and powdered sugar. Stroop is somewhat similar to maple syrup, which you could use too. I’ll share some of my favorite pancake toppings and will divide them by sweet and savory.

Sweet pancake toppings

The most simple topping is powdered or icing sugar, but you can add everything you like! I like fresh berries on my pancake a lot.

  • Powdered sugar
  • Stroop
  • Maple syrup
  • Caramel sauce
  • Chocolate sauce
  • Vanilla sauce
  • Brown sugar
  • Chocolate sprinkles
  • Fresh fruit
  • Lemon curd
  • Ice cream (make a dessert out of it with ice cream, whipped cream and fresh fruit!)
  • Apple (bake the apple slices with the batter in the pan)

Savory pancake toppings

When I eat pancakes, I always make one with Dutch cheese. It’ so good. But bacon ánd cheese might be even bettter. You can add the topping to a plain pancake, or you can bake the toppings with the batter.

In the case of cheese bacon pancakes, I always put some bacon in the pan and bake for a few minutes. Then add the batter and put cheese on top. After you flip the pancake and bake the side with cheese, you will have a crispy side. I’m drooling while I write this. I need to make these pancakes soon!

  • Cheese (I like Dutch cheeses, like Gouda. But you can even use Brie if you want)
  • Cheese AND bacon
  • Bacon
  • Bacon combined with apple slices (a perfect salty and sweet combo)
  • Mushrooms, bell pepper, bacon and onion, or in other words: the farmers’ pancake! (The ‘boeren pannenkoek’ is a real classic)
  • Pizza pancakes! I make them with tomato sauce, salami and cheese.

These are just a few of my favorites. The list could be at least 10 times longer, there are a lot of options.

Another tip: instead of using the ingredients above as toppings, you could also incorporate them in the batter. When you bake a pancake batter with savory fillings, they will be a bit thicker.

Best thin Dutch pancakes recipe 1

Questions about thin Dutch Pancakes

Can I use a different kind of flour?

Yes, I have made them with whole wheat flour instead of all purpose flour.

You could even use buckwheat flour to make them gluten-free. It’s possible you have to add a bit more milk to have a thin enough batter.

Can I make dairy free pancakes?

Of course, you can swap out the milk for almond milk for example.

How thin should Dutch pancakes be?

I bake mine almost as thin as a crepe. But it’s fine to make them slightly thicker.


thin dutch pancakes

Print Recipe

4.86 from 14 votes

Dutch pancake recipe

Do you love pancakes too? Then you need a good basic recipe! With this recipe you can make a whole stack of delicious pancakes in no time.
Prep Time5 minutes
Cook Time30 minutes
Total Time35 minutes
Servings: 18 pancakes

Ingredients

  • 600 grams of all purpose flour
  • 3 eggs
  • 1.5 liters of milk
  • Pinch of salt

Instructions

  • Combine the eggs and milk in a large bowl. You can use a hand or stand mixer, but a whisk works just as well. Gradually add the dry ingredients (flour and pinch of salt) while continuing to whisk. Make sure there are no lumps in the batter.
  • I personally prefer to bake the pancakes in a skillet with a little butter. I find that works best and the butter makes them even tastier. You can also use oil or baking spray if you feel more comfortable.
  • Using a ladle, scoop enough batter into the center of the pan on medium heat and spread it all over the bottom by taking the pan off the heat for a moment and using a twisting, tilting motion. When the top of the pancake is dry (after 1-2 minutes), flip the pancake with a spatula and bake the other side until golden brown. Remember: the first pancake will almost always fail. But enjoy that one as you bake the rest.
What to eat with lemon curd

Making your own lemon curd is not difficult at all. With just a few ingredients, you can make your own fresh curd to use in a delicious lemon meringue pie, for example.

Homemade lemon curd

On my baking weekend last month, I made lemon curd for the first time. I have no idea why I hadn’t done it before. Since I was so eager to make lemon meringue pie, I wanted to get it right the first time and make the curd myself.

I made a big batch so I could make more recipes with it and make sure I had some left over to put in the yogurt (very tasty!). I didn’t think it would be so easy to make my own curd from lemons and a few other ingredients.

Baking tip: When you make a curd, you can store it in a sealed jar. I usually use glass mason jars.

homemade lemon curd

What to eat with lemon curd

The possibilities are endless with this delicious curd. Put a little in your yogurt, a scoop over an ice cream dessert, spread it on a cracker, and of course: serve it on homemade scones with clotted cream. Yes, it really is all delicious!

Other popular recipes with this curd are, of course, any recipes that combine the curd with meringue. Like lemon meringue pie. I also love lemon curd cookies, like thumbprint cookies with the curd in the center. I will post a recipe for those soon.

Lemon curd cake is also very tasty. For example, you can use this recipe for lemon loaf and serve it with whipped cream and your homemade curd. Or with ice cream, which is also very tasty!

BAKING TIP: Love lemon curd? Then you will also LOVE these easy lemon bars!

How to make lemon curd

Frequently asked questions for lemon curd

Can you freeze lemon curd?

Yes, you can freeze any homemade curd! Once your curd has cooled, simply place the airtight, freezer-safe container in the freezer. You can store lemon curd in the freezer for up to a year.

Can I eat lemon curd if I am pregnant?

Yes, you can. The au bain-marie process ensures that the curd does not get hotter than 100 degrees Celsius (the boiling point of water). Fortunately, harmful bacteria are killed above 70 degrees Celsius.

Why isn’t my curd getting thicker?

The curd has not been cooked long enough and needs to be heated au bain-marie longer. How long this takes can vary depending on the heat source and the thickness of the bowl (I never use a thick bowl). Also remember that the curd will continue to thicken as it cools.

If your curd is still not the right thickness after more than half an hour au bain-marie heating? Then you can add half a beaten egg (maybe your eggs were on the small side) or add some gelatin to the mixture and let it cool.

There are white bits in my curd, what is that?

These are pieces of coagulated egg white, and you shouldn’t find them in your curd. It’s best to strain your curd to get rid of the white bits.

To prevent this from happening next time, make sure the heat is not too high when you add the egg and immediately stir it well, preferably with a whisk. Once the egg is incorporated into the mixture, it will no longer set. If the heat is too high and you don’t stir the egg immediately, it may solidify.

Why does my lemon curd taste bitter?

You probably used the white part of the lemon peel when you grated it. When using lemon zest, you want to use only the yellow part of the zest because the white part is very bitter and will give your curd a bitter taste.

Easy lemon curd recipe


Lemon curd recipe

Print Recipe

4.77 from 21 votes

Lemon curd recipe

Making your own lemon curd is not difficult. With just a few ingredients, you can make your own curd to use in a lemon meringue pie, for example.
Prep Time10 minutes
Cook Time20 minutes
Total Time30 minutes
Servings: 1 glass jar

Equipment

Ingredients

  • zest of 2 large lemons
  • 130 ml lemon juice 2 lemons
  • 200 grams of fine granulated sugar
  • 125 grams of unsalted butter
  • 2 eggs beaten

Instructions

  • Zest and squeeze lemons. Strain the juice briefly to remove any seeds.
  • Place the lemon zest, sugar, and butter in a bowl. You are making this recipe au bain marie, so place the bowl over a saucepan of boiling water. Do not turn the heat up too high. Let the ingredients melt in the bowl and stir gently until smooth.
  • When all the butter is melted, add the lemon juice and stir. Add the eggs and stir again. Now it is a matter of patience. Check from time to time to make sure there is enough water in the pan.
  • Continue to stir gently in the bowl as the lemon curd continues to thicken. When the curd is the consistency of yogurt, it is ready. This takes about 20 minutes.
  • Place the lemon curd in a bowl to cool. As the curd cools, it will continue to thicken to the proper final thickness.
Baking basics crème brûlée 1a

From now on, make your own crème brûlée with this easy recipe. Eating (and making!) this delicious crème brûlée dessert will never disappoint.

Classic crème brûlée recipe

I don’t know about you, but I have often eaten disappointing crème brûlée in restaurants. From ice cold to way too thick, or even without the crack of the caramelized layer that is essential when eating this dessert. It has made me less likely to pick this French dessert from the dessert menu.

Yesterday I made my own crème brûlée for the first time and wow, it was fantastically delicious. With only 5 ingredients you can make your own crème brûlée at home, so I highly recommend it. Of course I share this easy recipe with you!

Crème brùlée dessert flavors

And did you know that you can also vary with this recipe? For example by adding extra flavors, such as citrus peel or lavender. Still, for me, nothing beats the original, vanilla-based and with a golden brown, crunchy sugar coating.

Baking basics crème brûlée 2a

Crème brûlée torch

I often get asked which exact burner I use for this dessert and my answer is simple: it doesn’t really matter. I have tried several and they all work fine. As long as the burner has a child lock and can be refilled, it’s totally fine. Like this one for example.

I do like to have refill packs in the house because you will always find that your burner is suddenly empty at the moment you’ll need it. So don’t forget to purchase those as well.

Crème brûlée without torch

As already mentioned in the recipe, one option is to put the sugar-coated desserts under the grill until the sugar turns golden brown. So it can be done, but you get the best results with a burner.

Frequently asked questions about crème brûlée

Why is crème brûlée prepared au bain-marie (in a water bath)?

This ensures that the filling cooks evenly. Therefore, the layer of water should be as high as the filling in the dishes. For this reason, it is better not to fill the filling to the edge of the dishes. Another good tip: do not fill the oven dish with boiling hot water until it is already on the tray in the oven.

My crème brûlée is not firm enough, why is that?

This could be due to several factors. Perhaps the oven was not at the right temperature after all, or perhaps you used dishes that were too small. In restaurants you usually see somewhat lower dishes (like this one) and that is for a reason: that way the cream filling cooks better and especially faster. Also, crème brûléé desserts really need time in the refrigerator to set, so don’t skip this out of time constraints.

Can I also substitute the vanilla pod with vanilla extract?

You can, but then you miss the beautiful black speckles of vanilla that really belong in it if you ask me. To replace 1 vanilla pod, you need 3 tsp of vanilla extract.

Can I use any other sugar for the sugar coating?

I prefer to use cane sugar because it creates the most beautiful, brown caramel layer. Yes, you can use other sugar, but then the results will be a bit different.

No bake recipes

Looking for recipes that don’t need to go in the oven? I got you, here are a few of my no bake desserts:

Easy crème brûlée recipe

Print Recipe

4.54 from 49 votes

Vanilla crème brûlée recipe

From now on, make your own classic crème brûlée with this easy recipe, enjoy!
Prep Time10 minutes
Cook Time45 minutes
Total Time55 minutes
Servings: 6 servings

Ingredients

  • 5 egg yolks
  • 80 grams of fine granulated sugar
  • 500 ml whipping cream
  • 1 vanilla pod
  • cane sugar

Instructions

  • Put the egg yolks and fine granulated sugar in a bowl and using a whisk, whisk well together.
  • Pour the whipping cream into a saucepan. Cut the vanilla pod in half lengthwise and add the vanilla seeds to the whipping cream.
  • Heat the whipping cream while stirring and then pour it in with the egg yolks while continuing to stir in the bowl.
  • Divide the mixture among the baking dishes. Place them in baking dish, put in the oven and pour in a layer of hot water.
  • Bake the crème brûlée for 45-50 minutes (larger dishes up to 60 minutes) in the oven at 150°C/300℉ (conventional).
  • The dessert is good when the mixture is firm, but in the center of the dish it may still be a little jiggly.
  • Let them cool for a while on the counter and then put them in the refrigerator for at least 3 hours to set.
  • After they have set, remove them from the refrigerator and sprinkle a thin layer of cane sugar on top. Use a blow torch to caramelize the sugar layer. Putting them under the grill until the sugar is melted and turns golden brown is also an option.
Cranberry sauce-5

Making cranberry sauce is so easy and you can use this delicious, homemade sauce for both a main course as well as for dessert. Don’t mistake cranberry sauce and cranberry compote for the same thing as they are quite different. In terms of structure but also in terms of taste. And believe me when I say this is so much better than any canned stuff!

What goes into this sauce?

Cranberry sauce is incredibly easy to make, and you only need a handful of ingredients

  • Cranberries – You can use either fresh or frozen cranberries.
  • Water – The water in this recipe makes the sauce liquefy.
  • Sugar – This gives the sauce a sweet taste, but also preserves it. You can choose white sugar or brown sugar but keep in mind that the color will be less vibrant if you use brown sugar.
  • Citrus fruit(s) – I have chosen lemon for this recipe, but orange would also be good. You use both lemon zest or orange zest as well as fresh orange juice and/or lemon juice

Making this easy recipe is as simple as placing a medium saucepan on medium heat and adding the cranberries, the water, citrus juice and the sugar. You bring it to the boil and wait until the cranberries have popped. Once they do you can use an immersion blender or regular blender to make it into a smooth sauce.

Cranberry sauce

Cranberry sauce

When is it best to serve cranberry sauce?

Cranberry sauce is perfect for the holiday season and would do really well for your Thanksgiving dinner or Christmas dinner. It’s also the time of year that they are in season, so no reason not to go wild on the cranberries. So all cranberry recipes are perfect for this time of year. It’s also the time of year that all grocery stores will have a good supply.

And the good news is that you can buy a bag of cranberries from the frozen section almost year round. No need to wait for winter!

What dishes can you serve with it?

You may have seen cranberry sauce in a lot of thanksgiving recipes. It is often served with roast turkey. So pairing it with meat dishes is a great choice. But the fun thing about cranberry sauce is that you can also use it with a dessert. So it goes well with both sweet dishes and savory dishes. For example, a scoop of vanilla ice cream and a slice of fudgy brownie can be topped with this delicious cranberry sauce and perhaps some sugared cranberries.

BAKING TIP: Why not make a big batch of cranberry sauce when they are in season? Great idea! Then store the sauce in jars or jelly jars. If you sterilize them beforehand, you can keep the sauce for up to a year.

Storing cranberry sauce

This festive sauce will keep very well if you store it in sterilized jars or bottles. To sterilize, place the jars or bottles in a large pan of water, bring to the boil and simmer for a few minutes. Remove them from the water with tongs and place them on a clean tea towel. There is no need to dry them as the heat will evaporate the moisture.

How long will cranberry sauce keep?

Once your jars or bottles have been sterilized, cranberry sauce will keep for up to a year. Once opened, the sauce will keep in the fridge for 1-2 weeks. I love using leftover cranberry sauce on breakfast!

Can I freeze homemade cranberry sauce?

Homemade cranberry sauce freezes very well. In the freezer, cranberry sauce can be stored for up to three months in an airtight container or freezer-safe container.

Cranberry sauce

Cranberry sauce

Tips on how to make your own cranberry sauce

Citrus fruits

Both lemons and oranges can give a very nice flavor to the sauce. Use both the juice and the peel, but be careful not to grate the white part under the colored peel (it is very bitter). Lemon gives it a nice fresh touch which works perfectly if you’re using the cranberry sauce for sweets and desserts.

Orange, on the other hand, has a warmer flavor, especially when combined with cinnamon. In the recipe below, replace the lemon with the juice of a whole orange, orange peel and a cinnamon stick. The stick is left to cook and removed from the mixture before blending. It varies from dish to dish, but the orange combination is generally best with meat dishes. (and also great on your leftover turkey sandwiches!)

You can also experiment with other citrus fruits such as yuzu or grapefruit, but I have no experience of using them with this cranberry sauce.

Fresh, frozen or dried cranberries

Both fresh and frozen cranberries work well in this sauce. Frozen cranberries should be thawed completely and the liquid drained. Dried cranberries cannot be used in this sauce.

Sieving and/or blending

After cooking, you will have a fairly thin cranberry sauce. You can sieve out the skins, but I like to puree them with the sauce. This thickens the sauce naturally and will give it a perfect consistency and you don’t taste much of it, so why throw it away? You can use a hand blender or an immersion blender to puree, both work well.

Giving cranberry sauce as a gift

Have you made a lot of sauce? Why not give away a few bottles? As with jam, I find it very nice to give and receive. Put a pretty label on the bottle with the name and date, and maybe some holiday decoration. Nothing beats homemade gifts, especially when you can eat them 😉.


Cranberry sauce

Print Recipe

No votes yet

Cranberry sauce recipe

This fresh cranberry sauce tastes great with ice cream, cakes and desserts, but also with meat and main dishes.
Prep Time5 minutes
Cook Time10 minutes
Total Time15 minutes
Servings: 2 jars

Ingredients

  • 340 ml water
  • 200 grams granulated sugar fine
  • Juice of half a lemon
  • Zest of a whole lemon
  • 340 grams fresh cranberries

Instructions

  • Place all the ingredients in a saucepan and bring to the boil. As soon as it starts to boil, add the washed cranberries.
  • Continue stirring until all the cranberries have burst. This will take about 5-10 minutes.
  • Blend the mixture with a hand blender or in a heatproof blender until smooth. If necessary, leave the sauce to thicken in the saucepan over a low heat for a few minutes.
  • Pour the cranberry sauce into clean (boiled) glass swing top bottles or weck jars and seal well. Leave to cool completely.