


Room temperature
Make sure all your ingredients are at room temperature. This is an important rule for baking (unless the recipe states otherwise, of course).


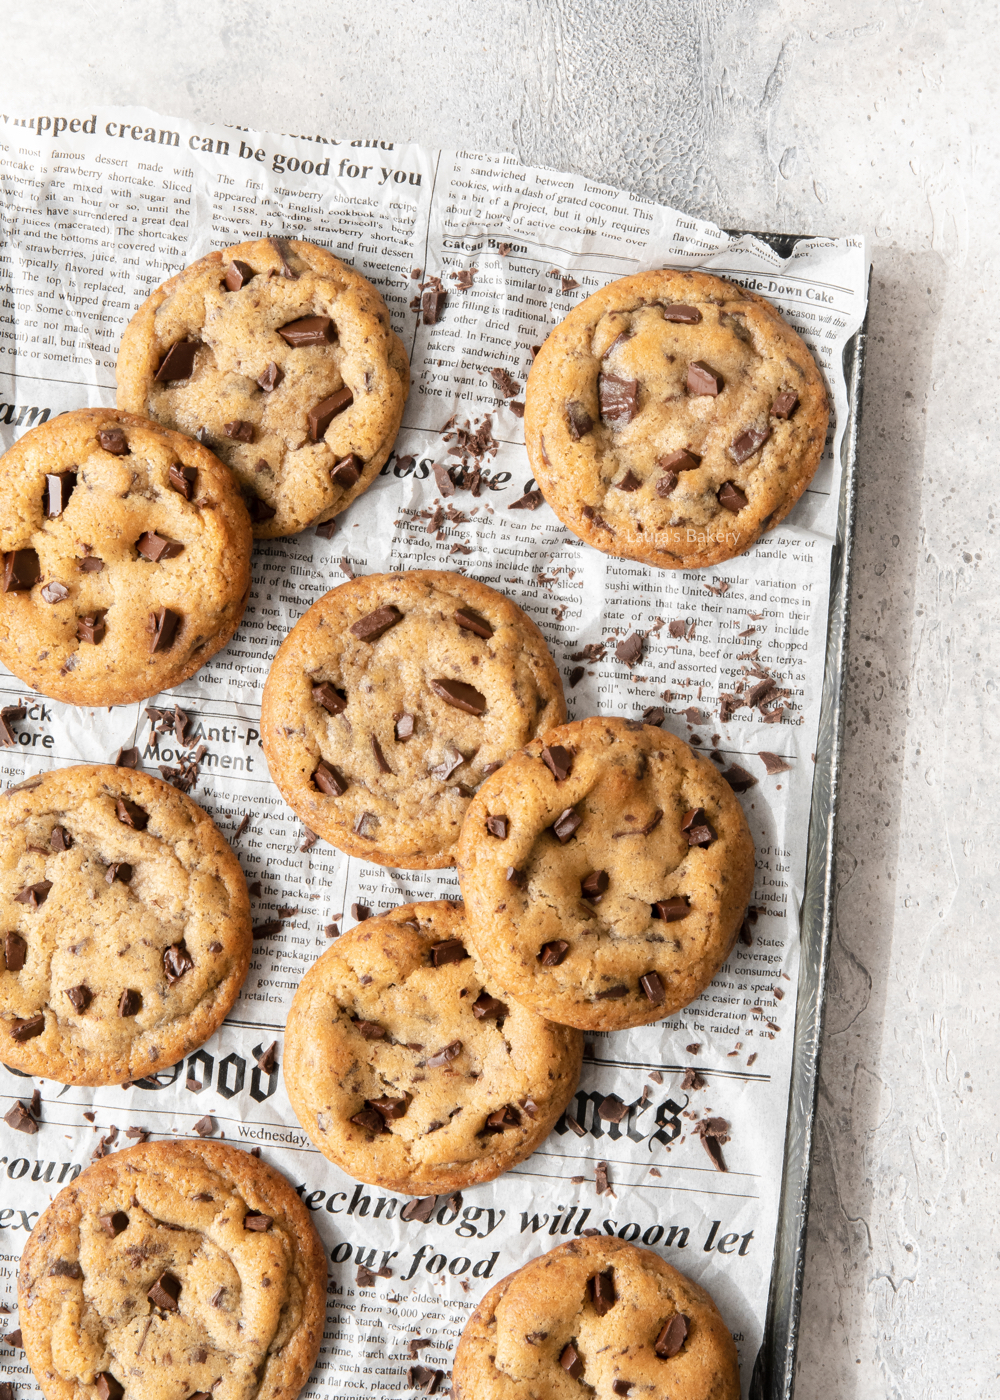
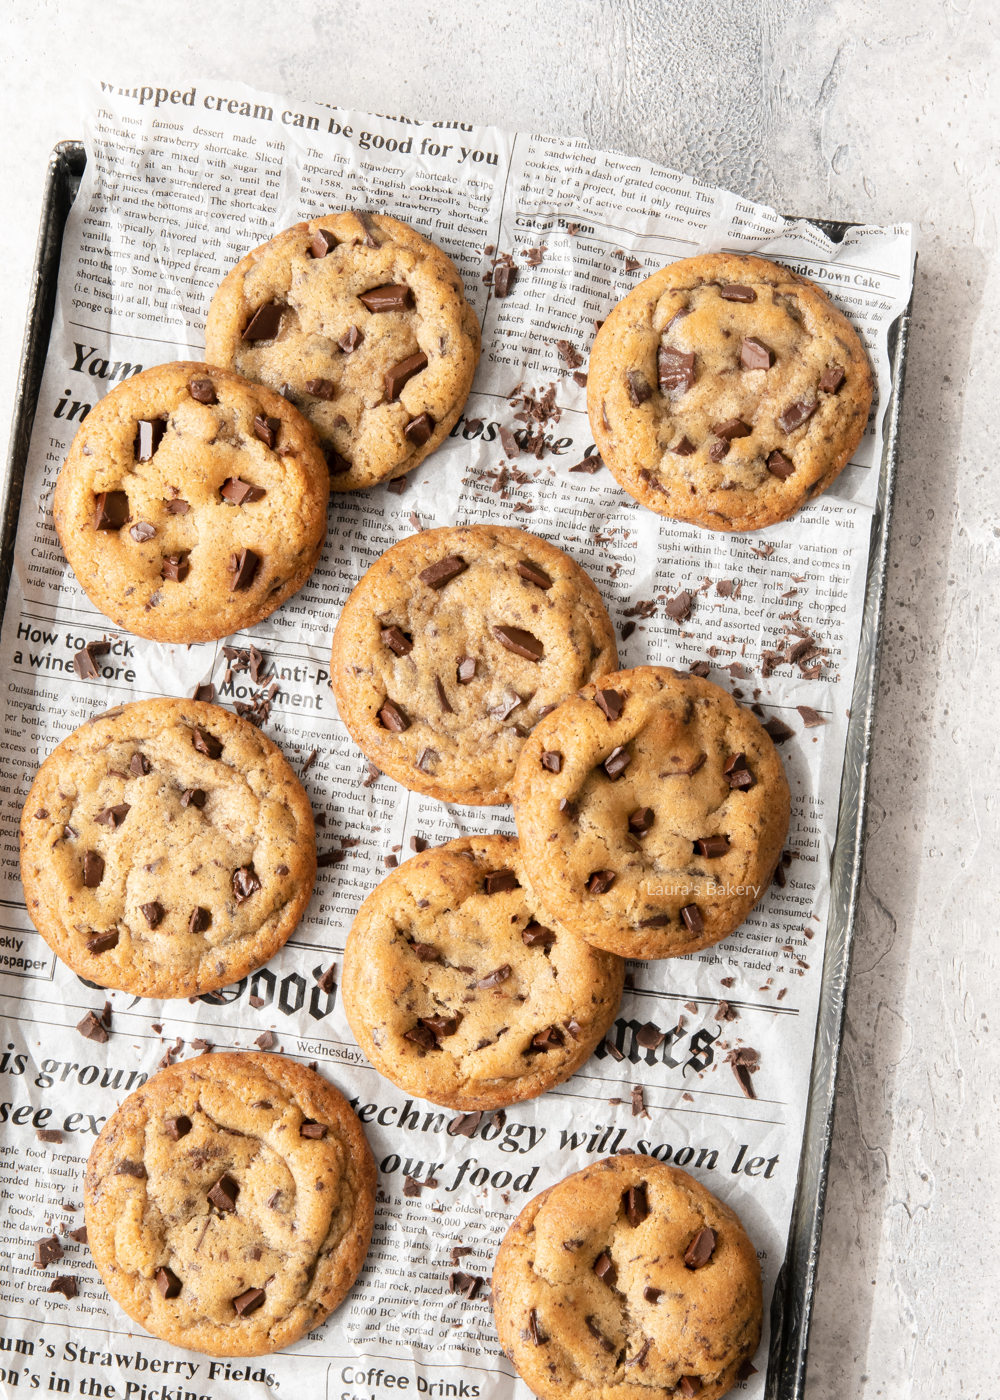
For years I have been baking the most delicious homemade chocolate chip cookies with this easy recipe. With all of my baking tips in this chocolate chip cookie recipe, you can bake them at home too!
This recipe is my basic recipe for chocolate chip cookies. I have made all kinds of variations on this recipe, but a good starter recipe is essential. To be honest, this is also the cookie recipe I make the most.
I like to tell you more about this recipe, the ingredients and of course I also give baking tips and answer frequently asked questions about these chocolate chip cookies.
My recipe for homemade chocolate chip cookies contains 8 ingredients. If you’re lucky, you’ll have all the ingrediënts in stock and can bake these cookies right away.
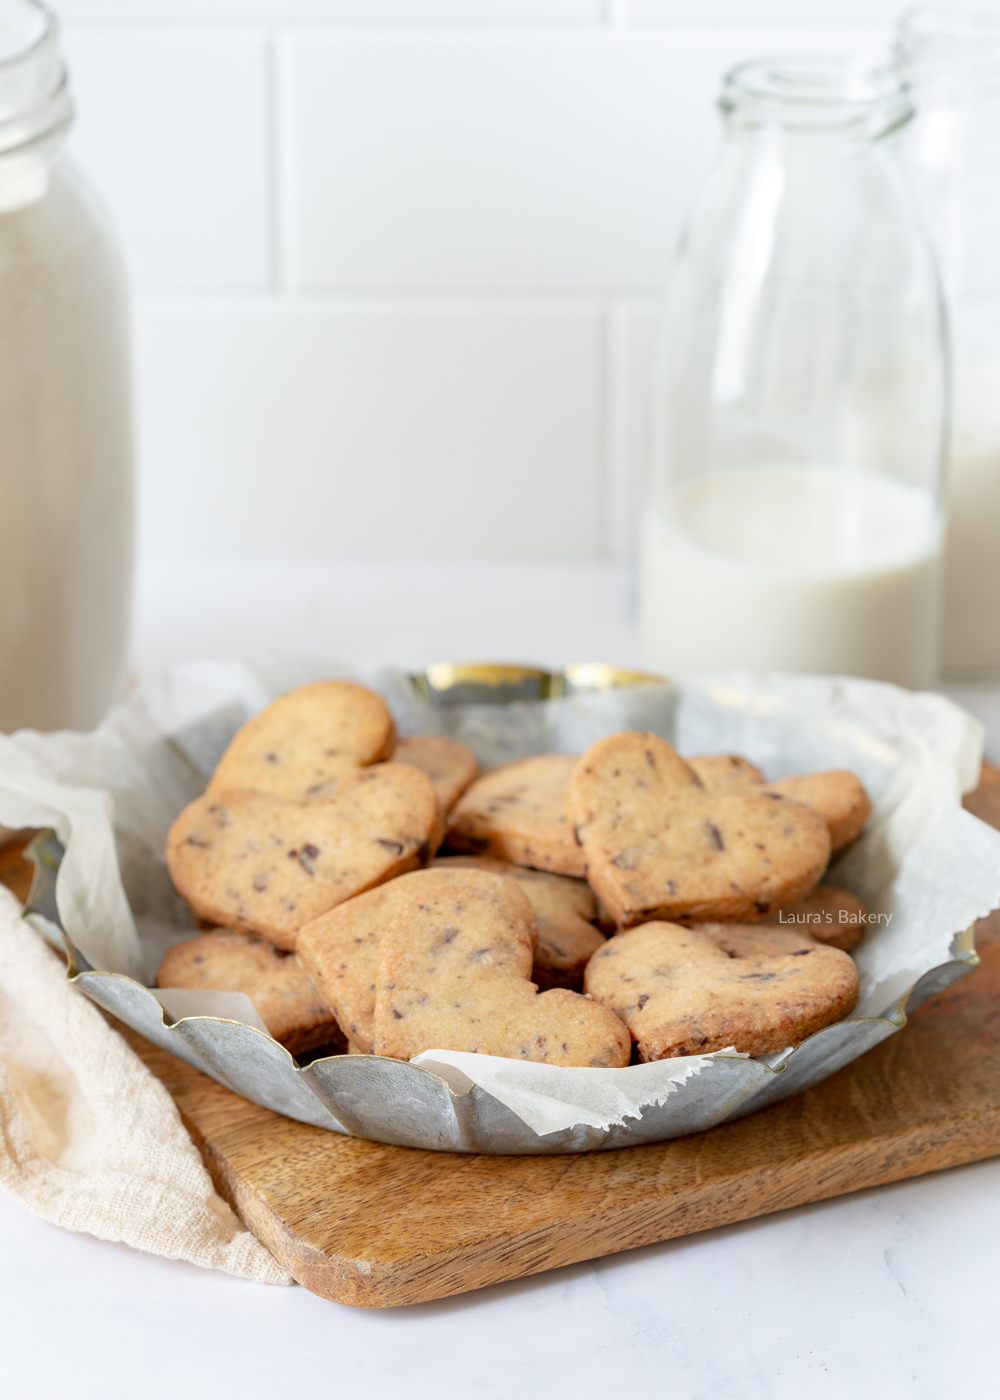
To get your cookies perfectly round, use a round cutter immediately after they come out of the oven. I always use a large cutter from this set of round metal cutters. You put the cutter around the cookie and spin it around so the cookies get a nice round shape.
Make sure all your ingredients are at room temperature. This is an important rule for baking (unless the recipe states otherwise, of course).
You can buy these ready-made, but chopping up a bar of chocolate is also fine. I did the latter myself this time, for a rustic look. Just don’t chop it too finely.
I always use brown sugar, but if you can’t find it, you can use dark brown sugar or white sugar as well. Just remember that this affects the color of the cookies as well as the taste and texture.
Most cookie recipes say to let the dough rest in the fridge for at least an hour, but it’s better to allow even more time for this. I left my dough in the fridge all night and did not proceed with it until a day later, which made for the most beautiful and tasty. They rise more, and the texture is also better
If you love chocolate chip cookies, I’m sure that you want to try these recipes with chocolate chips too!
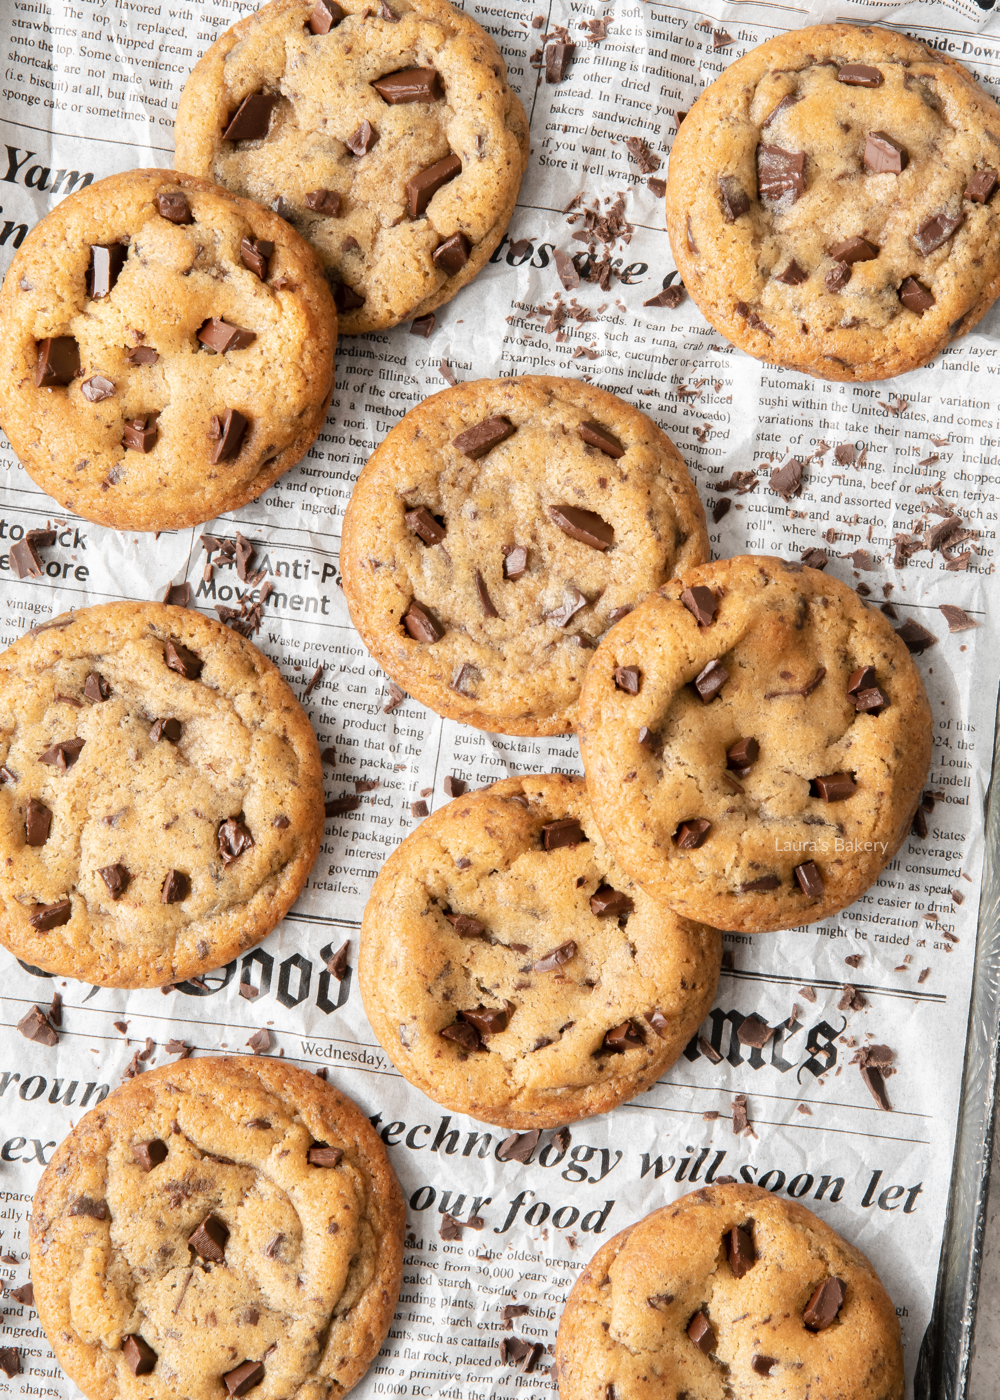
For years I have been baking the most delicious homemade chocolate chip cookies with this easy recipe. With all of my baking tips in this chocolate chip cookie recipe, you can bake them at home too!
This recipe is my basic recipe for chocolate chip cookies. I have made all kinds of variations on this recipe, but a good starter recipe is essential. To be honest, this is also the cookie recipe I make the most.
I like to tell you more about this recipe, the ingredients and of course I also give baking tips and answer frequently asked questions about these chocolate chip cookies.
My recipe for homemade chocolate chip cookies contains 8 ingredients. If you’re lucky, you’ll have all the ingrediënts in stock and can bake these cookies right away.
To get your cookies perfectly round, use a round cutter immediately after they come out of the oven. I always use a large cutter from this set of round metal cutters. You put the cutter around the cookie and spin it around so the cookies get a nice round shape.
Make sure all your ingredients are at room temperature. This is an important rule for baking (unless the recipe states otherwise, of course).
You can buy these ready-made, but chopping up a bar of chocolate is also fine. I did the latter myself this time, for a rustic look. Just don’t chop it too finely.
I always use brown sugar, but if you can’t find it, you can use dark brown sugar or white sugar as well. Just remember that this affects the color of the cookies as well as the taste and texture.
Most cookie recipes say to let the dough rest in the fridge for at least an hour, but it’s better to allow even more time for this. I left my dough in the fridge all night and did not proceed with it until a day later, which made for the most beautiful and tasty. They rise more, and the texture is also better
If you love chocolate chip cookies, I’m sure that you want to try these recipes with chocolate chips too!

Making homemade tortilla chips is so easy and incredibly delicious! You only need 3 ingredients and they are easy to make. They are delicious on their own, but you can certainly vary them or serve with your favorite dips.
With this tortilla chips recipe, you can make your own delicious tortilla chips in no time. The easiest way is to use store-bought corn tortillas or flour tortillas and then make chips out of them, but you can also make your own tortilla wraps first and then make chips out of them.
I have to admit that I don’t always make my own tortillas, but when I do, I always make sure that I “accidentally” make a little too much so that I can make delicious tortilla chips out of them.
Making your own (tortilla) chips doesn’t have to be complicated. Besides the few ingredients, there are only a few steps to take. In just a few minutes, you can have your tortilla triangles ready to pop in the oven. In fifteen minutes your own freshly made chips will be ready!
With this recipe you can make natural tortilla chips, but of course you can also add flavorings (like taco seasoning, chili powder or another seasoning blend) or make a dish with them.
Of course, you will want to serve a nice dip with your homemade chips. A classic is a cheesy dip or buffalo chicken dip. My favorites are guacamole and tomato salsa. Of course you can also use store-bought chips, but making your own is quite fun and easy to do. And tastier too.

Now when you have your wraps or tortillas you can use something like a pizza cutter to make tortilla wedges. I usually cut tortillas in 8 wedges but it also depends on the size.
Make a mixture of sea salt, pepper and a little oil and using a pastry brush you can brush the chip on both sides. Now taking a large baking sheet (or use two large baking sheets) you spread them in a single layer. That’s important as otherwise they will not crisp up.
If you really want to make it a party, you can make a nacho casserole (nachos todos!) with your own tortilla chips. These oven nachos are simple but fantastic.
Because even plain or seasoned to your liking, these tortilla chips are already great. It is a delicious snack and so simple. The important thing is not to overcook them. I did that the first time I made them myself and I can tell you that they didn’t taste as good burnt 😉 .
I’m curious how you think they taste, whether you use them plain or make another dish with them? Be sure to let me know, I really like to hear that!

Homemade corn tortilla chips can be stored in a tightly closed container for up to a week. They will stay nice and crispy. I don’t recommend freezing them, as they often don’t get any tastier.
Sure! You can use “regular” tortillas from the store, whole wheat tortillas, or make your own tortillas. You can make it with any kind. You can also add your own spices or other flavorings if you like.
I really like the results with olive oil. If you prefer to make it with another vegetable oil, you can certainly try that. I haven’t tested it myself, but let me know how it turns out for you!
While I have not tried that myself, that would work absolutely fine. You should probably shorten the baking time a bit.

Chocolate chip cookies are not only a delicious twist on the classic cut out sugar cookie, but they can also be beautifully decorated or filled. I’m going to tell you all about them today.
Making chocolate chip cookies is very easy. I combined the basic recipe for vanilla sugar cookies with chocolate chips. It’s that easy! To be honest, several batches went into the oven until I got the right ratio. Of course, you want to taste just the right amount of chocolate in your cookies.
So what do these chocolate chip sugar cookies taste like? Kind of like very crunchy chocolate chip cookies, actually. Delicious! Of course, an official chocolate chip cookie is supposed to be soft and a little crunchy around the edges. If this is what you are after, then you should definitely start with my chocolate chip cookie recipe, and save these chocolate chip sugar cookies for later.
You can choose to mix mini chocolate chips into your cookie dough, but I found it worked just as well to use a bar of chocolate and chop it finely. The pieces of chocolate in your cookies will be different sizes, but I didn’t find that to be a problem.

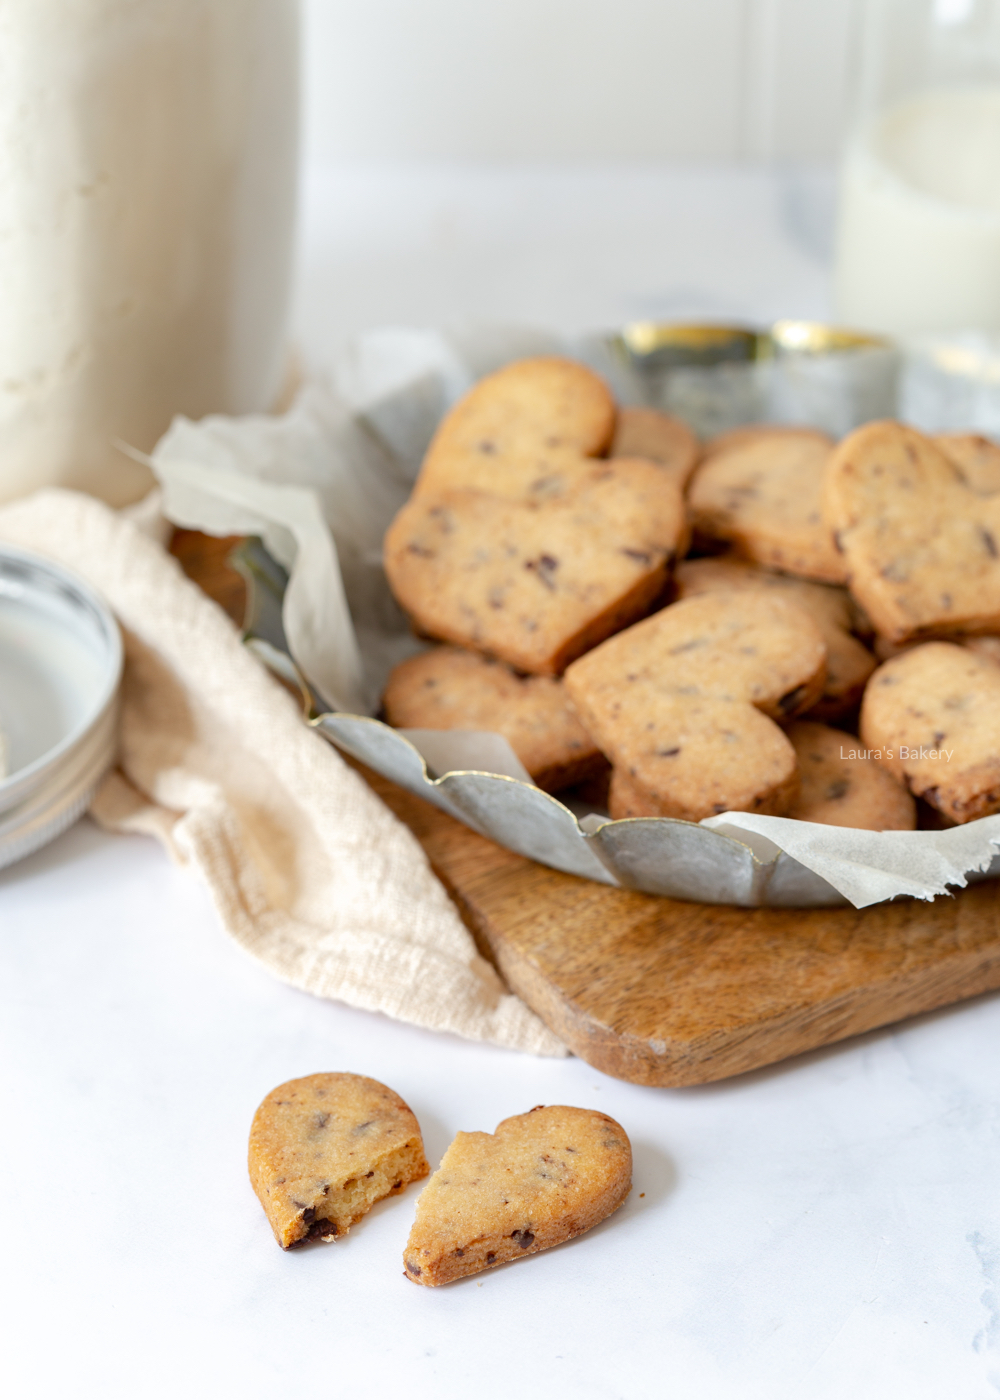
The great thing about baking sugar cookies is that they hold their shape in the oven. The dough is perfect for using a cookie cutter to cut into all sorts of pretty shapes and baking the cookies on a baking sheet.
For this recipe, I used a relatively small heart-shaped cookie cutter. But pick a shape (or several!) that you like, and keep in mind that it’s helpful to bake cookies of the same size on each baking sheet. That way, the cookies will bake and brown evenly.
My cookie cutter collection is already huge, but you can find lots of cute sugar cookie cutters here. Personally, I love having the 12-piece round cookie cutter set around the house. They come in handy for many recipes.
Because sugar cookies hold their shape so well, they are great for decorating with a glaze or royal icing after baking.
Another fun idea is to melt chocolate and put it in a piping bag. Then decorate the cookies with it. The taste is perfect, too.
Cookies come out of the oven soft and get firmer as they cool. So you cannot “feel” when they are done. The best way to bake cookies is to use your eyes and trust the recipe. When your cookies have golden brown edges, they are done.
I used dark chocolate, but you can also use milk chocolate.
You absolutely can! You can store cookie dough for a long time, especially in the freezer. Packaged in an airtight container, cookie dough will keep for up to a week in the refrigerator and up to three months in the freezer.
You certainly can. If you omit the chocolate from this recipe, you will be making classic cut-out sugar cookies. There are many more flavors, I will share them with you soon!


This is a great recipe for all those coffee lovers out there. Even better if they also love classic chocolate chip cookies as this is the best of both worlds. These coffee chocolate chip cookies (or call them espresso chocolate chip cookies for a stronger result!) have the best of both worlds.
Delicious coffee taste within a delicious cookie. What more could you want?
It’s still the case that I rarely drink coffee at home and regularly opt for cappuccino when I go out. So while I don’t drink a lot of coffee, I still absolutely love incorporating coffee into baked goods.
My latest in cookie recipes are these chocolate chip coffee cookies. I took my favorite recipe for chocolate chip cookies and made a version with coffee. Super easy, but SO delicious and even better served with a cup of coffee. Will you make them this weekend?
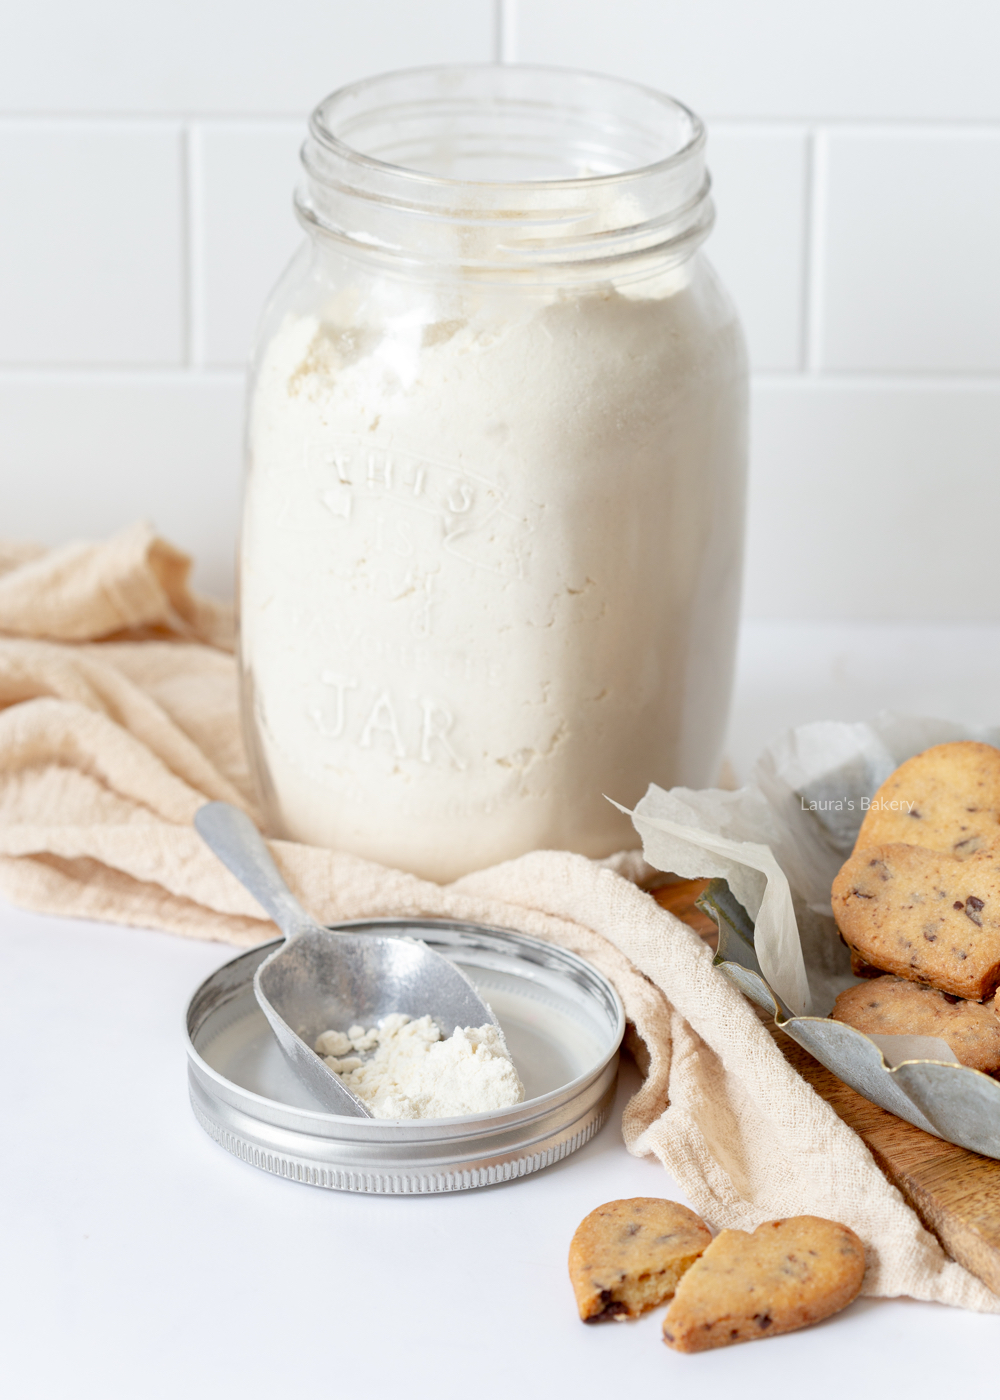
BAKING TIP: This recipe is also very nice to give as a gift in a glass mason jar for a birthday or another celebration.

Making these espresso cookies you will need the following ingredients at room temperature:
In addition you will need a stand mixer or electric mixer, parchment paper, cookie scoop (optional) and for best results I always recommend using a kitchen scale.

You start by creaming the butter and the sugar together. Add the egg in and the vanilla extract and mix it well. You add the dry ingredients together and add the flour mixture to the butter mixture.
Knead this into a firm dough. Taste to check if you like more coffee flavor and keep it mind that the flavor will mellow down once the cookies are baked. For extra coffee flavor you can add a bit more of the instant coffee powder.
The final step is to add the chocolate chips and knead them through the dough. Let it chill in the fridge for at least an hour for the best cookies (Find out why that is important here).
Once the dough is chilled enough form it into cookie dough balls. I like to use a cookie scoop or ice cream scoop for doing this so I get evenly sized cookies. But a spoon will also do the trick! Place them on a cookie sheet and flatten them slightly if necessary.
Bake in the preheated oven for 10-12 minutes or until the edges are golden brown and let them cool down on a cooling rack.
The cookies will keep in an airtight container for 1-2 weeks.

Ready to bake some chocolate chip madeleines? I love these little French cakes and love to make them in different kind of flavors. And since it is the month of Valentine’s I figured I share one of my all time favorites.
you guessed it, that is a recipe for perfect madeleines. This time it is a twist on chocolate chip cookies; chocolate chip madeleines! Perfect with a cup of tea and a great gift for Valentine’s!
I’ve already shared a recipe for chocolate dipped madeleines and red velvet madeleines but this one is very different as it has chocolate in the batter before baking. Although you could make chocolate-dipped chocolate chip madeleines too if you wanted to go all out!
I’ll soon be sharing a recipe for a classic madeleine as well but for now this delicious chocolate chip version.
First thing you need to have is a madeleine pan for baking them. If you’ve never made madeleines before it’s good to know that they require a special pan. Something like this although there are various models available.
Other than that you need the following ingredients at room temperature:

Now the first step is to whisk the eggs and the sugar together. The easiest way to do this is with a stand mixer but you can also use a large bowl and a hand mixer. You want the mixture to triplicate in volume. And then keep whisking for another 5 minutes.
Now carefully fold in the melted butter and the flour. Do this in batches and try and keep the air in as much as possible. Once everything is mixed you add the chocolate chips as the last step. Fill one large piping bag or two if it doesn’t fit.
If you don’t have a piping bag you can do this with two teaspoons. Now before you finish the chocolate madeleines you need to chill the dough in the fridge for at least two hours before moving on to the next step. That will enhance the flavor of the madeleines.
Now the last step is baking the madeleines and giving them that classic bump on top. You start by greasing the madeleine pan and dusting it with flour to ensure that they will release from the pan easily.
You bake the madeleines at 400˚F for just 8-10 minutes. You want them to be lightly golden brown but still quite pale in the middle.
Once baked the chocolate chip madeleines will keep in an airtight container for 3-4 days.

I love to bake little muffins as a treat for myself. These whole wheat chocolate chip muffins are one of my favorites! They do have some sugar with the added honey (and chocolate of course), but overall are pretty healthy.
At first glance, chocolate chip muffins sound like a recipe that can’t possibly be healthy. I’m not saying that these whole wheat chocolate chip muffins are the most healthy muffins out there, but using a whole grain batter as the base makes them much more nutritious.
Whole wheat flour fills you up quicker and keeps you fuller for longer. As a result, you are less likely to reach for a second muffin after the first. In terms of taste they are still absolutely delicious so using whole wheat flour is simply a way to make them a little better for you.
To make them even more healthy, you could switch the milk chocolate chips to (sugar free) dark chocolate. And the honey could be substituted with another sweetener.
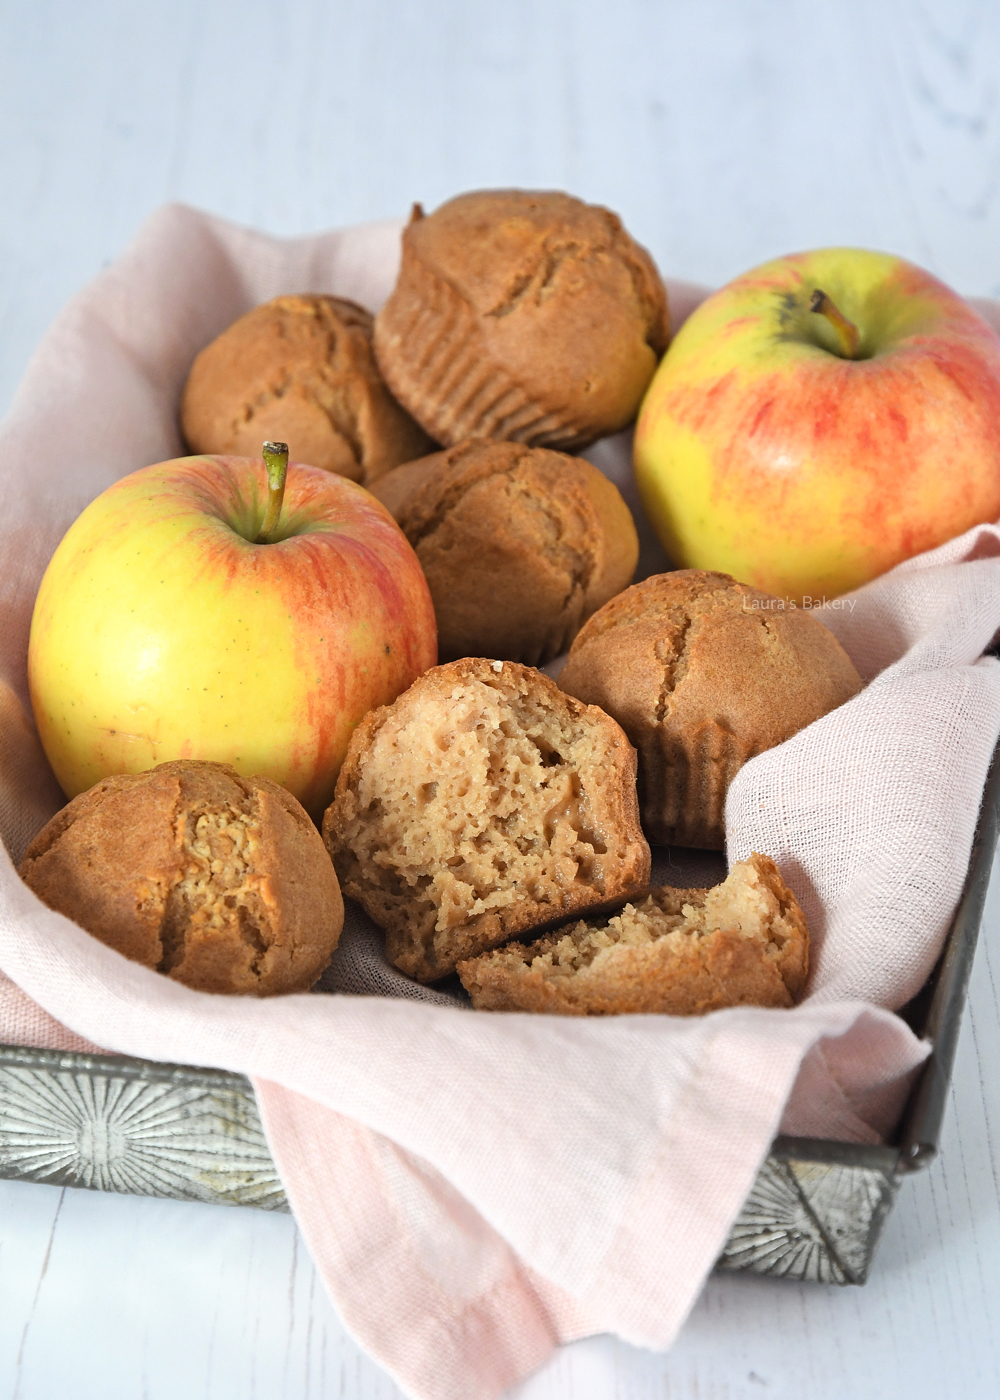
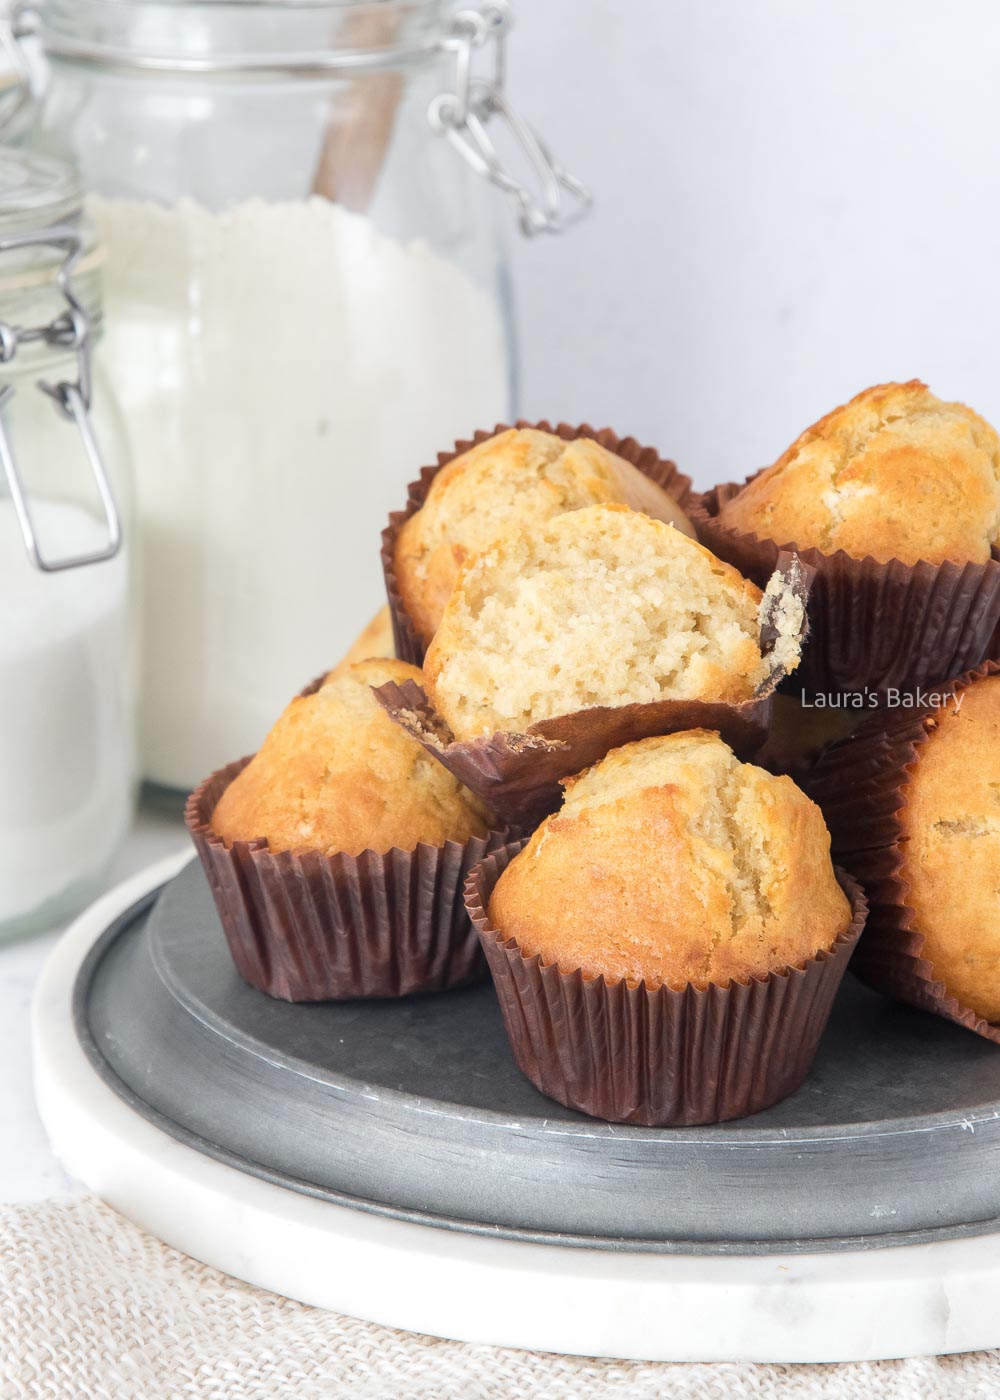
Do you prefer to make muffins without whole grain flour? Try these vanilla muffins or these delicious apple cinnamon muffins.
Have you ever made whole grain muffins? I’ve got the hang of them now and can’t get enough. Maybe I should also try to make a recipe for whole wheat cupcakes, but for now you can start with these whole wheat chocolate chip muffins.
There is much less sugar in these muffins and the only sweetness comes from the chocolate and the honey. No refined sugar is added to the muffin batter.
Not sure what the difference is between muffins and cupcakes?

Other than those ingredients you will need a muffin tin to make these healthy chocolate muffins. You don’t really need a food processor for this recipe as the mixing of the wet ingredients and the dry ingredients is super easy and doesn’t require long mixing.
You first mix the dry ingredients in a large bowl and mix the wet ones in another bowl. Combine the two together and you’re done.
Divide the batter over the muffin pan (lined with paper liners) and bake in the oven in around 15-18 minutes or until golden brown. Place them on a wire rack to cool completely
Now if you want to make some variations or go for a dairy free muffin you can replace the whole milk with a plant based alternative.
If you want you can replace the honey for coconut sugar or brown sugar as the amount is not that big and it should be possible without too much trouble with the batter. Keep in mind that I have not tested the recipe with the coconut sugar. But maple syrup should be an easy swap.
I find that these delicious healthy chocolate chip muffins make for easy healthy snacks. Perfect for a lunch break or snack in between meals.
I like to freeze them in single pieces in a ziplock bag so I always have a perfect snack ready to go.

These delicious Easter egg chocolate chip cookies are so good! You’ll want to make these as many times as you can, so I am sharing this in time for Easter so you can make them a couple of times. You do have to taste it all right? 😉
Last year I was visiting Chicago for a food blogger conference and of course one of the fun things to do in any country is visiting the local grocery store.
It was also around Easter so the shops where loaded with lots of different Easter treats, like Cadbury mini eggs. You can’t find those in the Netherlands so I stacked my suitcase full of them so I could make these super delicious Easter cookies (and these easter egg blondies too!).
It’s virtually the same as classic chocolate chip cookies but the sugar coated easter eggs give the cookies an extra delicious crunch!
Making these Easter egg chocolate chip cookies is pretty straightforward. You need the following:

In addition to the ingredients you also need parchment paper, a large bowl and an electric mixer. Of course a food processor with the paddle attachment will also work and that is what I used.
If you want to make sure they are all the same size you can use a medium cookie scoop, if you want to create the perfect cookie size.
Making the Easter chocolate chip cookies is a matter of creaming the butter and the sugar in a bowl. Add the egg and the vanilla extract and mix this until you have a smooth dough.
Then add the rest of the dry ingredients and turn of the mixer as soon as the flour is incorporated.
Chop up the mini eggs and fold them into the dough. As always you can find the full details on how to make these soft chewy cookies in the recipe card.
If you want to add some of the eggs on top of the cookies make sure to press them in lightly for best results.
Alternatively you can also add them to the cookies right after they come out of the oven and are still soft.

The cookies will keep in an airtight container outside of the fridge for 1-2 weeks. But chances are they are long gone before that. In the freezer they keep up to 3 months.
For this Easter cookie recipe you have to break the eggs into smaller pieces or they will be too large to include in the dough (unless that’s what you want). I roughly chop it with a sharp knife and then fold it into the dough.
Make sure to rest the dough for at least an hour in the refrigerator and then divide into cookie dough balls.
Yes you can use other Easter candy, Easter treats or another brand of easter eggs. Keep in mind that not all melt in the same way. But in general you can use all kinds of chocolate chunks for making this perfect Easter cookie.
Some pastel colored sprinkles would be fun too!
Keep in mind that cookies are always soft when they come out of the oven. They will crisp up as soon as they cool down. Do make sure to keep the chill time into account when making them.
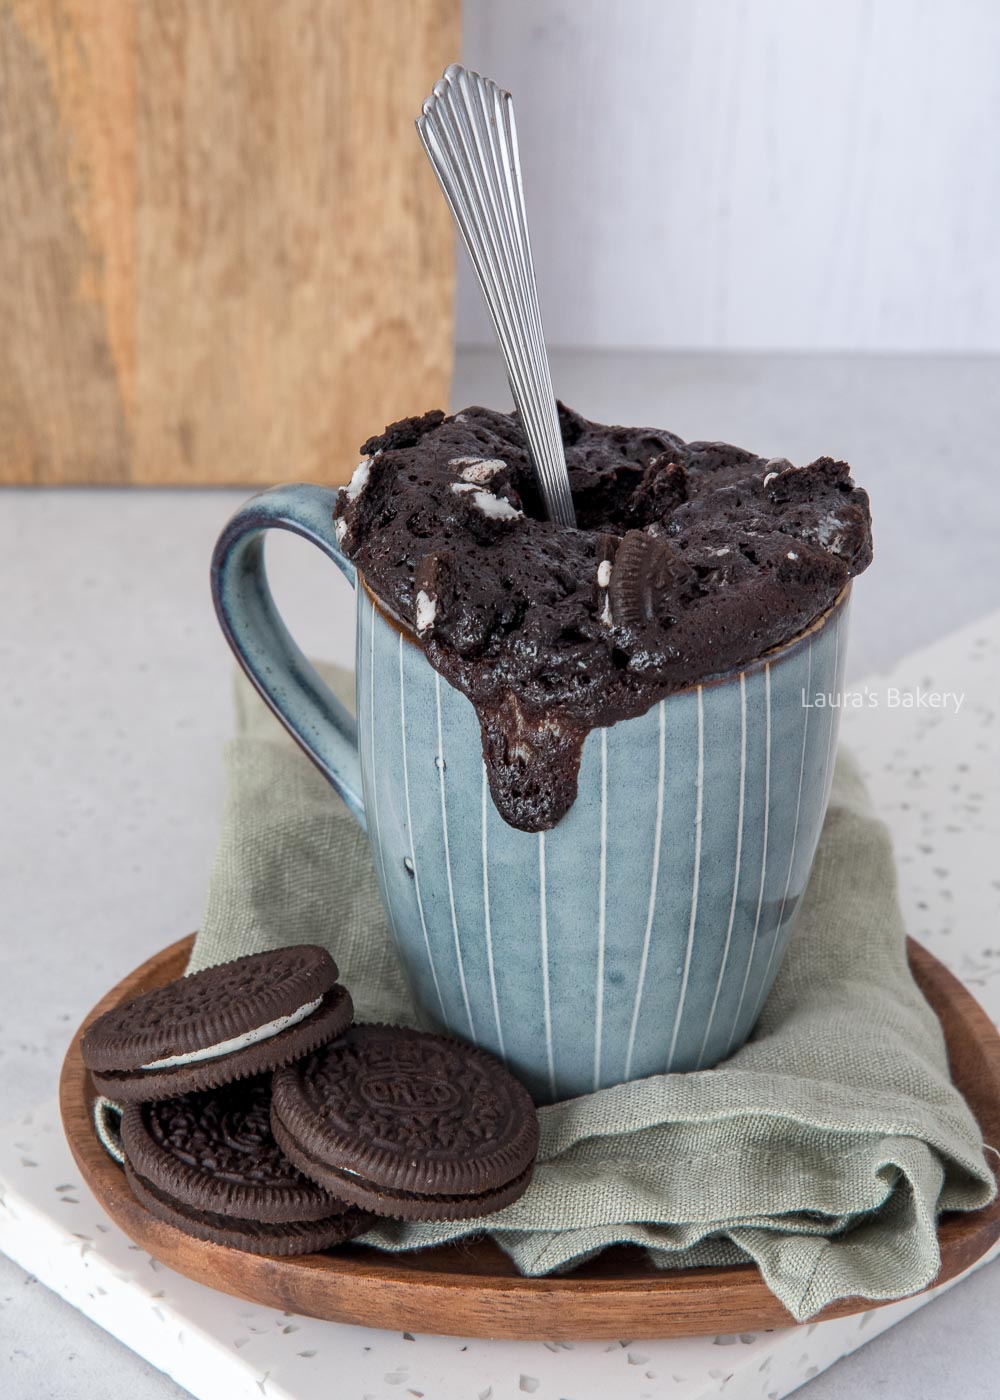
I’m starting to develop a bit of an addiction to mug cakes. It’s really nice to be able to conjure up a delicious cake so quickly and easily, isn’t it? This Oreo mug cake was another real success!
It’s been years since I shared my very first mug cake recipe with you (or at least it’s been years since I shared it on the Dutch website). Those were a vanilla mug cake recipe and a chocolate mug cake recipe. Many of you have been asking for more mug cakes recipes. While I generally prefer a ‘real’ cake like my favorite vanilla loaf cake, sometimes it is so convenient to whip up a delicious cake in no time at all. Today I am sharing my easy Oreo mug cake recipe.
Now for this Oreo cake you need only a few simple ingredients. That’s the fun of making a mug cake right? It’s such an easy dessert and serve it with a scoop of ice cream for an even better dessert. Or use a big dollop of whipped cream. So good.
In addition you will also need a microwave-safe mug. I like to use a mug that is roughly a little more than a cup in size.
Now this easy mug cake recipe requires you to mix the ingredients. And that’s about all that there is to it. The only difference is that you need to keep the Oreo cookies and the chocolate chips separate. You can simply mix all the ingredients together in the mug itself.
If you find that a little hard to do you can also use a separate small bowl for mixing the ingredients and then pour it into your mug. You really do not need a food processor for making this. A whisk or spatula is enough.
The microwave will need to be on high power for making the Oreo mug cake. Now how much that is depends on your microwave. For mine that is 800 watt. On that setting it takes a total of 140 seconds (2 minutes and 20 seconds) to make the best Oreo mug cake ever.
You might have seen the Oreo mug cake trend on TikTok where only two ingredients are used. Crushed Oreos and a cup of milk. While it looks good (haven’t tried this for myself though!) I would think it is not exactly a cake-like texture. It’s more a giant Oreo cookie after it’s been baked in the microwave.
But by all means try this for yourself! If you do want the airy texture of a cake? Try my Oreo microwave cake. I might try the tiktok version next time!
If you love baking cookies, you might want to know why chilled cookie dough is essential for a perfect cookie. You might feel the need to skip that all important chilling step, but let me explain why it is a good idea to place your dough in the fridge before baking.
Chilling the dough is essential for both cookie dough as well as the base of a short crust pastry. If you’re the kind of person who skips this step, this post is for you!
It’s not hard; the only thing you need to do is to have patience for an hour or so. During that time you can start tidying up the kitchen and make any other preparations for your finished product.
Resting the dough is essential for chocolate chip cookies, sugar cookies and almost any other type of cookie you can think of. I know resting the dough can be a bit of pain. You want to just get on with the recipe and skipping the resting part is so easy to do. You want to just place those cookies on the cookie sheet, plop them in the oven and get it over and done with. The sooner you can start eating that freshly baked batch of cookies!
But for the most delicious cookies you do need to have that little bit of patience. I’ll explain why that is.

One of the reasons for chilling your dough is that having used soft butter also means that your dough is quite soft. It will be stickier because of this and if you want to use it right away the cookies will expand and spread a lot more. So let’s say you are trying to make cute Christmas cookies and have used a cookie cutter. You want the shape of those cookies to stay intact, but baking the cookies right away will probably make the shapes less pronounced.
Once the dough is chilled (and the butter is once again cold butter) it is much firmer and will be less likely to ruin the shape of your cookies. You will have less spread of the cookie dough. This also depends on the recipe you use, I have a special cut out sugar cookie recipe for perfectly shaped cookies!
Now if you take your dough from the fridge after the chill time, it might still be too hard to roll out. It will crack and crumble. So when I take the cold dough out of the fridge I quickly and briefly knead it by hand before rolling it out and place the cookies on the baking sheet. The short kneading is enough to make the dough pliable again.
Yes, chilling your dough also means your cookies will have a better flavor! Cookies and shortcrust pastry actually taste better if you leave the dough in the fridge. The flavors will be absorbed and the final cookies and crusts will have a better texture. If that is not enough reason to give your dough time to chill!
The longer the dough is left in the fridge, the better the result. Personally, I like to make the dough the day before when I make cookies with spices. That way I know the dough has had a sufficient chilling time. Especially with gingerbread or speculaas, the flavor is so much better. You can even freeze most cookie doughs. Obviously frozen dough needs to defrost first, but it’s the ideal way to always have delicious baked cookies in no time at all.
Do you have a love for crispy cookies? Then make sure you let them cool. It will make a huge difference. Most cookies contain gluten, which makes them tougher. But when you let the dough rest, the gluten relaxes. Relaxed gluten makes for crispy cookies. And we all want delicious chewy cookies with lovely crispy edges right?
So as you can see, for the best cookies you just need to have a little patience and give the dough enough resting time. You will be rewarded with a delicious cookie.
Before I answer some questions on this topic, I would love to share a few recipes that definitely need a chilled dough for the very best results:
For resting cookie dough the times are the same for all kinds of cookies and for all kinds of basic cookie dough. Around an hour should be enough. If you have large balls of dough you might need just a bit more so the cold can get all the way through the dough. For small dough balls it might be quicker but to be on the safe side you can use a longer amount of time for the chilling process.
For best results you should always chill your cookie dough. It will give you more flavor, crispier and a chewier cookie and overall the best results. So for next time, don’t skip the chilling. It’s not impossible to bake the cookies right away, but know the result will be different.
You can leave your cookie dough in the fridge for up to one week. Any longer and you will need to freeze it. It will be good to use for up to 2-3 months. Freezing is not necessary, but it sure is easy. Especially if you want to serve freshly baked cookies at any time.
It depends. If you want to shape it using cookie cutters, you definitely need to defrost. If you’ve already shaped the cookies into balls you can just bake them straight from the freezer. Keep in mind that the baking time might vary if you do. Usually you should add 2-3 minutes baking time to the recipe.
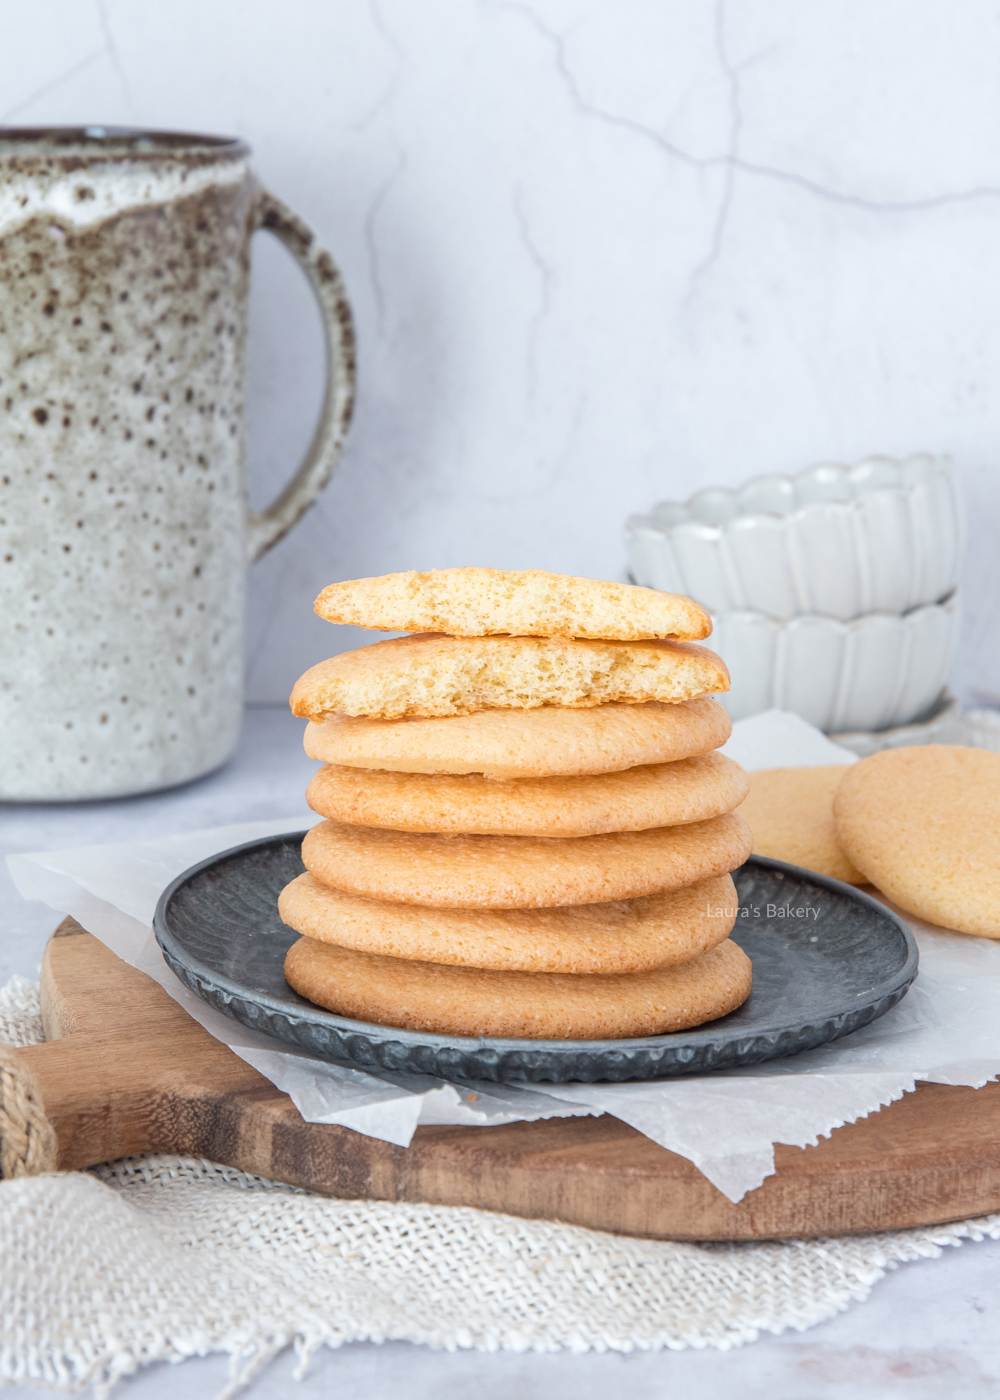
Time for another Dutch recipe: egg cakes! We call them ‘eierkoeken’ in The Netherlands and they are sort of a ligt and airy sponge cakes, very fluffy. You could even call it an egg sponge cake. They are known as a snack. Just plain, or with whipped cream and fresh berries.
Baking egg cakes is actually a bit like making a very airy sponge cake for a delicious cake. In fact, just like a sponge cake, the base for an egg cake batter is eggs, sugar, and flour. And perhaps more importantly (and to the surprise of many), you don’t use butter to bake these small cakes.
Some people separate the egg whites and egg yolks, but i don’t do that. I just put the whole eggs in a large bowl and mis them several minutes on high speed until they are light and fluffy. I always have the best results this way.
Eierkoeken were made famous by the Dutch Sonja Bakker, she is a well known dietician and advices to eat egg cakes as a healthy snack when following her program. I wouldn’t say eierkoeken are very healthy, but they are a good snack indeed.
You can even make a nice treat out of them by piping a nice swirl of whipped cream on an egg cake and add some fresh fruit. Not a healthy snack, but many people think it’s a nice alternative to a slice of cake or pie. And I do agree with that.

A homemade egg cake is best stored on room temperature. Don’t store them in de fridge, as they will dry out faster in here. I always store the egg cakes in an airtight container or a plastic bag. Packed airtight and stored out of the refrigerator, the egg cakes will keep for up to 4 days.
If you’ve made a lot of egg cakes, it’s a good idea to freeze them. That way, you can take an egg cake out of the freezer every day to enjoy as a snack later in the day.
Freezing an egg cake works the same way, wrap it tightly airtight. Personally, I like to put a piece of baking paper between each cake so they don’t stick together and I can easily take a single cake out of the freezer and let it thaw.
Over the years, I have made many different flavors eierkoeken. With apple and cinnamon, blueberries and even chocolate egg cakes. I will share some more egge cake recipes in the future, but here are some ideas in the mean time:

No, I would not, as this will add (too much) moisture to the recipe and will not improve the end result. Optionally, you could add a few drops of lemon extract to replace the lemon zest.
I have been asked this question many times. I’ve never tried it, and since I like these homemade egg cakes better than store-bought, I don’t expect I will try this anytime soon.
The egg cakes you’ll find in stores are often made with ammonium carbonate, but it’s an ingredient which many home bakers can’t find easily. I don’t miss it in my recipe and it makes it a lot easier.
You can replace the flour and some of the baking powder with self-rising flour, but you will still need to add baking powder to get the right airy effect.
The egg cakes were baked a bit too long, I recommend you try to bake them a bit shorter next time. Every oven is different. By the way, these homemade egg cakes are a little more chewy after cooling than the ones you’re used to from the store.
Please note that I use an convention, so if you have a fan oven, lower the temperature by 10-20%.
Oh dear, that’s not intentional. This can happen for several reasons:
Looking from more authentic recipes form The Netherlands? Make sure to check my collection of Dutch recipes!

Do you love cheesecake and cookies? Then this recipe for delicious Strawberry Cheesecake Cookies is for you. Delicious soft and chewy cookies with that creamy cheesecake filling that taste great. You will want to try these!
The combination of strawberries and cheesecake is always a good idea. Just look at these no-bake strawberry cheesecake bites. Then imagine a cheesecake inside of a cookie with fresh strawberries, it’s incredibly delicious. I know what I’m going to bake multiple times this strawberry season!
These cheesecake cookies are certainly not difficult to make yourself. But to be honest, it can get a little messy when you wrap the cheesecake filling in the dough. Let me tell you, it’s totally worth it! And I’ll share my tips for making the least amount of mess possible.
I use a dough similar to chocolate chip cookie dough for the base of these cookies. A favorite of many! This dough makes these cheesecake cookies deliciously creamy and they stay a little chewy and soft. Personally, I really like that about these cookies. And even better: you only need a few simple ingredients.
I first made cheesecake cookies for my cookbook ’50x Koekjes’ (50x Cookies in Dutch) and they were so good, I just had to make more. With a strawberry twist!
Of course, you can vary the flavors of these strawberry cookies even more. Think of different kinds of fruit or white chocolate in them. I can’t wait to make more cheesecake cookies.

I made a simple cream cheese filling for these cookies. As for cream cheese, I like to use Philadelphia, but you can use any kind of regular cream cheese for these cookies. Just use a brand that’s not too watery or thin.
Once you have made the cream cheese mixture, use a teaspoon to make small dollops of cheesecake filling on a baking sheet lined with parchment paper. You don’t need the chopped strawberries yet, I add them together with the cheesecake filling in the cookies dough. That gave me the best results.
Keep the portions of cheesecake filling in the freezer until you fill the cookies. It melts quickly, so it’s best to take it out of the freezer one (pair) at a time. Believe me, otherwise it will be messy 😉 .
I used fresh strawberries for this recipe, which are a little less moist than frozen strawberries.
You can also use frozen strawberries, but be aware that they may be a bit more moist. If you decide to use frozen strawberries, I would use them frozen in the cookies and not let them thaw first.
Keep in mind that the cookies may need a 1-2 minutes extra in the oven.
Another option: freeze-dried strawberries! I did not try this, but I have baked with them before and I know -almost- certain this would work as well.

Once you have you cookie dough balls, frozen cream cheese balls and chopped strawberries, it is time to make them into strawberry cheesecake cookies.
Take a ball of cookie dough and remove about a third of the dough. Make a ball of the bigger piece of dough, flatten it a bit and make a dimple in the dough.
Put a piece of frozen cheesecake in this simple. Add some strawberry pieces and use the small piece of dough to cover it up. Press the edges together, form into a nice round ball and place on a prepared baking sheet.
It’s totally fine if there are soms cracks in the dough where you can see the filling. If you like, you can press some extra strawberry pieces into the dough.
After you have a cookie sheet full of freshly baked cookies, you probably won’t eat them all in one sitting. Fortunately, you can keep them well.
In a jar or airtight container, they will keep for about a week. Where I normally don’t store cookies in the fridge, these cookies will stay best in de refrigerator due to the cheesecake filling.
In an airtight container, the cookies will keep for up to 3 months in the freezer. I like to store them between layer of parchment paper so they don’t stick to each other.
It is certainly possible to make these strawberry cream cheese cookies ahead of time. The dough should rest in the refrigerator for at least 1 hour, but longer is fine. Take it out of the fridge 1-2 hours ahead of time to allow it to come to room temperature before forming into balls.
You can make the dollops of cream cheese ahead of time too.
Want to make really nice round cookies? Use a big round cookie cutter. As soon as the cookies come out of the oven, place the ring around the still-warm cookie and rotate in a circle until the cookie form is nice and round. Repeat with all the cookies.
Of course! I would recommend to use white chocolate chips. The combination of white chocolate and strawberries is really good!
Yes! You could use strawberry jam to flavor the cream cheese filling or to replace the fresh strawberries. No matter what you choose, the cookies will have a perfect strawberry flavor.

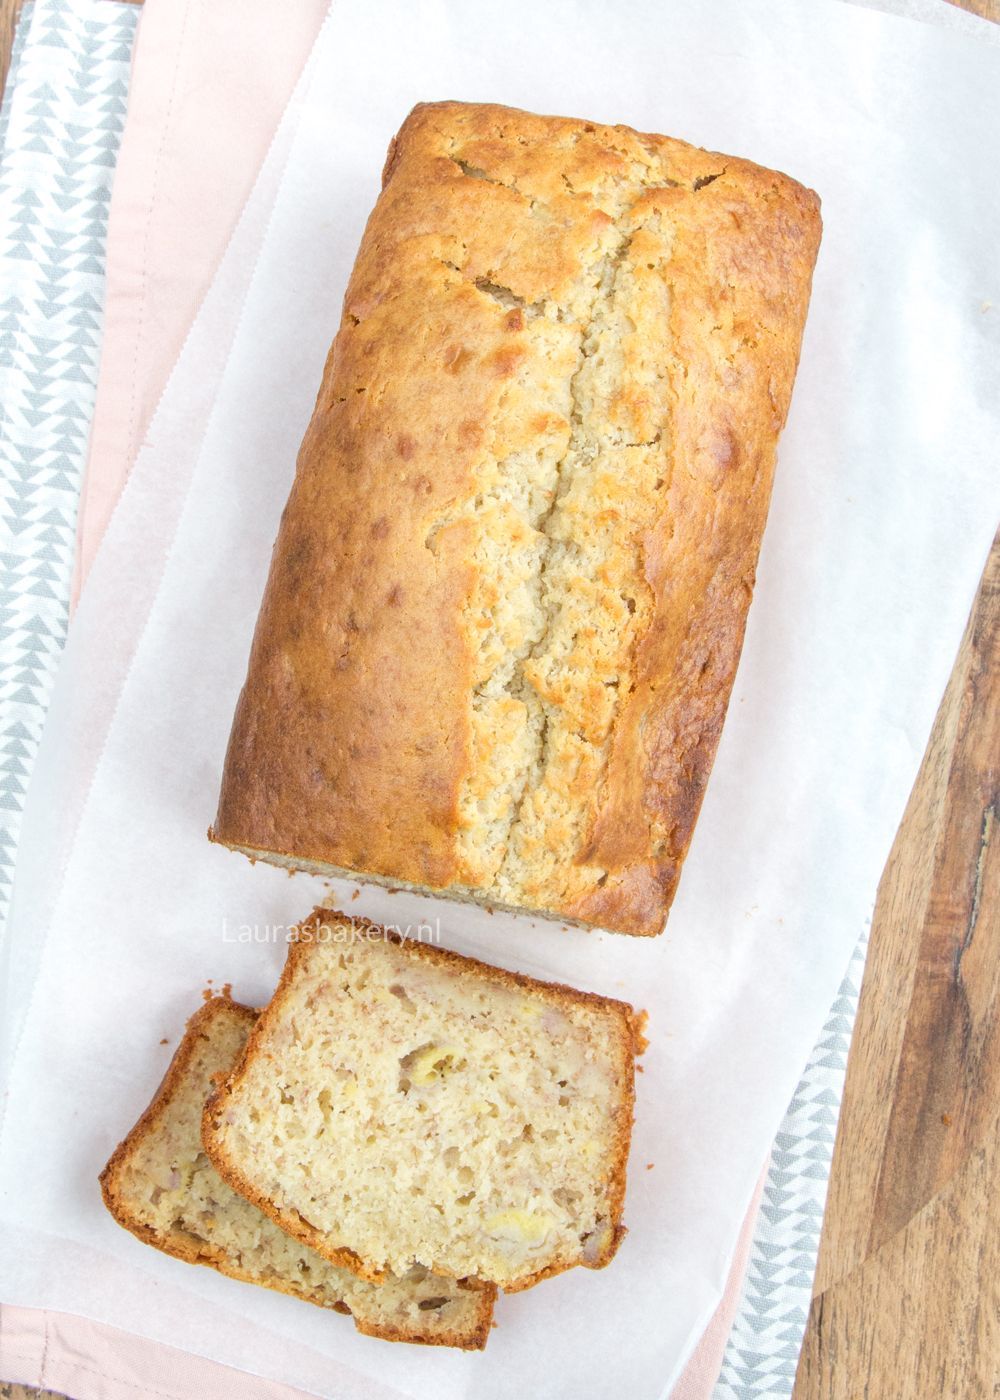
Imagine this: a delicious, creamy banana bread that tastes like a real treat. Look no further, this is the right recipe for you! The cream cheese mixed into the batter makes the most perfect cream cheese banana bread. You will love it!
I love a good banana bread. I make my recipe for healthy banana bread the most, but sometimes I love to make this banana bread with cream cheese. Where my healthy banana bread has no sugar of butter in it, this one does call for butter and sugar. And more important: cream cheese! It really takes a banana bread to the next level.
There are multiple ways of incorporating cream cheese into you banana bread. I chose to add it to the batter for that perfect creamy and moist results. But you could also make a banana bread with cream cheese filling by adding a sort of a cheese cake mixture in the batter before baking.
Another delicious variation: add a cream cheese frosting to your banana loaf after baking! To be honest, you could even do that with the recipe for my cream cheese banana bread. I’ll promise it will taste amazing with a cream cheese layer!

The recipe speaks for itself, but I will share some tips with you so you get the best results and this will become your favorite banana bread recipe!
Most important: the bananas! I always use overripe bananas for the best result. Mash the bananas with a fork or use a hand blender. It’s perfectly fine to have some lumps in your mashed banana. But if you like a more smooth batter, use a hand blender.
For my healthy banana bread I only use a whisk or spatula to make the batter, but for this recipe you will need an electric mixer. It’s important to mix butter, cream cheese and sugar into a creamy mixture and a electric hand- or stand mixer with the paddle attachment is best for that. Unless you have very strong arms 😉 .
The entire recipe is in the recipe card down below. But it’s actually no more than mix all the wet ingredients together and then add your dry ingredients and mix until incorporated. After that, you’ll pour the batter into a prepared loaf pan and your easy banana bread recipe is ready for the oven!
Oh and for preparing you loaf pan: you can use a nonstick spray, grease it with butter and dust with flour or just line it with parchment paper. Just pick you favorite way for a prepared baking pan.
And after baking: enjoy you best homemade banana bread recipe ever!
I’ve written a separate blog post about this subject. So if you want to know everything about storing banana bread, I recommend to read that post. Just looking for some quick tips? I will share them here!
I like to store my banana bread in slices. If you store them together in a container or freezer bag, make sure to put some pieces of parchment paper between the slices. This will prevent them from sticking together.
Before you wrap up you loaf for storing on room temperature or in the freezer: make sure you have let it cool to room temperature on a wire rack.
You can, but it is possible that the baking time will change a bit. I haven’t tried this myself, so I can’t tell you exactly how long it will need.
Of course! Just add in some chocolate chips, a swirl of peanut butter or some nuts. I bet it will taste amazing! I think I’m gonna try a chocolate chip banana bread myself the next time!
Yes it is. You can just replace the caster sugar with the same amount of brown sugar.
Again: yes you can! The recipe will make about 10-12 muffins. Bake them for 20-22 minutes (or until done).
Although both are a leaving agent, they are not the same in ‘strenght’. It is possible to make this recipe with baking soda, but the recipe will need a few adjustments. I haven’t tried this myself and therefore can’t share these adjustments.