Can I make the dough the day before?
Yes, you can. The dough keeps fresh up to one week in the fridge.
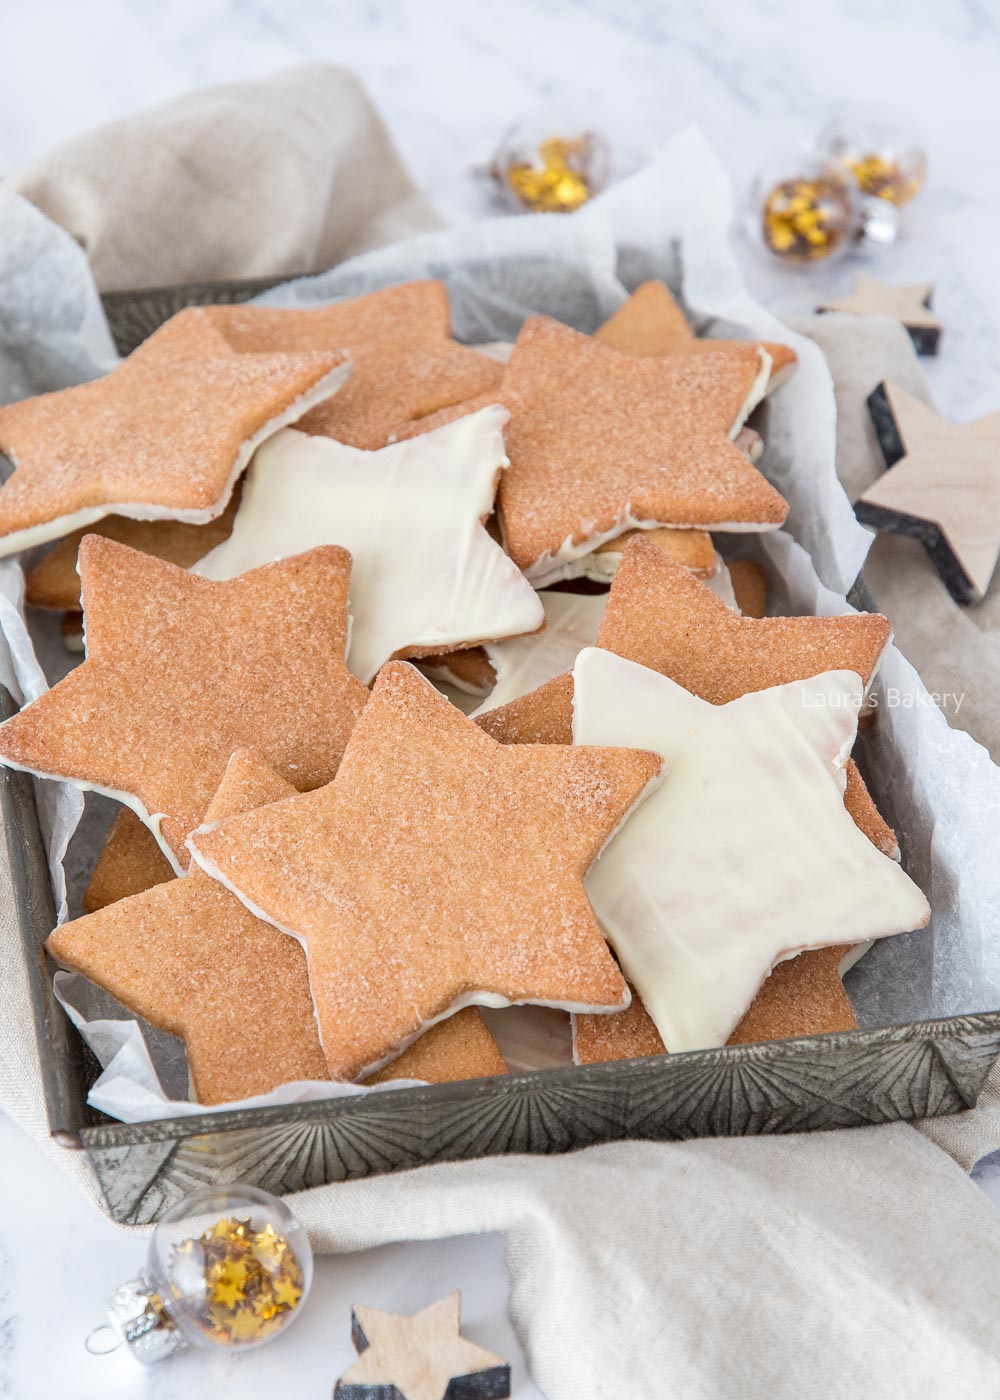
Every year around Christmas time you will find them everywhere. Those delicious and famous cinnamon star cookies. They’re absolutely delicious and also make for a great Christmas gift during the holiday season. Originally these cookies are called zimtsterne cookies and are German cinnamon star cookies. They are still incredibly popular during Christmas season in all German speaking countries. You can find them on all Christmas markets.
Yessss, a recipe for one of my favorite Christmas cookies! Every year I buy several packs of Cinnamon Stars, I can’t get enough of them. I find it somewhat annoying though that I have to wait for december to come around before they are in the grocery stores. While all Sinterklaas goodies are available in August! If not sooner.
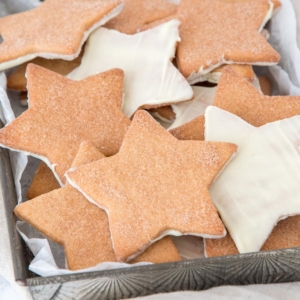
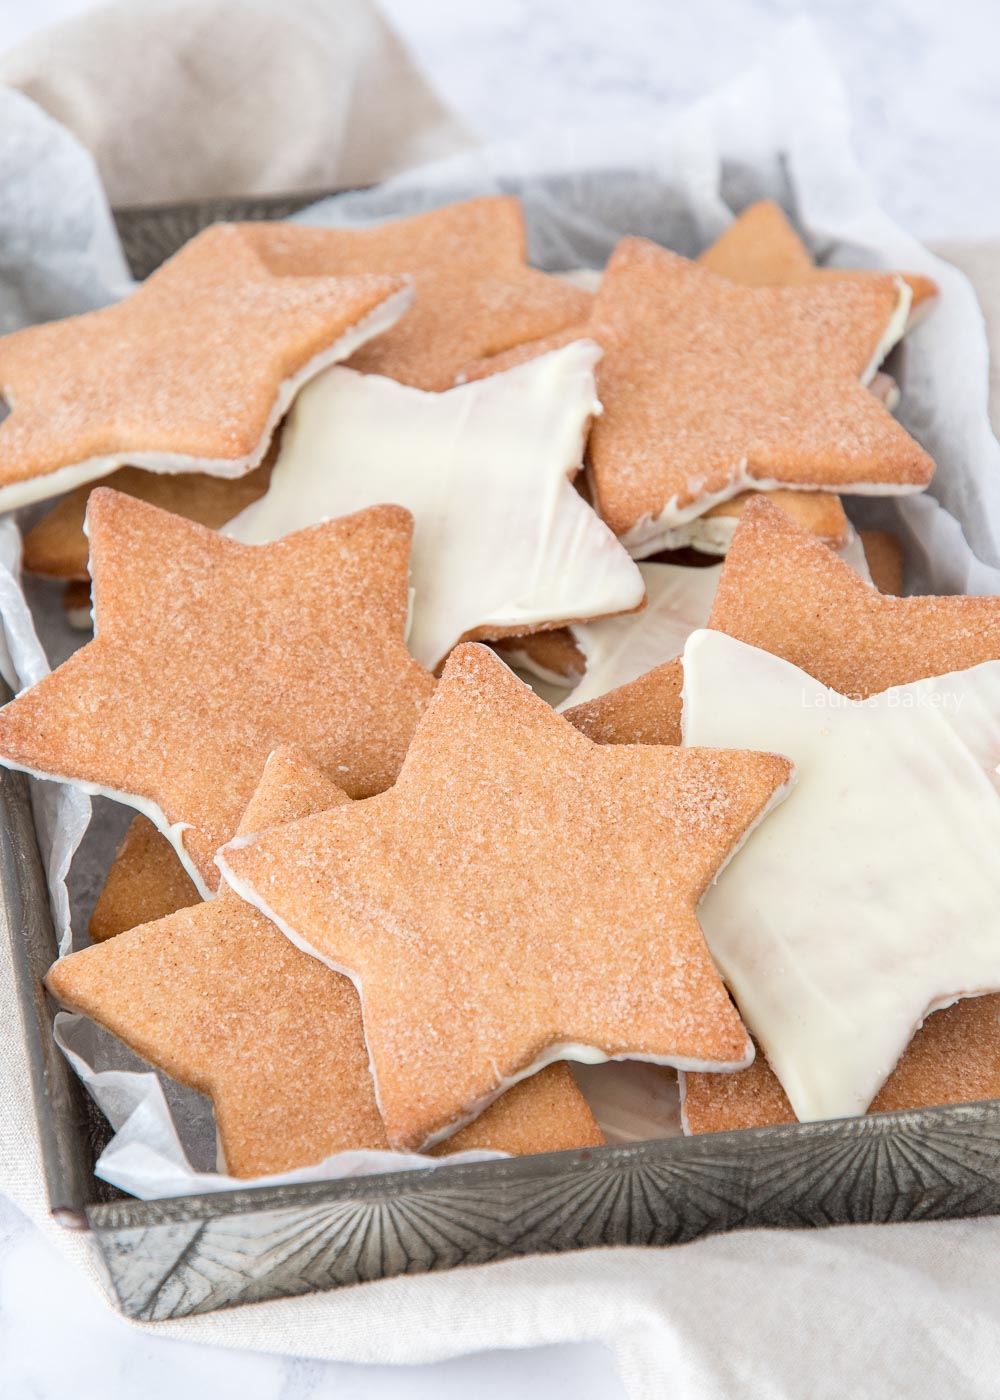
In the case of the Cinnamon Star biscuits, I am no longer dependent on December, because I just make them myself. I have been enjoying these fantastically delicious (and beautiful!) cinnamon star cookies all summer. Delicious crispy biscuits with sugar, cinnamon and white chocolate in the shape of a star.
Who else wants to fill their cookie jar with these edible stars? Or maybe you just like to make them in a different shape than a star, fun too!
Baking tip: I used an 8cm (3.2 inch) star-shaped cookie cutter for this recipe.
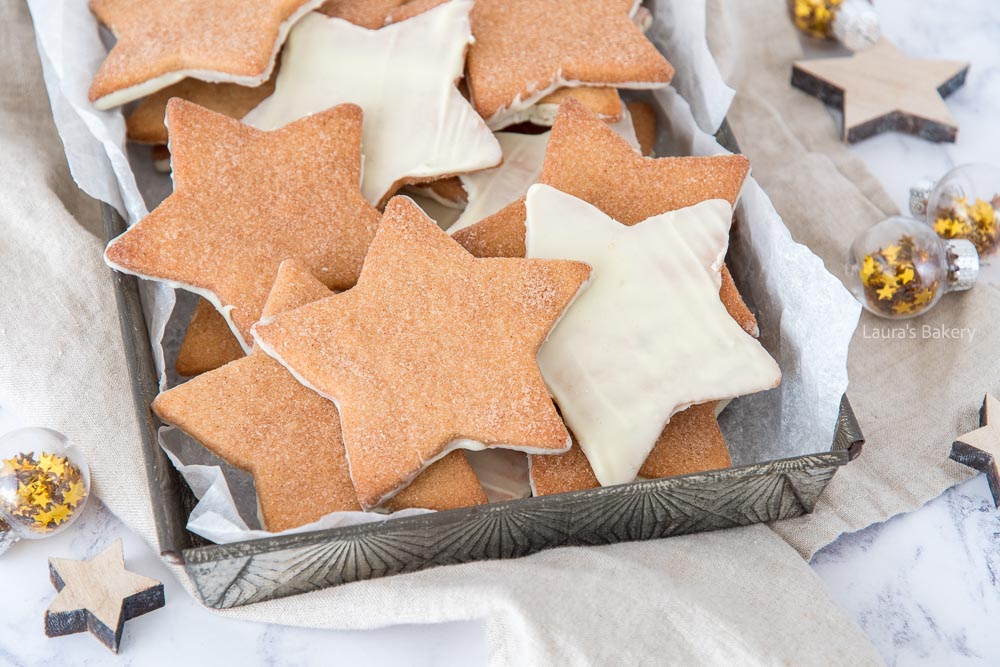
For making this easy recipe you start by creaming the butter and the sugar together in a food processor until soft and creamy. Add the egg and vanilla and mix it well. Last you add the all purpose flour and the cinnamon of course and you mix it until it forms a firm dough. Wrap the dough into plastic wrap and let it chill in the fridge for at least half an hour.
Once chilled take it out and prepare a baking sheet with parchment paper. Also prepare a bowl with cinnamon sugar (simply fine sugar combined with cinnamon).
Roll the dough out with a rolling pin on your work surface and using a cookie cutter make star shapes out of it. Dip each cookie in the cinnamon sugar and place on the prepared baking sheet. Once on the baking sheet sprinkle some extra cinnamon sugar on top.
Now bake in the preheated oven for around 10 minutes. Once baked take out and let them cool down completely to room temperature before moving on to the next step.
Once the cookies are cooled down you melt the white chocolate in a double boiler and dip each cookie into the white chocolate. Wait for the chocolate to set completely before storing them in an airtight container.
If you find it difficult to dip the bottom of the cookies, you could also use a knive and spread some chocolate on the cookie.
Christmas cookies are a fun homemade gift. They are great to give to the teachers at school, or to a family member or friend who could use a treat. There is nothing better than a homemade gift, because what feels more special than someone who has personally gone into the kitchen and lovingly baked delicious cookies for you? I mean, there is really nothing better!
These cinnamon stars (cinnamon biscuits) are a favorite Christmas cookie of many people around the world, so they make a great Christmas gift. All you need are bags with a wide and straight bottom to wrap the biscuits in and some decorating materials. I have already gathered the essentials for you:
Now all you have to do is think about who you want to give the cinnamon stars to and get into the kitchen.
Yes, you can. The dough keeps fresh up to one week in the fridge.
There are several reasons. From a practical point of view, the biscuits work better when the dough is firmer and less sticky. It also improves the flavor. By resting, the structure of the biscuits becomes tastier (crispier), but in the case of these cinnamon stars, the cinnamon flavor is also better absorbed into the dough. Want to know more? I explain it in more detail in this article with cookie tips.
I didn’t have this problem, but another reader gave me a good tip: brush the biscuits with a little water (e.g. with a pastry brush) and then dip them in the sugar. This makes the sugar stick better.
Yes, you can use any kind of chocolate you like. Whatever chocolate you like. I prefer to use Callebaut chocolate because the quality is very good and there is a wide range of different types.
Cookies always come out of the oven soft. Cookies harden as they cool, you can’t tell if they’re cooked by touching them. So trust the recipe and don’t put them back in the oven as they will get too dark or even burn.

Did you know that making your own Dutch chocolate letters is really not that difficult? All you need are two ingredients. After that, you can decorate to your hearts content!
I always like to make my own chocolate letters in the run-up to Dutch Sinterklaas eve parties (Saint Nicholas). It’s such a fun and surprising gift and especially if you’ve made them yourself. Perfect for the holiday season! Starting in October and sometimes even before that you can find store bought chocolate letters everywhere in the Netherlands. Almost every Dutch store selling anything related to food will have them for sure.
It’s not entirely clear where the chocolate letter tradition comes from but it could have something to do with the importance of chocolate in the 17th and 18th century. The Dutch chocolate companies played a huge part in making all sorts of chocolate products. And from around the 19th century chocolate letters started playing a role as little presents on Sinterklaas day.
Little Dutch kids will put their shoes out with little presents for the horse of St. Nicholas (carrots and hay, most often) and as a gift they will find a chocolate letter (or another little present) in their shoe the next morning. And while you probably won’t be able to find chocolate letters in the United States, you can make them yourself quite easily. And even if you do not celebrate Sinterklaas, I am sure Santa claus would be equally happy with these tasty treats.
BAKING TIP: Use quality ingredients when a recipe calls for few ingredients. So choose good butter and the best chocolate for these chocolate letters.

By adding creamed butter to melted chocolate, you can pipe shapes out of the chocolate that will hold their shape. The chocolate does not harden completely, but becomes deliciously creamy.
Chocolate letters made this way are also called butter letters. You can make chocolate letters in all letters of the alphabet or your own name in chocolate initials. You can use dark chocolate, white chocolate or milk chocolate to make your letters. They’re delicious as snack or with a nice cup of coffee or tea.
Once you have your chocolate letters, the best part comes: decorating! I used pepernoten (spiced cookies) and small Sinterklaas candies for decoration, but you can go as crazy as you like.
Sprinkles also look great on homemade chocolate letters. Another fun idea is to use small marzipan figures for decoration, so you can really personalize your chocolate letters.
When a recipe has only two ingredients, it is especially important to use good quality ingredients. So for these chocolate letters, choose good unsalted butter and the most delicious chocolate. I love using Callebaut chocolate but Tony’s Chocolonely chocolate bars are also a good base chocolate to use.
I like to use a star shaped piping tip for chocolate letters, for example the Wilton 1M. You can use any piping tip that you like, but the 1M is my favorite.
It can be difficult to make a nice chocolate letter without practice. You can draw a letter on paper. Place a sheet of baking paper over it so that you can still see the letter on the paper underneath, then just follow the lines.
Another fun and child-friendly idea is to decorate store bought chocolate letters. You can glue the decorations on with melted chocolate or use the butter and chocolate mixture to pipe decorative lines on before decorating. You can buy chocolate letters online and after Sinterklaas is over there will be loads of special offers for leftover letters at online shops.
Tilt your piping bag slightly and hold it just above the surface. Pipe the first part, stop squeezing the bag and pull it away in the direction you want to go. Repeat this over and over again, starting exactly where you left off. It’s not difficult and practice makes perfect.

Cheesecake is one of my favorite cakes to make. I have made many over the years, so it’s time that I share my tips for a perfect cheesecake!
I think it was the first cake I ever made without any packaging, because at that time cheesecake was still quite unknown in the Netherlands. I made a lemon meringue cheesecake with a Bastogne cookies base. Since then, I have made countless other cheesecakes and they are always a hit. So what makes the cheesecake so popular?
It must be the delicious creamy texture in combination with that delicious cookie crust. But while everyone seems to bake the most beautiful cheesecakes, yours keep cracking after you’ve baked them. The cheesecake crack seems to be the most annoying thing about this delicious pastry, but preventing it is easier than you think. To help you out, today I am going to give you some tips on how to make the perfect cheesecake, including how to prevent it from cracking.
Let’s start with the technical side of things: how do you prevent your cheesecake from cracking? Despite the many theories circulating on the internet, I really only have one that seems to work best. It’s all about the temperature of your oven. In preparation for this article, I tried my basic cheesecake recipe again the other day and changed one thing. As you can probably guess, my cheesecake cracked. So now I know for sure that this is the ultimate tip.
To avoid having your cheesecake crack, bake it gently. An oven that is too hot will cause the cheesecake to bulge and rise. This will, in turn, cause the cheesecake to crack as it cools, and sometimes already during baking. This is because the top cooks first and then cracks. If you bake a cheesecake at a lower temperature, the cheesecake will rise much more evenly. This is because you avoid the cheesecake batter to rise excessively and crack open in the process. So you want to bake your cheesecake at a fairly low temperature.

Now finding the perfect temperature to bake your cheesecake can be a bit of challenge. Every oven varies in temperature so it might be easier in one oven than in the other. It also varies if you bake with a conventional oven or with a convection oven. So you might have to search a bit before you find that perfect temperature in your oven. In my oven it is always 150˚C (300 ˚F – conventional oven). You can start there and check if that works for your oven as well.
Another tip is to place a separate oven thermometer inside your oven to check if the temperature is actually correct. If you have an older oven the temperatures might be wrong and testing it with a separate thermometer might give you some answers.
Once your cheesecake is nicely baked, leave it in the oven to cool. You can leave the oven door open a little if you like, but you shouldn’t take the cheesecake straight out of the hot oven and leave it to cool on the worktop. Once the oven and the cheesecake have cooled down, remove the cheesecake from the oven and put it in the fridge – the recipe will usually tell you how to do this. If you take it straight out of the hot oven your temperature difference is too big which results in another crack as the cheesecake filling cools down too quickly.


Of course, tips such as using a water bath will also help you make the perfect cheesecake. However, there is a big disadvantage to using a bain-marie, and that is the risk of leakage. No one wants hot water running into their cheesecake. I wouldn’t recommend wrapping a cheesecake pan in aluminum foil and than placing straight into the water bath as it can still leak and it won’t get you the best results.
To avoid this, you can also place a oven dish with hot water on the bottom of your oven, as steam rises. I think this is the best way to prevent your cheesecake from cracking ans avoids a mess.
Of course, you don’t want too much air in your cheesecake either, as air bubbles increase the risk of cracking. So don’t overmix your batter for too long and tap your filled springform tin on the worktop or work surface a few times before baking to remove any large air bubbles. Use room temperature ingredients to ensure a smooth batter too.
Not as common but sometimes your cheesecake can also crack at the sides of the baking pan. In order to prevent that you can run a knife along the edge of the pan. When the cheesecake cools it can sometimes shrink a little causing the edges to crack. Running the knife along the edge will prevent this from happening.
If you still have a crack in your cheesecake, the solution is simple. Make an overly tasty topping and no one will notice it’s a cracked cheesecake. Examples of tasty cheesecake toppings include mascarpone cream, meringue, lemon curd, fruit jelly or coulis. Or try this delicious cherry topping. Works brilliantly with every cheesecake!
You can also simply sprinkle a layer of crumbled biscuits over your cheesecake and top with whipped heavy cream.
I have sometimes been asked whether flour in a cheesecake will prevent it from cracking. Personally, I had never heard of it. You use flour to bind, of course, but that is not the cause of a crack in your cheesecake.
Adding flour to your cheesecake will make the baked cheesecake slightly drier. Personally, I like a soft creamy cheesecake, but adding flour makes it also firmer. A New York cheesecake is an example of a slightly firmer cheesecake, so a few tablespoons of flour is a standard ingredient. It is common to add 1-2 tablespoons of flour to the cheesecake batter for a slightly firmer consistency. Does it actually helps to prevent the cheesecake from cracking? I don’t think so but you can always give it a go.
I hope the above tips for making the perfect cheesecake are useful and I look forward to seeing your creations.

Delicious and soft Italian amaretti cookies. Amaretti cookies are essentially Italian macaroons which you can find as hard, crunchy biscuits or soft amaretti cookies. And the good thing is; you only need 4 ingredients to make them!
As mentioned this amaretti recipe is a little softer than what you might expect. And also not very bitter as I did not use bitter almonds or bitter almond extract. For the traditional Italian cookies, bitter almonds are used, but I just like it better with normal almond flavor. If you want you can definitely choose the bitter almonds.
Amaretti are one of those cookies that I didn’t eat for a really long time because I didn’t like them or so I thought. As a kid I once popped a Dutch version of a amaretti cookie in my mouth thinking it was actually a large Dutch spiced cookie. So imagine my disappointment when I tasted the amaretti cookies. I didn’t eat them for years afterwards. All because of that one mistake!
But I love these chewy amaretti cookies. So delicious! Especially hot out of the oven. Crispy on the outside and with a nice chewy center.

Other than these simple ingredients you will need a baking tray or cookie sheet, a large bowl and a piping bag with a round nozzle of around 3 cm in diameter or 1.2 – 1.5 inch. And the good news is that for these amaretti biscuits you do not need to whip any egg whites to stiff peaks as you might find in other recipes.
This recipe is super easy as the only thing you need to do is to mix all the dry ingredients together with the egg whites. You can use a food processor for this or simply use a whisk.
And that’s all there is to it!
Once you’ve made your sticky dough you add the mixture into the piping bag and you pipe into rounds. If you’re struggling getting even sized cookies you can – before piping the cookies – trace circles on the opposite site of the baking or parchment paper.
Use a coin that is roughly the right size. Now turn the paper over so the traced circles are not on the side of the paper you’re actually placing the dough. If all goes well you will still be able to see the lines of the circles you made. Which will make it easier to pipe them in the same size.
Alternatively you could use a small cookie scoop to create the same size cookies.
The baking time of the cookies is roughly between 12-14 minutes or until they are lightly colored. Let them cool down on a wire rack to room temperature before adding to an airtight container. Check the full recipe below the FAQ.
Both of these cookies use almond flour and egg whites, but in general amaretti cookies are a bit crunchier and a bit more rustic. They also don’t have those famous ‘feet’ at the bottom of the cookie. Macarons are also usually filled and amaretti cookies are presented in a single layer.
Good news! Amaretti cookies are already gluten free as the only ‘flour’ component is almond flour. So these chewy cookies can be enjoyed by everyone. The perfect recipe for any holiday season!
Yes you can easily add other flavors to the amaretti cookies recipe. Think about adding some lemon zest, orange blossom water or cocoa powder. You can also vary with the type of extract you’re using.
You can give a little dusting of icing sugar on top of the cookies before baking which will create that classic crack a little easier.
The amaretti cookies are done when the edges have a light brown color but the top is still quite pale.

Turning a simple tea mug (or coffee mug) into a darn tasty breakfast is easy with this recipe for banana oatmeal mug cake with blueberries. Thanks to the mug, you have the perfect portion for one person. Of course, you can also double it if you want to enjoy it as a couple or if you want to prepare breakfast for the next day.

The fun part about this oatmeal mug cake is that it can be prepared in either the microwave or the oven. So perfect for all people without a microwave (and of course for the people with a microwave as well). You need just a few simple ingredients to make this delicious healthy mug cake recipe.
You might have already seen this banana bread mug cake which is also delicious but has a different flavor to this one due to the use of the oatmeal

And that’s all there is to it. This banana mug cake is full of only healthy ingredients, making this also perfect for a quick breakfast. Do make sure you use a microwave-safe mug if you’re preparing it in the microwave and obviously an oven-safe mug when preparing in the oven. I like to use a large mug of roughly a little more than one cup in size. Slightly taller mugs work best.
Making the mug cake cannot be easier. The best way to make the batter is with an immersion blender but you can use a fork as well. I simply add wet ingredients and dry ingredients together but keep the blueberries separate. Blend it with the immersion blender, add the fresh berries in and your batter is done. Pour into the mug and microwave for 140 seconds on high power. Your healthy breakfast is done (or your healthy single-serve cake!)
As said this is a pretty perfect mug cake. But you can add other things to it. Making it potentially a little less healthy but no less delicious! I sometimes sprinkle a few chocolate chips in and adding just a bit of ground cinnamon is also delicious. You can make a pumpkin spice version by adding a teaspoon of pumpkin spice mix. Delicious during fall season. The blueberries can be replaced by almost any kind of fresh fruit, so just pick whatever is in season at the moment.
If you have a really sweet tooth you can add a teaspoon of brown sugar. You can also do this if the banana you’re using is not as ripe as you want it to be. Instead of brown sugar a touch of pure maple syrup is great too.

Now for me the combination of oatmeal and blueberries is a match made in heaven. I will soon have more in that particular combination coming up, but for now I have a few other mug cake recipes you might want to try too! As you can tell I love this easy way or making a single serving dessert. Check the full description in the recipe card.

If you love baking cookies, you might want to know why chilled cookie dough is essential for a perfect cookie. You might feel the need to skip that all important chilling step, but let me explain why it is a good idea to place your dough in the fridge before baking.
Chilling the dough is essential for both cookie dough as well as the base of a short crust pastry. If you’re the kind of person who skips this step, this post is for you!
It’s not hard; the only thing you need to do is to have patience for an hour or so. During that time you can start tidying up the kitchen and make any other preparations for your finished product.
Resting the dough is essential for chocolate chip cookies, sugar cookies and almost any other type of cookie you can think of. I know resting the dough can be a bit of pain. You want to just get on with the recipe and skipping the resting part is so easy to do. You want to just place those cookies on the cookie sheet, plop them in the oven and get it over and done with. The sooner you can start eating that freshly baked batch of cookies!
But for the most delicious cookies you do need to have that little bit of patience. I’ll explain why that is.

One of the reasons for chilling your dough is that having used soft butter also means that your dough is quite soft. It will be stickier because of this and if you want to use it right away the cookies will expand and spread a lot more. So let’s say you are trying to make cute Christmas cookies and have used a cookie cutter. You want the shape of those cookies to stay intact, but baking the cookies right away will probably make the shapes less pronounced.
Once the dough is chilled (and the butter is once again cold butter) it is much firmer and will be less likely to ruin the shape of your cookies. You will have less spread of the cookie dough. This also depends on the recipe you use, I have a special cut out sugar cookie recipe for perfectly shaped cookies!
Now if you take your dough from the fridge after the chill time, it might still be too hard to roll out. It will crack and crumble. So when I take the cold dough out of the fridge I quickly and briefly knead it by hand before rolling it out and place the cookies on the baking sheet. The short kneading is enough to make the dough pliable again.
Yes, chilling your dough also means your cookies will have a better flavor! Cookies and shortcrust pastry actually taste better if you leave the dough in the fridge. The flavors will be absorbed and the final cookies and crusts will have a better texture. If that is not enough reason to give your dough time to chill!
The longer the dough is left in the fridge, the better the result. Personally, I like to make the dough the day before when I make cookies with spices. That way I know the dough has had a sufficient chilling time. Especially with gingerbread or speculaas, the flavor is so much better. You can even freeze most cookie doughs. Obviously frozen dough needs to defrost first, but it’s the ideal way to always have delicious baked cookies in no time at all.
Do you have a love for crispy cookies? Then make sure you let them cool. It will make a huge difference. Most cookies contain gluten, which makes them tougher. But when you let the dough rest, the gluten relaxes. Relaxed gluten makes for crispy cookies. And we all want delicious chewy cookies with lovely crispy edges right?
So as you can see, for the best cookies you just need to have a little patience and give the dough enough resting time. You will be rewarded with a delicious cookie.
Before I answer some questions on this topic, I would love to share a few recipes that definitely need a chilled dough for the very best results:
For resting cookie dough the times are the same for all kinds of cookies and for all kinds of basic cookie dough. Around an hour should be enough. If you have large balls of dough you might need just a bit more so the cold can get all the way through the dough. For small dough balls it might be quicker but to be on the safe side you can use a longer amount of time for the chilling process.
For best results you should always chill your cookie dough. It will give you more flavor, crispier and a chewier cookie and overall the best results. So for next time, don’t skip the chilling. It’s not impossible to bake the cookies right away, but know the result will be different.
You can leave your cookie dough in the fridge for up to one week. Any longer and you will need to freeze it. It will be good to use for up to 2-3 months. Freezing is not necessary, but it sure is easy. Especially if you want to serve freshly baked cookies at any time.
It depends. If you want to shape it using cookie cutters, you definitely need to defrost. If you’ve already shaped the cookies into balls you can just bake them straight from the freezer. Keep in mind that the baking time might vary if you do. Usually you should add 2-3 minutes baking time to the recipe.

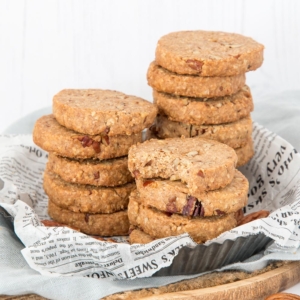
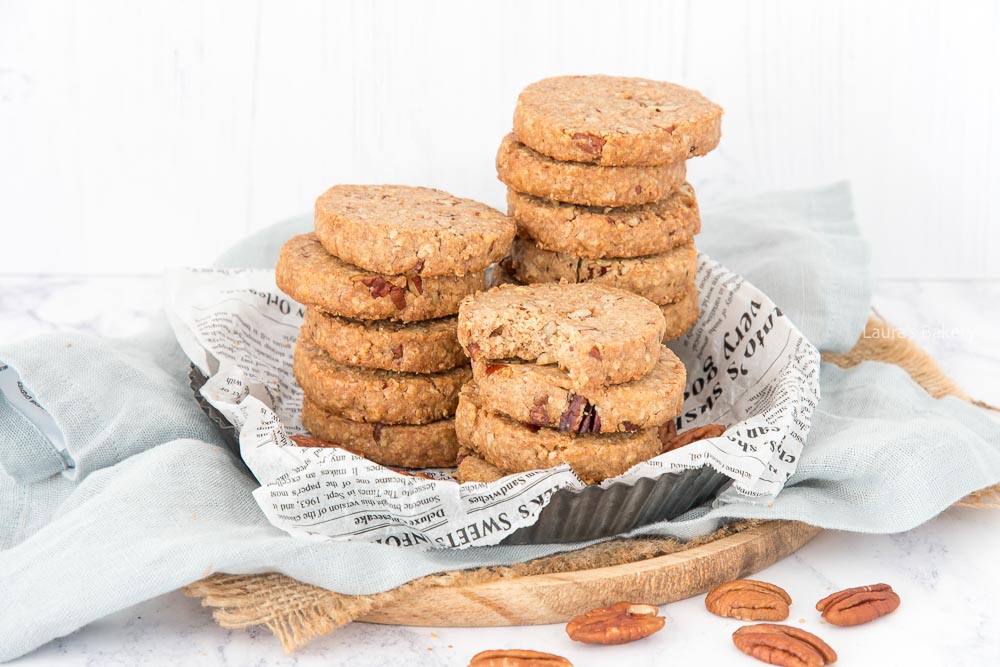
I love oatmeal cookies and have made many variations. These Pumpkin Spice Oatmeal Cookies are a new favorite out of all my cookie recipes and perfect for fall and pumpkin season. I like to add different spices to my biscuits. There are several spice mixes available online that are great for baking, one of which is pumpkin pie spice.
It is often used in baking with pumpkin, but I also find it an ideal spice for baking without pumpkin puree like in these cookies. Especially during the autumn and winter season this is absolutely my favorite spice mix. If you want to try something new you can also make these with my Dutch speculaas spice mix for a Dutch twist to this oatmeal cookie. (or try these speculaas cookies instead)
Now as I mentioned I really love oatmeal cookies (like these apple oatmeal cookies!). The classic oatmeal cookies are lovely, chewy and tasty. Easy to make and always a crowd pleaser. Funny enough oatmeal cookies took a while to get a hold in the Netherlands. I used to grab one when going to work for a while but there weren’t many places you could actually get them.
But why buy them when you can make them yourself with this super easy recipe? The pumpkin flavor in these oatmeal cookies make it the perfect cookie with fall flavors. You will find the full instructions in the recipe card below.
Using a food processor, you need to cream the butter and the sugar together. Use the paddle attachment for this and keep it turning for a few minutes. Scrape the sides of the bowl a few times if needed. You can also do the same in a large bowl with a hand mixer. I just like using the bowl of a stand mixer for this as I don’t need to wait for the butter and sugar to do their thing.
Once the butter is soft and creamy you add the other dry ingredients to the mix. Knead it into a firm dough.
Keep in mind that it should be firm but not dry. If you find it is too dry and it cracks when you roll it? You can add a little bit of butter or a tablespoon of milk to solve the issue.
Now make a roll of the dough of about 2 inch in diameter and wrap it tightly in cling film. Leave it in the fridge for at least an hour.
Once properly cooled (and why you should not skip this step I will explain soon!) cut the roll into thick slices of around half an inch each. Place them on a baking sheet lined with parchment paper. Bake in the oven for 10 to 12 minutes. Nothing better than the sweet smell of the pumpkin spice flavors wafting through the kitchen!
Once baked let them cool down on a cooling rack or wire rack. They will crisp up when cooling. You can keep the cookies for up to two weeks in an airtight container.
If you want sweeter cookies you can choose to add an icing on top of the cookies.
You sure can. Even better; you can easily freeze the dough so you always have a ready made supply that is easy to plop on a baking sheet and bake into a delicious cakey cookie in no time at all. In the fridge, you can keep the dough for about a week and in the freezer it keeps up to 3 months.
Absolutely. If you don’t want to use the pecan nuts you can leave them out or replace them with something like dark chocolate chips or white chocolate chips.
Not to worry. If you don’t want to make your own pumpkin spice mix or don’t have all the ingredients handy you can use just cinnamon and also get delicious fall oatmeal cookies.
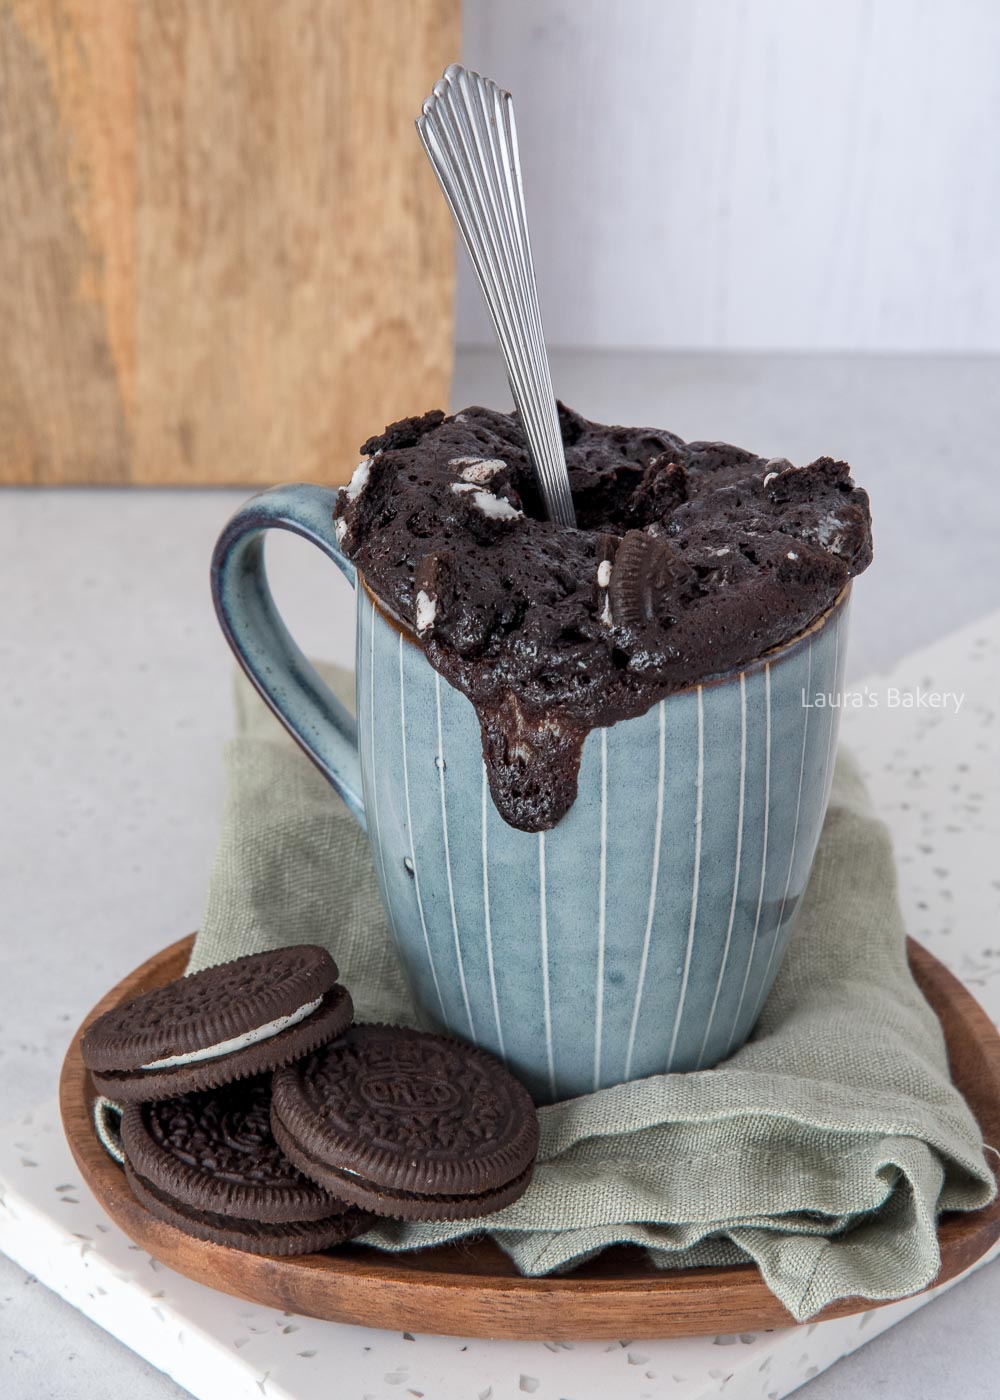
I’m starting to develop a bit of an addiction to mug cakes. It’s really nice to be able to conjure up a delicious cake so quickly and easily, isn’t it? This Oreo mug cake was another real success!
It’s been years since I shared my very first mug cake recipe with you (or at least it’s been years since I shared it on the Dutch website). Those were a vanilla mug cake recipe and a chocolate mug cake recipe. Many of you have been asking for more mug cakes recipes. While I generally prefer a ‘real’ cake like my favorite vanilla loaf cake, sometimes it is so convenient to whip up a delicious cake in no time at all. Today I am sharing my easy Oreo mug cake recipe.
Now for this Oreo cake you need only a few simple ingredients. That’s the fun of making a mug cake right? It’s such an easy dessert and serve it with a scoop of ice cream for an even better dessert. Or use a big dollop of whipped cream. So good.
In addition you will also need a microwave-safe mug. I like to use a mug that is roughly a little more than a cup in size.
Now this easy mug cake recipe requires you to mix the ingredients. And that’s about all that there is to it. The only difference is that you need to keep the Oreo cookies and the chocolate chips separate. You can simply mix all the ingredients together in the mug itself.
If you find that a little hard to do you can also use a separate small bowl for mixing the ingredients and then pour it into your mug. You really do not need a food processor for making this. A whisk or spatula is enough.
The microwave will need to be on high power for making the Oreo mug cake. Now how much that is depends on your microwave. For mine that is 800 watt. On that setting it takes a total of 140 seconds (2 minutes and 20 seconds) to make the best Oreo mug cake ever.
You might have seen the Oreo mug cake trend on TikTok where only two ingredients are used. Crushed Oreos and a cup of milk. While it looks good (haven’t tried this for myself though!) I would think it is not exactly a cake-like texture. It’s more a giant Oreo cookie after it’s been baked in the microwave.
But by all means try this for yourself! If you do want the airy texture of a cake? Try my Oreo microwave cake. I might try the tiktok version next time!

Some love it and others (unfairly!) prefer to stay away from it to avoid failure: baking bundt cakes. I have been baking bundt cakes for as long as I can remember. The beautiful shape of a bundt cake does it for me. Since people often ask me about it, today I am going to share with you all my tips and tricks for baking a bundt cake successfully!
Simply put, a bundt cake is a cake baked in an extra festive round baking tin with patterns on the outside and a hole in the middle. After baking, a bundt is often glazed or at least sprinkled with powdered sugar.
Because of the festive shape of a bundt and the decorations associated with it, a bundt is baked more often around the holidays. But it also makes for a great birthday cake!
As you have probably figured out by now, the difference between a regular cake and a bundt cake is not so much the recipe, but rather the size and the baking pan. Any cake batter can be baked in a bundt pan (and vice versa), as long as you take into account the size of the pan and the baking time.
A cake is delicious on its own, but once you bake it in a bundt pan, it immediately transforms into a beautiful cake to serve your guests. Just like this banana bread bundt cake!

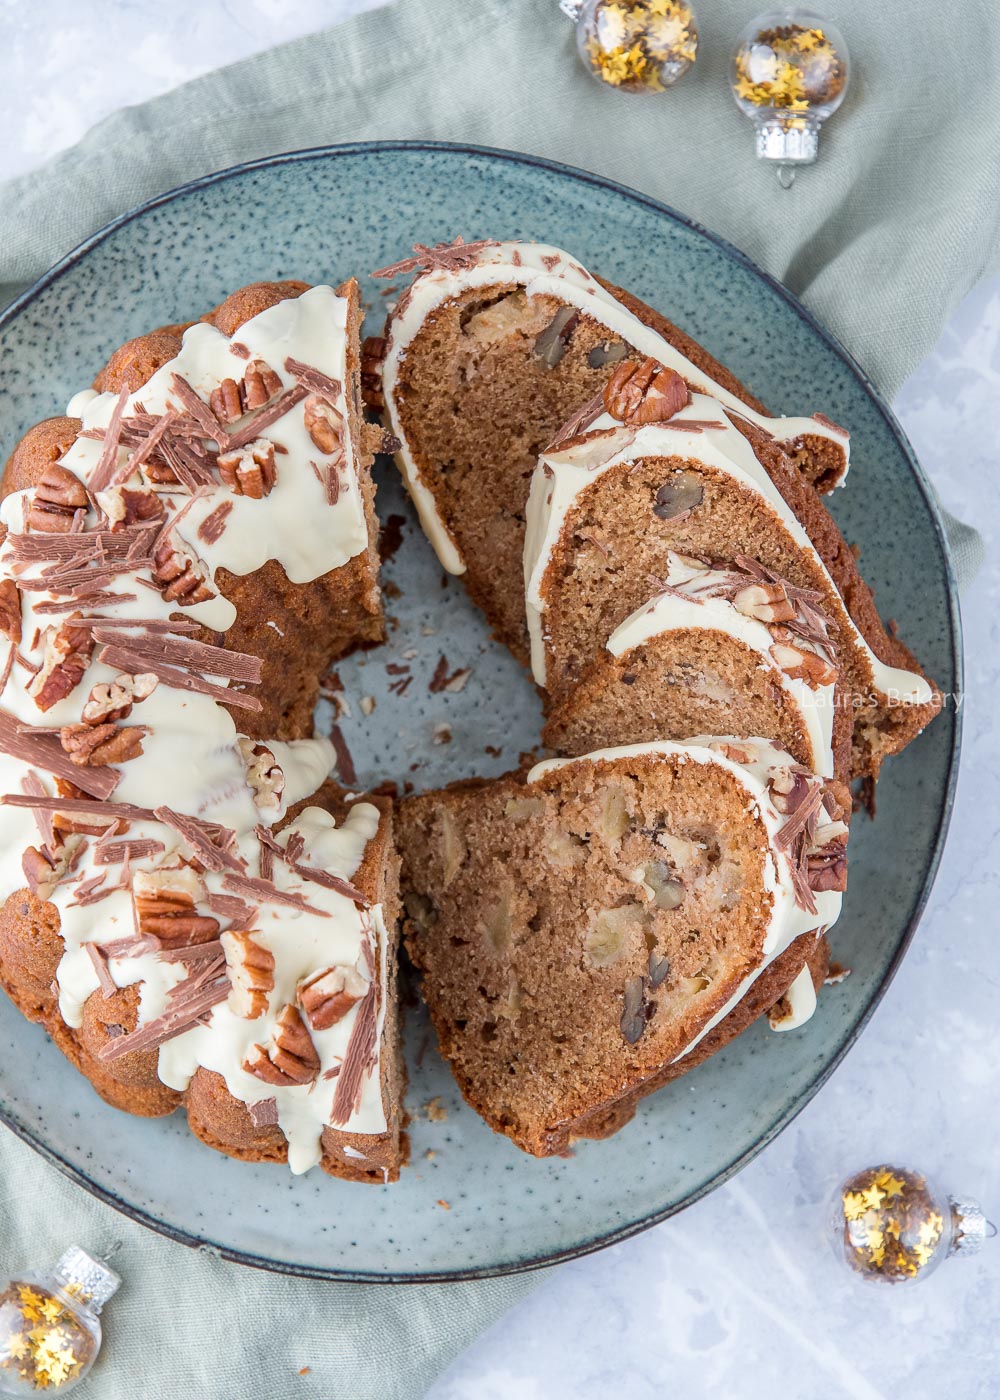
When you’re starting out with a bundt cake recipe, there are a number of things you need to keep in mind. Starting with a nice and especially good bundt cake pan; I share my favorite bundt pan brand below. Also, greasing a bundt baking pan is especially important because it has so many different patterns and corners.
And finally, how and when can you remove the bundt cake pan so that your cake comes out in one piece? Read the tips below carefully and everything will be fine.
A bundt baking pan is a round baking pan with a hole in the middle. Bundt pans come in different sizes with different intricate designs and markings. Apart from large bundt pans, there are also mini bundt pans that allow you to bake six smaller bundt cakes at a time, just like a stainless steel cupcake pan.
I now have a huge collection of bundt baking pans at home, and my favorite brand is Nordic Ware. Not only because this brand has several beautiful bundt cakes in its collection, but also because the quality is very good. I almost never have a cake stick to the pan. If it did happen, it was usually because I turned the cake out too fast, but more on that later. There are so many beautiful bundt designs out there that it is hard to choose.
When you buy a bundt cake pan, pay close attention to the size you buy. I now have such a large assortment at home that I have all sizes and shapes in the cupboard.
To convert round, square or rectangular cake pans into a different size cake pan, I have developed an incredibly handy (even if I say so myself) conversion tool for you. However, bundt pans are a different story because they have a hole in the middle.
For this reason, the size of a bundt baking pan is mainly indicated by a measure of capacity, usually cups or liters. If you want to convert a bundt baking pan to another baking pan (or vice versa), the best way is to calculate the capacity of that pan, e.g. with water.
For square or rectangular pans, you can also do the following calculation: length x width x height (of the pan) / 1000 = measure of capacity in liters. You can then compare this to your recipe for a bundt pan, or vice versa.
For example, suppose you found a delicious sheet cake recipe and you want to bake it in your new bundt pan, but you wonder if it will fit. The cake recipe is for a 25 cm x 25 cm pan with a height of 4 cm. Then the arithmetic is 25 cm (length) x 25 cm (width) x 4 cm (height) = 2500 / 1000 = 2.5 liters capacity. In this case, it would fit perfectly in a 2.6 liter bundt baking pan (note: the square shape refers to the height of the cake, not the pan).
On a simpler note: a normal loaf cake recipe for a 25cm loaf can be doubled in size for a 2.4-2.6 liter bundt pan. Depending on how much cake I want, I multiply the recipe by 1.5 or 2.

Anyone who has ever baked a bundt cake knows the feeling: you hold your breath for a moment when you remove the bundt cake pan. Just to see if your cake has come out of the pan in one piece.
To properly remove a bundt cake from the baking pan, you first need a good quality bundt baking pan. In addition, it is extremely important that you grease the pan properly, and there are several methods for doing this.
The most common and foolproof way to grease a bundt is to use some soft butter, a brush and some flour. Use the brush to apply the butter to sides of the pan. It is very important that you grease every spot, corner and seam. If you miss a square centimeter, chances are your cake will not come out in that spot. A pastry brush with bristles works best for this. And yes you also do this for a pan with nonstick coating
Once the pan is well greased, dust the pan with a little flour. Then hold the pan upside down and tap the countertop twice to remove any excess flour. The batter is now ready to go in the prepared pan! Note: If you are making a chocolate cake, it is best to dust the pan with cocoa powder instead of flour. This way, you will not see a cloud of flour on your bundt cake after baking.
A second option is to coat the inside of the pan with nonstick spray. Again, cover every part of the pan (inside, of course) with the regular cooking spray and then dust with flour as described above. Not everyone thinks this works well, but it always works for me and using a spray oil is definitely quicker. I also love the baking sprays with flour in it.
Cake Goop / Cake Release – On US baking blogs I regularly read about a goodie called either ‘cake goop’ or ‘cake release’. It’s a mixture of flour and oil, shortening, or hard margarine, and if you grease your baking pan (whether it’s a bundt pan or a regular baking pan) with it, you don’t need to grease the pan, dust it with flour, or line it with baking paper. Your cake would release perfectly with this mixture. I am very curious and will try it out for you soon, after which I will of course share it here on the blog.
It varies from recipe to recipe when it is best to remove the bundt, but unless the recipe states otherwise, I always use the following steps:
Use a cake tester or skewer to test if the bundt cake is done. If any batter sticks to the skewer, put the cake back for another five minutes (at least) before testing again.
If the skewer comes out clean, remove the cake from the oven.
Allow the bundt to cool on your countertop for 10 to 15 minutes, this will help the cake release from the pan.
Place a cooling rack, wire rack or serving plate on top of the cake and turn it over in one motion. The bundt cake should now be completely loose. If not? Then you can give the mold a light tap with a wooden spoon. A hard tap on the countertop may also help.
I’ve talked about my failed bundt experience before. Or I should say in the plural, because it has happened to me more than once. But it was never the recipe, it was always my impatience.
When you take a cake out of the oven, it is still very soft, too soft and therefore not firm enough to remove from the pan. If you let your cake cool for 10-15 minutes, the cake will become firmer and you can turn the bundt pan over with confidence.
Trust me, it really is better to wait a few minutes than to have to make the bundt all over again.
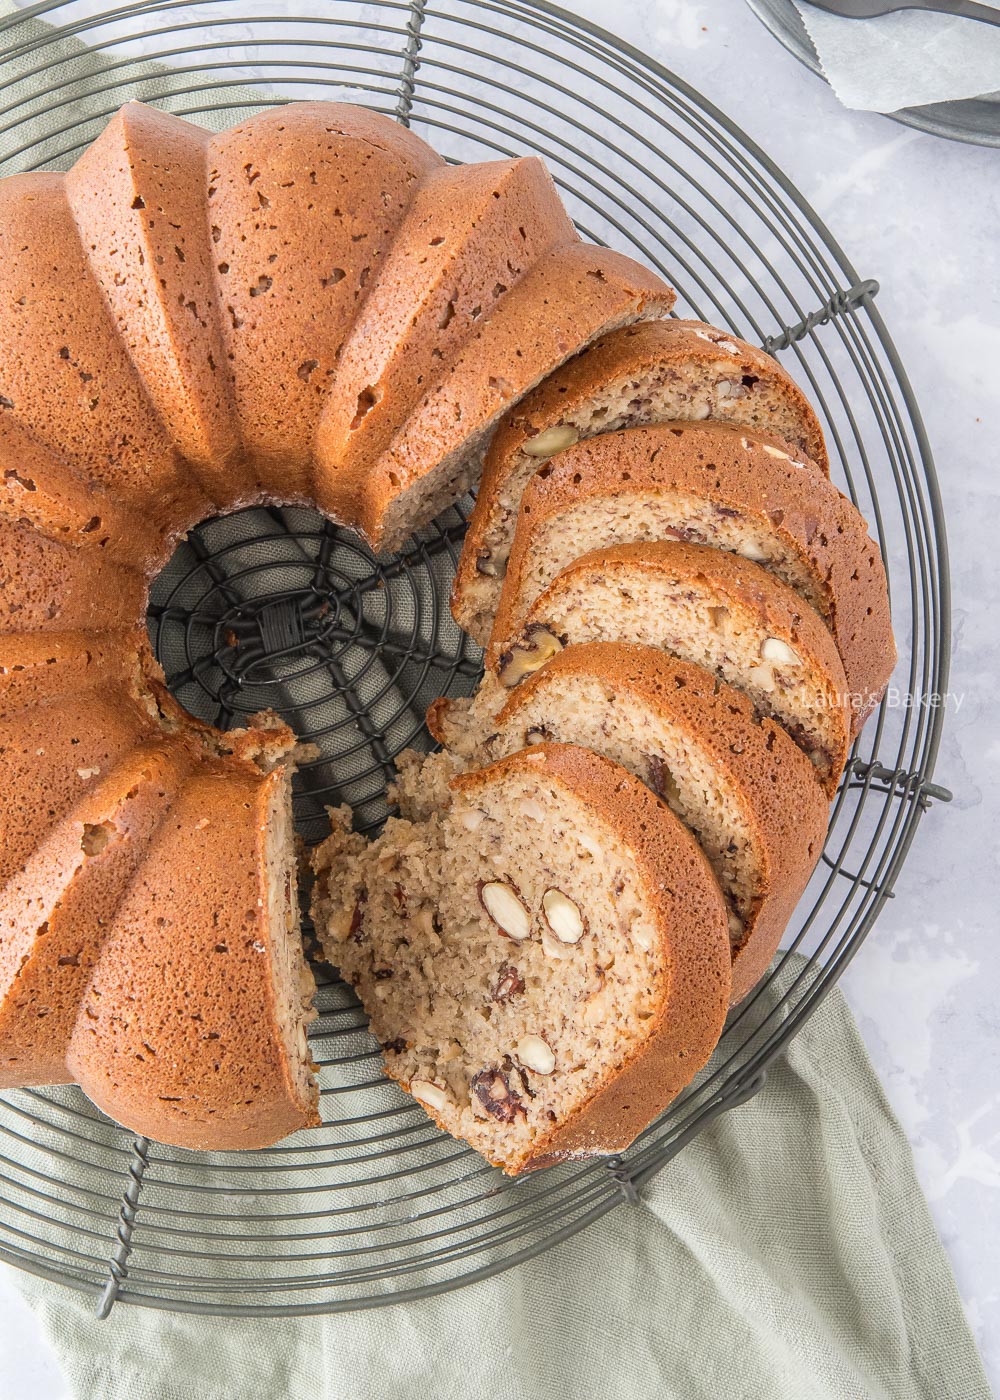

The festive nature of the bundt cake lends itself perfectly to decoration. The most common way to decorate a bundt is with a glaze. You make this by mixing a generous amount of icing sugar with a small amount of liquid (water or citrus juice for more flavor) until you have a firm, pourable icing, to which you can add coloring and flavoring if you wish.
You can also use melted chocolate or chocolate ganache as a topping. Or maybe even a nice cream if you like it a little chunkier. And, of course, don’t forget about the other decorations: sprinkles, cookie bits, coconut or nuts.
Just like a cake, a bundt should be stored out of the refrigerator. Wrap it in aluminum foil and place it on the counter, but not in the sun. This will keep a bundt cake (even with a glaze or melted chocolate on top) for at least a week.
The cake will dry out faster in the refrigerator, but if you have decorated the bundt with a frosting or ganache, the cake should be refrigerated. Ideally, you should wait until the last minute to decorate the bundt with cream or ganache so that the cake doesn’t have to sit in the refrigerator for too long.
Freezing is not a problem. Wrap the bundt cake in foil and put it in an extra plastic bag. That way, no air or moisture can get in. You can keep your bundt cake in the freezer for up to 3 months.
If you followed the recipe correctly, this shouldn’t happen unless the cake has been in the oven for too long (or at too high an oven temperature). However, there is a trick you can use to keep your bundt cake nice and ‘moist’: after removing the cake, place the bundt baking pan back over the cake. The condensation from the hot cake will prevent it from drying out. You can also grease the baked cake with (melted) butter before replacing the pan.
This depends on the filling you use, but also on the batter. Read my more detailed explanation of how to prevent the filling from sinking in your cake; this applies to both regular cakes and bundt cake recipes.
If you have a stuck bundt cake, this could be because the pan was not properly greased, the cake was not cooked through, too much wet filling was added, the cake cooled completely in the pan, or the bundt pan is scratched or damaged.
As you can see, there can be many reasons, and they can vary from recipe to recipe.
And now you want to get started with a tasty bundt recipe. Fortunately, I already have the necessary inspiration for you online. There will be a lot more bundt recipes coming up soon but for now check the recipes below!

If you love banana bread, you will absolutely LOVE this banana bread bundt cake! I added nuts to the batter and believe me when I say that’s a fantastic combination. This banana bundt cake is a perfect healthy treat that tastes amazing.
I may not have told you but whenever I buy bananas, it is not for eating them as they are. The only reason I ever buy bananas is for making some of my favorite banana recipes. If you’ve ever made my healthy banana bread you probably know that the best banana cake is made with overripe bananas.
And since you can’t really find brown bananas in the grocery store, I have to plan ahead and make sure I have enough bananas. In this particular case I needed to have no less than 6 bananas for this bundt cake banana bread.
I decided to bake it in a bundt pan. I love baking bundt cakes. There are so many gorgeous bundt cake pan designs available these days that it beats baking a regular cake in a regular loaf pan. But – don’t worry – if you do not have a bundt pan you can definitely also bake it in a loaf pan. And it will still taste equally good.
As I already mentioned you need quite a lot of bananas for this particular recipe
Now the funny part about this recipe is that you do not need to add any other liquid like greek yogurt, sour cream or milk, which you will see in a lot of other banana bread recipes. The mashed bananas combined with the large eggs give you all the liquid you need.
You also don’t need to add any additional sugar as the bananas are so ripe they will make the banana bread sweet enough. If you like it sweeter, you could of course add some sugar. I like it without any added sugars as a healthy treat.
Now the making of this banana bread recipe is not complicated at all. As usual it helps to have all the ingredients at room temperature before you start. You need to mash all your bananas into a pulp. This is easy to do with a fork but you can also use an immersion blender if you don’t feel like mashing all the bananas. Once the bananas are smooth add the eggs one by one. You can use an electric mixer but it is just as easy to do this by hand.
In another large bowl you add the dry ingredients (except the nuts) and mix those through. Add the banana mix to the flour mixture and mix it together until well combined. Chop the nuts a little smaller and add them to the batter.
Now a big part of baking a successful bundt cake is making sure you’ve prepared the 12-cup bundt pan properly. The first thing you do is that you brush the entire inside of the pan with oil or melted butter. Shake some flour into the pan and swirl it around.
Make sure to have a light coating of flour everywhere. Holding the tin upside down above the kitchen sink tap it firmly to remove all the excess flour. Too much flour will not create a smooth outside, so you want a thin layer.
Once you prepared the tin pour the batter into the prepared pan and make sure to distribute it evenly.
Now place in a preheated oven (at 340˚F) The baking time is roughly 60 minutes.
Did you know I have a post full of tips and tricks for perfect bundt cakes?
Once the banana bundt cake is cooked through (test it with a wooden skewer inserted into the center of the cake. If it comes out clean, it is cooked through) take it out of the oven and place on a wire rack. Don’t make the mistake of wanting to remove it from the bundt pan right away. Let it sit and cool in the tin for at least 10 minutes or so.
You will probably see the edges of the cake starting to separate from the tin a tiny bit. Now place a board, plate or something flat on top of the open side of the bundt. Using both hands hold both the board and the tin and turn it over in one sweeping motion.
If all goes well you will hear a ‘plop’ and when you remove the tin you will have a beautiful golden brown banana bundt. Let it cool down completely on a cooling rack.
This banana bundt is pretty big and will easily give you 24 slices. That is obviously depending on how thick you make the slices, but you can easily save the slices by freezing them. I do this in individual slices and freeze them two at the time in a freezer bag. That is an easy way to always have a supply of the best banana bread!
Now while this is a super easy recipe, you can definitely make a couple of adjustments if you want. I’ve not even talked about the frosting you could add but let’s start with the filling. Instead of the nuts you can add something like chocolate chips to the batter or pieces of fruit such as apple if you want more fruitiness besides the banana. The banana flavor will probably be pretty prevalent though so I would opt for something like chocolate to add instead of extra fruit.
You can easily add extra spices as well; cinnamon is delicious to add, as well as some ginger or cardamom. Of course adding pumpkin pie spices is easy too.
Now in terms of frosting; you can add some cream cheese frosting or a delicious brown sugar glaze. Always make sure to add the frosting to the cooled cake. A simple icing is also a great thing to add.
You can store this delicious banana bread bundt cake outside of the fridge for up to three days.
Yes you can definitely freeze this bundt cake. Wrap it properly in plastic wrap or add to a freezer-safe container. Stored that way it will keep for up to three months.
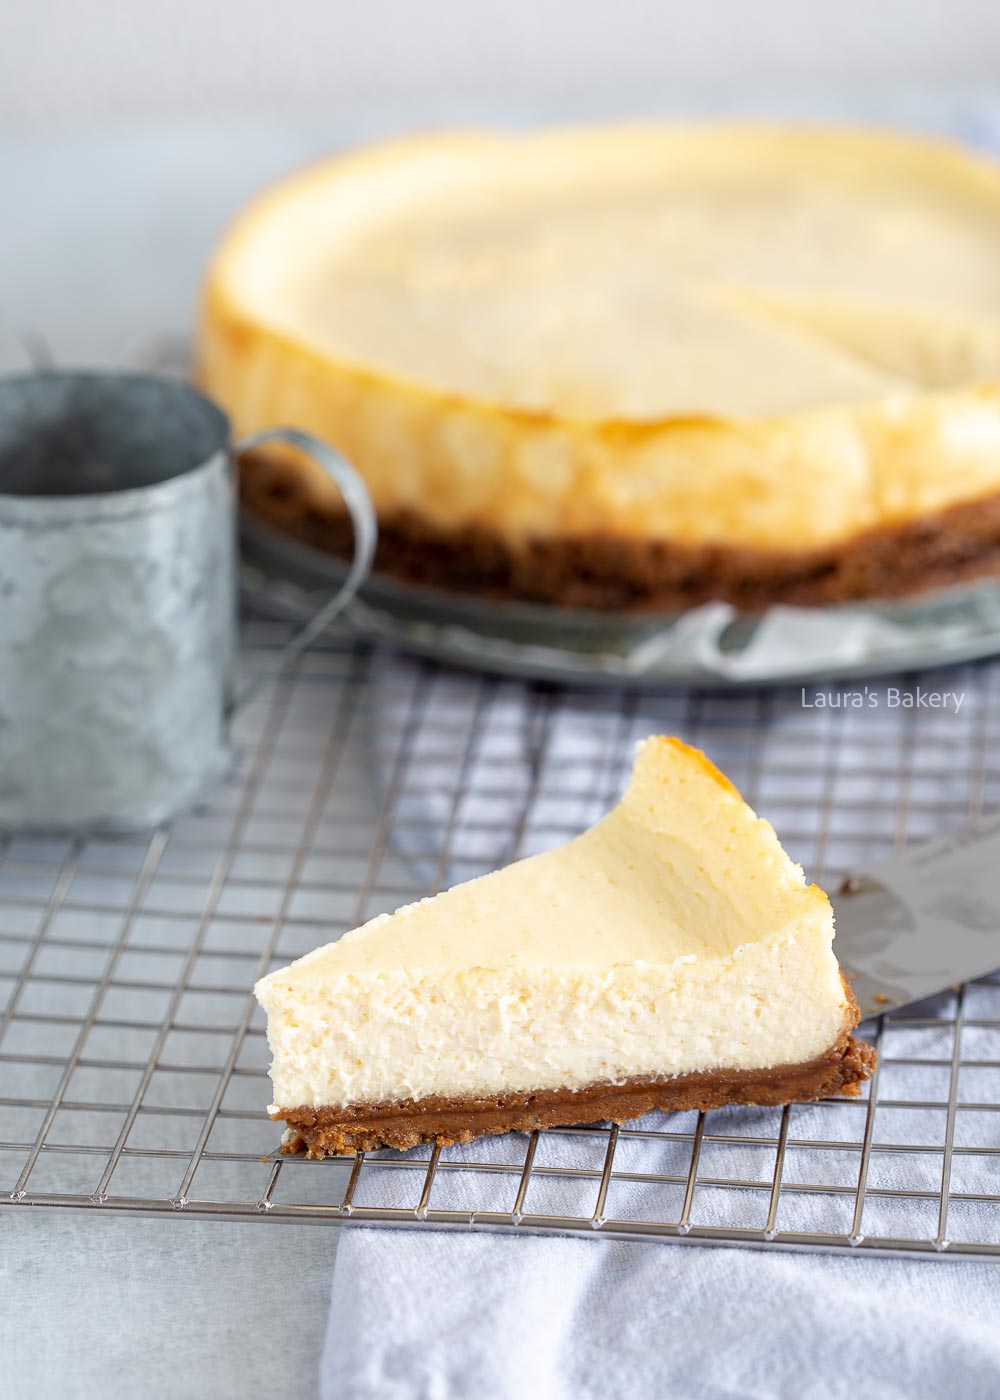
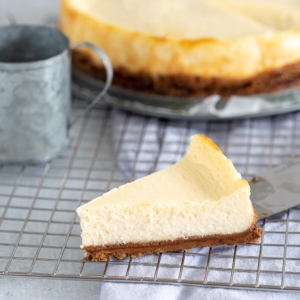
For years, I have been sharing the most delicious baked cheesecake recipes on my Dutch website (so expect some coming up in the next weeks!), but ironically, the basic recipe has always fallen by the wayside. So it’s about time I shared my simple cheesecake recipe with you that is the base of so many other cheesecakes.
Cheesecake, who doesn’t love it? Making cheesecake may sound intimidating if you’ve never tried it before, but once you know how easy it is, you will probably bake this delicious cake many times over. I find this the best cheesecake recipe out there, as it is so versatile and easy to adjust.
With this basic cheesecake recipe, you can go in any direction you want. For example, you can flavor the cream cheese filling with citrus or chocolate and top the cheesecake with a delicious Italian meringue. Or what about adding a crumble topping with crunchy honeycomb or make this blueberry crumble cheesecake! I even made a delicious apple pie cheesecake!
Or maybe you prefer to experiment with different cookies for the bottom, or maybe you like to use more than one cookie type! Later in this article, I’ll give you tips on the proportions of different types of cookies and how much unsalted butter you need for which cookies.
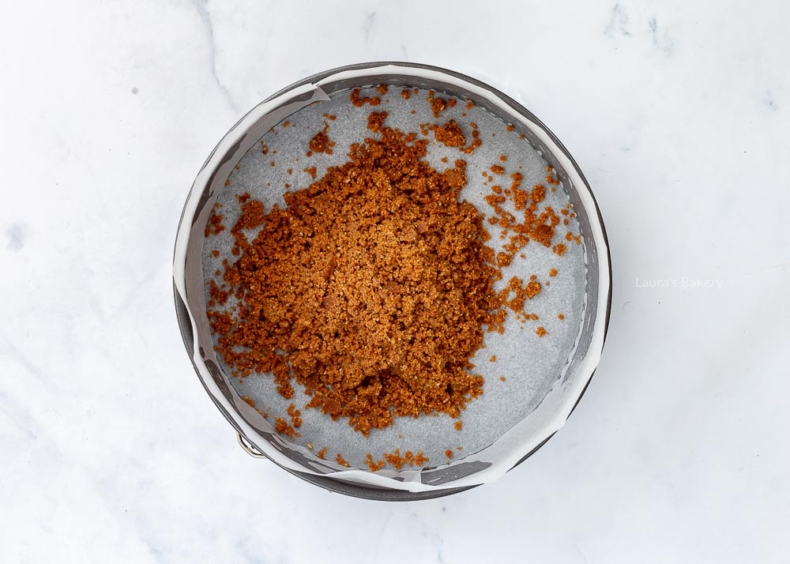
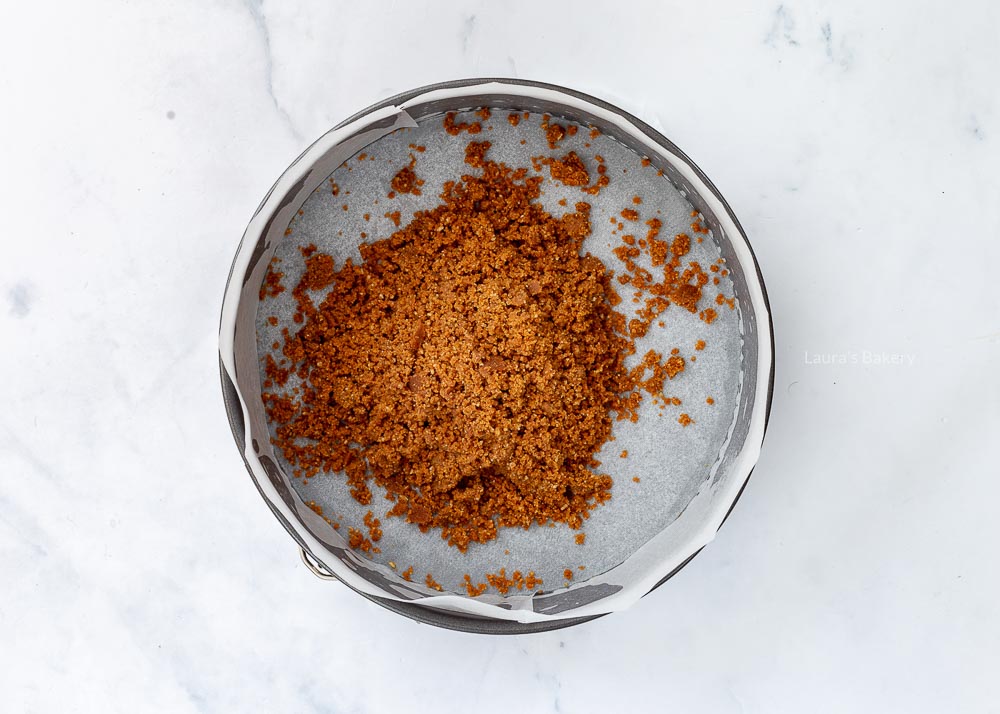
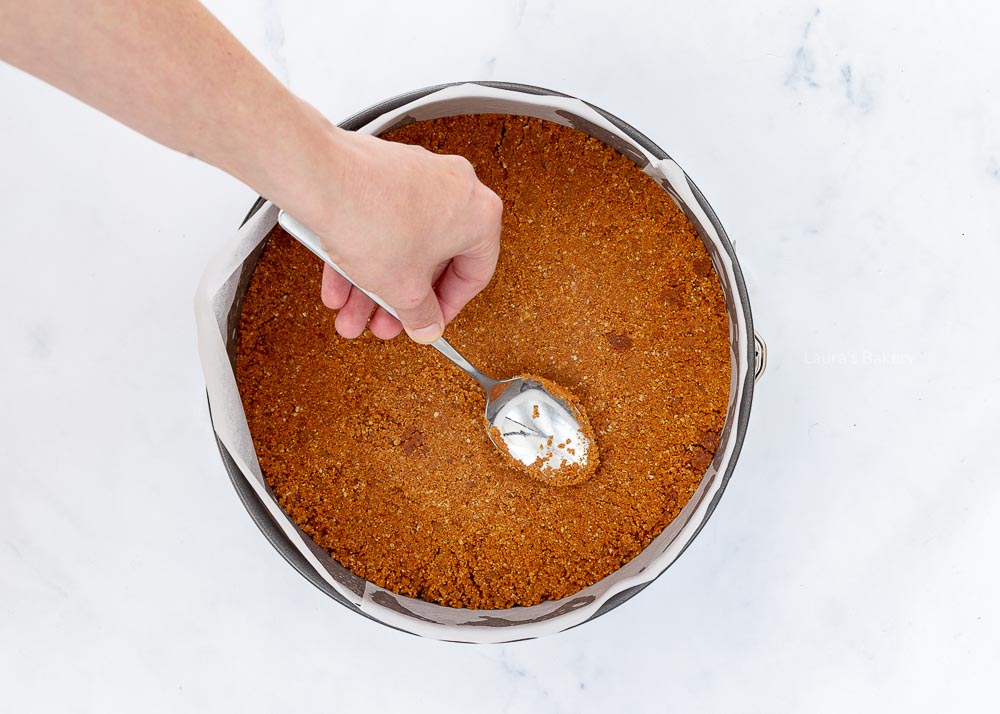
Crumble the cookies and mix with melted butter. Add to the baking tin lined with parchment paper

Firmly press the cookie crust into the tin with the back of a spoon

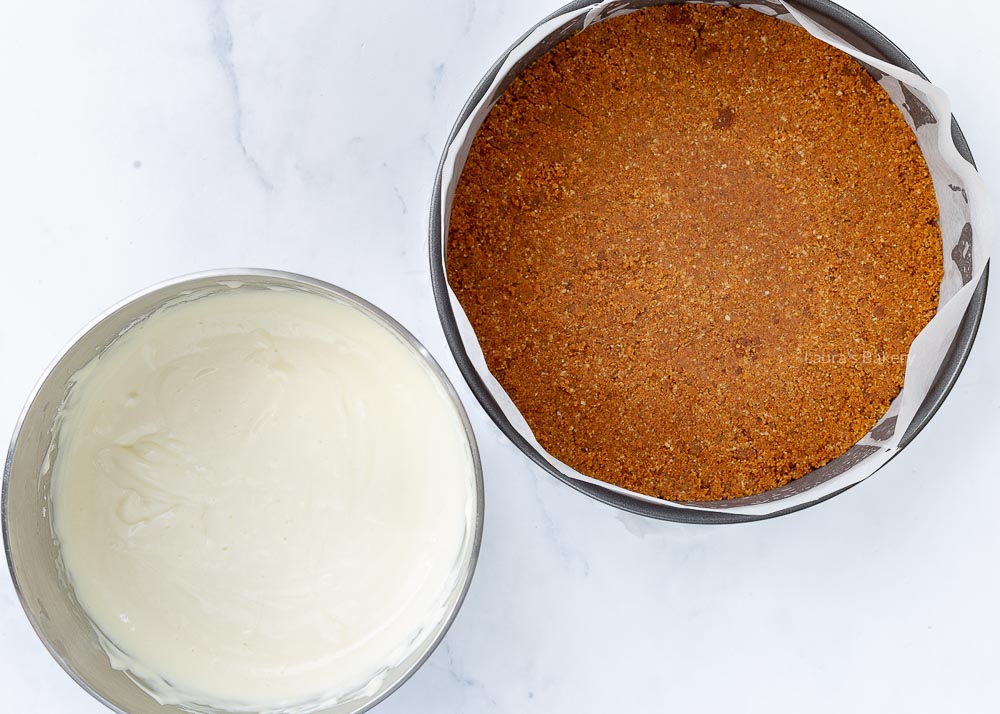
Mix the ingredients for the filling
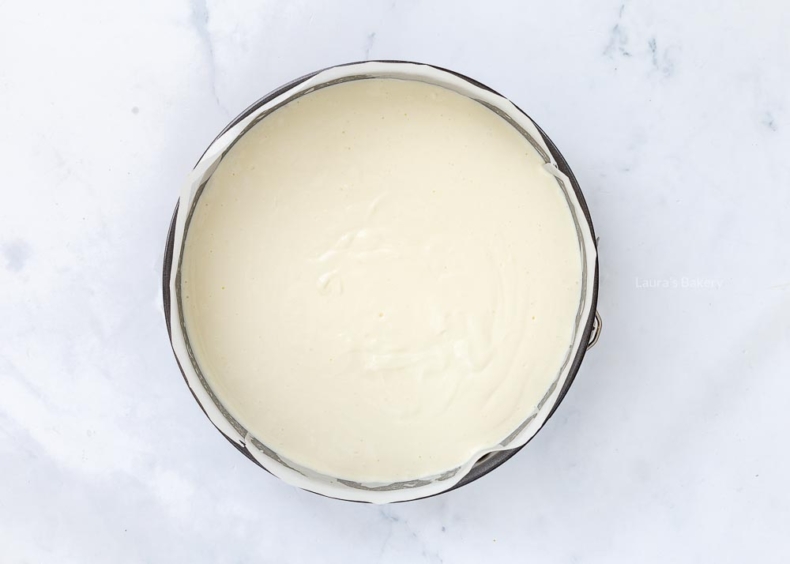
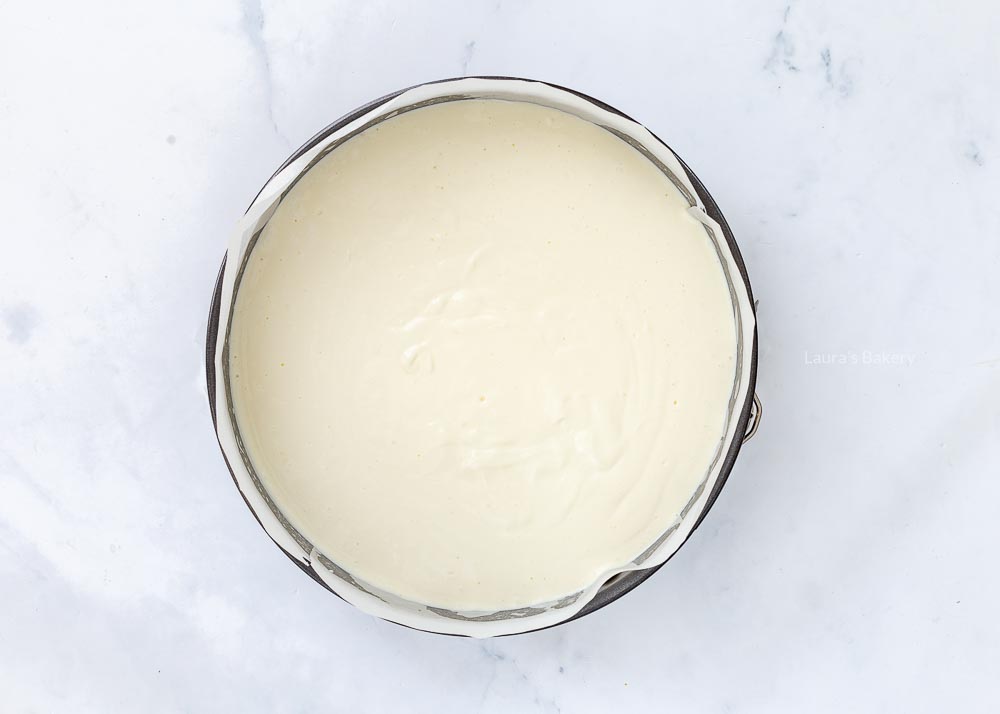
Add the filling on top of the cookie crust and bake in the oven.
The first step in baking a cheesecake is to make the base. You can use any kind of cookie (or even nuts). Most common is probably a classic graham cracker crust, but there are so many more options to choose from. Mix the cookie crumbs with the melted butter and press them into the bottom of your springform pan. An easy way to make sure you press it evenly around the base is to use a glass with a flat bottom to press the cookie crust. Put the base in the refrigerator while you make the filling.
I’m going to give you some additional guidelines for varying the cookie base to make it a little easier. Some types of cookies already contain more butter, so you need to add less butter to make a tasty cheesecake base.
Below is a list of the most common cookies used in cheesecake, along with how much unsalted butter in grams you need to bake the perfect cookie base for your cheesecake. You can then enter this into the base recipe below.
TIP: Did you know you can make cute mini cheesecakes? Or how about a cheesecake with a butterscotch cake base?
Of course, just as important as the base of the cheesecake is also the filling. Now the fun part of the filling is that there is no limit to the cheesecake variations you can make. But let’s start with the basics.
What do you need for making a classic cheesecake recipe
The first step is to add the cream cheese with the sugar in the bowl of a stand mixer (using a hand mixer is a good option too). Use the paddle attachment and keep in mind that you do not want to over whip the mixture. Using medium speed, cream the two together until smooth. Now add the eggs one by one on low speed, make sure each one is incorporated before adding the next one. Mix the sour cream with the vanilla and add that in. You can use the machine or a rubber spatula as well. And last but not least add the flour in and mix until just combined.
Once you’ve got your base done you can add flavorings if you want. You can add a bit of lemon juice, fresh berries or any other kind of flavor you like.
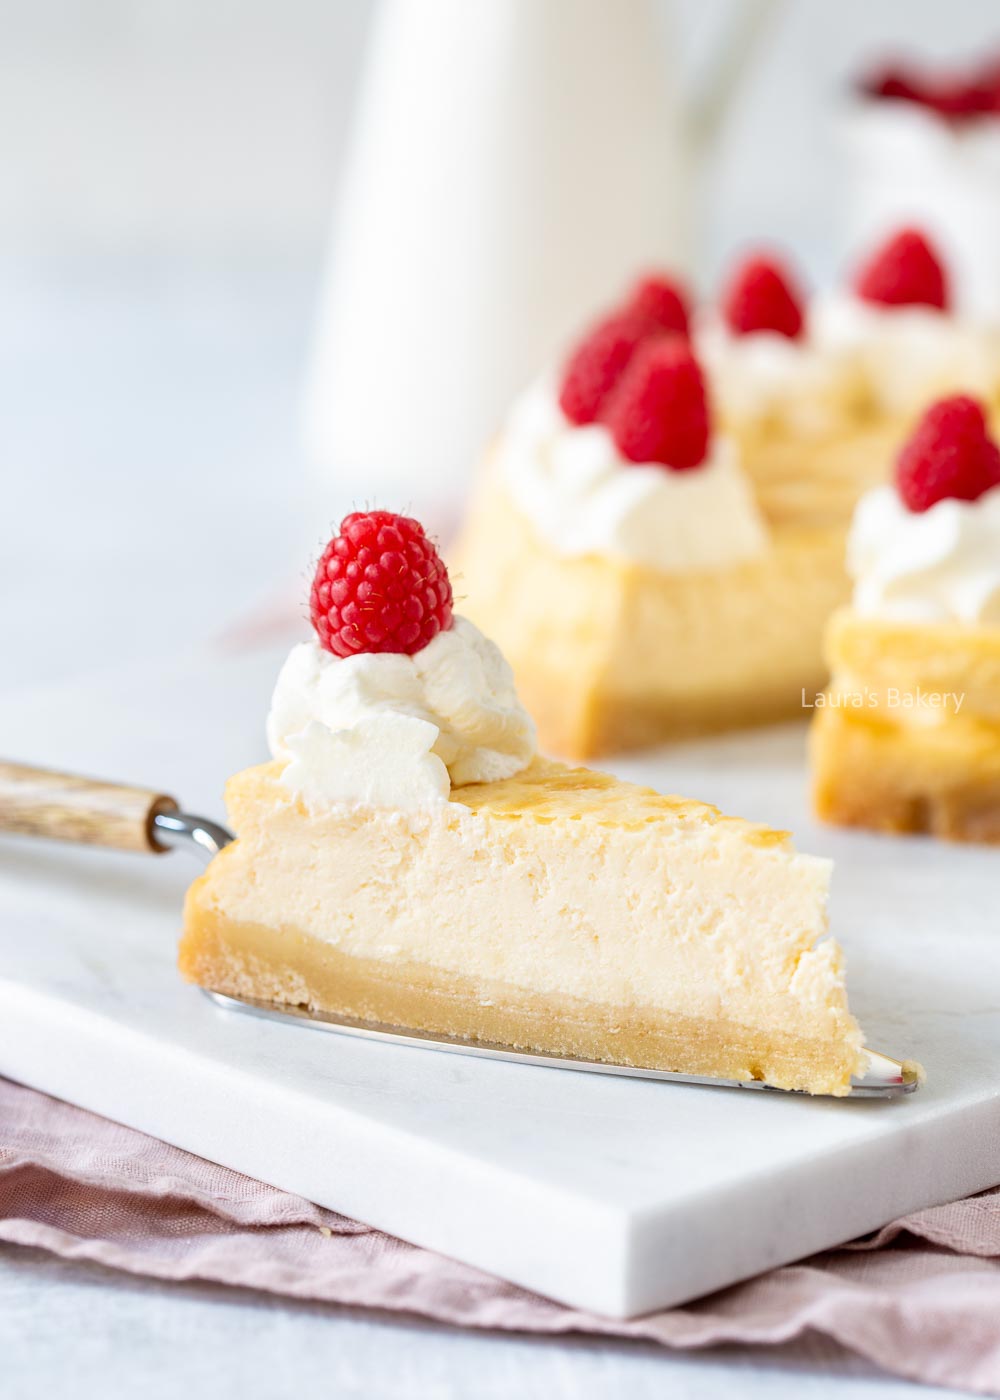
Actually, you can use any kind of all-natural full fat cream cheese, whether it’s a house brand or an A-brand.
Personally, I usually use Philadelphia’s natural cream cheese. Which brand of cream cheese you use depends largely on your location in the world and what is available. Sometimes you will find brands that carry a variety called rich and creamy. That is usually not the best choice. You want it to be firm enough to hold the cheesecake.
By using a loose-bottom springform pan, greasing the pan, and then lining the bottom and sides of the springform pan with parchment paper. It might seem like double action but it is the best way to ensure it comes out perfectly every single time.
Do not remove the cheesecake from the pan until it has baked, cooled and set in the refrigerator. Carefully loosen the springform pan of the cool cheesecake and remove the parchment paper from the sides. Transfer the cheesecake to a large cutting board or cake platter for decorating, slicing, and/or serving.
In my experience, it comes down to the temperature of your oven during the baking and cooling process. At a lower temperature, a cheesecake will bake more evenly, so it will not collapse to the point where cracks appear when it cools. For the same reason, it is important to keep the cheesecake in the oven while it cools. But the best two tips I have are these:
The extra moisture prevents the cheesecake from cracking.
Not to worry! You can easily hide the cheesecake cracks by decorating the top of your cheesecake with a delicious topping. Think lemon curd, whipped heavy cream, or Italian meringue. Or even a layer of fresh berries will do the trick. The taste will stay be the same so while the crack might not look all that great it’s not a big issue for the flavor.
A baked cheesecake is done when the edges feel firm but the center is still wobbly. As it cools and sets in the oven and refrigerator, the entire cheesecake will firm up.
Some recipes will tell you to use a cheesecake water bath when baking to prevent the cheesecake from cracking. First of all you will need a solid cheesecake pan if you want to do that or the water will leak into the springform pan.
What I think works best, is a small oven dish with hot water on the bottom of the oven. But even without, I often have cheesecakes without cracks. Just keep the door closed when the cheesecake cools down in the oven.
This easy cheesecake recipe will create a delicious and perfect homemade cheesecake and is your starting point for making your first cheesecake and add your favorite cheesecake toppings!
More cheesecake recipes will follow soon but also check out below delicious no bake cheesecake recipes if you have less time at your hands.
And if you are looking for more tips on how to bake the best cheesecake, you don’t want to miss out on my tips for perfect cheesecakes.

I recently sat down and wrote a long article about how to bake the perfect cookie. While this is not online yet, I felt it was a great idea to start with an article on how to bake the perfect cake. I receive questions about this on a daily basis, so time to put all my tips together for easy reference.
I like to think that baking a good cake is easy and simple, but in reality there is a ton of things that can go wrong. The fact that I don’t find it difficult is mainly due to the fact that I have made more cakes than most people do in a lifetime. And as with all things; practice does make perfect.
Don’t be afraid to make mistakes either, because I learned all the things below by doing it wrong a couple of times! So making mistakes is almost essential to being a good baker. But there are a couple of things that can be prevented if you know how. So if you have a good look at the below baking tips, it’s easy baking the perfect cake.

When you bake a cake you want the end result to be nice and moist. A dry cake is definitely not a big success. The cause for ending up with a dry cake is pretty simple; you have either baked it for too long or it has baked in an oven that was too hot.
Too much moisture has evaporated, which results in a dry cake. So for next time, try baking at a lower temperature and/or check the cake a little earlier to see if it is done. Every oven is different so having an oven thermometer separately that measures the temperature might help in figuring out your oven. Read this article also which is full of tips on how to avoid a dry cake.
A compact and dense cake can be very tasty with certain recipes, but most of the time you just want an airy result. Dense cakes can have several causes. One is too much moisture, for example from milk, eggs or butter. This prevents the cake from cooking and rising properly, resulting in a compact cake.
Another reason is too much cake batter. Yes, you can have something as too much batter! A batter that is too airy will actually collapse, resulting in a compact cake. But you can also make your batter too dense by using too much baking powder.
A collapsed cake and a dense cake are closely related. Your cake can collapse because you whipped the batter too long so it has too much air. Or again you might have used too much leavening agents.
A cake can also collapse if you open the oven too early. Your cake needs the heat in the oven to rise and set. You disrupt this process by opening the oven door. Cold air enters your cake, and as a reaction, your baking may fail completely. In the case of a cake, it will collapse.
Do you still want to open the oven to check your baking? Do it as late as possible. I usually wait until at least two-thirds of the way through the baking time. That way it has already set enough for me to be able to open the oven door without too much of a risk.

I love a cracked cake, it looks so rustic. But I know from the many questions I get that not everyone thinks so. Many of you prefer a cake that doesn’t come out of the oven with a rustic look. Fortunately, it is not difficult to bake such a smooth cake, as it has everything to do with the temperature.
Just bake at a lower temperature and leave your cake in the oven a little longer if necessary. That way it will rise more gradually and you prevent the crack from happening.
You add pieces of chocolate to your cake and once baked you cut into the cake, expecting to see lovely chocolate pieces throughout the cake. But annoyingly they all sank to the bottom! This can happen with pieces of fruit, cookies or any other ingredients you add to the batter.
Again, there are several reasons for this to happen. Trick number one is to add some flour to the chocolate pieces, for example. Just mix them in a separate bowl so that all the pieces are coated with flour, then add them to the dough.
Reason number two is that the batter is too airy. A batter that is too airy is not firm enough to keep the pieces from sinking to the bottom. Think of it like the foam on your cappuccino. On a firm layer of foam, your coffee spoon will stay on top (at first), but if it is not firm due to too many air bubbles, it will sink right through.
Once you’ve baked the perfect cake, you want it to stay perfect until you serve it. The most important thing is to keep it out of the refrigerator, as it will dry out. Good packaging is also important, I usually use aluminum foil. You can read my tips on how to store cupcakes here. I will soon have more tips on how to store cakes in general.
Finally, here are some of my favorite cake recipes where you can apply the above tips: