How long can I store the healthy carrot cake banana bread?
You can store the banana bread in an airtight container for 2-3 days or for 3 months in the freezer

This carrot cake banana bread recipe had been on my to make list for a long time. It just felt like such a great combination of flavors and that’s just bound the be delicious right? The texture of this bread is just absolutely delicious.
I quickly ordered a bunch of bananas and the rest of the ingredients I usually have available. My bunny Lot had to sacrifice some of her carrots, Haha.
I had to wait for the bananas to ripen, because that is the most important part of any banana bread; the bananas have to be really ripe as they provide most of the sweetness. Once they were ripe I got to work.
This recipe is a variation of my favorite banana bread recipe and I am always playing around with variations (like this lemon poppy seed banana bread!) on it. After some trial and error I was happy with how the carrot banana bread batter tasted so I poured the batter into a cake tin and placed it in the oven.
Initially I wanted to make a cream cheese glaze to go on top of the bread but I decided against it as I wanted to be able to freeze it easily so I would always have an easy afternoon snack.
If you want you can absolutely make my favorite cream cheese frosting to top the carrot bread with. With this frosting it’s less healthy, but very delicous.

As you can see you do not add any other refined sugar which is also why it is important to make sure you’re using overripe bananas (brown bananas are best!).
If they are not you could consider adding a small amount of brown sugar to the mix but it’s better to wait until the bananas are ripe.
Making this homemade banana bread with carrots is as easy as mixing the wet ingredients together in a large bowl. Mix the dry ingredients together and add to the wet ones. Fold it through until incorporated and add the chopped walnuts and the shredded carrots at the last step.
Since the mixing doesn’t require a lot of time you don’t really need a food processor or hand mixer here. Just a large mixing bowl is enough.
Fold it through and pour batter into the prepared loaf pan. You can either grease the loaf pan and dust with flour or you can use parchment paper.
Place the banana bread carrot cake in the preheated oven and bake until golden brown. Let the bread cool for a few minutes in the loaf pan and take it out to cool completely on a wire rack.
This moist carrot cake will keep for 2-3 days in an airtight container (not in the fridge) or freeze it in slices for easy acces to a quick snack. You can read more about how to store banana bread here.
Now the number of variations on my classic healthy banana bread recipe are ever growing. If you’re a fan of banana bread make sure to check out the recipes below and stay tuned for much more variations coming soon!
You can store the banana bread in an airtight container for 2-3 days or for 3 months in the freezer
No, if you don’t like banana go for a regular carrot cake recipe.
Sure. Just make sure that the dimensions of the other tin are somewhat similar. Also keep in mind that baking times may vary if you change the tin. So always test if the cake is cooked through.

A delicious easy French toast recipe. I’ll show you how to get a stack of delicious sweet slices on the table in no time at all.
French toast is something I love but rarely make. When it is made here, we usually eat it for breakfast or lunch on the weekend.
I really enjoy eating it with the family. You can sprinkle some (powdered) sugar on them or serve them with strawberries, but they are delicious without all those extras.
Here at home, we like to eat them with a slice of cheese, a savory twist but also so delicious!
Soaking thick slices of bread in an egg mixture (whole milk and egg) and then frying them in a pan creates a delicious new creation: French toast.
Don’t forget to flip it while frying, as both sides must be golden brown. The egg-and-milk mixture is usually flavored with a little sugar and cinnamon, but these can also be sprinkled over the baked result as well.
I like to mix in cinnamon with the eggs and milk, and use powdered sugared on top of the baked result.

French toast is a sweet dish invented to give stale bread a new purpose. Bread, especially homemade bread, tends to get old and dry quickly.
If you make this recipe with fresh bread, the result quickly becomes soggy, which is not tasty.
You’ll often find this dish called “French toast” on menus (or abroad), and I personally like to order it when I’m out and about.
It’s also called pain perdu (literally meaning lost or wasted bread) and you can pretty much find it around the world in different versions.
Obviously making French toast is super easy to do. You need a shallow dish where you mix the milk and the eggs in and ideally day-old bread like brioche bread.
The best bread to use is mostly depending on your preference. You can use almost any kind of bread you like. For the perfect french toast I do like to use brioche, but feel free to use whatever bread you prefer.
For the pictures you see here, I used simple white sandwich bread.
You add the bread in a single layer in your milk mixture and add a large skillet on medium heat on the stove.
Don’t let the bread soak for too long or it will start to fall apart. You add a bit of butter to the pan and bake both sides of the slice of bread.
Let it rest on a wire rack for a little bit. And that’s all there is to it. It is delicious served with fresh fruit or fresh berries and a bit of heavy cream whipped to soft peaks. It’s a delicious breakfast but can even serve as a dessert.

Do you like this recipe for breakfast? Then you might like these breakfast recipes as well:

Of course, you can make this recipe with fresh bread, but make sure the soaked slices of bread will not fall apart when placing them in the skillet.
Of course you can! That’s the genius of this recipe: you can basically make it with any kind of bread, as long as it’s stale. You can even make a french toast casserole if you want to keep it simple!
You can replace the milk in the recipe with a lactose-free milk alternative or a plant-based milk like almond milk or coconut milk for instance.
Omitting it is not the way to go because the bread needs the moisture. With just the eggs it would be a weird kind of omelette.
Oh yes, I love savory French toast! You can use white bread, but a savory bread is also great. Basically, you can follow the recipe below, omitting the sugar and cinnamon.
After baking, you can add savory toppings of your choice, such as cheese, avocado, roasted vegetables, tapenade, pesto, pinch of salt etc.
It is also delicious to add a nice filling before baking, as I did once with my savory pesto and cheese French toast. Like grilled cheese, but different.
So this is a pretty easy recipe to vary. Since it’s such simple ingredients it’s also super easy to make your own variations.
In theory, this should be possible. I haven’t tested it myself, but I’ve seen recipes like this before. It’s on my (long) baking list to try them in my waffle iron, but maybe a contact grill that you use to make sandwiches on will work even better.

It’s time to tell you more about my favorite types of vanilla! Vanilla is the most common flavoring in my recipes. After all, it is a true classic and provides a rich flavor in sweet cooking and can be found in many ingredient lists.
Not only vanilla sugar and vanilla extract are welcome guests, but also vanilla paste or vanilla beans are often used in recipes.
In this article, I will explain the differences between all the types of vanilla flavors and the different forms so you can better understand what to use when and if you can substitute them for each other.
Let’s start at the beginning: the vanilla bean pods. You can also call it a vanilla pod or a vanilla bean and I use them to make all types of vanilla flavoring.
Vanilla pods are very dark brown and feel a little sticky. You can cut them open and scrape out the vanilla pulp (filled with vanilla seeds), but you can also cook them in milk, for example.
They have a unique flavor and you can find them in different countries around the world. You have tahitian vanilla beans, mexican vanilla beans and the most well know; the madagascar vanilla beans.
One vanilla pod is equal in strength to a full tablespoon of vanilla paste or extract. But beware, one vanilla pod is not the same as another. There are many differences in quality, but Bourbon vanilla from Madagascar is the cream of the crop.
Some examples of recipes that call for vanilla beans:

Pure vanilla extract is one of the most common types of vanilla that I use because it is a vanilla product that can be used in any recipe.
It is made from real natural vanilla and you can taste that in your baking. Nowadays it is available in more and more supermarkets and it is easy to find in (cooking-) webshops.
Because of the differences in price and quality, I prefer to make my own vanilla extract. Super easy to do. I also give the proportions compared to other vanilla flavors so you can substitute.
You usually add the extract to a recipe by the teaspoon. Some examples of recipes in which I have used vanilla extract (that would be in fact, most of the recipes on Laura’s Bakery):

The name says it all, but a vanilla flavoring or essence is not made from real vanilla. It is an artificial vanilla that mimics the taste of real vanilla.
I read online that it has the advantage of being able to withstand the high temperatures of the oven better, leaving more of the vanilla flavor after baking.
Also, it is available in all supermarkets and is much cheaper than “real” vanilla flavoring. So it’s a popular choice for a lot of people who don’t want to spend the higher price on real vanilla.
Quality vanilla extract is something you add in drops, that’s how strong the flavor is.
The vanilla flavoring and essence you can buy at the supermarket is not very concentrated. You add it in the same amounts as extract, but I personally think it doesn’t taste all that good. So I personally never use it.
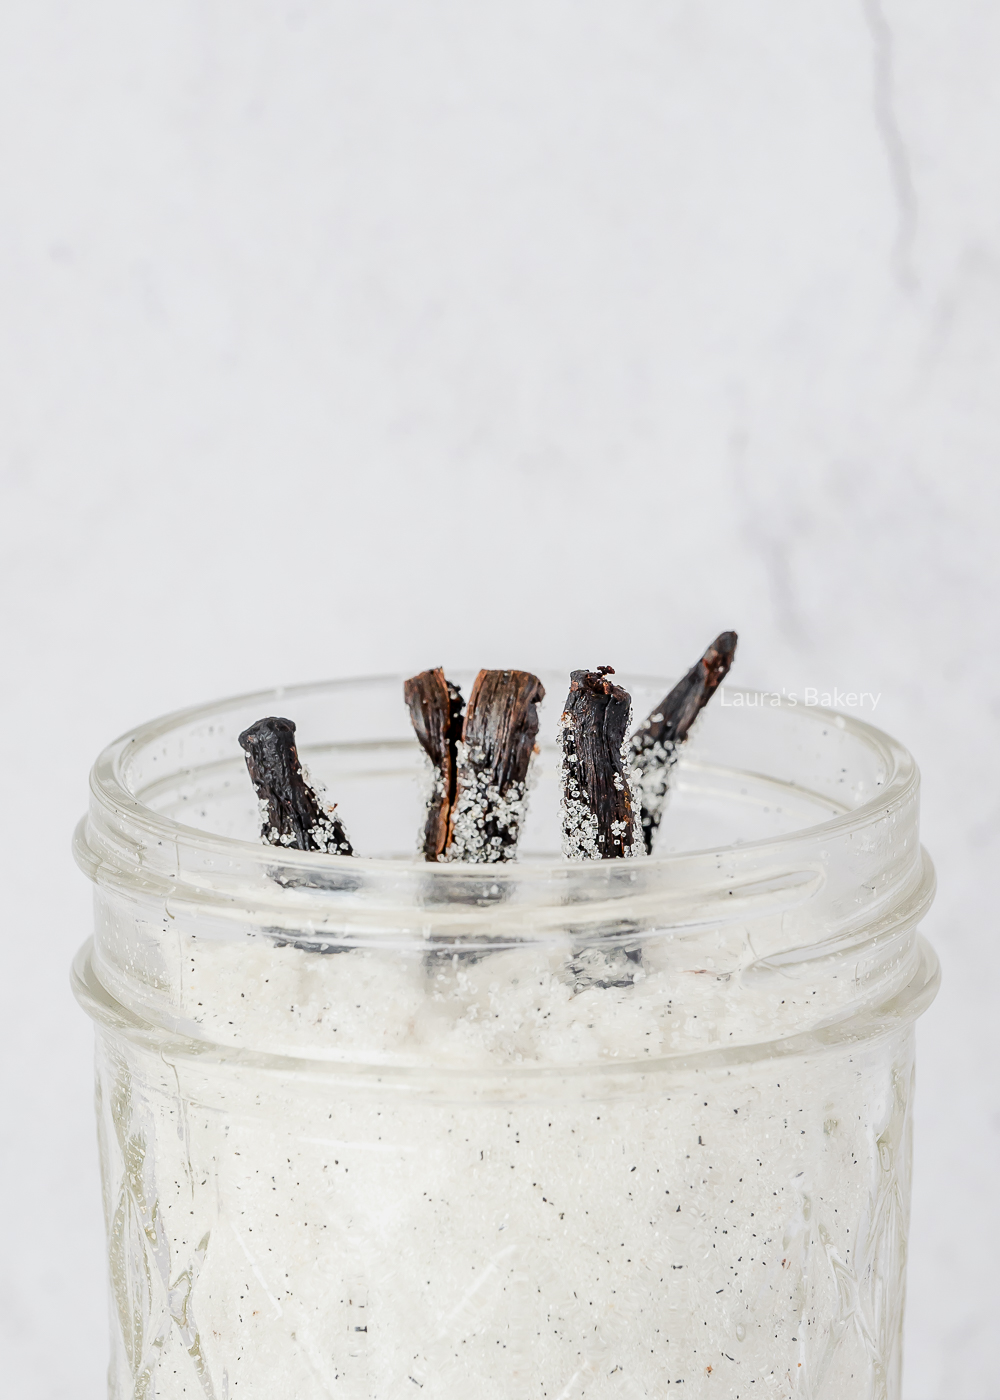
Vanilla sugar is sugar that has been flavored with vanilla beans.
You can buy it ready-made in the supermarket. These packets usually do not contain real vanilla, but the sugar is flavored with vanilla flavoring (an artificial flavoring).
Fortunately, you can make it yourself by putting some vanilla beans in a jar of sugar. I explain all about it in my recipe for vanilla sugar.
You usually add this sugar in 8 gram bags (0.2 oz), like you get at the grocery store, or by the tablespoon.
If you are using vanilla sugar to replace other vanilla flavorings, subtract the remaining sugar in the recipe evenly to avoid making the recipe too sweet.
Here are a few recipes where I usually use vanilla sugar:

This paste is made from pure vanilla beans, finely ground with sugar, water and glucose syrup.
Incredibly easy to make, but the use of glucose syrup may put some off. This ingredient is readily available online, so don’t be put off.
Once you have a jar of glucose syrup in your home, you can still use it to make a lot of vanilla paste.
Use my recipe to make your own vanilla bean paste.
Vanilla paste is liquid because of the glucose syrup, but it is more solid than vanilla extract.
You can substitute it for other vanilla flavors, but the big advantage is the distinctive tiny seeds of vanilla pith that you will see in your final product.
Vanilla paste is just as strong in flavor as vanilla extract and is usually added in teaspoons.
Recipe I like to use vanilla paste in:
Making my own puff pastry had been on my bucket list for years. It wasn’t until my 3th book that was all about making delicious snacks and appetizers that I got started making my own rough puff pastry.
In my head making puff pastry dough was really complicated but in fact it was absolutely not complicated. And the good thing is you really only need four ingredients. Flour, butter, water and salt.
Let me first start by explaining what the difference is between rough puff and regular or classic puff pastry:
In terms of flavor both are equally delicious and you will still get a very flaky pastry. So that’s what the difference between the two is. And the easy version is of course less work.
As you might have guessed the method we are highlighting here today is the rough puff pastry. It’s absolutely perfect for making loads of puff pastry recipes! Think about making this delicious plum pie for instance , a Dutch banketstaaf, brie and mango empanadas or sausage rolls.


Now making this quick puff pastry I have already given you the pretty simple ingredients. A few things that are really important when making sheets of puff pastry.
First is that the butter and the water that you’re going to be using need to be cold and not just cold from the tap. It needs to be ice-cold water. Set the water in the fridge prior to using or add a couple of ice cubes to a bowl of water and let it sit for a bit so the water gets really cold. That’s step one.
Step two is to make sure the butter is also really cold. That works best if you already make little cubes of the butter and place those in the fridge again to cool down.
Now you first mix the dry ingredients (flour and salt) together and add the cubes of butter. Add the ice cold water and mix it briefly. The flour mixture should be absorbed into the dough but you still want to be able to see the butter cubes. So don’t knead it for too long!
Form a disk of the dough, wrap it in plastic wrap and place in the fridge for at least 30 minutes.
Once the dough is chilled it is time to start folding it by making turns. You start by placing the dough on a lightly floured surface and – using a rolling pin – roll it out into a long rectangle.
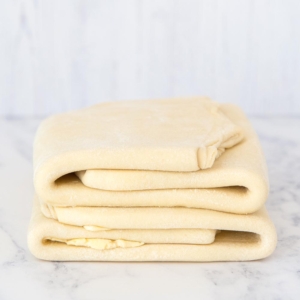
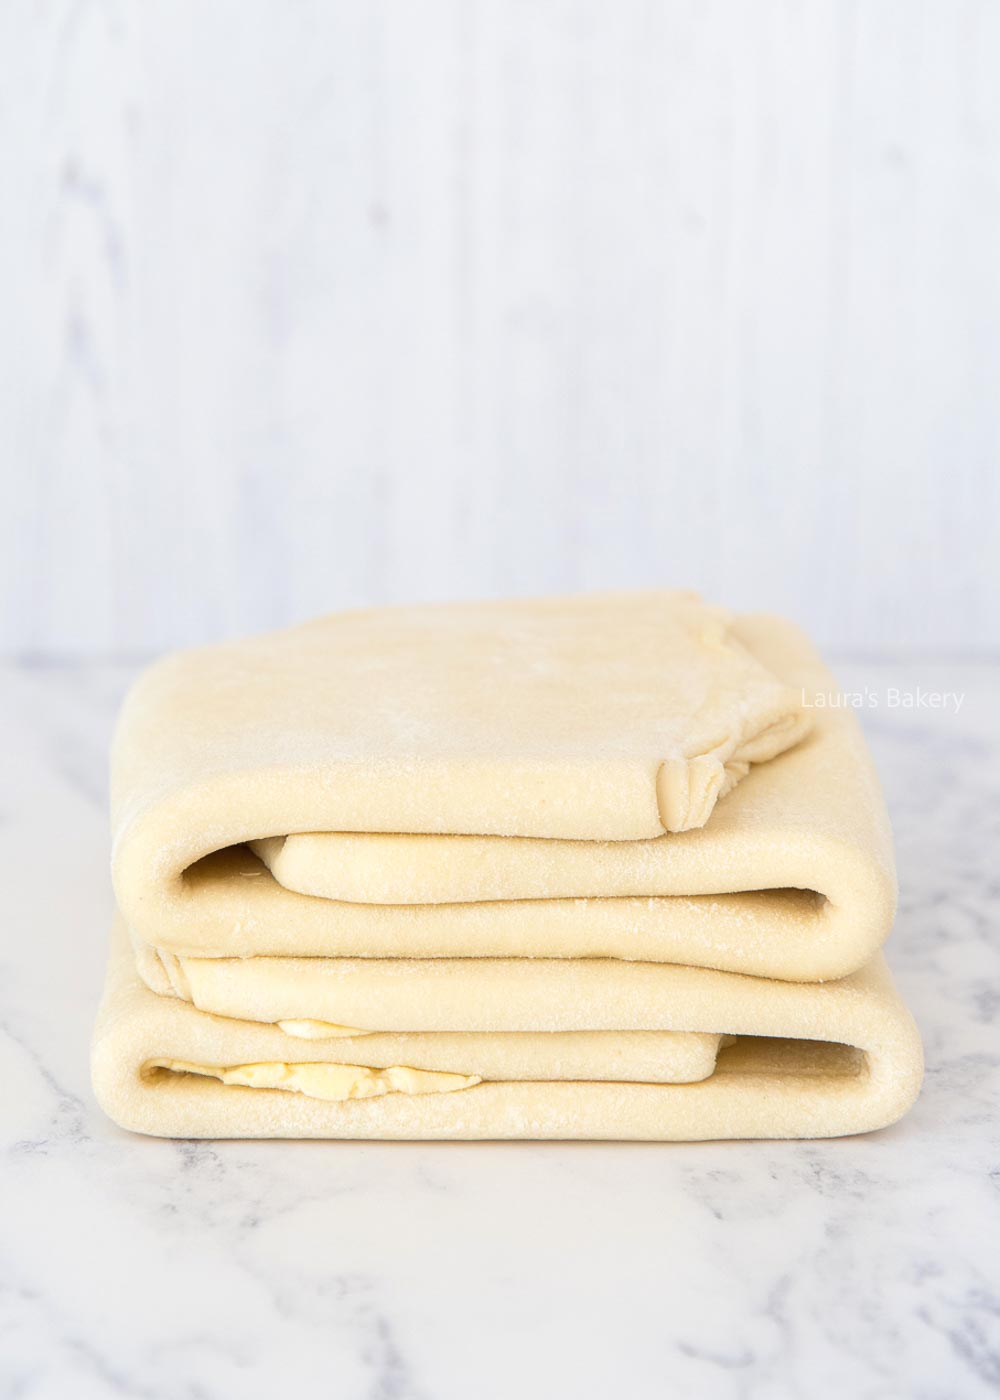
Now fold the dough into thirds. Almost like folding a letter for an enveloppe. The picture shows you how it should look when you’ve folded it properly.
Now turn the dough a quarter of the way and roll out again to repeat the folding. This is now called a turn. So by rolling it out twice you’ve created one turn. Wrap the dough again and place back in the fridge.
You repeat this process two more times. So in total you will have three turns.
After the last turn you can cover and refrigerate the dough until you’re ready to use it. Or continue by making for instance these saucijzenbroodjes or a banketstaaf. These are both Dutch recipes but there is so much more you can make with this easy puff pastry recipe.

With the current prices of eggs, having a couple of baking recipes without eggs under your belt is a good idea. If only for budget purposes.
So today I am giving you my favorite recipes that do not require any eggs at all. From a delicious vanilla cake to a tiramisu without eggs. Once you know how baking without eggs works it is not that complicated to do.
Egg-free recipes are not only easy for budget purposes it is also great if you have guests or friends with an egg allergy. And while you might think that an eggless cake can not be as airy as a regular cake with whole eggs, I beg to differ.
There are a couple of tricks you need for replacing the eggs in the recipes. Or just pick one of the delicious recipes listed below.
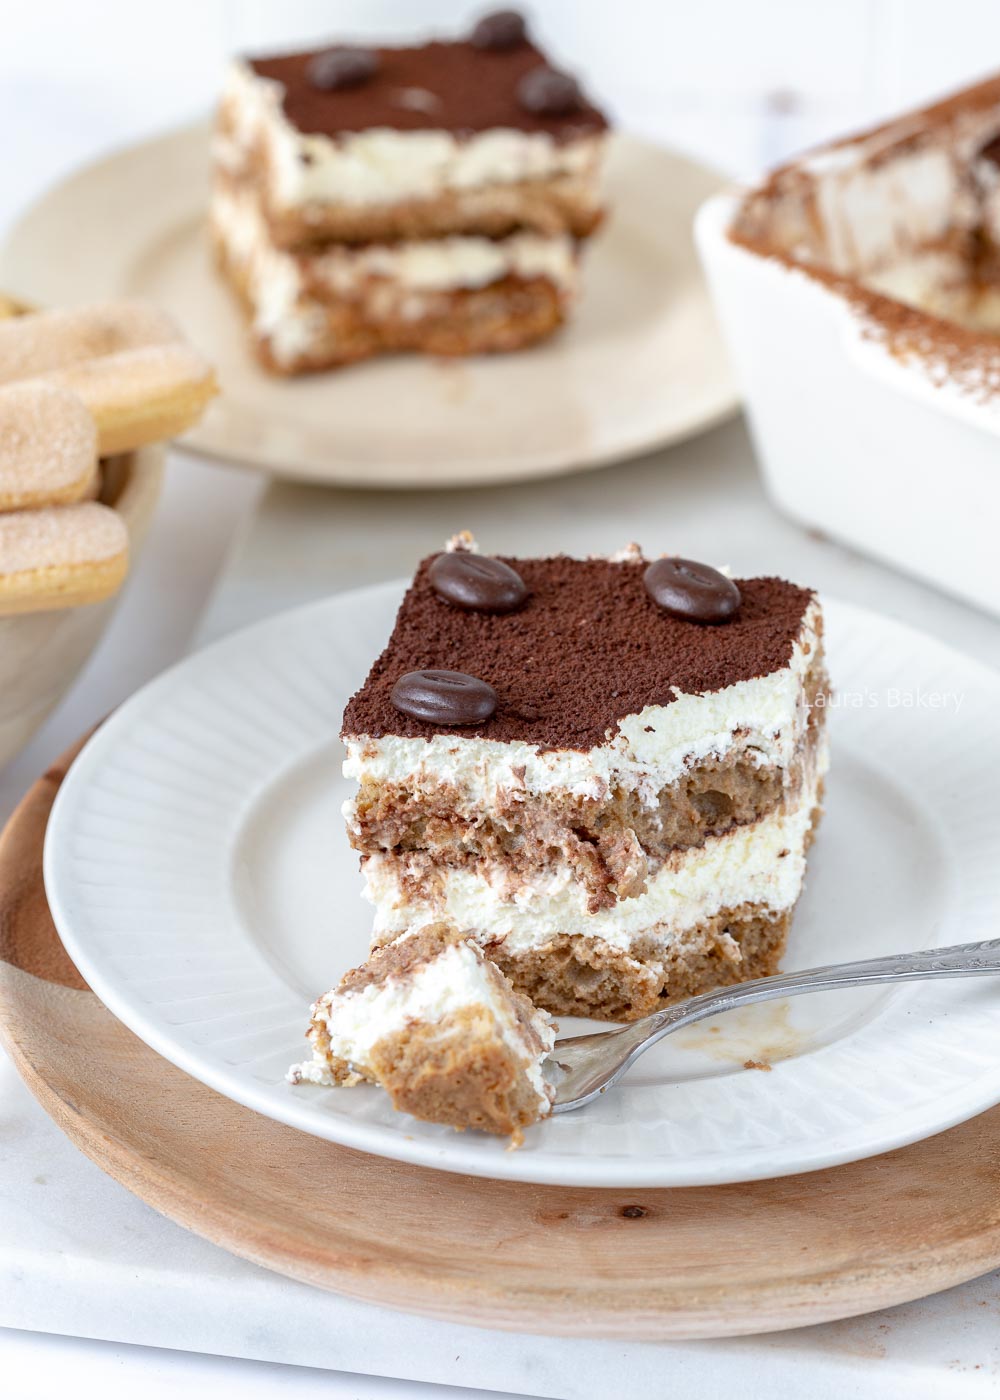
To start the list of delicious egg free recipes I have a classic tiramisu recipe without eggs and without alcohol. I do have an option in the recipe to include alcohol if you prefer.

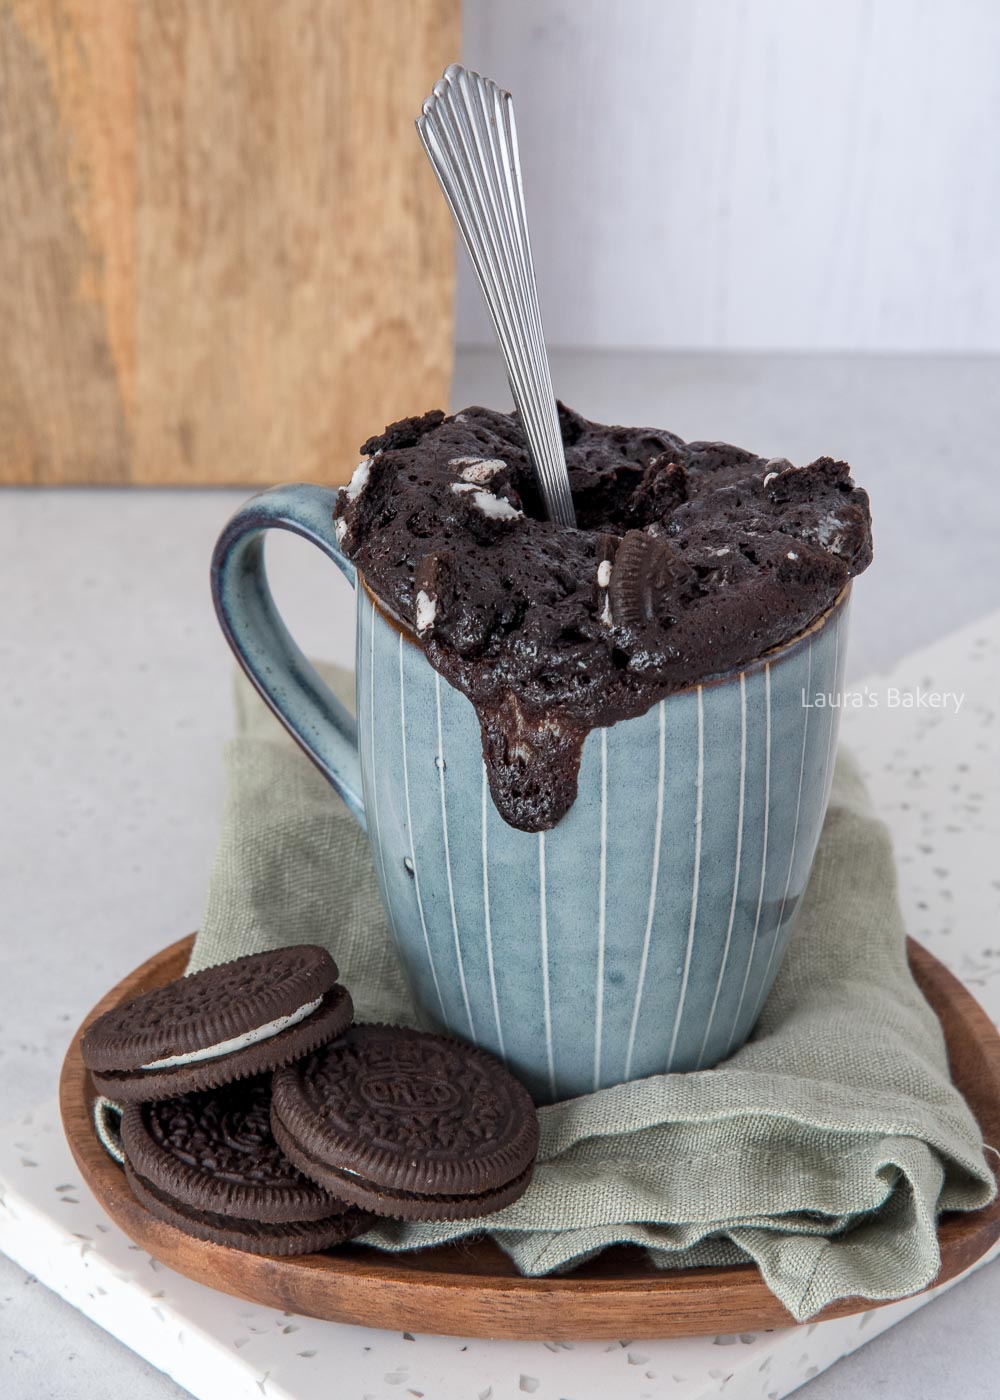
If you love Oreo you’re going to want to try this Oreo mug cake recipe. It doesn’t contain any eggs, is delicious and fluffy and ready in no time at all! The only equipment needed is your microwave.
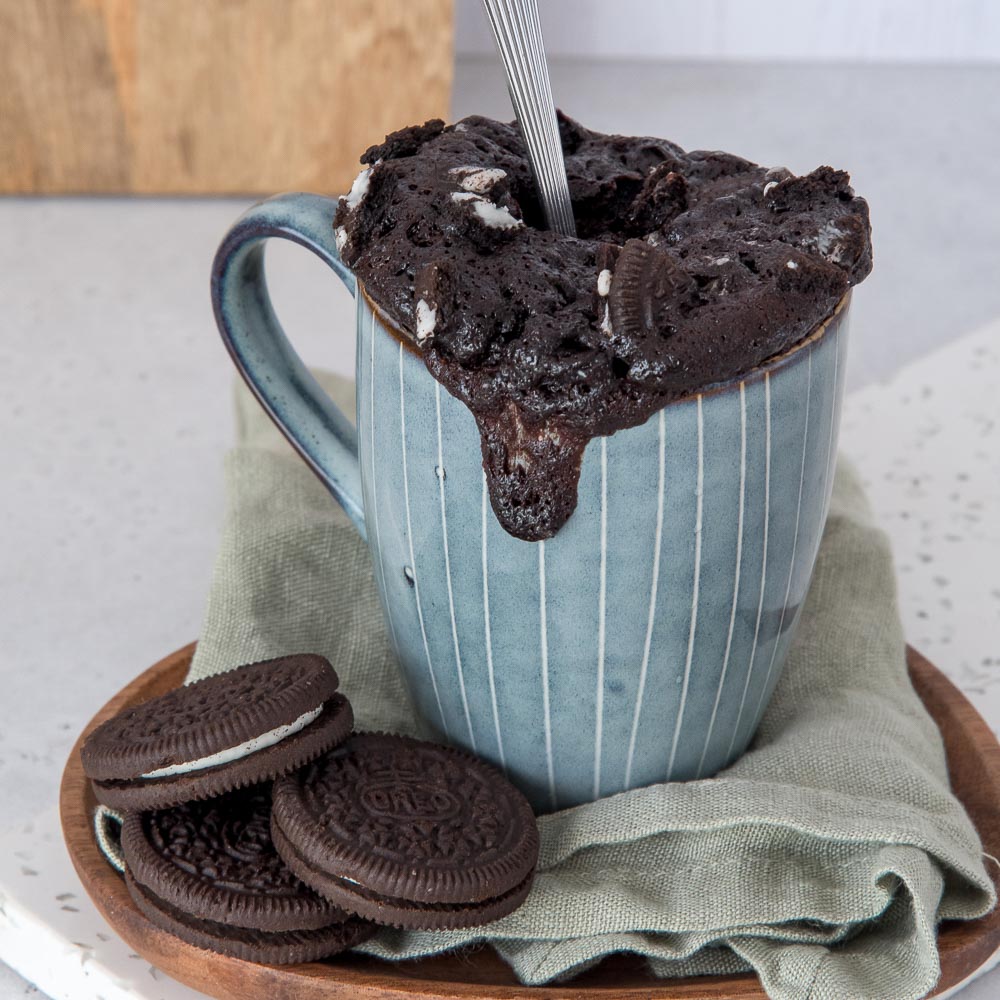
Another fabulous mug cake which uses no eggs at all is this vanilla mug cake. It’s the base of most of my mug cakes and all of them are super quick and easy to prepare. It would be your go to recipe for a very fast cake recipe.

The perfect vanilla cake without eggs is this easy recipe. I’ve made it so many times already I lost count and it still continues to be one of my favorite recipes. And not only mine, but my guests are always happy when I make this delicious vanilla cake.

If you love chocolate mousse, like I do, you might be used to the fact that it contains egg whites most of the time. But this delicious recipe uses only three ingredients and no eggs! You will love it!
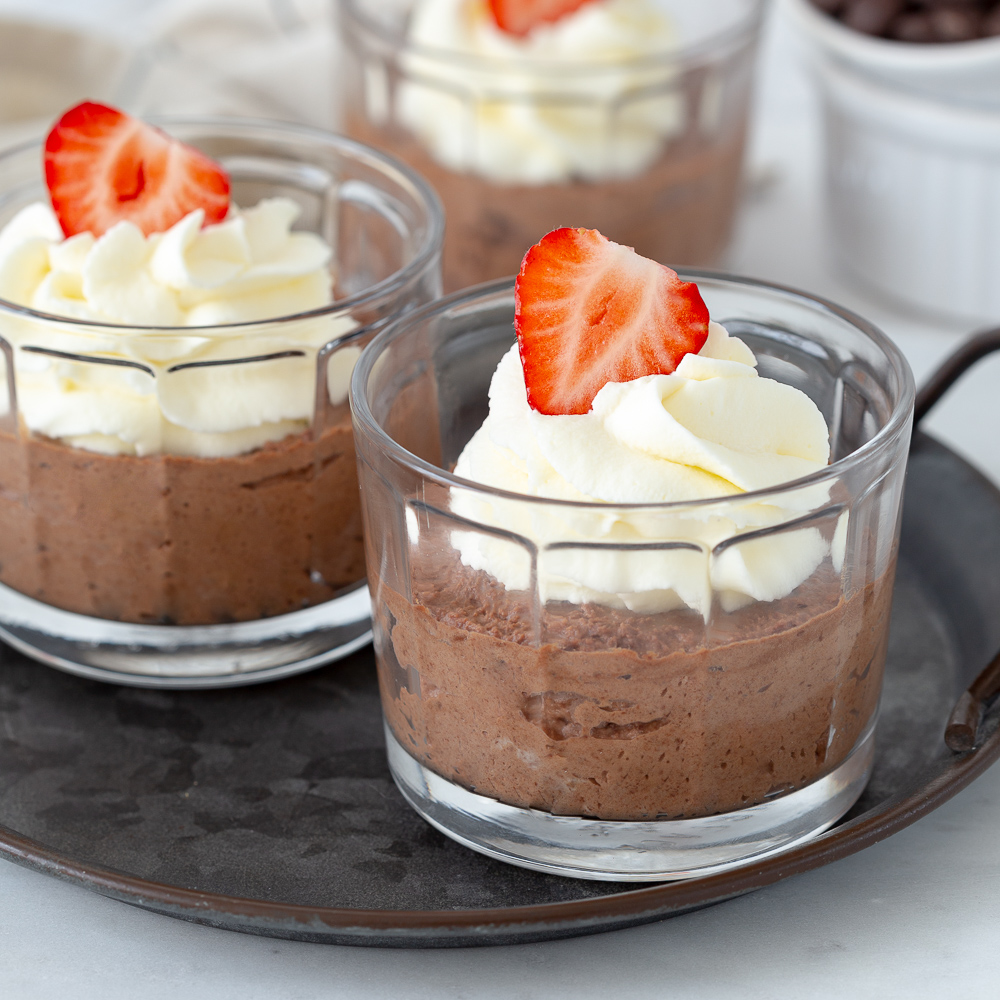
Panna cotta usually doesn’t contain any eggs and that makes it the perfect make-ahead dessert for any dinner party. It’s no bake too!

When it comes to baked cheesecakes eggs are used for stabilizing the mixture. For no bake cheesecakes that is not necessary so it’s a delicious eggless dessert!

One of my favorite recipes by far is this Dutch breakfast cake. It doesn’t contain any eggs and is perfect for serving both as a breakfast cake and also delicious served with a steaming cup of coffee!

These cheesecake bites are the perfect little treat. I love the fact that strawberry season is getting closer and these bites are perfect for serving.

Who doesn’t love a good crumble? Rhubarb season is too short if you ask me but with this easy crumble recipe you have a dish that can serve both as breakfast (just add some crumble to your morning yogurt) as dessert (add a scoop of vanilla ice cream!) or as a coffee treat.
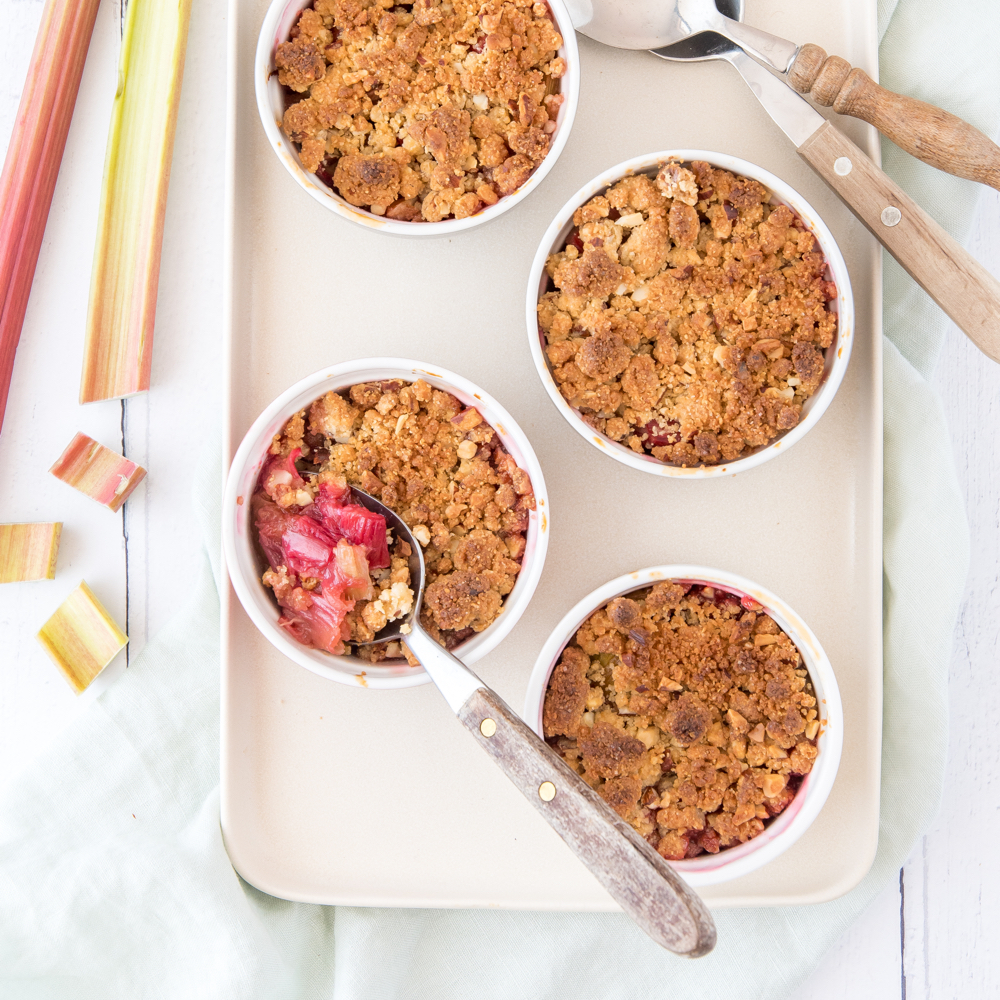
Every year at the end of the year you can find many different speculaas cookies everywhere in the Netherlands. But the good news is that you can serve these delicious cookies year round and even better; they are eggless cookies!

Like all my tiramisu recipes this one also does not contain any eggs. No eggs but all the creaminess and due to the use of whipping cream it is every bit as light and airy as tiramisu recipes that do contain eggs.

These eggless oatmeal cookies are easy to make and due to the oatmeal I always feel they are (a bit) healthier than any other cookie.

Yes another delicious mug cake. This time with chocolate flavor. Ready in just a few minutes and a favorite on the site! It’s been successfully made by lots of people already. Are you going to try this recipe next time?
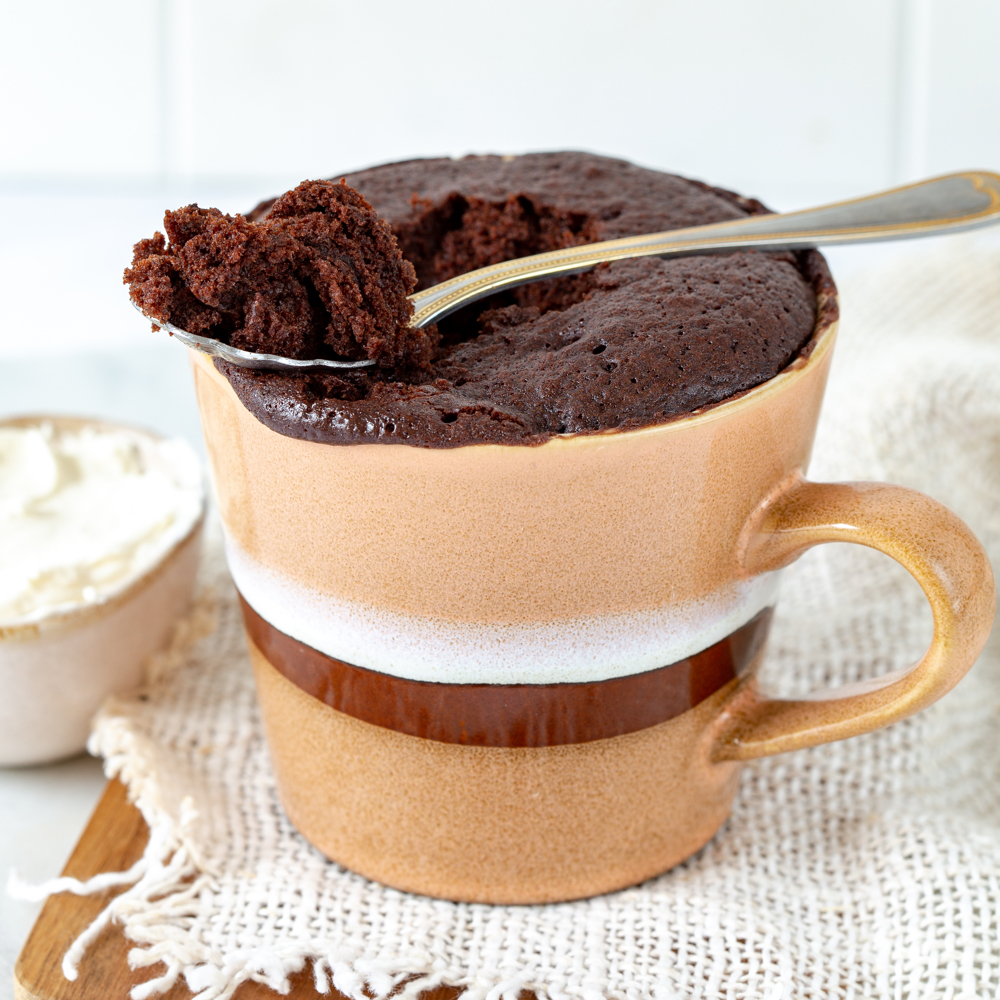
Scones are another delicious recipe that uses no eggs. If it’s important for you to not use any eggs, make sure you use eggless ingredients as the toppings as well. The good news is that you need a milk wash for the scones and not an egg wash. But pay attention if you would want to add lemon curd as that does contain eggs.

One of the things that eggs provide is a moist and light texture. Not using eggs might make your cake dense and in general not the best cake. You can use various ingredients to solve that issue.
Think about adding applesauce, mashed banana or yogurt. Things like flaxseeds and chia seeds are mostly used to replace the egg and do require extra liquids like milk or water.
Another texture element is the density of the cake. Not using eggs can make the cake a lot denser. Things like apple cider vinegar, baking soda and even sparkling water can help with that.
Of course one of the best known qualities of eggs is the fact that they bind everything together. Not using eggs in your baking recipe might result in the cake or cookies falling apart.
That’s where a so called flax egg or chia seeds come in handy. They replace the function of eggs. In general the formula for a flax egg is 1 tablespoon of flax seeds to 3 tablespoons of water would replace one egg.
Don’t we all love a golden brown cookie! One aspect you might not think about when it comes to baking without eggs is the browning effect the eggs have to the end result.
You can solve part of that problem by brushing the surface (cookie recipes or similar) with melted butter or a milk mixture.
The best way to start baking your eggless recipes is to use one of the recipes I have outlined above. Those are all extensively tested and will work. I also have an article on replacing eggs and what other things you need to take into account.

Vanilla is my favorite flavor in sweet baking and cooking. There are many different ways to incorporate it into dishes, including in the form of vanilla bean paste. This is incredibly easy to make. I’ll give you all the tips and tricks in this recipe.
A vanilla bean is the purest vanilla flavor. You can easily process the vanilla pods and pulp to make vanilla sugar, extract, or paste, so you always have it on hand to incorporate into recipes.
These days, pure vanilla extract is (thankfully) as readily available as its artificially manufactured sibling, vanilla flavoring, but I can’t say the same for vanilla bean paste.
The advantage of pure vanilla paste is the presence of the typical black speckles, the real vanilla seeds from the pith of the whole vanilla beans, which allow you to immediately see that real vanilla has been used in your baking.
That always has a lovely visual appeal. By starting to make your own vanilla paste, you will not be dependent on the availability in stores and will always have a supply on hand. And to be fair: it’s fun to make it yourself!
If you want to learn more about vanilla or get started creating your own supply of vanilla flavoring, these articles are sure to come in handy:

I have been using vanilla paste for several years, but when I was writing my latest cookbook, I decided to make it myself.
Making vanilla paste is incredibly simple. However, you will need glucose syrup. This keeps the paste liquid so you can easily incorporate it into recipes. It is available at many online webshops, and once you have a jar in your home, you can make a lot of vanilla paste.
You can also use corn syrup instead of glucose syrup. Corn syrup has more water content and is a bit more liquid but you can use both.
In addition to the ingredients listed in the recipe below, a good sealable jar is essential for storing vanilla paste. I use a small airtight jar. This jar can be labeled with what is in it and when you made it
As long as you work cleanly (always use a clean spoon) and seal the paste airtight, you can keep it in a dark place for up to a year.
You can definitely freeze vanilla paste (in small portions) and it will keep for a year. The question is if this is more convenient than the storage advice above which also keeps the vanilla paste for a year. Plus the upside of storing it in a dark and cool place is that you can use it right away.

I’ve come to appreciate vanilla paste more and more over the past few years. It’s such a great product to use. Not only does it add the flavor of vanilla to a recipe, but you can see it thanks to the actual vanilla seeds.
This is not the case with vanilla extract, even though it adds just as much delicious flavor to baked goods. That’s why I use vanilla bean paste in recipes where it’s going to show those beautiful vanilla seeds, like vanilla cheesecake, homemade ice cream, crème brûlée or panna cotta.
Once you’ve made a nice batch of this paste, it’s helpful to know in what proportions you can use it in recipes (replacing other vanilla flavors). Optionally, you can write this on a label on the jar to keep it handy.
The easiest replacement is in place of vanilla extract where you can simply replace it one on one.
1 tablespoon vanilla bean paste equals :
You can even use the vanilla bean paste in savory sauces or savory dishes as it adds a rich vanilla flavor.

That depends on your preference. There are many differences in quality when it comes to vanilla beans, and they also bring big differences in price. Most common type of beans are Madagascar vanilla beans.
You can use fine granulated sugar instead of glucose, but your paste will crystallize quite quickly. Glucose syrup, on the other hand, keeps the paste liquid for a long time. You can replace with corn syrup if you want.
If you don’t feel like making your own vanilla paste despite this simple recipe, you can buy ready-made vanilla paste at a couple of different online stores, like amazon.
The shelf life of vanilla bean paste is one year when kept in a dark place and definitely out of direct sunlight.
Some of my favorite recipes are using vanilla in the ingredient list. The below is just a small selection of the many recipes that feature a form of vanilla!

Making homemade tortilla chips is so easy and incredibly delicious! You only need 3 ingredients and they are easy to make. They are delicious on their own, but you can certainly vary them or serve with your favorite dips.
With this tortilla chips recipe, you can make your own delicious tortilla chips in no time. The easiest way is to use store-bought corn tortillas or flour tortillas and then make chips out of them, but you can also make your own tortilla wraps first and then make chips out of them.
I have to admit that I don’t always make my own tortillas, but when I do, I always make sure that I “accidentally” make a little too much so that I can make delicious tortilla chips out of them.
Making your own (tortilla) chips doesn’t have to be complicated. Besides the few ingredients, there are only a few steps to take. In just a few minutes, you can have your tortilla triangles ready to pop in the oven. In fifteen minutes your own freshly made chips will be ready!
With this recipe you can make natural tortilla chips, but of course you can also add flavorings (like taco seasoning, chili powder or another seasoning blend) or make a dish with them.
Of course, you will want to serve a nice dip with your homemade chips. A classic is a cheesy dip or buffalo chicken dip. My favorites are guacamole and tomato salsa. Of course you can also use store-bought chips, but making your own is quite fun and easy to do. And tastier too.
If you love a good snack, make sure to also check the below:

Now when you have your wraps or tortillas you can use something like a pizza cutter to make tortilla wedges. I usually cut tortillas in 8 wedges but it also depends on the size.
Make a mixture of sea salt, pepper and a little oil and using a pastry brush you can brush the chip on both sides. Now taking a large baking sheet (or use two large baking sheets) you spread them in a single layer. That’s important as otherwise they will not crisp up.
If you really want to make it a party, you can make a nacho casserole (nachos todos!) with your own tortilla chips. These oven nachos are simple but fantastic.
Because even plain or seasoned to your liking, these tortilla chips are already great. It is a delicious snack and so simple. The important thing is not to overcook them. I did that the first time I made them myself and I can tell you that they didn’t taste as good burnt 😉 .
I’m curious how you think they taste, whether you use them plain or make another dish with them? Be sure to let me know, I really like to hear that!
If you make your own tortilla chips you can store them in an airtight container for up to a week. They should stay nice and crispy.
I don’t recommend freezing tortilla chips as they will not stay crispy. And since they’re so easy to make, it’s better to whip up a fresh batch instead.

Homemade corn tortilla chips can be stored in a tightly closed container for up to a week. They will stay nice and crispy. I don’t recommend freezing them, as they often don’t get any tastier.
Sure! You can use “regular” tortillas from the store, whole wheat tortillas, or make your own tortillas. You can make it with any kind. You can also add your own spices or other flavorings if you like.
I really like the results with olive oil. If you prefer to make it with another vegetable oil, you can certainly try that. I haven’t tested it myself, but let me know how it turns out for you!
While I have not tried that myself, that would work absolutely fine. You should probably shorten the baking time a bit.

Want to make carrot cake? This easy recipe makes a creamy, fluffy and spiced carrot cake. The best carrot cake recipe I’ve ever had! So if you’re a carrot cake lover I would urge you to try this recipe!
Here it is at last: a recipe for carrot cake! And if I may be so bold, this really is the most delicious carrot cake ever. I had eaten a lot of carrot cakes and had a clear idea of what I wanted my version to be. The result was even more delicious than I had hoped, so you can understand how happy I am with this easy carrot cake recipe.
This carrot cake is airy, creamy, and has just enough spices. It’s perfect on its own, but when paired with the cream cheese frosting, it’s a real party. I made a layer cake out of it myself, but hesitated for a long time about whether to bake it in a bundt. I’m sure it would also look great with cream cheese frosting and walnuts on top.
Baking tip: Did you know that you can make carrot cake in an air fryer? Check the recipe for an air fryer carrot cake.

A carrot cake is a cake in which grated fresh carrots are mixed into the batter. This not only gives the carrot cake a beautiful color, but also gives it a slightly sweet taste and a nice smoothness.
In addition, carrot cake always contains a special spice mixture consisting of at least cinnamon and ginger, but preferably also nutmeg and cloves.
Before the recipe came to Holland, it was already very popular in England and later in America. That is why we have so many words for this delicacy. Think worteltaart (in Dutch), carrot tart or carrot pie, depending on which country you live in.
Personally, I like to stick to the official English name carrot cake as most people would refer to it that way. Even most people in The Netherlands.
One final element that a carrot cake is known for is the topping. A carrot cake topping is usually called a frosting, a cream cheese frosting to be exact. This is my favorite cream cheese frosting recipe. This is a mixture of cream cheese, butter, powdered sugar and vanilla.
It seems that this frosting is a modern addition, not found in old recipes. Whoever came up with it, I am very grateful, because the sweet and creamy addition of the frosting completes a spicy carrot cake!

In my opinion, a carrot cake should have a deliciously creamy base, but the layers should also be nice and fluffy and with moist crumbs. To get both that creaminess and lightness in this carrot cake, I played around with the ingredients. Below I will tell you a bit more about the role of the ingredients in this layer cake:
As always make sure all ingredients are at room temperature before you start baking your homemade carrot cake recipe.
Properly covered you can store this carrot cake with the frosting in the fridge for 4-5 days. Take it out of the fridge for half an hour before you’re ready to serve. This will ensure the best flavor.
You can freeze the carrot cake as well. Make sure to wrap it properly and it will keep in the freezer for up to 3 months.

I personally used baby carrots, but you can also use winter (big) carrots.
Don’t grate the carrots too coarsely (like julienne), but certainly not so finely that they come out as a mush. You want small, thin strands of carrot. That’s what tastes best in the cake. I like to use a coarse grater to grate the carrots.
If you do have julienne cut carrots, make sure to chop them into smal pieces before adding the carrot to the batter.
You certainly can, but I haven’t done it myself (yet!). I read in the comments that someone has already baked this carrot cake recipe in this Nordic Ware cake pan with a baking time of 60 minutes.
This cake has three layers and I prefer to bake them in the oven at the same time. I use three of these 9-inch cake pans around the house. By greasing and dusting them with flour, the cakes come out perfectly after baking.
Yes, you can. The only thing you need to be aware of is the effect of the baking soda on the dough, as the baking soda is activated when it comes into contact with the light brown caster sugar or baking powder. Therefore, divide the carrot cake batter into three bowls (just weigh it out) and add the baking soda just before you pour it into the prepared pans and put it in the oven.
If you do it in 3 separate layers, yes. But not if you want to bake all of the batter in one big cake. I do not recommend it for this recipe.
You bake the cake in 3 separate layers because you get a better result than if you bake it as 1 big cake and cut it later.
Do you want to bake it in a larger springform pan and serve it as a single layer cake? Use a 24 cm (9.5 inch) or 26 cm (10 inch) pan. The bake time will need to be longer, so it’s best to experiment. Use a skewer or a cake tester in the center of the cake to check if the cake is done (it should come out clean) before you remove it from the oven.
Haven’t done that myself, but it’s definitely possible. The best thing about this carrot cake recipe is that it is pretty flexible. Cupcakes usually take 18-20 minutes to bake.

Eggs are one of my favorite ingredients. Probably not surprising since I love baking and they are used in countless baking recipes. And for me using eggs is not an issue at all. I don’t not have an egg allergy and I am not on a special diet that restricts the use of eggs.
However, I do know there are a lot of people who cannot use eggs due to egg allergies and need to use egg substitutions for all their baking and cooking. And that can be quite a challenge. Now while eggs have a pretty specific use in a lot of recipes you cán replace them.
Another good reason is the fact that egg prices are going through the roof. And with vegan baking on the rise that is another good reason to have some alternatives ready. I’ll tell you how to substitute eggs in baking.
So in this article I will explore the best egg substitutes and how to use them. It is good to know that substituting eggs will give a different result, depending on which alternative you go for. The good news is that you can still continue baking, even though you cannot use or don’t want to use eggs. The reason why can vary of course.
It’s also good to know that I am not specifically talking about plant-based recipes or vegan substitutes. Even though most will work as a vegan alternative as well, but that aways depends on the rest of the recipe. Also I am not talking about any commercial egg replacement product as I have not tried those myself.
Using these alternatives is also great if you do not have eggs at home and don’t want to go to the grocery stores. Of course that is assuming that you have the following alternatives available to you!
The below options are all common alternatives to the use of eggs and are ones that you will likely have in stock in your cupboard.
Flax eggs are made from flax seeds and 3 tablespoons of water. The ratio is one tablespoon of flax seeds to 3 tablespoons of water.
Another almost similar replacement is chia seeds. Same as with a flax egg, for chia eggs you keep the same ratio of 1 tablespoon chia seeds to three tablespoons of water.
Now here is one that might come as a bit of a surprise but you can use peanut butter as well. If you think about it and I’m sure most people can relate, stick a tablespoon of peanut butter in your mouth and that sticky feeling?
Well that’s exactly why it works. For replacing one egg you would need 3 tablespoons of peanut butter.
For replacing one egg you would need 80 grams of apple sauce. That’s about 1/3 of a cup of applesauce.
You can also use other fruit purees. In that case you’d need 3 tablespoons of fruit puree.
Yes, ripe bananas can also function as a great substitute for a whole egg. You need about half a mashed banana for 1 large egg.
To replace an egg for yogurt in baked goods you will need about 60 ml or 1/4 cup of plain yogurt.
Another replacement for an egg is 3 tablespoons of aquafaba. Aquafaba is the liquid you will find in a can of chickpeas. It’s pretty magical stuff a you can use to make meringue and mayonnaise too!
Now while the above are popular egg substitute options it does not give you any guarantees and a lot of these things take a bit of trial and error for best results.
It will vary from recipe to recipe and the final product will also be slightly different than the original with eggs.
The eggless recipes we have on the site right now are all tested, so those are a sure bet, but if you want to try your own hand at using some replacement than it would really need some testing.
Not all replacements work for all recipes. You can imagine that a banana would work really well for banana bread for instance, but it might not be a good idea for quick breads.
Also something like peanut butter has a distinct flavor so you would want the nutty flavor to work with the rest of the ingredients.
Now as you probably know eggs also have a leavening function. The replacements are not necessarily a leavening agent. So you might have to look at another way to increase the rise in your baked goods.
Think about extra baking powder, baking soda and/or apple cider vinegar.
Eggs have a pretty strong binding function. Stronger than most of the ingredients above. So the finished product will have less binding and will be a bit easier to fall apart.
You can counter balance some of that by using something like arrowroot powder and tapioca starch in addition to the egg replacements. Both can be used interchangeably and are great binding ingredients.

Frangipane is a delicious filling for cakes, pies, tarts and other pastries. You bake this velvety almond cream in tart bases or in cakes, including various types of French pastries. Another bonus is that frangipane – using only ground almonds – is naturally gluten free.
Frangipane, as the name suggests, is a basic French recipe (also called creme d’amande) for a cake filling based on almond meal, sugar, eggs and butter.
Funny enough it took me quite a while before I first started using frangipane. And it is such a great addition to so many different baking dishes, that I’m not sure anymore why I didn’t use it sooner.
It’s also a recipe that appears in many French pastry recipes (like galette des rois!) and it is delicious when used as a pastry cream in fruit tarts or in a shortbread base tart.
A frangipane almond filling is baked and makes a tart or pie nice and creamy. It is often combined with fresh fruit, simply because that is a classic combination.
I love using it with summer fruits. You only need 4 ingredients to make your own frangipane tarts and you can make it in a few minutes. ‘A child can do the laundry’ as we like to say here in the Netherlands (meaning that it’s really easy)!
This almond cream filling is a true French classic. It consists of a crispy tart shell filled with a baked frangipane filling. A common name for such a tart is a bakewell tart. You might have heard of this before. This filling is sometimes topped with apples or pears, which adds a nice fresh element.
It’s also delicious as a croissant filling and you might have tasted it before in almond croissants (my favorite croissants!) I have made a pear frangipane tart in this way that is simply unbeatable. And you can expect some delicious frangipane based recipes in the coming weeks and months. I’ve got quite a few lined up already.

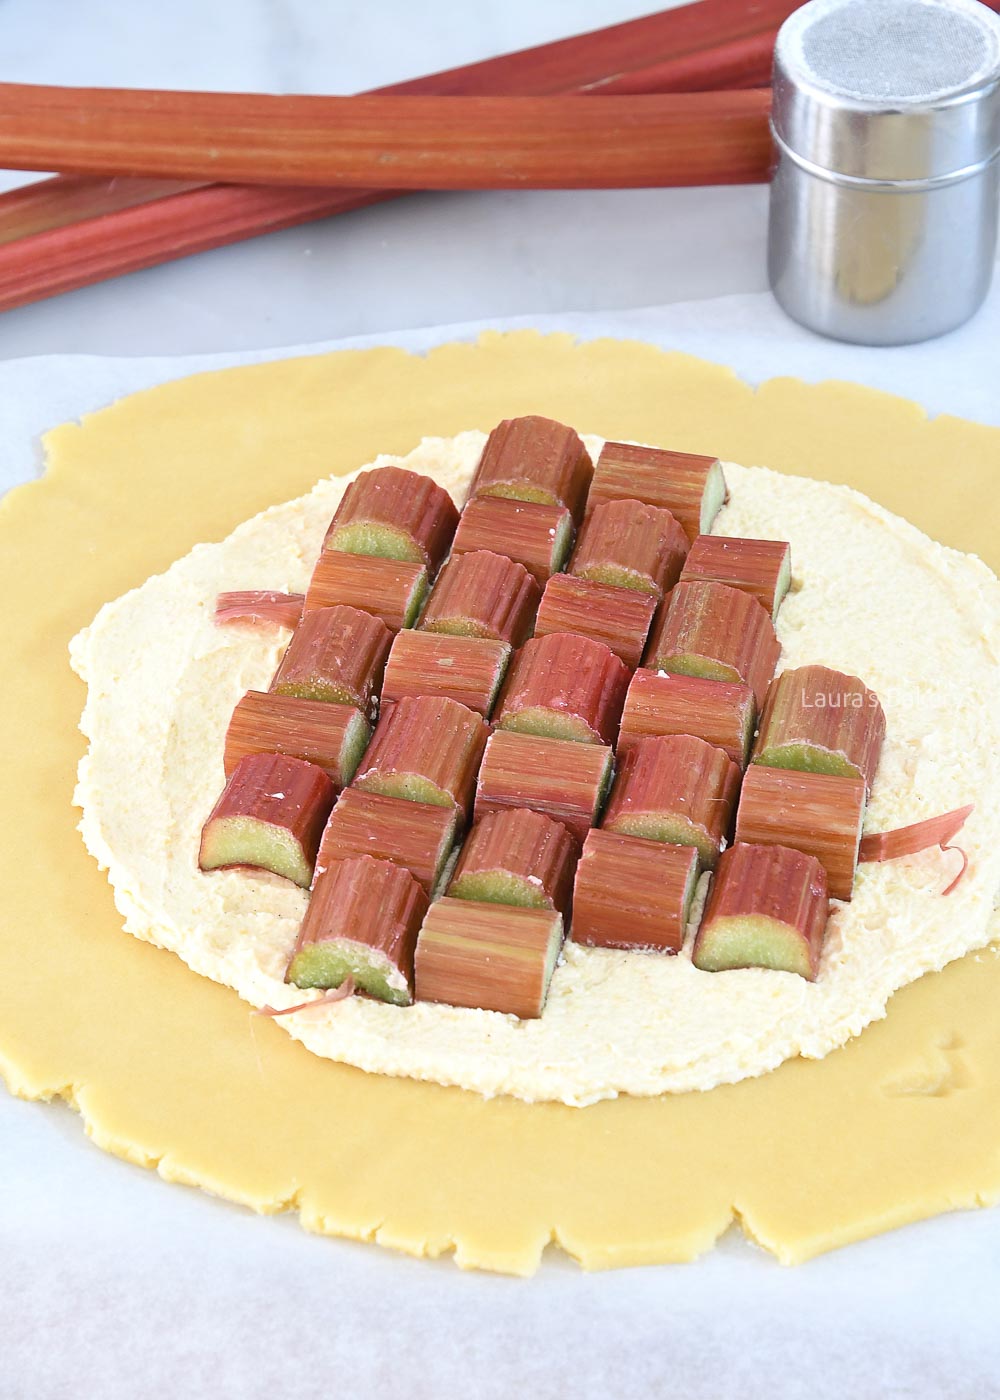
You need just a few simple ingredients to make a homemade frangipane cream, unless you want to make your own almond flour from whole almonds (white ones). If that is the case, use a blender or food processor. Be careful not to grind the almonds too long, as this will release the fats and make an almond butter instead of almond flour.
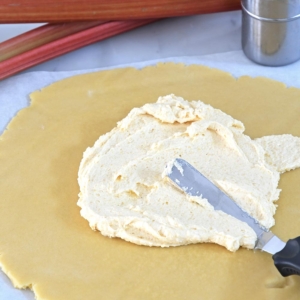
The frangipane is very easy to spread on a pie base using a spoon or a pastry bag. I personally find it very handy to use a palette knife to smooth it all out (as shown in the photos), but if you don’t have one at home, a spatula or knife will work just as well.
The recipe below is for the basic frangipane almond cream and gives you the main ingredients but keep in mind that you will need a base to use the frangipane on and that is had to be baked.
As a base, you can use buttery puff pastry, a pie crust, short crust or a store bought tart shell. There are different ways of using the creme frangipane and I’ll be sharing more on that later.
How long you can store frangipane depends on the state of the frangipane. Wether it’s already baked or still unbaked. Unbaked frangipane can be stored in the refrigerator for up to 2-7 days. Once baked you can store it for 2-3 days.
Freezing frangipane works really well too. Properly wrapped it will keep for up to three months in the freezer.

No, ideally you should always use room temperature butter. This is the basic rule for all my recipes, unless otherwise stated.
I have not tested this myself, but I think it should be possible. In that case, use only hard margarine. Have you tested this at home? If so, would you share your results in a comment below the recipe card? That will help other readers (and me) 🙂 .
Yes you can, even though officially you shouldn’t, but as with the almond paste, you can vary the frangipane by substituting the almonds with pistachios, ground hazelnuts or pecans (or use a mix of different nuts). You grind this into a flour in a food processor and then use it in the recipe below.
I’ve also made a coconut paste before (a variation on the almond paste), so I’m pretty sure you can make a coconut version using the basic recipe below. In that case, replace the almond flour with 100 grams of dry, grated coconut. So stick to equal amounts of either nuts or coconut.
Yes, you can. Making frangipane is a little more work than making almond paste, but it gives a richer flavor. I don’t necessarily find a shortcrust base with frangipane tastier than one with almond paste, but it’s tasty anyway, so feel free to try it. Use the same amount by weight as the recipe calls for almond paste.

In the Netherlands meatballs or as we like to call them – gehaktballen – are a staple in many Dutch kitchens. Most families have their own special family recipe. Today I am sharing my favorite recipe for a Dutch meatball. And that wouldn’t be complete without adding gravy as well! Absolutely one of my favorite Dutch recipes.
Fun fact: Traditionally many Dutch people would even have a special day in the week which was meat balls day. Usually a Wednesday when all the butchers in the Netherlands would have their beef mixture on sale! Woensdag gehaktdag!
When you’re making Dutch meatballs you’re gonna want them to be nice and juicy. One of the most common ways to ensure they are is by using half and half ground meat. So half beef and half pork. Due to the extra fat from the pork the end result will be juicier.
However, I have actually baked these meatballs with lean ground beef, and the meatballs turned out hearty and juicy. So this recipe is for lean ground beef, not half and half.
The trick to avoiding dry meatballs is simply not to bake them too long. Also, the gravy that accompanies this recipe makes them irresistibly delicious.
BAKING TIP (from a follower): Roll the meatballs in all purpose flour before frying for a thicker gravy.
Eggs, along with bread crumbs, provide binding. Eggs also add moisture to the meatballs, which (among other things) makes for a juicy meatball.
However, it is important not to add too much egg to your meatball mixture or, if you have a really large egg to try and compensate the extra egg with adding more bread crumbs. The breadcrumbs will absorb the excess moisture, so the binding effect of the eggs can ensure that all the loose ingredients form a well-bonded meatball.

A cast iron large skillet is recommended for baking meatballs. These pans are great when you need to bake something for a long time at a consistent temperature. The heavy bottoms of cast iron skillets ensures that the heat is well distributed and the meatballs are cooked evenly.
Once the meatballs are in the pan on medium-high heat, you should keep turning them. This will first sear them on all sides and then brown them evenly on all sides.
Then it’s time to bake the meatballs in butter, which will give them an extra tasty exterior. Finally, add the beef broth and soy sauce to make a delicious sauce. This keeps the meatballs juicy and finishes the flavor.
Would you rather not have gravy with your meatballs? Omit this part of the recipe. A reader suggested that at this point, you could roll the meatballs in some breadcrumbs (with extra herbs if you like) and bake them in butter again. This gives the Dutch meatballs a crispy crust.
Did you know that ‘gehaktballen’ and ‘bitterballen’ are two different Dutch recipes, but both are called meatballs. Dutch bitterballen are basically fried meatballs made from a thick meat gravy covered in bread crumbs.
Personally, I find these meatballs to be very flavorful, but you can enhance this flavor by adding some extra mustard and soy sauce. If you add extra liquid (such as kecap manis), also add some extra breadcrumbs to prevent the meat from becoming too moist and the balls from falling apart.
Of course, you can also add extra spices to your minced meat mixture, or replace the nutmeg with a mixture of chili powder and paprika, for example. Extra salt is an option, but it varies greatly from person to person, so I never want to call for too much salt in my recipes.
As an alternative to gravy, you could use a sauce, such as a tomato sauce or peanut sauce.
Want to try something different? Try these keftedes or these meatballs in apricot sauce.

This could be due to a number of things:

This is a classic and one of the most delicious recipes for tartlets. I’m talking about strawberry tartlets with pastry cream, of course! The buttery crust goes so well with the delicious strawberries and makes for a perfect summer dessert.
How cheerful are these strawberry tartlets? They are perfect for high tea as they are not too big. I filled each strawberry tartlet with pastry cream. In principle, you can use any kind of fresh fruit to top the tartlets. But it is hard to beat the combination of a crispy tartlet base, fresh strawberries and the rich pastry cream.

For making these pretty little tartlets it is important to know that to make these I used a specific mould from my own line of products but these are pretty similar. Of course you can use other little tart pans if you want but keep in mind that it might also have an effect on the total number of tartlets and/or the preparation time needed. I also like to use pastry cases with removable bottoms for easy removal of the tartlet shells once baked golden brown.
For making these beautiful fruit tarts you will also need pastry cream. For that you need to follow the recipe I linked to here.
Other than that you need the following ingredients at room temperature:
And for the filling fresh strawberries and the pastry cream. In addition you will need plastic wrap for wrapping the tart dough, a mixing bowl, rolling pin and your tartlet molds. You can make this in a stand mixer but quite frankly it is so easy that you can also make this quickly in a bowl with your hands or with a hand mixer.
Once made and baked golden brown you can fill the tart shells with the delicious cream and finish the mini tarts by adding the fresh strawberries. Optionally you can add a bit of whipped cream on top. A delicious dessert in no time at all!

Strawberry tartlets are definitely in my top 3 favorite strawberry cakes. Especially when strawberries are in season, I highly recommend making something delicious with strawberries every week. Luckily, strawberry season lasts all summer long, so there are plenty of strawberry recipes to inspire you. Here are a few strawberry recipes to try:
You can easily store these strawberry tartlets in the fridge for up to three days. I find they were still very crispy after one day. If you want to make they stay crispy for longer you can add a thin layer of chocolate on the tartlets before adding the cream.
For best results I would advice to freeze the unfilled tartlets and add the cream and fresh strawberries once defrosted.
It depends on the reason. For a lighter filling, you could use Swiss cream, but if you just don’t like pastry cream, mascarpone cream is a good (and easy) alternative. If you want to know more about all the different creams out there, check this article.
Absolutely! But keep in mind that the times and quantities will vary. I will soon share a recipe for a larger tart using the same pastry crust.
You could use a muffin tin to bake the tartlet bases. For all my tips on making a basic tart recipe, see my article ‘Making your own tartlets’.
Would you like to prepare the strawberry tartlets ahead of time? Then I recommend the following: