How long can I store the lemon poppy seed muffins?
You can store these in an airtight container outside of the fridge for about 5 days. You can also freeze them for up to three months.
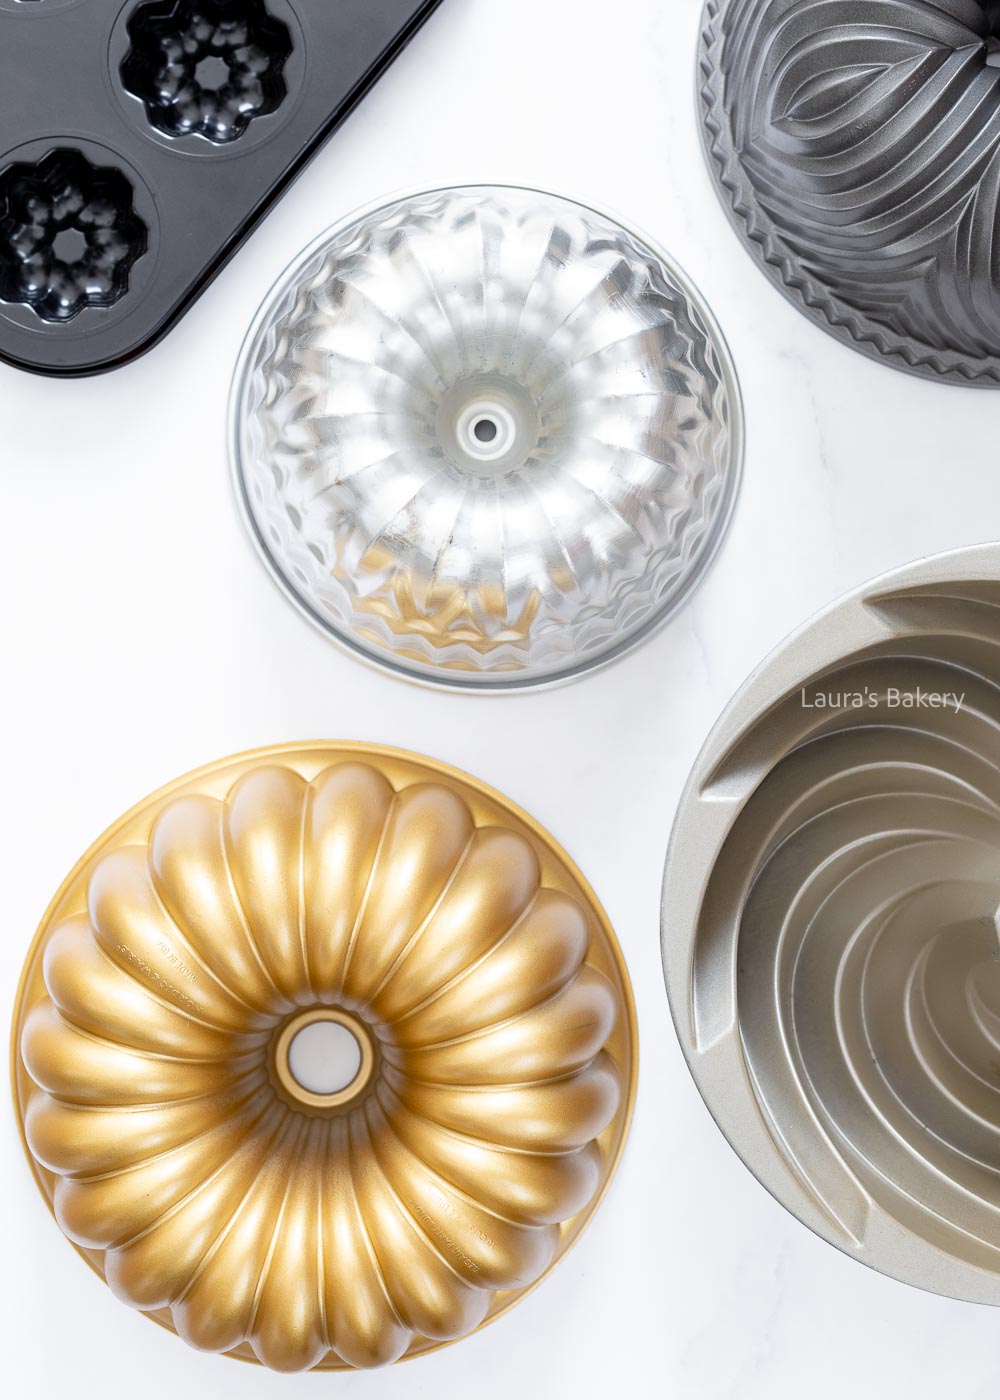
As you can imagine: I bake a lot! I made a selection of my most used and favorite baking pans. This collection is perfect for every home baker.
If you love to bake, you know that your cupboards are slowly but surely filling up with baking utensils. I know that especially baking pans take up a lot of space. For a while, I bought and received special baking pans with some regularity, but I found that I ended up using them little to none.
I almost always reach for the same basic tins and rings anyway. I use them a lot and like to make room for them in my cupboards.
I’m currently cleaning out my cupboards. I have the most used pans in a drawer in my kitchen, the rest are in my office, in my junk room or in the attic. Totally inconvenient to have all these different places. So I’m going to change that soon.
At the same time, I’m going to take another look at what shapes I really want to keep. Today I will tell you more about my most used and favorite baking pans. And I have also created a list with a bakeware collection for the avid home bakers.
Sizing is a little bit different between European standard sizing in centimeters and the inch sizing so I’ve rounded up the inch. So a 8.9 inch pan will become a 9-inch pan.
I have 2 metal loaf pans that are 25 cm/10 inch long. I find this to be the perfect size for cakes and I use them a lot. I have tried several brands over the years and find that there is not much difference in quality. I currently have 2 of these loaf pans at home.
As far as I’m concerned, you don’t need expensive loaf pans. They cost a few dollars and for that amount of money I don’t mind if you have to replace them at some point.
I use them quite a lot myself and I want to look at a slightly more expensive loaf pan to replace them, mainly because I am curious to see if I actually find it nicer to work with and if it will last longer. I will give an update when the time comes 😉 .
For years I have been working with springform tins from two particular brands, Patisse and Kaiser which are more than fine to work with. For about 2 years now I have owned two Le Creuset springforms.
They are quite expensive and I don’t know if I would have bought them if I hadn’t been given them. However, now that I know how they work, I am sure I would buy them myself. They are fantastic.
If one of them fails, I’m sure I’ll buy the same one again. But it will be a long time before I do, because even though they are used a lot, they still look pretty good.
I have a 20cm/8 inch and a 24cm/ 9 inch springform pan, both of which I use a lot. I have been using them for about five years now and they still look great.
A baking pan is a solid bottom pan and comes in all shapes and sizes. I own (or have owned) several different shapes and sizes, but there are only a few that I actually use a lot.
Those are the 20 x 20 cm square pan (perfect for brownies) and the 15 and 20 cm round pans. I even have three of the 15cm ones, which are perfect for baking layer cakes.
Of course, you can do this with just one pan, but it’s much faster and more convenient with multiple pans. Highly recommended if you make this type of cake regularly.
There are several brands of pans. Mine are almost all PME, but I also have a few from Wilton. These brands are mostly available online. These are mine:
I just mentioned my square baking pan, which is also available as a rectangular baking pan. Personally, I use oven baking dishes whenever I need a rectangular baking pan. From cakes to crumbles, I use them for almost everything.
While baking pans are all standard sizes, baking dishes are very different. The sizes I use most often are 16 x 25 cm (6 x 10 inch) and 20 x 30 cm (8 x 12 inch), but any size close to that will work.
Otherwise you can just convert your recipes with my conversion tool. This set of 4 baking dishes is nice to have around the house. The small one is similar to what I often use for baking recipes, the large one is perfect for casseroles.
As far as brands go, I don’t really have a preference. I have baking dishes from Le Creuset and a lot of other brands you can find online. I also have a set of these rectangular sheet pans which are great for lots of different things too. From sheet cakes to using as cookie sheets.
I have had a set of baking rings for a few years now and I use them a lot, which I never expected. I mostly make tartelettes and rondos, but you can use them for anything. Baking rings have no bottom, you put them on a baking tray covered with baking paper, which forms the bottom.
I personally have these baking rings that are 8 cm/3 to 4 inch in diameter, an ideal size. I have a set of 6, but would like to expand to 10 or 12. Then I don’t have to clean them in between and can just keep baking. You can also use these tall baking rings, you can use them for even more dishes in the kitchen.
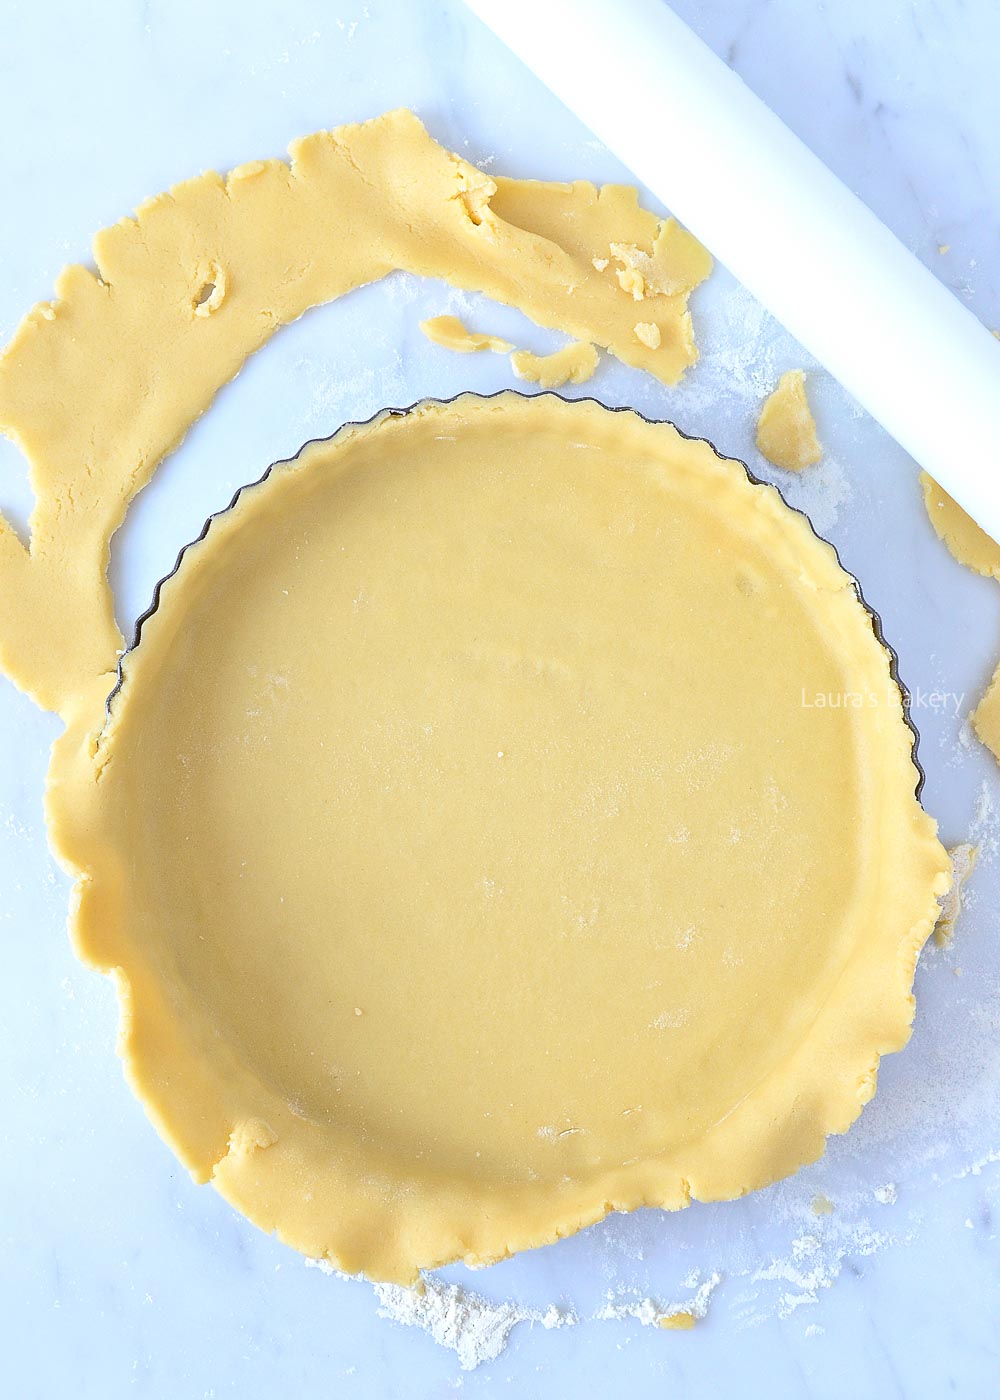
I bake quiches and pies in round quiche pans with a (solid bottom and) scalloped rim. I have both ceramic and metal pans, both of which I use regularly.
The ceramic quiche pan I have is 28 cm/11 inch, a hefty size but very handy for savory pies. The metal one is 25 cm/10 inch and is a flan/quiche tin with a removable bottom, very handy for getting your pie out of the tin easily. I use this one for both savory and sweet pies.
I don’t have a strong brand preference. My metal mold is unbranded and the stone mold is from Le Creuset. The important thing is that the metal mold has a good non-stick coating. And a loose bottom works so well with a metal pan. It’s also very convenient to have different sizes.
That was quite a bit of text about the baking pans I like and use a lot, but there are more! These are more specific pans for “special” baking. For example, I wouldn’t want to be without my muffin pans. I have one for regular muffins and cupcakes and one for mini muffins and cupcakes.
My molds are from Wilton, the first one I ever bought is about 10 years old and still good. But any good brand will work.
I bought my madeleine pan at a grocery store and I wouldn’t be without it. In fact, I would rather have another one. After all, you can often fill two molds with one recipe.
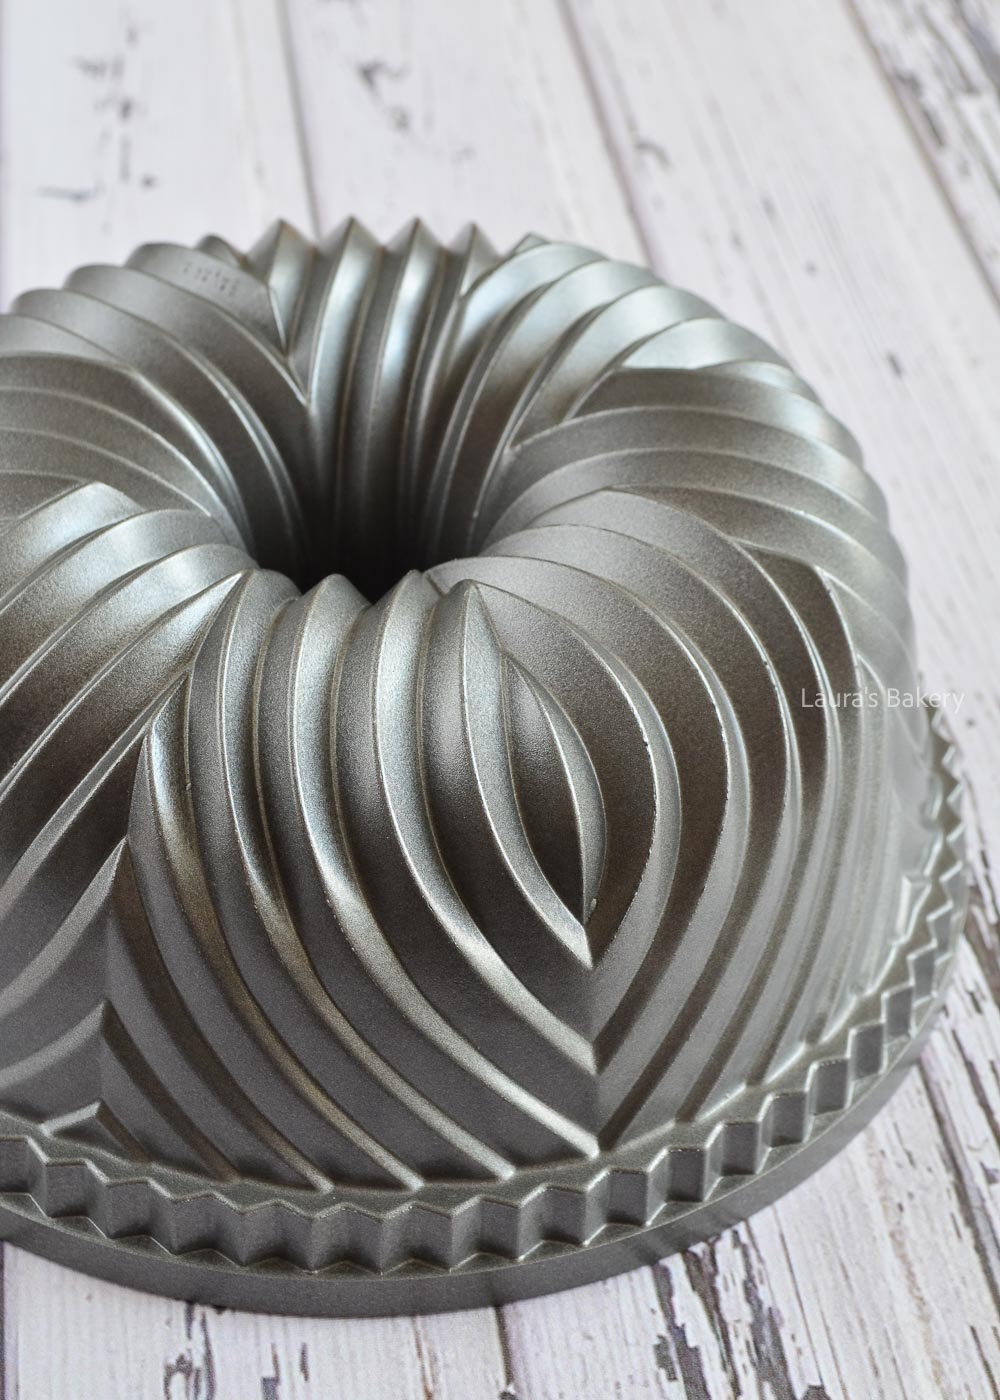
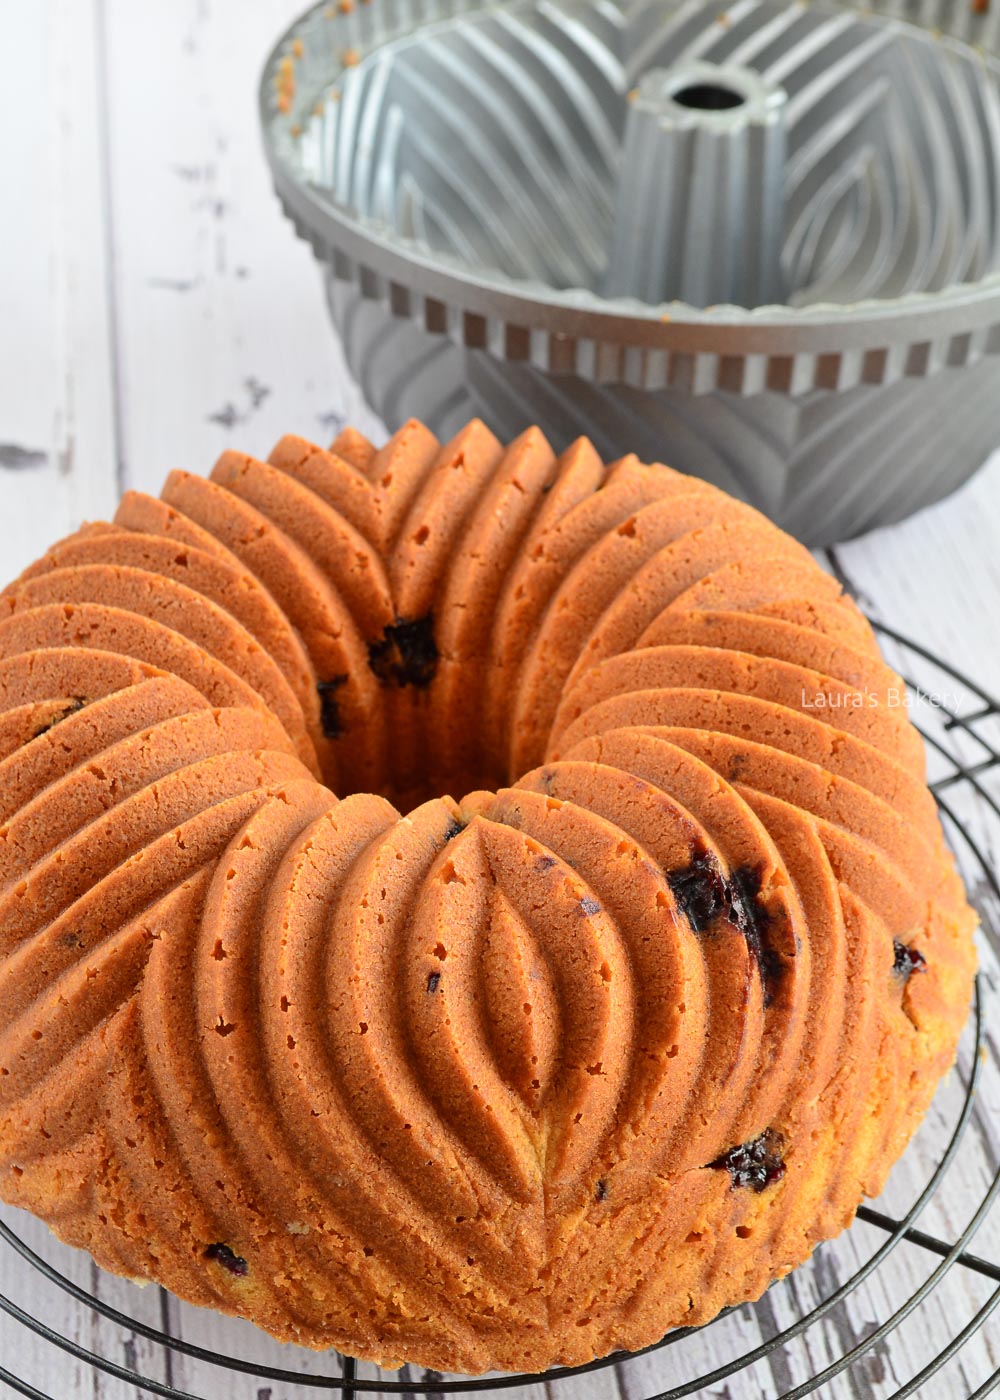
Finally, bundt cakes, one of my favorite baking molds. Also one where I have a strong brand preference. All but one of my bundt pans are from Nordic Ware. You pay a little extra for them, but they are worth it.
Besides the special and beautiful shapes, they have a very good coating. I just use a baking spray to grease them and all my cakes come out of the mold beautifully. Although I already own 4 of these pans, I have many more on my wish list. The designs are unique and they keep coming up with new and beautiful designs.

Here are the cake pans that I like to use a lot and that I think are useful in any baking enthusiast’s kitchen:
That’s a pretty big list. I have many more molds, but the ones I mentioned are the ones I use the most and would really miss if I didn’t have them anymore.
Do you have a lot of baking pans at home? Or are there many more on your wish list? I am curious about your favorite baking pan(s)!

I have another delicious recipe with a perfect flavor combo: lemon poppy seed muffins! They are fluffy, moist, easy to make and one of my favorite muffin recipes.
These delicious lemon poppy seed muffins where first made for a photo shoot I did a few years back. At the time I wrote a weekly column for a Dutch magazine which always featured a new recipe plus a photo of me. Because we needed a few new head shots I figured it would be nice to make these lemon poppy seed muffins. (Or these raspberry muffins would also have been a good choice)
People often look at me a little crazy when I say I put poppy seeds in a batter (at least they do here in the Netherlands), but after they taste it, they are convinced.
I think the best example of this was when I was at a food market with the lemon poppy seed cake from my second book. I encouraged everyone with raised eyebrows (poppy seeds, in a cake? Why?!) to try a piece, and it was so funny to see everyone start laughing as they chewed. They loved it!
Since I like the combination of lemon and poppy seeds so much, I decided to combine them again, this time in muffins. I love muffins. In a few minutes they are in the oven and before you know it you are enjoying delicious muffins.
Making this lemon poppy seed muffins recipe is really super easy to do. I always love how easy it is to make muffins, and the lemon flavor in this muffin recipe is just so delicious! I love all things lemon, it’s my go to ingredient in spring and summer.
You need the following ingredients:
In addition to the above you will also need paper muffin cups, a muffin tin and a wire rack to cool down the muffins once baked.

The good thing about making any kind of muffin is that the batter is usually simply a matter of combining the dry ingredients with the wet ingredients.
You also don’t need to whip it for very long so a large bowl is usually enough. No need to use a food processor either.
Just mix the flour, sugar, baking powder, baking soda, salt, lemon zest and poppy seeds. Use a whisk to mix it through and use a separate bowl for mixing the wet ingredients. It’s ok if there are a few streaks of flour in the batter. And that’s all there is to it.
Place each muffin liner inside of your muffin pan and fill with the batter. You want the batter to be just below the rim of the paper so you will get nice round muffin tops.
Bake in the preheated oven until golden brown and cooked. The baking time is roughly 12-18 minutes.
I love making a quick batch of these muffins and freeze them for later use. Perfect to include in your weekday breakfast or as a snack and even better for lemon lovers!
For all my lemon lovers, here are a few recipes you might like:
What are your lemon recipes? Let me know in the comments below!
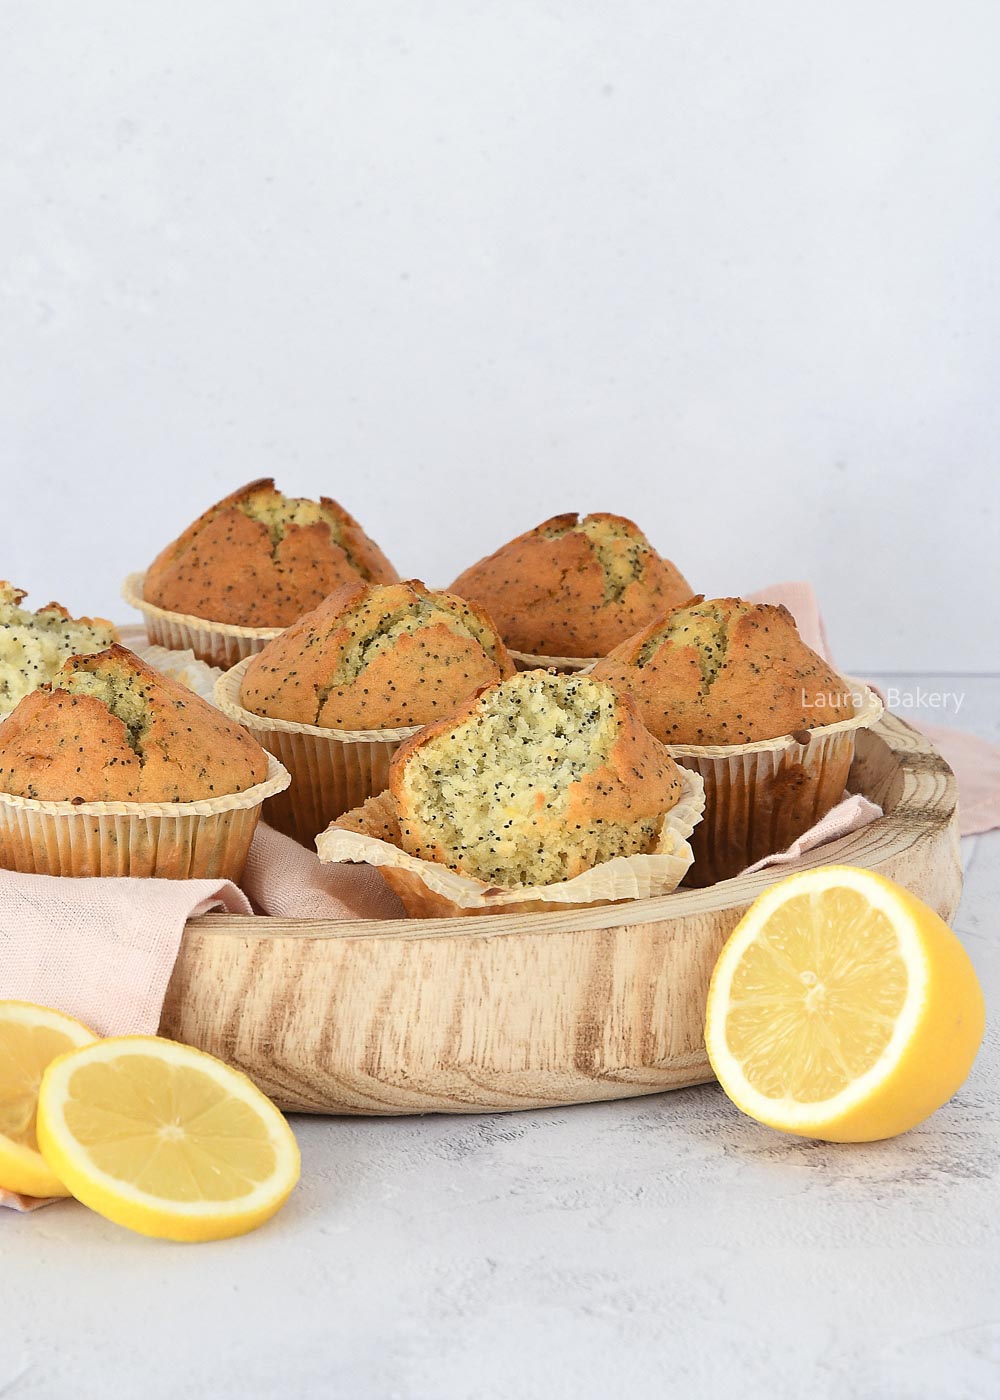
You can store these in an airtight container outside of the fridge for about 5 days. You can also freeze them for up to three months.
You can also use melted butter instead of the sunflower oil but the muffins will be a bit firmer as the butter solidifies at room temperature. But you can use it.
A lot of muffin recipes use sour cream or greek yogurt. They can pretty much be replaced in equal ratios. The flavor will be subtly different though.
Sure! If the crunchy poppy seeds are not enough you can add something like chocolate chip or add additional flavor to the batter by adding some vanilla extract or a teaspoon of lemon extract. You could even add pieces of candied lemon peel or a nice lemon curd swirl.
You can if you want to, but keep in mind that this recipe is called lemon poppy seed muffins so leaving them out would give you just lemon muffins. The closest in looks would be to use chia seeds. These do absorb a bit more moisture so you might want to add a bit extra of that.

There is something so satisfying about working with phyllo dough. It is the crispiest after baking and these baked feta bites in phyllo pastry are my new favorite.
It’s super easy to make and the crispy outside layer with the creamy feta on the inside is just the best! One of my favorite feta recipes.
Phyllo pastry or filo pastry can be a little bit tricky to work with if you’ve never used it before. There is also quite a big difference in quality.
I like to buy my phyllo pastry in the Turkish grocery store as I find they have the best phyllo that is easiest to handle. But you can certainly use regular phyllo pastry too. Just something to be aware off.
The most important thing when working with this kind of pastry is to not let it dry out. So as soon as you remove it from the package, cover the sheets of phyllo with damp paper towels.
Also don’t be afraid to use a lot of olive oil. That will prevent the phyllo from breaking.

Now as I said you only need four simple ingredients to make the feta bites.
The first step is to cut the sheets of phyllo in half length wise. Cut your feta block into 10 feta rectangles and make sure they are a little narrower than the halved sheets.
Have both the honey and the olive oil ready in a small bowl. Brush a generous amount of oil over the pastry sheet. Place one feta cube on top and add a drizzle of honey over the feta.
Now roll the sheet of phyllo up around the feta, folding the sides inwards as you roll. Place the phyllo-wrapped feta on a baking sheet lined with parchment paper.
Repeat this proces for all 10 rolls. Bake in the preheated oven for about 12 minutes or until golden brown and crispy.
I’ve got you covered! I love to create appetizers and savory snacks and there are a lot of recipes I want to share with you. These recipes are a fes of my favorite Dutch snacks:

Cover the phyllo with damp towels while you’re working and use plenty of oil or butter on the sheets.
It’s delicious with an easy dipping sauce like tzatziki or use sweet chili sauce or something like a fig jam. You can add them to a serving platter with various dips or use it as a simple feta appetizer.
Absolutely! You can add something like fresh herbs (fresh thyme leaves, dill or fresh parsley work really well) or a little bit of lemon zest. Fresh cracked pepper is also nice on top of the feta.
This feta recipe is best enjoyed right away. If you want to store them or use them the next day, you can, but be sure to reheat in the oven at 180˚C/350˚F to get crispy phyllo again.
Alternatively you can freeze them unbaked for up to three months and bake them straight out of the freezer. Just add a few minutes of baking time.
If you want to make this with puff pastry you can. Just make sure to use a single layer of the puff pastry instead of a couple of the phyllo sheets. Puff pastry works differently so the end result will be different as well. I would advise for best flavor to use the phyllo.

While I love being in the kitchen for more elaborate recipes, I also love the baked goods you can make in a pinch. Take lemon fudge, for example! Basically, this is a chocolate fudge made with white chocolate.
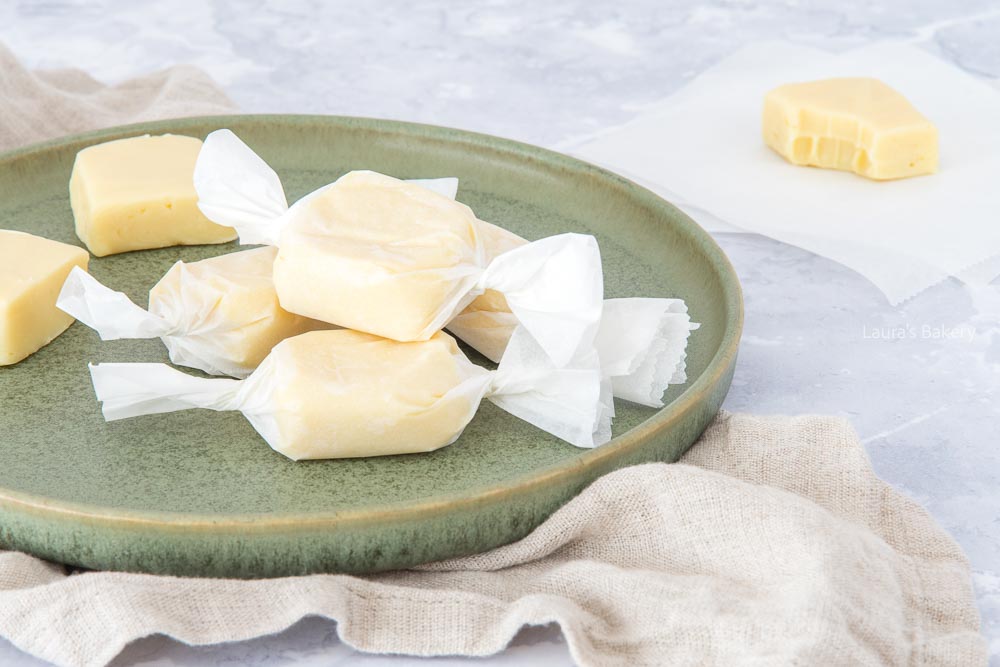
I also added lemon extract and lemon curd to make a deliciously fresh lemon fudge. Because of the additions, the fudge is a little softer and has a creamy texture, but that actually makes it even more delicious. I wrapped the pieces of fudge in sheets of parchment paper for storage.
Apart from being absolutely delicious, these also make a great gift to someone who loves that zesty lemon flavor. You can fill a bag, a tin or a jar with some wrapped pieces of the creamy lemon fudge and you’ll make someone really happy. And if you love fudge, make sure to check out the caramel pecan fudge!
This recipe makes more than enough to fill your own candy jar. Plus it’s super easy and you need just a few simple ingredients.
In addition to the ingredients you need a square or rectangle pan lined with parchment paper to pour the fudge mixture in.
There are several methods for making fudge. A traditional fudge recipe would require the use of a candy thermometer and can be a bit more fiddly to get right.
I personally love easy fudge recipes and this lemon fudge is really quite simple. No need for thermometers or other fancy equipment.
Just melt, stir and cool. That’s basically all it takes. As always make sure to check the full details in the recipe card.
You only need a large saucepan where all the ingredients would easily fit in. Place the pan on low heat to maximum medium heat (you don’t want it to get too hot) and gently melt the chocolate.
Once the mixture is smooth and creamy you pour the fudge into your prepared pan or baking dish. Spread evenly with a spatula, cover with aluminum foil and place in the fridge for at least 4 to 6 hours to set.
Now if you are thinking of making this sweet treat into a lovely gift you can wrap each piece in a bit of parchment paper.
Wrapping also helps in storing it, because the lemon fudge is a little softer than normal fudge. So wrapping it makes it easier to handle.
When you’re cutting your fudge, do this straight from the fridge with a sharp knife. Don’t leave it at room temperature and then cut it as that will be more difficult.
I know I’m not the only one that loves those fresh lemon recipes. I share a few of my favorites, but know there are many more lemon recipes on the blog:
The recipe makes roughly 35 pieces of fudge, but that obviously depends on how big you cut it. Keep it small as it can be quite filling.
You can store the lemon fudge for 1-2 weeks in an airtight container in the fridge or freeze for up to three months
You can, but keep in mind that changing the ratios of the recipe might result in a different texture. Lemon extract is stronger but with less liquid. If you want to replace with lemon juice stick to only 2 teaspoons to keep the ratios equal.
Absolutely. Have some poppy seed leftover? (maybe after making my lemon poppy seed pancakes!) That would be a great addition. But you can also add crushed cookies or coconut flakes.

If you love pancakes, you’re going to adore these delicious fresh lemon poppy seed pancakes. Delicious for breakfast or lunch or a lazy Sunday morning, this easy recipe for homemade pancakes will get you started right away!
Poppy seed for baking may sound strange, but it is surprisingly delicious! Lemon poppy seed combinations are quite common in the US (not so much in The Netherlands, although it’s a bit more common now).
Think about lemon poppy seed muffins (my favorite muffin!) or lemon poppy seed bread. The list of recipes goes on and on!
Ever since I created a lemon poppyseed yogurt cake for one of my books, I am addicted to this delicious combination. So I wanted to do more with these two ingredients.
Be prepared for more recipes with these ingredients coming up soon. It’s that bright lemon flavor that does it for me every single time. And if you love pancakes, make sure to check out my oatmeal banana pancakes or the fluffy yogurt pancakes too. And for a totally different flavor these blini!
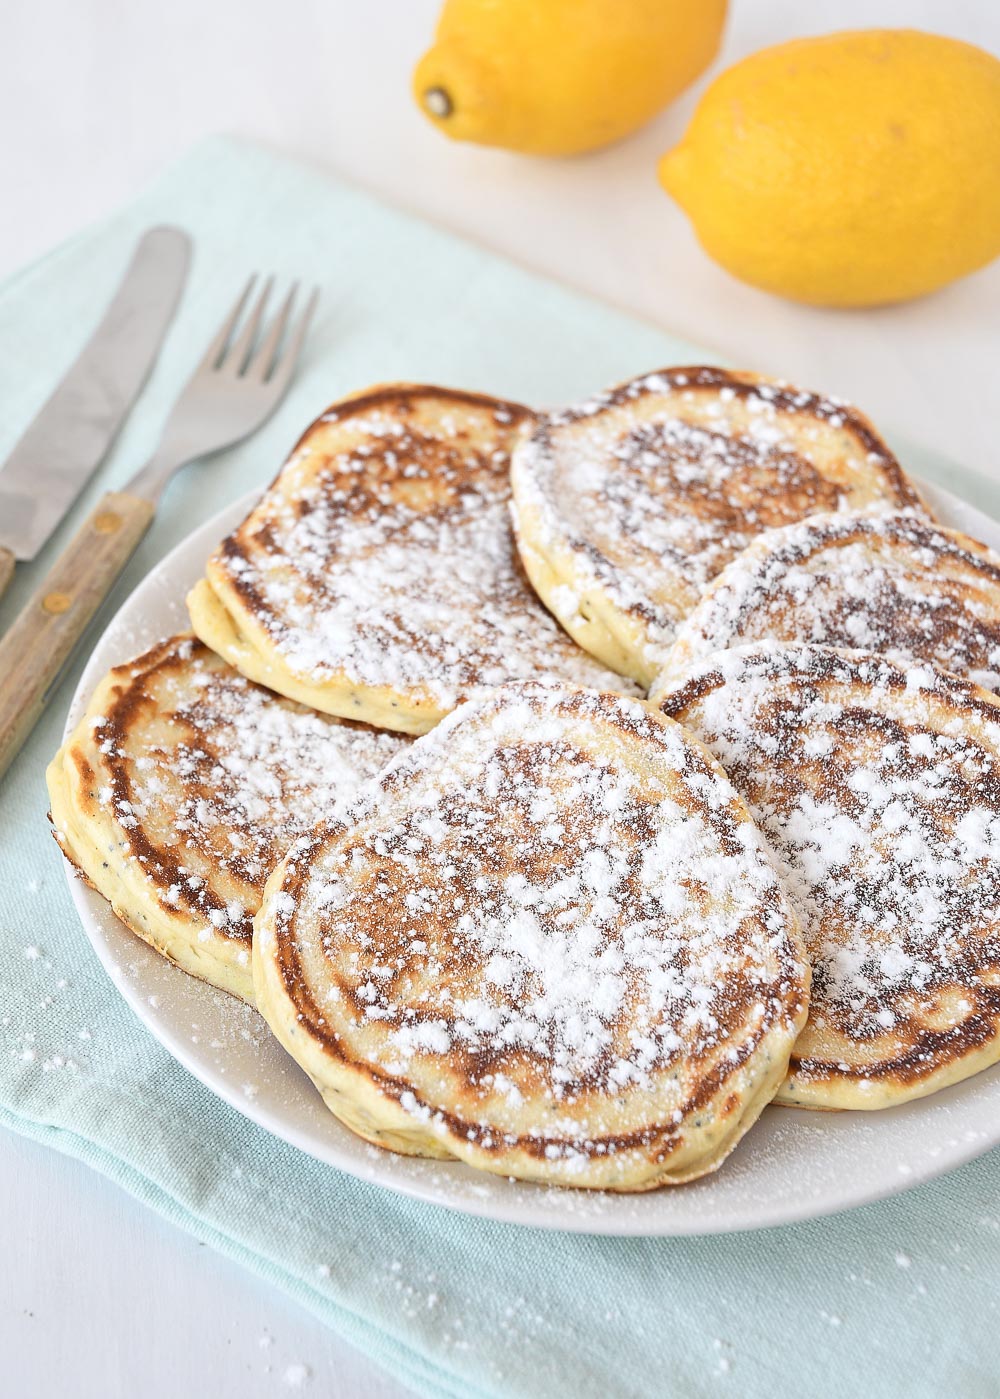
These fluffy pancakes are not difficult to make. You will need the following:
For baking these pancakes I use melted butter, but you can also use oil if you prefer. I like the butter better as it browns all pancakes recipes better in my opinion.
Take a large bowl and add the dry ingredients into the bowl. Mix it for a bit before adding the wet ingredients. Mix it all through. A few lumps is not a problem, it doesn’t have to be super smooth.
Now add enough butter into a large skillet (on medium heat) and add about a quarter of a cup of batter into the pan. I also like to use an ice cream scoop to pour batter into the pan.
Let it gently simmer on medium-low heat until the top of the pancake gets a bit dry and bubbly. At that point you can flip the pancakes and bake the other side until both sides are golden brown.
Add a little butter and repeat these steps with the remaining batter until all pancakes are done. You can serve the pancakes with fresh fruit, some warm maple syrup or a dusting of powdered sugar.
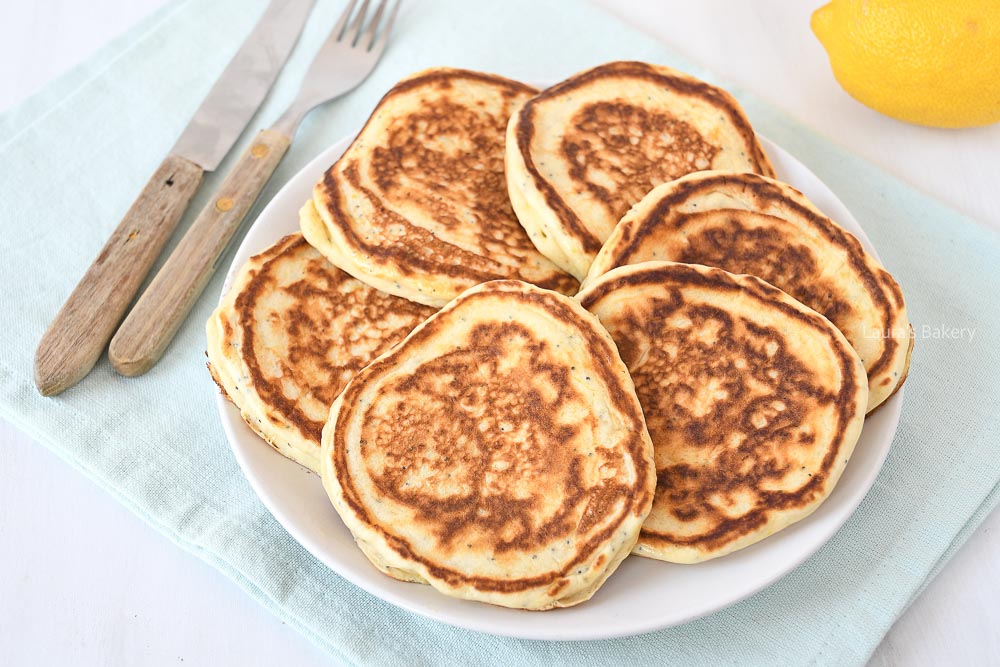
There will be more lemon and poppy seed recipes coming up soon but for now I do already have a few delicious lemon recipes lined up for you:

These cheese croquettes are a favorite here. I would love to make them every single week. They are that good!
Keep in mind that they do require some resting time, so if you want to make them calculate a couple of hours so they have enough time to set in the fridge. This is a crucial step for most croquettes.
The funny thing is that we Dutch like to believe that croquettes (or kroketten as we call them) are a typical Dutch invention. But as it turns out there are more countries that are home to the (little) croquette: France, Spain, Japan and Brazil!
There is a bit of a difference between the different regions and you’re probably not gonna find these cheese croquettes in Japan, for instance. In Spain you might find cheese croquettes as well but with different ingredients.
So each region has its own take on this delicious snack. But today I’m sharing my favorite cheese croquettes.
Want more Dutch recipes?
If you love delicious snacks such as these cheese croquettes be sure to check out the following recipes as well:

The first thing is to assemble all the needed ingredients. Making sure they are all at room temperature.
Now once you’ve assembled all your ingredients you start by making a ragout. You can find how to make this in the recipe card.
Once everything is mixed well and firm, place it in a baking tray or baking dish and cover with cling film. Now place this mixture into the fridge for at least 4 hours.
You can leave it in the fridge longer. I like to keep mine in overnight. Whatever works for you.
Once the ragout is cooled enough you can cut it with a knife. Cut it into 24 equal slices. It helps to rub your hands with a little olive oil so the ragout becomes easier to handle.
Roll the ragout in your hands and form into croquette shape. Prepare two bowls or a deep plate with the eggs and another one with the breadcrumbs.
Heat the oil in the frying pan to 180˚C/350˚F while you prepare the coating for the croquettes.
Roll each croquette through the breadcrumbs, the beaten egg, breadcrumbs again, egg again and finish with the breadcrumbs. So you will have three layers of breadcrumbs.
Repeat this for every single piece. Now deep fry the croquettes in a single layer in the fryer until golden brown. Take them out of the hot oil with a slotted spoon and place them on paper towel to crisp up.
Now the last thing to do is to make a dipping sauce. You can keep this very simple as I did and just use sweet chili sauce. That’s ready in no time.
Just serve the cheese croquettes in a large bowl and add the chili sauce. But you can also make any other kind of dip that goes well with cheese. Mixing mayonaise with some sweet chili sauce is really tasty as well.
You can easily make small variations to your cheese croquettes recipe. You can add a bit of garlic powder or onion powder next time for instance or add some crispy bacon.
You can also mix some fresh herbs through the ragout for additional flavor.
Store the prepared -but not fried- cheese croquettes in an airtight container in the fridge for 1-2 days prior to baking. Or freeze them uncooked for up to 3 months.
You can even fry them straight out of the freezer, although keep in mind that the total preparation time in the deep frying will be slightly longer.

These delicious Easter egg chocolate chip cookies are so good! You’ll want to make these as many times as you can, so I am sharing this in time for Easter so you can make them a couple of times. You do have to taste it all right? 😉
Last year I was visiting Chicago for a food blogger conference and of course one of the fun things to do in any country is visiting the local grocery store.
It was also around Easter so the shops where loaded with lots of different Easter treats, like Cadbury mini eggs. You can’t find those in the Netherlands so I stacked my suitcase full of them so I could make these super delicious Easter cookies (and these easter egg blondies too!).
It’s virtually the same as classic chocolate chip cookies but the sugar coated easter eggs give the cookies an extra delicious crunch! And if you love chocolate chip cookies be sure to check out these mini chocolate chip cookies and the coffee chocolate chip cookies too!
Making these Easter egg chocolate chip cookies is pretty straightforward. You need the following:

In addition to the ingredients you also need parchment paper, a large bowl and an electric mixer. Of course a food processor with the paddle attachment will also work and that is what I used.
If you want to make sure they are all the same size you can use a medium cookie scoop, if you want to create the perfect cookie size.
Making the Easter chocolate chip cookies is a matter of creaming the butter and the sugar in a bowl. Add the egg and the vanilla extract and mix this until you have a smooth dough.
Then add the rest of the dry ingredients and turn of the mixer as soon as the flour is incorporated.
Chop up the mini eggs and fold them into the dough. As always you can find the full details on how to make these soft chewy cookies in the recipe card.
If you want to add some of the eggs on top of the cookies make sure to press them in lightly for best results.
Alternatively you can also add them to the cookies right after they come out of the oven and are still soft.

The cookies will keep in an airtight container outside of the fridge for 1-2 weeks. But chances are they are long gone before that. In the freezer they keep up to 3 months.
For this Easter cookie recipe you have to break the eggs into smaller pieces or they will be too large to include in the dough (unless that’s what you want). I roughly chop it with a sharp knife and then fold it into the dough.
Make sure to rest the dough for at least an hour in the refrigerator and then divide into cookie dough balls.
Yes you can use other Easter candy, Easter treats or another brand of easter eggs. Keep in mind that not all melt in the same way. But in general you can use all kinds of chocolate chunks for making this perfect Easter cookie.
Some pastel colored sprinkles would be fun too!
Keep in mind that cookies are always soft when they come out of the oven. They will crisp up as soon as they cool down. Do make sure to keep the chill time into account when making them.

Today’s recipe is super fun. It’s a cheesecake filled Easter egg! Delicious creamy no bake cheesecake with homemade lemon curd inside of a chocolate egg.
The idea is to make the eggs look like ‘real’ eggs with a bit of egg yolk in the middle, that’s what the lemon curd is used for. It’s super easy to make, fun to present and very tasty too. What more can you want?
I initially made this recipe for one of my books, but because it is such an easy and fun recipe I figured I should share it here as well. I love simple recipes like this.
It’s good to know that my chocolate easter eggs where roughly the size of a regular medium egg. Of course you can use any shape and size of egg you want. You could even use one half of an chocolate egg.
There will be more fun easter recipes coming up in the next couple of days so be sure to check them all in the easter recipes category.
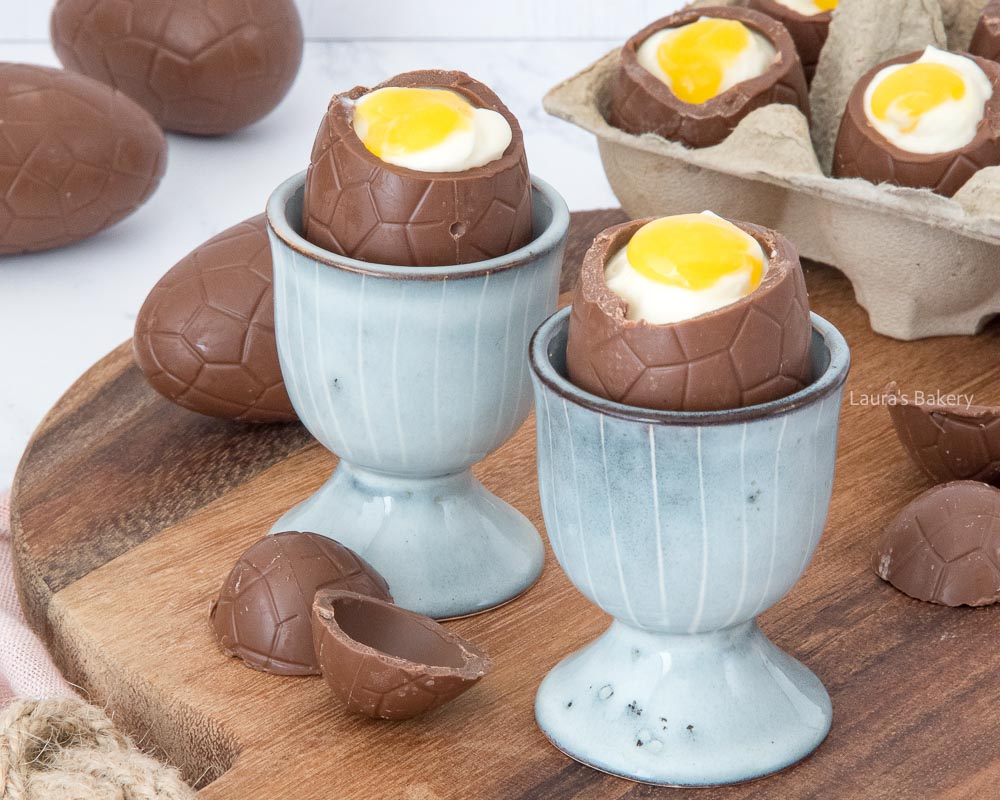
As always make sure the ingredients are at room temperature and double check the recipe card for the full details and instructions. This is a no bake cheesecake filling. Obviously as baking a chocolate egg would result in a melted chocolate puddle 😉 . Not exactly what we’re going for.
No special equipment is needed for this, but a food processor or electric mixer would come in handy for whipping the cream and the cream cheese.
Making this easter egg recipe is super simple. You start by heating a large sharp knife in hot water. That is essential as you need a warm knife to easily slice through the chocolate eggs without breaking them. You only want to slice the top of.
While your knife is warming, remove all the wrappings of the eggs. Take your knife, dry it and immediately cut the top of the eggs. You might have to dip the knife back into the hot water when necessary. And that is the hardest part of this recipe. Easy right?
Next you add the cream cheese to a large mixing bowl and you add the sugar. Mix it with a whisk until creamy. Add vanilla extract and whip again.
Whisk or mix the heavy cream in another bowl until it has formed stiff peaks. Add the cream cheese mixture in and blend it together while the mixer is on low speed.
Add your cream cheese mixture into a piping bag and do the same with the lemon curd in another piping bag.

Now take your egg cups and pipe the cream cheese in. Don’t fill all the way up as the lemon curd still need to go in as well.
Cut of a small bit of the piping bag holding the lemon curd. You do not want it to be too big. Insert the piping bag in the middle of your chocolate egg. Gently squeeze the lemon curd out and pull the piping bag upwards.
You want to end with some lemon curd on top of the cheesecake filling, so it looks like egg yolk.
It actually helps if you place the chocolate eggs in a fridge egg holder or something similar. Maybe you have an old egg carton you can use to hold the chocolate shells.
Sure. You can use a bit of apricot jam for instance and insert that into the centre of each cheesecake egg. You might want to do that with a very small spoon instead of a piping bag as the jam would be a bit harder to use
You can store them in an airtight container in the fridge for 4-5 days. They will also be a little firmer once chilled properly. It does help to store them in the fridge using an egg holder too, otherwise they might tip over.
You can use any kind of size you like. It all depends on how you want it to look. You can use a large chocolate egg or go for mini size. But keep in mind that you will need either more or less of the cheesecake mixture. I used eggs that were the same size as a medium ‘real’ egg.

>A few years back I totally discovered halloumi cheese. And these crispy halloumi cheese fries recipe is the result! It is so good! And also incredibly easy to make.
They’re pretty addictive so probably a good thing that they are also very filling. I like to serve mine with a fresh yogurt and parsley dip. It’s great for any party as I am sure most of your guests will be won over in no time. If you like mozzarella sticks? This is pretty similar, but better!
If you’re not familiair with this white cheese than it is good to know that halloumi is made from a mixture of goat and sheep’s milk. It originates from Cyprus but it has become increasingly popular everywhere so you should be able to buy a block of halloumi in most grocery stores.
Halloumi is a firm cheese and needs some work to make it edible. You don’t want to eat it straight out of the package.
The fun thing about halloumi is that it has a very high melting point. That means you can easily grill it, bake it or make salty halloumi fries! It can have a bit of a squeaky texture if it has not melted properly but these halloumi sticks are all soft and melty on the inside!

Now let me start by saying that you really don’t need a lot to make these crispy halloumi fries. You need just two ingredients to make the cheese sticks. Halloumi and all purpose flour. And ok, they do need to be fried in hot oil so you will need oil as well.
You can use a deep fryer for that or you can shallow fry them in a vegetable oil. Don’t use olive oil but something a bit more heat resistent. Shallow frying uses less oil than deep frying but is a bit more work as you need to manually turn the halloumi fries.
To make the fries, you simply dust the halloumi with the flour and place them in a single layer in the deep fryer until golden brown.
Let them drain on paper towels and – for the best experience – serve immediately. Once they cool down, they become tough and not so tasty. You want crispy halloumi cheese fries with a melty inside and a crunchy coating. It’s the perfect snack and delicious finger food.
You can use any kind of dip you like really but I love serving these crispy fries with this fresh dip. It’s the perfect combination of flavors.
You finely chop the parsley and add it to the Greek yogurt with the juice of half a lemon, the zest and salt and pepper. If you’re not into a yogurt dipping sauce, something like marinara sauce is also quite good.

The official halloumi is half goat and half sheep, but there are also varieties out there using cow’s milk. While that can be tasty as well, they do tend to be softer and fall apart more easily. Check the package to see if you have the right kind.
Absolutely. You can make the halloumi cheese fries with a coating of panko bread crumbs for instance. In that case you dip the fries into the flour, then into an egg wash and last through the panko. That would make them even more crunchier!
You can do that. I have not tried this myself but if you want to try spray the halloumi fries with a bit of oil and place them in a single layer in the air fryer. Prepare them for 8-10 minutes at 200˚C/400˚F.

It’s almost Easter! And I love creating fun and surprising variations of some of my favorite recipes. Today I’m sharing my take on Easter egg blondies. Blondies are one of my favorite takes on brownies. And these are not only fun to serve at Easter but they’re also great for using leftover easter candy.
For making these chewy blondies I use Cadbury mini eggs. You can’t actually buy those where I live (the Netherlands) but I got a good supply of the mini cadbury eggs last year when I was in Chicago.
I was there around the same time of year and so the stores where packed with all sorts of Easter goodies. I packed a good portion of my suitcase full of the mini cadbury eggs as well as the pastel m&m and other sweet treats.
With the cute mini eggs I made these delicious blondie bars and I also made my new favorite chocolate chip cookies. And if you love blondies you might want to check out these raspberry and white chocolate blondies as well.or these chocolate chip blondies.

Making this easy blondie recipe is not complicated. In case you don’t know the difference between blondies and brownies…. it’s pretty self explanatory.
Brownies are brown and blondies are blond. The color speaks for itself. But basically blondies are brownies without the chocolate. You can make white chocolate blondies of course, but the basic blondie does not need chocolate for the batter.
Blondies are a perfect treat and the best part is that adding the cadbury eggs gives the blondies an extra bit of crunch.
For full details check the recipe card but you will need the following ingredients at room temperature:

To make the blondies you start by melting the butter. Add the melted butter with the sugar into a large bowl or use a stand mixer. Mix it with an electric mixer until smooth and creamy.
Now add the eggs one by one, mixing in between. Mix the vanilla extract in and the last step is to add the rest of the dry ingredients (flour and salt).
Next up: you will want to chop the eggs a bit smaller. Even though they are already small, it’s easier to eat and cut if you break them up a bit. Fold them into the blondie batter with a rubber spatula.
Now pour the blondie mixture into a square baking pan lined with parchment paper and use the spatula – if needed – to spread the mixture evenly. Sprinkle a few more of the eggs on top of the blondie batter and place in the preheated oven.
Now bake the blondies for approximately 25-30 minutes. The top should have a crisp thin layer and the inside can still be a bit wobbly. Always make sure to let it cool down completely before slicing.
A good blondie (or brownie) is crispy on the outside and fudgy on the inside.

No you can’t. While you can use a cake tester for a regular cake recipe, in this case you don’t want the tester to come out completely dry as that will mean the blondies are overcooked. So you will have to use your eyes and common sense for deciding if they are cooked enough. The top should feel dry and if you hold the pan it shouldn’t wobble excessively if you’re shaking it (gently!)
Not too long! You want it to just come together and that’s enough mixing. You could even use a spatula.
You can store them in an airtight container for about a week. Make sure to not put them into a fridge. That will dry out the blondies. Freezing is also an option for up to three months.

I made this strawberry tiramisu with whipped cream and mascarpone in individual servings. That way, you can serve everyone their own small dessert for dinner. How cute and convenient too!
Don’t let the Italians see how I like to make my strawberry tiramisu: no raw eggs, no alcohol, and no coffee. Instead of coffee or alcohol, I soak my lady fingers in orange juice (strawberry juice works too!). It works great with the fresh strawberries.
As key ingredient I use a mixture of mascarpone cheese and heavy whipping cream. That is a great combination if you don’t want to use raw egg yolks.
By leaving those out this is safe to eat for everyone. Pregnant women and children included. Of course it doesn’t resemble a traditional tiramisu recipe. This classic Italian dessert has pretty strict guidelines as to what goes into a tiramisu.
To make extra pretty single portions, I decided to make the tiramisu into a layered version. A small tower of tiramisu!
You can serve it right away after you’ve made it or you can leave it in the fridge overnight to set. In either case it is a lot of fun to serve this when you have guests for dinner.
BAKING TIP: If you clean your strawberries, do so before removing the crowns. Otherwise, the strawberries will soak up the water and your strawberries will have less flavor.

Now you might think that this is a complicated dessert but it really isn’t. I would say this is the perfect no bake dessert!
You just make a single layer of ladyfingers, add a tablespoon of apricot jam on top and pipe some of your mascarpone filling followed by some sliced strawberries. And repeat for a second layer.
Now a few things to keep in mind. Don’t go overboard when creating your layers. You want it to be small as it is for one person after all.
Three lady fingers is enough for one layer, or maybe even two if you want to make smaller portions.
Adding the layers of mascarpone cream is easiest with a piping bag. You can use a smooth nozzle as I did here or use a special one.
Instead of the apricot jam you can use another jam like homemade strawberry jam. Finish the stack with some juicy strawberries and you’re ready to serve your perfect dessert.
A little sprinkle of powdered sugar on top of the tiramisu is always a good idea too.
Desserts, I love them. We used to have a standard bowl of yogurt for dessert after every meal at home. Nowadays, I don’t do that very often, although sometimes it would be good maybe against a sweet craving in the evening.
Now, when I make dessert, I like to make an impression. Without too much time and effort. This easy strawberry tiramisu is a good example: little effort, big effect.
By the way, this tiramisu with strawberries, orange juice and apricot jam is also a big hit with the kids!
It is one of my favorite strawberry desserts. Check the recipe card for the full instructions.
Also check the lemon raspberry tiramisu and the classic tiramisu (without eggs)
Absolutely you can. You may also want to adjust the apricot jam to match the flavor of the fruit you use. I’ve made tiramisu with blackberries, blueberries, and raspberries, so I know it works well and is very tasty.
Basically, you can use any fruit juice of your choice as long as it matches the flavor of the strawberries and apricot jam. Strawberry syrup is usually a bit too sweet but if you want to use a strawberry sauce you can thin it a bit with lemon juice or orange juice.
Yes, you can. In that case, use a little more ladyfingers (225 grams/8 oz) and possibly a little more orange juice to dip the cookies in. This way you can make the tiramisu in a 20 x 20 cm (9×9 inch) baking dish.
This is not the intention of tiramisu. If you want to, it’s best to make the dessert just before serving. It is possible to make the mascarpone cream mixture the day before (and keep it refrigerated, covered with plastic wrap) to save time during the rest of the preparation.
You can, but while they might look pretty I would recommend making this with fresh strawberries. If you crumble the freeze-dried strawberries they would look good sprinkled on top though.
If you want you can make more layers but keep in mind that it might become unstable. Two layers is probably high enough.
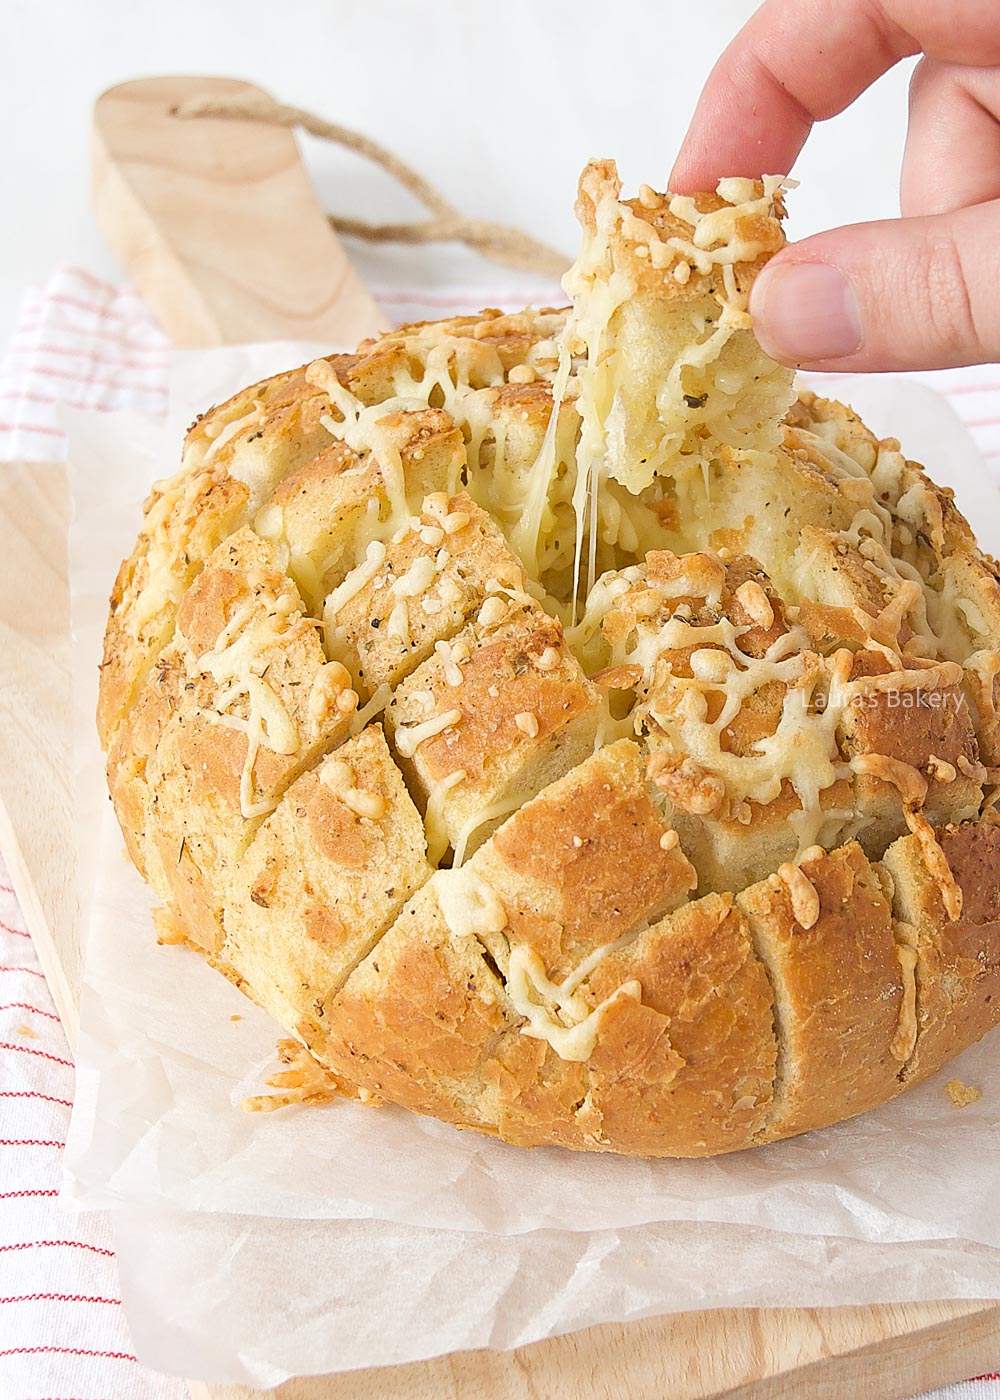
This cheese and garlic pull apart bread is absolutely delicious and perfect for any party or Friday night easy meal time. With lots of cheesy goodness you will love this recipe. You can use the bread as a great appetizer or as part of a cheese board.
Is there anything better than a warm slice of cheesy garlic bread? I seriously doubt it. This easy recipe is pretty straight forward. You will need the following simple ingredients at room temperature:
Additionally you could add some fresh parsley to sprinkle over the top if you want.

Once you have the ingredients it is as simple as cutting the bread (the top of the bread) in diagonal slices with a sharp serrated knife. You don’t want to cut all the way through. Make sure to have about half an inch where the bread is still attached. Place it on a baking tray lined with parchment paper.
Take a small sauce pan and combine the butter, garlic, oregano, salt and pepper. Melt the butter and mix it with the other ingredients creating a garlic butter. Now using a pastry brush spread the garlic herb butter mixture over the soft bread. Making sure to also add some of it in between the cubes.
Melting the butter gives the best results but you could also use softened butter and mix the garlic and seasoning into the butter. Melting is just easier and it also makes sure that the melted butter is easier to distribute.
Once you’ve mixed the cheeses together you place the cheese in between the bread cubes. Make sure to do this carefully as you do not want to break the bread.
Now bake in the preheated oven until golden brown and melted. Serve right away! This is a perfect side dish or perfect appetizer but does need to be served hot (unless you want the melted cheese of course). This cheesy pull apart garlic bread is just the best there is!
Sure you can buy garlicky bread in the grocery stores but it is just not the same as making your own. And it can’t be much easier.
You can store this delicious bread for about 2-3 days in an airtight container. It is best eaten warmed up a little. For that I preheat the oven to 180˚C/350˚F, sprinkle a little bit of water on top of the crust and place in the oven for about 10 minutes or so until the crust is crispy again.
You can also freeze the bread. Wrap it properly in plastic wrap or use a freezer-safe container. The bread can also be reheated as mentioned above.
Check out the below recipes as well:

Yes you can replace the butter for olive oil. I like to use butter as it tends to brown better in the oven and also gives it better crispy edges, but you can absolutely replace butter for olive oil. If you do use olive oil there is no need for melting the butter obviously so the mixing can be done in a small bowl instead.
Yes you can. As long as the bread is small enough to fit in the air fryer basket you should be good to go.
You can prepare the bread up to the point where it is ready to be placed in the oven. Cover it with plastic wrap and store in the fridge until you’re ready to bake the bread. It’s also great for using up leftover bread.
If you want you can use something like pizza dough to make this bread as well. You make small dough balls and place them together in a ring or a bundt pan. Now generously spread the butter over the dough and add the cheese.
You could even sprinkle over some pizza sauce if you want to. If necessary let the dough rise in a warm place before placing in the oven. You can also use crescent rolls for doing the same. If I use fresh dough I use the ones you can buy in a can. Make sure to check the package instructions for how to make these.