Cheese fondue-2

Cheese Fondue isn’t just incredibly delicious, it’s also wonderfully cozy. Gather everyone around a pot of melted cheese and start dipping! In this article, I’m sharing my easy cheese fondue recipe, tips for choosing the best fondue pot, and plenty of inspiration for what to serve alongside it.

What is Cheese Fondue?

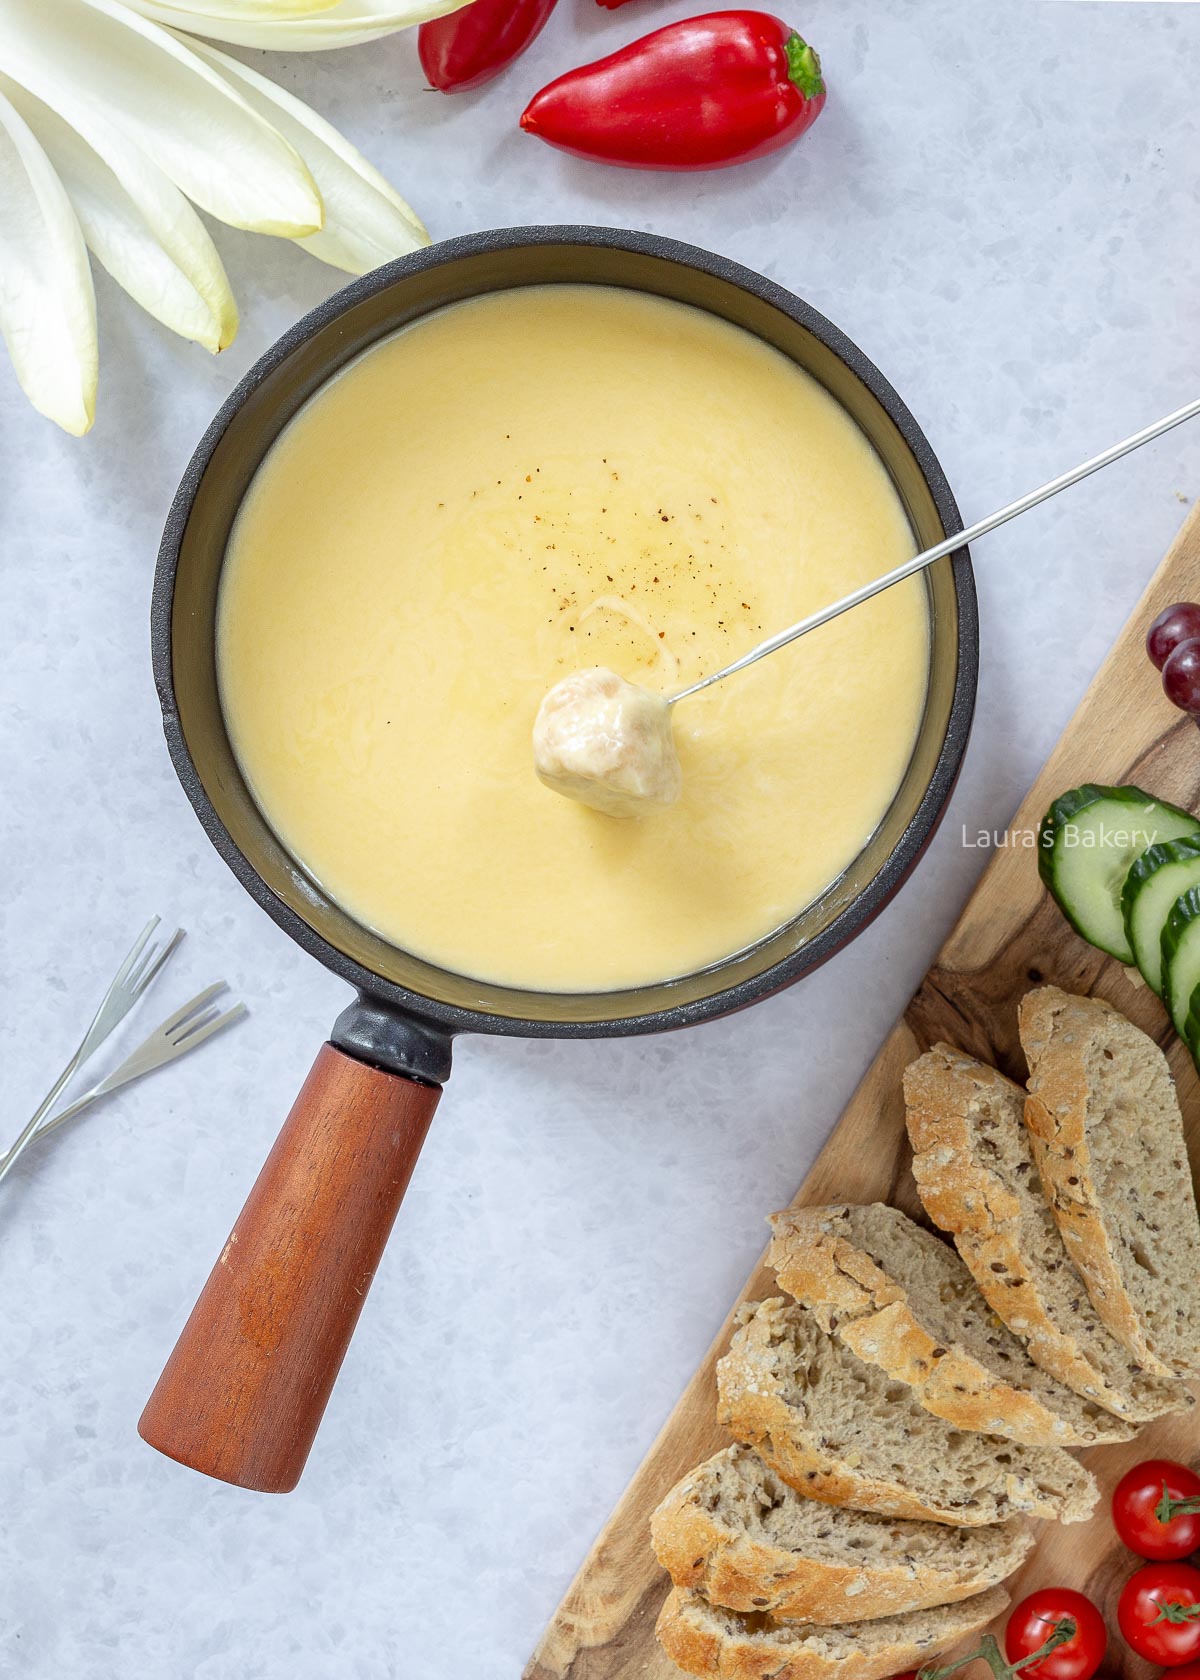
With cheese fondue, you dip small pieces of bread and vegetables into a fondue pot filled with a mixture of melted cheese, wine, and garlic. The origin of cheese fondue is a bit unclear. Some say it is from Switzerland, others claim it is from France.

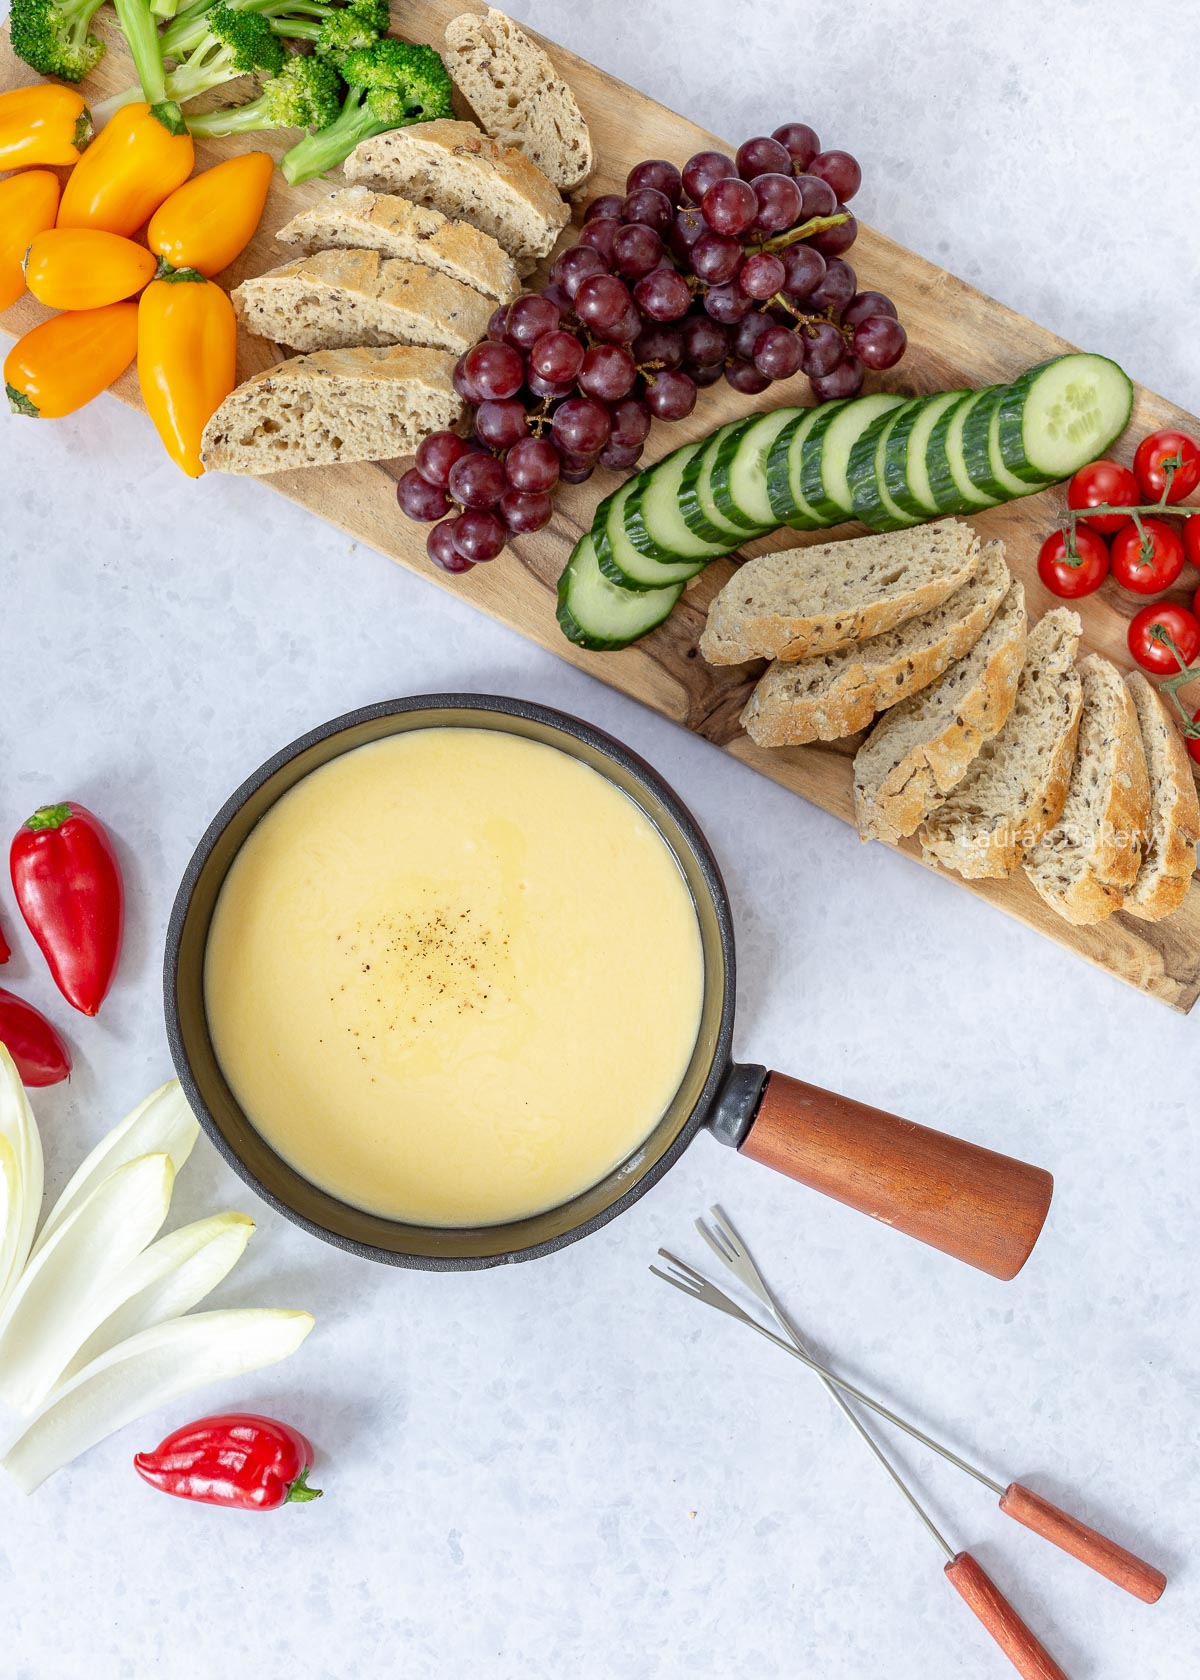
The bread and other dippers are speared onto long, thin fondue forks, dipped into the melted cheese and then transferred to your plate, perfectly coated in gooey cheese. The fondue pot usually sits on a burner, keeping the cheese warm and smooth.

What’s the Best Cheese for Cheese Fondue?

Want to make a classic Swiss cheese fondue? Then combine the Swiss cheeses Gruyère and Emmental. Super tasty! But the fun of making it yourself is that you can go in many directions.

Generally, you’ll want to combine two to three different types of cheese that complement each other in flavor. Three very strong cheeses together usually aren’t a great match.

You could opt for a Dutch-style cheese mix with Gouda or farmer’s cheese, but you can also jazz up a mild cheese base with a more intense cheese such as Parmesan, blue cheese, or goat cheese.

A cheese specialist can give great advice, and even better, they can grate the cheese for you so you don’t have to deal with that at home.

Cheese fondue-5

How to Make Cheese Fondue

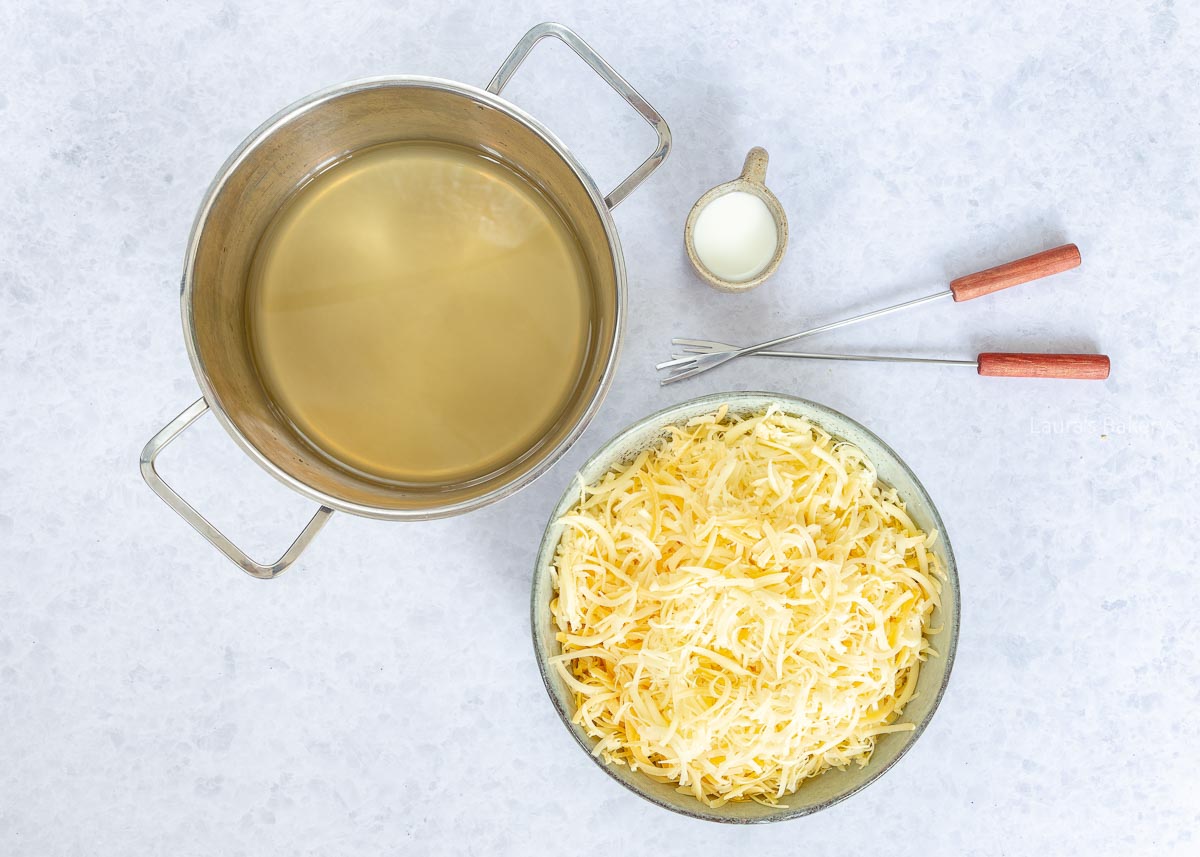
A cheese fondue recipe is actually very simple. You melt your chosen mix of cheeses in a pot on medium heat with warm wine and garlic. Add the shredded cheese in portions, stirring until the previous addition has fully melted before adding more.

Once all the cheese has melted into the wine, stir in cornstarch (dissolved in a little water) to help thicken and bind the fondue. You can season it with dried spices such as pepper and nutmeg, and if you like, add a splash of kirsch.

What to Serve with Cheese Fondue

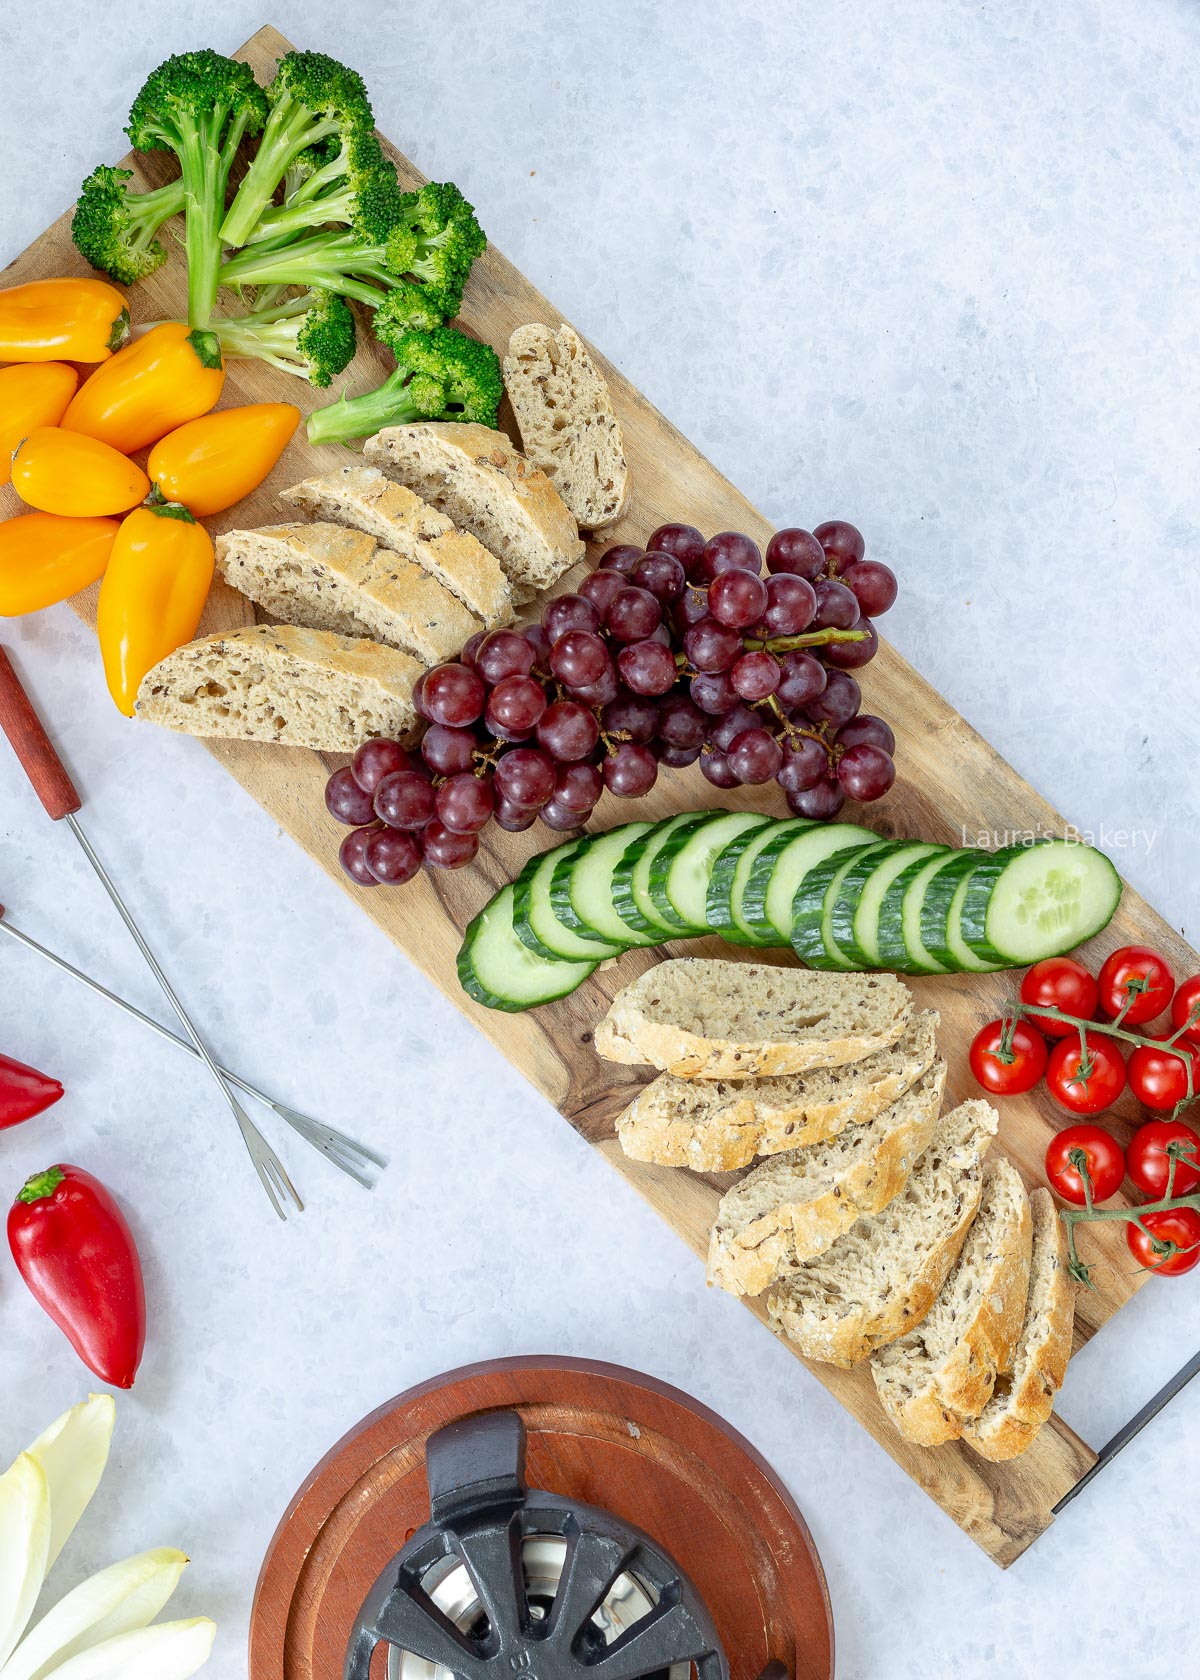
A cheese fondue evening calls for lots of different dippers. And by that, I mean not sauces, but veggies, fruit, and bread pieces to dunk into the melted cheese.

Think of ingredients that pair well with cheese. Below are plenty of ideas to choose from:

Vegetables

  • cucumber slices
  • cherry tomatoes
  • bell peppers
  • carrots
  • Belgian endive leaves
  • blanched broccoli
  • blanched cauliflower
  • celery
  • mushrooms
  • baby potatoes (pan-fried or boiled)

Fruit

  • grapes
  • pineapple
  • apple
  • pear

Bread

  • baguette
  • ciabatta
  • tortilla chips
  • breadsticks

Personally, I like to serve four types of veggies, 1-2 types of fruit, and 1-2 types of crusty bread.

You can prep the fruit and vegetables the night before (washing and cutting), so on the night of your dinner, you only have to make the fondue and set everything out.

I also once had a charcuterie plate with a cheese fondue and that tasted amazing.

Cheese fondue-3

Which Wine Pairs Well with Cheese Fondue?

Experts recommend using a crisp and/or dry white wine, both in the fondue and to drink with it. Think Sauvignon Blanc, Chablis, or Riesling.

Avoid rich, buttery wines, as they feel too heavy with the cheese. If you want the perfect wine pairing for the cheeses you’re using, get advice from a wine or cheese specialty store.

Alcohol-Free Cheese Fondue

Yes, you can absolutely make cheese fondue without wine. There are several suggested alternatives online, each with pros and cons.

Want something close to the taste of wine? Try a crisp alcohol-free white wine. Broth is another flavorful option, just make sure your cheese isn’t too salty, since broth adds salt too.

Apple juice is a great option when making fondue for kids. It sweetens the cheese a little, which can help if you’ve chosen stronger, sharper cheeses (kids usually don’t love those!). Milk also works well here and has a neutral flavor.

How Much Cheese Do You Need?

A cheesemonger once told me to count on about 200 g (7 oz) of cheese per person for a fondue night.

Consider whether your guests are big or light eaters, you ideally want that pan to be empty by the end of the evening! Have leftovers? No problem, see below for how to store and reuse them.

How Long Does Cheese Fondue Keep?

Store leftover cheese fondue in an airtight container in the refrigerator for up to two days.

You can thin it out to use as a cheese sauce for cauliflower dishes, casseroles, or as a base for pasta. Delicious!

Can You Freeze Cheese Fondue?

Freezing is great if you want to save leftover cheese fondue for your next fondue night. Store it airtight for up to three months, which means the next fondue evening won’t be too far away. 😉
Cheese fondue-1

Final Tips for Making Cheese Fondue

Melting the Cheese

Melting cheese for fondue takes a little patience, but it pays off. Keep the heat low, use a wooden spoon, and stir in a figure-eight motion. Take your time, slow melting gives the best texture. Add a splash more wine if the fondue seems too thick at the end.

Fondue Pot (or Not)

Once your cheese mixture is ready, pour it into a fondue pot and place it over a burner to keep it warm and prevent burning. You can also use a regular pot on a small burner as long as the heat stays very low.

A good fondue set isn’t cheap, but a high-quality one will last a lifetime since you don’t use it often. If you don’t want to buy one, consider borrowing from neighbors, friends, or family.

Kirsch

Traditional Swiss fondue often includes kirsch, a strong distilled cherry brandy, not sweet despite its name. If you’d like to use it in the recipe below, mix 3 tablespoons kirsch with the cornstarch instead of water. Then follow the rest of the recipe as written.


Cheese fondue thumbnail

Print Recipe

No votes yet

Cheese Fondue Recipe

With this easy recipe, you’ll have a delicious pot of cheese fondue on the table in just 30 minutes. Dig in and enjoy!
Preparation15 minutes
Cooking15 minutes
Total30 minutes
Servings: 4 people

Equipment

  • Fondue pot

Ingredients

  • 800 grams mixed cheeses such as Emmental, Gruyère, or other cheeses of choice
  • 400 ml dry white wine
  • 1 tbsp cornstarch
  • 1 garlic clove
  • Black pepper to taste
  • Dippers of your choice bread, vegetables, and fruit (see suggestions above)

Instructions

Preparation

  • Prepare your chosen vegetables (peel, clean, wash, blanch if needed, and cut).
  • Grate the cheese, unless your cheesemonger already did this for you.

Make the Cheese Fondue

  • Halve the garlic clove and rub the inside of your fondue pot with it.
  • Press the garlic and heat it with the white wine in a pot on the stove until it comes to a boil. Reduce the heat and add the cheese in portions of about 100 g (3-4 oz), stirring until completely melted before adding more.
  • Dissolve the cornstarch in 2 tbsp cold water. Stir into the melted cheese until the mixture is smooth and slightly thickened.
  • Pour the mixture into your fondue pot and finish with black pepper (and nutmeg, if desired).
Melted snowman cookies 3

Looking for a fun and easy recipe for making Christmas cookies? These melted snowman cookies are not only easy to make, they’re the perfect cookies for the holiday season. No need to be perfect with these fun holiday cookies.

Why You’ll Love This Recipe

Instead of making perfect snowman heads these cookies give you the excuse to go a little wild, no perfection needed! So much fun to make these cookies with kids too.

No need for cookie cutters either! You can just go freeform all the way with these. An easy and fun activity during the holidays.

Recipe Ingredients

  • cookie dough – I used my favorite recipe for gingerbread cookies but you can use any sugar cookies recipe as well
  • white chocolate – I would say you can use other chocolate as well but since these are little snowmen you will want to keep it white. As white chocolate can be a bit on the yellowish side, it’s perfectly fine to use white candy melts too.
  • marshmallows – I used normal sized ones for the head of the snowman
  • chocolate decorating pens – these are used for the final details. Melted chocolate in a piping bag will work too.
  • colorful sprinkles – you can use orange sprinkle, or whatever fun color sprinkles you want to use. They are used for the buttons of the snowman.

Make sure to double-check the quantities and exact ingredients in the recipe card below.

Melted snowman cookies 3

How To Make Melted Snowman Cookies

Start by making a batch of cookies. If going for the gingerbread cookies recipe you will need about half a batch. Alternatively you can also use these sugar cut out cookies or the chocolate version of that.

Once the dough is ready, use a sharp knife to make various melted snowman shapes. You can also use a round cookie cutter and reshape them slightly once you cut them out.

Bake the cookies and let them cool completely before moving on to the next step.

The base of the cookies is the white chocolate (or candy melts) and a marshmallow representing the snowman’s head. While the chocolate is still soft, you add the sprinkles where the buttons would be.

For the last step you will need to let the chocolate set completely so you can ‘paint’ on top of each cookie with the chocolate decorating pens.

After you made the arms and a cute face just let the little guys set completely and your snowmen cookies are ready to serve!

Storing Melted Snowman Cookies

You can store these cute melted snowman cookies quite well. They will be a little softer once the chocolate is set but you can store them in a cookie jar for up to two weeks.

Can I freeze the melted snowman cookies?

You can freeze the baked cookies (without decorations) for up to 3 months. Decorated cookies don’t freeze well, as the sprinkles and chocolate may lose texture. It is possible though, just be prepared that they may look a bit different after thawing them.

FAQ Melted Snowman Cookies

Can I use store-bought cookies instead of baking them myself?

Yes! If you’re short on time, you can use plain store-bought cookies such as sugar cookies, shortbread, or gingerbread rounds. Just decorate them the same way.

What kind of chocolate works best for the “melted snow” effect?

White chocolate works best because it gives that classic melted-snow look. Candy melts also work well and are a bit easier to handle, especially when decorating with kids.

How can I prevent the white chocolate from hardening too quickly while decorating?

Work in small batches. Keep the bowl of melted chocolate over a pot of warm (not boiling) water while decorating, or rewarm gently when needed.

Can I decorate these cookies without chocolate pens?

Yes! You can use melted dark chocolate in a piping bag, edible food markers (once the chocolate is set) or even royal icing.


Melted snowman cookies thumbnail

Print Recipe

No votes yet

Melted Snowman Cookies

These adorable melted snowman cookies will, without a doubt, be a hit at any holiday party, or simply enjoyed at home with the family.
Preparation30 minutes
Cooking20 minutes
Total50 minutes
Servings: 20 cookies

Ingredients

  • ½ batch gingerbread cookies follow the recipe
  • 200 grams white chocolate
  • 10 pcs marshmallows
  • chocolate decorating pens
  • colorful confetti sprinkles
  • white mini pearls and/or snowflake sprinkles

Instructions

  • Make half a batch of gingerbread cookies. Cut out various shapes with a small knife to form the melted snowman look. To make things easier, you can also just cut out round circles. Bake the cookies according to the recipe and let them cool on a wire rack.
  • Melt ⅔ of the white chocolate over a double boiler, then add the remaining chocolate and stir until fully melted. If the chocolate starts to harden again, warm it gently while stirring over the double boiler.
  • Cut the marshmallows in half so they’re half as tall. Use a tiny dab of melted chocolate to stick the marshmallow onto each cookie. Spread white chocolate over the marshmallow and cookie, then add confetti where the “buttons” should be, and decorate the edges with mini pearls and snowflake sprinkles.
  • Let the chocolate set in a cool, dry place until firm enough to draw on with a chocolate pen. Draw the snowman’s face and arms. Your cookies are ready!
Orange curd -1

We all know lemon curd, but have you ever tried orange curd? It’s perfect for desserts, especially during the holidays. It’s easy to make and you can even prepare it well.

Homemade orange curd

It can sometimes be a challenge to try something new, like figuring out which ratios and ingredients make the best orange curd. It took me a few tries to get it right.

The first batch was super delicious, but way too runny. The second one was a bit thicker, but still too thin and, to be honest, not as tasty.

So I went back to the first recipe to see what I could tweak. The final result turned out amazing. If you love fresh orange juice, you’re going to adore this curd.

It may have cost me quite a few eggs to get there, but now I can share the best homemade orange curd recipe with you!

Why This Recipe Works

If you love lemon curd, you will want to try making this orange curd too. Instead of using lemon juice, you use orange juice, making the flavor softer and more suitable for various uses.

Nothing better than fresh orange curd. It’s easy to make, can easily be stored and is perfect for the holidays!

Recipe Ingredients

  • egg yolks – You will need about 6 egg yolks to make a total quantity of around 2 cups of this easy orange curd recipe
  • sugar – I use fine granulated sugar for the best result
  • oranges – while I used 2 regular navel oranges for this, you can definitely also try making this with blood oranges for a different look and taste.
  • butter – make sure to use unsalted butter

Other than those simple ingredients you will need a medium saucepan or if you want to make sure to heat it slowly you can use a double boiler. Both will work, but the double boiler makes it easier to get the temperature right.

Orange curd -2

How To Make Orange Curd

Add the egg yolks, the sugar, the juice and zest to the saucepan and whisk untill it is combined.

Now you can place the pan on medium-low heat and bring to a boil. Once it boils, it will quickly thicken, so keep whisking gently.

Let it cook for about 5 minutes and add the butter at the last stage. It will become glossy and delicious. The curd is ready when it sticks to the back of a spoon.

You can pour the homemade curd into sterilized jars and store for up to a year this way.

How to store orange curd

Orange curd is a perfect recipe you can make in advance and you can store it for a long time, depending on if the jar is opened or not.

How long can you store orange curd?

Stored in a clean, airtight container in the refrigerator, it lasts up to 2 weeks after the jar is opened.

If properly canned/sterilized, it can last up to 1 year in a cool, dark place.

Can you freeze orange curd?

Yes you can, use suitable storage containers for the freezer and it keeps for up to a year. Extra tip: freeze in small batches so you can take out small portions easier.

FAQ Orange Curd

Can I use other citrus fruits instead of oranges?

Yes! You can substitute the oranges with lemons, limes, or grapefruits. But the ratios of the ingredients could be different. Also keep in mind that the sweetness and acidity will vary for the fruit curds, so you may need to adjust the sugar slightly to taste.

Why did my curd turn out runny?

Curd thickens as it cooks and continues to set while cooling. If it’s still runny after cooling, it likely wasn’t cooked long enough. Make sure it gently bubbles for the full 5 minutes. Also ensure you used enough egg yolks, these are key for thickening.

Can I make orange curd without a double boiler?

Yes, this recipe works directly in a saucepan, as long as you keep the heat on medium and whisk continuously. If you’re worried about curdling, you can use a double boiler for more control.

How can I use orange curd?

It’s delicious on toast, scones, pancakes, waffles, or as a filling for cakes, cupcakes, tarts, pavlova, or yogurt bowls. It also makes a wonderful layer in trifles or dessert parfaits.

Why did my curd taste eggy?

This can happen if the mixture was cooked too hot or too fast, causing the eggs to scramble slightly. Always cook it on medium heat and whisk continuously. Straining the curd through a fine-mesh sieve after cooking helps remove any small bits of cooked egg.


Orange curd recipe

Print Recipe

No votes yet

Orange Curd Recipe

This delicious orange curd is quick and easy to make and perfect for all kinds of desserts.
Preparation5 minutes
Cooking10 minutes
Total15 minutes
Servings: 500 ml

Ingredients

  • 6 egg yolks medium
  • 175 grams fine granulated sugar
  • Zest and juice of 2 oranges about 150 ml juice
  • 100 grams unsalted butter

Instructions

  • Add the egg yolks, sugar, juice, and zest to a saucepan and whisk to combine.
  • Place the pan over medium heat and bring to a boil, whisking gently. Once it starts boiling, the orange curd will begin to thicken. Let it cook for 5 minutes and add the butter during the last minute. Once it has cooked for 5 minutes and the butter has melted, remove from heat.
  • Pour the hot orange curd into a heat-resistant bowl or jar and let it cool completely. Once cooled, store it in the fridge for up to two weeks.
Speculaas banana bread -1

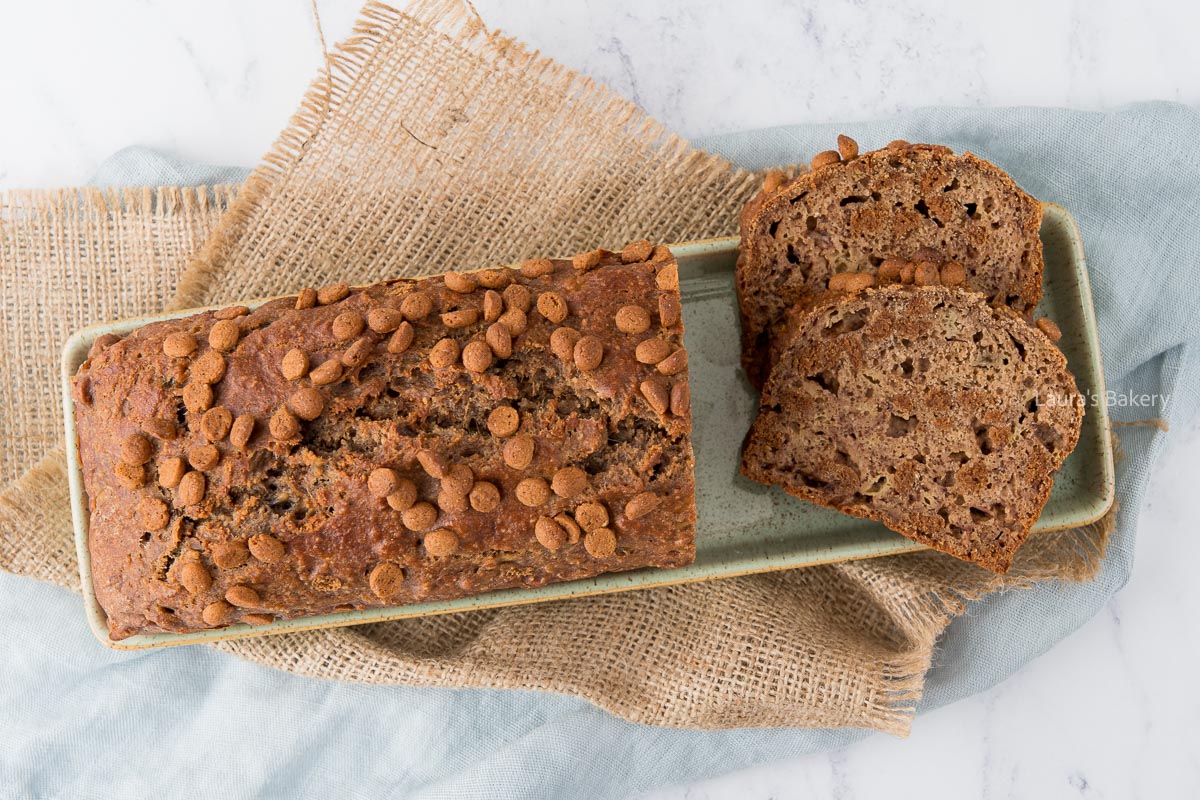
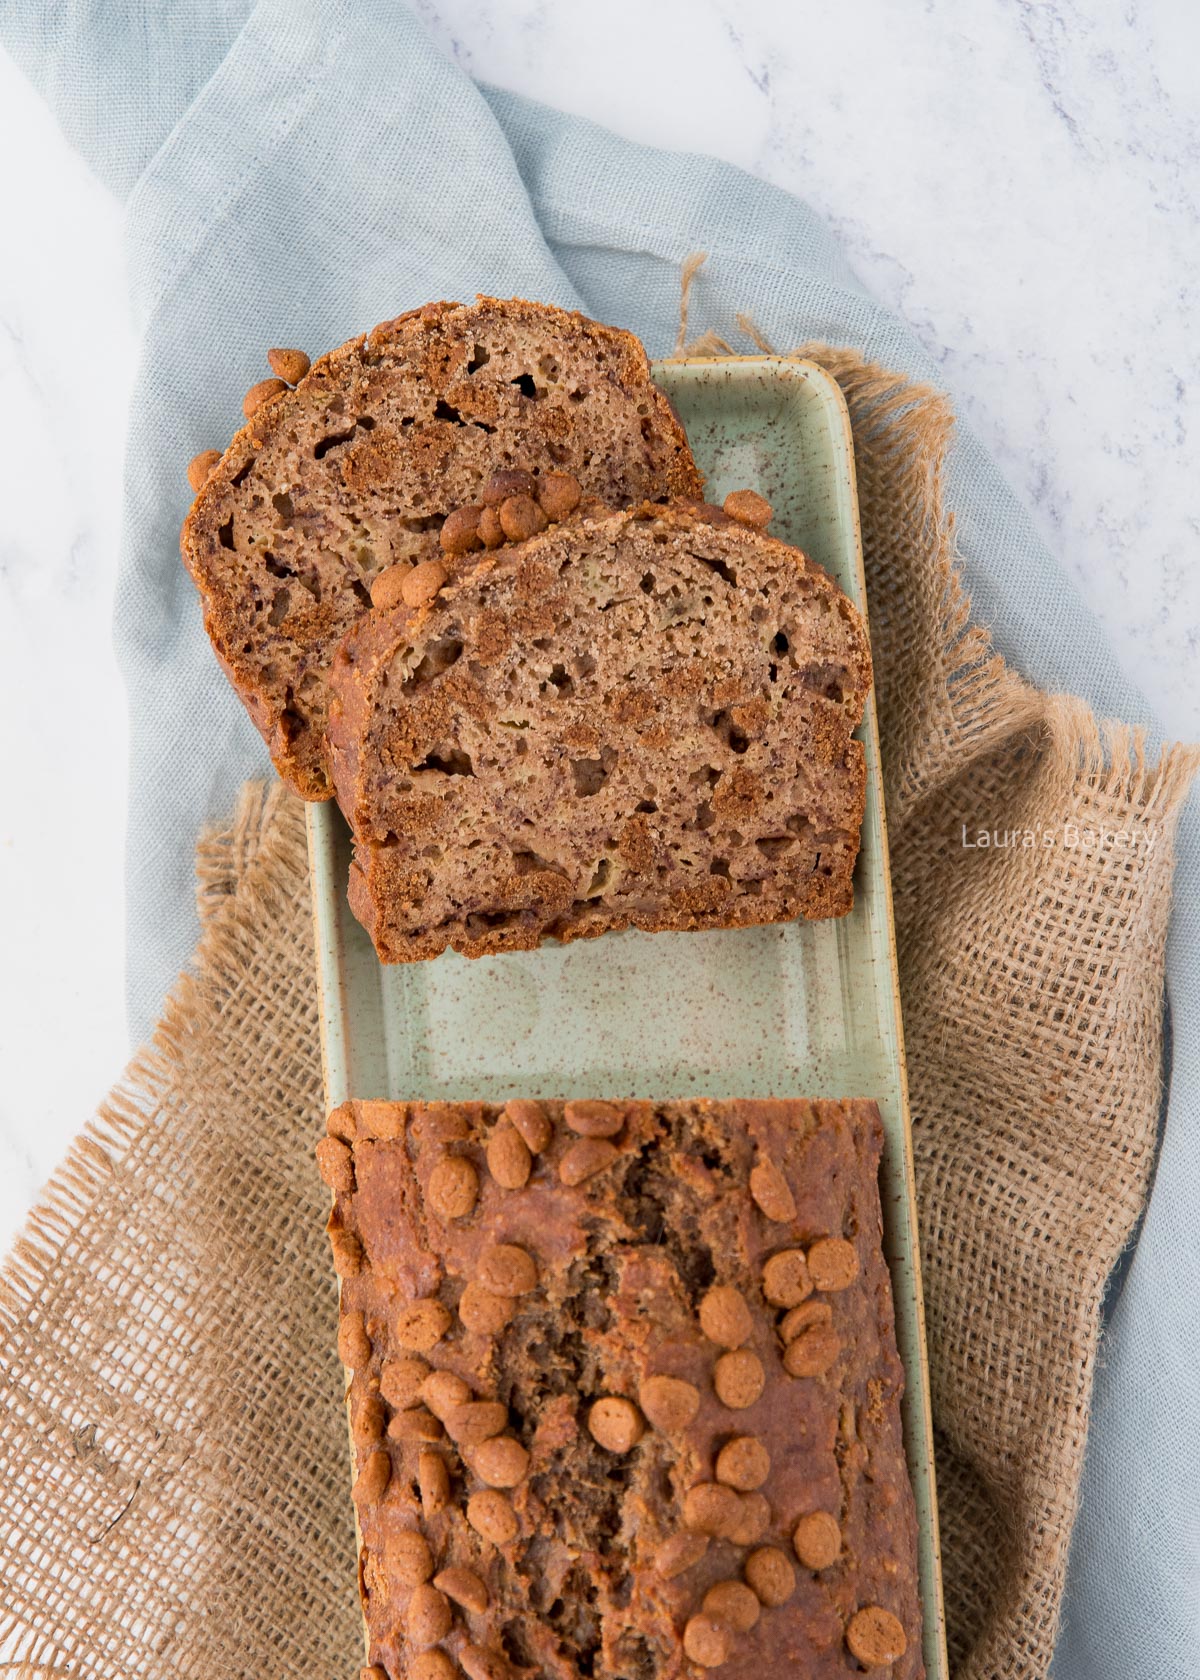
I always love baking banana bread. This time I made a speculaas banana bread, one of the many variations on my basic (healthy) banana bread recipe. Honestly, it’s the most delicious banana bread I’ve ever made (and eaten!).

Why You’ll Love This Recipe

The fact that I’ve already baked it three times says it all, right? I slice it and freeze the pieces individually so I can always grab a snack when I need one. Ideal if you ask me. I’m curious to know which banana bread is your favorite. If you don’t have one yet, start with the recipe below.

Now for me speculaas is one of those typical holiday flavors. And this banana bread is the ultimate holiday banana bread version. You can use gingerbread too if you don’t have access to speculaas or make your own with this easy speculaas recipe. Thank me later! And if you love banana bread variations make sure to also check out this lemon poppy seed banana bread.

Recipe Ingredients

  • bananas – this recipe is best made with overripe bananas
  • speculaas cookies – speculaas is a typical Dutch cookie, but can be replaced with gingerbread or Biscoff cookies. Alternatively, you make your own pepernoten or speculaas.
  • almond flour – the almond flour in this recipe makes it even better. It gives it a lovely almond flavor.
  • spice mix – you can use either speculaas spice mix or pumpkin pie spice
  • eggs – I used medium eggs for this recipe

As always make sure to double the quantities in the recipe card below. It’s best if the ingredients are all at room temperature.

Speculaas banana bread -3

How To Make Speculaas Banana Bread

Take a large mixing bowl and mash the bananas. Add the eggs one by one and add the vanilla extract as well. Add the dry ingredients to the bowl and mix it together.

Now chop the speculaas cookies (or whatever replacement you’ve used) into smaller pieces and fold it through the batter.

Pour the batter into the prepared loaf tin and smooth the top of the batter. Sprinkle some extra cookies bits over the top and bake in the preheated oven for about 40 minutes or until a wooden skewer comes out clean.

Let the banana cake cool down on a wire rack before slicing.

More Speculaas Recipes

I absolutely love recipes with speculaas flavors, these are a few of my favorites:

Speculaas is a traditional flavor for the Dutch holiday Sinterklaas, and with that, there are many delicious Sinterklaas recipes.

Storing Banana Bread with Speculaas

Banana bread is easy to store so you’ll always have access to homemade snacks. I always make two loafs at a time to have some healthy snacks in stock.

How long can you store banana bread?

You can store the banana bread in an airtight container outside of the fridge for 4-5 days. It also works to wrap it well in aluminum foil.

Can you freeze banana bread?

Absolutely. Slice the loaf, wrap each slice individually (or per 2 slices), and freeze. This way, you always have a quick snack on hand. Thaw at room temperature or pop into the toaster/air fryer for a few minutes.

Speculaas banana bread -2

FAQ Speculaas Banana Bread

What is speculaas spice, and where can I find it?

Speculaas spice is a Dutch warming spice blend similar to pumpkin pie spice. It usually contains cinnamon, nutmeg, cloves, ginger, cardamom, and white pepper. If you can’t find it in stores, you can substitute pumpkin pie spice or make your own blend at home.

What can I use instead of speculaas cookies?

If you’re outside the Netherlands, use chopped gingersnaps, Biscoff cookies, or gingerbread cookies. They will give a similar warm, spiced flavor and crunch.

How do I know when the banana bread is done baking?

Insert a toothpick into the center of the loaf. If it comes out clean or with just a few crumbs, the bread is ready. If it comes out with wet batter, bake around 5-8 minutes longer and check again.

Can I add nuts, chocolate, or other mix-ins?

Yes! Pecans, walnuts, or dark chocolate chunks pair great with the spices. Fold in up to ½ cup of additions before baking.


Speculaas banana bread

Print Recipe

No votes yet

Speculaas Banana Bread

A banana bread with warm speculaas spice flavor. Perfect for fall.
Preparation15 minutes
Cooking40 minutes
Total55 minutes
Servings: 12 slices

Equipment

  • 10-inch loaf pan

Ingredients

  • 3 ripe bananas about 300-350 grams
  • 3 eggs
  • 1 tsp vanilla extract
  • 100 grams almond flour
  • 150 grams all-purpose flour
  • 1 tsp baking powder
  • 1 tsp baking soda
  • 2 tsp speculaas spice mix or pumpkin pie spice as a substitute
  • Pinch of salt
  • 80 grams speculaas/gingerbread cookies or Dutch pepernoten

Instructions

  • Mash the bananas until smooth. Add the eggs one at a time along with the vanilla extract and mix well.
  • Add the almond flour, all-purpose flour, baking powder, baking soda, speculaas spices, and salt. Mix until fully combined.
  • Fold in the speculaas bits and pour the batter into a greased and floured loaf tin. Smooth the top and sprinkle a few extra speculaas bits on top.
  • Bake the speculaas banana bread for 40 minutes at 180˚C/ 350°F (conventional oven). A wooden skewer should come out clean when it’s done.
Brie pecan puff pastry bites -1

Brie puff pastry bites with crunchy pecans, sounds good right? Nothing better than melted brie cheese combined with a bit of honey. Perfect for your next holiday party.

Why You’ll Love This Recipe

Let’s be honest; once the holiday season arrives, we’re all looking for easy recipes to relieve some of the holiday cooking and baking stress, right?

This super-easy recipe is one of my all-time favorite appetizers to serve when I have friends or family in the house. It’s quick and baked brie is always so satisfying!

Recipe Ingredients

  • puff pastry – you can buy a sheet of puff pastry ready-made in almost all grocery stores, but if you want you could make it yourself too. Check this puff pastry recipe for that.
  • brie – you will need about 7 oz/200 grams for this recipe
  • pecans – can be replaced with walnuts if you prefer
  • honey – the honey is used to drizzle over the top of the brie

For full ingredients and quantities, you can check the recipe card below.

In terms of possible additions, these puff pastry brie bites are also delicious served with a bit of cranberry sauce or cranberry compote.

Brie pecan puff pastry bites -2

How To Make Brie Puff Pastry Bites with Pecans

First start with cutting the puff pastry sheet into 6 equal squares. Next: slice those squares diagonally, creating two triangle sizes.

Now slice the brie and place one piece of brie on the wider end of the triangle. Add some (chopped) pecans on top and sprinkle with a bit of honey. Fold the opposite point of the triangle over the filling and seal it. It doesn’t have to cover everything. So you can leave the sides open.

Place the bites on a baking sheet lined with parchment paper and brush them with egg wash before you bake them in the preheated oven for about 12 minutes or until golden brown.

Puff Pastry Recipes

Puff pastry is incredibly versatile in the kitchen. Whether you’re craving a savory snack, a festive appetizer, or a sweet dessert, puff pastry helps you whip up something delicious in no time.

It’s quick, easy, and always a crowd-pleaser. Below you’ll find a selection of our favorite puff pastry recipes:

FAQ Brie Puff Pastry Bites

Can I prepare these puff pastry bites ahead of time?

Yes! You can assemble them a few hours in advance and keep them in the refrigerator until baking. For best results, brush with egg just before putting them in the oven.

Can I bake them in advance and reheat later?

Absolutely. Bake as directed, let them cool, then store in an airtight container. Reheat in the oven at 350°F (180°C) for 5-7 minutes to crisp them back up.

Avoid reheating in the microwave, as the pastry will get soft.

Can I substitute the pecans?

Definitely. Walnuts, hazelnuts, pistachios, or even almonds are great substitutes. For a nut-free option, try dried cranberries or caramelized onions instead.

Can I use pre-cut puff pastry squares instead of a sheet?

Yes, if you can find pre-cut squares, use them to save time. You can easily cut those in half and use them as per the recipe.

Do I need to peel the rind off the brie?

No. The rind is edible and softens nicely when baked. You can remove it if you prefer a milder flavor, but it’s not necessary.


Brie puff pastry bites with pecans

Print Recipe

No votes yet

Brie Pecan Puff Pastry Bites

Perfect for any kind of party but especially delicious around the holidays are these brie puff pastry bites!
Preparation15 minutes
Cooking12 minutes
Total27 minutes
Servings: 12 bites

Ingredients

  • 1 sheet puff pastry
  • 200 grams brie
  • 1 handful pecans
  • Honey
  • 1 egg for egg wash

Instructions

  • Unroll the puff pastry and cut it into 6 equal squares, then slice each square diagonally to form 12 triangles.
  • Slice the brie. Place a piece of brie on the wide end of each triangle. Top with some pecans and drizzle with a little honey.
  • Fold the pointed end of the triangle over the filling. They don’t need to be fully sealed.
  • Place the bites on a baking sheet lined with parchment paper and brush with beaten egg.
  • Bake for about 12 minutes at 200°C / 390°F (conventional oven).
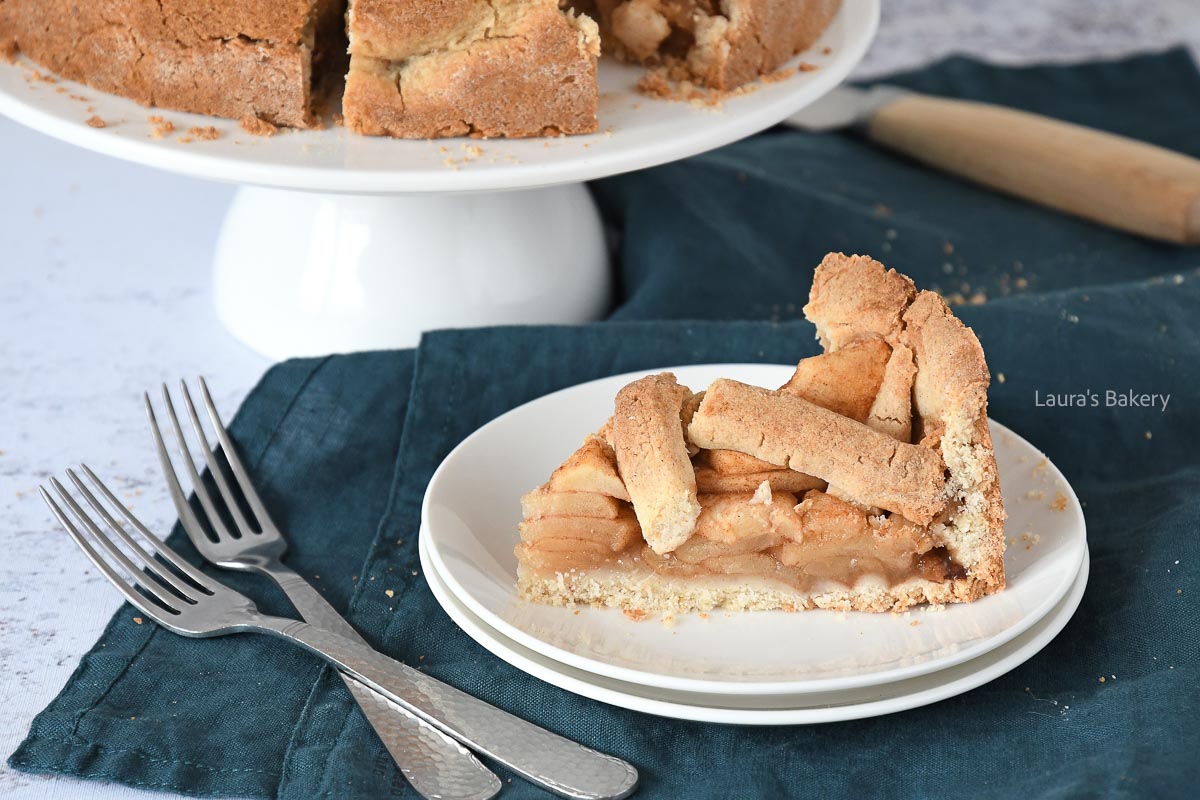
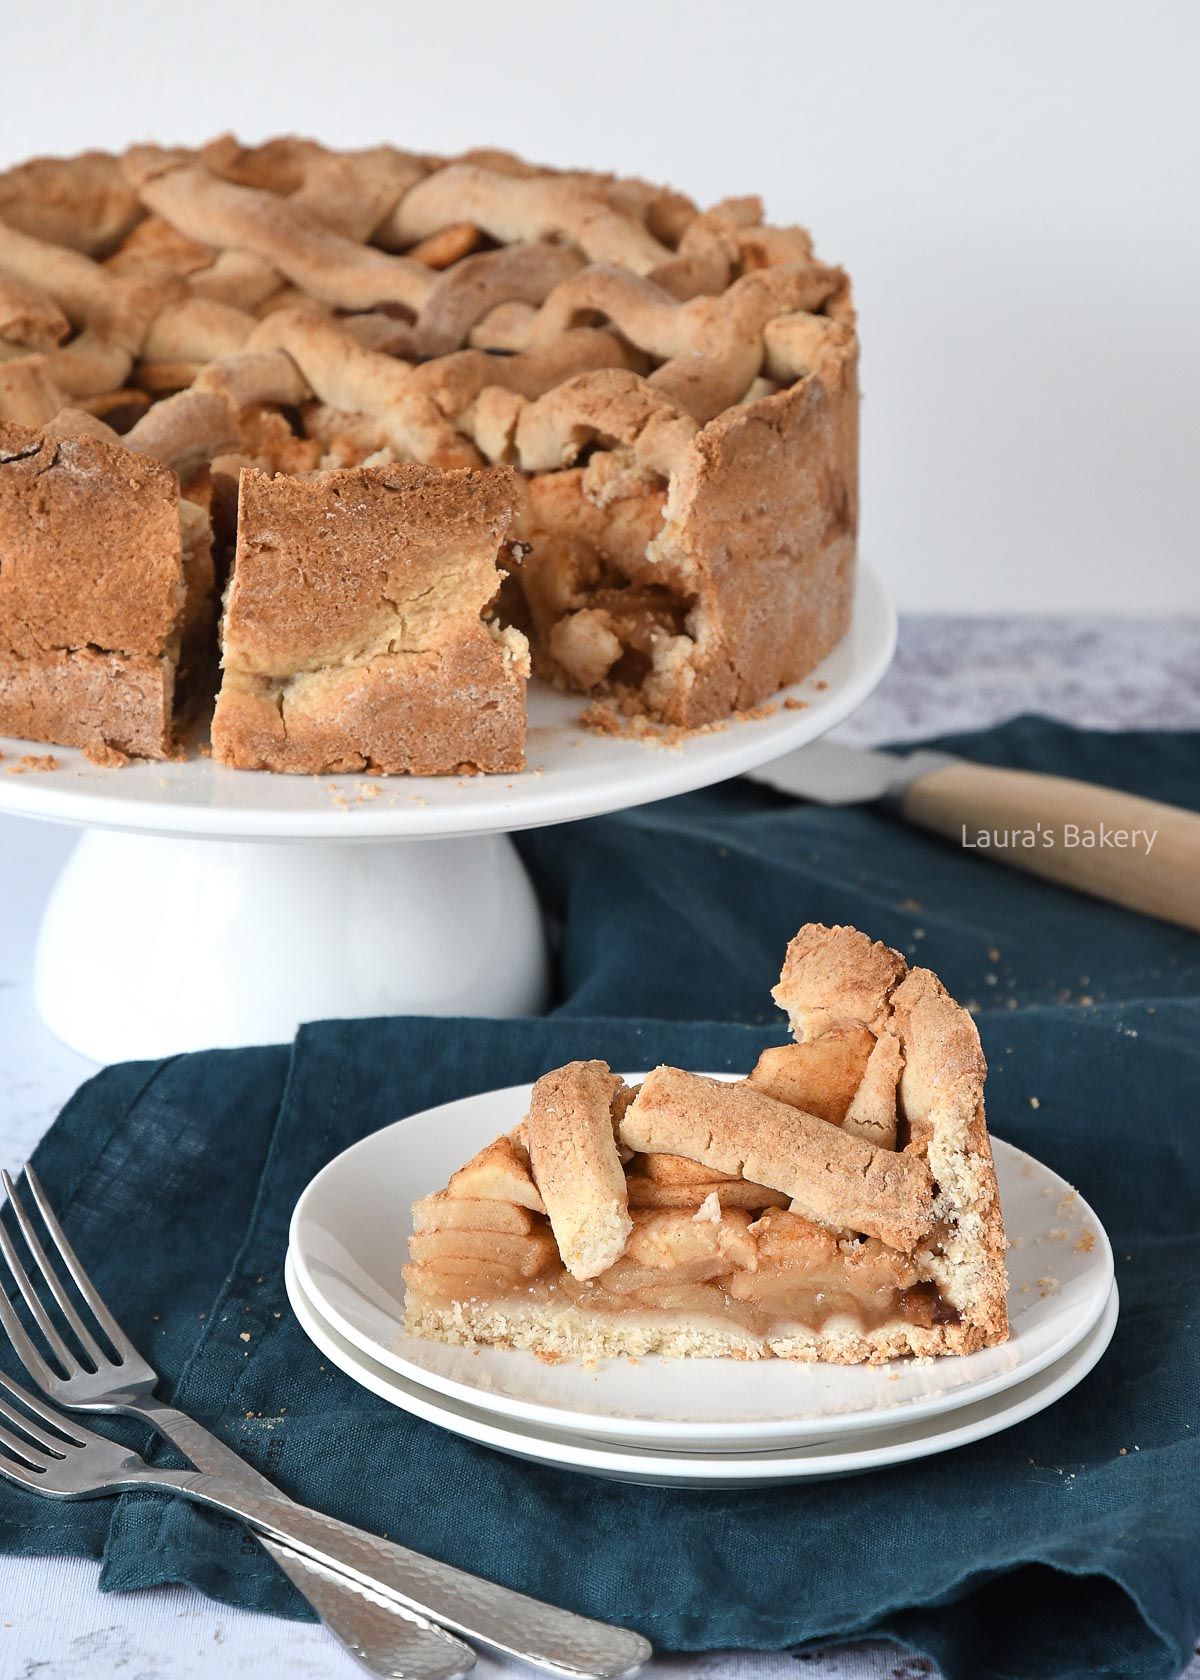
Gluten-free Dutch apple pie-1

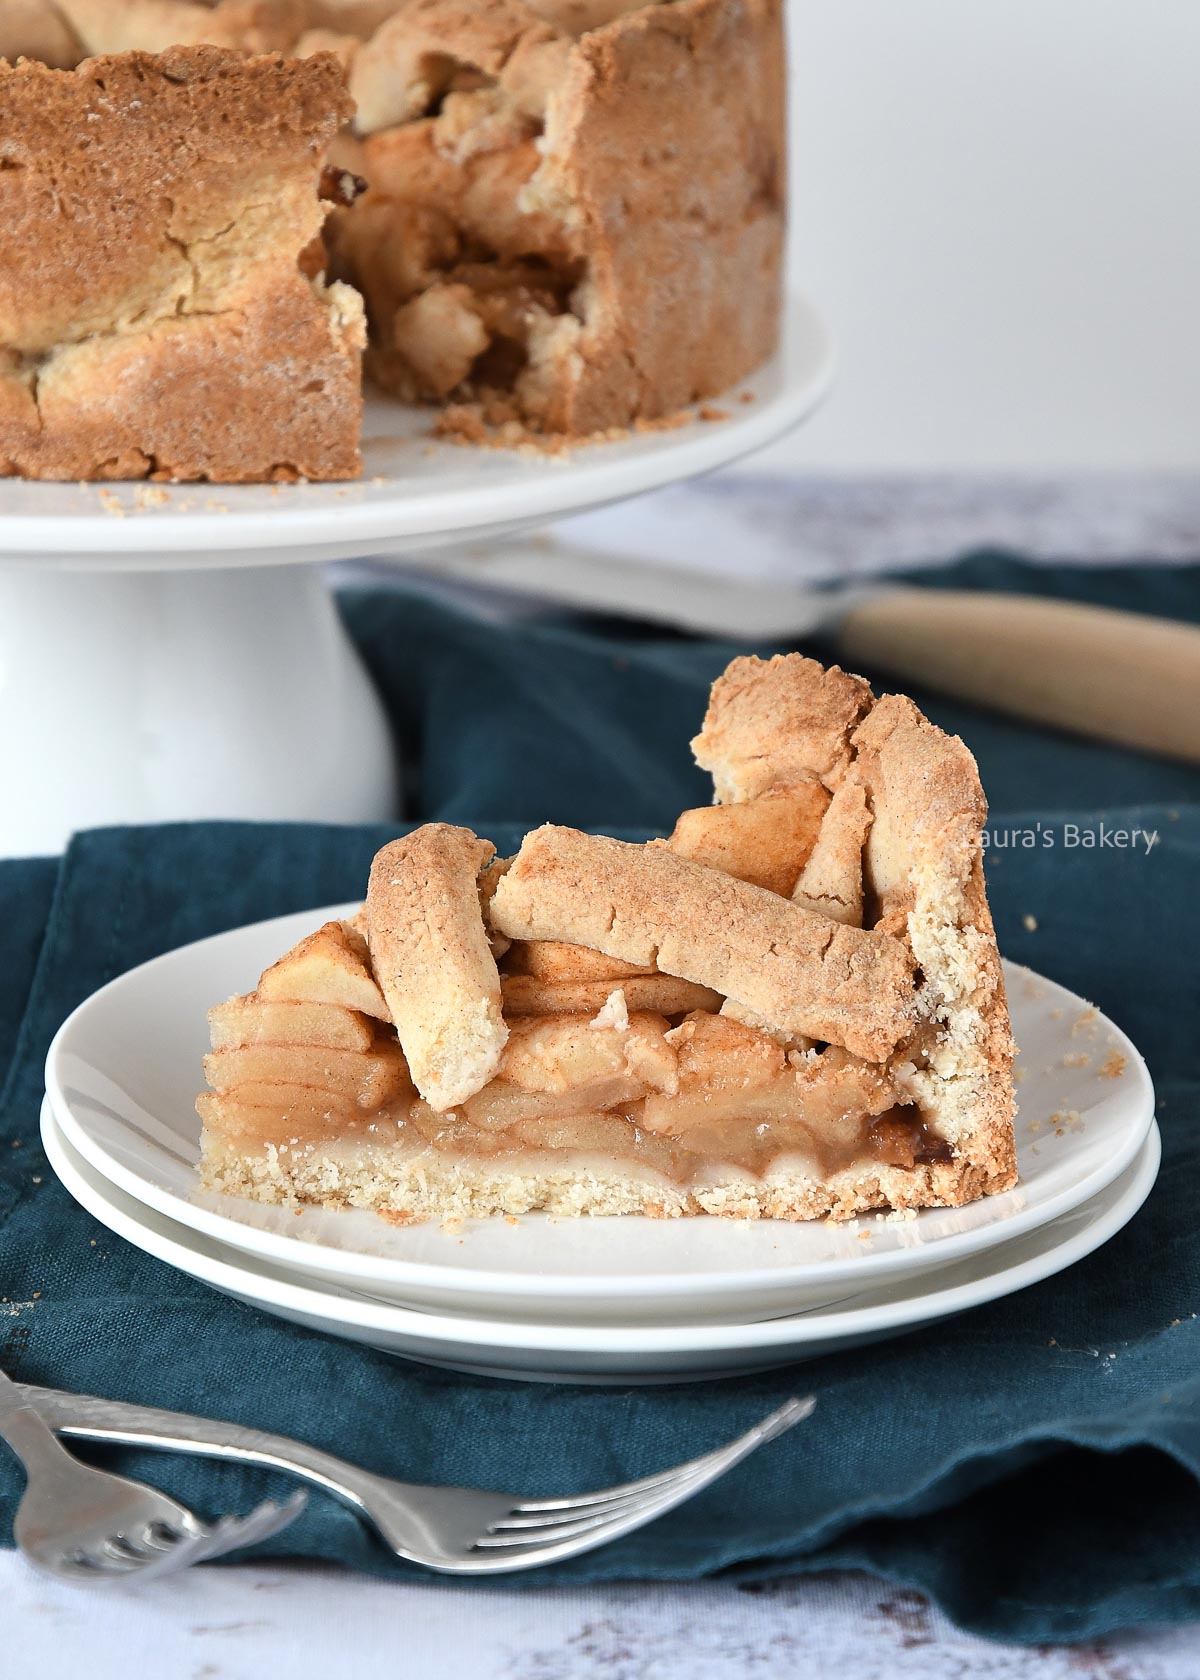
I had been toying with the idea of making a gluten-free version of one of my favorites apple desserts for a while. The traditional Dutch apple pie is my all-time favorite, as you probably know, and I wanted to share a delicious gluten-free version with you as well.

We tested a few different versions; one with plant-based butter and one with ‘real’ butter. Both were delicious and a great replacement for a classic apple pie.

Why You’ll Love This Recipe

If you’re looking for a delicious gluten-free Dutch apple pie recipe you’ve come to the right place. When served to some of my friends, the verdict was unanimous. Everyone loved it!

Recipe Ingredients

  • rice flour – for using gluten-free flour, I went for the majority with rice flour but I also used buckwheat flour and tapioca. Tapioca can also be replaced with arrowroot flour. Don’t skip this as it serves as a binding agent in the apple pie.
  • butter – as mentioned you can replace this with margarine or another plant-based butter if you want it lactose free
  • egg
  • psyllium husk – psyllium husk absorbs a lot of water, making it ideal to hold the apple pie together
  • apples – I used about 6 large Elstar apples, but you can use any kind of tart apple (like Granny Smith apples) you like.
  • raisins – I love using raisins to absorb the extra apple liquid. If you don’t like raisins you can replace it with bread crumbs.
Gluten-free Dutch apple pie-3

How To Make The Gluten-Free Dutch Apple Pie

Your first step is to make the dough. Simply combine all the ingredients for the crust into a large bowl and knead until you have a firm dough. You don’t really need a food processor for doing this. Wrap in plastic foil and let it rest in the fridge for a bit while you prepare the apples.

Peel the apples, clean them and dice. Mix the apple with the raisins, cinnamon and the sugar and set aside.

Take the dough out of the fridge and divide it into three parts. One part will be used for the bottom of the pie, one for the sides and one for the lattice top.

Prepare for baking

Prepare your springform pan with parchment paper and roll out the dough for the bottom. Press it into the pan and do the same for the sides. Make sure to close the seams together firmly.

Now spoon the apple filling onto the pie dough and spread the sliced apples evenly over the form. Press it down gently. This will help the apple pie filling stay together when you slice into it later.

Use the rest of the dough to make your lattice top. Use a little egg wash to brush the top of the pie and bake in the oven for about 70 minutes or until golden brown.

Storing Gluten-Free Apple Pie

You can store this delicious gluten-free apple pie for 4-5 days. Covered with aluminum foil outside of the fridge.

Freezing is also a good option and it will keep for 3 months if you do.

More Apple Recipes

I will soon be sharing more gluten-free recipes but for now I am sharing some more delicious apple pie flavored recipes below:

Gluten-free Dutch apple pie-2

FAQ Gluten-Free Dutch Apple Pie

Can I make this gluten-free apple pie dairy-free as well?

Yes! Simply replace the butter with a good-quality margarine or a plant-based butter alternative. The texture will be slightly different, but the flavor stays delicious.

Which apples are best for gluten-free apple pie?

Tart apples like Elstar, Granny Smith or Jonagold work beautifully because they keep their shape and balance out the sweetness of the filling. Sweeter apples tend to become mushy when baked.

Can I make the dough ahead of time?

Definitely. You can prepare the dough a day in advance and keep it wrapped in plastic in the fridge. Just let it sit at room temperature for 10-15 minutes before rolling it out.

Can I freeze gluten-free apple pie?

Yes, both baked and unbaked versions freeze well. Wrap the pie tightly in plastic wrap and foil. Baked pie can be frozen for up to 3 months. Reheat it in the oven until warm and crisp again.

Why did my gluten-free crust turn out crumbly?

That usually means the dough didn’t have enough moisture or wasn’t kneaded long enough for the psyllium husk to activate. Add a little extra cold water (a teaspoon at a time) next time until the dough comes together smoothly.

Can I use a different gluten-free flour mix?

Yes, as long as your mix contains a combination of starch and whole grain flours (like rice flour, tapioca starch, and buckwheat). Keep in mind that every flour blend behaves differently, so you may need to adjust the water slightly.

How do I prevent the pie from getting soggy?

Make sure to press the apple filling down firmly and avoid adding excess liquid. You can also sprinkle a thin layer of almond flour or (gluten-free!) breadcrumbs on the bottom crust before adding the filling to absorb any juices. The raisins also help.


Gluten-free Dutch apple pie

Print Recipe

No votes yet

Gluten-Free Dutch Apple Pie

This delicious version of a classic Dutch apple pie is completely gluten-free and can easily be made lactose-free as well
Preparation15 minutes
Cooking1 hour 10 minutes
Total1 hour 25 minutes
Servings: 12 people

Equipment

  • 9.5 inch/24 cm springform pan

Ingredients

Crust

  • 230 grams white rice flour
  • 70 grams buckwheat flour
  • 30 grams tapioca flour
  • 175 grams cold unsalted butter (or margarine for lactose-free)
  • 1 egg
  • 1 tbsp psyllium husk
  • 4 tbsp cold water
  • 150 grams white caster sugar
  • Pinch salt

Filling

  • 6 large Elstar apples or other tart apples
  • 100 grams raisins
  • ½ tbsp cinnamon
  • 50 grams granulated sugar

Extra

  • 1 egg for brushing the top

Instructions

  • Start by making the dough. Combine all the crust ingredients in a bowl and knead until a firm dough forms. Let it rest in the refrigerator for a bit.
  • Meanwhile, prepare the filling. Peel and core the apples, then slice or dice them. Mix with the raisins, cinnamon, and sugar, and set aside.
  • Take the dough out of the fridge and divide it into three parts: one for the bottom, one for the sides, and one for the lattice top.
  • Line your springform pan with parchment paper. Roll out the bottom portion of dough and press it into the pan. Do the same for the sides, pressing the seams together firmly.
  • Spoon the apple mixture into the crust and press it down evenly. This helps the pie hold together when sliced later.
  • Use the remaining dough to make a lattice top.
  • Beat the extra egg and brush it over the top of the pie.
  • Bake the apple pie for 70 minutes at 350°F/180˚C (conventional oven).
  • Let the pie cool in the pan before slicing.
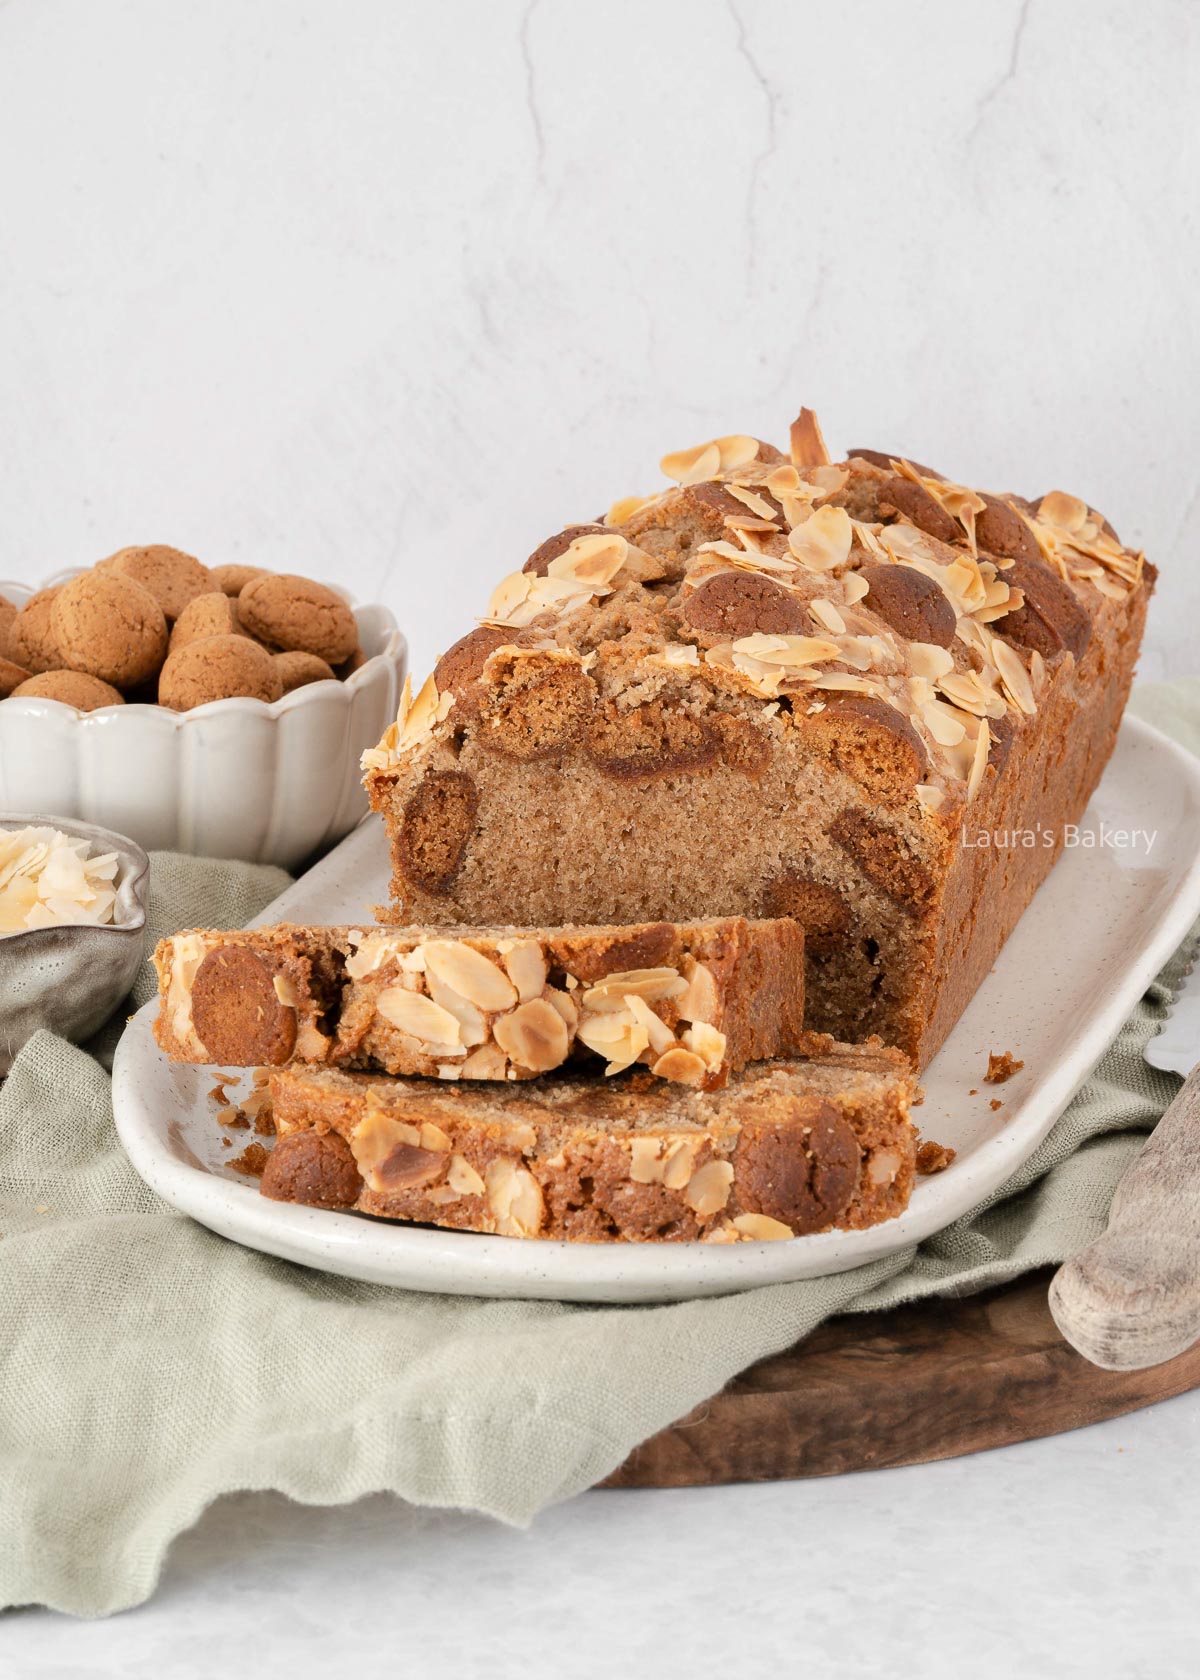
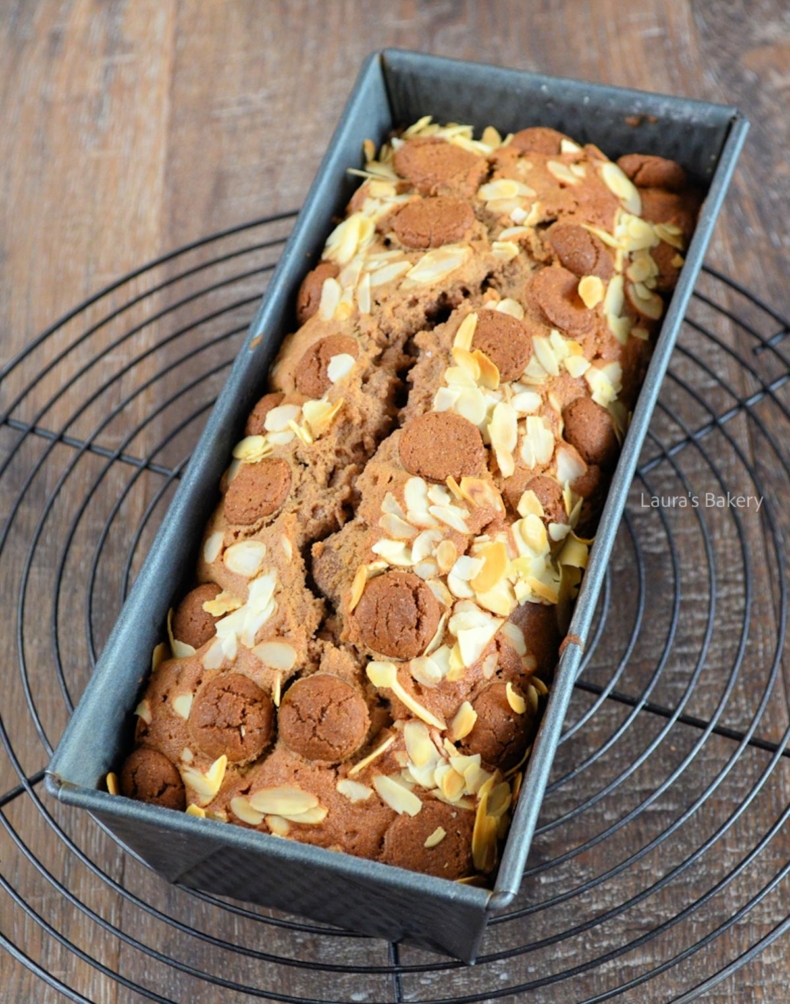
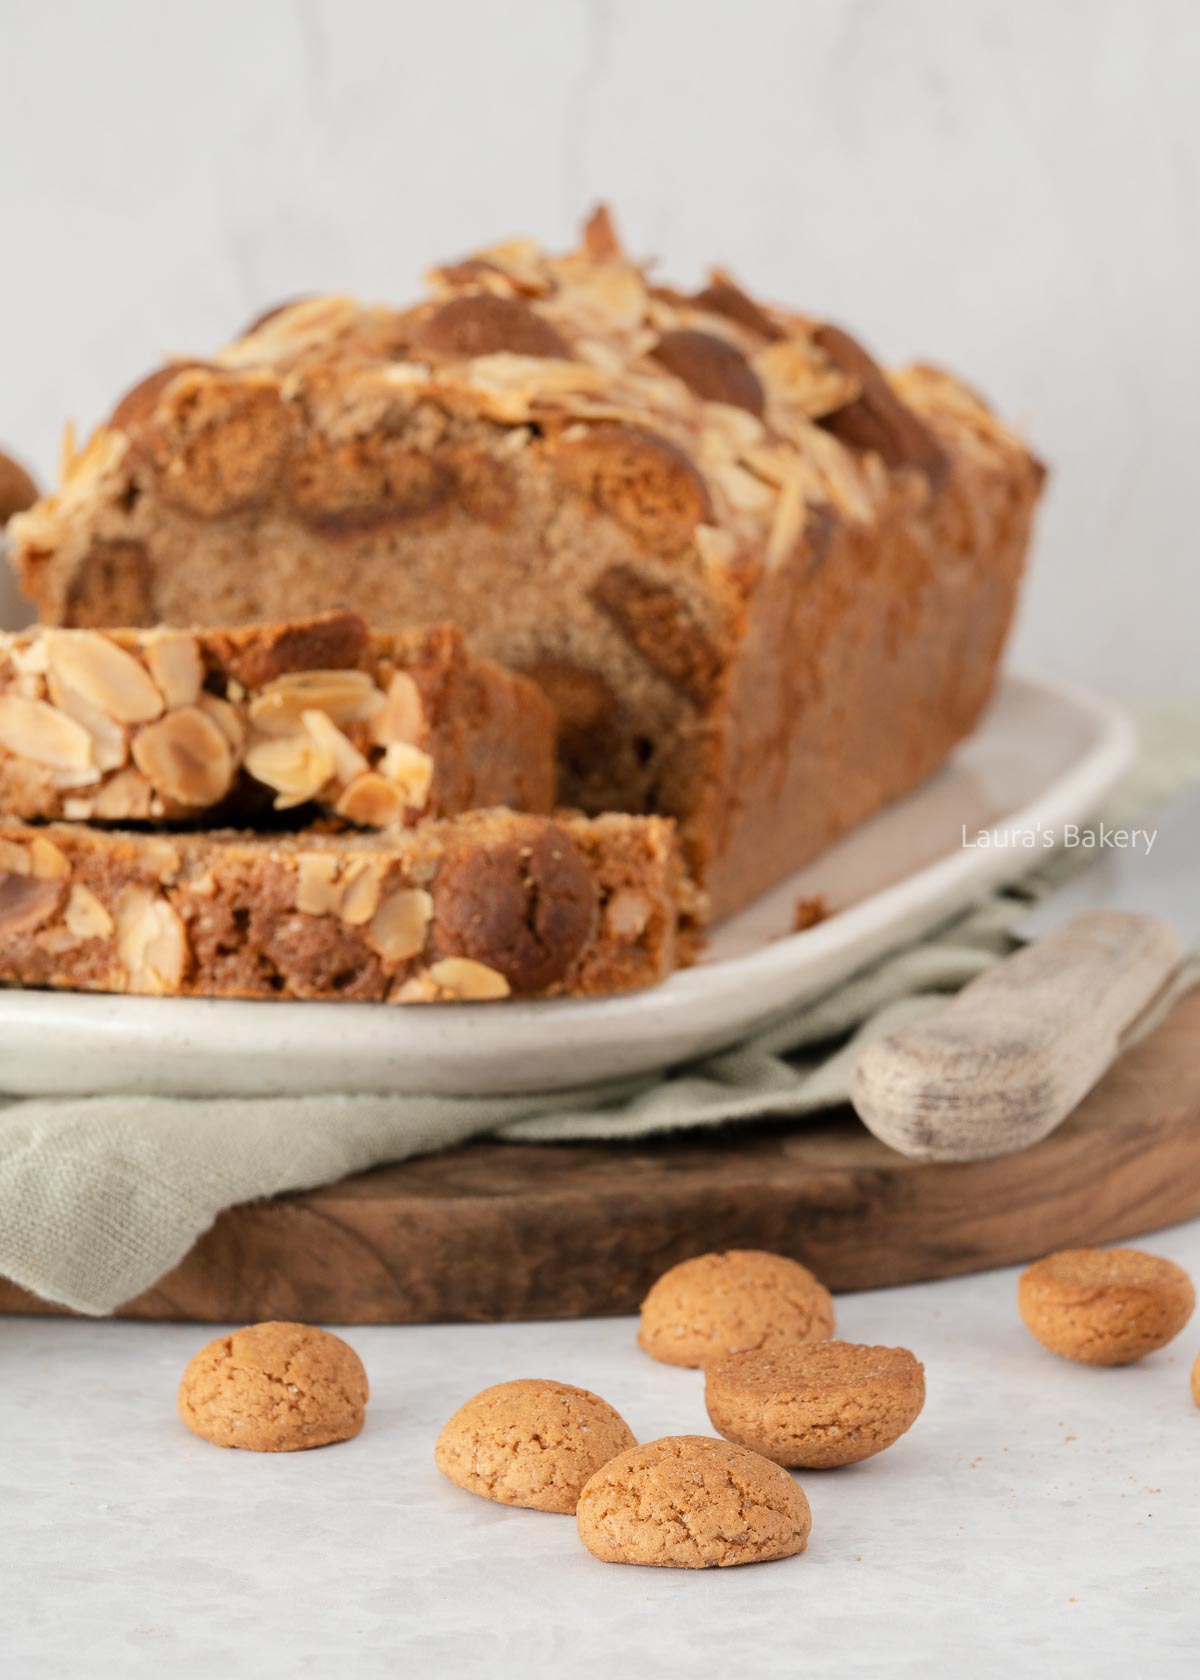
Dutch pepernoten loaf cake-1

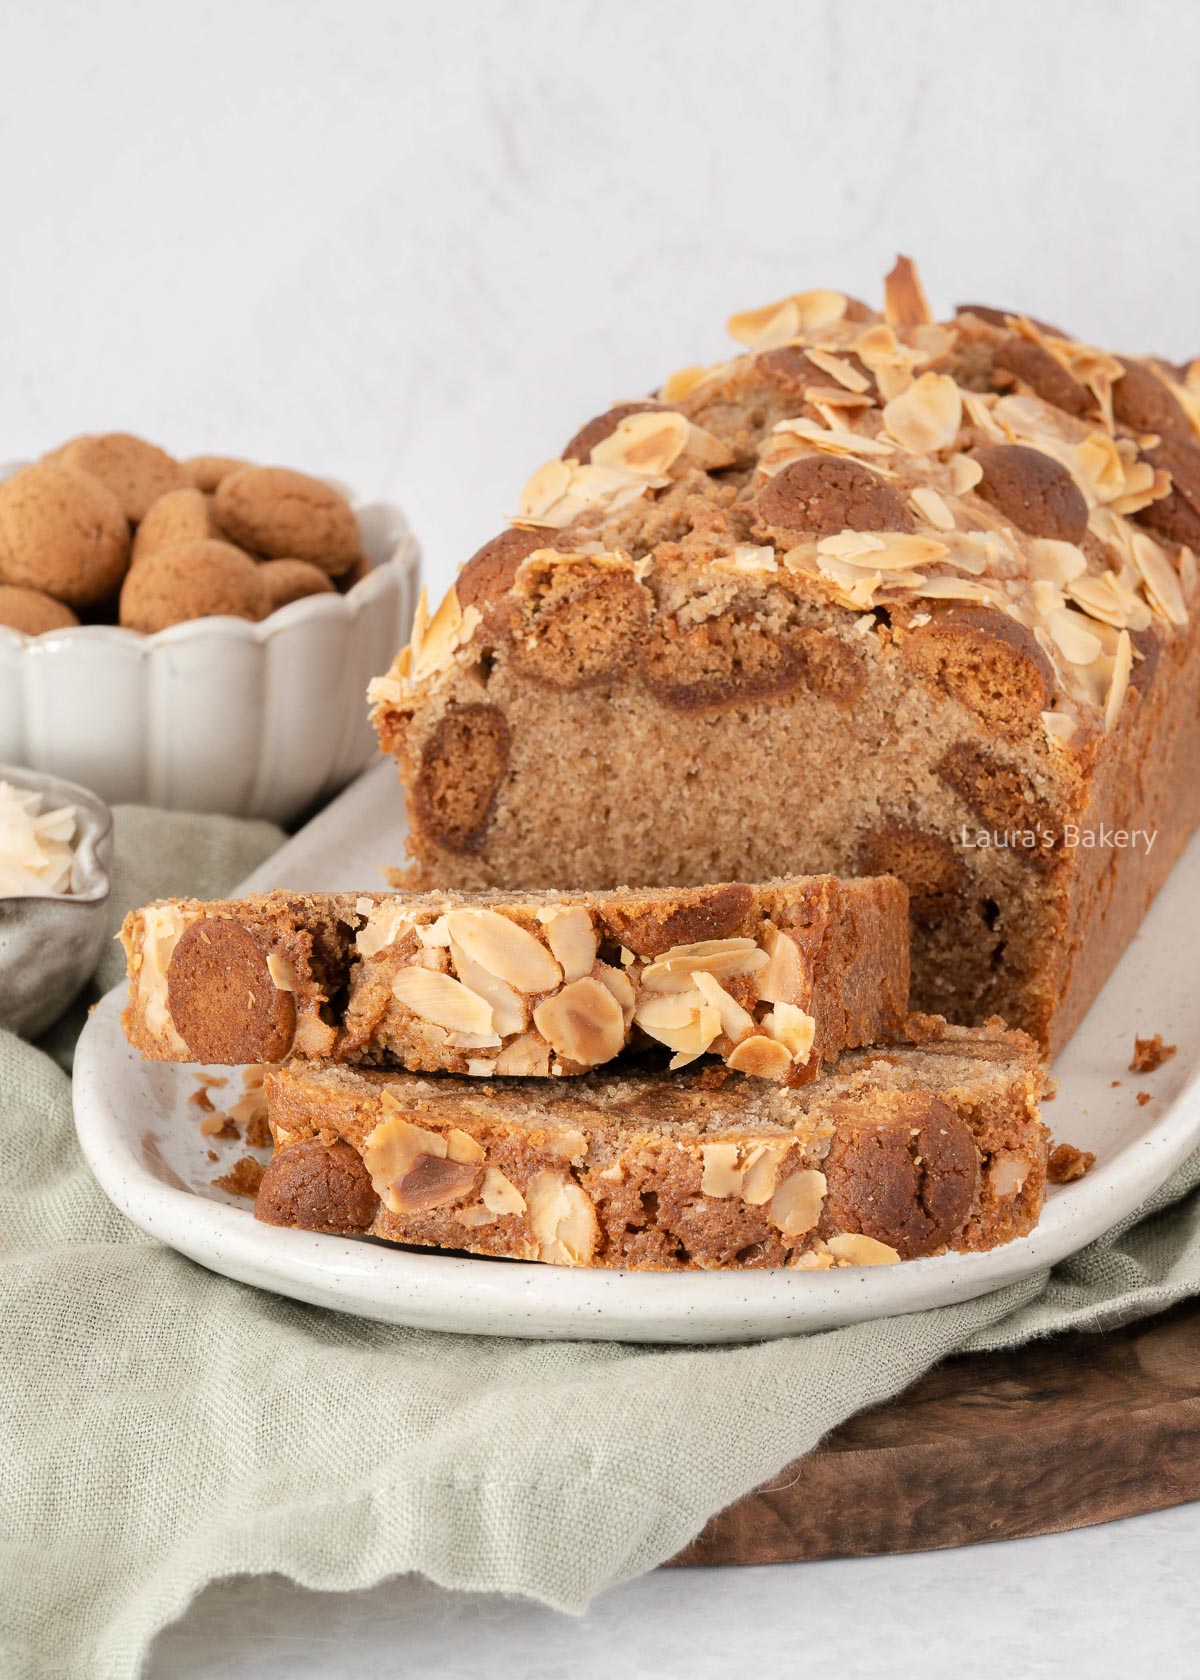
Are you ready for a simple yet incredibly delicious holiday bake? Then you’re going to love this Dutch pepernoten loaf cake. This cozy, spiced cake brings all the warm Sinterklaas vibes straight into your kitchen.

Sinterklaas is a traditional Dutch holiday and somewhat similar to Santa Claus although definitely not the same.

Why this recipe works

This cake is based on my classic vanilla cake recipe, but with a festive twist. A few small additions like warm speculaas spices (similar to pumpkin pie spice) and crunchy Dutch spiced cookies (also known as pepernoten) turn it into a true holiday favorite.

A splash of milk keeps the texture light and moist because the cookies absorb some of the moisture as the cake bakes.

Baking tip: Invest in a sturdy rectangular loaf pan. A good one will last for years and is a must-have in every baker’s kitchen.

What Are Pepernoten (Dutch Spiced Cookies)?

In the Netherlands, these tiny cookies are a holiday favorite. It’s an easy recipe and one of my favorite Dutch recipes for sure. They’re crisp, bite-sized, and full of delicious spices. Think of them as a cross between ginger snaps and speculoos cookies.

Traditionally, they’re tossed into gift bags or scattered around for kids during Sinterklaas celebrations, but they’re also wonderful to bake with.

If you can’t find authentic kruidnoten or pepernoten, don’t worry, you can easily substitute them with ginger snaps or Biscoff cookies. The flavor and texture will be similar. The key is to use crunchy cookies.

Dutch pepernoten loaf cake-2

Recipe Ingredients

  • unsalted butter – Use a good-quality butter for best flavor.
  • granulated sugar
  • vanilla sugar – Or 1 tsp vanilla extract.
  • eggs – Medium-sized.
  • self-rising flour
  • speculaas spice mix – Or use pumpkin pie spice as an alternative.
  • milk – Keeps the cake soft and moist.
  • pepernoten or spiced cookies – want to try using traditional Dutch pepernoten cookies? Make them yourself with this original recipe.

Expert tip

When the cake first comes out of the oven, the cookies on top are wonderfully crisp. As it cools and you store it, they’ll soften slightly. This is perfectly normal and gives the cake that signature chewy texture.

Other Fun Loaf Cake Recipes

I love baking loaf cakes and below are a fun other great examples. Make sure to check all cake recipes here.


How To Make Dutch Pepernoten Loaf Cake

How to make Dutch pepernoten loaf cake
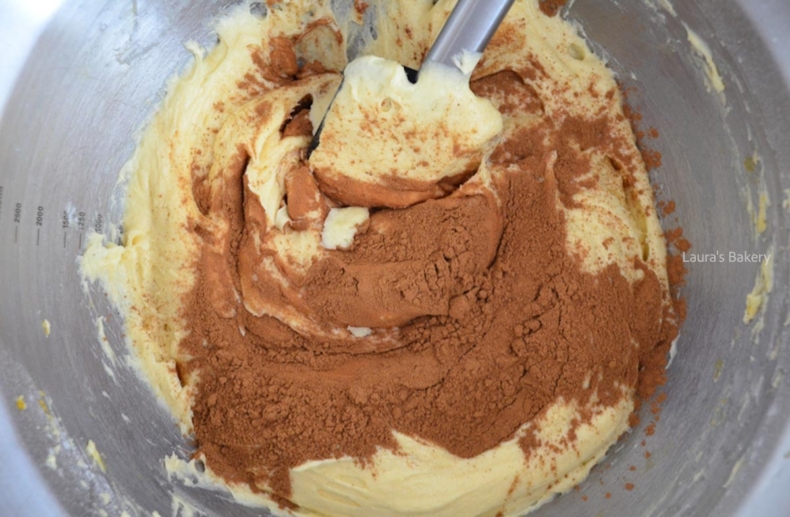
1

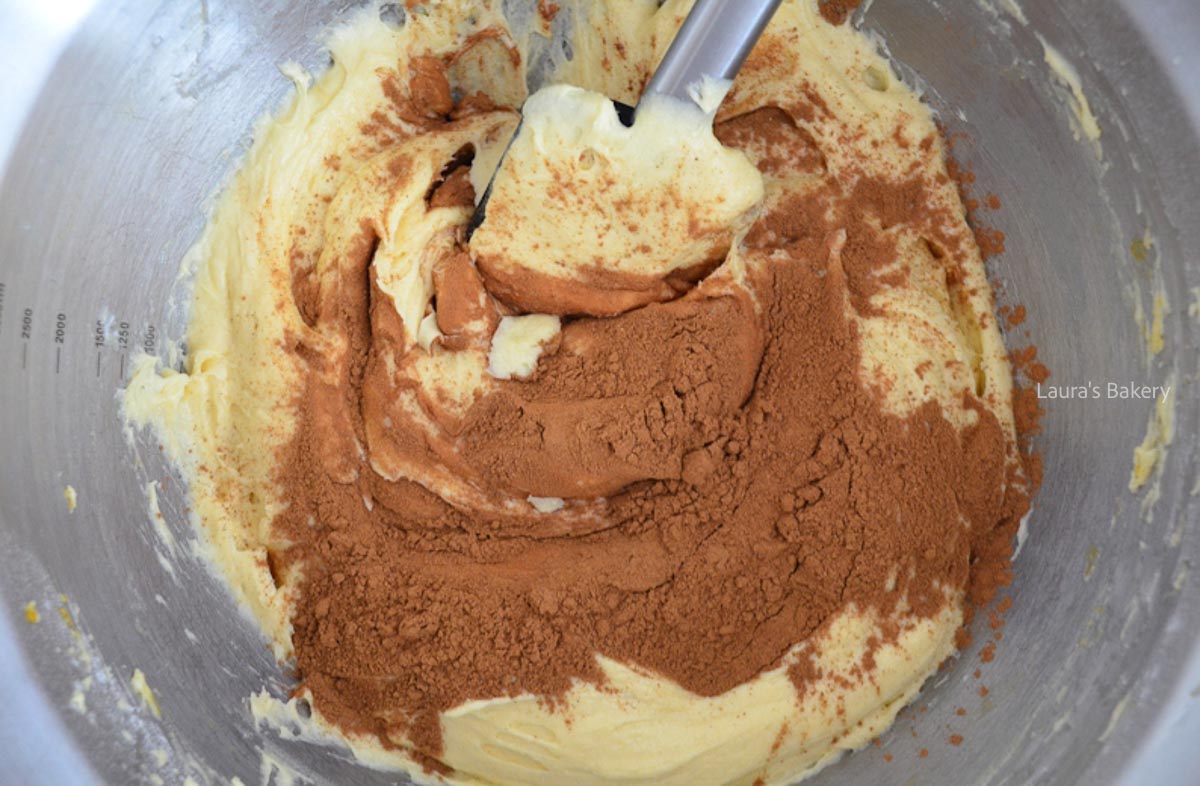
Make a batter by combining all the ingredients in the order mentioned

Open lightbox for image about Make a batter by combining all the ingredients in the order mentioned
How to make Dutch pepernoten loaf cake
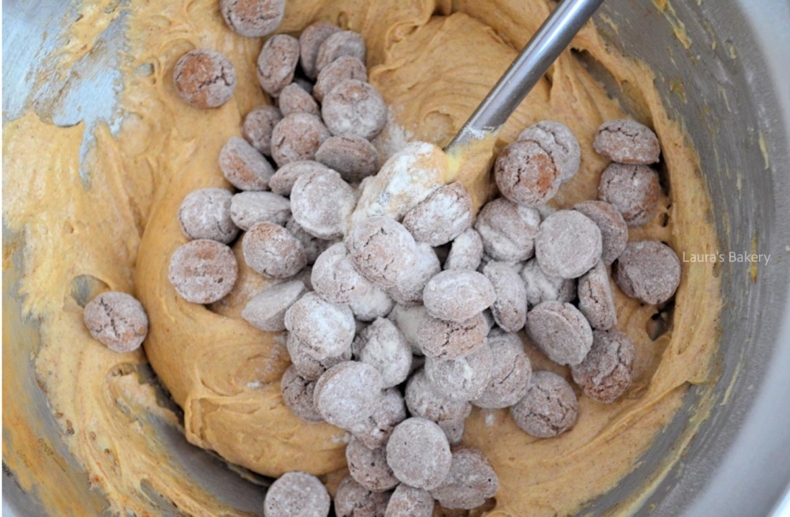
2

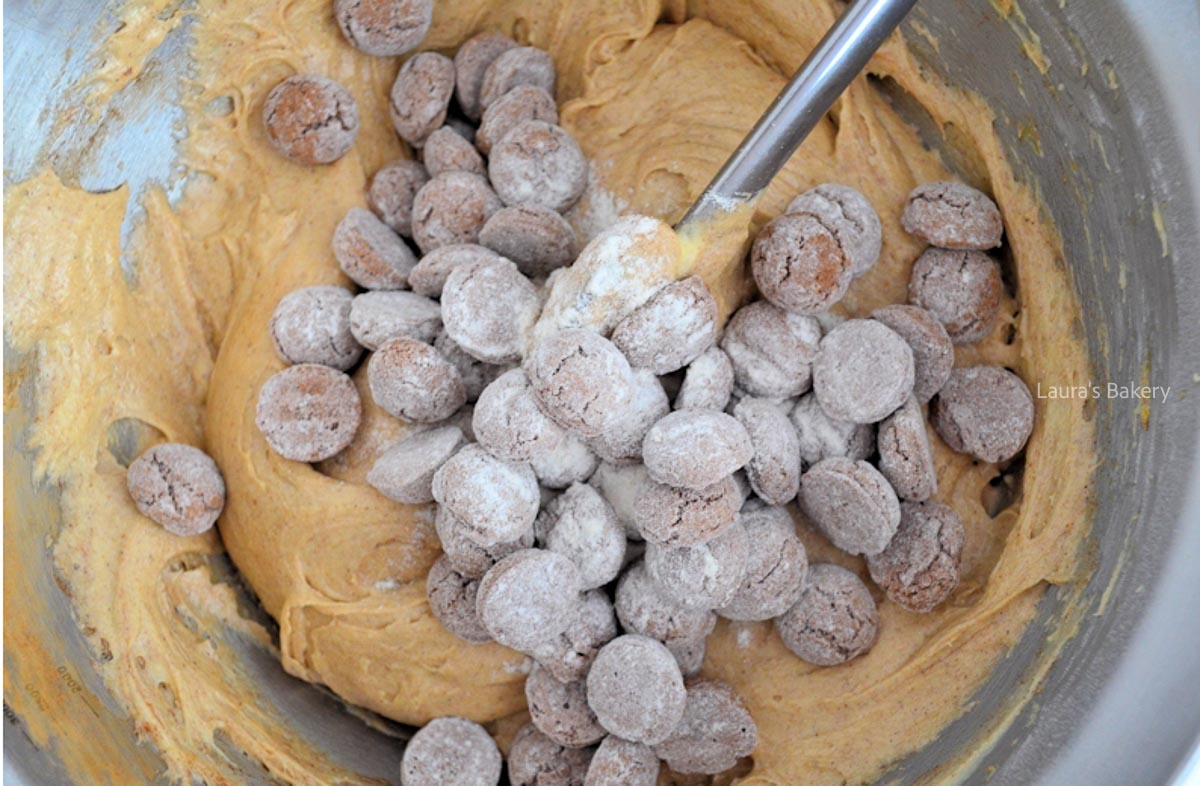
Dust the pepernoten with a bit of flour before adding them to the batter

Open lightbox for image about Dust the pepernoten with a bit of flour before adding them to the batter
How to make Dutch pepernoten loaf cake
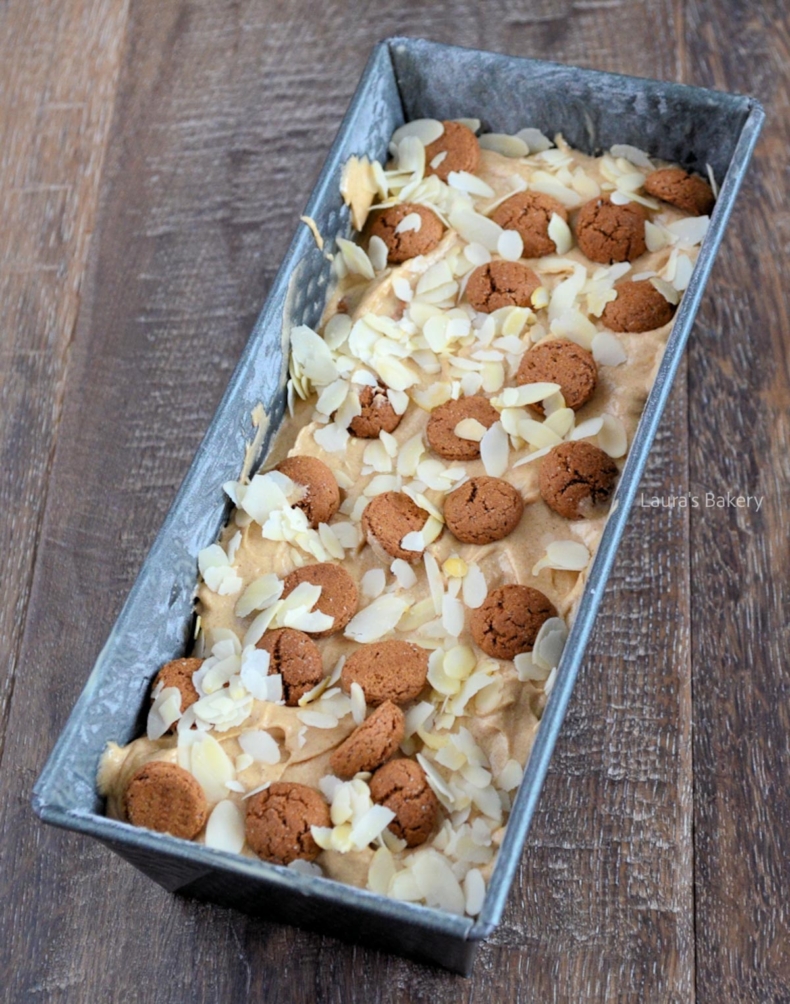
3

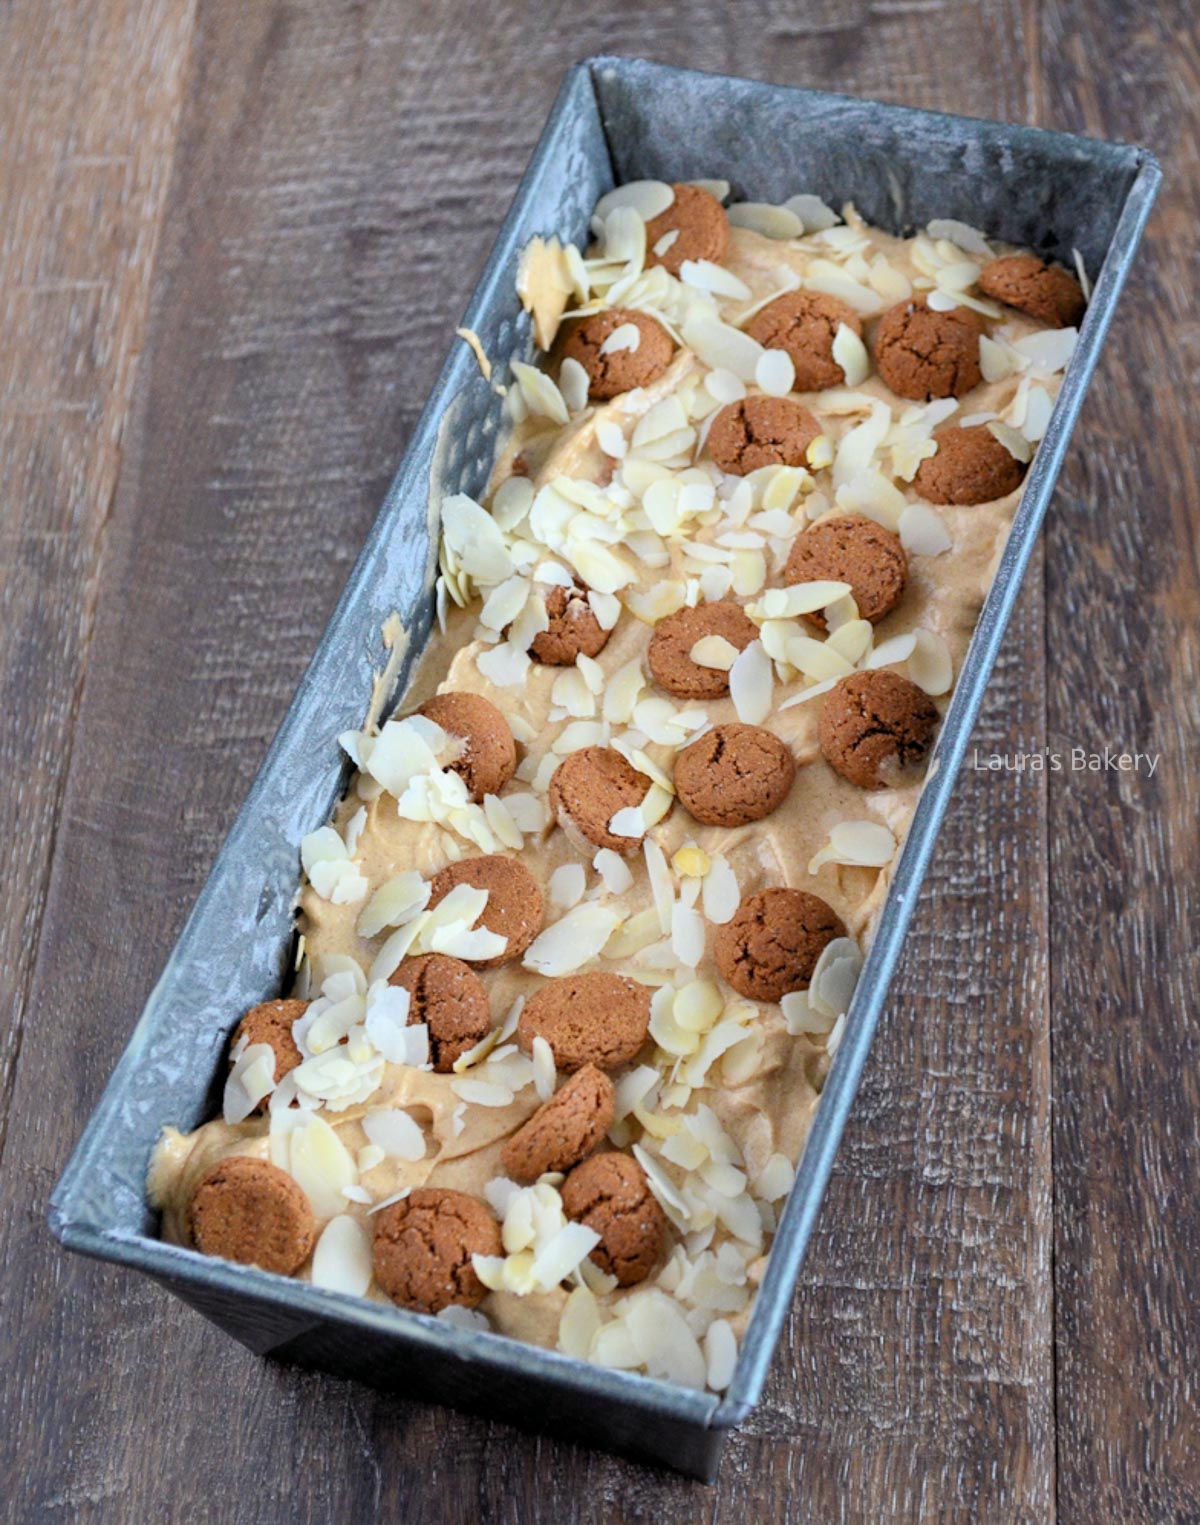
Add the batter into the loaf tin and sprinkle some additional pepernoten and almonds over the top

Open lightbox for image about Add the batter into the loaf tin and sprinkle some additional pepernoten and almonds over the top
1/4

FAQ Dutch Pepernoten Loaf Cake

How do I keep the cookies from sinking to the bottom?

Toss them in a little flour before folding them into the batter. This helps the batter “grip” the cookies so they stay evenly distributed.

Can I make this cake without the cookies?

Yes! Simply leave out the milk as well and follow the rest of the recipe as written.

Can I bake cupcakes with this recipe?

Absolutely. You will need a shorter baking time if you do. Bake at 350°F/180°C for about 20 minutes.

Can I use chocolate-covered pepernoten?

Yes, just keep in mind that chocolate pepernoten are heavier, so you’ll need a bit more by weight to get the same amount.

Storage

Wrap the cooled cake in aluminum foil or store it in an airtight container. It will stay fresh for up to a week at room temperature. In the freezer, it keeps up to 3 months.

Dutch pepernoten loaf cake-4


Dutch pepernoten loaf cake

Print Recipe

No votes yet

Dutch Pepernoten Loaf Cake

This Dutch Pepernoten Loaf cake is perfect for this time of year and so delicous. Filled with crunchy pepernoten cookies.
Preparation15 minutes
Cooking1 hour
Total1 hour 15 minutes
Servings: 12 people

Equipment

  • Loaf tin 25 cm/10 inch

Ingredients

  • 200 grams unsalted butter room temperature
  • 200 grams granulated sugar
  • 1 tsp vanilla extract
  • 4 medium eggs
  • 200 grams self-rising flour
  • 2 tsp baking powder
  • 4 tsp speculaas spice mix or pumpkin spice
  • 50 ml milk
  • 100 grams pepernoten cookies or similar
  • Optional: extra cookies and sliced almonds for topping.

Instructions

  • Preheat your oven to 340°F/170˚C (conventional oven) and prepare your loaf pan (10-inch/25 cm) by greasing and dusting it with flour.
  • Cream together the butter, sugar, and vanilla until light and fluffy.
  • Add the eggs one at a time, mixing well after each addition.
  • In a separate bowl, combine the self-rising flour, salt, and spices.
  • Alternate adding the flour mixture and milk to the batter until everything is smooth and well combined.
  • Toss the cookies lightly in a little flour, then gently fold them into the batter. This keeps them from sinking.
  • Pour the batter into the loaf pan and smooth the top. Sprinkle extra cookies and sliced almonds on top if you like a festive finish.
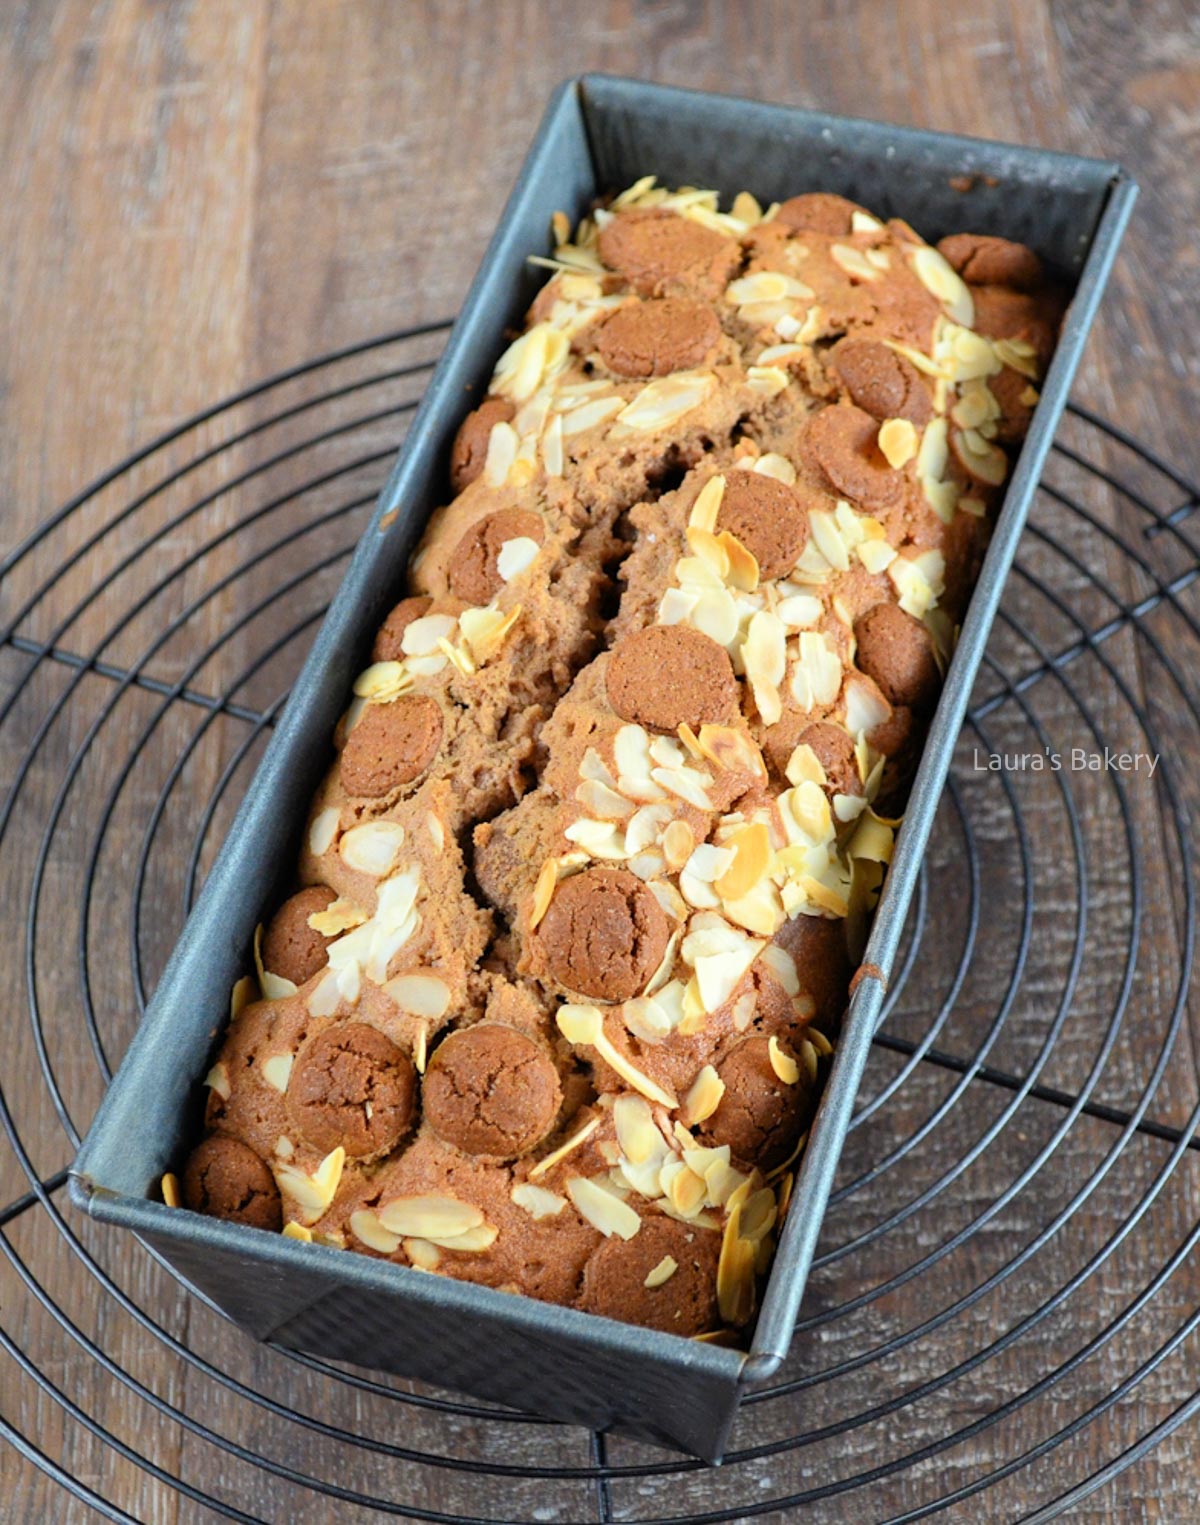
  • Bake for about 60 minutes, or until a toothpick inserted in the center comes out clean.
  • Cool the cake in the pan for a few minutes, then transfer it to a wire rack to cool completely.
Almond muffins with speculaas kruiden-2

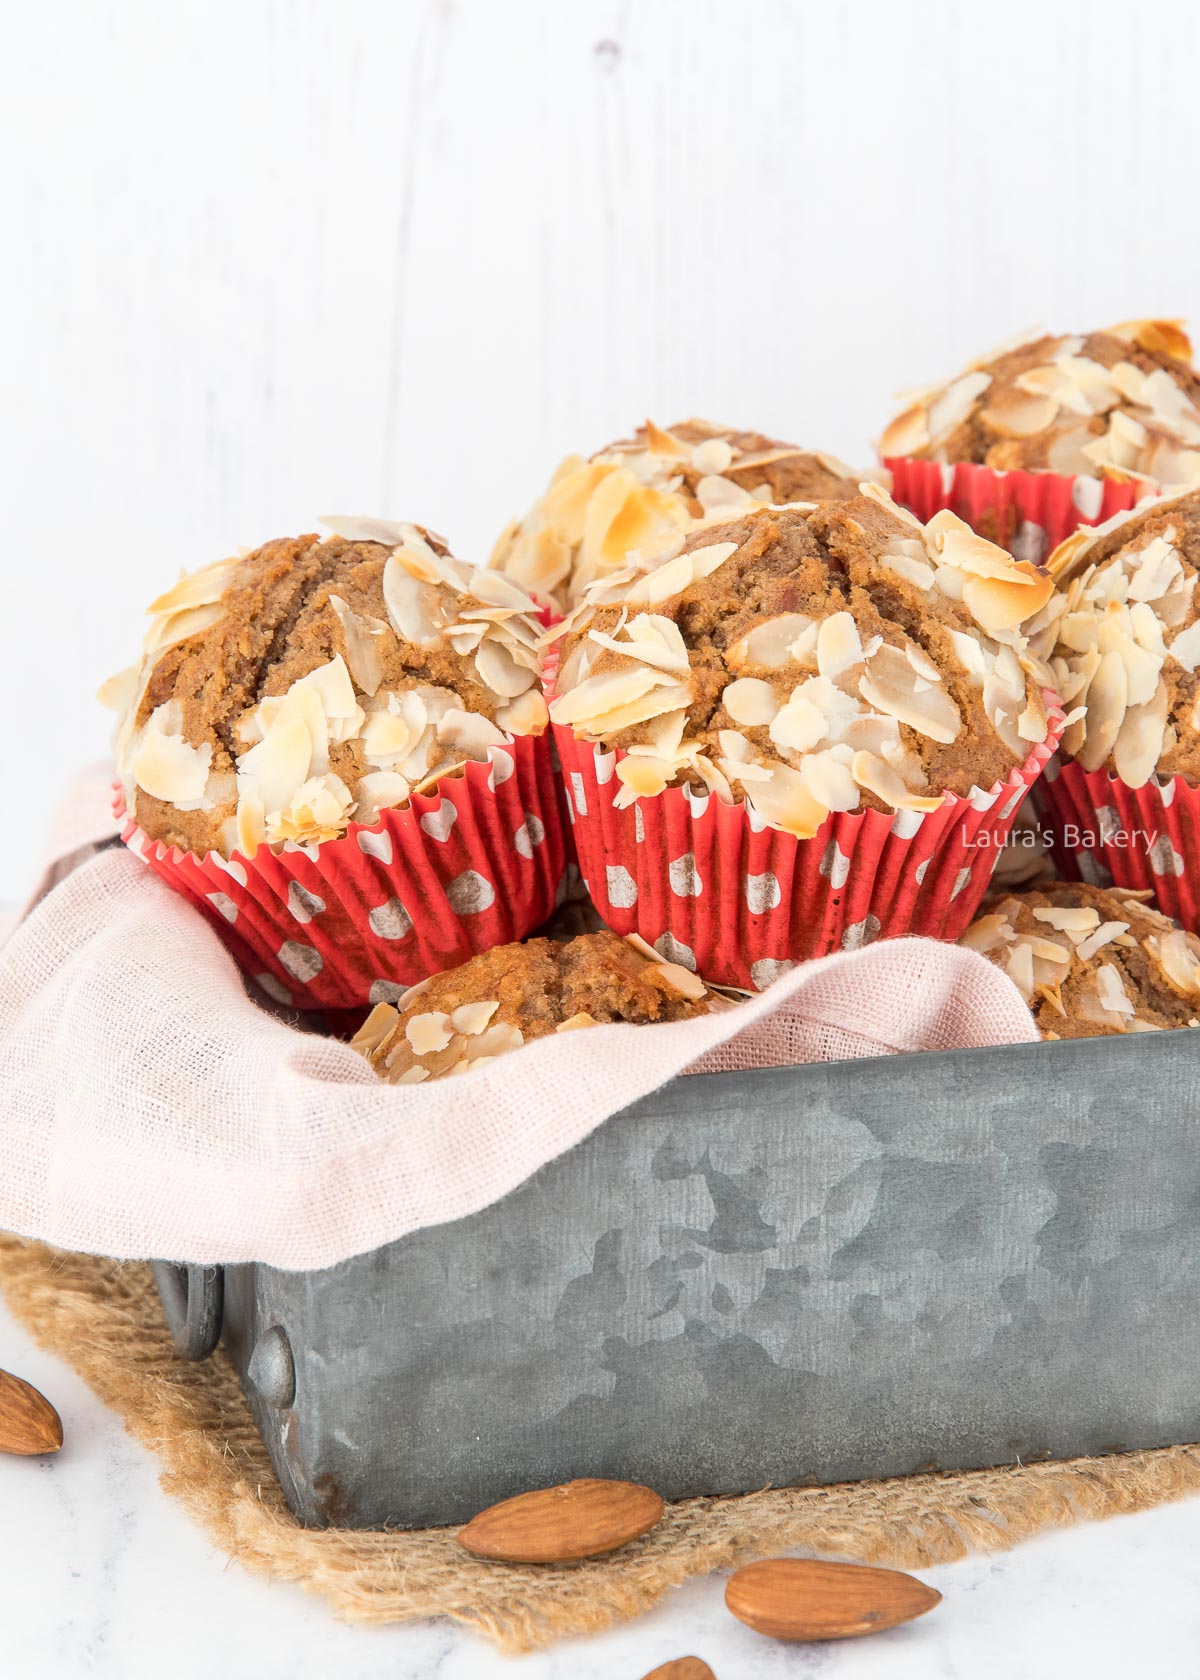
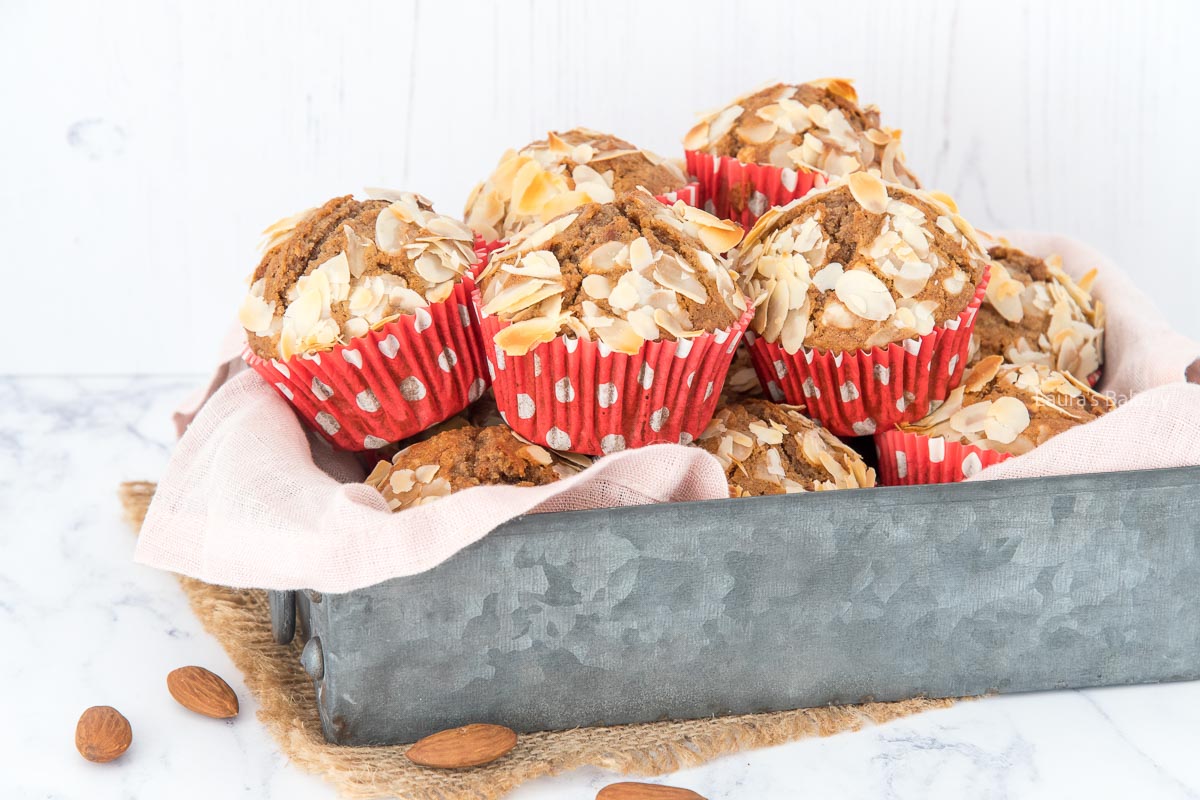
When fall arrives, I can’t resist adding warm speculaas spices to nearly every bake I make. These Almond Spice Muffins are one of my favorites for the cozy season.

They’re soft, full of flavor, and have the perfect balance of sweet spices and nutty almonds. Around the holidays, especially during the Sinterklaas holiday season in the Netherlands, these muffins are always a hit, but honestly, they’re delicious any time of year. Nothing better than the smell of speculaaskruiden when baking in the oven!

Why This Recipe Works

These muffins are simple to make but taste as if you spent all afternoon in the kitchen. The almond flour adds a soft, tender crumb, while the speculaas spices bring that cozy flavor of cinnamon, cloves, and nutmeg.

A touch of almond extract brings out the nuttiness, and the crunchy almond flakes on top give each muffin a little extra texture. The combination of spice, sweetness, and crunch makes these irresistible.

Recipe Ingredients

  • almond flour – I love the flavor of almond flour and in these easy almond muffins, it is the highlight.
  • all-purpose flour – the combination with regular flour ensures that they rise properly and are fluffy and delicious once baked
  • sugar – I used regular granulated sugar but you can also use brown sugar if you prefer
  • speculaas spice mix – you can make your own spice mix or use pumpkin pie spices as an alternative.
  • vegetable oil – I use sunflower oil for this recipe, but you can use any other kind of neutral vegetable oil you want
  • cookies – these speculaas muffins are extra delicious if you add some speculaas cookies (or Biscoff cookies) in the batter. Speculaas cookies are a traditional Dutch pastry but can be made yourself with this easy speculaas recipe.

Make sure to double-check the quantities in the recipe card below, which includes all the ingredients.

Almond muffins with speculaas kruiden-1

How To Make Almond Muffins with Speculaas Spices

Making these easy almond muffins you will need a muffin pan or muffin mold to bake them.

Start by adding the all the dry ingredients to a large bowl. Use another bowl to add the wet ingredients and mix them together. You can use a food processor, but to be honest, you don’t really need one as the batter is very easy to mix.

Simply fold it together with a spatula until just combined. It’s totally ok if the flour mixture is not super smooth.

Now you add the cookie pieces and the chopped almonds and mix it together so it is evenly distributed in the batter.

Divide the batter over the muffin tin (using cupcake liners) and bake in the preheated oven for about 20 minutes or until a wooden skewer comes out clean when inserted.

Expert Tip

For an extra crunch, sprinkle a few extra cookie pieces on top before baking. They toast beautifully in the oven and add a delicious bite to every muffin.

You’ll need a cupcake or muffin pan for this recipe. I like using the Wilton nonstick pan, it’s durable, easy to clean, and gives perfect results every time.

FAQ Almond Muffins with Speculaas Spices

How long do these muffins keep?

Store them in an airtight container at room temperature for 4-5 days.

Can I freeze them?

Yes! Let the muffins cool completely, then freeze them in a sealed container or freezer bag for up to 3 months. Thaw at room temperature before serving.

Can I make them ahead of time?

Definitely. These muffins taste just as good the next day and are perfect for breakfast, a cozy snack, or to share with friends.


Almond muffins with speculaas

Print Recipe

No votes yet

Almond Muffins with Speculaas Spices

Perfect for the holiday season are these easy almond muffins. They will fill the house with a delicious smell when they’re in the oven!
Preparation10 minutes
Cooking20 minutes
Total30 minutes
Servings: 12 muffins

Equipment

  • Muffin tin
  • Paper liners

Ingredients

  • 120 grams fine granulated sugar
  • 200 grams all-purpose flour
  • 100 grams almond flour
  • 1 tsp baking powder
  • 1 tsp baking soda
  • Pinch salt
  • 3 tsp speculaas spice mix (or pumpkin pie spice as an alternative)
  • 2 medium eggs
  • 250 ml milk
  • 120 ml vegetable oil (such as sunflower or canola)
  • 1-2 tsp almond extract
  • 100 grams spiced cookie pieces (Biscoff or speculaas cookies work well)
  • 75 grams finely chopped almonds
  • Sliced almonds for topping

Instructions

  • Preheat your oven to 400°F/200°C (conventional oven) and line a 12-cup muffin pan with paper liners.
  • In a large bowl, mix together the sugar, flour, almond flour, baking powder, baking soda, salt, and speculaas spices.
  • In a separate bowl, whisk the eggs, milk, oil, and almond extract until smooth.
  • Pour the wet ingredients into the dry ingredients. Gently fold together with a spatula until just combined. It’s fine if the batter is a little lumpy.
  • Fold in the cookie pieces and chopped almonds until evenly distributed.
  • Divide the batter among the muffin cups, filling them almost to the top. Sprinkle with sliced almonds for a pretty finish.
  • Bake for 20 minutes, or until golden brown and a toothpick inserted in the center comes out clean.
  • Let the muffins cool in the pan for 5 minutes, then transfer them to a wire rack to cool completely.
Bacon cheddar scones-1

Scones are usually sweet, but you can make savory scones too! One of my all-time favorites: bacon cheddar scones!

Homemade Savory Scones

I’m a huge fan of scones and love making them almost every weekend. When I bake a batch, I usually freeze them in pairs so I can just thaw and reheat them later for a quick and delicious breakfast (or lunch!).

Up till now I’ve shared a few of my favorite scones recipes here, but those were all sweet. Such as the gingerbread sconeslemon and rosemary scones (with just a hint of savory) and traditional English scones. But savory scones are a big favorite around here too and today I have a delicious flavor variation for you. Scones with bacon and cheddar!

Why You’ll Love This Recipe

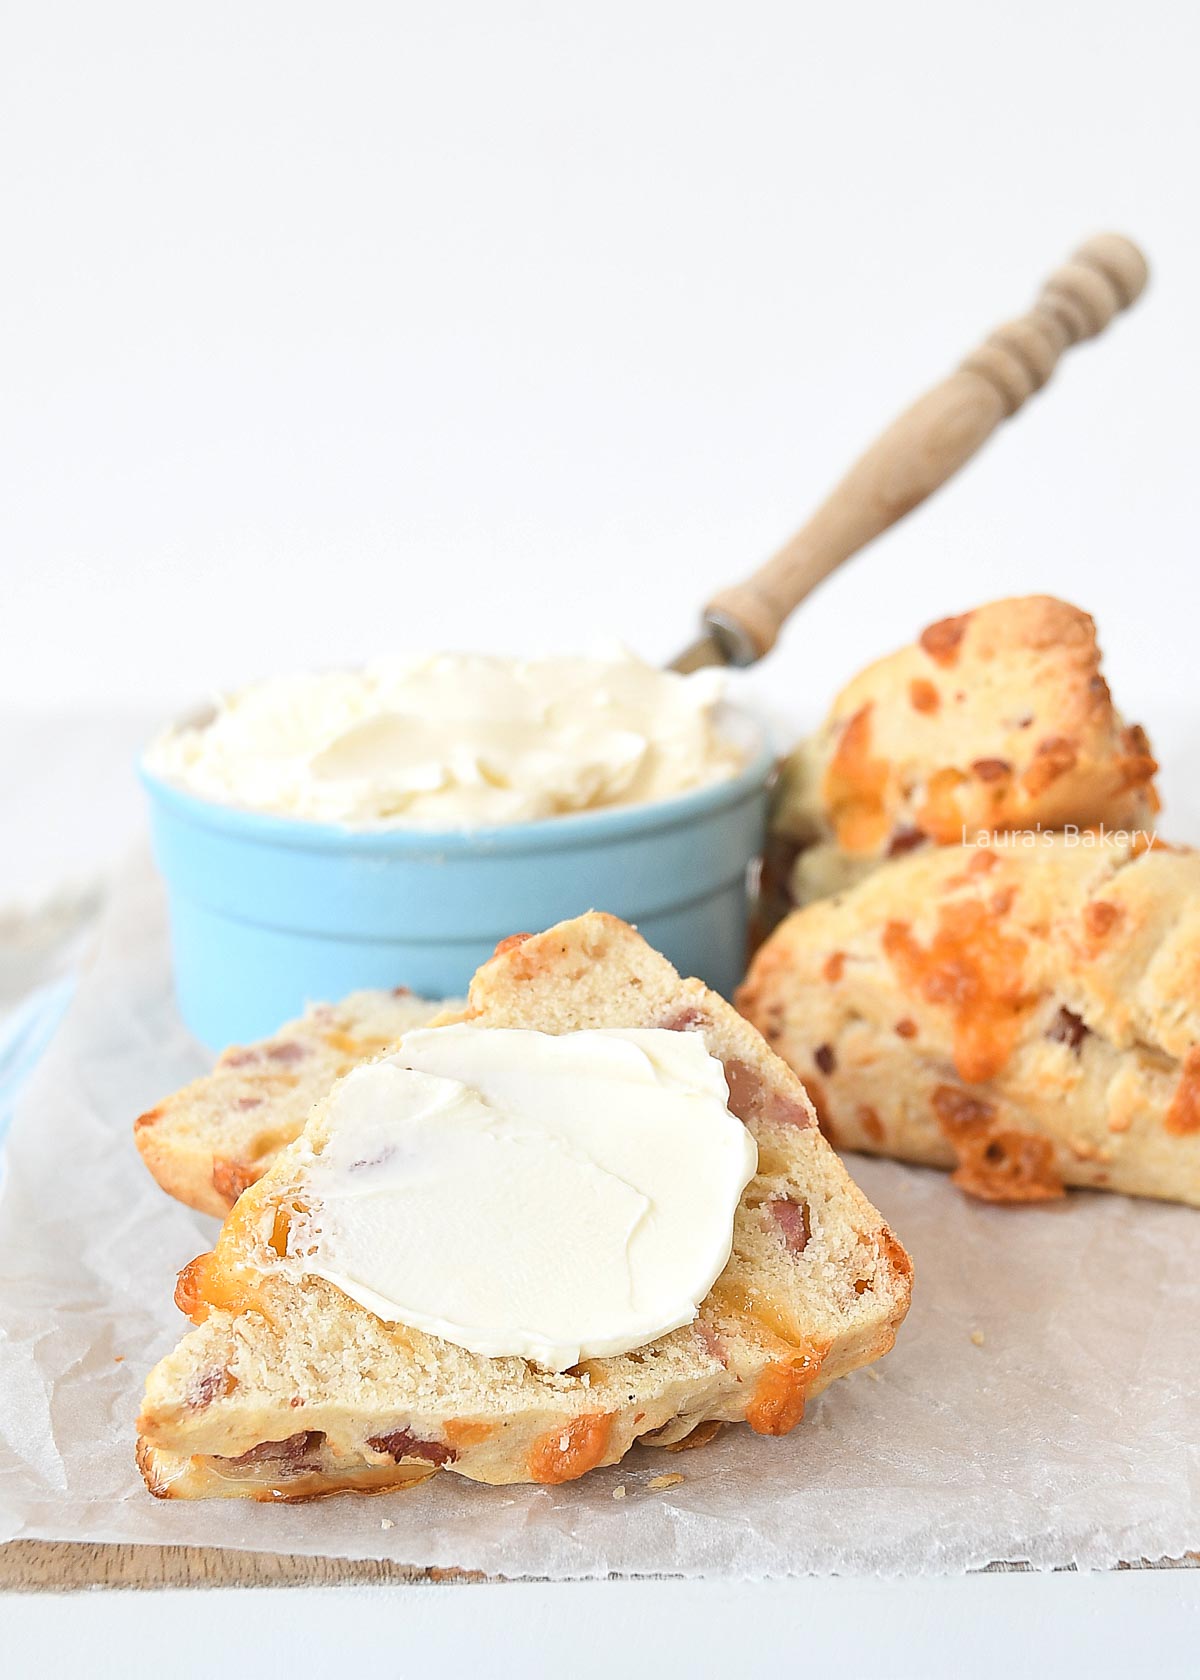
The crumbly texture of these delicious and yet easy bacon cheddar scones is something you will want to try. Serve them with cream cheese, fresh herbs and extra crispy bacon on top.

Recipe Ingredients

  • self-rising flour – you will need a little more than 2 cups. Alternatively you can use all-purpose flour with baking powder. Check this post to see how to substitute.
  • butter – I always use unsalted butter. Make sure it is cold butter
  • bacon – you can use the bacon as it is or you can crisp the bacon first and than add it to the dough
  • cheddar – I like using a sharp cheddar cheese as that gives extra flavor but you can use other types of grated cheese as well

Check the full ingredients and quantities in the recipe card below

Bacon cheddar scones-2

How To Make Bacon Cheddar Scones

Start by using a large bowl and combine the dry ingredients (flour, salt and pepper) into the bowl. Mix it together. Next add the butter in cubes and, using the tip of your fingers, work the butter through the flour mixture. Make sure you have a crumbly mixture. Add the chopped bacon and the cheddar as well and mix it through.

Next you add the milk and stir this through with a spatula until it becomes a dough. At that point you start kneading the dough with your hands into a firm dough ball. Alternatively you can use a food processor, but because the kneading is fairly quick I find it easier to use my hands.

Flatten the dough into a round disk and cut into wedges with a pastry cutter or a sharp knife. For this savory scone recipe I chose to cut it into wedges but if you prefer you can also turn them into a round shape like regular scones.

Now place the scones on a prepared baking sheet and brush them with a little milk. I tend to use milk instead of egg wash for brushing the tops.

Next bake the scones for about 12 to 15 minutes or until lightly golden brown. Let them cool slightly before serving with cream cheese.

More Scones Recipes

I can never get enough of scones, so check out the below easy scones recipes as well!

Bacon cheddar scones-3

FAQ Bacon Cheddar Scones

Can I make the dough ahead of time?

You can prepare the dough a few hours in advance and keep it covered in the fridge until you’re ready to bake. Just bring it back to room temperature before shaping and baking for the best rise.

Can I freeze the scones before baking?

Yes! Shape the dough into wedges and freeze them raw on a baking sheet. Once solid, transfer to a freezer bag. Bake straight from frozen, just add 2-3 minutes to the baking time.

Can I use a different type of cheese?

Definitely. Sharp cheddar gives the best flavor, but gouda, parmesan, or even pepper jack work really well too.

What can I serve these scones with?

They’re delicious on their own, but also great with cream cheese, butter or even a fried egg for a more filling breakfast or brunch.

Why did my scones turn out dense?

Make sure you don’t overwork the dough, mix it just until it comes together. Over-kneading can make the scones tough instead of soft and fluffy inside. Also make sure you indeed used self-rising flour.

How do I reheat frozen scones?

Let them thaw at room temperature, then warm them in the oven at 350°F/175°C for about 5-7 minutes until heated through.


Bacon cheddar scones

Print Recipe

No votes yet

Bacon Cheddar Scones Recipe

Delicious savory scones that are perfect as a breakfast or brunch dish
Preparation20 minutes
Cooking15 minutes
Total35 minutes
Servings: 8 scones

Ingredients

  • 275 grams self-rising flour
  • Pinch salt
  • Black pepper to taste
  • 40 grams unsalted butter
  • 50 grams cheddar cheese grated or cut into small pieces
  • 75 grams cooked bacon chopped
  • 150 ml milk I used low-fat, but whole milk works too

Instructions

  • In a bowl, combine the self-rising flour, salt and pepper. Stir together with a spatula.
  • Add the butter cubes and rub them into the flour with your fingertips until the mixture looks slightly crumbly.
  • Stir in the cheddar and bacon evenly.
  • Pour in the milk and mix with a spatula until the dough just comes together. Then use your hands to gently knead it into a firm ball of dough.
  • Flatten the dough into a round disk about 1½ inches (3-4 cm) thick. Cut the disk into 8 wedges with a sharp knife.
  • Place the scones on a baking sheet lined with parchment paper and brush the tops with a little milk.
  • Bake the savory scones for 12-15 minutes at 425°F/220°C (conventional oven), until lightly golden. Let cool slightly before serving.
  • I like to serve them with cream cheese, but there are plenty of other spreads and toppings that go perfectly with them!
Cantuccini -4

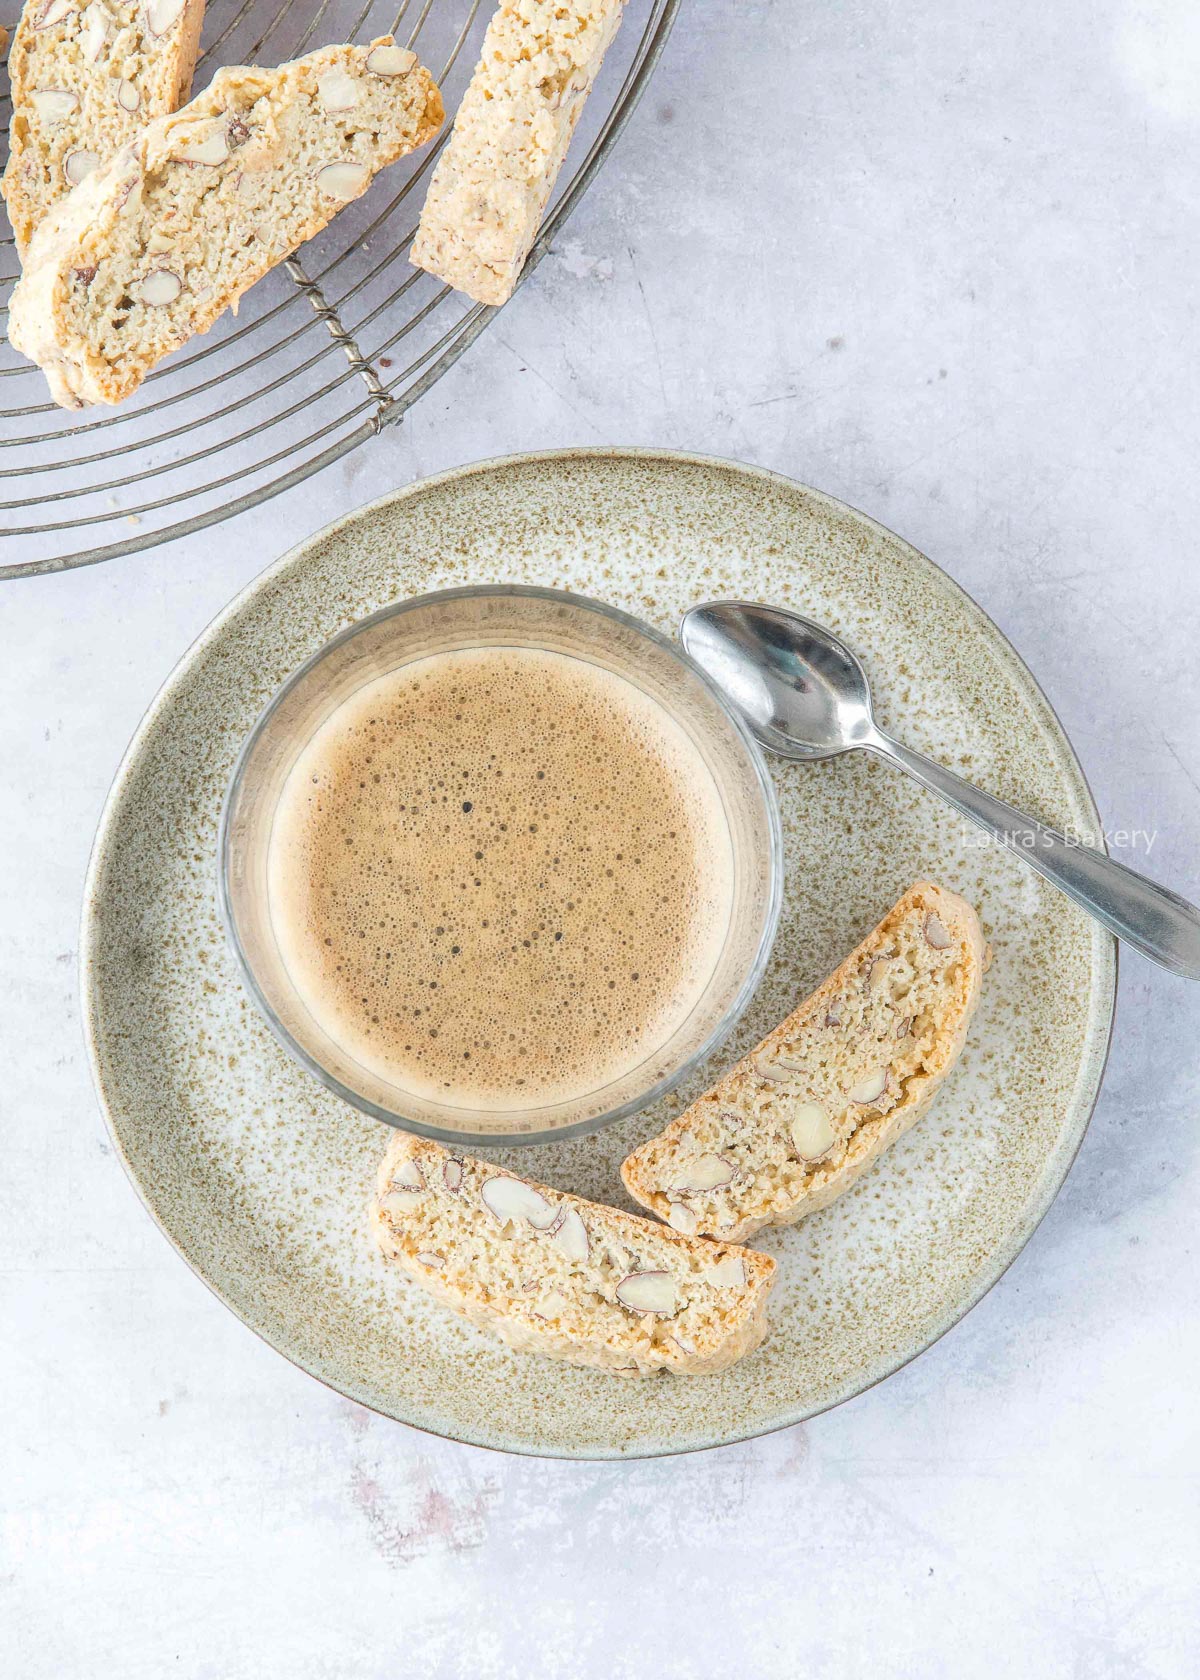
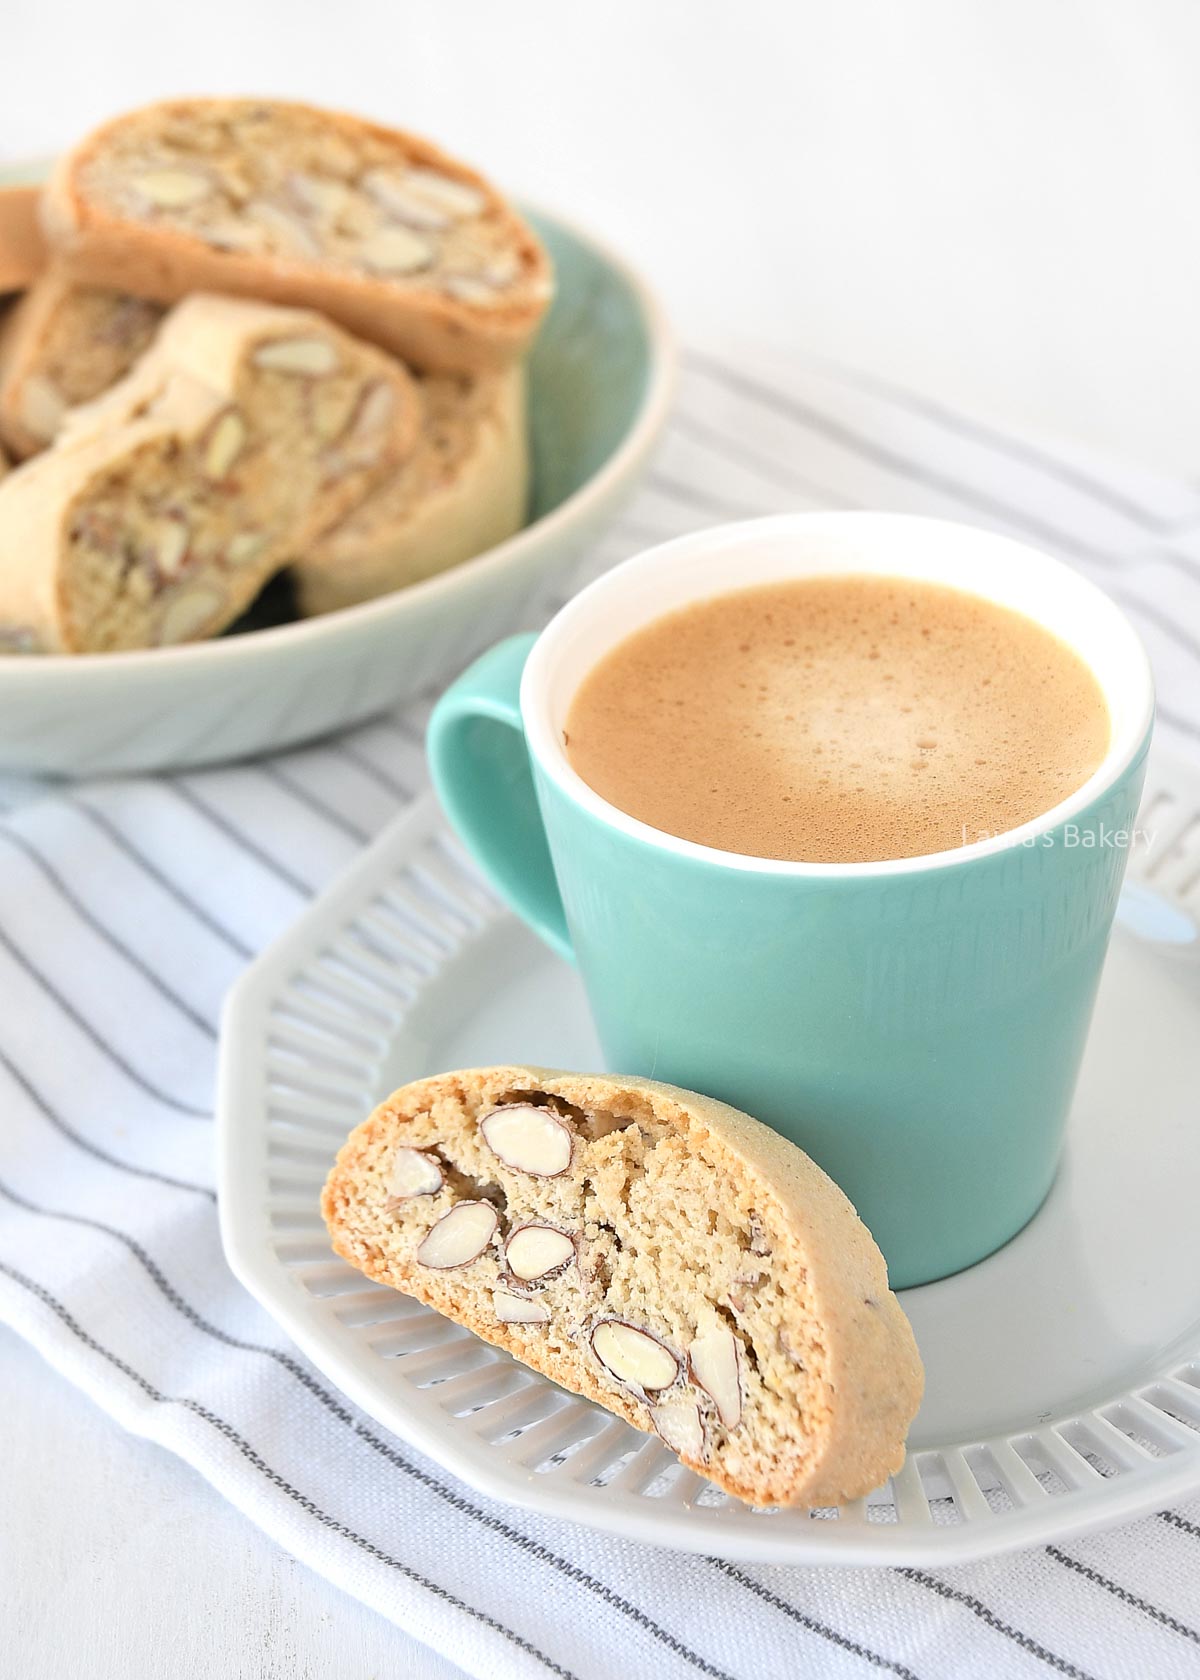
Cantuccini are Italian almond cookies that are baked twice. First, the dough is shaped into a log and baked, then it’s sliced and baked again. That’s what makes them so delicious. And with this recipe, you can easily make them yourself!

Why You’ll Love This Recipe

The recipe is simple, but it takes a bit more time than other cookies because you have to bake them twice. The result is amazing, try it yourself.

These cantuccini cookies are among my favorite Italian cookies. They’re perfect with your morning coffee or serve them for dessert with a glass of Vin Santo.

Recipe Ingredients

  • self-rising flour – if you do not have self-rising flour you can substitute for regular all-purpose flour, check how to substitute here.
  • granulated sugar – I think this is the best sugar to use for cantuccini
  • almonds – you can use whole almonds either with the skin or blanched almonds
  • eggs – medium size
  • vanilla extract

Make sure to double-check the recipe card for the full details and quantities below.

Cantuccini -5

How To Make Italian Cantuccini

The very first time I tried cantuccini, I had no idea what to expect. I took a big bite full of enthusiasm and nearly broke my teeth on the much-harder-than-expected cookie, oops. I definitely didn’t see that coming! These Italian cookies are anything but soft and crumbly.

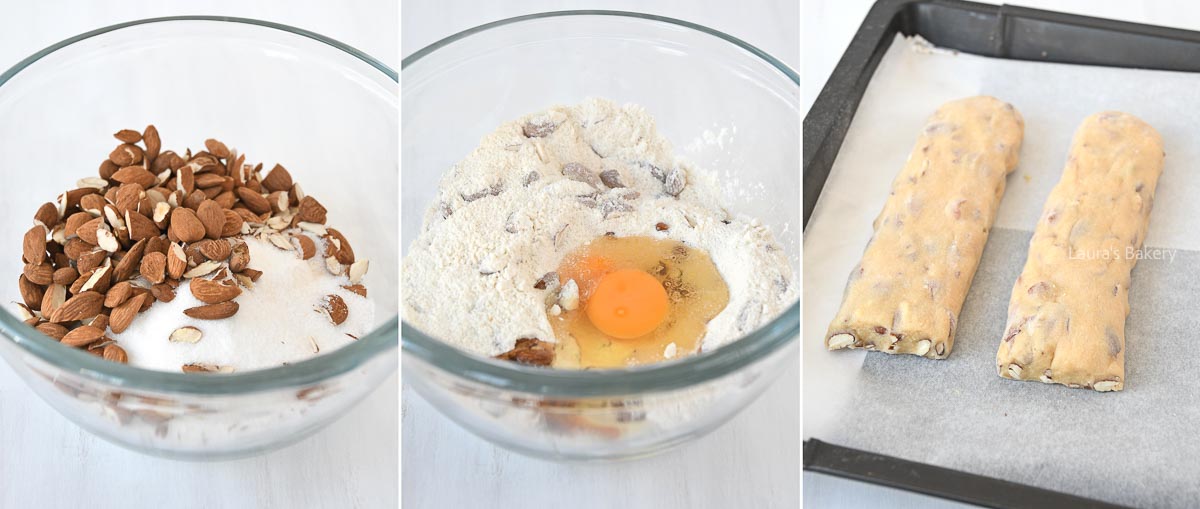
Making them is really quite easy. You start by making the dough. This is shaped into a log shape and pressed down slightly with the palm of your hand onto a baking sheet. It might be a little sticky but that’s ok.

After the first bake you want the logs to be a slightly golden color but not too dark. Taking them out of the oven you will want to slice them quickly or they will be too hard to cut. The reason cantuccini cookies are so hard is that they’re baked twice.  That double-baking method is exactly what makes these cookies so unique and traditionally Italian.

It’s no wonder that Italians usually dip them in liqueur, sweet wine or coffee before eating them. I personally like to just nibble on them as they are, but I do take small bites! 😉

Baking Tip: It’s important to use a very sharp knife to slice the pre-baked dough. If the dough is still a bit soft, let it rest for about 5 minutes before slicing – but don’t wait too long or it’ll be too hard to cut.

Cantuccini -3

What’s the Difference Between Cantuccini, Cantucci, and Biscotti?

We usually know these Italian almond cookies by the name cantuccini, but in Italy, they’re also often called biscotti or cantucci. The main difference between cantucci and cantuccini is the size: cantuccini are the smaller ones, and cantucci are the larger versions.

Biscotti is simply another word for the same cookies. The original name was Biscotti di Prato, named after a pastry chef called Prato, who rediscovered the recipe in the 16th century. The word biscotti comes from the Latin biscotus, which means “twice baked.”

Later, the name changed to cantucci or cantuccini, derived from the Latin word cantellus, meaning “little slice of bread.”

More Italian Recipes

I have a real soft spot for Italian food and I don’t think I’m alone in that! I could easily eat something Italian every single day, and I’m not just talking about pizza. 😉
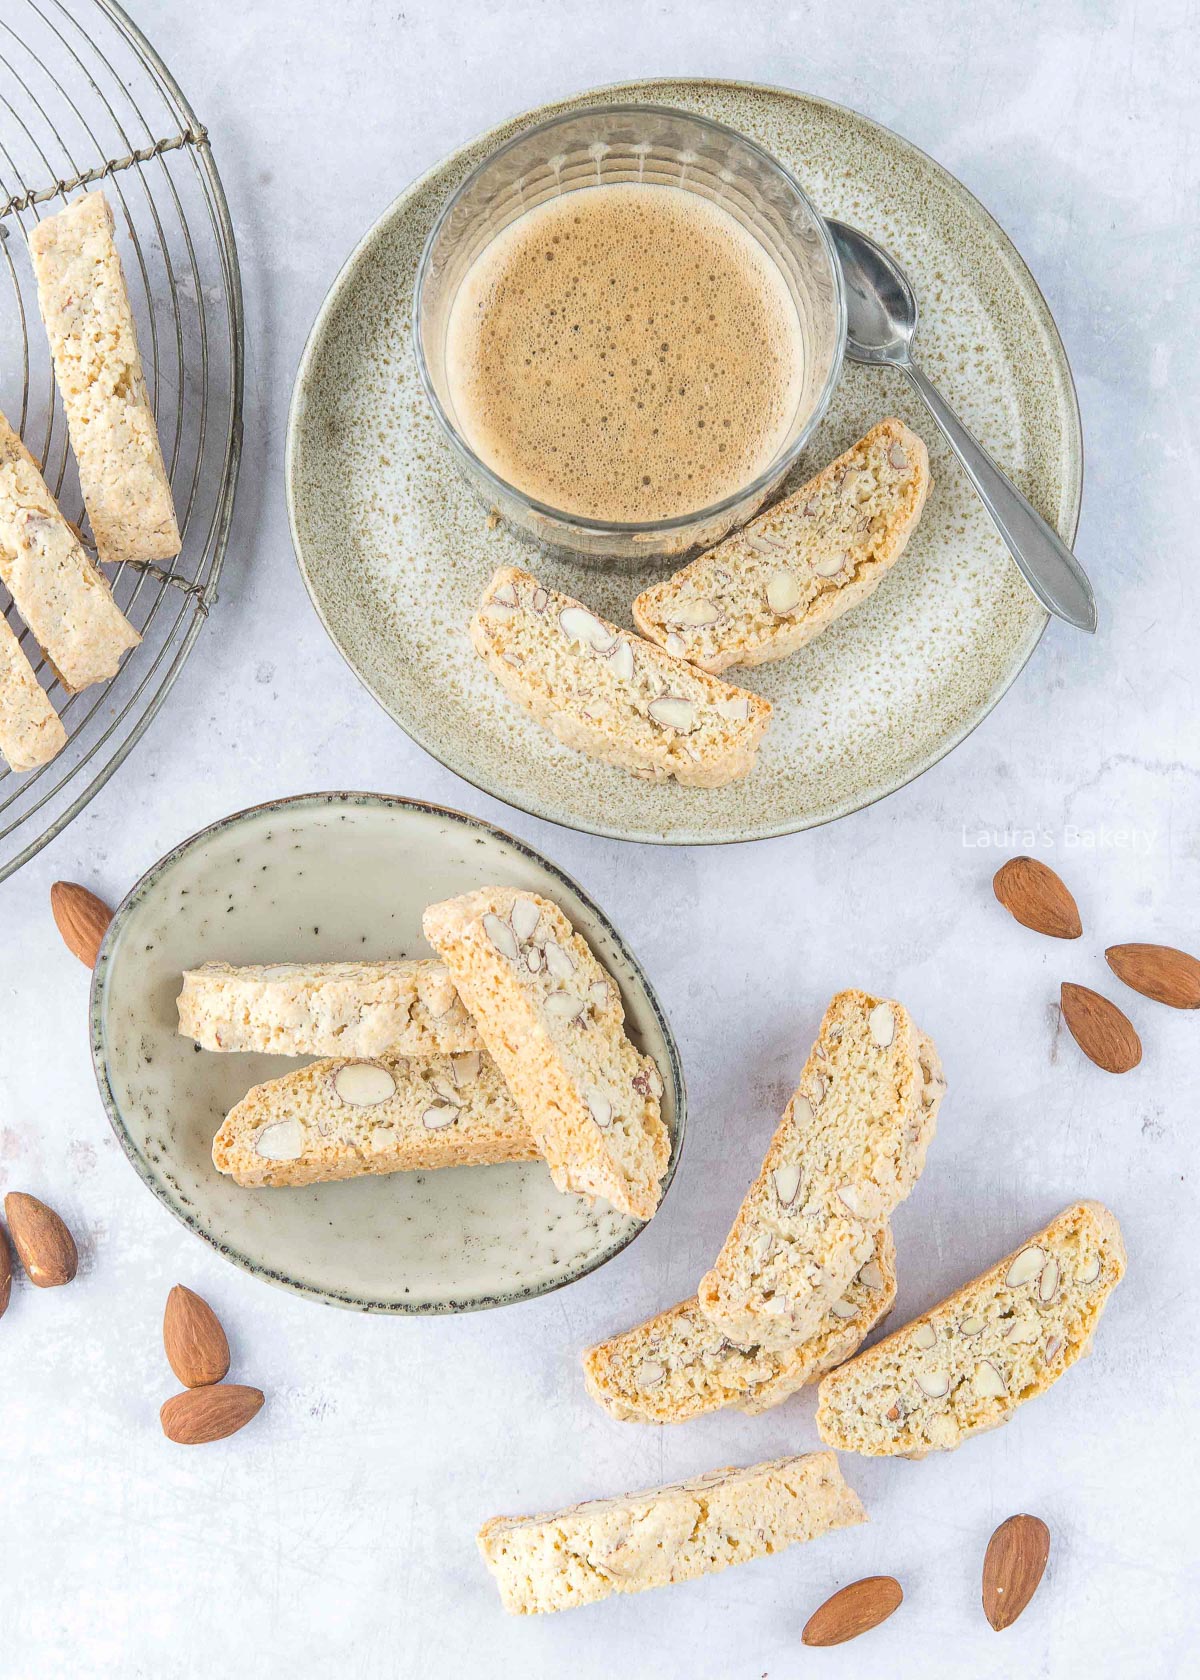
Here are a few of my favorite Italian recipes:

Cantuccini -1

FAQ Cantuccini

Which almonds should I use for these cookies?

Almonds are a key ingredient in these traditional Italian cookies. I always use raw almonds, often with the skins still on, but blanched almonds work just as well.

What should you dip cantuccini in?

Coffee or tea are the most common options, and they soften the cookies just enough. In Italy, especially in Tuscany, people love dipping cantuccini in Vin Santo, a sweet dessert wine, at the end of a meal.

Can I add extra flavorings?

Absolutely! Try adding some orange or lemon zest to the dough, or a ½ teaspoon of almond extract for an extra-strong almond flavor. I’ve even made a festive version of cantuccini for Christmas with pistachios and dried cranberries!

Is it true that there’s no butter in this recipe?

That’s right! These cookies don’t contain any butter at all, a perfect example that you can bake delicious, crunchy cookies without it.

Another great butter-free cookie recipe to try is my eierkoeken (Dutch sponge cookies) and there are plenty more like it on the site!


Cantuccini cookies

Print Recipe

No votes yet

Cantuccini Recipe

This easy recipe for classic cantuccini cookies is the perfect little dessert for any Italian meal!
Preparation15 minutes
Cooking1 hour
Total1 hour 15 minutes
Servings: 50 Cookies

Ingredients

  • 350 grams self-rising flour
  • 200 grams granulated sugar
  • Pinch of salt
  • 200 grams almonds coarsely chopped
  • 3 medium eggs
  • 1 tsp vanilla extract

Instructions

  • In a mixing bowl, combine the self-rising flour, sugar and salt. Stir to mix, then add the chopped almonds and mix again.
  • Add the eggs and vanilla extract and knead the dough (by hand or with a mixer using dough hooks) until it comes together into a firm dough. It can still be a little sticky, that’s fine.
  • Shape the dough into a log about 2-2.5 inches (5-6 cm) thick. Divide it into two pieces if needed to fit your baking tray or cookie sheet. Place the logs on a baking sheet lined with parchment paper and press them down slightly.
  • Bake the logs for 20-25 minutes at 320°F/160°C (conventional oven), or until the edges start to turn golden brown.
  • Remove the baking sheet from the oven and, using a sharp serrated knife, cut the logs into slices. This is easiest when placed on a cutting board. If the dough is too soft to cut, let it rest for 5 minutes. But don’t wait too long, or you won’t be able to slice them cleanly.
  • Place the slices back onto the parchment-lined baking sheet and bake for the second time for 15 minutes at 285°F/140°C (conventional oven).
Dulce de leche-2

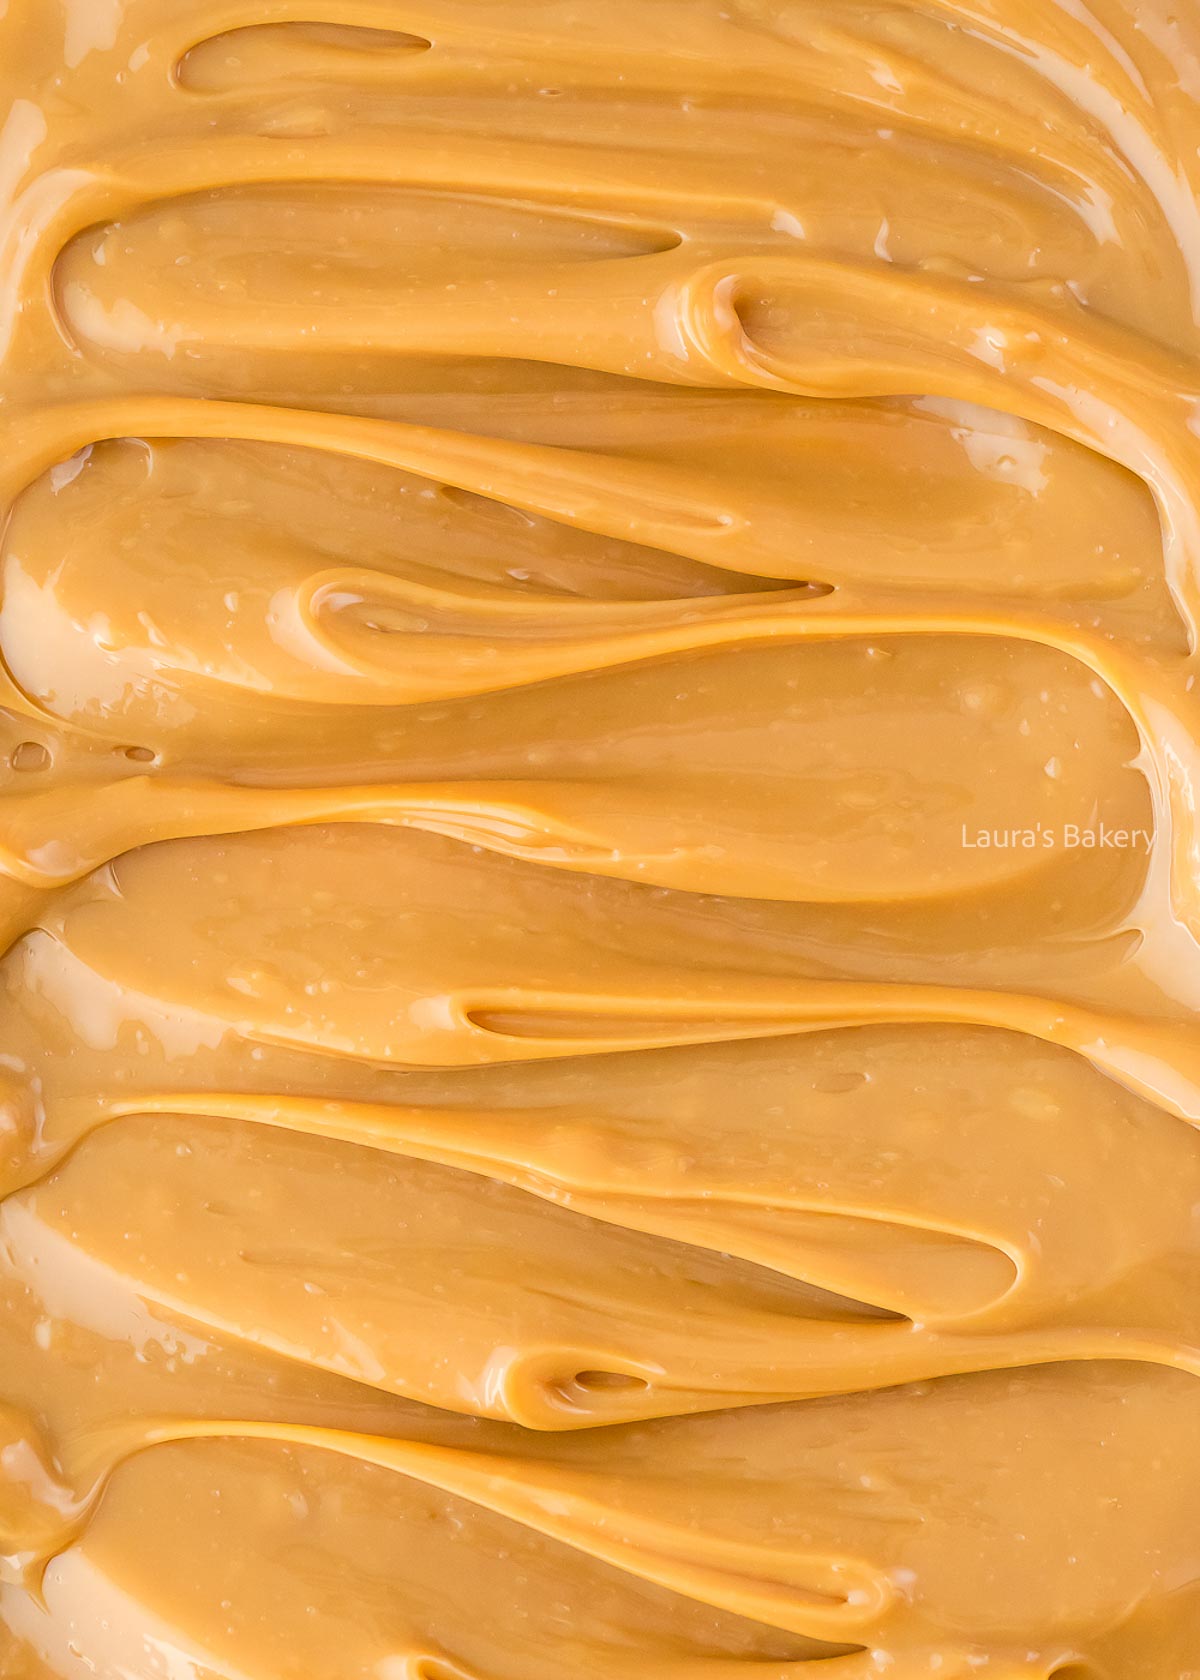
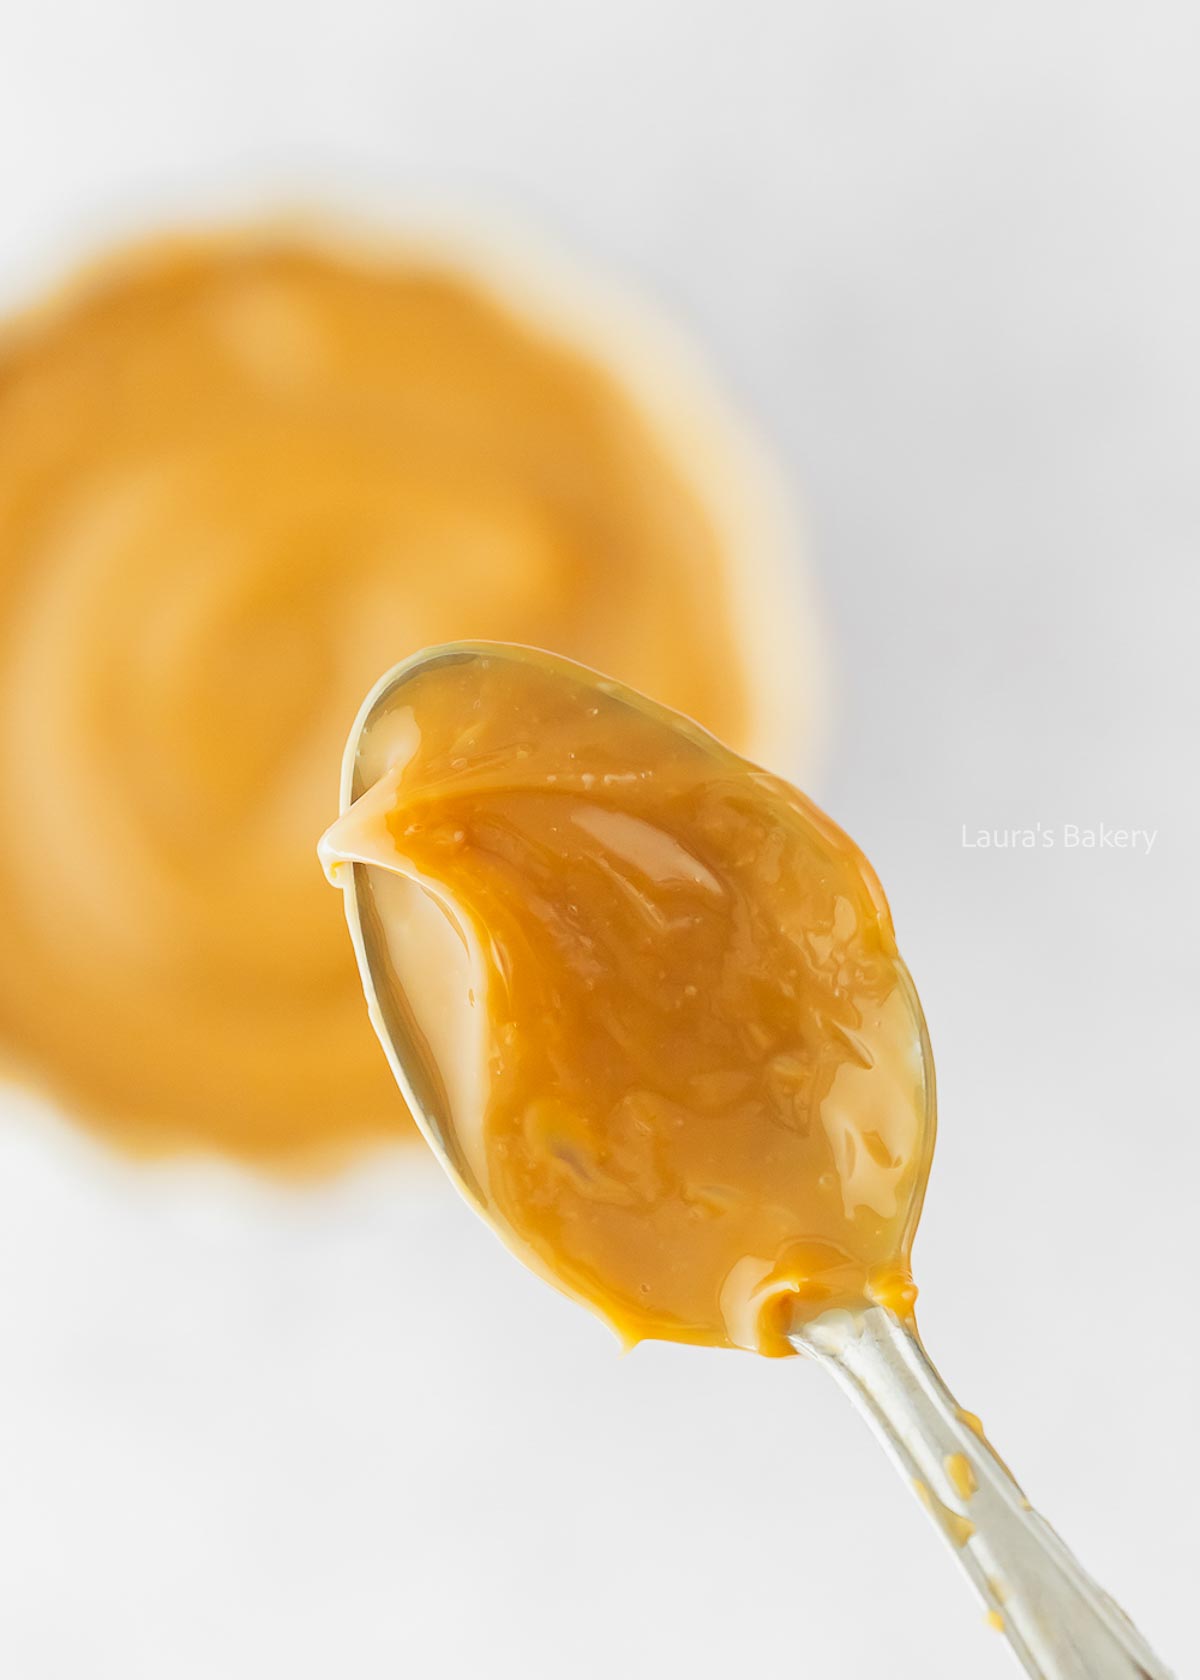
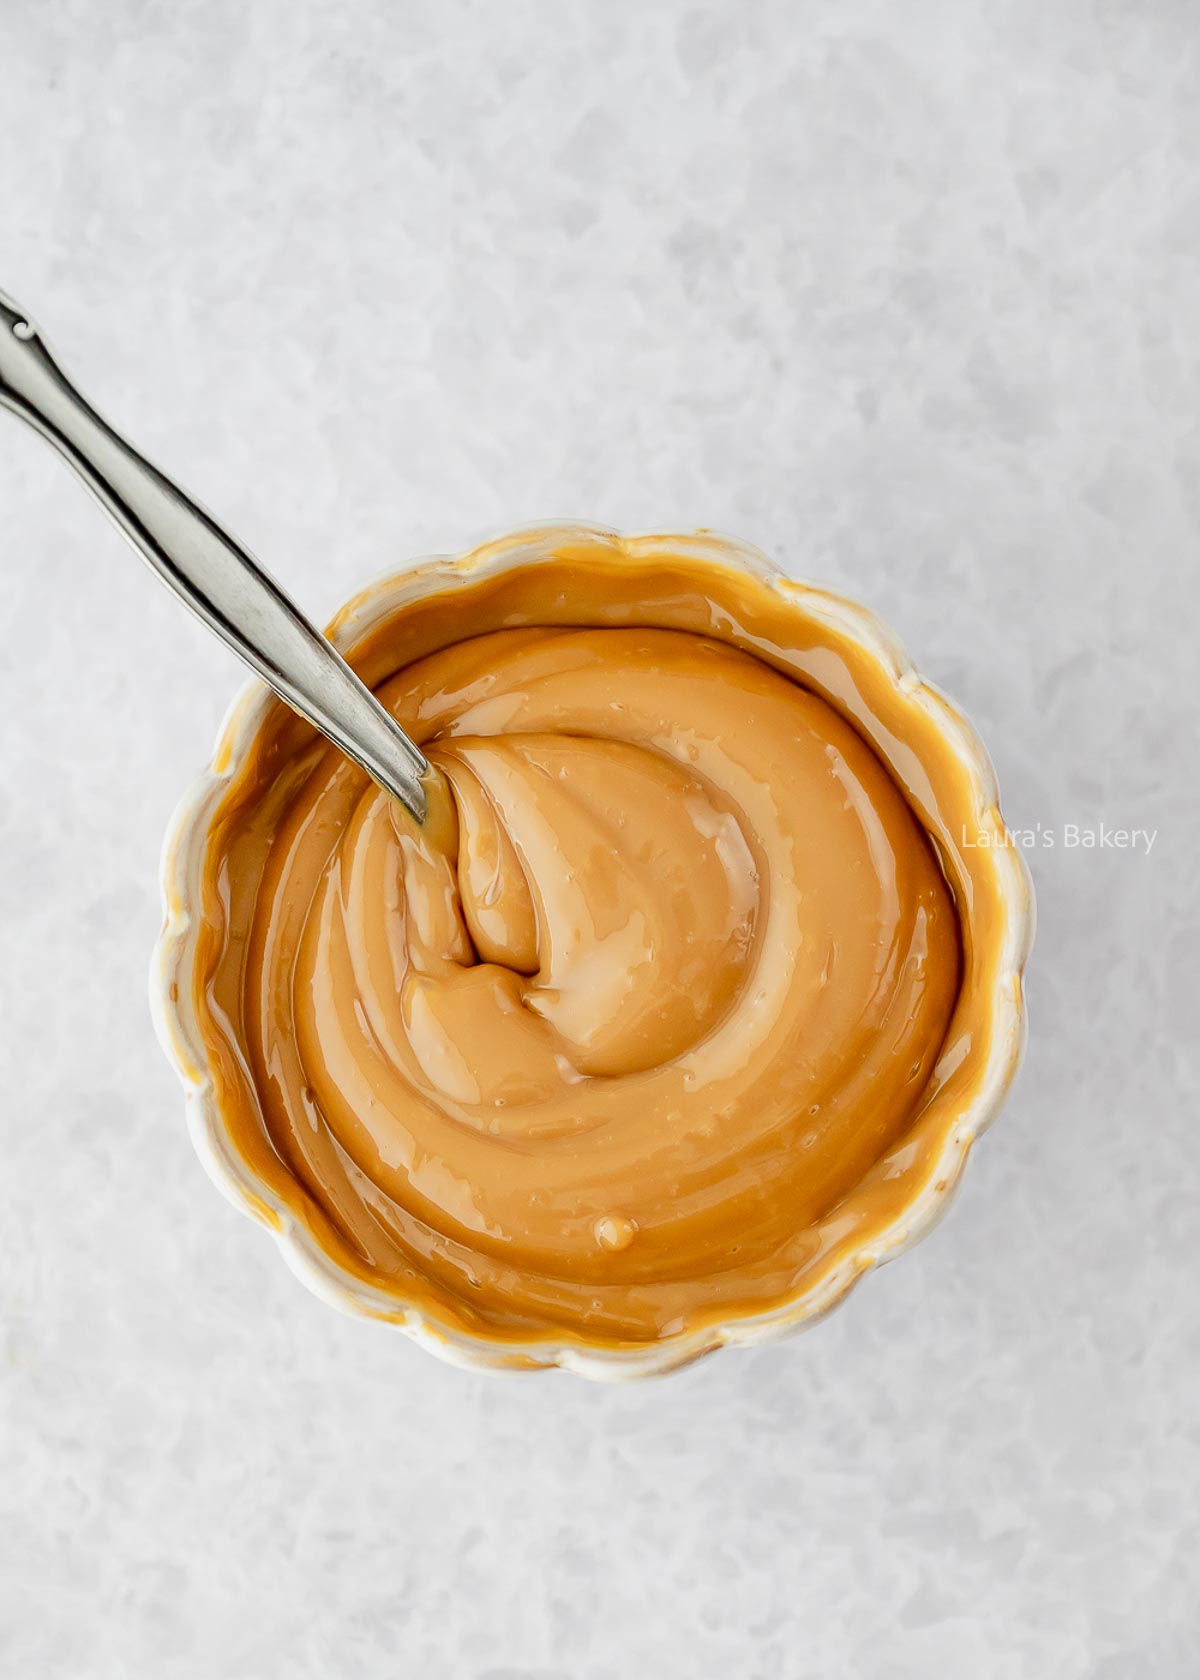
With this recipe, making dulce de leche is super easy! I’ll also share which delicious recipes you can make with this caramel spread and more coming up soon!

Why You’ll Love This Recipe

Making homemade dulce de leche is not only super easy to do, but it is such a great recipe to have under your belt. You can use dulce de leche in so many different ways.

From sprinkling over ice cream to making a banoffee pie to whatever else you can think off. It’s pretty versatile!

How to Make Dulce de Leche

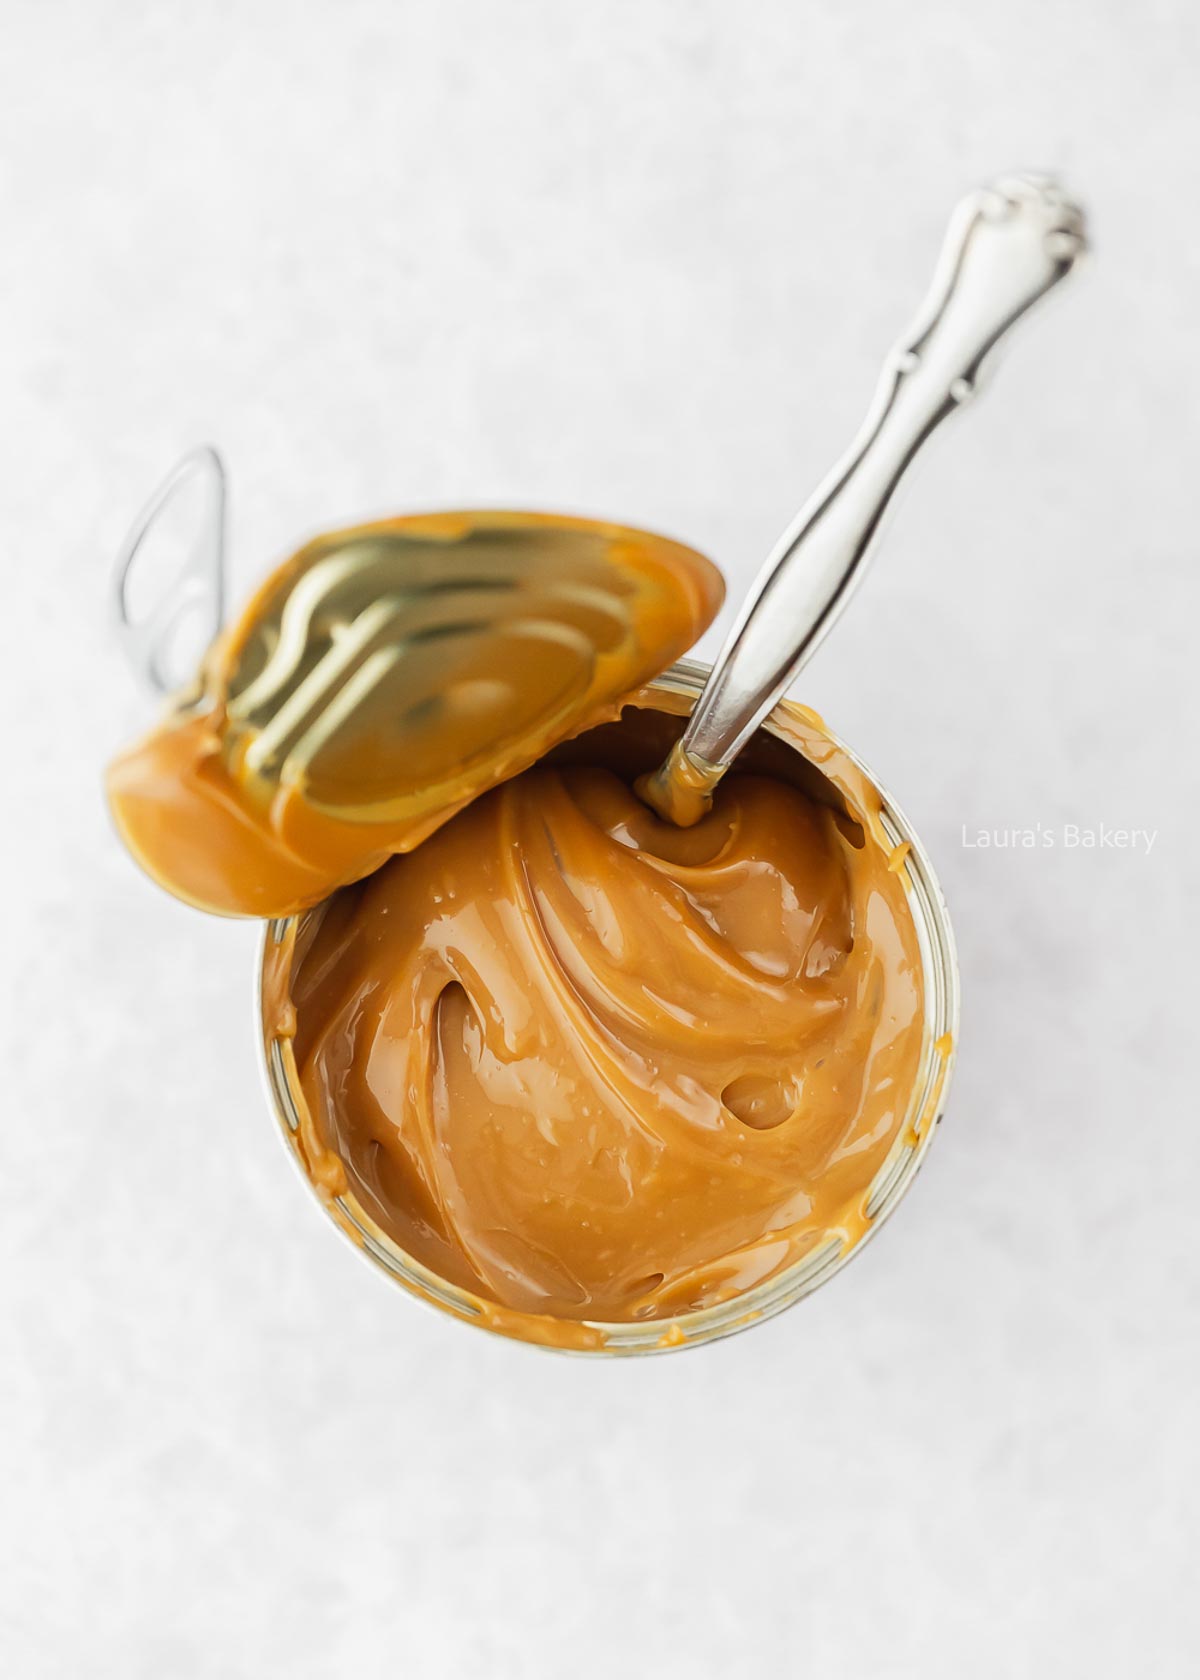
Making dulce de leche is a bit like magic. You turn a can of sweetened condensed milk into a can full of golden caramel goodness, without even opening it!

When my dad saw a can simmering in a pot on the stove the other day, he couldn’t believe it would actually turn into caramel. But once he tasted it, he immediately took back his words!

Still, dulce de leche tastes different from a traditional caramel sauce made with cream, butter, and sugar. The flavor is similar to bebogeen (a Dutch caramel spread), and the texture is more like a thick cookie or chocolate spread. You can easily spread it on toast, scones, or pancakes.

Making your own dulce de leche is incredibly easy, but it does take time. The can needs to simmer for about three hours. That’s why I usually cook several cans at once. As long as they stay sealed, you can store them for weeks or even months.

Homemade dulce de leche

Creamy dulce de leche

Where Does Dulce de Leche Come From?

This caramel spread is very popular in Latin America and actually originates there. It’s not entirely clear which country invented it, since Argentina, Uruguay, Chile, Colombia, and Peru have all tried -without success- to claim dulce de leche as part of their cultural heritage.

The name dulce de leche literally translates from Spanish as “sweet from milk.” Every country has its own version, but the way it’s used is pretty similar everywhere. From spreading it on cookies, cakes, and pastries to adding it to breakfast dishes.

Recipes with Dulce de Leche

Dulce de leche has a soft but firm texture when cooled. If you stir it well, it becomes smoother, and when you warm it, it turns pourable. That means there are endless ways to use it in recipes!

Over the years, I’ve baked so many treats with it. Here are a few of my where you  can use it.

What would you make with dulce de leche?

Dulce de leche-7

Tips for Making Dulce de Leche

I don’t have time to wait 3 hours.

If you really don’t have time to wait for 3 hours, you can go for store-bought or just wait until you do have the time. There is also an oven method, but at the end of the day, you will still need the same amount of time.

I’m worried about the cans exploding.

No need to worry! As long as you keep the top of the cans completely submerged in water the entire time. I like to use a tall stockpot with a lid, so I can fit several cans in at once and ensure they stay well below the water level. Keeping the lid on also helps reduce evaporation.

Can I make it with condensed coconut milk instead?

I haven’t tried it myself, but one of my readers shared that it worked for her using sweetened condensed coconut milk. If you give it a try, let me know how it turns out. I’d love to hear your results!

Does it matter what kind of stovetop I use?

According to readers, the results are the same no matter what type of stove or cooktop you have. Apparently, you can also make this in an Instant Pot, although I have not tried this myself.

My dulce de leche turned out too thick.

In general, the longer you simmer the cans, the thicker the caramel will be. If you cooked it for the full three hours and let it cool completely, it might be quite firm. Stirring it well usually helps soften it, and if that’s not enough, gently warm it au bain-marie (in a hot water bath).


Homemade dulce de leche

Print Recipe

No votes yet

Dulce de Leche Recipe

The perfect way to make your own batch of creamy dulce de leche!
Preparation2 minutes
Cooking3 hours
Total3 hours 2 minutes
Servings: 1 can

Ingredients

  • 1 can sweetened condensed milk
  • Large pot filled with water

Instructions

  • Remove the paper label from the can and place it in a large pot of water. Make sure the can is fully submerged.
  • Bring the water to a boil and let the can simmer for 3 hours. Check occasionally to make sure it stays underwater. Add more water if needed.
  • If the can isn’t completely covered, there’s a risk it could burst, so keep an eye on it! I like to keep the lid on the pot to reduce evaporation.
  • After 3 hours, carefully remove the can and let it cool completely before opening.
Biscoff tiramisu-1

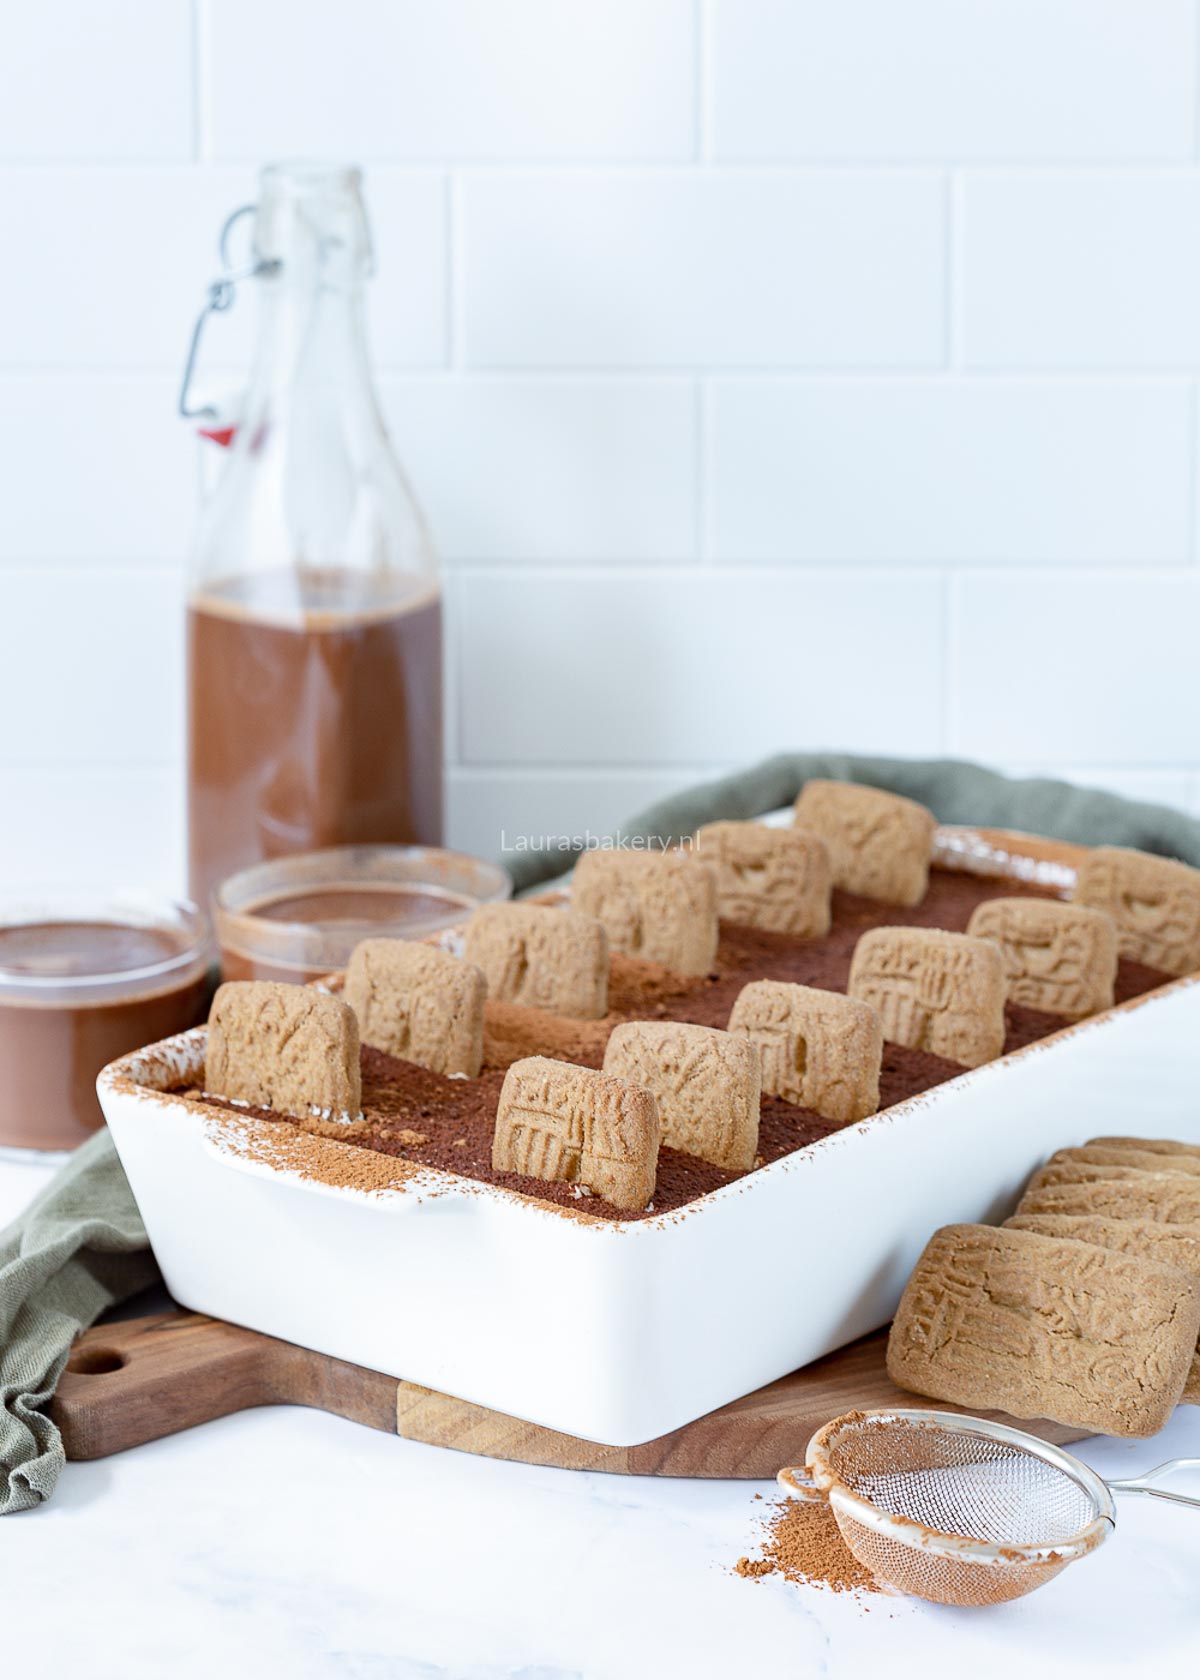
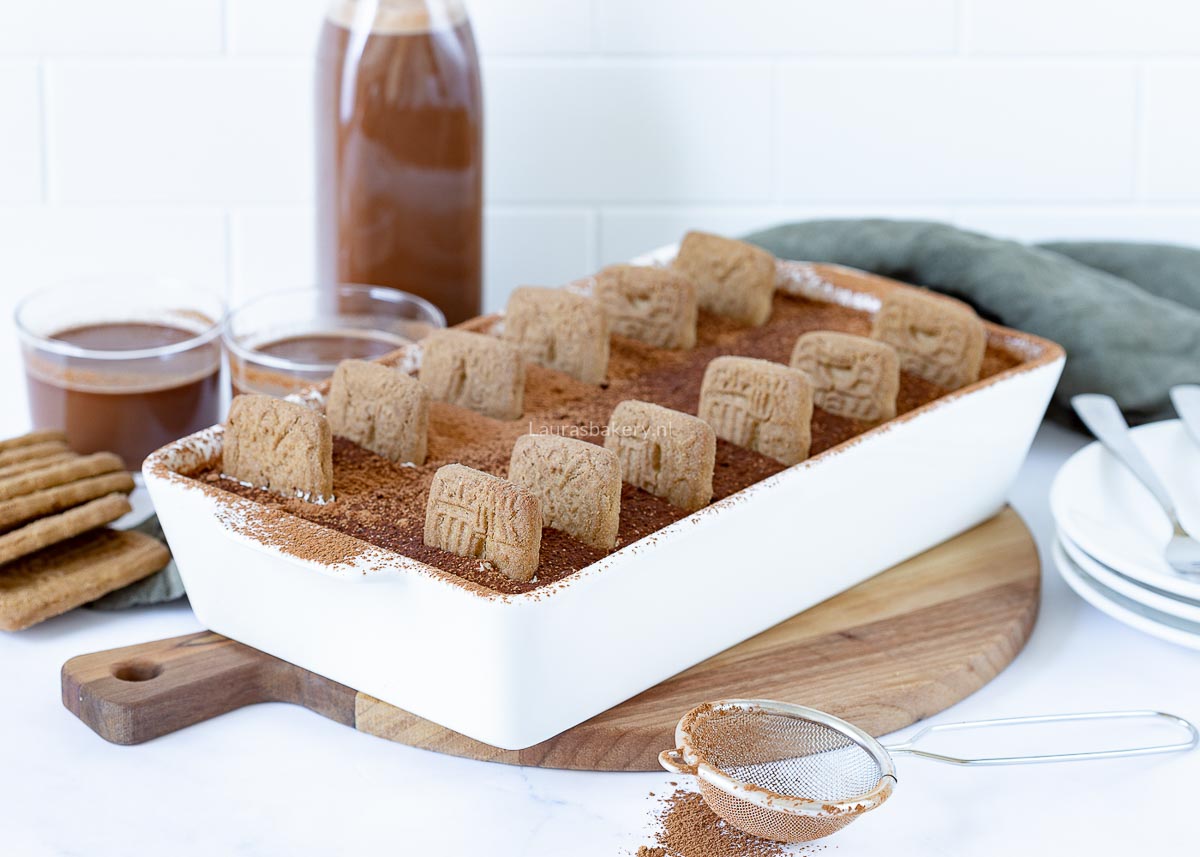
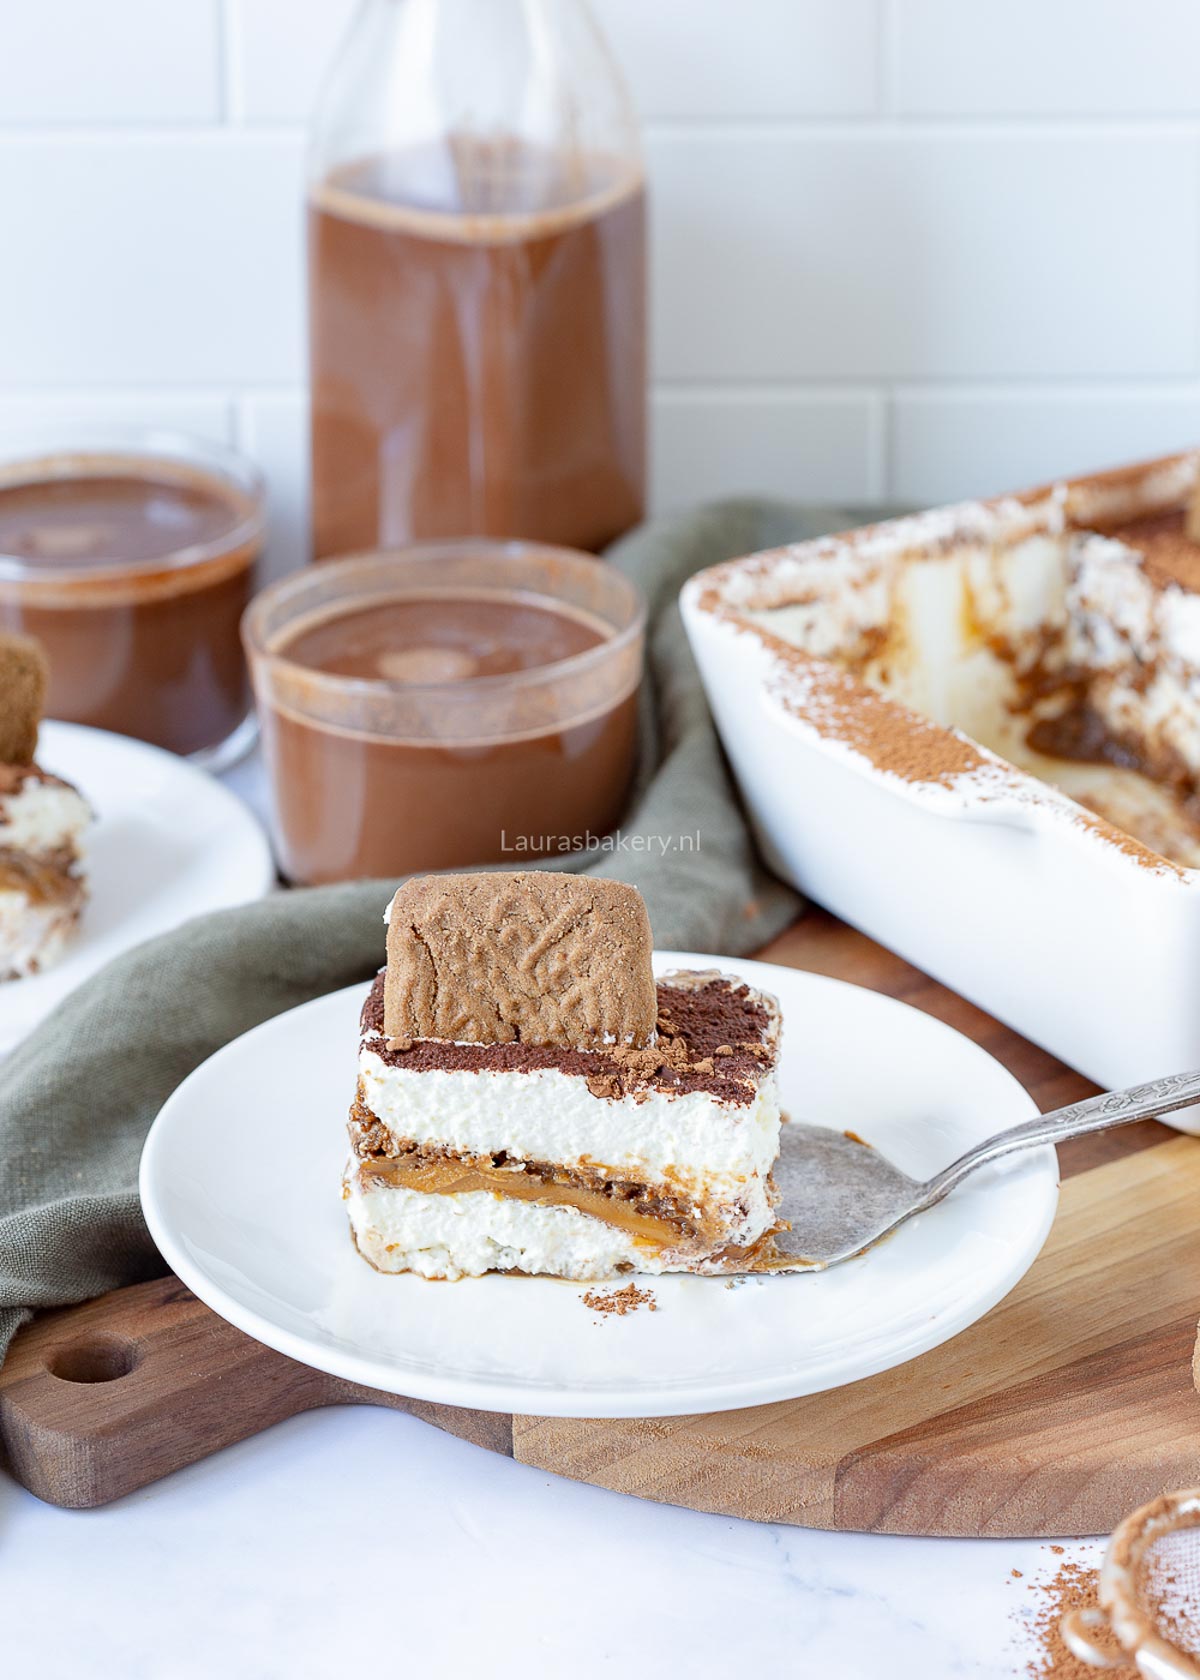
Making Biscoff Tiramisu without coffee, eggs, or alcohol? No problem! This Biscoff tiramisu with speculaas cookies is totally kid-friendly – and the adults here loved it just as much.

Why You’ll Love This Recipe

For this child-friendly tiramisu recipe, I swapped out the lady fingers from a classic tiramisu for speculaas cookies. Not only are they delicious, but they also give the dessert a cozy December vibe.

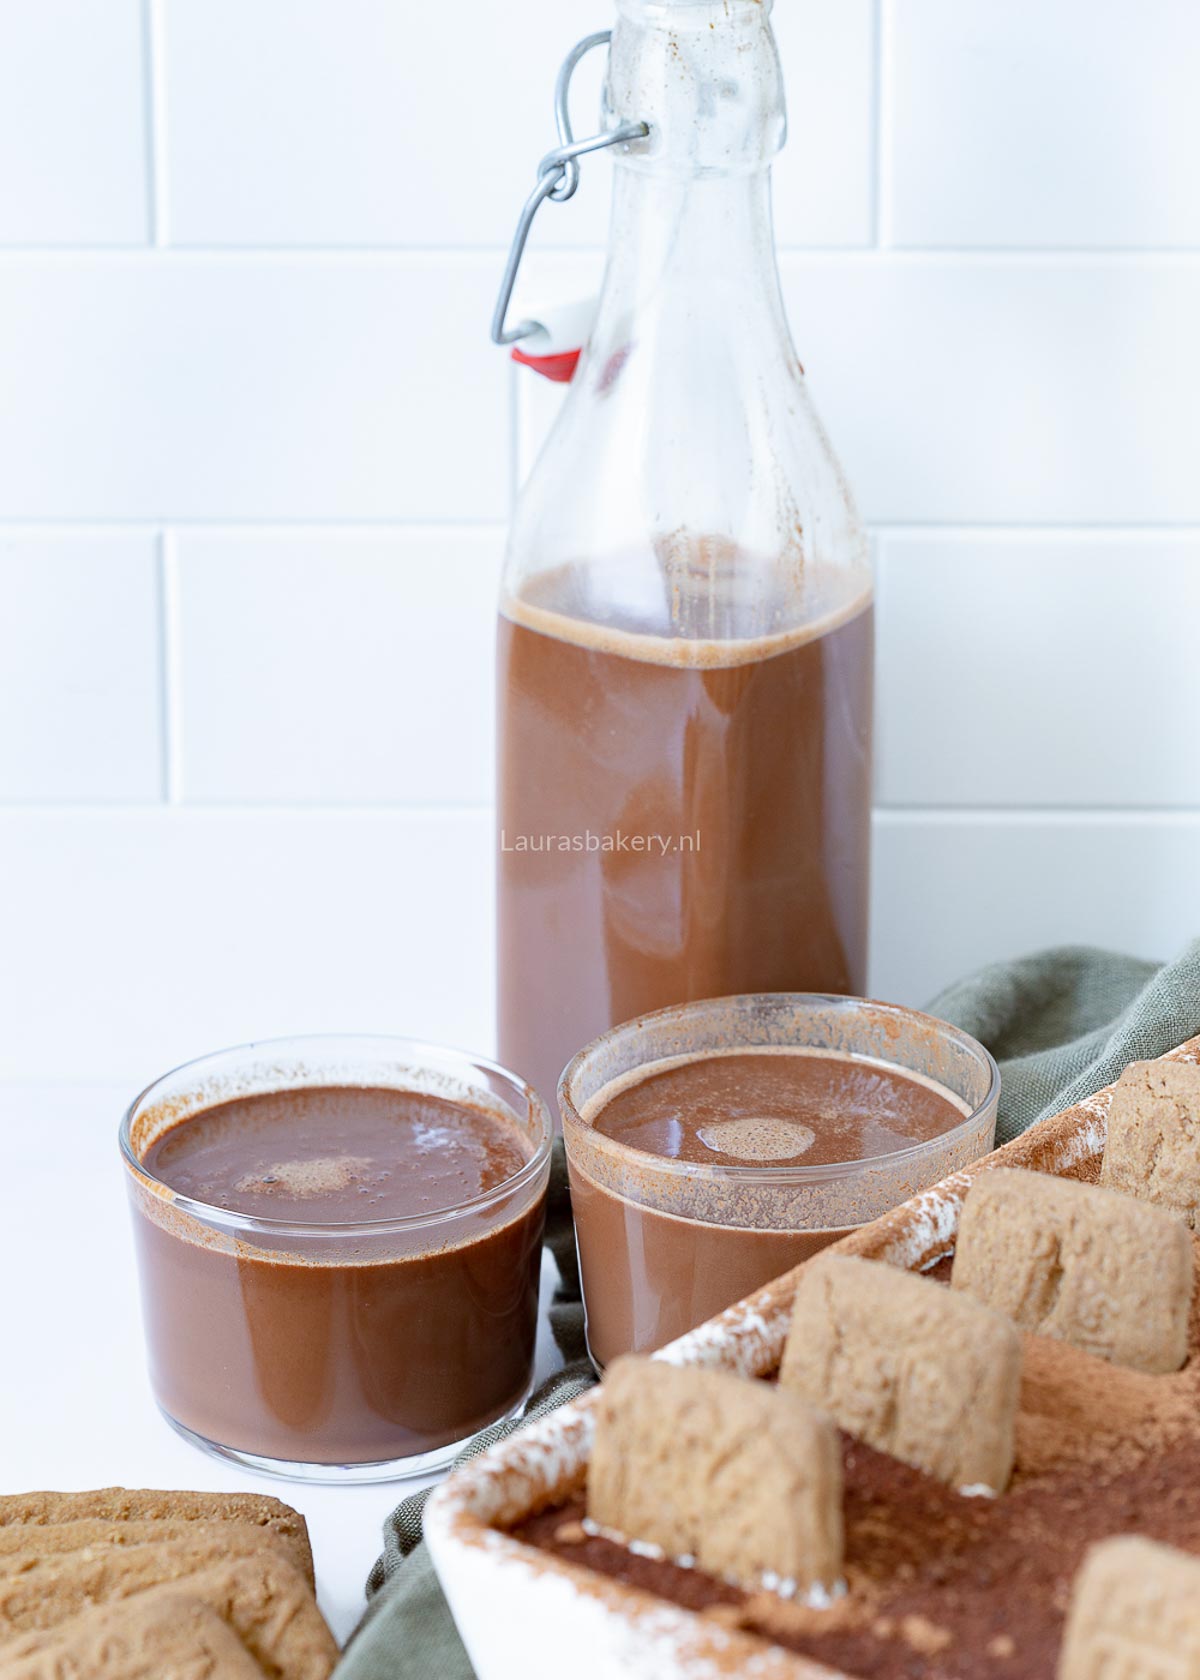
Instead of dipping the cookies in coffee (because let’s be honest, most kids aren’t big coffee fans) I used chocolate milk. You can easily make your own and control how strong the chocolate flavor is, or just use store-bought chocolate milk.

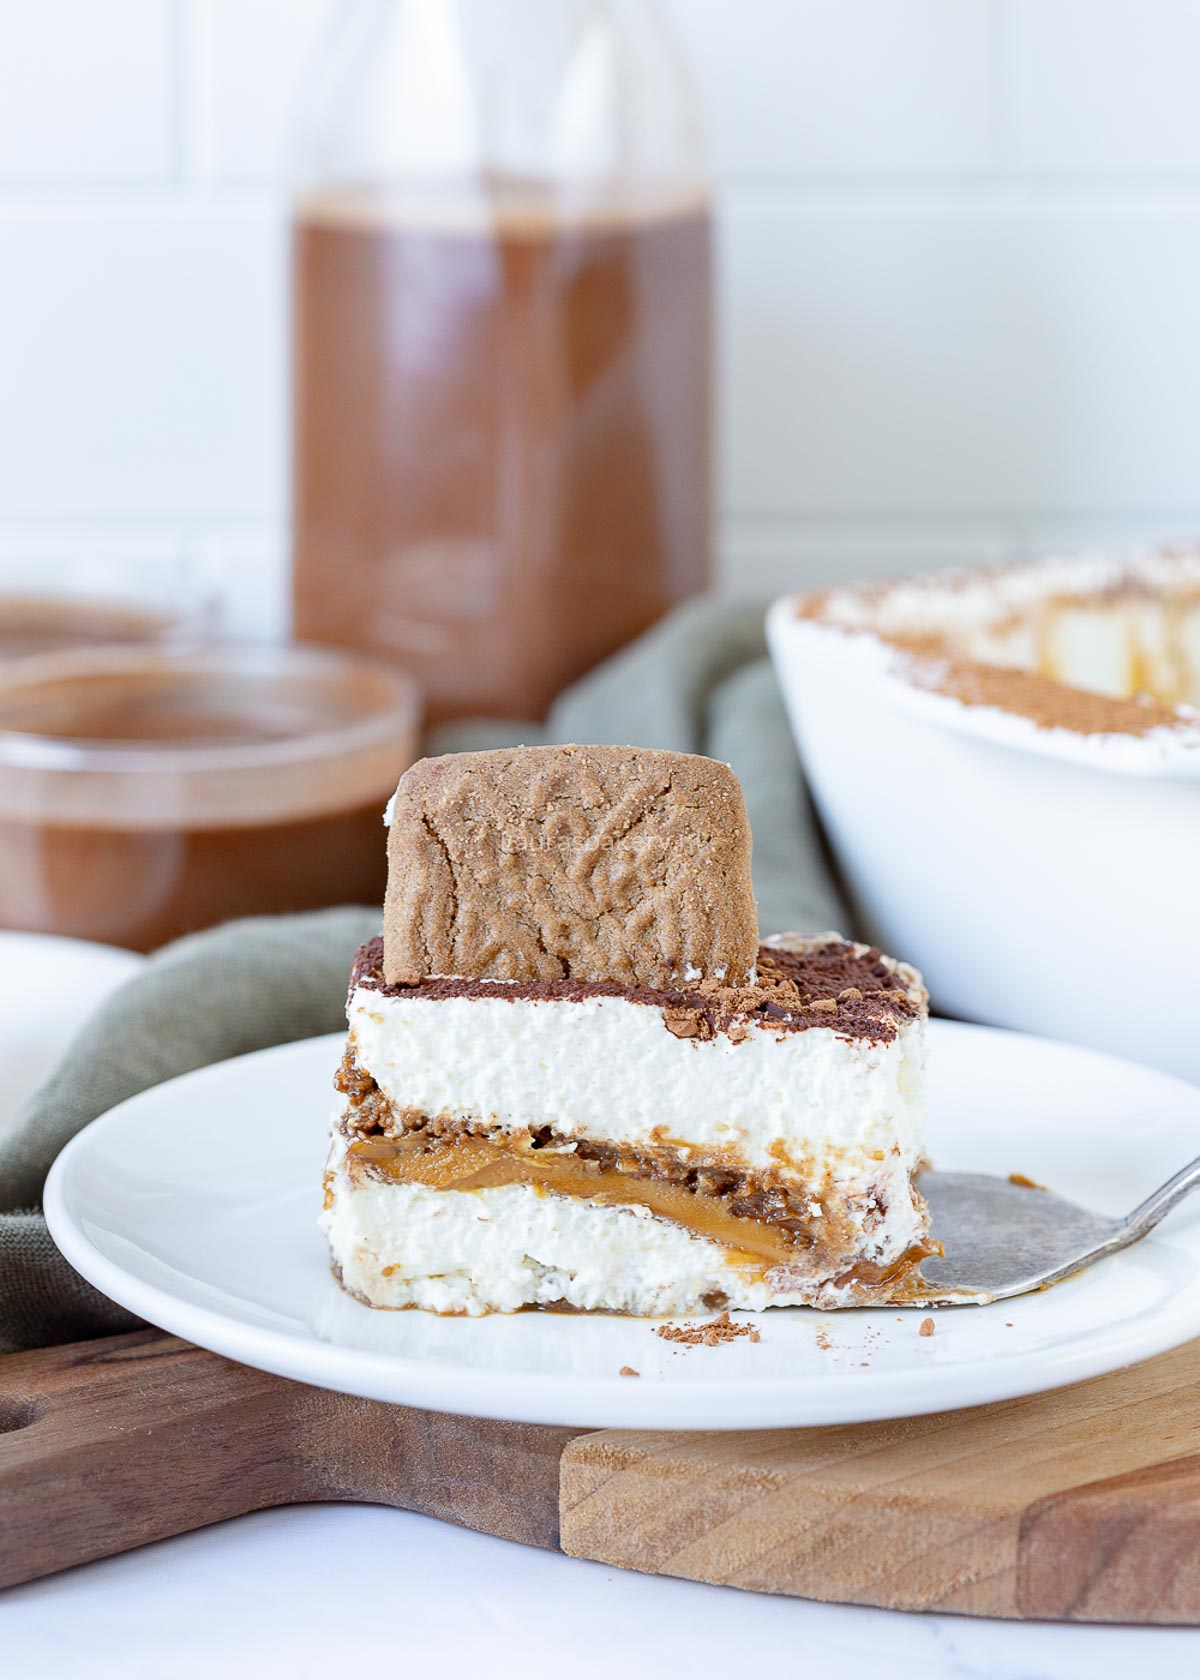
Either way, it makes the cookies nice and soft, just like in traditional tiramisu. As a finishing touch, I added a layer of Lotus Biscoff spread (speculoos) in the middle. I melted it briefly in the microwave so it became easy to spread, super simple and incredibly tasty!

It’s a real treat, especially for kids. Of course, you can also use Lotus Biscoff cookies instead of the speculaas if you prefer. And if you love Biscoff, make sure to also check the Biscoff Blondies!

Biscoff tiramisu

Biscoff tiramisu

Recipe Ingredients

  • heavy cream – or use heavy whipping cream
  • mascarpone cheese – essential in any tiramisu I think, although you can use another type of cream cheese if you want
  • sugar – I use fine granulated sugar
  • speculaas cookies – can be replaced by savoiardi biscuits or Biscoff biscuits too. Speculaas is a typical Dutch cookie but you can make it at home too!
  • chocolate milk –  while the recipe calls for 400 ml (1 3/4 cup) of the chocolate milk you only use it for dipping the cookies in. You can drink the rest afterwards!
  • cocoa powder

Make sure to double check the quantities and full ingredients in the recipe card.

How To Make Biscoff Tiramisu with Speculaas Cookies

This speculoos tiramisu is quite easy to make. You start by making the cream layer by mixing the heavy cream with the mascarpone and the sugar. Whip it till you have stiff peaks.

TIP: It’s delicious to mix in a few tablespoons of Biscoff spread into the mascarpone cream!

Pour the chocolate milk into a shallow bowl or dish and dip the cookies into the milk. Don’t let them sit for too long or the cookies will fall apart.

Take your bowl and arrange the speculaas cookies in a single layer so they cover the bottom of the dish. The layers of mascarpone cream come on top of the cookies. Use a spatula to spread it.

It’s easy to warm the cookie butter in the microwave until it is easily spreadable. Don’t let it get too hot. Spread this evenly over the mascarpone layer.

Repeat this process with another 10-12 cookies and the remaining mascarpone mixture. You can serve it right away or let it set overnight. I always prefer to let it set so the flavors have some time to develop. Dust it with a bit of cocoa powder (or finish with another layer of Biscoff) before serving and decorate with extra cookies.

Biscoff tiramisu-4

Adult Version

Want to make an adult version with coffee and liqueur? No problem! Replace the chocolate milk with 1 cup (250 ml) of strong coffee and ⅔ cup (150 ml) of coffee liqueur or Baileys. You can even make two versions: one for the adults and one for the kids. Just make sure to decorate them differently so you can tell them apart!

More Tiramisu Recipes

Tiramisu is one of my favorite desserts. I’ve created endless variations, and sometimes I even turn other desserts into tiramisu-inspired treats! If you love tiramisu as much as I do, you might also enjoy these versions:

Storing Biscoff Tiramisu with Speculaas Cookies

Tiramisu gets even better if you store it overnight! The flavors have more time to soak into the cookies, making it the best dessert.

How long can you store Biscoff tiramisu?

You can store the Biscoff tiramisu in the fridge for 2-3 days. Keep in mind that the cookies will soften more the longer you keep it in the fridge.

Can you freeze Biscoff tiramisu?

You can also freeze tiramisu. The texture of the cream might change a little bit, but you can store it in a freezer-safe container for up to 3 months. It helps to wrap it tightly in plastic wrap to prevent freezer burn. Let it slowly thaw in the fridge (which will take about 6-8 hours).


Biscoff tiramisu-2

FAQ Biscoff Tiramisu With Speculaas Cookies

How long should tiramisu chill?

Tiramisu actually tastes even better the longer it sits in the fridge. The flavors blend together, and the cookies soften perfectly. I recommend making it a day ahead so it can chill overnight and set completely.

Can I make this tiramisu in glasses?

Absolutely! The layering process is the same, you’ll just divide everything between 10-12 glasses instead of one large dish.

Which alcohol or liqueur pairs well with tiramisu?

If you’re making this for kids, skip the alcohol. But for adults, advocaat (Dutch egg liqueur, similar to eggnog) pairs nicely with the cookie butter, or you can use coffee liqueur or Baileys. Mix either one with 1 cup (250 ml) of coffee and use that instead of the chocolate milk.

What kind of chocolate milk should I use?

You can use store-bought chocolate milk, or make your own with cocoa powder and melted chocolate if you want a richer flavor.


Biscoff tiramisu

Print Recipe

No votes yet

Biscoff Tiramisu with Speculaas Cookies

This is such a great tiramisu to serve during the holidays!
Preparation15 minutes
Chilling4 hours
Total4 hours 15 minutes
Servings: 12 people

Ingredients

  • 250 ml heavy cream
  • 500 grams mascarpone cheese
  • 60 grams fine granulated sugar
  • 400 grams speculaas cookies
  • 400 ml chocolate milk
  • 250 grams Biscoff spread speculoos or cookie butter
  • Cocoa powder for dusting

Instructions

  • In a bowl, beat the heavy cream, mascarpone and sugar for 3-5 minutes until smooth, creamy, and thick.
  • Pour about ¾ cup (200 ml) of chocolate milk into a shallow dish. Dip about 10-12 speculaas cookies in the milk for a few seconds – don’t let them get too soggy, or they’ll fall apart.
  • Arrange the cookies in a rectangular dish in a single layer to cover the bottom. Spread half of the mascarpone mixture over the top.
  • Warm the cookie butter briefly in the microwave until spreadable (but not hot). Spread it evenly over the mascarpone layer.
  • Repeat the layering with another 10-12 cookies and the remaining mascarpone mixture. For the best flavor, refrigerate the tiramisu overnight to set (You can also serve it immediately if you prefer).
  • Before serving, dust with cocoa powder and decorate with extra cookies, one half cookie per slice works great. Slice into 10-12 servings and enjoy!

Notes

  • You can also layer this tiramisu in small glasses or individual dishes.
  • Decorate with speculoos cookies, speculaas chunks, or mini gingerbread cookies.
  • Add some Biscoff spread to the mascarpone cream for a delicious taste.