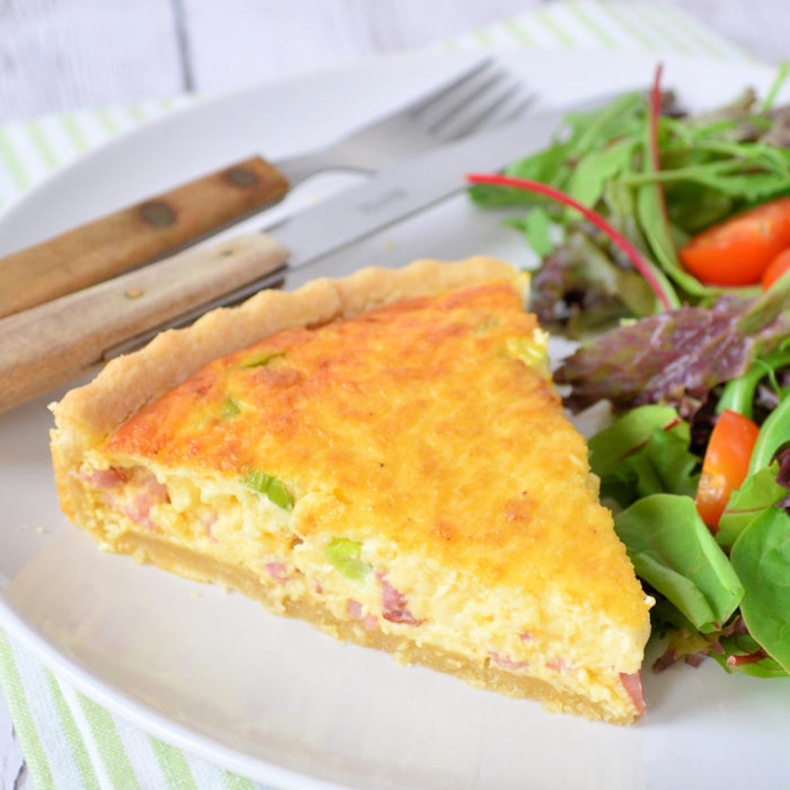
For years, I have been sharing the most delicious baked cheesecake recipes on my Dutch website (so expect some coming up in the next weeks!), but ironically, the basic recipe has always fallen by the wayside. So it’s about time I shared my simple cheesecake recipe with you that is the base of so many other cheesecakes.
Making a basic cheesecake recipe
Cheesecake, who doesn’t love it? Making cheesecake may sound intimidating if you’ve never tried it before, but once you know how easy it is, you will probably bake this delicious cake many times over. I find this the best cheesecake recipe out there, as it is so versatile and easy to adjust.
With this basic cheesecake recipe, you can go in any direction you want. For example, you can flavor the cream cheese filling with citrus or chocolate and top the cheesecake with a delicious Italian meringue. Or what about adding a crumble topping and make this blueberry crumble cheesecake!
Or maybe you prefer to experiment with different cookies for the bottom, or maybe you like to use more than one cookie type! Later in this article, I’ll give you tips on the proportions of different types of cookies and how much unsalted butter you need for which cookies.
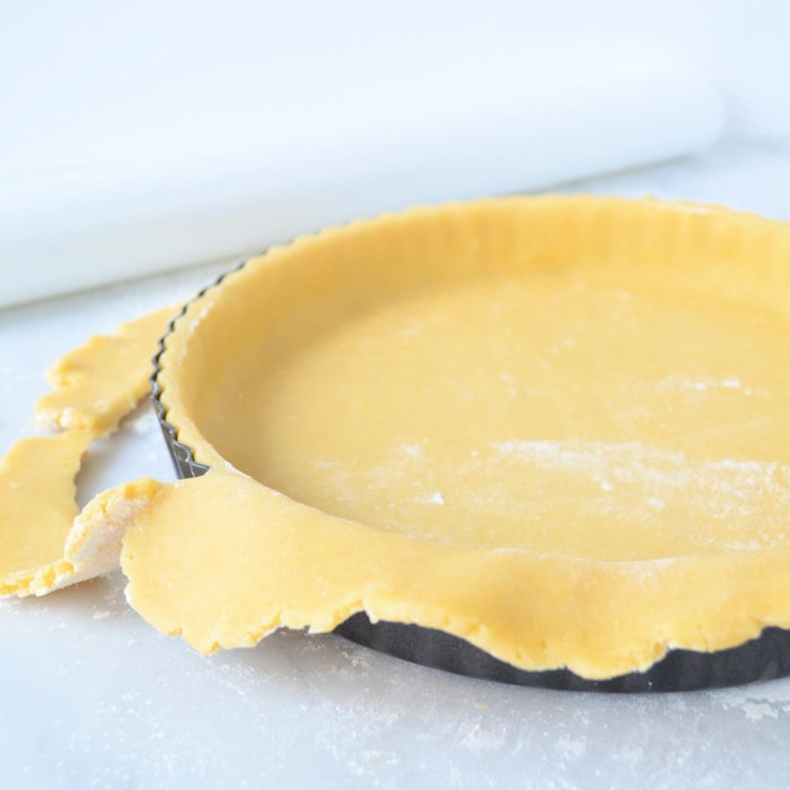
Making the Cheesecake Cake Base
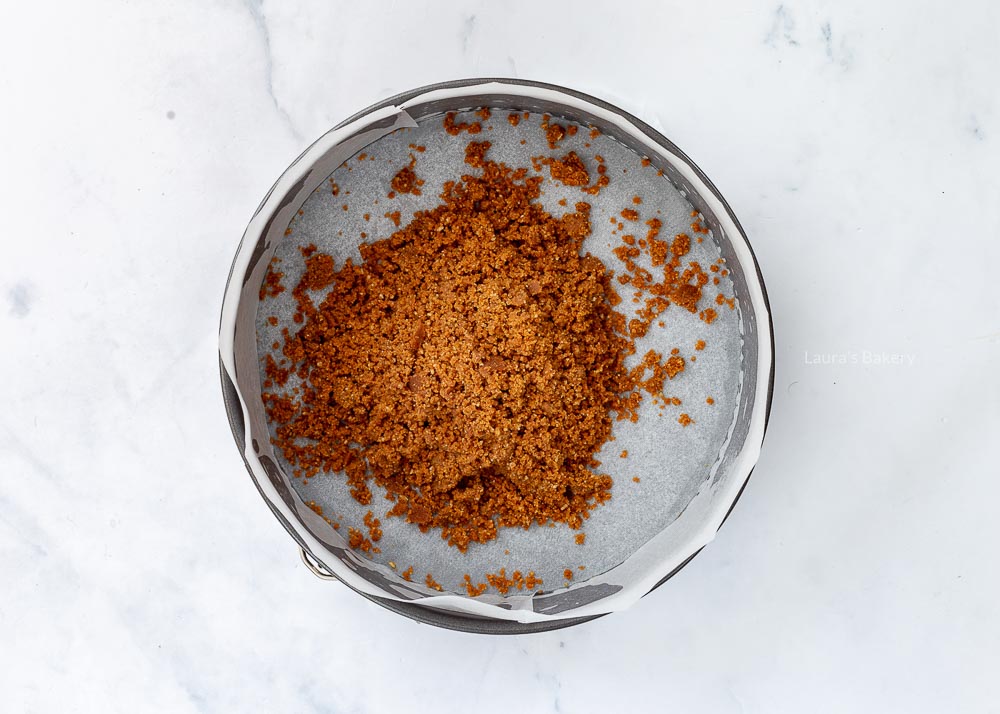
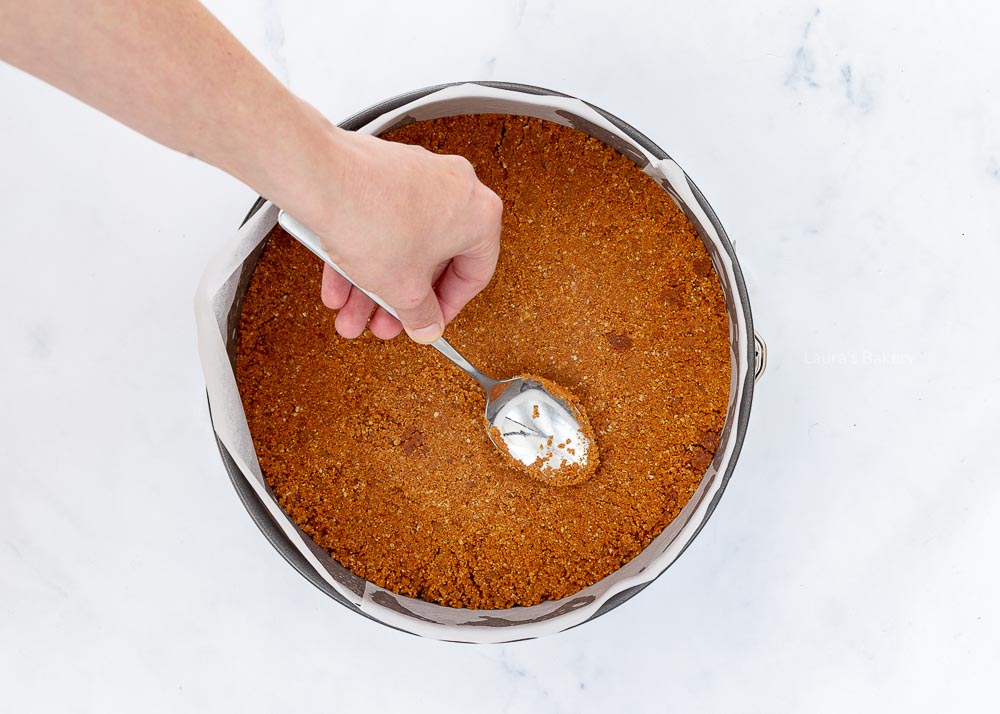
The first step in baking a cheesecake is to make the base. You can use any kind of cookie (or even nuts). Most common is probably a classic graham cracker crust, but there are so many more options to choose from. Mix the cookie crumbs with the melted butter and press them into the bottom of your springform pan. An easy way to make sure you press it evenly around the base is to use a glass with a flat bottom to press the cookie crust. Put the base in the refrigerator while you make the filling.
I’m going to give you some additional guidelines for varying the cookie base to make it a little easier. Some types of cookies already contain more butter, so you need to add less butter to make a tasty cheesecake base.
Below is a list of the most common cookies used in cheesecake, along with how much unsalted butter in grams you need to bake the perfect cookie base for your cheesecake. You can then enter this into the base recipe below.
TIP: Did you know you can make cute mini cheesecakes? Or how about a cheesecake with a butterscotch cake base?
Making the cheesecake filling
Of course, just as important as the base of the cheesecake is also the filling. Now the fun part of the filling is that there is no limit to the cheesecake variations you can make. But let’s start with the basics.
What do you need for making a classic cheesecake recipe
full fat cream cheese
sugar – you can use brown sugar but that will have an effect on the color of the end result. I usually go for (fine) granulated sugar
eggs
sour cream
vanilla extract
all purpose flour
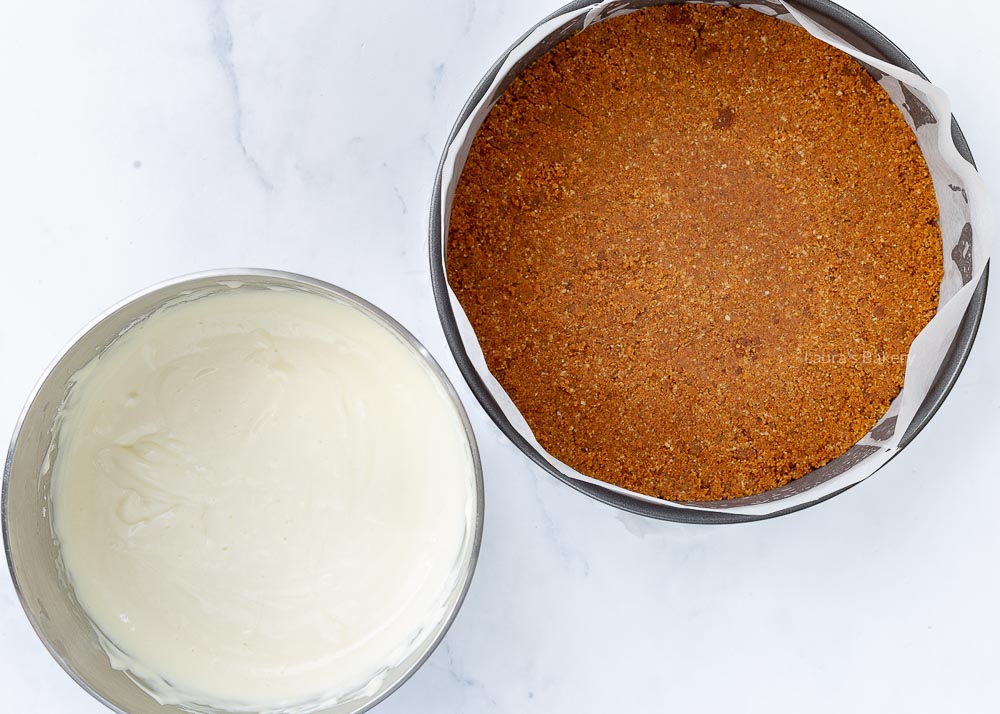
The first step is to add the cream cheese with the sugar in the bowl of a stand mixer (using a hand mixer is a good option too). Use the paddle attachment and keep in mind that you do not want to over whip the mixture. Using medium speed, cream the two together until smooth. Now add the eggs one by one on low speed, make sure each one is incorporated before adding the next one. Mix the sour cream with the vanilla and add that in. You can use the machine or a rubber spatula as well. And last but not least add the flour in and mix until just combined.
Once you’ve got your base done you can add flavorings if you want. You can add a bit of lemon juice, fresh berries or any other kind of flavor you like.
Frequently Asked Questions: Cheesecake Recipe
What is the best type of cream cheese for a creamy cheesecake?
Actually, you can use any kind of all-natural full fat cream cheese, whether it’s a house brand or an A-brand.
Personally, I usually use Philadelphia’s natural cream cheese. Which brand of cream cheese you use depends largely on your location in the world and what is available. Sometimes you will find brands that carry a variety called rich and creamy. That is usually not the best choice. You want it to be firm enough to hold the cheesecake.
What is the best way to get a cheesecake out of the pan?
By using a loose-bottom springform pan, greasing the pan, and then lining the bottom and sides of the springform pan with parchment paper. It might seem like double action but it is the best way to ensure it comes out perfectly every single time.
Do not remove the cheesecake from the pan until it has baked, cooled and set in the refrigerator. Carefully loosen the springform pan of the cool cheesecake and remove the parchment paper from the sides. Transfer the cheesecake to a large cutting board or cake platter for decorating, slicing, and/or serving.
How do I keep my cheesecake from cracking?
In my experience, it comes down to the temperature of your oven during the baking and cooling process. At a lower temperature, a cheesecake will bake more evenly, so it will not collapse to the point where cracks appear when it cools. For the same reason, it is important to keep the cheesecake in the oven while it cools. But the best two tips I have are these:
put a small oven dish with hot water on the bottom in the oven
leave the oven door closed after baking.
The extra moisture prevents the cheesecake from cracking.
I have a crack in my cheesecake, what do I do?
Not to worry! You can easily hide the cheesecake cracks by decorating the top of your cheesecake with a delicious topping. Think lemon curd, whipped heavy cream, or Italian meringue. Or even a layer of fresh berries will do the trick. The taste will stay be the same so while the crack might not look all that great it’s not a big issue for the flavor.
How do you know if a cheesecake is baked?
A baked cheesecake is done when the edges feel firm but the center is still wobbly. As it cools and sets in the oven and refrigerator, the entire cheesecake will firm up.
Do I need to use a water bath?
Some recipes will tell you to use a cheesecake water bath when baking to prevent the cheesecake from cracking. First of all you will need a solid cheesecake pan if you want to do that or the water will leak into the springform pan.
What I think works best, is a small oven dish with hot water on the bottom of the oven. But even without, I often have cheesecakes without cracks. Just keep the door closed when the cheesecake cools down in the oven.
This easy cheesecake recipe will create a delicious and perfect homemade cheesecake and is your starting point for making your first cheesecake and add your favorite cheesecake toppings!
More cheesecake recipes will follow soon but also check out below delicious no bake cheesecake recipes if you have less time at your hands.
Grease the springform pan and line with baking paper. Crush the biscuits. Melt the butter and stir the cookie crumbs into the melted butter until you have a crumbly, sticky mixture. Pour into a springform pan lined with baking paper and press down firmly (I do'nt cover the sides of the baking pan).
Prepare the filling or batter for the cheesecake. Cream together the cream cheese and sugar. Add the eggs one at a time, beating just until incorporated. Mix the vanilla extract with the sour cream and add while beating. Add 15g (0.5 oz) flour and beat until smooth, but not too long.
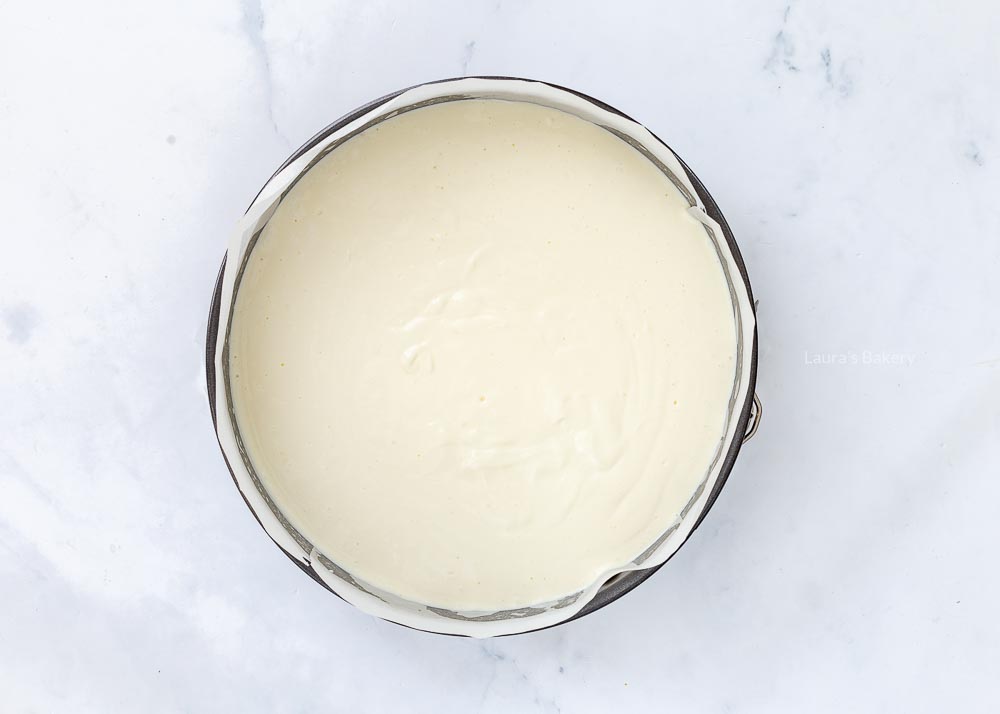
Now add any flavorings to the base. Pour the batter onto the cookie base and smooth down with a spatula. Bake the cheesecake in a preheated oven (conventional oven) for 60 minutes at 150°C (300˚F). TIP: Put a small oven dish with hot water on the bottom of the oven.
After baking, turn off the oven and leave the cheesecake to cool with the oven door closed. Once the cheesecake is at room temperature, place it in the refrigerator to set for at least 4 hours.
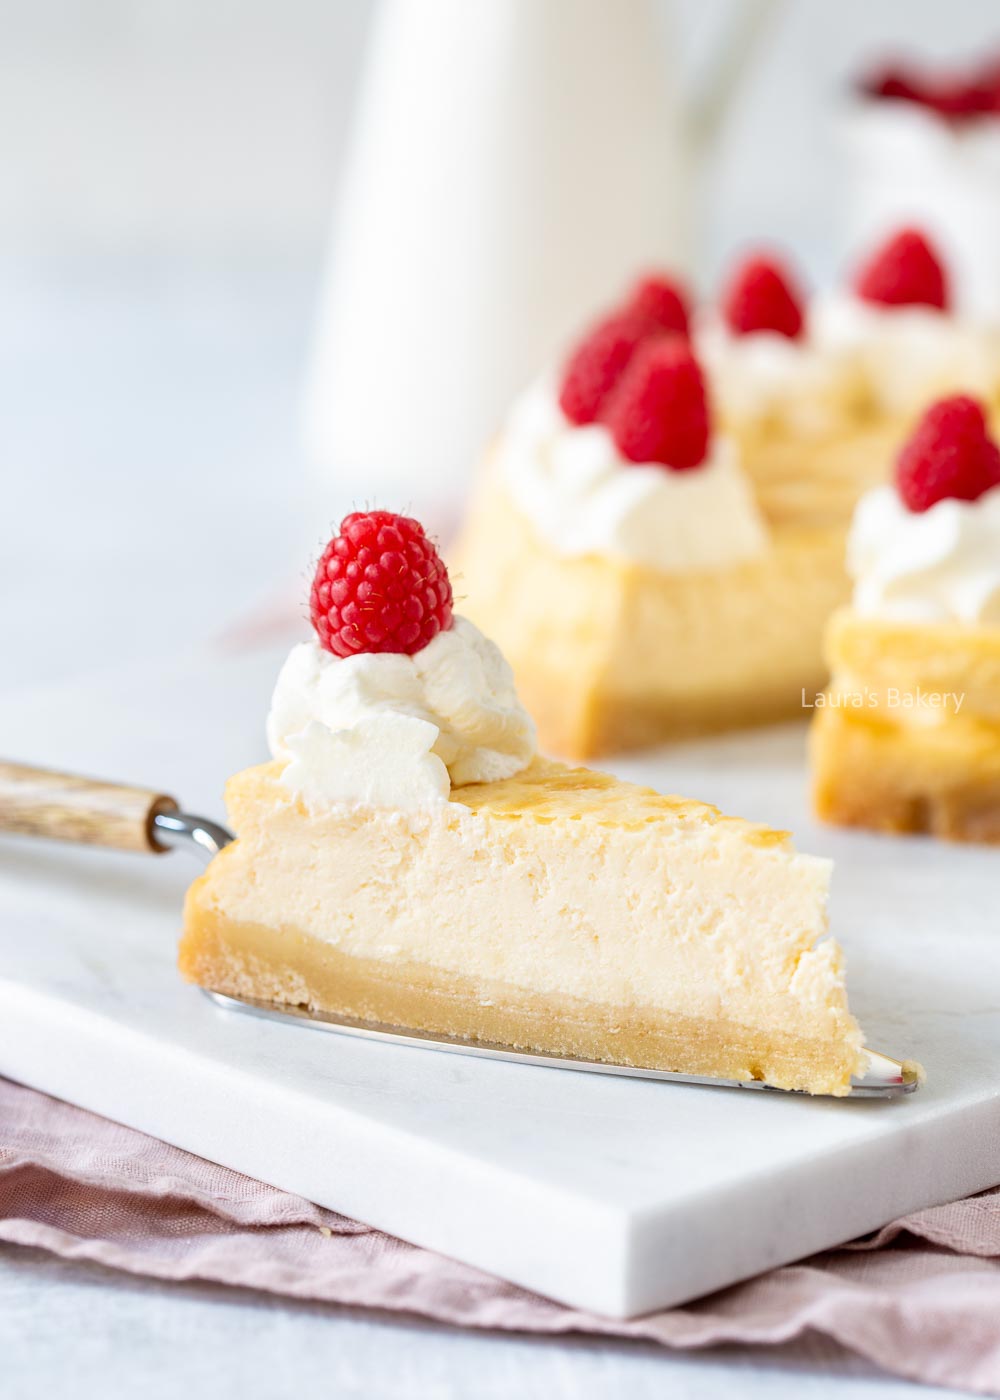
Serve with a dollop of whipped cream and decorate with fresh fruit or cookies.
For years, I have been sharing the most delicious baked cheesecake recipes on my Dutch website (so expect some coming up in the next weeks!), but ironically, the basic recipe has always fallen by the wayside. So it’s about time I shared my simple cheesecake recipe with you that is the base of so many other cheesecakes.
Making a basic cheesecake recipe
Cheesecake, who doesn’t love it? Making cheesecake may sound intimidating if you’ve never tried it before, but once you know how easy it is, you will probably bake this delicious cake many times over. I find this the best cheesecake recipe out there, as it is so versatile and easy to adjust.
With this basic cheesecake recipe, you can go in any direction you want. For example, you can flavor the cream cheese filling with citrus or chocolate and top the cheesecake with a delicious Italian meringue. Or what about adding a crumble topping and make this blueberry crumble cheesecake!
Or maybe you prefer to experiment with different cookies for the bottom, or maybe you like to use more than one cookie type! Later in this article, I’ll give you tips on the proportions of different types of cookies and how much unsalted butter you need for which cookies.
Making the Cheesecake Cake Base
The first step in baking a cheesecake is to make the base. You can use any kind of cookie (or even nuts). Most common is probably a classic graham cracker crust, but there are so many more options to choose from. Mix the cookie crumbs with the melted butter and press them into the bottom of your springform pan. An easy way to make sure you press it evenly around the base is to use a glass with a flat bottom to press the cookie crust. Put the base in the refrigerator while you make the filling.
I’m going to give you some additional guidelines for varying the cookie base to make it a little easier. Some types of cookies already contain more butter, so you need to add less butter to make a tasty cheesecake base.
Below is a list of the most common cookies used in cheesecake, along with how much unsalted butter in grams you need to bake the perfect cookie base for your cheesecake. You can then enter this into the base recipe below.
TIP: Did you know you can make cute mini cheesecakes? Or how about a cheesecake with a butterscotch cake base?
Making the cheesecake filling
Of course, just as important as the base of the cheesecake is also the filling. Now the fun part of the filling is that there is no limit to the cheesecake variations you can make. But let’s start with the basics.
What do you need for making a classic cheesecake recipe
full fat cream cheese
sugar – you can use brown sugar but that will have an effect on the color of the end result. I usually go for (fine) granulated sugar
eggs
sour cream
vanilla extract
all purpose flour
The first step is to add the cream cheese with the sugar in the bowl of a stand mixer (using a hand mixer is a good option too). Use the paddle attachment and keep in mind that you do not want to over whip the mixture. Using medium speed, cream the two together until smooth. Now add the eggs one by one on low speed, make sure each one is incorporated before adding the next one. Mix the sour cream with the vanilla and add that in. You can use the machine or a rubber spatula as well. And last but not least add the flour in and mix until just combined.
Once you’ve got your base done you can add flavorings if you want. You can add a bit of lemon juice, fresh berries or any other kind of flavor you like.
Frequently Asked Questions: Cheesecake Recipe
What is the best type of cream cheese for a creamy cheesecake?
Actually, you can use any kind of all-natural full fat cream cheese, whether it’s a house brand or an A-brand.
Personally, I usually use Philadelphia’s natural cream cheese. Which brand of cream cheese you use depends largely on your location in the world and what is available. Sometimes you will find brands that carry a variety called rich and creamy. That is usually not the best choice. You want it to be firm enough to hold the cheesecake.
What is the best way to get a cheesecake out of the pan?
By using a loose-bottom springform pan, greasing the pan, and then lining the bottom and sides of the springform pan with parchment paper. It might seem like double action but it is the best way to ensure it comes out perfectly every single time.
Do not remove the cheesecake from the pan until it has baked, cooled and set in the refrigerator. Carefully loosen the springform pan of the cool cheesecake and remove the parchment paper from the sides. Transfer the cheesecake to a large cutting board or cake platter for decorating, slicing, and/or serving.
How do I keep my cheesecake from cracking?
In my experience, it comes down to the temperature of your oven during the baking and cooling process. At a lower temperature, a cheesecake will bake more evenly, so it will not collapse to the point where cracks appear when it cools. For the same reason, it is important to keep the cheesecake in the oven while it cools. But the best two tips I have are these:
put a small oven dish with hot water on the bottom in the oven
leave the oven door closed after baking.
The extra moisture prevents the cheesecake from cracking.
I have a crack in my cheesecake, what do I do?
Not to worry! You can easily hide the cheesecake cracks by decorating the top of your cheesecake with a delicious topping. Think lemon curd, whipped heavy cream, or Italian meringue. Or even a layer of fresh berries will do the trick. The taste will stay be the same so while the crack might not look all that great it’s not a big issue for the flavor.
How do you know if a cheesecake is baked?
A baked cheesecake is done when the edges feel firm but the center is still wobbly. As it cools and sets in the oven and refrigerator, the entire cheesecake will firm up.
Do I need to use a water bath?
Some recipes will tell you to use a cheesecake water bath when baking to prevent the cheesecake from cracking. First of all you will need a solid cheesecake pan if you want to do that or the water will leak into the springform pan.
What I think works best, is a small oven dish with hot water on the bottom of the oven. But even without, I often have cheesecakes without cracks. Just keep the door closed when the cheesecake cools down in the oven.
This easy cheesecake recipe will create a delicious and perfect homemade cheesecake and is your starting point for making your first cheesecake and add your favorite cheesecake toppings!
More cheesecake recipes will follow soon but also check out below delicious no bake cheesecake recipes if you have less time at your hands.
Grease the springform pan and line with baking paper. Crush the biscuits. Melt the butter and stir the cookie crumbs into the melted butter until you have a crumbly, sticky mixture. Pour into a springform pan lined with baking paper and press down firmly (I do'nt cover the sides of the baking pan).
Prepare the filling or batter for the cheesecake. Cream together the cream cheese and sugar. Add the eggs one at a time, beating just until incorporated. Mix the vanilla extract with the sour cream and add while beating. Add 15g (0.5 oz) flour and beat until smooth, but not too long.
Now add any flavorings to the base. Pour the batter onto the cookie base and smooth down with a spatula. Bake the cheesecake in a preheated oven (conventional oven) for 60 minutes at 150°C (300˚F). TIP: Put a small oven dish with hot water on the bottom of the oven.
After baking, turn off the oven and leave the cheesecake to cool with the oven door closed. Once the cheesecake is at room temperature, place it in the refrigerator to set for at least 4 hours.
Serve with a dollop of whipped cream and decorate with fresh fruit or cookies.
Cheesecake is one of my favorite cakes to make. I have made many over the years, so it’s time that I share my tips for a perfect cheesecake!
Cheesecake recipe
I think it was the first cake I ever made without any packaging, because at that time cheesecake was still quite unknown in the Netherlands. I made a lemon meringue cheesecake with a Bastogne cookies base. Since then, I have made countless other cheesecakes and they are always a hit. So what makes the cheesecake so popular?
It must be the delicious creamy texture in combination with that delicious cookie crust. But while everyone seems to bake the most beautiful cheesecakes, yours keep cracking after you’ve baked them. The cheesecake crack seems to be the most annoying thing about this delicious pastry, but preventing it is easier than you think. To help you out, today I am going to give you some tips on how to make the perfect cheesecake, including how to prevent it from cracking.
Preventing cracks in your cheesecake
Let’s start with the technical side of things: how do you prevent your cheesecake from cracking? Despite the many theories circulating on the internet, I really only have one that seems to work best. It’s all about the temperature of your oven. In preparation for this article, I tried my basic cheesecake recipe again the other day and changed one thing. As you can probably guess, my cheesecake cracked. So now I know for sure that this is the ultimate tip.
To avoid having your cheesecake crack, bake it gently. An oven that is too hot will cause the cheesecake to bulge and rise. This will, in turn, cause the cheesecake to crack as it cools, and sometimes already during baking. This is because the top cooks first and then cracks. If you bake a cheesecake at a lower temperature, the cheesecake will rise much more evenly. This is because you avoid the cheesecake batter to rise excessively and crack open in the process. So you want to bake your cheesecake at a fairly low temperature.
Now finding the perfect temperature to bake your cheesecake can be a bit of challenge. Every oven varies in temperature so it might be easier in one oven than in the other. It also varies if you bake with a conventional oven or with a convection oven. So you might have to search a bit before you find that perfect temperature in your oven. In my oven it is always 150˚C (300 ˚F – conventional oven). You can start there and check if that works for your oven as well.
Another tip is to place a separate oven thermometer inside your oven to check if the temperature is actually correct. If you have an older oven the temperatures might be wrong and testing it with a separate thermometer might give you some answers.
Let the cheesecake cool
Once your cheesecake is nicely baked, leave it in the oven to cool. You can leave the oven door open a little if you like, but you shouldn’t take the cheesecake straight out of the hot oven and leave it to cool on the worktop. Once the oven and the cheesecake have cooled down, remove the cheesecake from the oven and put it in the fridge – the recipe will usually tell you how to do this. If you take it straight out of the hot oven your temperature difference is too big which results in another crack as the cheesecake filling cools down too quickly.
Hot water in the oven
Of course, tips such as using a water bath will also help you make the perfect cheesecake. However, there is a big disadvantage to using a bain-marie, and that is the risk of leakage. No one wants hot water running into their cheesecake. I wouldn’t recommend wrapping a cheesecake pan in aluminum foil and than placing straight into the water bath as it can still leak and it won’t get you the best results.
To avoid this, you can also place a oven dish with hot water on the bottom of your oven, as steam rises. I think this is the best way to prevent your cheesecake from cracking ans avoids a mess.
Don’t overmix
Of course, you don’t want too much air in your cheesecake either, as air bubbles increase the risk of cracking. So don’t overmix your batter for too long and tap your filled springform tin on the worktop or work surface a few times before baking to remove any large air bubbles. Use room temperature ingredients to ensure a smooth batter too.
Preventing side cracks
Not as common but sometimes your cheesecake can also crack at the sides of the baking pan. In order to prevent that you can run a knife along the edge of the pan. When the cheesecake cools it can sometimes shrink a little causing the edges to crack. Running the knife along the edge will prevent this from happening.
Cheesecake toppings
If you still have a crack in your cheesecake, the solution is simple. Make an overly tasty topping and no one will notice it’s a cracked cheesecake. Examples of tasty cheesecake toppings include mascarpone cream, meringue, lemon curd, fruit jelly or coulis. Or try this delicious cherry topping. Works brilliantly with every cheesecake!
You can also simply sprinkle a layer of crumbled biscuits over your cheesecake and top with whipped heavy cream.
Flour in a cheesecake
I have sometimes been asked whether flour in a cheesecake will prevent it from cracking. Personally, I had never heard of it. You use flour to bind, of course, but that is not the cause of a crack in your cheesecake.
Adding flour to your cheesecake will make the baked cheesecake slightly drier. Personally, I like a soft creamy cheesecake, but adding flour makes it also firmer. A New York cheesecake is an example of a slightly firmer cheesecake, so a few tablespoons of flour is a standard ingredient. It is common to add 1-2 tablespoons of flour to the cheesecake batter for a slightly firmer consistency. Does it actually helps to prevent the cheesecake from cracking? I don’t think so but you can always give it a go.
I hope the above tips for making the perfect cheesecake are useful and I look forward to seeing your creations.
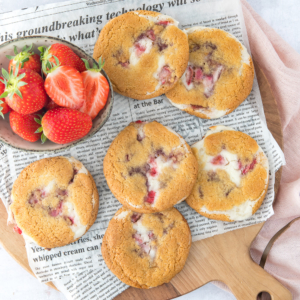
Do you love cheesecake and cookies? Then this recipe for delicious Strawberry Cheesecake Cookies is for you. Delicious soft and chewy cookies with that creamy cheesecake filling that taste great. You will want to try these!
Homemade Strawberry Cheesecake Cookies
The combination of strawberries and cheesecake is always a good idea. Just look at these no-bake strawberry cheesecake bites. Then imagine a cheesecake inside of a cookie with fresh strawberries, it’s incredibly delicious. I know what I’m going to bake multiple times this strawberry season!
These cheesecake cookies are certainly not difficult to make yourself. But to be honest, it can get a little messy when you wrap the cheesecake filling in the dough. Let me tell you, it’s totally worth it! And I’ll share my tips for making the least amount of mess possible.
Strawberry cookie dough
I use a dough similar to chocolate chip cookie dough for the base of these cookies. A favorite of many! This dough makes these cheesecake cookies deliciously creamy and they stay a little chewy and soft. Personally, I really like that about these cookies. And even better: you only need a few simple ingredients.
I first made cheesecake cookies for my cookbook ’50x Koekjes’ (50x Cookies in Dutch) and they were so good, I just had to make more. With a strawberry twist!
Of course, you can vary the flavors of these strawberry cookies even more. Think of different kinds of fruit or white chocolate in them. I can’t wait to make more cheesecake cookies.
Cheesecake filling
I made a simple cream cheese filling for these cookies. As for cream cheese, I like to use Philadelphia, but you can use any kind of regular cream cheese for these cookies. Just use a brand that’s not too watery or thin.
Once you have made the cream cheese mixture, use a teaspoon to make small dollops of cheesecake filling on a baking sheet lined with parchment paper. You don’t need the chopped strawberries yet, I add them together with the cheesecake filling in the cookies dough. That gave me the best results.
Keep the portions of cheesecake filling in the freezer until you fill the cookies. It melts quickly, so it’s best to take it out of the freezer one (pair) at a time. Believe me, otherwise it will be messy 😉 .
Fresh or frozen strawberries
I used fresh strawberries for this recipe, which are a little less moist than frozen strawberries.
You can also use frozen strawberries, but be aware that they may be a bit more moist. If you decide to use frozen strawberries, I would use them frozen in the cookies and not let them thaw first.
Keep in mind that the cookies may need a 1-2 minutes extra in the oven.
Another option: freeze-dried strawberries! I did not try this, but I have baked with them before and I know -almost- certain this would work as well.
How to assemble the cookies
Once you have you cookie dough balls, frozen cream cheese balls and chopped strawberries, it is time to make them into strawberry cheesecake cookies.
Take a ball of cookie dough and remove about a third of the dough. Make a ball of the bigger piece of dough, flatten it a bit and make a dimple in the dough.
Put a piece of frozen cheesecake in this simple. Add some strawberry pieces and use the small piece of dough to cover it up. Press the edges together, form into a nice round ball and place on a prepared baking sheet.
It’s totally fine if there are soms cracks in the dough where you can see the filling. If you like, you can press some extra strawberry pieces into the dough.
How to store strawberry cheesecake cookies
After you have a cookie sheet full of freshly baked cookies, you probably won’t eat them all in one sitting. Fortunately, you can keep them well.
Storing strawberry cheesecake cookies
In a jar or airtight container, they will keep for about a week. Where I normally don’t store cookies in the fridge, these cookies will stay best in de refrigerator due to the cheesecake filling.
Freezing strawberry cheesecake cookies
In an airtight container, the cookies will keep for up to 3 months in the freezer. I like to store them between layer of parchment paper so they don’t stick to each other.
Questions about Strawberry Cheesecake Cookies
Can I prepare the recipe?
It is certainly possible to make these strawberry cream cheese cookies ahead of time. The dough should rest in the refrigerator for at least 1 hour, but longer is fine. Take it out of the fridge 1-2 hours ahead of time to allow it to come to room temperature before forming into balls.
You can make the dollops of cream cheese ahead of time too.
How do I get perfect round cookies?
Want to make really nice round cookies? Use a big round cookie cutter. As soon as the cookies come out of the oven, place the ring around the still-warm cookie and rotate in a circle until the cookie form is nice and round. Repeat with all the cookies.
Can I add chocolate?
Of course! I would recommend to use white chocolate chips. The combination of white chocolate and strawberries is really good!
Can I use strawberry jam?
Yes! You could use strawberry jam to flavor the cream cheese filling or to replace the fresh strawberries. No matter what you choose, the cookies will have a perfect strawberry flavor.
Do you love cheesecake and cookies? Then this recipe for delicious Strawberry Cheesecake Cookies is for you. Delicious soft and chewy cookies with that creamy cheesecake filling that taste great.
Start with the filling, mix the cream cheese and powdered sugar in a small mixing bowl with a hand mixer. Place a sheet of parchment paper on a baking sheet or plate that will fit in your freezer. Spoon 20 dollops of cheesecake mixture onto the paper. Place the plate in the freezer.
Combine butter and both sugars in a large bowl and mix until creamy. I used a stand mixer. Add the egg and vanilla extract and mix until smooth.
Add flour, salt and baking soda and mix until dry ingredients are incorporated. Wrap dough in plastic wrap and refrigerate for at least one hour.
Divide dough into 20 balls, using a small cookie scoop. Take one ball and remove about a third of the dough. Make a ball from the majority of the dough, flatten it slightly and make a dimple in it. Put a piece of cheesecake filling from the freezer in this dimple. Sprinkle some strawberry pieces on top.
Use the small piece of dough to make a flatter piece and place it over the cheesecake filling. Press the edges together. A crack in the dough where you can see the filling is not a problem. Repeat these steps for all the dough balls. You can press in strawberry pieces on top of the cookie dough if you like.
Place the cookies on a lined baking sheet with plenty of space in between. These cookies will run out quite a bit.
Bake the cheesecake cookies at 180°C/350°F (conventional oven) for 10-12 minutes until done and golden brown. Allow the cookies to cool completely on the baking sheet. The cookies will still be a little soft from the filling. Transfer to a wire rack after cooling.
One of my all time favorite cheesecake recipes is this blueberry crumble cheesecake. It’s a golden oldie but I make it quite often and I’ve been known to eat three slices in one day. It is just that good! I’m not the only one who likes it either as my visitors tend to rave over this blueberry cheesecake all the time too!
Blueberry crumble cheesecake
It’s also a great cheesecake to freeze any leftovers but I’ll get to that later. Let me first tell you what you need to make this blueberry crumble cheesecake: (always check the recipe card for full details)
biscuits – I use digestive biscuits for making the bottom of the cheesecake
unsalted butter
cream cheese – for the cheesecake batter
granulated sugar – I never use brown sugar here as that greatly effects the color of the filling
eggs
sour cream
all purpose flour
fresh blueberries
And of course, you’ll need the ingredients for the crumble as well: butter, sugar, flour, oatmeal and a pinch of salt.
How to make the blueberry cheesecake
Making the cheesecake starts with making the buttery crumble for the base layer. You first crumble all the cookies. This is easiest to do in a food processor. Mix it with the melted butter and press it firmly into your springform pan or cheesecake pan. Of course the baking pan is first prepared with a lining of parchment paper and make sure to also butter the sides of the pan. Nothing worse than a cheesecake that sticks to the pan after you’ve baked it.
Once that is done you move on to the creamy cheesecake filling. You can do this in a large bowl but it helps to make this in the bowl of a stand mixer with the paddle attachment or whisk attachment. First mix the cream and sugar together until smooth. Add the eggs one by one until fully incorporated.
Mix vanilla extract and sour cream in and finish with the flour. It’s just a little bit but it helps to stabilize the filling. The remaining flour you mix in with the juicy blueberries. This will help them stay in the batter without all sinking to the bottom. It also helps to pick blueberries that are not too big. Small ones tend to ‘float’ better. Mix the blueberries with the rest of the batter and fold it through.
Pour the mixture on top of your buttery crust and smooth the top with a spatula.
Making the crumble
The only thing you need for making the crumble are your hands. You add butter, sugar, flour, oatmeal and a little pinch of salt into a medium bowl and use your fingers to make a crumble with this. Sprinkle this over the top of the cheesecake batter and place in the oven for about an hour or until golden brown.
I generally don’t use a hot water bath for this recipe as I find it works fine without. Check all my tips for baking the perfect cheesecake here. It’s all about controlling the temperature of the oven for the best result. Once the hour has past turn the oven off and set the oven door open slightly so the heat can escape.
Once cooled down this is really the perfect dessert for all and any special occasion.
Fan of cheesecakes? Check out these delicious cheesecakes as well
If it is not blueberry season you can also make this with frozen blueberries. But do make sure to defrost the berries first and drain any excess moisture as that will have an effect on the texture of the filling.
How long can I store the blueberry cheesecake?
You can store the cheesecake in an airtight container in the fridge for 3-4 days or freeze in slices. For slicing make sure to use a sharp knife and it also helps to warm the knife under hot water before slicing.
What cookies can I use for the base?
You can use just about any kind of cookie you prefer. It helps to use a cookie that doesn’t have additional ingredients like chocolate chip cookies. Plain cookies like digestive biscuits, ginger cookies or something similar are ideal.
Start by making the base. Finely crush the digestive biscuits. Melt the butter and mix the biscuit crumbs into the melted butter until you have a crumbly, sticky mixture. Pour into a springform pan lined with baking paper and press down firmly. Grease the sides of the tin as well.
Make the filling or cheesecake base. Whisk the cream cheese and sugar together until creamy. Add the eggs one at a time, beating until incorporated. Mix the vanilla extract with the sour cream and add. Finally add 15g of the flour. Whisk until smooth, but not too long.
Add the remaining 10g flour to the blueberries. Stir until all the berries are covered with a thin layer of flour. Spread the batter with a spatula. Pour the mixture onto the cake base and smooth down with a spatula.
Put the butter, sugar, flour, oats and salt in a bowl and work with your fingers until you have crumbs. Spread this over the cheesecake. Bake the Blueberry Crumble Cheesecake in a pre-heated oven (conventional oven) for 60 minutes at 150°C/302˚F.
After baking, turn off the oven and leave the cheesecake to cool with the door slightly ajar. Once the cheesecake is at room temperature, place in the fridge to set for at least 4 hours.
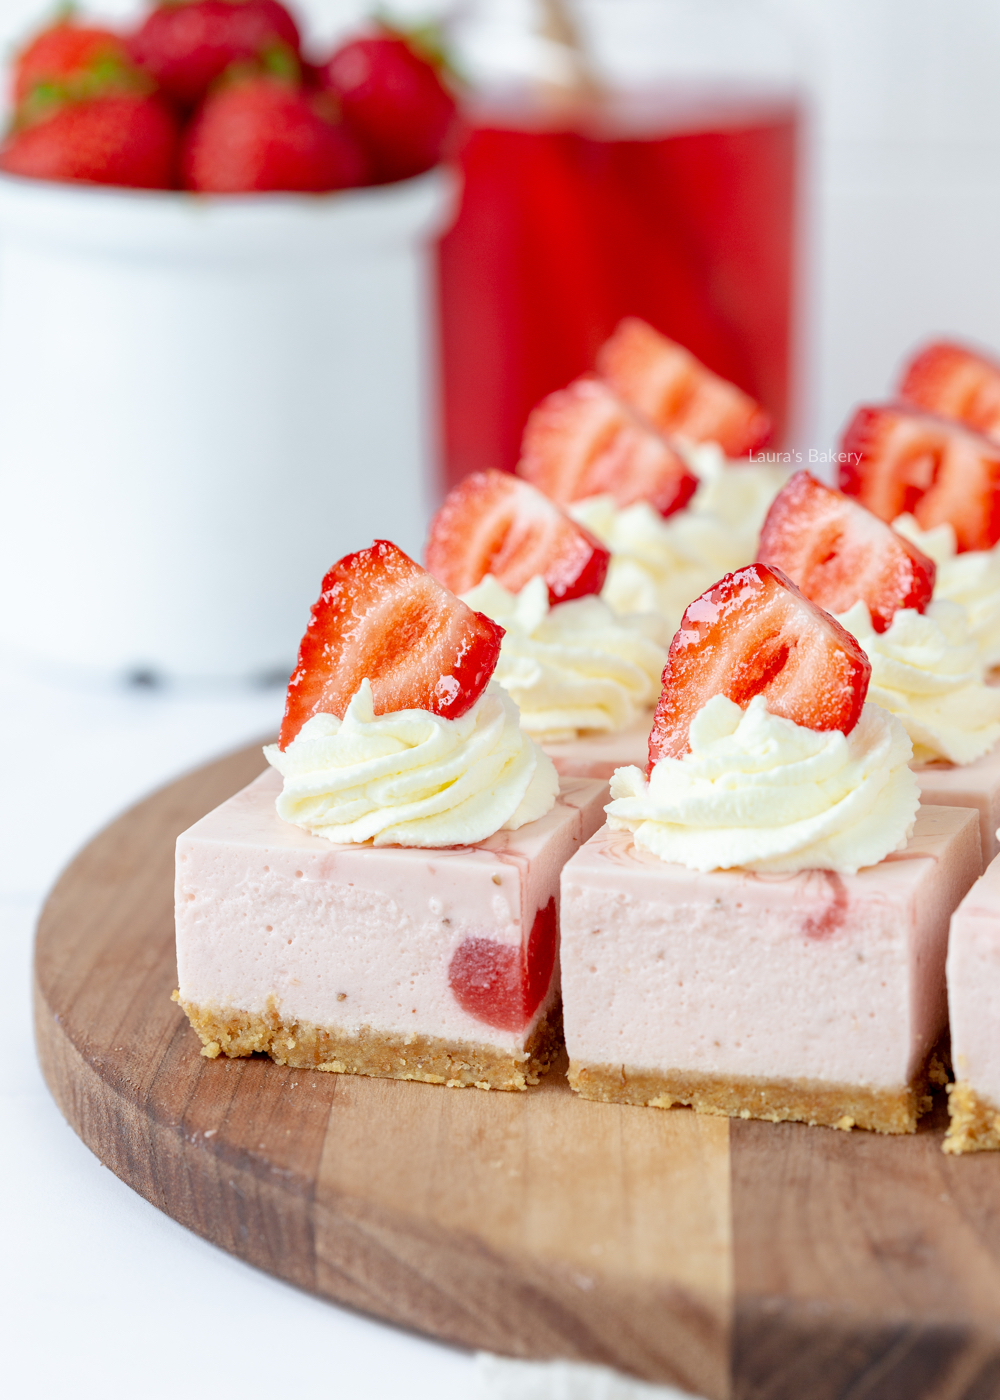
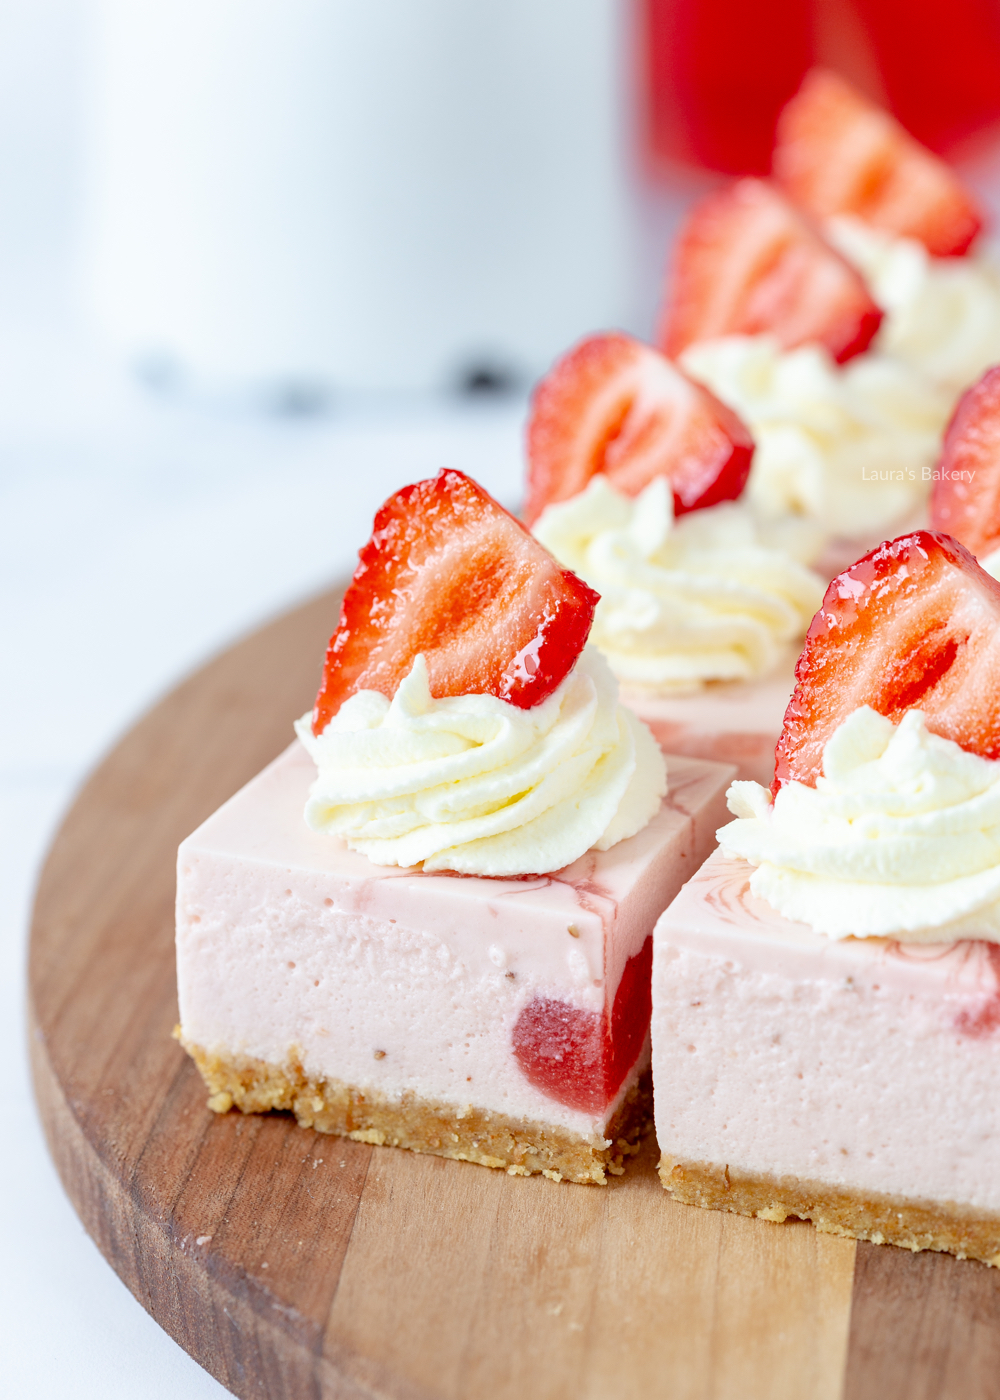
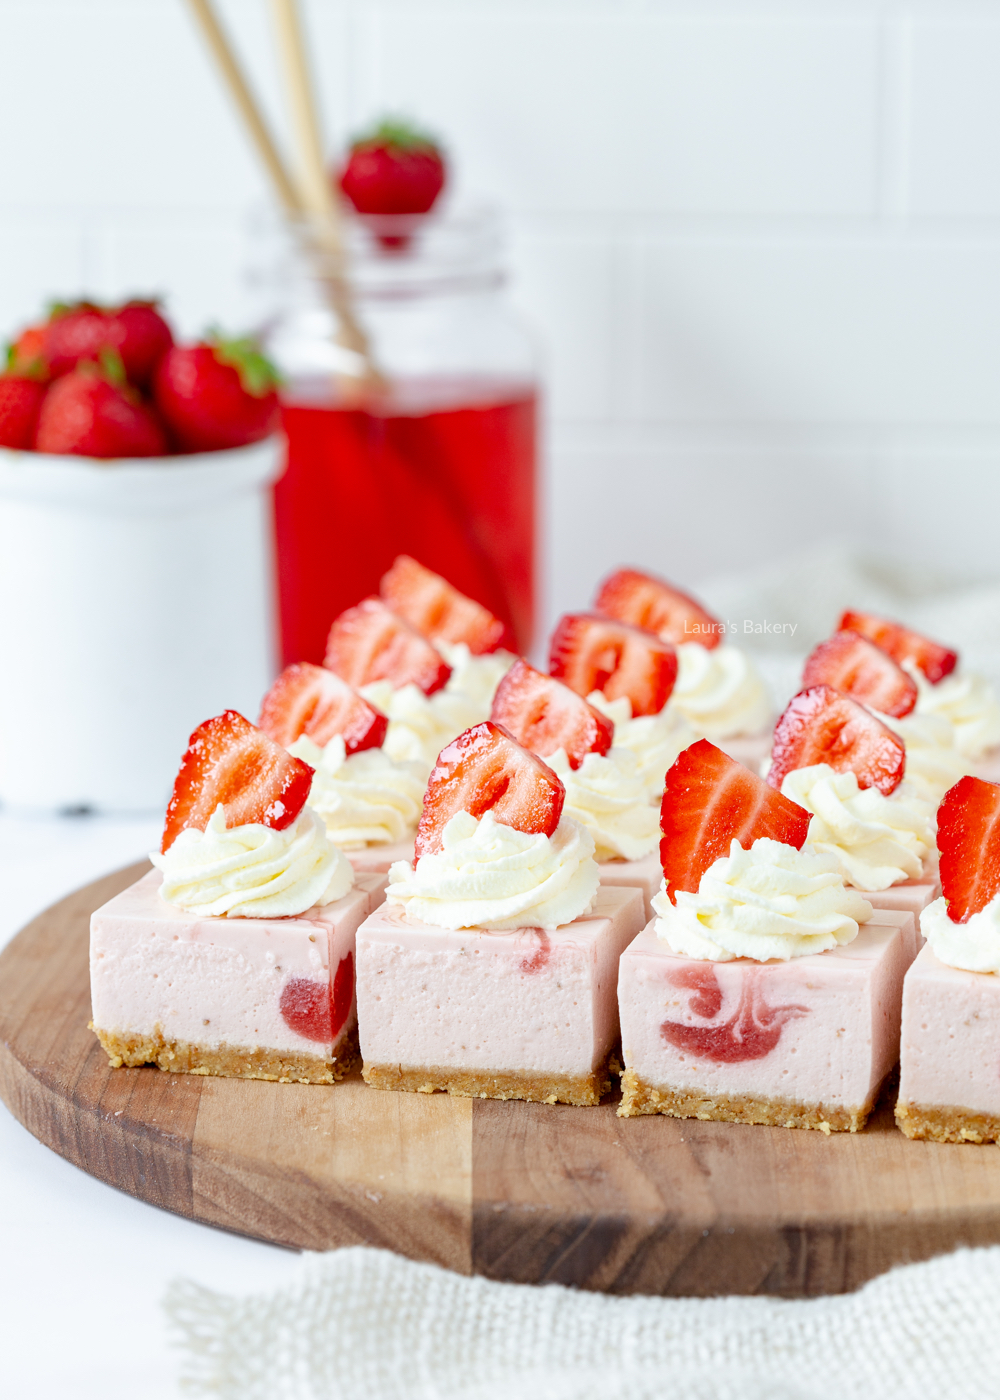
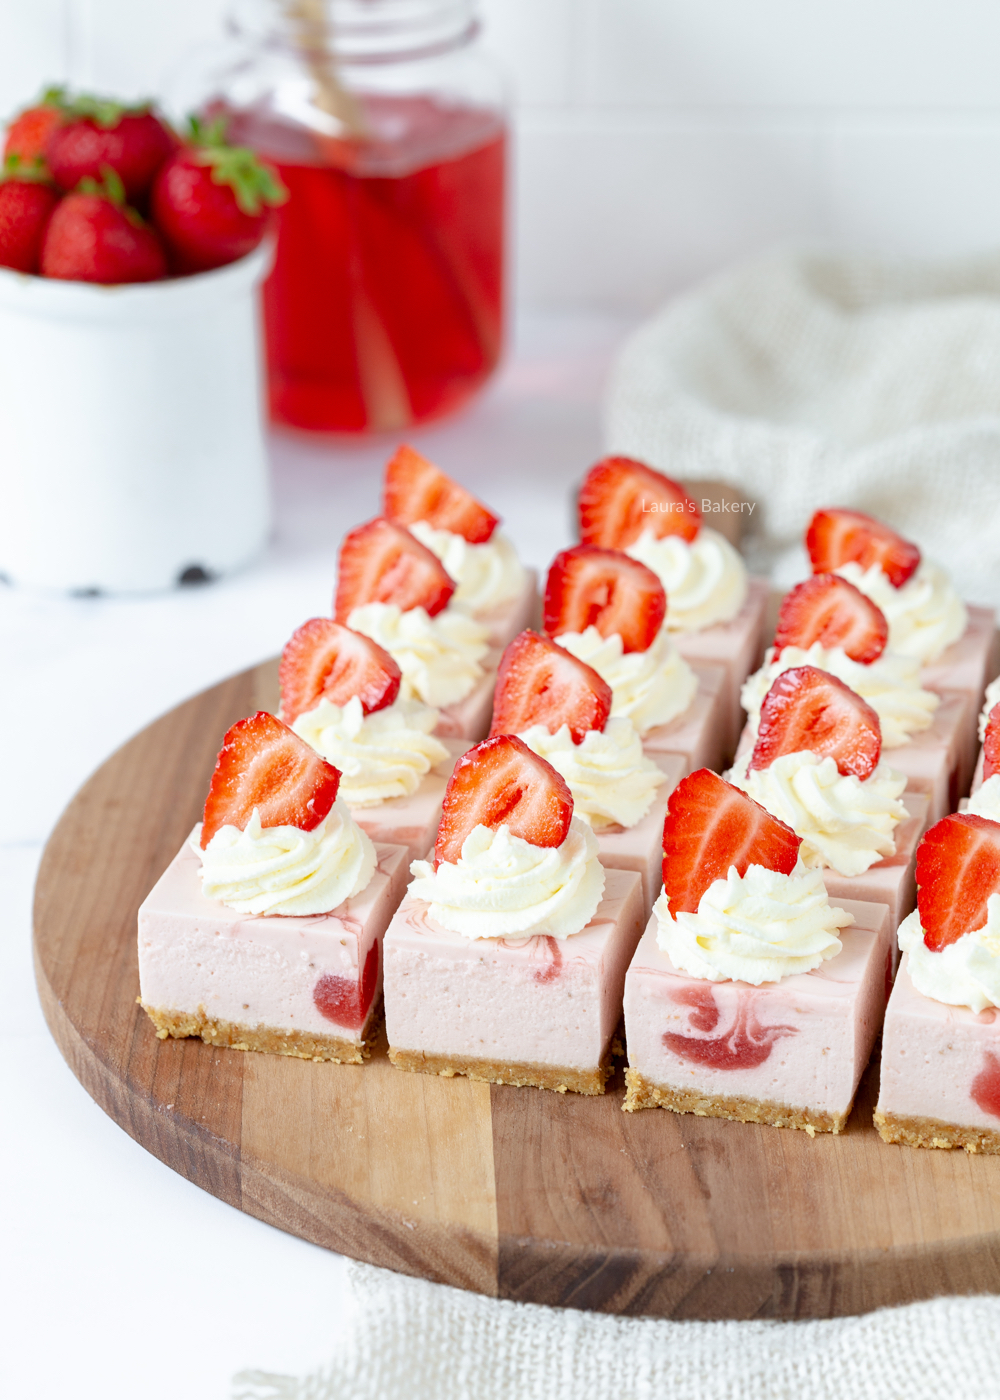
Never made no-bake strawberry cheesecake bites before? Get ready, because if you taste a slice of these, you’ll be in the kitchen preparing this delicious treat many times this summer.
No-bake strawberry cheesecake bites
Has strawberry season arrived yet? Because I can’t wait to make this cheesecake with strawberries again.
This strawberry cheesecake recipe is made without an oven, so it is a no-bake recipe. Strawberries are always available in the warmest months of the year, so it’s nice if the oven can stay out.
Strawberry cheesecake recipe
I chose to make the recipe in a square baking pan, so you can cut these nice square bites out of them after they set. Of course you can also make the recipe in a round springform or baking pan, I give a tip for that in the frequently asked questions below.
For the base, I used the following ingredients:
Biscuits, like graham crackers
Butter, this will make the cookie crumbs form into a firm base.
For the strawberry filling (and decoration) of the cheesecake, you will need the following:
Cream cheese, from Philadelphia, for example.
Vanilla extract, indispensable and easy to make yourself.
Lemon juice, because the juice gives the cheesecake a nice freshness.
Whipping cream, to make your cheescake nice and fluffy as well as to decorate the bites nicely.
Gelatin, you will need this to make the cheesecake keep its shape.
Granulated sugar, this gives a nice but not too sweet taste to the cake.
Strawberries, the most important flavoring of this strawberry cheesecake.
FAQ: strawberry cheesecake bites recipe
Can I also bake this cheesecake in the oven?
No, that’s not what this recipe is meant for.
Which baking pan did you use for the strawberry cheesecake?
I used a 20 x 20 cm (8 x 8 inch) square baking pan to make these cheesecake bites. This baking pan, for example.
Can I also make this cake in a round springform or baking pan?
That is possible. In the recipe card, under the small picture of the recipe, you will find a “convert recipe” button. If you click on this you can enter a different size baking pan and then the tool will convert the ingredients for you. Handy isn’t it?
Can I replace the strawberries with another type of fruit?
Yes you can. I have not tested it for this particular recipe, but I would replace the strawberries in this recipe 1:1 with raspberries or blackberries.
Can I also make the cheesecake without gelatin?
No, you cannot simply leave out the gelatin. However, it is possible to replace it with an alternative such as agar-agar.
Crush the cookies to fine crumbs, melt the butter and add the crumbs to this. Mix well and pour into the baking pan (lined with baking paper). Press firmly and place in the refrigerator.
Strawberry cheesecake filling
For the strawberry cheesecake filling, mix cream cheese, vanilla extract and lemon juice until blended in a bowl. Then add 125 ml of whipping cream in a small stream while continuing to mix for two minutes. Set aside.
Soak the gelatin sheets in a large bowl of cold water.
Blend 250 grams of strawberries in a blender. Heat the strawberry puree in a saucepan with the sugar until the sugar is dissolved. Let simmer for a few minutes. Turn off the heat, squeeze the gelatin leaves and dissolve them in the strawberry mixture in the saucepan. Make sure this mixture is not too hot.
Mix the strawberry-gelatin mixture into the cream cheese mixture in a thin stream while continuing to mix, but keep 4 tablespoons of the strawberry mixture aside. When fully mixed, pour it onto the cookie base and smooth it out.
Spread the four tablespoons of the strawberry mixture over the top of the cheesecake and swirl it in with a wooden skewer. Let the cheesecake set in the refrigerator.
Decorating
To serve, cut the cheesecake into 16 pieces. Whip the remaining whipped cream ( delicious with some vanilla sugar) and pipe a swirl on each strawberry cheesecake bite. Stick half a strawberry into each swirl of whipped cream and enjoy!
A delicious recipe for making your no bake cherry cheesecake (Dutch MonChou pie). This pie is made without an oven and has a tasty Bastogne biscuit base. Bastogne cookies are originally from Belgium and while super tasty, you can easily replace them for another kind of cookie you like. Graham crackers is a classic of course so that will work just fine.
Making No bake cherry cheesecake
The first time I made this recipe back in 2014 I wasn’t a big fan of MonChou or cream cheese in desserts in general. Over time I have grown to love and appreciate cream cheese in recipes but in the beginning I found it really weird to have a sweet dish with cheese in it.
In fact, thanks in part to the delicious biscuit base, I am in love with this no bake cherry cheesecake recipe. It has a lovely creamy cheesecake filling and in combination with the cherries it’s the perfect summer dessert.
Ever since my first no bake cherry cheesecake recipe I make it on a regular basis. It’s incredible easy and a perfect crowd pleaser.
Baking tip: I like to use a loose-bottom pie tin for this type of no bake dessert. This makes it easy to remove the Dutch MonChou pie from the tin and the tin is easy to clean.
What is MonChou?
To first explain a bit about the origin of MonChou. It was originally made by a company in the Netherlands called Friesland Campina. They marketed a cream cheese in small square packages and called it monchou. It’s not made anywhere else, but you can very easily replace it with any other kind of firm cream cheese. So if you want to make this no bake cherry cheesecake you can absolutely do that.
MonChou can be found online in a few different stores but it might be easier swapping for another full-fat cream cheese filling. Make sure it is a firm cream cheese and not too soft or the cheesecake will not hold.
Cherry season
Summer roughly coincides with cherry season, which I love. If you’re making this during cherry season, it’s fun to make your own cherry pie filling. There is nothing wrong with the store-bought stuff, but there is nothing like making it yourself.
If cherries are out of season, you can still make a homemade cherry filling. Instead of fresh you can use a can of cherry pie filling or use canned cherries (with juice)
Making the no bake cherry cheesecake
Making the cherry cheesecake starts by making the crust first. You place the cookies of your choice in a food processor and grind them into small crumbs. Add the melted butter and mix the two together. A package of Bastogne cookies that I used here is 260 grams (9.2 ounce). If you’re using graham crackers or another type of cookie you might have to vary the butter content. Make sure all crumbs have some butter.
Press the cookie crumb mixture into the bottom of the tin firmly. You can use a springform pan for this but I like to use a pie dish with a loose bottom. This makes it easier to release the cheesecake once cooled. Place in the fridge until ready to use.
Making the cherry pie filling
For making this easy no bake cherry cheesecake you need tins of cherry pie filling. It’s easiest to buy this ready made. You need roughly 800 grams (1.8 pound) or two tins of the cherry pie filling.
Next step is to prepared the cream cheese mixture. First you whip the double cream or heavy whipping cream with 2 tablespoons of sugar to stiff peaks. You can replace the double cream with cool whip to make the cake firmer or if you do not have very firm cream cheese. Set the cream aside and take a separate bowl for making the cream cheese filling.
Mix cream cheese, sugar and vanilla sugar and mix till you have a creamy filling. You can use a hand mixer to do that or use the mixing bowl of the food processor. Fold the whipped cream through the cream cheese with a rubber spatula.
Take the tin out of the fridge and pour the filling on top of the buttery graham cracker (or Bastogne cookie) crust. Smooth the surface and let it sit in the fridge for at least two hours or until it is set. Cover with plastic wrap.
Once set add the cherry pie filling on top of the cream cheese layer. And the perfect dessert is ready! It is one of my favorite no bake desserts. It’s also a great recipe to make mini cheesecakes. It’s a favorite here at family gatherings or for any special occasions. It doesn’t take much time at all to make it and although you do have to wait for the cheesecake to set, that is not active time!
Tips for making No bake cherry cheesecake
Which cream cheese do you use?
I use small firm MonChou cream cheese packages but you can use another brand with firm cream cheese. Prairie farms is a good and firm substitute and works great in no bake desserts.
How can I make the filling more firm?
You can use cool whip as a replacement for whipping cream for a firmer result. I never do this myself, simply because it is not necessary. Optionally, if you haven’t bought the firm cream cheese, it can help give the filling extra firmness.
Isn’t two tins of cherry pie filling a lot?
Cherries on jelly are a must cherry topping on this no bake cherry cheesecake pie. Like the biscuit at the bottom, cherries in jelly are inseparable from this cake. However, I myself do not like a lot of jelly on the cream cheese filling, so I prefer to use two tins so that I can leave out some of the jelly, but still have lots of cherries. I explain how best to do this in the recipe card below. You can also use one tin of pie filling, but you will have proportionately more jelly and less cherries. Just the way you like it!
Can I replace the cherries?
Absolutely. In fact, you can use any fresh fruit of your choice, whatever is in season and whatever you like for this no bake recipe. I once used blueberry jam instead of cherries for a birthday cake. With fresh blueberries and raspberries on top, it is delicious! You can also use fresh cherries (remove the stones first though!) or fresh berries.
Can I substitute Bastogne biscuits?
Basically you can use any biscuit that crumbles easily. However, bear in mind that each biscuit requires a slightly different amount of butter. If you use 200 grams of digestive biscuits or 240 tea biscuits, you can use the same amount of butter from the recipe below.
Which baking tin did you use?
I prefer to use a loose-bottomed pie tin. This makes it easy to remove the no bake cheesecake from the tin and the tin is easy to clean.
Can you freeze a no bake cherry cheesecake?
Yes, you can. Ideally you should freeze the cake without the cherry pie filling. Make sure you pack the cheesecake in an airtight container, and it will keep in the freezer for up to three months.
Do you want to defrost the cake? Do it in the fridge. It will take a little longer, but this is the best way to prevent the cake from getting soggy.
Are you a fan of cheesecake?
You might want to try these recipes below as well:
Crush the Bastogne biscuits in a food processor. Melt the butter in a pan and add the crumbled biscuits. Stir well until firm.
Pour the biscuit-butter mixture into the baking tin lined with baking paper and spread evenly over the base. Chill the cake in the fridge.
Meanwhile, make the filling for the cake. Whip the cream with 2 tablespoons of sugar in a bowl until stiff.
In another bowl, mix the sugar, vanilla sugar and cream cheese until creamy. Add the whipped cream to the MonChou mixture and mix well.
Spoon the filling into the cooled cookie base and refrigerate for at least 2 hours to allow the filling to set.
If you are using one tin of pie filling, you can spread it evenly over the cake. Are you using two tins like me? Use a fork to remove the cherries from the tin. Leave the excess jelly in the tin. This way you'll have a nice amount of cherries on the cake, but it won't get too full because you won't use all the jelly. Spread the cherries evenly over the cake.
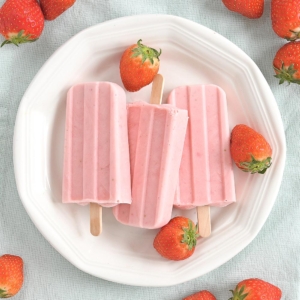
If you love strawberry cheesecake, you’re gonna want to make these strawberry cheesecake popsicles. You make them with fresh strawberries and cream cheese. Absolutely delicious on a hot summer day.
Strawberry cheesecake popsicles
The fun part is that these homemade popsicles really do taste like cheesecake. The first time I made them I did a little happy dance after tasting them.
The creamy texture in combination with the fresh berries is just the best! No one wants to stand in front of a hot oven in the summer, so this is the perfect replacement!
What do you need for making these popsicles
Apart from the below ingredients you will also need popsicle sticks and silicone popsicle molds for making this strawberry cheesecake popsicle recipe. And once you have all the ingredients it’s the easiest thing to make. Check the recipe card for full details
cream cheese – use your favorite brand
sugar – I use fine granulated sugar
vanilla extract
heavy cream – or whipping cream
milk
fresh strawberries – you can also use frozen strawberries if strawberries are not in season. But fresh is still best.
If you want it to be even more like cheesecake another great option is to add graham cracker crumbs to the ice cream as well. Graham crackers is the logical choice since that is most often used as a crust, but you could absolutely use other cookies as well. I’ll explain how to do that below.
Making the popsicles
As I mentioned before, making these strawberry cheesecake popsicles is super easy. The hardest part is collection the ingredients (and that’s easy too)!
You just add all the ingredients to a food processor or a blender, blend until smooth and pour into your favorite ice cream mold. You can also turn this into ice cream bars or make ice cream waffles by adding the frozen popsicles on vanilla wafers.
Since the fruit is so soft you don’t really need a high-powered blender for making this, but if you use harder fruits that might be a good choice for the smoothest result.
You can use an ice cream maker if you have one but I usually just pop them in the freezer. They will need about 3 to 4 hours to freeze completely.
Now if you want to add that graham cracker crust to the popsicles you fill the entire mold a little less full and sprinkle the crumbs on top. Making layers is also an option and you can absolutely add your favorite flavors to the mixture. I find it a perfect way to eat a little more fruit during warmer weather.
Additions and variations
You can turn this fruity cheesecake into your favorite flavors of cheesecake by changing the strawberries to raspberries, peaches, cherries; you name it.
If you want a little less cream cheese you can replace half of it with Greek yogurt if you want. Since it is mostly very simple ingredients it is also really easy to vary with different fruits. You can change the strawberry mixture by adding additional fruits as well.
Tips on making strawberry cheesecake popsicles
Can I use frozen strawberries instead of fresh?
Yes! Just thaw them first and drain excess liquid before blending to keep the popsicles from getting too icy.
Can I make them dairy-free?
Absolutely. Use a plant-based cream cheese and yogurt or coconut milk for a creamy dairy-free version.
Do I need popsicle molds?
They help with shape and easy removal, but you can also use small paper cups and insert wooden sticks after partially freezing. When ready to serve just tear off the paper.
How do I get the strawberry cheesecake popsicles out of the mold easily?
Run warm water over the outside of the mold for 10–15 seconds. Wiggle the sticks gently and they should slide right out.
How long do they keep in the freezer?
They’re best within 2–3 weeks for optimal texture and flavor, though they’ll technically last longer.
These popsicles are so incredibly simple to make. Really. You put all the ingredients in a blender or food processor and blend until smooth.
Pour the cheesecake mixture into your popsicle molds until just below the rim and place the sticks in the molds.
Put the popsicles in the freezer for at least 3 to 4 hours.
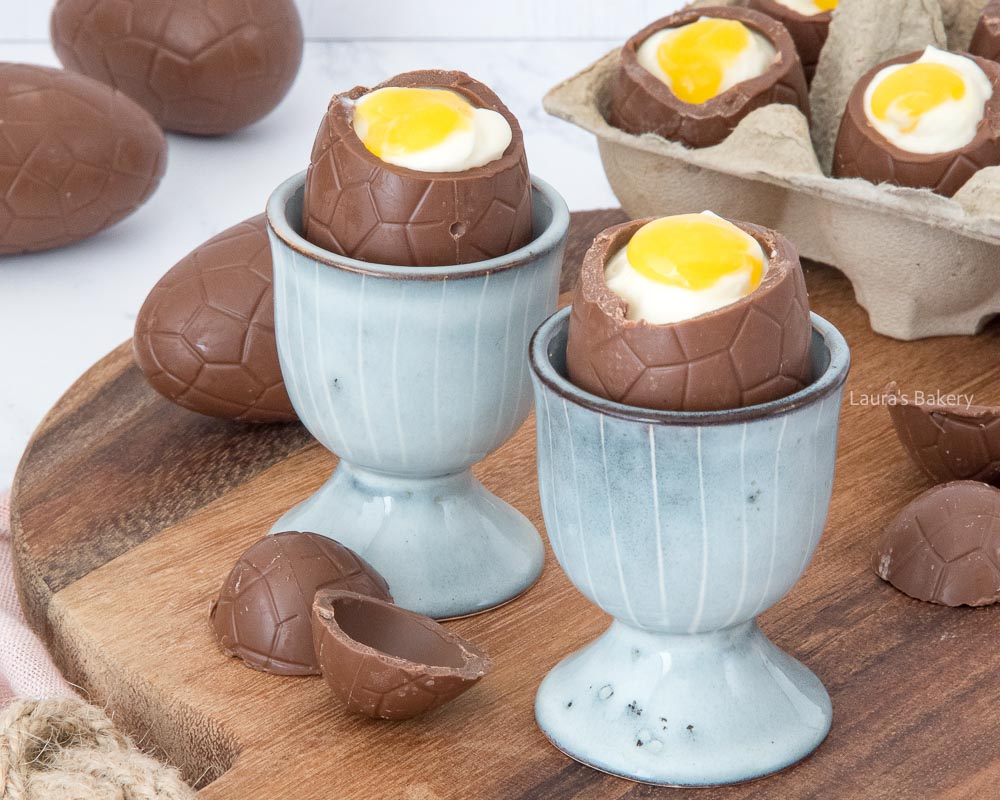
Today’s recipe is super fun. It’s a cheesecake filled Easter egg! Delicious creamy no bake cheesecake with homemade lemon curd inside of a chocolate egg.
The idea is to make the eggs look like ‘real’ eggs with a bit of egg yolk in the middle, that’s what the lemon curd is used for. It’s super easy to make, fun to present and very tasty too. What more can you want?
Cheesecake filled easter eggs
I initially made this recipe for one of my books, but because it is such an easy and fun recipe I figured I should share it here as well. I love simple recipes like this.
It’s good to know that my chocolate easter eggs where roughly the size of a regular medium egg. Of course you can use any shape and size of egg you want. You could even use one half of an chocolate egg.
There will be more fun easter recipes coming up in the next couple of days so be sure to check them all in the easter recipes category.
What do you need to make chocolate easter egg cheesecake
As always make sure the ingredients are at room temperature and double check the recipe card for the full details and instructions. This is a no bake cheesecake filling. Obviously as baking a chocolate egg would result in a melted chocolate puddle 😉 . Not exactly what we’re going for.
chocolate eggs – the color or flavor of chocolate doesn’t make a difference. You can use dark chocolate, milk chocolate or white chocolate. Arguably the white chocolate would look most like a ‘real egg’ but it really doesn’t make a huge difference.
cream cheese – go for full-fat cream cheese as the fat content will make the cream cheese firmer. I like using Philadelphia cream cheese but any brand that has firm cream cheese will do.
sugar – I used regular granulated white sugar
vanilla extract – you can also use vanilla essence or vanilla paste
whipping cream – or use heavy cream
lemon curd – either make this yourself or go for store bought
No special equipment is needed for this, but a food processor or electric mixer would come in handy for whipping the cream and the cream cheese.
How to make this fun easter treat
Making this easter egg recipe is super simple. You start by heating a large sharp knife in hot water. That is essential as you need a warm knife to easily slice through the chocolate eggs without breaking them. You only want to slice the top of.
While your knife is warming, remove all the wrappings of the eggs. Take your knife, dry it and immediately cut the top of the eggs. You might have to dip the knife back into the hot water when necessary. And that is the hardest part of this recipe. Easy right?
Next you add the cream cheese to a large mixing bowl and you add the sugar. Mix it with a whisk until creamy. Add vanilla extract and whip again.
Whisk or mix the heavy cream in another bowl until it has formed stiff peaks. Add the cream cheese mixture in and blend it together while the mixer is on low speed.
Add your cream cheese mixture into a piping bag and do the same with the lemon curd in another piping bag.
Making the actual filled eggs
Now take your egg cups and pipe the cream cheese in. Don’t fill all the way up as the lemon curd still need to go in as well.
Cut of a small bit of the piping bag holding the lemon curd. You do not want it to be too big. Insert the piping bag in the middle of your chocolate egg. Gently squeeze the lemon curd out and pull the piping bag upwards.
You want to end with some lemon curd on top of the cheesecake filling, so it looks like egg yolk.
It actually helps if you place the chocolate eggs in a fridge egg holder or something similar. Maybe you have an old egg carton you can use to hold the chocolate shells.
Tips on making the cheesecake filled easter eggs
I don't like lemon curd can I use something else?
Sure. You can use a bit of apricot jam for instance and insert that into the centre of each cheesecake egg. You might want to do that with a very small spoon instead of a piping bag as the jam would be a bit harder to use
How long can I store the cheesecake eggs?
You can store them in an airtight container in the fridge for 4-5 days. They will also be a little firmer once chilled properly. It does help to store them in the fridge using an egg holder too, otherwise they might tip over.
What size of chocolate eggs should I use?
You can use any kind of size you like. It all depends on how you want it to look. You can use a large chocolate egg or go for mini size. But keep in mind that you will need either more or less of the cheesecake mixture. I used eggs that were the same size as a medium ‘real’ egg.
Cheesecake in a chocolate egg? Why not! This vanilla cheesecake with lemon curd works great with chocolate, let me tell you. The fact that it looks like a boiled egg just makes it perfect.
Take a glass of hot water and put a sharp knife in it. In the meantime, remove all the wrappings from the eggs. Take the knife out of the water and dry with a towel. Now, carefully cut the top off the eggs. Dip the knife back into the hot water now and then.
In a bowl, beat the cream cheese with the sugar until creamy. Add the vanilla extract and mix. In a separate bowl, beat the heavy cream until stiff. Add to cream cheese mixture and mix on low speed.
Fill a pastry bag with the cream cheese mixture. Cut off the tip and fill the eggs with the cheesecake mixture. Don’t fill to the brim; you’ll need to add some lemon curd.
Put the lemon curd into a separate piping bag. Cut off a small tip, insert into the cheesecake and gently squeeze to fill. Gently pull the piping bag up until you can see some lemon curd coming out of the top.
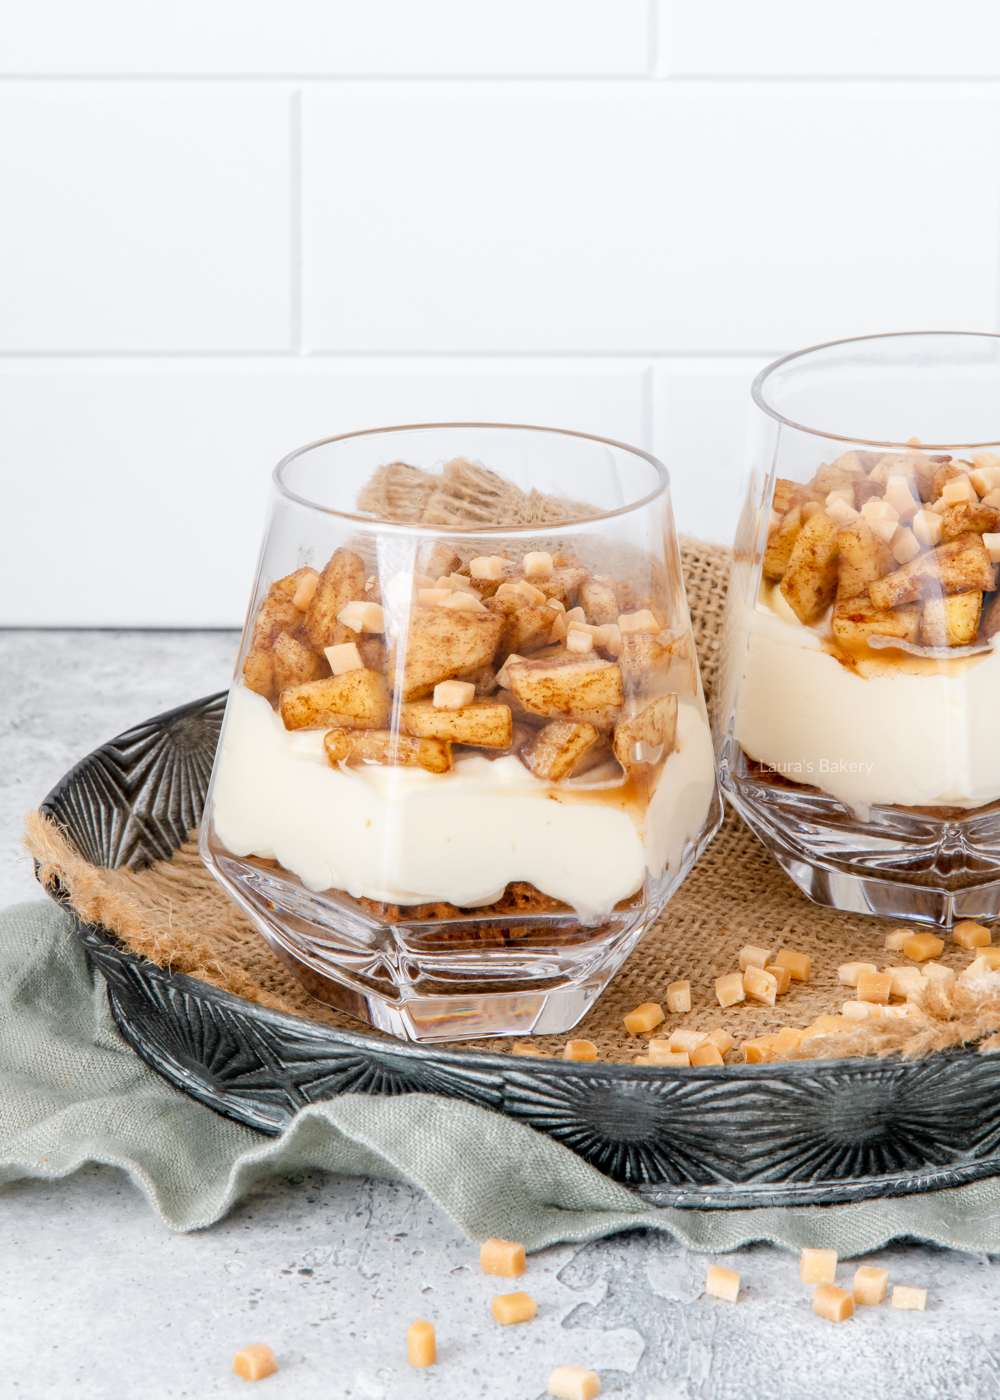
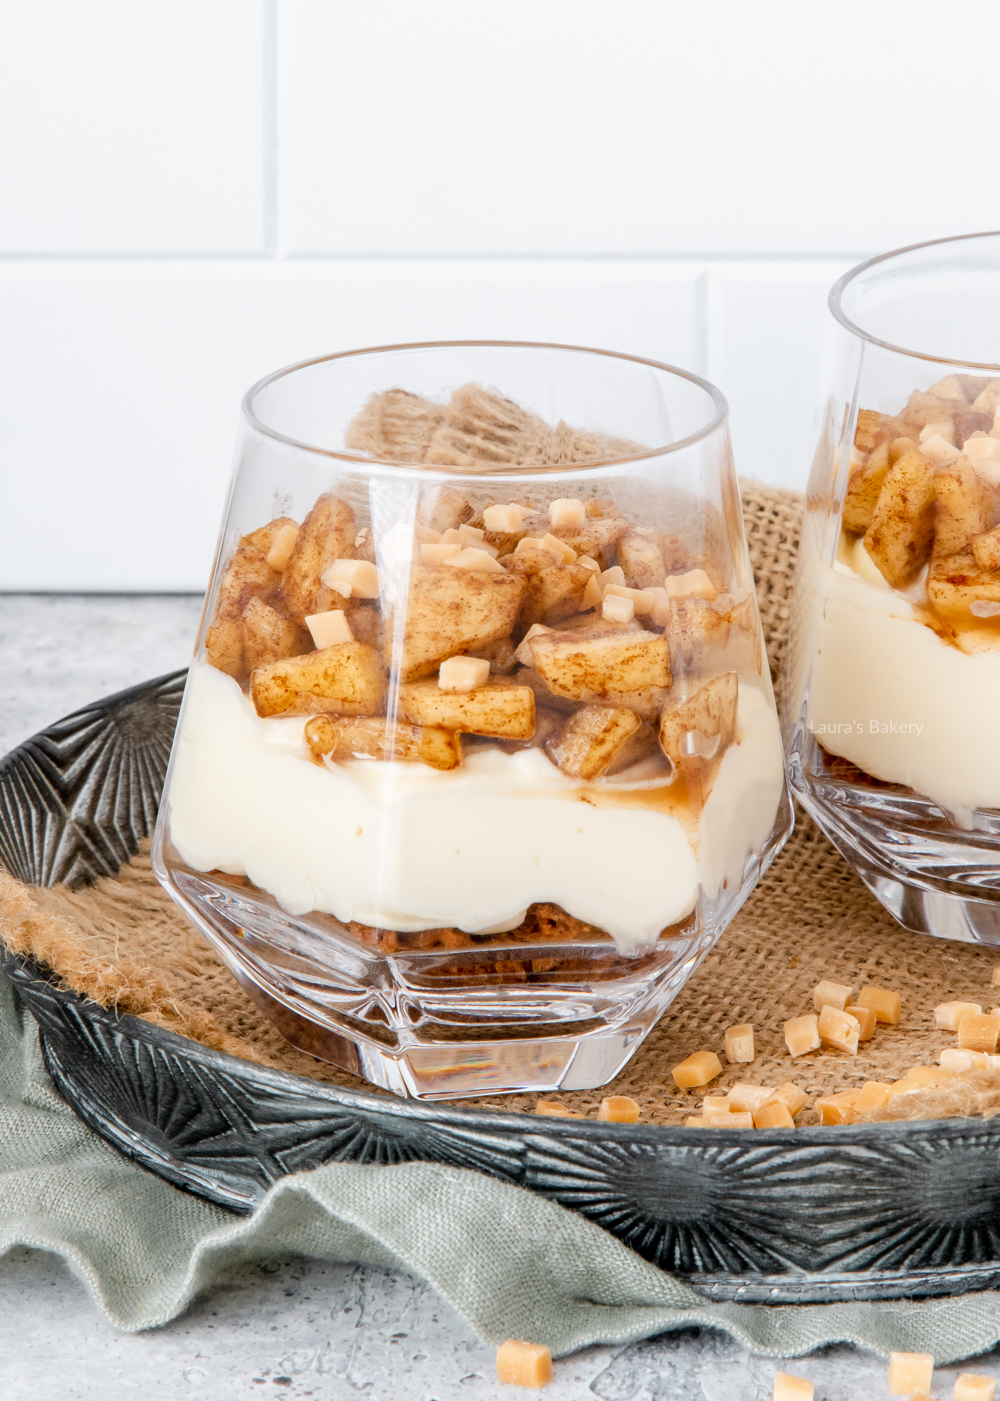
It’s like a little apple pie combined with caramel cheesecake. With this recipe, you can easily make delicious no bake apple caramel cheesecakes dessert.
How to make individual no bake cheesecakes?
Start with small glasses or glass jars. These are really cute. You build the dessert in layers, starting by crushed cookies. Top that with your cheesecake mixture and finish it with your topping. Warm caramelized apple for this recipe. It’s really easy to make small one person cheesecakes as you can see!
You can prepare this cheesecake dessert very well, which I think is perfect. Put the prepared dessert in the refrigerator and take it out when needed. it’s similar to this strawberry and lemon mini cheesecake or the
However, you can also prepare the base (cookie + cheesecake layer), and make the apple mixture only just before you want to serve the dessert. This way, you have little cheesecakes with warm apples as a topping. Delicious!
In the last case, you can prepare the apple layer as well. Add a little lemon juice to keep the apple pieces fresh and store them in the refrigerator until you need them. I made them this way for Christmas and it worked perfect.
Apple caramel cheesecake recipe
For this dessert, I decided to first heat the apple in a pan and caramelize it with some sugar. Warm apple pieces work incredibly well in a dessert. In this case, I combined it with whipped cream, cookies and cream cheese.
For the cookies, I chose Bastogne cookies, which are a kind of spice cookies. It’s hard to find this particular cookie outside The Netherlands and a few other European countries, but any spice cookie will do. Biscoff cookies are a good alternative for example.
Tips for no bake apple caramel cheesecakes
Can I add pecans or other nuts to this cheesecake recipe?
Of course! Chop some pecans or other nuts, add them to the apple mixture in the saucepan and enjoy your pecan caramel cheesecakes.
Which caramel bits do you use?
I used small caramel fudge pieces. You can buy them or cut bigger pieces up. These caramel bits are also perfectly fine.
How big are the glasses for individual cheesecakes?
First of all: you can decide yourself how full you want to make your glass jars. I used diamond shaped glasses that are almost exactly the same as these ones.
More individual desserts
I love making desserts in individual portions, here are some more delicious dessert recipes that you can serve in small glass jars:
Beat whipping cream with the 50 grams of sugar until stiff. In another bowl, mix vanilla extract and cream cheese until creamy. Add the whipped cream and mix on a low setting until evenly combined.
Crumble the cookies, either by hand or a food processor. The crumbs may still be somewhat chunky.
Divide the cookie crumbs among the glasses, followed by the cream cheese mixture.
Peel the apples, remove the core and cut into cubes. Put these diced apples together with cinnamon and 2 tbsp sugar in a pan and heat until caramelized. Stir the mixture frequently.
Divide the apple mixture among the glasses. To finish, sprinkle some caramel pieces on top.
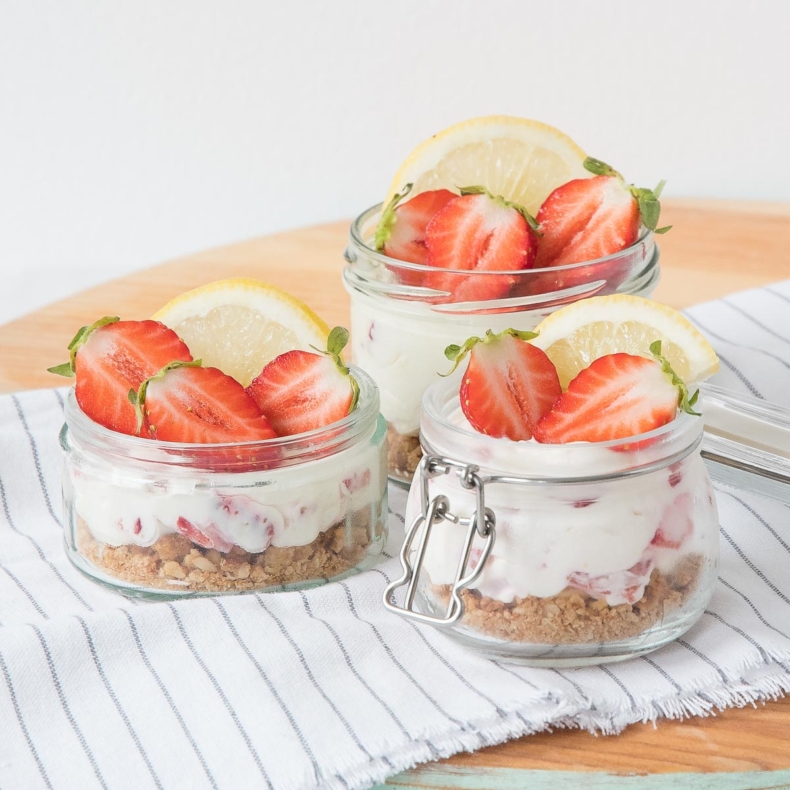
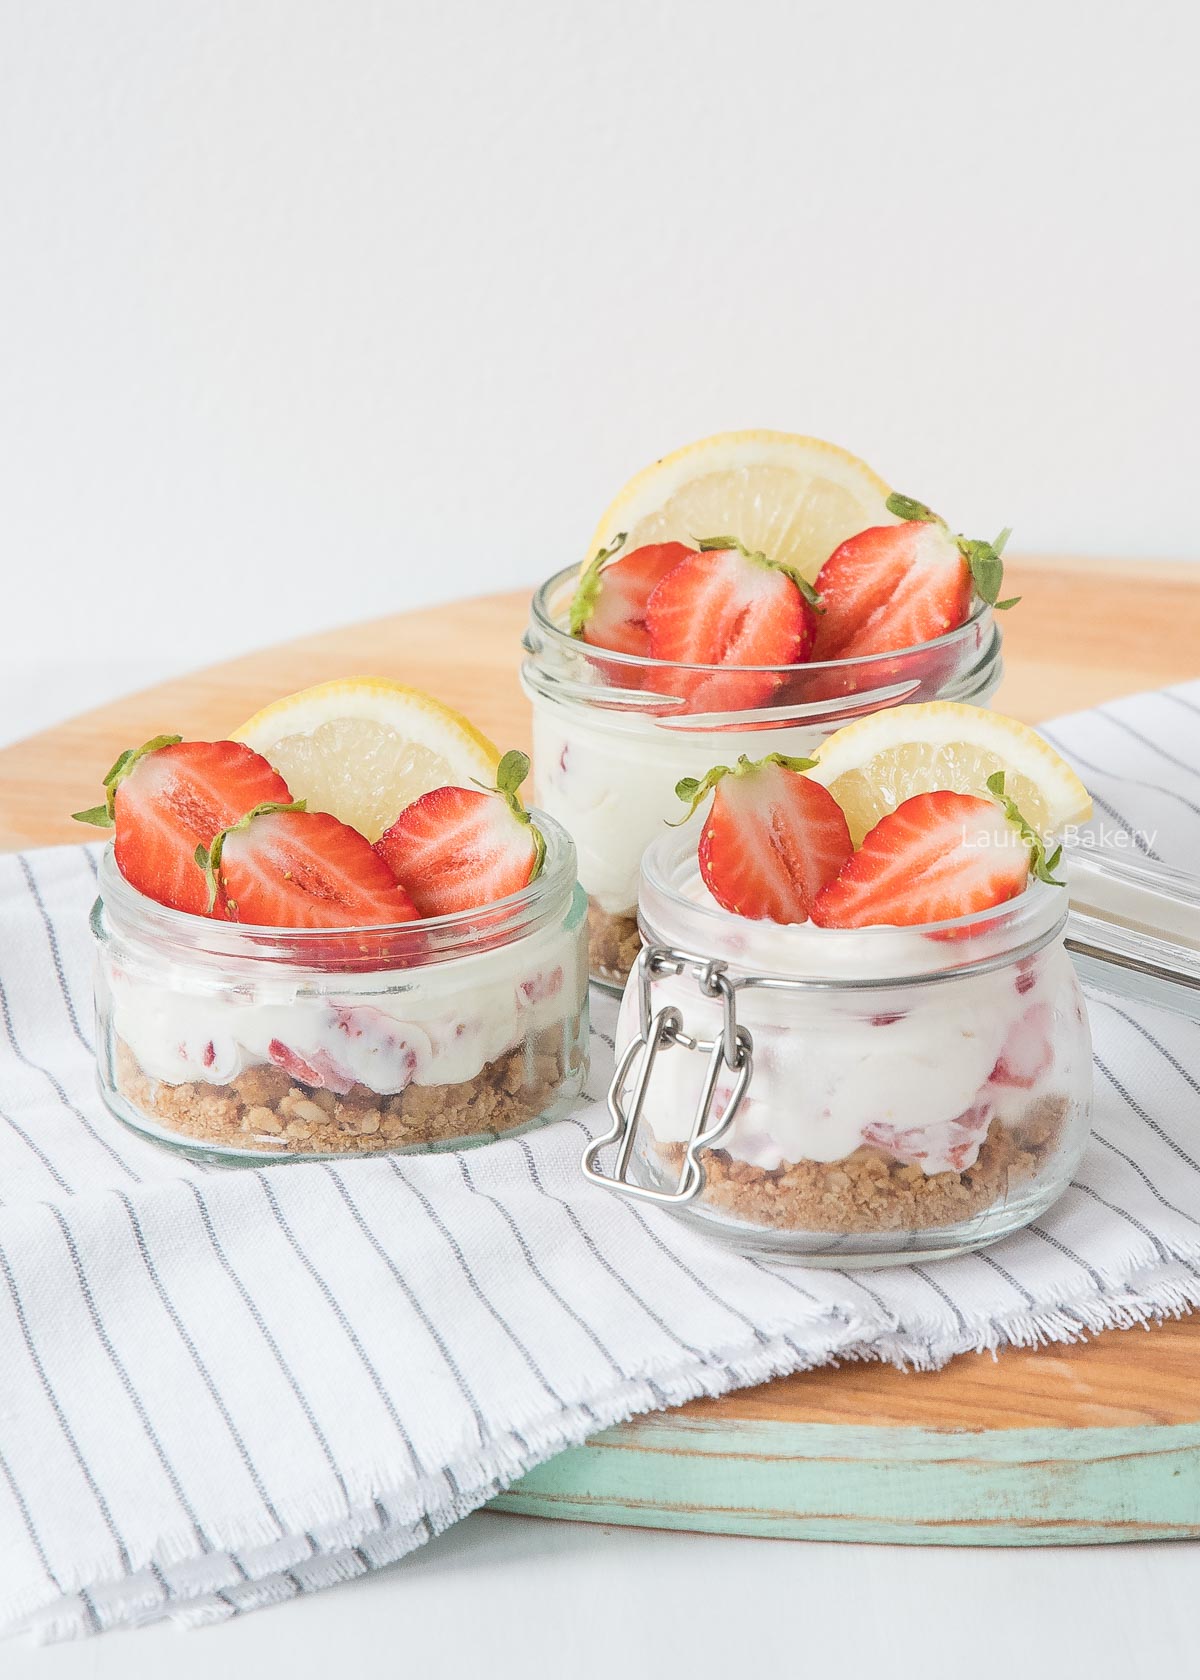
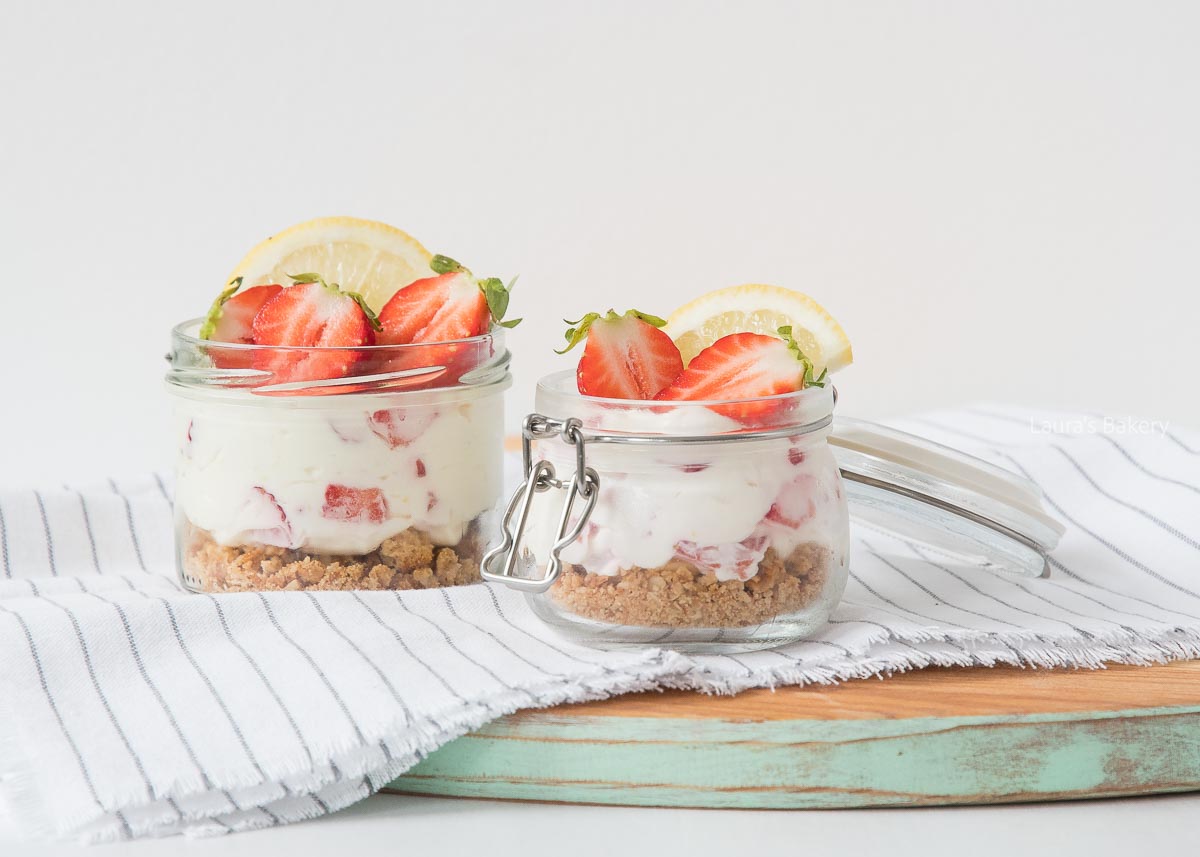
Looking for a delicious refreshing and super quick summer recipe? These no bake strawberry lemon mini cheesecakes are perfect for that summer season when fresh strawberries are everywhere.
Adding a bit of lemon makes the strawberries shine even more. I could eat this no bake cheesecake recipe every day.
Why this recipe works:
Super quick: it literally has all the flavor but without the work. Ready and on the table in less than 10 minutes
No bake: I don’t know about you but putting on the oven when the temperatures are rising is not always fun. No bake cheesecakes are perfect for still enjoying the taste!
Recipe ingredients
For making this easy recipe you will need the following ingredients:
cookies – I like using graham crackers for this, but really you can use just about any cookie you like. I actually used pumpkin spiced oat meal cookies for the version you see in the photos as that is what I had on hand
cream cheese – use your favorite brand for this
sugar – I use regular white sugar. You can use brown sugar but keep in mind that looks change if you use darker sugar
lemon – I use both the juice and the zest for extra lemon flavor. You can replace this with lime if you want.
whipped cream – adding a bit of heavy cream whipped to stiff peaks makes the end result even more delicious!
strawberries – of course the heroes of this simple dish are deliciously sweet strawberries, but you can replace them with any kind of seasonal fresh berries
How to make no bake strawberry lemon mini cheesecakes
Making these mini cheesecakes cannot be easier. It’s a matter of crumbling your digestive biscuits, adding them to a few cute glasses or small bowls and making your cheesecake mix.
For that you take a medium bowl and add cream cheese, sugar, lemon juice and lemon zest. Spoon the heavy cream in once whipped and fold it through.
Keep mixing until you have a smooth mixture. The last step is to add the strawberry pieces in.
The strawberry mixture is then divided over the glasses. I place it in the fridge for at least an hour. That firms the mixture and will make it taste even more like real cheesecake, but it is not an absolute necessity.
So if you’re stretched for time and want to dive right in? You can.
EXPERT TIP: When cleaning your strawberries with water, do so before removing the crowns. Otherwise, the strawberries will absorb the water and lose some of their flavor. You can then easily remove the crowns with a strawberry crown remover or a small pairing knife.
Storing the cheesecake
This is one of those recipes that is perfect to prepare in advance. You can store them in the fridge for about 3-4 days but they are still best served the day you make them.
If you want to prepare for a dinner party, make them in the afternoon or morning and enjoy in the evening.
Absolutely. In order to do so it is best to let them defrost completely and drain excess fluid. Frozen strawberries are soft and much more wet. You can also use a strawberry compote or combine strawberries with other fruits.
Can I replace the cream cheese?
If you want to make the strawberry mini cheesecakes a bit lighter you can replace the cream cheese partially with a bit of Greek yogurt. Or switch the heavy cream to sour cream. The flavor will absolutely change if you do that so make sure to taste test before serving.
Do I need a food processor for this recipe?
No, you don’t need any equipment although a hand mixer might come in handy for mixing it into a smooth filling, but folding it with a spatula usually works fine.
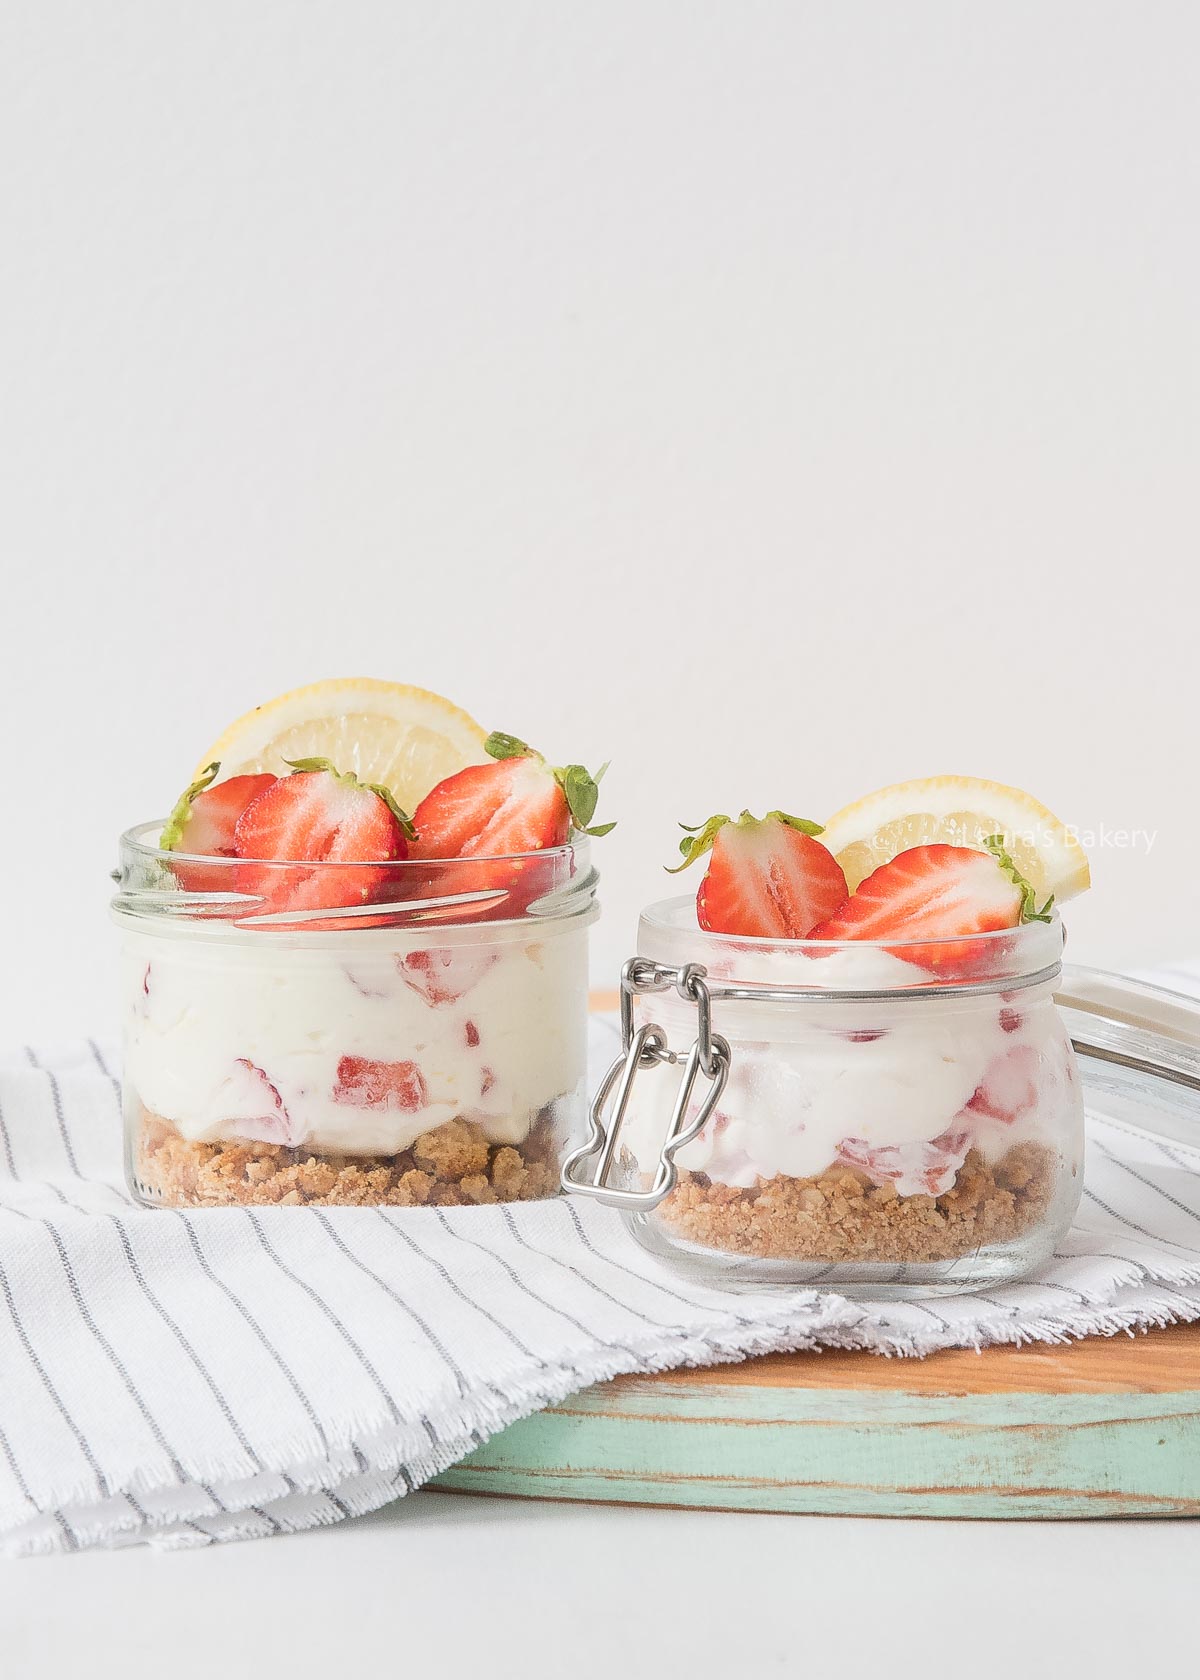
These mini cheesecakes are incredibly delicious and very easy to make. After making the quick cheesecakes, simply put them in the fridge to set and enjoy a delicious dessert.
Prep Time5 minutesmins
Cook Time5 minutesmins
Total Time10 minutesmins
Servings: 4portions
Equipment
4 jars
Ingredients
125gramsgraham crackers or use your favorite; oatmeal cookies were used this time
Crumble the cookies into fine crumbs or pieces. I do this by hand. Divide the cookie crumbs among the ramekins or bowls you want to use.
In a small bowl, stir together the cream cheese, sugar, lemon juice, and lemon zest. Whip the heavy cream until stiff and fold it into the cream cheese mixture. Gently fold until the mixture is smooth. Finally, fold in the strawberry pieces evenly.
Divide the mixture between the glasses, then place them in the refrigerator for at least one hour.
You can add the decorations just before serving or after the hour is up, then return them to the refrigerator.
To make the decorations, cut a lemon into thin slices. Then, cut a small piece off each slice so they are easier to place on the cheesecakes. Finish with half strawberries, and you’re done!
This delicious no bake mango pie combines my basic vanilla no bake pie recipe with one of my favorite fruits: mango. It’s the perfect no bake dessert for warmer weather.
Not only does it prevent turning on the oven (always a great option when the weather is hot) but it’s also super delicious and refreshing. Nothing better during mango season!
No bake mango pie
Here’s how to make the most delicious no bake pie.
Making a no bake pie is easy, and you don’t need much to make an incredibly delicious pie. You can choose any type of fruit, but a creamy mango pie is especially good!
Ingredients for a mango pie:
Cookies – For the crust, I chose basic graham crackers because they go well with mango and many other fruits.You can also use other digestive biscuits.
Butter – Mix the butter into the crushed cookies so that they bind together when set.
Gelatin – Gelatin ensures the filling is firm. I like to use gelatine sheets but you can also use gelatin powder. If you don’t want to use gelatin you can replace it with agar agar powder.
Mango – This is the pies main flavor, so look for ripe, flavorful fresh mangoes. That is used for making the fresh mango puree.
Quark or thick Greek yogurt – See the notes below on the difference between the two.
Vanilla paste – This can be replaced at a 1:1 ratio with vanilla extract or other vanilla alternatives.
Heavy cream – Heavy whipped cream makes the pie extra creamy and light.
Sugar – I usually use fine granulated sugar. If the filling is sweet enough for you, you can leave out the sugar.
Milk – Skim, semi-skimmed, or whole milk—anything goes.
Making no bake mango pie recipe
Making the pie is absolutely not complicated. You might want to use a food processor for getting a smooth mango pie filling and for crushing the cookies, but if you don’t have one you can also use a handmixer or a whisk.
The buttery biscuit base is the first thing you make by crushing the cookies to a fine crumb.
Once that is done mix it with the melted butter and make sure to press it firmly into a lined springform tin. For pressing it I like to use the back of a straight glass but a spoon works fine too. Place your gelatin sheets in a bowl with cold water to soak.
What’s the difference between quark and Greek yogurt?
Quark and Greek yogurt look similar, but they’re quite different in taste, texture, and how they’re made — and that can slightly affect your mango pie. Quark is readily available in the Netherlands but can be harder to find in other countries.
Quark is a soft, creamy – very young – cheese with a mild, slightly tangy flavor. It’s made by warming soured milk and straining it, resulting in a smooth, thick dairy product that’s higher in protein and less tart than yogurt. It’s popular in many European countries and often used in cheesecakes or spreads.
Greek yogurt, on the other hand, is strained yogurt. It’s thicker and creamier than regular yogurt, with a more noticeable tang. It’s rich in protein and commonly used in both sweet and savory dishes.
Which to use in your mango pie?
Both work well, but:
Use quark if you want a milder flavor and a slightly richer, cheesecake-like texture.
Use Greek yogurt for a tangier taste and a lighter, more yogurt-forward filling.
Making the filling
Now it is time to make the filling mixture. You mix the yogurt with the vanilla paste and the mango puree until it is smooth. Use a separate bowl to mix the heavy cream with the sugar to stiff peaks and combine the two together.
Use a spatula to fold the two until they are properly mixed. Now heat the milk gently in a small sauce pan and squeeze any excess water out of the gelatin sheets. Add to the mix and stir until it is dissolved. Add the gelatin mixture to the filling and mix it well.
Pour the pie filling on the graham cracker crust and smooth the top with the back of a spoon or a spatula. Let it set in the fridge for at least three hours but preferably overnight.
Storing no bake Mango pie
In the past, no bake mango pie (or as we call it in the Netherlands; mango quark pie (‘mango kwarktaart’)) wasn’t one of my favorite cakes, but now I find it hard to stay away from. The same seems to be true for my friends and family because there are rarely any leftovers. However, you can easily store this pie in the refrigerator or freezer.
How long does mango pie keep?
You can store it in the refrigerator for up to three to four days, provided it is well sealed. This prevents moisture or odors from entering the cake.
Can you freeze mango pie?
Mango pie freezes well. If you wrap the pie (or slices) in an airtight container, it will keep for up to three months. Let the frozen pie thaw in the refrigerator the day before serving.
You can use all kinds of cookies to make a delicious crust for your pie, combined with butter. The amount of butter needed varies by cookie. For example, it’s best to use a little less butter with Bastogne cookies because they are quite fatty.
Can the mango pie be made from frozen fruit?
Yes, you can. Just make sure to thaw the mango completely and drain off any excess moisture.
Can I make the pie without gelatin?
The gelatin helps the yogurt filling set, so it can’t simply be left out. A good alternative is agar-agar.
Can I use a springform pan of a different size?
In the recipe card below, you will find the “Convert Recipe” button. It will take you to the conversion tool, which you can use to easily convert any recipe to the size baking pan you want. Simply enter the current size of the baking pan and the size you want to convert to.
Storing no bake mango pie
A well-covered mango pie can be stored in the refrigerator for three to four days. Without decoration and in an airtight container, it can be frozen for up to three months.
Crush the cookies into fine crumbs. Melt the butter in a pan, then add the crumbs. Stir, then pour the mixture into a springform pan that has been lined with parchment paper. Spread the mixture evenly and press it firmly. Place the base in the refrigerator.
Soak the gelatin sheets in a bowl of cold water for at least 10 minutes. Peel and cut the mango into pieces, then puree it until smooth.
In a bowl, combine the Greek yogurt, vanilla paste, and mango pulp, stirring until smooth. In another bowl, whip the heavy cream and sugar together until stiff peaks form.
Heat the milk in a saucepan until lukewarm. Remove the pan from the heat and add the squeezed gelatin sheets. Stir until melted.
Pour the milk mixture into the yogurt mixture and stir. Fold the whipped cream into the yogurt mixture until everything is incorporated. Pour the mixture onto the cookie base and smooth the top of the pie.
Refrigerate the pie for at least 3 hours to set.
With the current prices of eggs, having a couple of baking recipes without eggs under your belt is a good idea. If only for budget purposes.
So today I am giving you my favorite recipes that do not require any eggs at all. From a delicious vanilla cake to a tiramisu without eggs. Once you know how baking without eggs works it is not that complicated to do.
Baking recipes without eggs
Egg-free recipes are not only easy for budget purposes it is also great if you have guests or friends with an egg allergy. And while you might think that an eggless cake can not be as airy as a regular cake with whole eggs, I beg to differ.
There are a couple of tricks you need for replacing the eggs in the recipes. Or just pick one of the delicious recipes listed below.
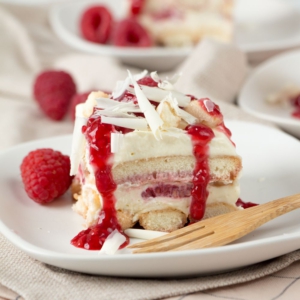
Classic tiramisu recipe
To start the list of delicious egg free recipes I have a classic tiramisu recipe without eggs and without alcohol. I do have an option in the recipe to include alcohol if you prefer.
1
Classic Tiramisu without eggs
No votes yet
All my tiramisu recipes are egg-free, but I had not yet made the classic tiramisu in a large dish that is enough for all your guests. But not anymore!
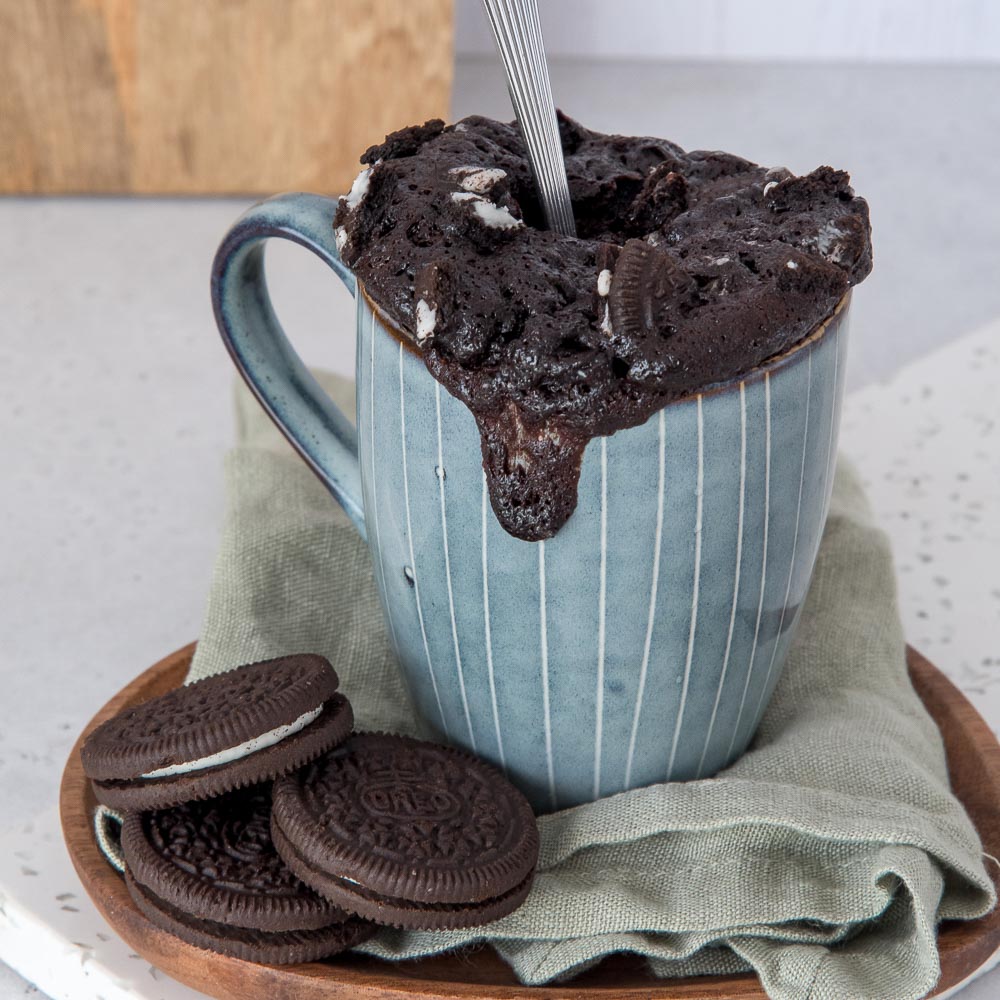
If you love Oreo you’re going to want to try this Oreo mug cake recipe. It doesn’t contain any eggs, is delicious and fluffy and ready in no time at all! The only equipment needed is your microwave.
2
Oreo mug cake
No votes yet
Make this chocolate Oreo cup cake in minutes! Just mix the ingredients in a mug and let the microwave do the rest.
Another fabulous mug cake which uses no eggs at all is this vanilla mug cake. It’s the base of most of my mug cakes and all of them are super quick and easy to prepare. It would be your go to recipe for a very fast cake recipe.
3
Mug Cake Recipe
3 of 1 vote
Making a mug cake is not only delicious, it’s also incredibly quick. This easy vanilla mug cake recipe can be made in minutes in the microwave!
The perfect vanilla cake without eggs is this easy recipe. I’ve made it so many times already I lost count and it still continues to be one of my favorite recipes. And not only mine, but my guests are always happy when I make this delicious vanilla cake.
4
Vanilla Cake without Egg
5 from 2 votes
Do you love vanilla cake but have to make it without egg because of an allergy? That's convenient, because especially for you I developed this egg-free vanilla cake recipe.
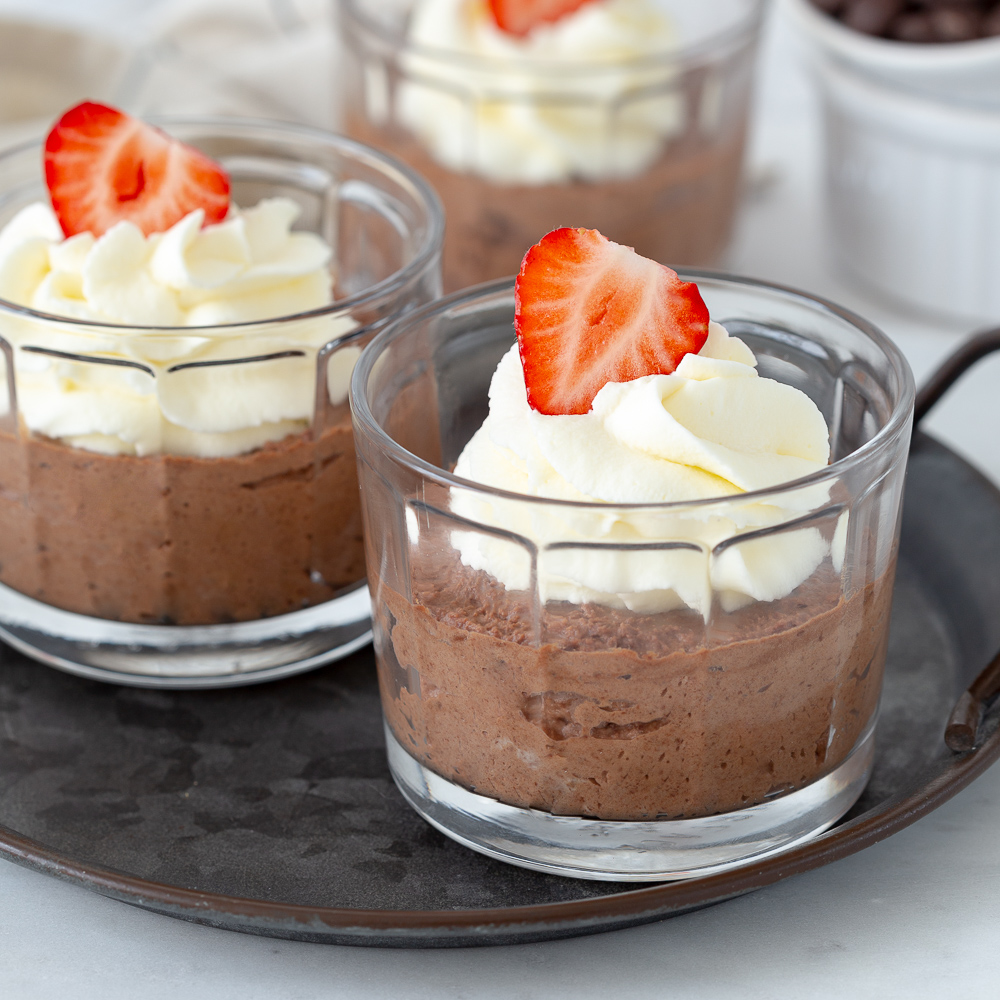
If you love chocolate mousse, like I do, you might be used to the fact that it contains egg whites most of the time. But this delicious recipe uses only three ingredients and no eggs! You will love it!
5
3 ingredient chocolate mousse recipe without eggs
5 of 1 vote
A recipe for easy eggless chocolate mousse made with only three ingredients! The perfect chocolate dessert.
When it comes to baked cheesecakes eggs are used for stabilizing the mixture. For no bake cheesecakes that is not necessary so it’s a delicious eggless dessert!
7
No bake cherry cheesecake (Dutch MonChou pie)
No votes yet
A delicious recipe for making your own MonChou cake. You can make this cake without an oven and it has a base of Bastogne biscuits.
One of my favorite recipes by far is this Dutch breakfast cake. It doesn’t contain any eggs and is perfect for serving both as a breakfast cake and also delicious served with a steaming cup of coffee!
8
Dutch breakfast cake recipe
5 of 1 vote
Do you like Dutch ontbijtkoek? With this easy recipe you can make a homemade version of this Dutch spiced breakfast cake.
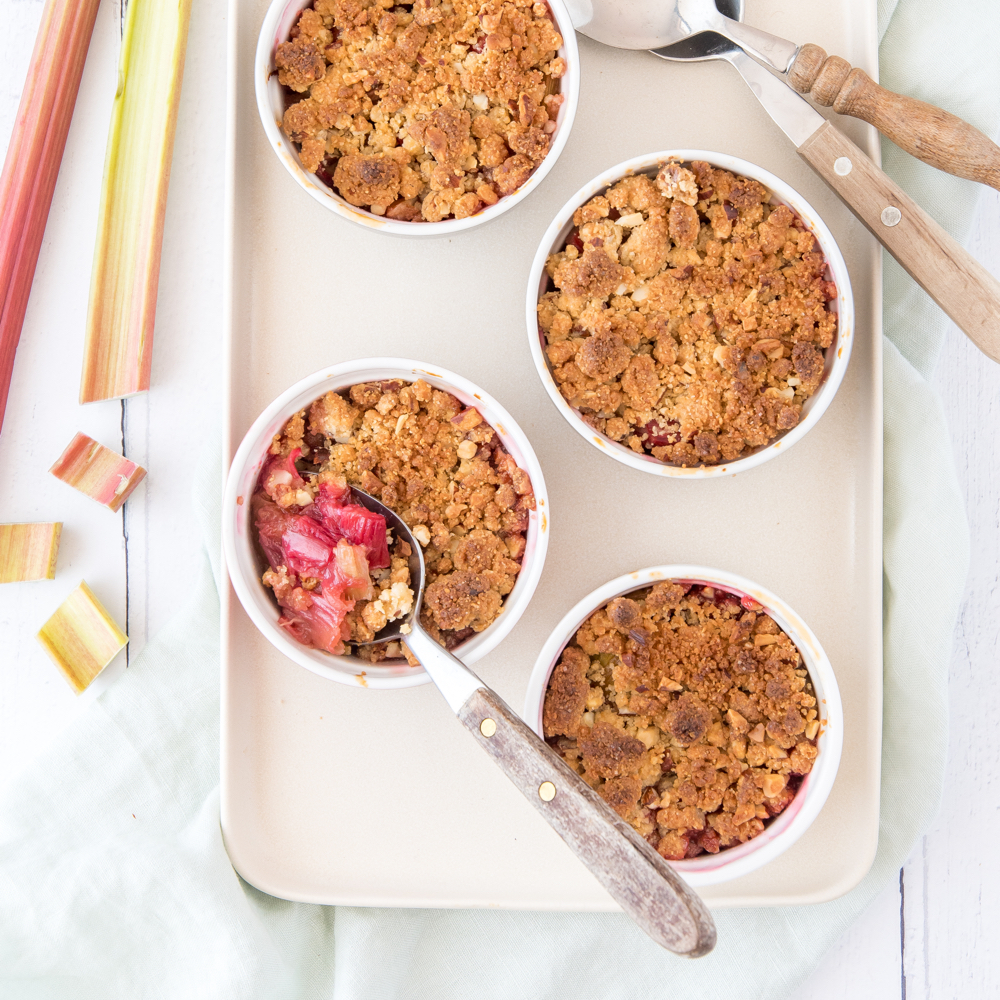
Who doesn’t love a good crumble? Rhubarb season is too short if you ask me but with this easy crumble recipe you have a dish that can serve both as breakfast (just add some crumble to your morning yogurt) as dessert (add a scoop of vanilla ice cream!) or as a coffee treat.
10
rhubarb crumble recipe
5 from 3 votes
A delicious fresh crumble made with rhubarb and an almond crumble.
Every year at the end of the year you can find many different speculaas cookies everywhere in the Netherlands. But the good news is that you can serve these delicious cookies year round and even better; they are eggless cookies!
11
Speculaas cookies recipe
2 of 1 vote
Making your own Speculaas cookies with the Speculaas board is easier than you think! I share my recipe and all my tips for perfect speculaas cookies.
Like all my tiramisu recipes this one also does not contain any eggs. No eggs but all the creaminess and due to the use of whipping cream it is every bit as light and airy as tiramisu recipes that do contain eggs.
12
Limoncello Tiramisu
3 of 1 vote
This Limoncello Tiramisu is a deliciously fresh dessert with lemon curd and limoncello. A great way to end an Italian dinner.
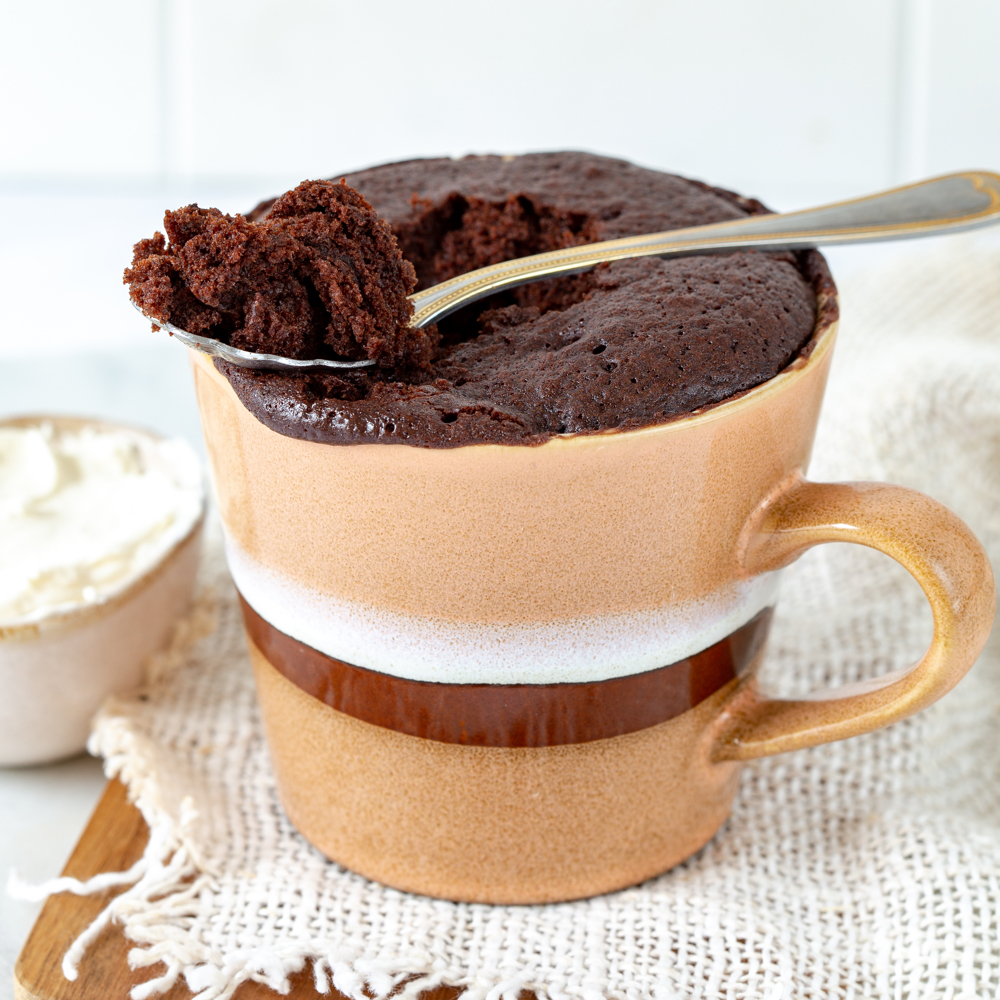
Yes another delicious mug cake. This time with chocolate flavor. Ready in just a few minutes and a favorite on the site! It’s been successfully made by lots of people already. Are you going to try this recipe next time?
14
Chocolate Mug Cake Recipe (no egg)
4.40 from 76 votes
You can make this easy chocolate mug cake recipe in just a few minutes! Just stir the ingredients together in a mug, pop it in the microwave, and enjoy!
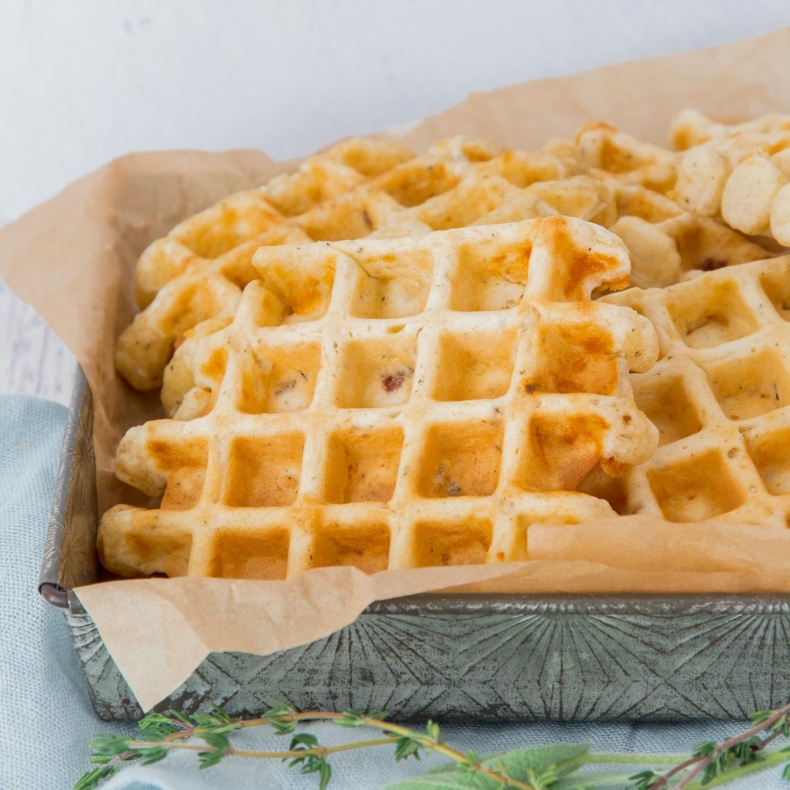
Scones are another delicious recipe that uses no eggs. If it’s important for you to not use any eggs, make sure you use eggless ingredients as the toppings as well. The good news is that you need a milk wash for the scones and not an egg wash. But pay attention if you would want to add lemon curd as that does contain eggs.
15
Homemade English scones recipe
4.35 from 63 votes
Did you know that making your own English scones is incredibly simple? Delicious with clotted cream and a bit of jam. Perfect for high tea, but also for brunch.
One of the things that eggs provide is a moist and light texture. Not using eggs might make your cake dense and in general not the best cake. You can use various ingredients to solve that issue.
Think about adding applesauce, mashed banana or yogurt. Things like flaxseeds and chia seeds are mostly used to replace the egg and do require extra liquids like milk or water.
Another texture element is the density of the cake. Not using eggs can make the cake a lot denser. Things like apple cider vinegar, baking soda and even sparkling water can help with that.
Binding
Of course one of the best known qualities of eggs is the fact that they bind everything together. Not using eggs in your baking recipe might result in the cake or cookies falling apart.
That’s where a so called flax egg or chia seeds come in handy. They replace the function of eggs. In general the formula for a flax egg is 1 tablespoon of flax seeds to 3 tablespoons of water would replace one egg.
Browning
Don’t we all love a golden brown cookie! One aspect you might not think about when it comes to baking without eggs is the browning effect the eggs have to the end result.
You can solve part of that problem by brushing the surface (cookie recipes or similar) with melted butter or a milk mixture.
The best way to start baking your eggless recipes is to use one of the recipes I have outlined above. Those are all extensively tested and will work. I also have an article on replacing eggs and what other things you need to take into account.