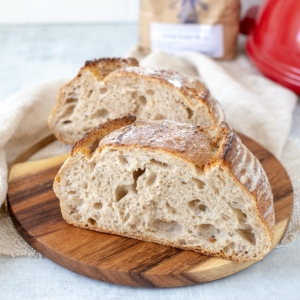
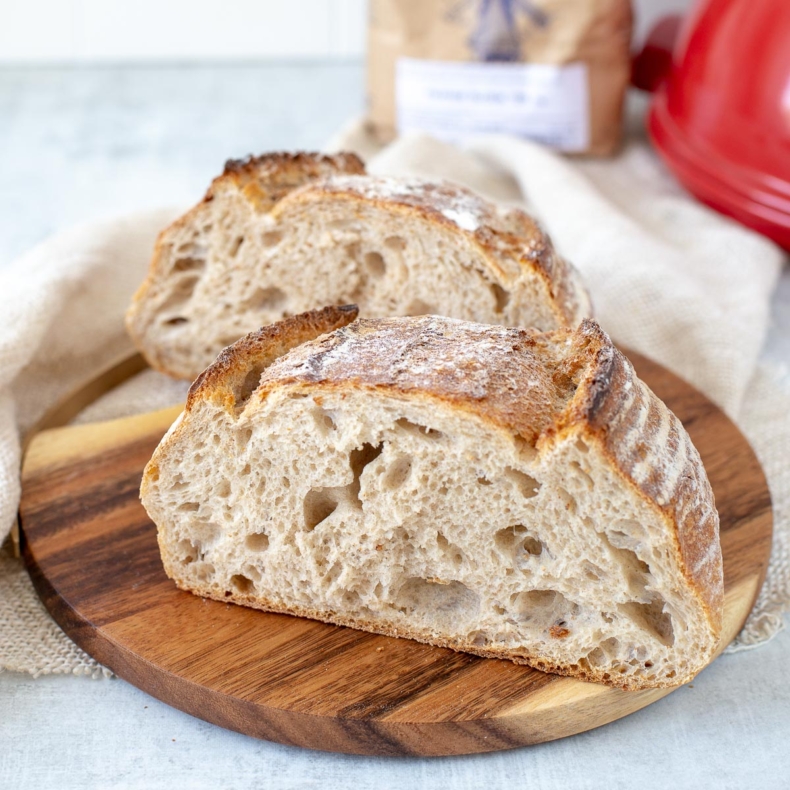
With this recipe, I’ll show you step by step how to bake your own sourdough bread at home. Homemade sourdough simply tastes better, and it’s also a fun and rewarding baking project.

Why Baking Your Own Bread is So Great

Yes, baking your own bread does require a bit more patience but it is such a full-filling thing to do!

  • Simple ingredients. Just flour, water, salt, and sourdough starter.
  • Incredible flavor. Slow fermentation creates a rich, tangy taste that’s hard to beat.
  • Beautiful crust. Crisp on the outside, soft and chewy on the inside.
  • A rewarding baking project. Every loaf helps you build confidence and improve your skills.
  • Easy to customize. Once you’ve mastered the basics, you can add seeds, herbs, cheese, or whole grains to make it your own.

Homemade Sourdough Bread

Before you can make this bread, you’ll need an active sourdough starter. If you don’t have one yet, check out my tips and recipe for making your own sourdough starter.

For this recipe, you’ll first build a levain by feeding a portion of your active starter with flour and water. Since you don’t want to use up your entire starter, it’s a good idea to make a little more than you need for one loaf.

That way, you’ll have plenty left over for your next bake without having to start from scratch.

Sourdough bread-5

How to Bake Sourdough Bread

There are many different ways to make sourdough bread. From how you mix the dough to how you knead, shape, and proof it, every baker has their own preferred method.

This recipe is the result of trying countless recipes from books and online sources. After a lot of practice, I’ve developed the techniques that work best for me.

Start with the Basics

I chose a relatively simple method with no unnecessary extras. I intentionally don’t add fats, sugar, seeds, or other mix-ins to the dough because I want to show you just how easy and delicious homemade sourdough bread can be.

It will probably take a few loaves before you really get the hang of it, but that’s simply part of learning to bake bread. My very first sourdough loaf certainly didn’t look as beautiful or airy as the one in the photos. So don’t worry if your first attempt isn’t perfect.

Bake this basic recipe a few times before experimenting with different flavors or additions.

BAKING TIP: You can slice your sourdough with a regular serrated bread knife, but if you want to make it even easier, I recommend using an electric knife once the loaf has completely cooled.


Sourdough bread proofing basket

Sourdough basket

Which Proofing Basket Should I Use?

The dough will do its final proof in a proofing basket. Be sure to choose the right size. The proofing basket I used was actually intended for a larger round loaf, but you will need something similar to this basket in the right size.

If you plan on working with larger batches of dough or baking multiple loaves at once, a dough scraper is also a handy tool to have. For this recipe, however, it’s not essential.

How Should I Score My Sourdough Bread?

Once the dough has finished proofing, score the top of the loaf with a decorative cut. The easiest way to do this is with a razor-sharp bread lame or scoring blade.

If you’re new to sourdough baking, I recommend starting with one simple slash down the length of the loaf. Once you’ve become more comfortable, you can experiment with decorative patterns or create a beautiful “ear,” just like the one you see on the loaf in the photo.

This how-to video gives a clear visual demonstration of the scoring technique.

Sourdough bread-4

Which Type of Flour Should I Use for Sourdough Bread?

When it comes to baking sourdough bread, the possibilities are endless. Different types of flour each produce their own flavor, texture, and crumb. Standard all-purpose flour contains less protein, resulting in a softer loaf.

For this recipe, I use French T55 flour as the base of the dough. If you’re in the US a good replacement would be King Arthur bread flour. Its higher protein content helps create a stronger dough structure and gives the bread more oven spring and volume. That’s exactly the texture I love in a good sourdough loaf.

I also add whole grain spelt flour to the mix. You can replace it with more bread flour, another whole grain flour, or a combination of flours, depending on the flavor and texture you’re after.

Sourdough bread-3

Storing Sourdough Bread

Bread stores very well, and sourdough is no exception. For the best results, keep your sourdough bread in a bread bag or bread box. It will stay fresh for several days, although I think it tastes best during the first two to three days.

Can you freeze sourdough bread?

Absolutely! Sourdough bread freezes very well. Wrap it airtight and store it in the freezer for up to 3 months. Once thawed, you’ll be able to enjoy a fresh slice whenever you like.

I usually slice the loaf before freezing it so I can thaw only what I need. Pop a slice in the toaster for a few minutes, and it tastes almost as if it just came out of the oven.

FAQ Baking Sourdough Bread

Can I use a different type of flour?

Absolutely, but keep in mind that different flours can’t always be substituted one for one. Look for a recipe that’s specifically developed for the type of flour you’d like to use and the style of bread you want to bake.

Why isn't my sourdough dough rising?

The most likely reason is that your starter wasn’t active enough when you mixed the dough. If your kitchen is on the cool side, the dough may simply need more time to rise. Fermentation naturally slows down at lower temperatures.

Why is my dough so sticky or slack?

Sourdough dough should feel slightly sticky. If it’s extremely loose and won’t hold its shape, you may have added too much water, your flour may absorb less moisture, or the dough hasn’t developed enough strength yet. Overproofing can also cause the dough to become slack.

Why Didn't My Sourdough Bread Turn Out Light and Airy?

There are several possible reasons, including the issues mentioned above.

Can I Bake Sourdough Without a Dutch Oven?

Yes, you can. However, you’ll have less control over the crust. Place the shaped loaf on parchment paper on a baking sheet or, even better, on a baking stone. To create steam during baking, place one or more oven-safe dishes filled with water in the oven.

Can I Bake Sourdough Bread in a Bread Machine?

I haven’t tested this myself, so I can’t say for sure. I expect the recipe would need to be adapted specifically for a bread machine.

Plan Ahead

Making sourdough bread takes time, but very little hands-on work. Most of the process is simply waiting while the dough rests and proofs. That’s why it’s important to plan ahead. If it fits your schedule better, you can also let the shaped dough proof overnight in the refrigerator and bake it the next day.

Every baker’s schedule is different and depends on your daily routine. Use the timeline below as an example. This is what my typical baking day looks like:

  • Morning: Build the levain.
  • Afternoon: Mix the dough and perform the stretch and folds.
  • Evening: Shape the dough and let it complete its final proof (or refrigerate it overnight).
  • Next morning: Bake the bread.


How to bake sourdough bread

Save
Print recipe

No votes yet

Basic Sourdough Bread Recipe

Make your own sourdough starter and bake homemade sourdough bread from scratch!
Preparation10 hours
Cooking45 minutes
Cooling Time1 hour
Total11 hours 45 minutes
Servings: 1 bread

Ingredients 

Levain

  • 25 grams active sourdough starter
  • 25 grams French T55 or T65 flour or use bread flour
  • 25 grams whole grain spelt flour
  • 50 grams lukewarm water about 77°F / 25°C

Dough

  • 350 grams T55 or T65 flour
  • 150 grams whole grain spelt flour
  • 365 grams water
  • 125 grams levain
  • 10 grams salt
  • Oil for greasing the bowl

Instructions

Before You Begin

  • Including all resting and proofing times, this recipe takes about 10 hours before the bread is ready to bake. Keep this in mind when planning your baking day.
  • If I don’t have time to bake the loaf after the final proof, I simply place the proofing basket with the dough in the refrigerator and bake it the following day. This works very well for me.

Build the Levain

  • Mix the active sourdough starter, flour, whole grain spelt flour, and water together in a bowl using a spatula. Cover the bowl and let it rest at room temperature for 4 hours. Your levain is now ready to use.

Make the Dough

  • In a clean mixing bowl, combine 275 ml/9.3 floz of the water with the levain. Stir until the levain is completely dissolved.
  • Add the flour and whole grain spelt flour. Mix and squeeze the dough together until all of the water has been absorbed.
  • Gradually add another 50 ml/1.7 floz of water, taking your time. Over the next 5-10 minutes, work the water into the dough using gentle squeezing motions without tearing the dough.
  • Once all the water has been absorbed, let the dough rest for 15-20 minutes. This gives fermentation a head start and allows the gluten structure to begin developing.
  • Next, add the salt along with 20 ml/0.68 floz of the remaining water. Knead for about 5 minutes, until the dough feels smoother and has absorbed the water. Repeat with the final 20 ml/ 0.68 floz of water.
  • Grease a clean bowl with a little oil. Place the dough in the bowl, cover it, and let it rest at room temperature for 30 minutes.
  • Keeping the dough in the bowl, wet your hands and gently lift one side of the dough, folding it over itself toward the center. Turn the bowl and repeat from all sides, being careful not to tear the dough. Cover and let it rest for another 30 minutes. This is known as the stretch-and-fold technique, which strengthens the dough without intensive kneading.
  • Repeat the stretch-and-fold process one more time. Then cover the bowl again and let the dough rise at room temperature for 4 hours.
  • Dust your work surface with flour and gently turn the dough out onto it. Press it down lightly to flatten it. Meanwhile, preheat your oven to 480°F /250°C (conventional oven) and place your Dutch oven or bread baker inside. It should preheat for at least 30 minutes so it’s fully heated before baking.
  • To shape the loaf, fold two opposite edges of the dough toward the center. Repeat with the other two sides, continuing until you’ve formed a round ball. Flip the dough over and use your palms to gently rotate and tighten the surface into a smooth, round loaf. Be careful not to tear the dough.
  • Dust your proofing basket with flour and place the dough inside. Let it proof for at least 30 minutes.
  • Turn the dough out of the basket, brush off any excess flour if needed, and score the top with one long slash at least ¼ inch (½ cm) deep.
  • Using oven mitts, carefully remove the hot Dutch oven from the oven. Dust the bottom lightly with flour, place the dough inside, cover immediately with the lid, and return it to the oven as quickly as possible. The hot baking vessel gives the bread an excellent oven spring.
  • Bake for 25 minutes with the lid on. Then remove the lid and continue baking for another 20 minutes, until the crust is deep golden brown.
  • Remove the bread from the Dutch oven and let it cool completely before slicing. This will take at least 1 hour.
How to store

Store sourdough bread in a bread bag or bread box, where it will stay fresh for 2–3 days. It also freezes very well. Wrap it airtight and freeze for up to 3 months. After thawing, you’ll be able to enjoy fresh-tasting sourdough whenever you’d like.

Links in this article may be affiliate links. If you purchase something through such a link, I will receive a small commission, without you paying anything extra.

Leave a comment

Your email address will not be published. Required fields are marked *

Recipe Rating