How long can I store the vanilla sugar?
The vanilla sugar keep “forever” and the flavor might even get deeper if you keep it longer
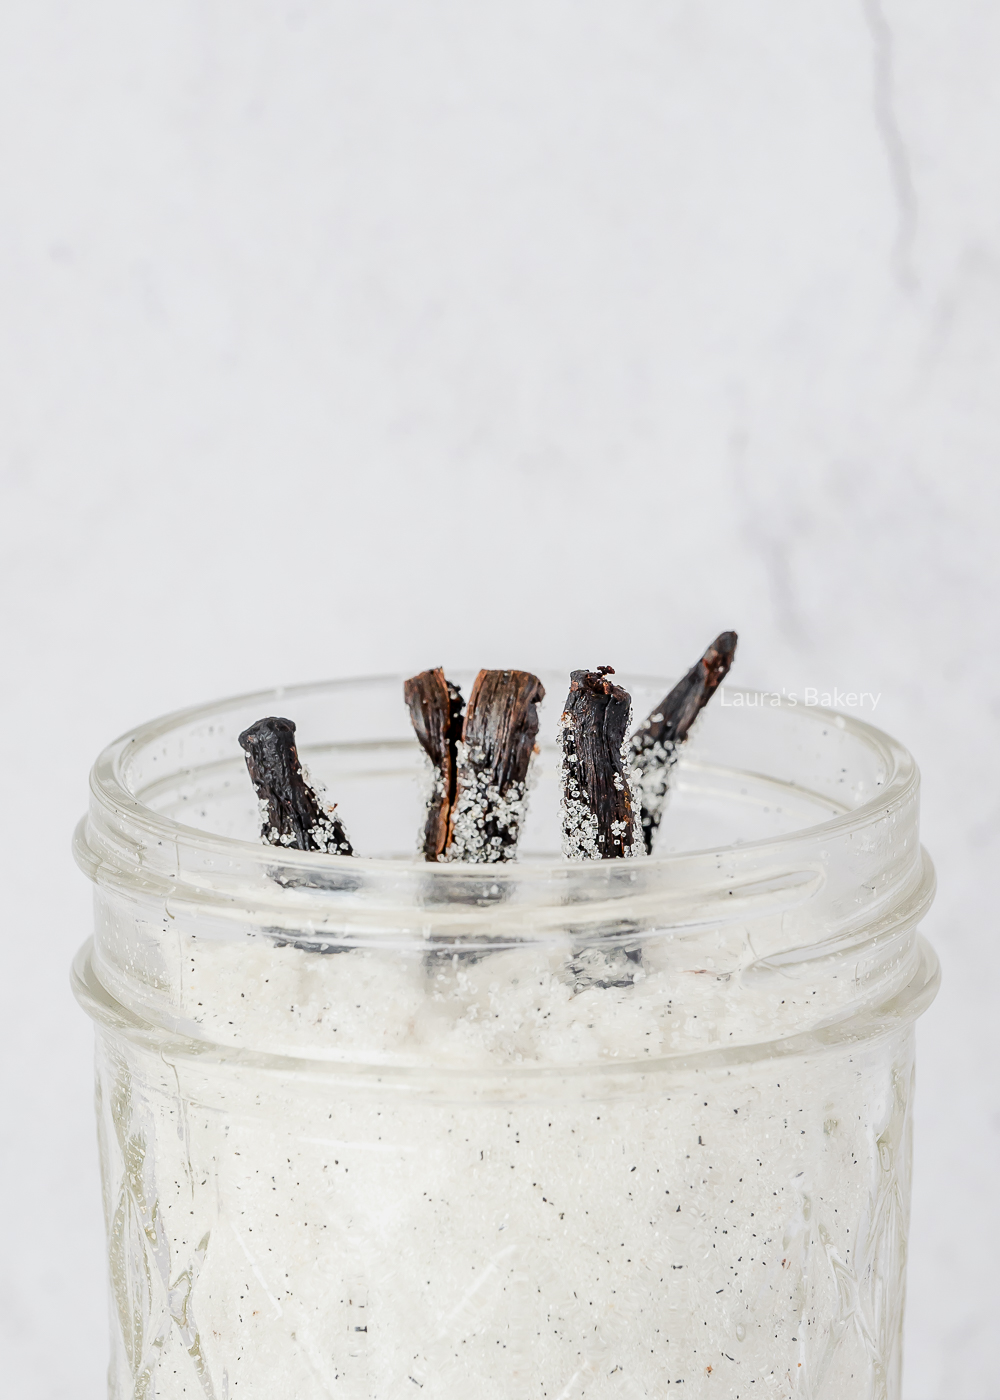
A few weeks ago I told you how to make your own vanilla extract and that was such an easy recipe! Making your own homemade vanilla sugar is almost easier than that! No complicated things to do, it’s more a good tip than anything else. Personally I never buy the store-bought vanilla-infused sugar from the grocery store anymore. Making it yourself is so much tastier! And you need only two ingredients for making it. Regular sugar and whole vanilla beans.
I love being able to see the little specks of vanilla in a product. It’s a good sign that real vanilla has been used for making it. I’ll let you know how I make my own vanilla sugar and will give some tips on how to make the most out of those expensive vanilla bean pods. It also makes for a great gift.
To start with the basics. Vanilla sugar or vanilla bean sugar is sugar mixed with vanilla. I guess the name explains it all! Pretty simple ingredients and takes no time at all to make. You can use it as a sweetener in baked goods or desserts. It’s one of my favorite flavor enhancers!
You can make vanilla sugar in two different ways. The first one involves the whole pod and the second one is made with pure vanilla extract. I’ll explain both below.

The first method involves using fresh vanilla beans and granulated plain sugar. Slice the whole pods open lengthwise with a sharp knife. You scrape the vanilla seeds out of the beans and the empty vanilla pods are also used in the sugar. The seeds are mixed with the white sugar.
It helps to rub it between your fingers to prevent a clump of vanilla forming. I usually place it in a glass jar. I add half of the sugar, stick the empty pods inside the sugar and add the rest of the sugar on top. You close the lid of the jar and put it away for 1-2 weeks. The longer you let it stand the better the vanilla taste will be.
If the sugar is almost finished you can refill the jar with fresh sugar. The vanilla will continue to release flavor of vanilla into the sugar but you won’t be able to do this endlessly. At some point you will need to remove the empty vanilla bean pod and replace it with a fresh one.
You can also use pods that you used for something else as well and stick the empty ones in the glass jar. That way it keeps fresh and delicious. Once the ‘old’ vanilla pods are no longer giving of their flavor you can grind them in a coffee grinder or food processor and add the fine powder to the sugar again. That’s a great way to re-use them again.
You can also mix some vanilla extract (about a teaspoon of vanilla extract to 1 cup of sugar) with the sugar and let it dry. If it forms clumps due to the high moisture content you can break it up with your fingers. Once dried you can keep it in a jar.
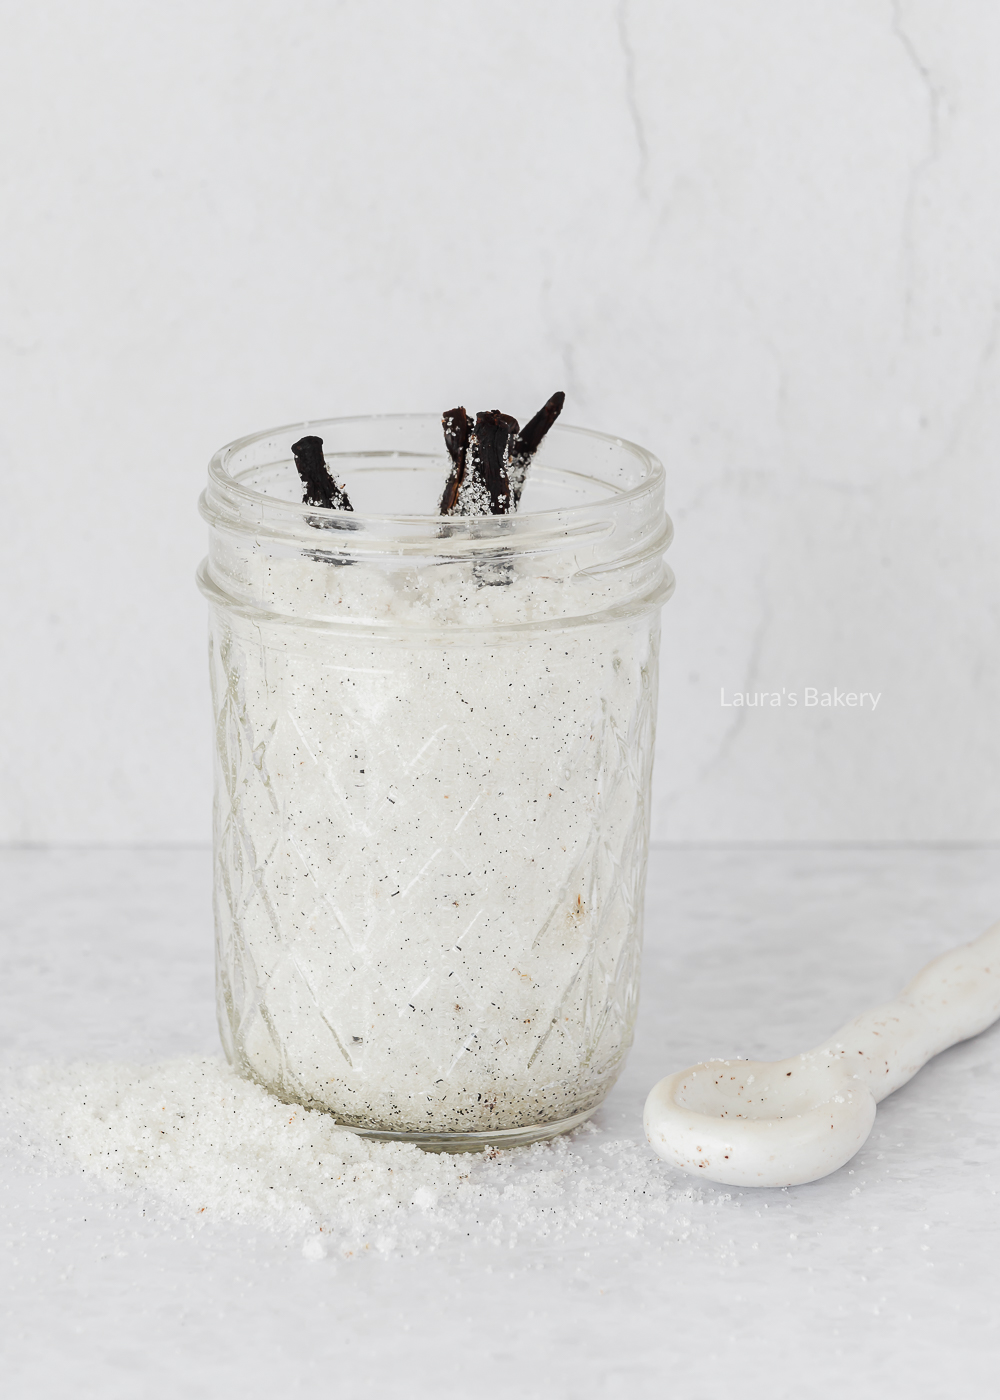
The vanilla sugar keep “forever” and the flavor might even get deeper if you keep it longer
While white granulated sugar is the most common sugar used, you could do the same with brown sugar, coconut sugar or cane sugar. Keep in mind that these sugars have a different taste and different flavors already so the end result will definitely be different.
No you can use any kind of whole beans you have on hand. That’s the fun part because even grade B vanilla beans will get a great use in this sugar.
A glass jar, mason jars or another airtight container is best for making the vanilla sugar. Keep it in a dark place for best flavor.


On many occasions you will see mentioned in a recipe that you need to blind bake the pie crust. Blind baking essentially means that you’re pre-baking the pie crust or tart shell to prevent soggy bottoms when you add the – usually wet – filling.
Blind baking also means adding a piece of parchment paper and pie weights. In this article I will explain exactly why you should blind bake your pie shell and what kind of baking weights you can use to do this.
As I mentioned blind baking is pre- baking a crust for when you’re either having a filling that does not require to be cooked like a fruit filling or a lemon meringue pie for instance or a pie that has a relatively wet bake filling (like for instance pumpkin pie). If you would not blind bake, the bottom of the crust would become quite soggy and could also remain raw.
Not really what you want in a pie dough right? A pie filling that is usually quite wet would be quiche filling for instance. Cream pies like coconut cream pie or banana cream pie are generally not baked at all so in that cause you want the bottom crust to be fully cooked.

If you’re planning on blind baking your pie crust there are a couple of steps to take. You can use either store-bought crust or make your own. The process is the same.
Now in many cases you then proceed to remove the weights and the parchment paper and you place the crust back into the oven for a second bake. It depends on the final use of your pie. Are you adding a filling that does not require any further baking? Then now is the time to brush the blind-baked crust with egg wash (this is optional) and place back in the oven until golden brown.

There are official baking beans you can buy but they are fairly expensive, although you can use them many times. A lot cheaper and easier option is to use one of the following:
Keep in mind that once you’ve used the dried rice or dried beans you cannot eat them afterwards. But you cán re-use them time and time again for blind baking. Just let them cool to room temperature and place them in a jar for the next time you need something to cover the bottom of the pie crust.

You can use another mould that is slightly smaller than your pie pan. For instance a springform pan or a glass pie dish. Place the plan inside the pie plate and follow the recipe for the timing. Basically you could use any weight that is able to withstand the heat of the oven. That is the main deciding factor. You could even use regular marbles, but make sure to wash them properly before using.
Assuming it is a raw dough than yes you will need to blind bake that as well. Same as the homemade pie crust.
Short crust pastry, puff pastry, pie dough and store bought pie crust can all be blind baked.
It depends on the recipe so always follow the guidelines on the baking time described there, but in general the following rules apply:
Blind baking is one of the things that helps to prevent a soggy bottom. Using egg wash also creates a barrier between the dough and the filling, so that helps as well.
If you fill your crust with, for example, pastry cream after baking, you could brush the crust with melted chocolate too.
Nothing more annoying than a dough that shrinks in the form which also means the filling will spill over in the oven. Using a baking sheet to place the pie on is always a good idea but it’s better to prevent dough shrinking in the first place (but: it always shrinks a little, that is just normal).
Chilling the dough is an important step, but also not stretching the dough too much when you place it in the pie pan. Don’t excessively use the rolling pin either.
When using weights distribute them evenly over the crust too.

These Ferrero Rocher cupcakes will steal the show, that’s for sure. Not only that, they are delicious too. Not surprising, as I love chocolate cupcakes on their own, but add a chocolate buttercream and Ferrero Rocher chocolates and they literally take my breath away. It’s just the perfect match. I am very curious to hear what you think.
I would like to add that these cupcakes are a big bite and not light by any means. There is a Ferrero Rocher hidden in the center of each cupcake cupcake, and of course, as you can see, there is one on top of the buttercream for decoration. Delicious, but something to keep in mind if you are planning to make other tasty snacks.
The basis of this cupcake recipe is a chocolate cupcake batter (like these chocolate cupcakes) and you will need the following ingredients to make them. In addition you will also need cupcake liners, a piping bag and a muffin pan to place the cupcakes in. Also keep in mind that it helps to have all ingredients at room temperature before starting.
And for the Nutella buttercream you also need Nutella and extra cocoa powder. For making the Nutella frosting I used this basic buttercream recipe.

The process for making the Ferrero Rocher cupcakes starts with creaming the butter and the sugar until light and airy. You can do this the easiest way in a stand mixer with the paddle attachment. Or use a large bowl with a hand mixer. Takes a little more effort but totally do-able.
Once the butter and sugar mixture is creamy you add the vanilla extract and the eggs one by one. Make sure that the first egg is fully incorporated before adding the next one! Lastly you add the flour, baking powder, cocoa powder and salt and mix until all the dry ingredients are incorporated into the wet ingredients and you have a smooth batter.
Now divide the batter over the 8 cupcake liners (placed in the cupcake tin) and place a Ferrero Rocher candy in all cupcake cases. Just press one in the center of the cupcake and cover with a little bit of batter on top. You can make a small hole with a small spoon before doing so but the batter should fold around the Ferrero Rocher chocolate easily.
Bake the Ferrero Rocher cupcakes in the oven in about 18 minutes. Once golden brown and cooked through let them rest in the tin for a little bit before taking them out of the muffin tray and letting them cool completely on a cooling rack.
I love making cupcakes and these are some of my favorites! Make sure to also check out my Ferrero brownies recipe if you love Ferrero Rocher!

While the cupcakes are cooling down you can make your Nutella buttercream. Once the cupcakes are cooled completely you can make a lovely swirl on top of each cupcake and place an extra Ferrero Rocher chocolate on top of the cupcake. The perfect cupcakes for all special occasions. For an extra festive look you can add some gold sprinkles as well.
If you don’t want to add another Ferrero Rocher to the cupcake you can add some chopped chocolate instead. They also taste good with just a bit of chocolate ganache or whipped heavy cream.
Undecorated cupcakes can be kept in an airtight container. Keep in mind that you should keep it outside of the fridge. Placing them in the fridge will result in dry cupcakes.
You can store the undecorated cupcakes in an airtight container outside of the fridge. Placing them in the fridge will dry out the cake. They can be store for about 4 to 5 days. Check on how to store cupcakes here.
Undecorated you can freeze the cupcakes in a freezer-safe container for up to three months.

Making your own homemade vanilla extract is incredibly easy to do and will save you a lot of money too in the process. The only thing you need is whole vanilla beans, a bottle of vodka and some patience. Oh and a dark place would be handy to have too.
You’ve probably noticed that the price of vanilla is incredibly high these days. Not only have vanilla beans gone up in price, but so have all vanilla products. This is due to several poor vanilla harvests combined with huge demand.
To give you an example, in November 2017, I bought a 118ml bottle of vanilla extract for 14.90 euros. Less than two weeks later, you paid almost €10 more for it.
Currently, the cheapest vanilla extract is the one you make yourself. You make a bigger investment at the beginning, but you get a lot for your money. Besides, making your own vanilla extract is not difficult at all, you only need 2 ingredients. And some patience. Let me show you how to make your own DIY vanilla extract!

As mentioned making your own homemade vanilla extract is very simple. Apart from the vanilla pods you need a glass jar or mason jars will work as well. Alternatively you can also use the vodka bottle itself.
Per 100 ml of vodka (3.3 fluid ounces of alcohol) you will need roughly 1.5 whole beans. If you have bought the vanilla beans in the grocery store the quality is likely not the best. In that case it wouldn’t hurt to add a few more vanilla beans in.
If you can get your hands on madagascar vanilla beans, tahitian vanilla beans or another great source of the vanilla it will have an impact on how your vanilla extract will taste. But whatever the case it will always be better than most store-bought vanilla extract! (and cheaper too!)
You also need a sharp knife to cut the fresh vanilla beans lengthwise. Place in a clean clear bottle and add the vodka until just under the rim of the bottle. Add a tight-fitting lid
And now the hardest part of this recipe is to wait. You need approximately 1-2 months before the vanilla is ready. Give the bottles a good shake every few days or so and you will see how it darkens each time.

Yes you can use different kinds of alcohol. Vodka is popular because it is neutral in flavor, but you can also use bourbon or rum to make the vanilla extract. That will give you a range of different flavors. Of course some of these will be expensive alcohol so the question is how much do you want to spend on the alcohol.
Well the vanilla extract will keep for years! Store it in a cool dark place preferably and avoid direct sunlight. That is also a good reason to use smaller bottles as you can keep the unused ones sealed tight.
If you shake the bottles once every few days you should be good. The shaking is helping the flavor to seep into the alcohol.
You should keep them in at least 1-2 months but longer is no problem at all. You will see how dark it gets and that is a good indicator to know when the extract has the best flavor.


Baking and using a type of cream pretty much go hand in hand. There are the types where the word cream is literally in the name, but there are also different types of cream where it is not immediately obvious that it is a cream.
And then you have the difference between the names used in different countries and different types of creams mentioned in foreign recipes. It’s no surprise that a lot of people get confused and we’re often asked what the difference is and what can be substituted for what. To shed some light on the cream situation I will explain it in this article. Where possible I will also give the Dutch name for the cream.
Perhaps the most helpful place to start is by explaining what cream is. Cream is a dairy product made from cow’s milk. When the whole milk sits for a while, a layer of fat rises to the top, you skim it off and that’s how you get cream. Nowadays there are many other ways of making all kinds of cream, but to be officially allowed to call a product cream it has to contain at least 10% fat.
Below I will discuss all types of cream. To distinguish between them, I have divided them into the well-known (Dutch) types of cream and the lesser known types of cream.
Officially, pastry cream is not a real type of cream, but since it contains the word cream, I will discuss it briefly. Pastry cream is similar to custard and is made from sugar, egg yolks and milk. So there is no cream in it at all. Besides, you have to make it yourself and you won’t find it in the fridge section of your supermarket. Want to know how to make it? Check the recipe for pastry cream here.

Crème fraîche is a type of cream with a fat content of 30%. This makes it a real cream. It is often firm and thick, but after stirring for a while it becomes more liquid. Crème fraîche can be used in both hot and cold dishes. For cold preparations, you can replace crème fraîche with sour cream.
Cooking cream is actually a light version of heavy cream. It is basically the same product, but with less fat. This means you can’t whip it until it gets stiff. It is usually used to add a creamy taste or texture to sauces or soups, but you can achieve the same effect with unwhipped heavy cream or crème fraîche.
Cooking cream usually has a fat content of 20%. In the Netherlands this is called cooking cream (kookroom) but it might also be called single cream.
Mascarpone is not actually a type of cream, but an Italian cheese made from cream. It is therefore similar in consistency to cream cheese and is used in much the same way. It has a fat content of around 40% and can be used to make delicious tiramisu or mascarpone cream. It’s also quite easy to make yourself and I’ll be sharing a recipe for that later.
Cream cheese, like mascarpone, is a type of cheese. Made from cream, the name says it all. It can only be called cream cheese if it meets a number of requirements, one of which is that it is made from cream.
This is why cheaper but similar products are often called dairy spread or soft cheese rather than cream cheese. Want to make a cream cheese topping? Make sure you use a product that mentions cream cheese on the label.

Whipping cream is cream as it should be. It has a fat content of 35% and is actually the cream that is skimmed of the top of the milk. Unlike cream with a lower fat content, whipped cream is easy to whip (due to the higher fat content).
Want to make whipped cream that doesn’t deflate? Whip some mascarpone first and then add the whipping cream and sugar. Whip this into stiff peaks. That way the end result will hold much better.
Sour cream is known in the Netherlands both by it’s English name and by the Dutch name. On the shelves you will usually find it as sour cream. It has an incredibly low fat content of just 10%, so it can only just call barely call itself cream.
It is actually the light sister (or brother) of crème fraîche, and you can easily substitute them. It is often advised not to heat sour cream, but I have never had any problems with it.
With foreign I mean the types of cream that aren’t (easily) available in The Netherlands. So it might not be foreign to you.
Clotted cream comes from England. It is an incredibly thick cream with a fat content of about 64%. Clotted cream is rarely used in cooking or baking, but it is used as a garnish. Think of scones with clotted cream.
Clotted cream is a little less known here in the Netherlands but it is becoming more common and it’s a bit easier to find in some stores during the holidays. Depending on where you live it might be easy or not so easy to find.
You can make it yourself, real clotted cream is made in the oven and is a pretty labor intensive job (I tried it once and will share my recipe and experience soon!), but there is also a quick version that comes close to the original. I will share how to make that soon too!
Another British product is double cream. It is an incredibly fatty whipping cream that stiffens incredibly well. It has a fat content of around 48% and is therefore much thicker than Dutch whipping cream or slagroom.
Always check how it is used in a recipe to see how best to replace it. If it’s to be used in a recipe, you can use normal whipping cream, but it won’t be the same. If it needs to be whipped until stiff, use the mascarpone and whipping cream trick from above.
Heavy cream is the American equivalent of double cream, but with less fat. Are you still with me? It is lighter than double cream, but in most cases thicker than Dutch 35% whipping cream.
Heavy cream has a fat content of between 36% and 40%. This makes it much closer to Dutch whipping cream, and you can basically always substitute heavy cream for whipping cream. The difference in fat content is minimal.
And there you have it; the entire list of cream types you can find in the grocery stores. Which ones you can find is depending on where you live and whatever the retail stores buy but with the above list you should be able to replace whatever is mentioned in a recipe with another type. Taking the above considerations into account.

I think this limoncello tiramisu is absolutely delicious. It has the brightness of fresh lemons with the sweetness and creaminess of the mascarpone. The lemon curd makes it a nice sweet and fresh dessert, and this tiramisu is perfect to finish off an Italian dinner. With an (extra) glass of limoncello on the side (totally optional of course). It’s a nice lemony twist to a classic tiramisu, featuring limoncello liqueur.
I love quick and easy recipes, so that was the starting point for this Limoncello Tiramisu. I used my basic recipe for a quick tiramisu and replaced the coffee with limoncello and the cocoa powder with lemon curd. This really brings out the limoncello and lemon curd flavors in the dessert.
If you have already prepared the candied lemon slices and the lemon curd, it will take you no more than half an hour to make this tiramisu. Making the tiramisu a day in advance is also good for the taste, as the flavors will be better absorbed the next day.
Baking tip: If you make your own lemon curd, you’ll probably have enough left over for another recipe. I usually store the leftover lemon curd in glass jars with lids.

Apart from the candied lemon slices you will need the following ingredients. Make sure to double check the full quantities in the recipe card below
Make sure to have prepared the candied lemon slices and the lemon curd (if making your own). Next step is to take a large bowl and to mix the mascarpone with the heavy whipped cream till it’s creamy, firm and smooth. Set aside.
Now take a separate bowl (preferably a shallow bowl) and pour the limoncello in. While the recipe states 200 ml (little less than one cup) you will not be using all of that. You use the limoncello to dip the ladyfinger cookies in so you need the volume but you won’t be using it all.
Now dip each lady finger into the limoncello and place the dipped ladyfingers in a single layer in a rectangular or square baking dish. Add a layer of mascarpone ( a little less than half the total amount) and using a offset spatula or a large rubber spatula spread it out over the soaked ladyfingers. Repeat this with the remaining ladyfingers and the remaining mascarpone. End the limoncello tiramisu with a layer of lemon curd on top.

All my tiramisu recipes are made without eggs. Wherever possible, I avoid using raw eggs in recipes. So the base of my tiramisu is a mixture of mascarpone and whipped cream. I don’t think you miss the eggs at all. It really is a perfect dessert for any festive occasion or dinner parties and so simple to make!
As you can see, I made candied lemon slices for this recipe. Personally, I think they look really cool as a decoration and they are also edible. Candied lemon slices are not difficult to make (very easy in fact), but you will need plenty of time to make them.
Making candied lemon peel is a little quicker. I describe how to do this in the recipe for candied lemon peel in the FAQ section. It’s up to you, maybe you want to leave them out altogether. That’s fine too, but I think it does add an extra fancy look on top of the tiramisu.
If you are using lemon zest in a recipe, try to buy organic lemons. Non-organic lemons are treated with pesticides to make them last longer, and a layer of wax is added to make them shine. Unfortunately, scrubbing and washing won’t get rid of this, so there’s only one solution: organic lemons.
If you decide to skip the candied lemon slices, I have another tasty tip for you. Replace them with raspberries! It looks incredibly cheerful and besides, this limoncello tiramisu goes really well with the flavor of raspberries.
Don’t like limoncello and wondering if you can leave it out of this recipe? I will soon be sharing more tiramisu recipes that are without alcohol but for this recipe it is an essential part of the flavor. That said; you can always leave out the alcohol and replace the limoncello with lemon syrup or lemonade instead. Test the liquid before using to make sure it is not too sour. If it is, add a few tablespoons of sugar (or a bit of water). That will transform this into a lemon tiramisu.
I myself am not a huge fan of alcohol in my food, but the Laura’s Bakery team who tested this limoncello tiramisu gave it a big thumbs up.


You can keep limoncello tiramisu in the fridge for up to 4 days. Just make sure that all the ingredients you use have a long shelf life.
Of course you can, in fact it is recommended. After all, tiramisu should be nice and smooth. If you make the limoncello tiramisu the day before, it will be at its best.
Absolutely. You can use -for instance- whiskey tumblers for placing the tiramisu in. It helps if the opening is a bit wider so you can easily add the contents of the tiramisu.
Yes, you can. Just check the ladyfingers’ packaging to make sure no butter or other dairy products are used, otherwise make them yourself using a ladyfingers recipe (I will share my recipe soon). You can replace the mascarpone and cream with lactose-free varieties, which are now available in every supermarket. Finally, replace the butter in the lemon curd with hard margarine. And you have a lactose-free limoncello tiramisu!

Today I have an authentic Dutch recipe for you that is traditional to eat on New Year’s Eve. They are called kniepertjes. Now giving you a translation for this typical Dutch treat is a bit challenging, as there is no direct translation.
Basically kniepertjes are a flat cookie that can be transformed into rolled cookies or can be eaten flat. Probably the best translation would be to call these thin waffles. They are delicious served with a cup of coffee and the rolls are also sometimes filled with sweet whipped cream.
If you have no idea what I am talking about, Dutch kniepertjes are thin sweet waffles eaten on the last day of the year. They are particularly popular in the east of the Netherlands. In Drenthe, the Northern province of Groningen, Twente, the Achterhoek and Salland they love them. It is a real tradition there to bake ‘kniepertjes’ on New Year’s Eve.
Kniepertjes are also called knijpertje, knieperties or knieperkes in some dialects. This is because the waffles used to be ‘pinched’ between a special waffle iron over a fire. And knijpen or kniepen in dialect means ‘to pinch’. So that’s where the name comes from.
Nowadays, instead of hovering over a fire with an old-fashioned waffle iron, you can make this type of waffle with an electric waffle maker. They have special waffle irons for these cookies, but I used a waffle iron that you can also make stroopwafels with and it worked very well.

Kniepertjes taste like an ice-cream cone, but sweeter. Sometimes cinnamon is added. The dough is made from butter, sugar, eggs and flour. You will likely have all those ingredients already so no need to go to the grocery store either. I love adding a little bit of vanilla extract to the dough
In this recipe I make flat knieperjes, but maybe you have tasted the rolled version? Rolled up they are officially called new year’s rolls. If you want to try those, you can easily use the same recipe below. To make the flat version into a roll you use a wooden stick (like the handle of a wooden spoon) while the cookies are still warm and pliable.
When they have cooled and the cookie sets, you can fill them with whipped cream or butter cream. You could probably also use an ice cream cone maker for making the Dutch kniepertjes but I have not tried this myself.
Fun fact: according to tradition, flat wafers are eaten until New Year’s Eve, representing the old year that has already passed (like an open book). The New Years eve rolls symbolizes the upcoming year that has just arrived (the book had to be opened and unfold) and is eaten on the first day of the New Year.
As well as kniepertjes, there are other recipes that are typical of New Year’s Eve and are delicious to make. Do you bake different things on New Year’s Eve, or do you always make the same recipe?

This is a very simple dough made from butter, sugar, vanilla extract, eggs and flour. Make a firm dough and shape into small balls.
For baking, you will need a waffle iron. Always grease it well to prevent the waffles from sticking. They are ready when they are golden brown. After baking, when they are still soft (and very hot!), transfer them to a wire rack with a spatula and leave to cool.
Want to make New Year’s rolls? Wrap the warm wafers around a (wooden) stick immediately after baking and leave to cool. You can then fill them with whipped cream or butter cream.
The best way to keep the waffles crispy is to store them in an airtight container. They will keep for at least two weeks, and probably longer. You can also freeze the dough balls and bake them fresh.

I have already mentioned the use of baking soda in a couple of articles on the site. Last week I wrote an extensive article on how to use baking soda and the differences with baking powder.
Baking soda is also known as bicarbonate of soda or soda bicarbonate, has leavening power and is able to make your baked goods rise. It creates a chemical reaction in combination with an acidic component. Combine the two together and you basically create carbon dioxide gas.
In today’s post I’m giving you the most common acidic ingredients. While some might look obvious others might surprise you!
Baking soda is pretty well known in the United States and is becoming increasingly popular in the Netherlands. Which is good news as it can be found in almost any grocery stores.
As I mentioned baking soda needs a type of acid to form that acid-base reaction you’re looking for. The reaction will create air bubbles and will give your cupcakes, pancakes or whatever else you’re baking an airy texture. Ingredients like lemon juice, vinegar or another kind of citrus juice are the obvious choices, but there are many other possible ingredients that have the presence of an acid. I have made a handy overview for you to fall back on if you need more information.
Some of the acidic ingredients are obvious and most of you will know their names. But there are also ingredients that don’t taste acidic or sour at all, but still have an acidic ingredient in their composition that baking soda reacts to. Natural cocoa powder for instance, I knew myself, but in my research for this article I found many more that will create the same effect. The list includes both dry ingredients and wet ingredients. Obviously the ingredient you pick will have to fit with whatever else the recipe calls for.
So the ingredients in this list will work with baking soda, but there are many more. Even ketchup works because it has vinegar in it, although you probably won’t be baking with ketchup anytime soon (nothing sweet anyway). Many fruit purees will also work, as will fruit and vegetable juices. But the listed ingredients work best. Of course, if you have any additions, I would love to hear about them!
Hopefully this list will help you and not leave you wondering why there is baking soda in a recipe but no obvious acidic ingredient.

To be honest, I had never made candied lemon slices or lemon peel before, so it was time to try. The result was these delicious candied lemon slices for my limoncello tiramisu. It’s the perfect topping for a cupcake, a lemon meringue pie, ice cream, a frosted cake or a dessert. Also a great gift for a lemon lover!
Making candied lemon is a very simple process and an easy recipe but it is time consuming. You start by making the citrus slices. Slice lemons either with a very sharp knife or a mandoline. You’re aiming for uniformly thin slices.
Then you need to blanch the lemon several times in a pot of water (a large saucepan or a large skillet will work as well), and it is important to change the water after each boil. You do this because it removes the bitterness from the peel; after all, nobody likes the bitter part of the lemon peel.
Next step is to turn sugar water into a sugar syrup. In the sugar mixture you bathe the lemon slices so that they are soaking up the sugar. You repeat this process several times while the lemon slices drain in a single layer on a rack to let the excess syrup drip away and the sugar syrup continues to thicken.
This is not something you do in one evening, but you can keep the slices for a long time. The drying process also takes some time so keep that in mind. They will still be a little sticky but that’s normal.
Are you going to make this candied lemon recipe? If so, I would recommend using organic lemons. I know they are a lot more expensive, but when you know what nasty chemicals are sprayed on regular lemons, the organic lemons will be worth the money.
Some time ago there was a documentary on Dutch tv showing where that shine from the regular lemons comes from! Not what you want! Depending on where you live you can use meyer lemons or another type of fresh lemons.

In a nutshell, candying is a way of preserving food. By cooking edible products in fat or sugar at a low temperature for a long period of time, they can be preserved for much longer. This applies not only to lemons, but also to candied duck (confit de canard), candied peel and candied ginger.
The method of candying with a sugar syrup not only makes it last longer, it also instantly transforms what you are candying into a kind of candy.
When you first start candying fruit, you will usually use the sugar syrup method as described in the recipe below. In fact, you can candy many types of fruit. In general, harder fruits are the easiest to candy. Soft fruits cook too easily in the sugar syrup and become mushy.
You can use this recipe not only with lemon slices, but also with other citrus fruit such as lime or orange slices. It is also very nice to just grate the peel of a lemon and then candy-coat it, this gives a more subtle effect (and flavor) for a lemon candy decoration. No matter if you’re using citrus peel, orange peel or lime this will make for beautiful toppings on so many baked goods.

Officially, the sugar syrup should be between 105 and 110 ˚C (220-225˚F). I personally have a sugar thermometer, but sometimes I do it myself without a thermometer. That’s fine as long as you’re careful not to turn the heat up to the highest setting. You want a low simmer or medium heat at most.
Yes, there is. And I like quick recipes, so I tried this method first. Instead of soaking the slices in the sugar syrup several times, you can make one sugar syrup and cook the slices in it on a low heat for about 30-35 minutes. The syrup is equal parts water and sugar.
The risk here is that the hot syrup will damage the flesh of the lemon slices or cause them to boil to pieces. Unfortunately, this happened to me the first time (see the first photo) and I think it’s a shame, so I haven’t described this method in the recipe.
The quick method works very well for candying citrus zest or julienned peel. Here you use a cheese slicer to scrape off the yellow part of the lemon peel and then cut it into thin strips. After blanching and cooking in the sugar syrup, the strips are stored in a jar with the sugar syrup. That’s a great way to quickly make a sweet treat to go on your desserts.
Yes. By blanching (thin) lemon slices and then candying them, the slices fill up with sugar and become sweet. However, I should point out that the lemon peel is at its best when it has become translucent, and this is best achieved by cooking it as described above. So take your time. And because you can keep it for such a long time just use extra lemons and make a lot. It’s a delicious treat that goes so well with loads of different dessert recipes.
The best way to store them is in an airtight container in the fridge. Candied Lemon Slices will keep for months.
I have no experience with this, I never have them in the house. Again, I would recommend trying an organic version. If you do try it, I would love to hear if it works with frozen lemon slices!

Dutch apple dougnuts or Dutch apple beignets are a must on New Year’s Eve! Next to Dutch oliebollen, they are one of my favorite New Year’s Eve treats. They are delicious with a little icing sugar or cinnamon sugar on top and very easy to make.
Making your own Dutch apple beignets is not difficult. Of course, I have some handy tips to help you make the tastiest apple fritters, but other than that, you just have to cut the apples up, put them in the batter and fry them.
You can use an ‘official’ frying pan but it will work just as well with a regular pan.
In the Netherlands we have a difference between an apple turnover and an apple beignets or an apple fritter. All those names can be quite confusing but the General Dutch Dictionary describes the difference as follows ‘The triangular apple pastry made from puff pastry and baked in the oven is called an appelflap (apple turnover), and the apple slice dipped in batter and deep-fried is an apple doughnut or apple beignet’. So there is that sorted out. Of course I also have a recipe for apple turnovers on the blog!
There is also another version of apple beignets using puff pastry but those are not the same so this is my version of classic Dutch apple beignets. (I do use the name apple fritter, apple dougnuts or apple beignets interchangeably)

I often make a lot of apple dougnuts so that I have enough for New Year’s Eve. Friends and family love them. It is a tradition in our house to have an apple beignet (and/or oliebol) for breakfast on Januari 1st. It’s easy to heat up an apple beignet in the oven, deep fryer or microwave. So good!
When I bake apple beignets, I often bake Dutch doughnuts (oliebollen) at the same time. Because if the fryer is out why not make the most of it right? Of course there are more things you can make for Newyears and I’ll be sharing more of those soon!
For this recipe, I prefer to use a firm variety of apple, such as Honeycrisp, granny smith or Gala apples. I cut an apple into about 5 slices, each 1-1.5 cm (around 0.5 inch) thick. You can use an apple corer to remove the core.

The batter for these irresistible apple beignets is very easy to make and quite thin. You could use beer instead of milk for an even crispier result. The cinnamon in the batter is optional, but I personally love adding a bit of cinnamon. Or try a little bit of pumpkin spice instead. It’s easiest to work if you add the simple batter to a large bowl so you can dip the apple rings in and transfer to the hot fat right away.
I bake the apple fritters in a large frying pan or deep pan filled with sunflower oil. You can also use peanut oil or another cooking oil suitable for deep frying. Sunflower oil is easy to heat and the pan should be large enough. I use about 2 liter of oil (the total amount of oil may vary depending on the size of your pan). Use a slotted spoon to lift the baked apple beignets from the hot oil. Let them drain on paper towels.
I like to eat my Dutch apple beignets with a dusting of confectioners’ sugar. Cinnamon sugar is also delicious. Just mix some sugar with cinnamon in a small bowl and use that to dust your fritters with.
You can store apple fritters in a tightly closed airtight container in the fridge for up to 2 days. If you freeze them, they will keep for about 3 months.
Reheat in the oven, air fryer or microwave. In the oven, depending on the quantity, they often heat up in a few minutes. The same applies to an air fryer. You can reheat them in the microwave, in which case they will probably be hot in 20-30 seconds (again, depending on the quantity), but they may be a little softer.
Over the past few years I have written a lot about baking soda. Although the ingredient is becoming better known and more readily available (in The Netherlands), there are still a lot of questions about it. Not everyone is aware that it’s really different from baking powder, and many don’t quite understand how to work with it now.
If you’ve followed me for a while you might have seen some tips passing by and maybe you already understand how the two work, but I thought it would be a good idea to explain in one article what the difference is between baking soda and baking powder and what you need to know to work with the two.
If a recipe calls for baking soda you cannot simply replace this with baking powder. The two are really very different.
Baking soda, sodium carbonate, bicarbonate of soda and sodium bicarbonate. Just a few names for the same product. Although there are many different ways to use baking soda for cooking and for using in your household, I only use it in recipes as a leavening agent. Do not confuse it with baking powder, which is very different.
Whereas baking powder is made up of several ingredients and needs nothing else to ‘work’ as a leavening agent, baking soda needs some help in the form of an acidic ingredient. The chemical reaction between the two will create the result you are looking for. The acidic ingredient can be something like lemon juice, which you would immediately associate with acid but there are many more options, some of which might surprise you. I’ll explain more later in the article.
Shops have realized that baking soda is becoming increasingly popular in the Netherlands, and that’s a good thing, because it’s much more readily available than it was a few years ago. Most grocery stores even have several varieties on their shelves these days, from Oetker bags to Arm & Hammer’s American orange boxes. Tokos, bakery/cookery shops and other shops often stock them too. It is also readily available online, of course.
In the United states you can find it online at stores like amazon but most grocery stores will stock it like Walmart to name just one. It should not be hard to find at all. You can find it in the baked goods section most of the times. Most famous are probably the orange boxes of arm & hammer.
You may not have realized that baking soda is a multi-functional product, as you can do much more with it than just use for it’s leavening effect in a baking recipe.
I always refer to baking soda as an ingredient. You might not expect it, but baking soda has many uses in the home. How about a homemade toothpaste and deodorant, or as an aid to removing a splinter? Or literally around the house as a fabric softener or cleaning agent. It’s fantastic for cleaning something simple like water bottles but is also perfect for making sure the drainage pipes in your house stay clean. Have a blocked drain? Try clearing it with a mix of baking soda and vinegar.
In the kitchen, of course, you can use baking soda for all the necessary cleaning tasks, but I’ll focus on recipes for now. You will often see baking soda used in a recipe to make a cake fluffy or make a bread rise. So it is a leavening agent. Sometimes only baking soda is used for this purpose, but I regularly combine it with baking powder. It’s also an easy way to tenderize meat or sea food. So a little baking soda goes a long way!

Baking soda and baking powder are both baking ingredients and have leavening power. But there is an important difference. In a nutshell:
Baking soda only works if you also add something acidic and some liquid or wet ingredient. Upon contact the baking soda will produce carbon dioxide gas which results in the leavening effect. When you’re using baking soda the effect will be immediate which means it is best to bake right away if you use baking soda.
Baking powder consists of baking soda and an acidic component (often cream of tartar), so no extra acid is needed and it works by itself. The reaction of baking powder works in two stages; the first reaction will be upon contact with the liquid. The second reaction will be upon heating in the oven.
When not using enough acid in a baking recipe baking soda can have a soapy taste, so the acidic ingredient is needed to neutralize the flavor.
Baking powder already has a neutral taste since it has its own acid.
Baking soda lasts a really long time when stored in a dry place.
Baking powder does have an expiration date and a shorter shelf life due to the combined ingredients. You can test if it is still fresh by adding some warm water. If it creates air bubbles it is still active.
Can you use baking powder as a baking soda substitute and vice versa? Well technically no. Both work different and you cannot substitute one for the other. If you have only baking powder and the recipe wants you to use baking soda, you need about 3 times the amount of baking powder. But that will also have an effect on the texture of the cake batter as you will have more acid and extra filling.
If substituting baking powder with baking soda you will need an acidic ingredient to activate the baking soda. Which in turn will create a different flavor to the original intended recipe.
If you use only baking soda in a recipe without an acid, it will have no effect. If you add baking powder, it will work because it already contains the dry acid you need. Of course, you can also use baking powder alone, but then you will need proportionally much more as the baking soda is only a small part of the mix.
For a nice, airy result, baking powder and baking soda are often combined. It will have a double acting effect. Even if the recipe already has the necessary acidity, it will still have a fluffy texture.
Finally, the acidity I keep talking about. By now you’ve probably realized that baking soda needs enough acid to act as a leavening agent. Lemon is obvious, vinegar and buttermilk are also common and probably easy to think of.
But there are also ingredients that are less obvious. Honey, for example, but also chocolate or cocoa powder. Or what about sour cream ? There are many more ingredients than you might think that make baking soda work as a leavening agent. Check the list below for some surprising ingredients:
I bet there are a couple of ingredients here that you didn’t see coming. But this little list is not all. There are many more ingredients that will have the desired effect. Think about fruit purees for instance.
Did you know all this about baking soda? Or do you have more facts to share?

Homemade chocolate ganache is very easy to make. In short, it is a mixture of chocolate and (double) cream. I will explain how to make a nice creamy white chocolate ganache, a milk chocolate ganache and a dark chocolate ganache.
Today’s recipe is one of those recipes that is super easy to make, but still gets quite a lot of questions from my followers. So I figured it was time to give it a stage of it’s own to make sure you can make a delicious and perfect ganache every single time. So voila, my easy chocolate ganache recipe.
In the pictures you will see 3 types of ganache: dark chocolate ganache, milk chocolate ganache and a white chocolate ganache. I have used this ganache in many recipes in Laura’s Bakery, but it deserves its own basic recipe. There are also a number of different ways you can use this recipe. Like making truffles or make a whipped ganache. The possibilities are endless!


Where to start? I have made an incredible number of recipes using ganache and they are all so delicious. There are also many ways to use chocolate ganache. For example, as a topping for a cake, a brownie or a tartlet. I will soon be sharing much more delicious recipes featuring ganache in all shapes and sizes. But here’s a baking tip I love: pour milk chocolate ganache over a vanilla cake!
For making ganache you really only need two simple ingredients; chopped chocolate and heavy whipping cream. Now the ratio of chocolate to cream can vary depending on the type of chocolate which is why I am sharing the ratios of each ingredient in the recipe card.
Apart from the chocolate and the cream you will need a small saucepan and a rubber spatula is also a handy tool to have on hand.
You can also whip up the ganache and use it as an airy topping for pastries like chocolate cupcakes, or simply as a creamy filling for a bonbon or chocolate truffles. Or simply pour over ice cream. Or use as a cupcake filling. Mmmm. There is no end to the usage of this simple ganache recipe.
When we think of ganache, we often think of the brown chocolate version. But the white chocolate version is just as tasty and easy to make. The nice thing about it is that you can also give it a beautiful color of your choice. You will need a special chocolate food coloring or an oil-based (gel) food coloring. You mix the coloring with the liquid melted white chocolate and then work it into the recipe.

Layer cakes where the chocolate ‘drips’ from the top are incredibly beautiful and are also called drip cakes. The chocolate ganache you use for a drip cake has a different ratio to the one I have included in the recipe below. I will share a recipe for a drip cake soon and will also give you the correct ratio for that then.
This only happens when it cools. Once you’ve mixed the warm cream with the small pieces of chocolate it will take some time for the chocolate to set and get the right consistency of the ganache. When the chocolate ganache cools but is still not as firm as you would like it to be? It’s best to add more chocolate (or less cream) next time. The more chocolate you add, the firmer the end result will be.
In theory, you can make this chocolate ganache with all your favorite chocolate bars. The question is whether the fillings in these bars will taste very good in the end result. I would chop coarse fillings with a knife first. If it is the best chocolate to use for making a ganache is debatable but if you happen to have a lot of bars of chocolate leftover it is worth the try to make them into a chocolate frosting.
You can also use a combination of different types of chocolate. For example, a ganache with semisweet chocolate and bittersweet chocolate, remembering that the hot cream will also have to be converted to these proportions. I would always go for a good quality chocolate for the best flavor.
The amount of chocolate ganache you need to cover a cake, fill a tart or top a brownie depends entirely on the size of the cake and the desired thickness of the ganache layer. The best way to know for sure is to always check the respective cake recipes where the ganache is used.