Gingerbread cookies recipe 1a

Today I am sharing my favorite gingerbread cookie recipe to make the most delicious Christmas cookies. You can use this recipe to make gingerbread houses and decorated gingerbread cookies.

How to make gingerbread cookies

Gingerbread is becoming more and more popular in Holland, although speculaas is still the most popular spiced cookie. You can find gingerbread cookies in Holland a little better these days than a few years ago when I decided to make them myself.

These are the best gingerbread cookies I have ever had, much better than the ones you can buy in the store (here). The reason I think these cookies turned out so delicious is because the spicy flavor of the gingerbread spices did not become too overwhelming.

This has to do with the amount of spices I used in the recipe, but also because I like to make my own gingerbread spice mix.

This spice mix is tailored to my taste and you only need four types of spices: ginger, cinnamon, nutmeg and gingerbread. In proportion, you need the most ginger and cinnamon, with the ginger tasting well above.

Gingerbread cookies recipe 2a

Decorating gingerbread cookies

If you want to make gingerbread cookies, you can choose from a variety of cookie cutters. The most popular is the gingerbread man cookie cutter. The jolly cookie man is a part of Christmas. But of course you have many more options. How about a cookie cutter shaped like a beautiful star, a Christmas tree, a Christmas sock, a bell or an oven mitt?

BAKING TIP: This Christmas cookie cutter set is ideal for making Christmas cookies.

Gingerbread cookies with royal icing

Aside from the different shapes you can give your cookie by choosing all kinds of Christmas cookie cutters, you can also vary how you decorate the cookies. I like to use white royal icing, which gives the cookies a classic look.

You can also choose different colors of icing and not only draw subtle lines on the cookie, but decorate the entire cookie.

An easy alternative to royal icing is melted white chocolate.

Snowflake gingerbread cookies

Like me, many of you like to decorate gingerbread cookies in the shape of a snowflake. I will of course give you more inspiration, but for now I would like to refer you to my Dutch blog, where I have a how to for gingerbread snowflakes with royal icing.

The pictures should be clear enough to get you started.

Gingerbread cookies recipe 3a

FAQ: Gingerbread cookies

How long can I keep the dough in the refrigerator?

About two days. Just keep in mind that you may have to take the dough out of the fridge a little earlier or it will be too hard to roll out immediately.

If you’re looking for more tips, check out all my tips for perfect cookies.

Can I freeze gingerbread cookie dough?

You can freeze cookie dough just fine, it will keep for up to 3 months. I would then freeze it in sheets, so it defrosts more easily.

Can I also replace the dark brown sugar with other sugar?

You can, but I wouldn’t. The dark brown sugar adds a lot of flavor.

Are these gingerbread sugar cookies?

You can call them that. They hold their shape in the oven which is most important for me.

How long should mini gingerbread cookies bake?

I bake my cookies for about 16 minutes. If you want to make them smaller, I would start with 10-12 minutes. It depends on the size, shape and oven how long they’ll need.

More delicious christmas cookies

If you’re like me, you probably want to bake all kinds of christmas cookies! Here are a few of my favorite christmas cookie recipes:

Gingerbread cookies recipe

Print Recipe

4.74 from 26 votes

Gingerbread cookies recipe

Make your own gingerbread cookies with this recipe and decorate them with royal icing or melted white chocolate.
Prep Time15 minutes
Cook Time16 minutes
Total Time31 minutes
Servings: 40 cookies

Ingredients

Gingerbread cookies

  • 225 grams of unsalted butter
  • 160 grams of dark brown sugar
  • 160 grams of molasses
  • 1 egg
  • 1 egg yolk
  • 500 grams of all purpose flour
  • 3 tbsp gingerbread spice mix
  • Pinch of salt

Decoration options

  • Royal icing
  • White chocolate melted

Instructions

  • Cream together butter, sugar, and molasses. Add the egg and extra yolk and stir well until incorporated.
  • In a separate bowl, mix together the flour, gingerbread spices, and salt. Add these to the other mixture, mixing well.
  • This dough is quite sticky because of the molasses. Divide the dough into 2 parts, make sheets and wrap in foil. The sheets will cool faster in the refrigerator, so you can get to work sooner. Let the dough rest for at least four hours before making cookies.
  • Roll out the dough on a flour dusted working surface to a thickness of up to 5 mm. Cut out your cookies and place on a baking sheet with parchment paper.
  • Bake the cookies for 16 minutes at 160 °C/320 ℉ (conventional).

Decorating gingerbread cookies

  • Feel like decorating? You can easily decorate the gingerbread cookies. I used white royal icing, but you can use any color royal icing or white chocolate.
  • Pipe all the details on the cookies with Wilton's piping tip #2.
gingerbread spice mix 1a

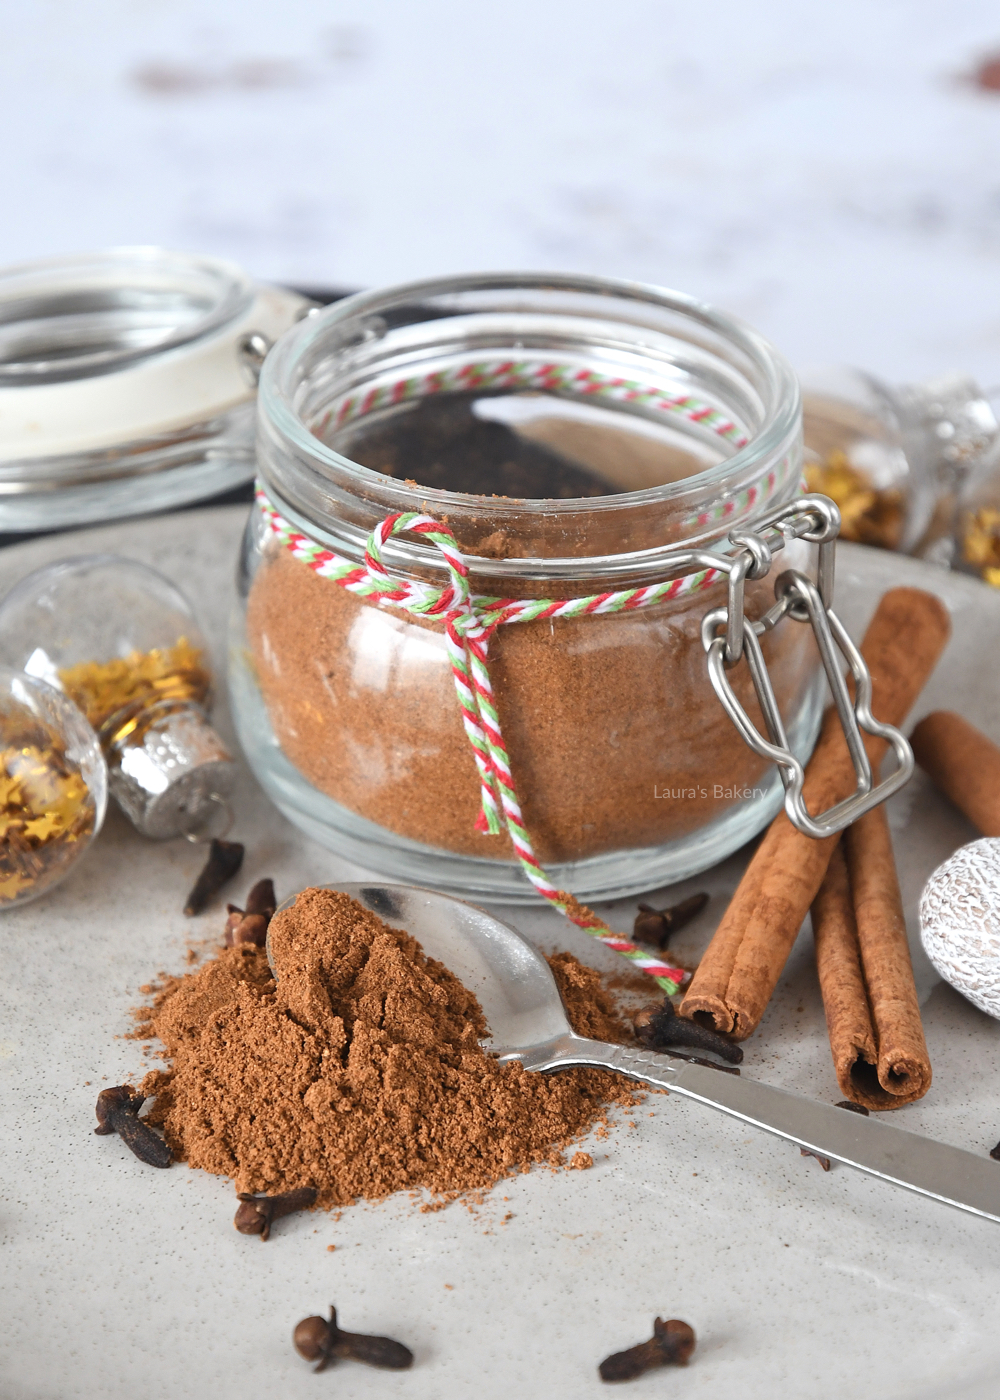
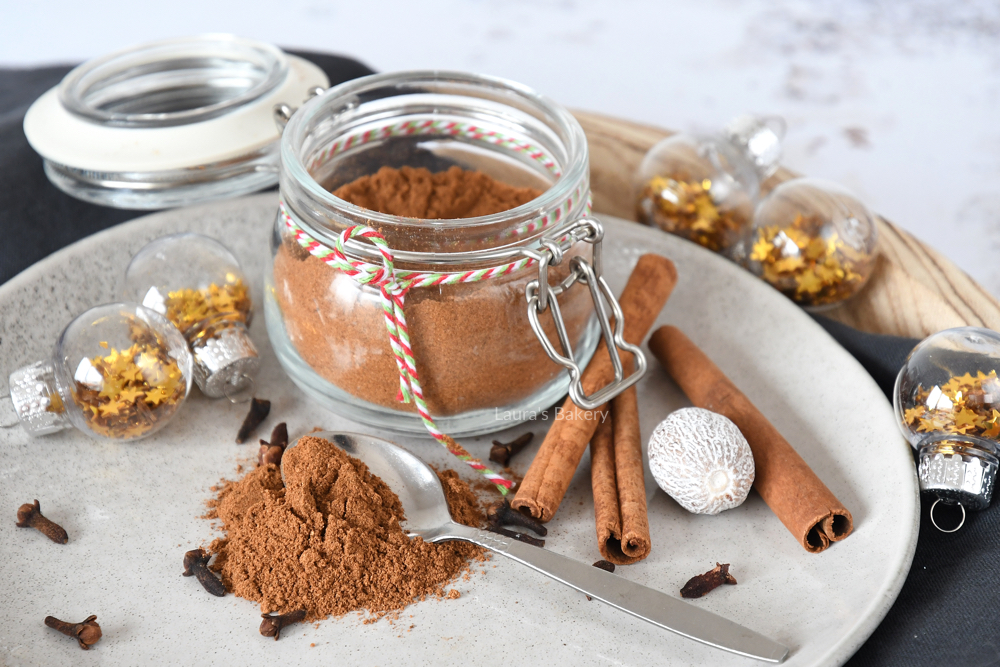
Perfect to make yourself and to have around the house during the holidays: gingerbread spices. In the Netherlands, this spice mix is hard to come by, so I always make it myself.

How to make gingerbread spice mix

I used to just add the spices for gingerbread recipes separately with each recipe, but that’s totally impractical. Especially if you like to bake with gingerbread spices like I do.

From now on, I (and you!) won’t have to deal with loose spices in every recipe, because I’ve made my own gingerbread spice mix. Since I wrote this recipe, the jar has already been refilled with a new homemade gingerbread spice mix. It went through several Christmas recipes I made in the last few weeks.

If you love gingerbread, I recommend you make enough and stock up 😉

Gingerbread spice substitute

As mentioned above, these spices are not easily available in the Netherlands. Therefore, an alternative is often chosen: Speculaas spice mix! This is a really typical Dutch spice mix, and of course I have a recipe for it.

Pumpkin spice is also a good alternative. Just remember that your recipe will taste different if you use an alternative.

gingerbread spice mix 2a

Homemade gingerbread spice mix

Every year I bake something with that famous gingerbread flavor. It’s a bit like our speculaas spice mix, but this gingerbread spice mix obviously contains more ginger.

While cinnamon is the dominant spice in the speculaas spice mix and usually at least 5-6 spices are added, the gingerbread spice mix is a bit simpler.

The gingerbread spice mix contains as much ginger as cinnamon, but because ginger is quite strong, you will taste it more. In addition, nutmeg and cloves come through, making it a truly wintry flavor combination.

FAQ: Gingerbread spice mix

Can I change the ratio of the spices?

Of course, you can make it your own spice blend. That’s part of the fun. For example, don’t like nutmeg or cloves? You can halve the amount.

Should I grind the spices in a mortar first?

Of all the spices in the ingredient list, I use the powder variety. So a mortar is not necessary.

Can I use gingerbread spices in cooking?

Absolutely. Just as speculaas spice mix tastes great in a stew, so does gingerbread spice mix. Experiment and share your results in the comments so other readers (and me 😉 ) can enjoy.

What kind of jar do you use to put the herbs in?

Basically, you can use any glass jar that you can seal airtight. Personally, I use a small jar like the one in the picture.

gingerbread spice mix 3a


gingerbread spice mix

Print Recipe

5 from 5 votes

Gingerbread spice mix recipe

Perfect to make at home and have around the house during the holidays: gingerbread spice mix. Gingerbread spices are delicious in a variety of recipes.
Prep Time5 minutes
Total Time5 minutes
Servings: 1 small jar

Ingredients

  • 2 tbsp ginger
  • 2 tbsp cinnamon
  • 1 tbsp nutmeg
  • 1 tbsp cloves

Instructions

  • Combine all the spices in a small bowl and stir well. It's okay to stir a little longer than you think is necessary; it just adds to the flavor.
  • You can also double the ingredients for a larger batch of spices.
  • Store the mix in a sealed jar.
Gingerbread scones-1

Scones are perfect for high tea, weekend breakfasts and of course the holiday season. You can serve them for breakfast, brunch or even lunch. This gingerbread scones recipe is perfect for Christmas breakfast. Serve with clotted cream and – perfect for this time of year – homemade cranberry compote.

Not a fan of cranberry compote? You can use any jam you like. The scones are quick to make, so you can bake them in the morning or make them in advance and heat them up just before you need them. The choice is yours! Looking for a classic scones recipes, I have that one too!

Gingerbread scones

Making these gingerbread scones is super easy to do and with the delicious gingerbread flavors it is one of my favorite things to serve on Christmas morning.

It took me a while before I learned to love baking my own scones. It also meant several failed attempts but there is nothing better than homemade scones and once I got the hang of it, it turned out they are really not that complicated to make.

What you need:

For making these easy gingerbread scones you will need the following (make sure to check the recipe card for full details)

  • Unsalted butter – the butter needs to be in small cubes. I generally use butter at room temperature but you can also use butter straight from the fridge
  • self rising flour – if you don’t have self rising flour you can use all purpose flour combined with baking powder
  • granulated sugar – you can use brown sugar as well
  • gingerbread spices
  • milk
Gingerbread scones-2

The process

For making the scones you don’t even need a food processor. Just a large bowl and your hands. How’s that for convenience?

You place the butter and the self rising flour in a bowl and you use your fingers to rub them into coarse crumbs. Now add the other dry ingredients (sugar, salt and gingerbread spices) and mix it through.

Add the milk in and work it into a firm dough. You can use a wooden spoon or rubber spatula or your hands to do this. Your hands will be the best tool. Don’t overwork the dough!

Now roll the dough into a ball and shape it into a flat disc of around 3 centimers thick (a little more than one inch). This is best done on a lightly floured surface. Use a pastry cutter or cookie cutter and cut the dough into 8 equal sized circles or equal wedges like I did here. Place them on a prepared baking sheet with parchment paper and brush the tops of the scones with a little bit of milk. You can use egg wash (one egg yolk) instead of the milk if you prefer.

Bake them in the preheated oven for around 12-15 minutes or until golden brown. Usually you want a good scone to not be very brown, but due to the gingerbread spices the looks of this scone is slightly different than your normal scone.

You can serve them hot or let them cool on a wire rack to room temperature. Serve with clotted cream and cranberry compote. The flavor of these scones is just absolutely fantastic and goes so well with a nice cup of coffee.

Questions you might have on making gingerbread scones

How long do I knead the dough?

With scones the saying goes; as little as possible. You should not overwork your flour mixture as that will result in tough scones that are too firm.

How long can I keep the scones for?

You can keep them in an airtight container for 2-3 days. Don’t place them in the fridge. In the freezer they last for 3 months.

My scones didn't rise!

I learned from an English lady that how you cut out the scones is important. Twisting and turning your cutter might result in scones that don’t rise as well. The trick is to push down and take the cutter away. No twisting and turning! This should help with making them rise properly. Also they need to bake in a hot oven of 220˚C (430˚F) for perfect scones.

What can I serve instead of clotted cream?

If you don’t want clotted cream or can’t find clotted cream (I’ll soon be sharing a recipe for making your own too!) you can also use heavy cream or even a thick sweetened Greek yogurt will be delicious.


gingerbread scones

Print Recipe

No votes yet

Gingerbread Scones

Gingerbread scones are perfect for the holidays, high tea and breakfast. Served with clotted cream and cranberry compote, they are irresistible!
Prep Time15 minutes
Cook Time11 minutes
Total Time26 minutes
Servings: 8 pieces

Ingredients

  • 40 grams unsalted butter
  • 225 grams self-rising flour
  • 30 grams caster sugar
  • Pinch of salt
  • 1 tbsp gingerbread spice mix according to recipe
  • 110 ml milk
  • Extra milk for glazing

Serve with

Instructions

  • Place the butter and self-rising flour in a bowl and rub the butter cubes through the flour between your fingers until crumbly. Add the sugar, salt and gingerbread spices and mix well.
  • Add the milk and work into a firm dough with a spoon or spatula. It is best to knead the last bit by hand.
  • Roll the dough into a ball and shape it into a flat disc about 3cm thick. Use a pastry cutter or sharp knife to cut the dough into 8 dots. Place the scones on a baking tray lined with baking paper and brush with a little milk (or egg if you like).
  • Bake for 12-15 minutes at 220°C/430˚F (conventional oven).
  • Serve hot or cold with the homemade cranberry compote and clotted cream.
Dutch speculaas chunks - speculaasbrokken 2

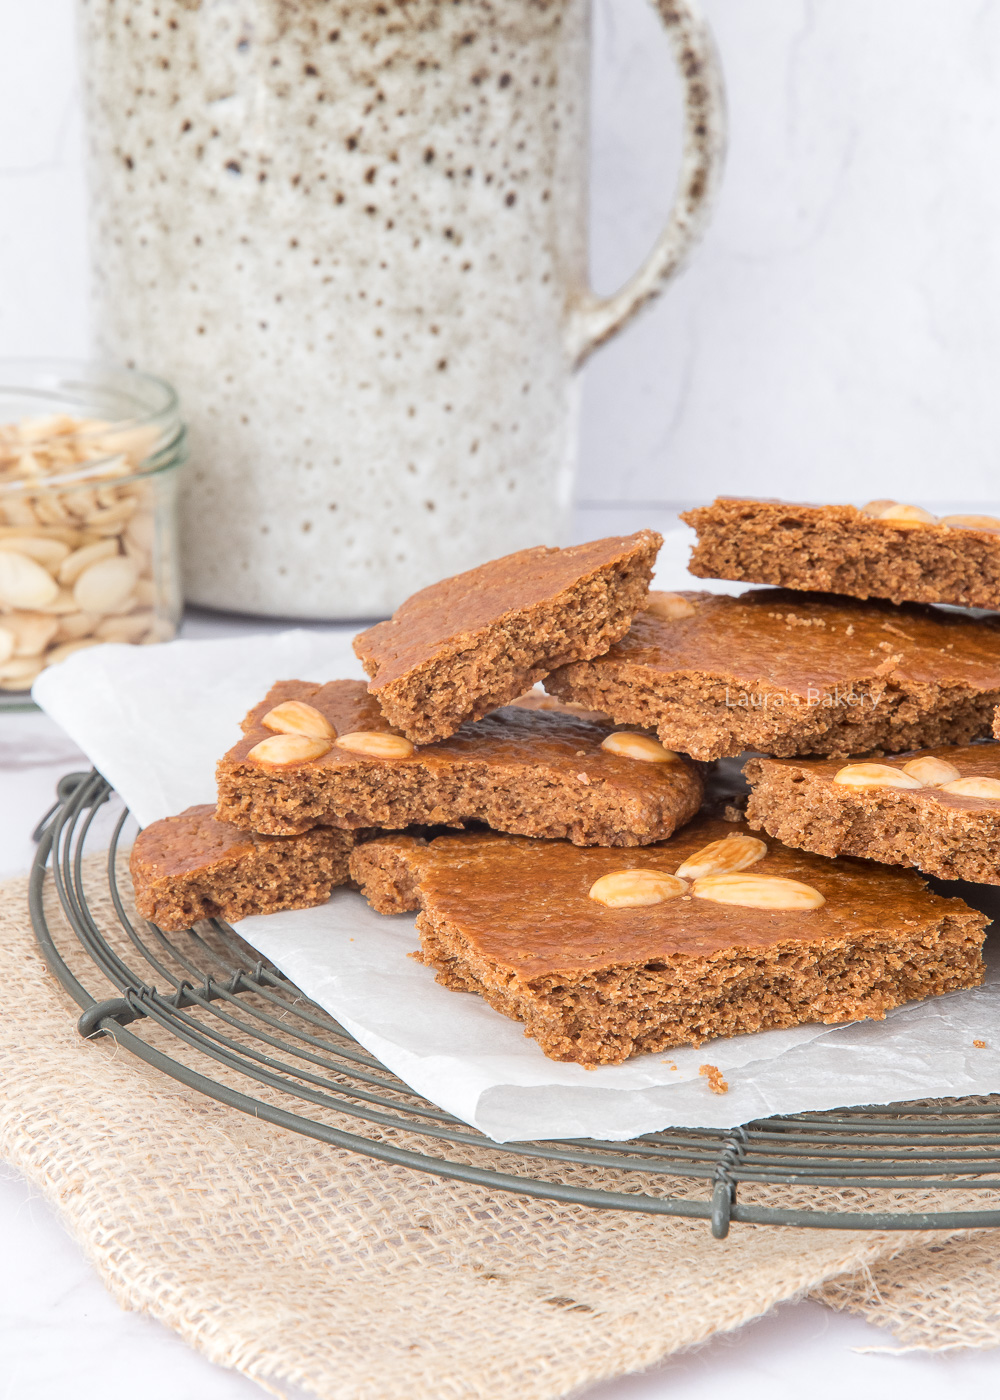
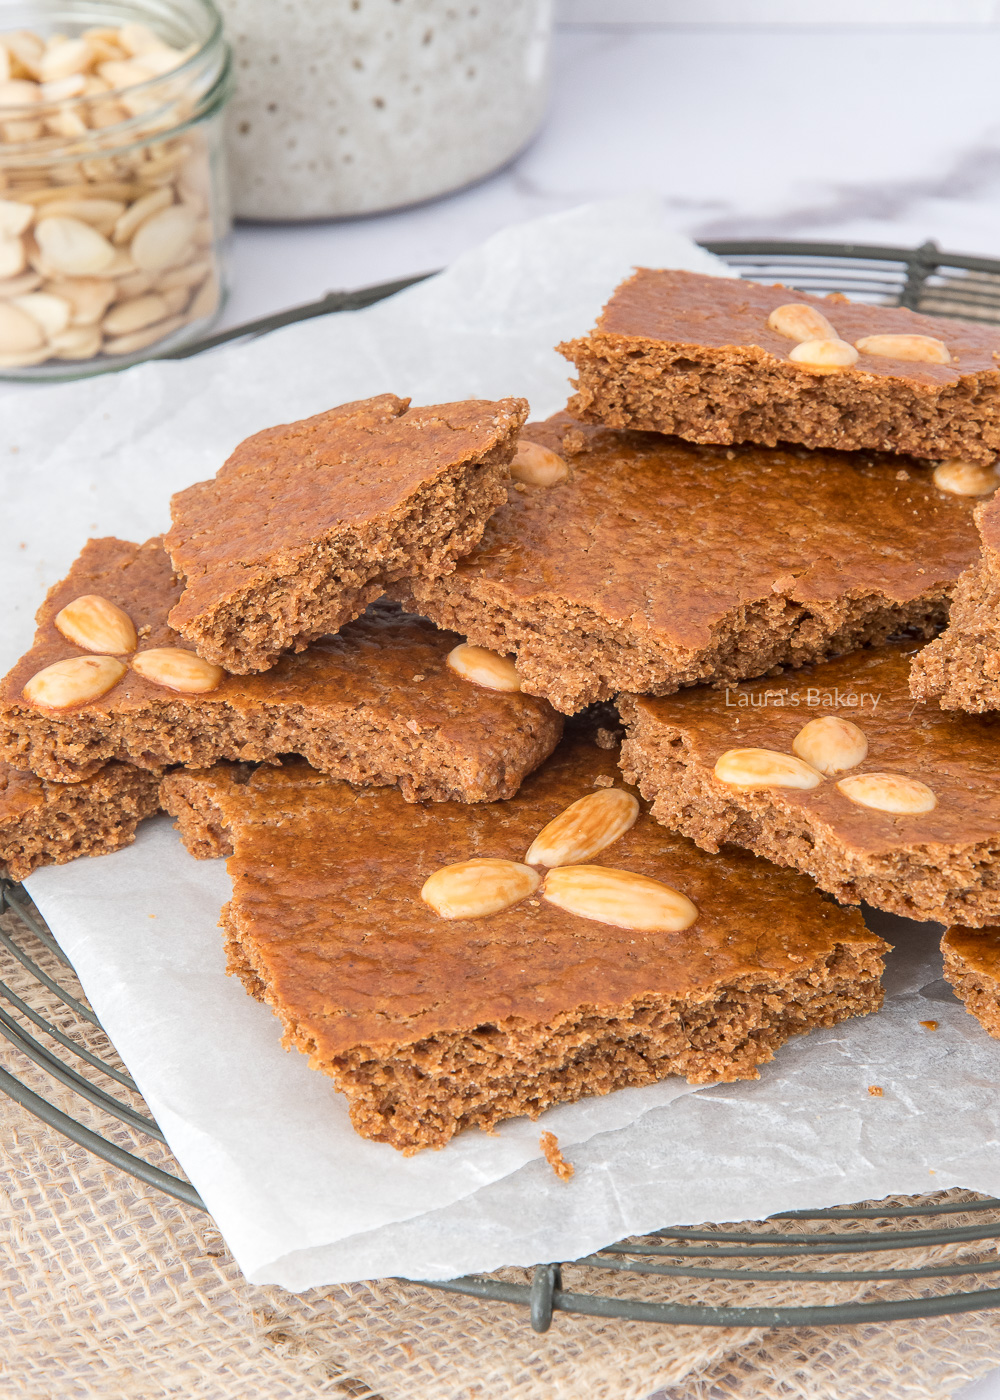
Speculaasbrokken are typically Dutch and are often eaten in the fall and winter, especially around Sinterklaas. However, they are available all year round, and as far as I’m concerned, just make your own speculaasbrokken with this easy recipe.

Making Dutch speculaas chunks

Speculaas is a very popular flavor in the Netherlands. You could call it the Dutch gingerbread. With a homemade speculaas spice mix you can add this delicious taste to all kinds of baked goods.

I love everything with that spicy taste. It doesn’t matter if it’s a traditional recipe or if I just turn another recipe into a Speculaas version.

Speculaasbrokken are a traditional Dutch recipe. In the store you usually buy big crunchy pieces, that you break into smaller pieces, with my recipe you get softer pieces. Personally, I like that best!

Another nice bonus: the house smells deliciously of speculaas spices when you make these speculaas cookies. For that alone, you’ll want to get in the kitchen right away!

Dutch speculaas chunks - speculaasbrokken 3

Speculaasbrokken ingredients

The list of ingredients for speculaas chunks is not complicated, but each ingredient plays an important role. I’ll walk you through each one:

  • Self-rising flour. These cookies rise a bit in the oven, which gives them a nice, slightly softer texture.
  • Dark brown sugar. Gives a deeper flavor than regular sugar and a nice color.
  • Speculaas Spice Mix. The ultimate flavor in this recipe. You can even add an extra teaspoon if you like. You can easily make this spice mix yourself.
  • Salt. Almost all sweet baking recipes call for (at least a pinch of) salt. Salt balances all the flavors.
  • Cold butter. Normally, butter should always be at room temperature, but not in this recipe, because cold butter makes your speculaas pieces nice and crispy, especially around the edges.
  • Milk. The right amount of milk is important for binding the proteins in a recipe, as well as for a nice, crispy exterior. That’s why a little egg and milk are mixed together and brushed on before baking. This not only gives them a crispy exterior, but also a nice shine.
  • Almonds. These are added just for a little extra flavor and decoration.

TIP: Speculaas and speculoos are two very different things but yet so similar, you can read about the difference between speculoos and speculaas here.

Dutch speculaas chunks - speculaasbrokken 1

The difference between speculaas and gingerbread

The main difference between speculaas and gingerbread is the use of spices. Speculaas spices contain more (and different) spices in total, and cinnamon is the main spice.

In gingerbread spices, both ginger and cinnamon are prominent, but because ginger has a more pronounced flavor, you taste it above them.

Even though I love the gingerbread spices the most, the gingerbread spices are also a big favorite of mine and I use them both a lot. Do you have a preference or do you, like me, like to alternate?

Tips for Dutch speculaas chunks

I have made speculoos biscuits many times, and so I am happy to share with you my two most important tips.

Make your own speculaas spice mix

Making your own speculaas spice mix is nothing more than mixing a number of spices together.

This way you can choose the exact ratio between the different spices and create the most tasty speculaas spices.

And you can taste that in your speculaas. Use my recipe for speculaas spice mix to make your own jar full of these tasty spices.

Dutch speculaas chunks - speculaasbrokken 4

Let your cookie dough rest

I can’t say this enough: always let your cookie dough rest if the recipe calls for it. Do you like crunchy speculaas pieces? One way to achieve this is to let the dough rest long enough. The gluten in the self-rising flour will “relax” in the refrigerator, making for a crispier result.

Full flavor is another reason to prepare your dough the night before and let it rest overnight in the refrigerator. This will allow the spices to be absorbed into the dough and the flavor to develop.

How to store Dutch speculaasbrokken

After you have a cookie sheet full of speculaasbrokken, you probably won’t eat them all in one sitting (although I could). Fortunately, you can keep them well.

Storing speculaas chunks

In an airtight container, they will keep for about two weeks. You can store them at room temperature.

Freezing speculaas chunks

In an airtight container, the cookies will keep for up to 3 months in the freezer. I like to store them between layer of parchment paper so they don’t stick to each other.

Dutch speculaas chunks - speculaasbrokken 5

Questions about speculaasbrokken

How do you keep speculaas as crunchy as possible?

By storing them in a container that is not 100% airtight. This allows not only air to escape, but also moisture, which keeps the speculaas crunchy.

Personally, I use an airtight container because I like them soft.

My speculaas are not as hard or crispy in the middle, how can I improve this?

A few things are important: make sure you let your dough cool well and long enough and use cold butter.

Also, make sure you do not roll out the dough too thickly and evenly. Optionally, you can leave it a little thicker at the edges so that the edges don’t cook faster than the inside. Finally, you could make the pieces a little smaller (i.e. don’t bake one big slice of speculaas dough, but more smaller strips) so that they crisp up more easily.

Remember that all cookies are soft when they come out of the oven and harden when they cool. So, you can’t immediately tell if your cookies are crisp enough when you take them out of the oven.

Can you make speculaas cookies without sugar?

You can’t just leave out the sugar, you have to use a substitute that has the same effect as brown sugar. Sugar adds color and flavor as well as crunch.

What are the speculaas cookies with almond filling called?

You probably mean ‘gevulde speculaas’. Two layers of speculaas with almond paste in between.

Here is my recipe for Dutch filled speculaas.


speculaas cookie chunks

Print Recipe

No votes yet

Dutch speculaas chunks (speculaasbrokken)

Speculaas chunks are a must during the weeks around Sinterklaas. With this easy and delicious recipe, you can bake your own speculaasbrokken!
Prep Time10 minutes
Cook Time30 minutes
Total Time40 minutes
Servings: 18 portions

Ingredients

  • 300 grams self-rising flour
  • 150 grams dark brown sugar
  • 5 tsp speculaas spice mix
  • Pinch of salt
  • 125 grams unsalted butter cold
  • 50 ml milk
  • egg + milk for egg wash
  • Half almonds to decorate

Instructions

  • Mix together the self-rising flour, sugar, speculaas spice mix and salt. Add the butter and milk and knead into a firm ball. If the dough is too stiff or dry, add an extra tablespoon of milk.
  • You can use the dough right away, but it will be tastier if you let it rest in the refrigerator, preferably overnight. It will only improve the flavor.
  • Roll out the dough on parchment paper, but don't make it too thin. Place the parchment paper and dough on a baking sheet.
  • Whisk an egg and mix in a little milk. This gives the cookies a nice shine and prevents them from forming sheets, which can happen if you only use egg.
  • Brush the speculaas with the egg mixture. Garnish the speculaas with the almonds in a pattern of your choice and then coat the speculaas with another layer of egg wash.
  • Bake for 30 minutes at 170°C/340℉ (conventional oven).
  • Break the speculaas into pieces after it's cooled and enjoy! Delicious with a cup of tea or coffee, but also delicious on their own.
Dutch pepernoten-2

The easy recipe you’ve been waiting for! 🙂 Traditional dutch pepernoten cookies. Also known as spicy cookies, pepper nuts or gingerbread cookies. In the Netherlands there is a never ending debate about wether or not these should be called pepernoten or kruidnoten. The official term is kruidnoten and most Dutch people would know this, but the most used term for describing these delicious cookies is pepernoten. So I’m gonna stick with that for the purpose of this recipe.

Recipe for Dutch pepernoten

This recipe makes the one and only ‘pepernoten’ for me. When I was a toddler, the teacher gave me a sheet of paper with the recipe to take home when we made pepernoten at school. After that day, we made the recipe many times at home, adapting it to our tastes. It’s the ultimate childhood memory for me.

I remember that my sister and I were allowed to help my mother make the dough. Then we would sit at the table with our own ball of dough and a plate on which we could put all our pepernoten. When my mother wasn’t looking, we would sneak little pieces of dough into our mouths, assuming our mother didn’t notice. Of course, nothing could be further from the truth.

The dough for these kruidnoten does not need to rest in the fridge. However, it can still be a good idea, because the flavor of the spices will intensify even more.

A perfect Sinterklaas treat

Pepernoten are popular cookies associated with the Dutch holiday Sinterklaas. Just like candy canes are with Christmas. These small spiced cookies can be bought in stores from august trough september, but are eaten most from mid November trough the holiday itself on december 5.

This Dutch holiday has multiple treats and snacks specifically for this day, just like chocolate letters! People will often get the first letter of their name in chocolate.

Laura Kieft   I

What are pepernoten anyway?

First a little bit of history. Pepernoten (literall translation is pepper nuts) originate all the way back to the year 1700. To be more precise; pepernoten are from the 16th century, but kruidnoten came around a little later. At the time a lot of spices came out of the East Indies and for the sake of convenience all those spices got the name ‘peper’ (pepper) In reality the spices were nutmeg, ginger, cinnamon, cloves and white pepper, which later became the famous ‘speculaas’ spice mix. And this is the same mix that is used for making Dutch pepernoten

So why add ‘nut’ at the end of the word? Well at the same time the spices were imported the Dutch also imported lots of nuts. And because the shape of the little cookies kind of looked like half of a nut the name soon became ‘pepernoot’.

To add even more confusion; there are pepernoten and kruidnoten. Those are not the same! I will share a recipe for Old Dutch pepernoten later on. But it’s good to know that while they are not the same, the names have gotten mingled over time and most Dutch actually refer to kruidnootjes as pepernoten. Are you still following?

But regardless of the history, these crunchy cookies are a staple during Saint Nicholas (Sinterklaas) festivities. Saint Nicholas is not the same as Santa claus (even though they do kind of look the same and both have a long white beard) and ‘de sint’ is the patron saint of childen. His birthday is celebrated on December 5th or 6th and every Sinterklaas evening small presents are exchanged and loads of pepernoten are consumed! It’s a typical treat to serve on St. Nicholas day.

St. Nicholas goes around on a white horse and arrives in the Netherlands by boat. Just another difference between ‘Sint’ and Santa.

How to make pepernoten

Making pepernoten is very easy to do. They are small crispy cookies and are shaped into small half ball sizes. The recipe contains really only a few ingredients; all purpose flour, self-rising flour, speculaas spice mix, brown sugar, salt butter and milk.

The flavor is somewhat similar to gingerbread although classic gingerbread usually contains anise seed and pepernoten do not.

You add all the dry ingredients to a large bowl, add the wet ingredients and mix it into a firm pliable dough. Roll into little balls and place each small ball on a baking sheet covered with parchment paper. Press each ball gently into the shape of a half sphere.

The fun part is that you can do lots of different things with the pepernoten and give them all sorts of different flavors, dip them into melted chocolate to make chocolate kruidnoten or add additional spices. A Dutch speculaas spice mix is not exactly the same as a pumpkin spice mix or gingerbread spices, but you can definitely use that for making these pepernoten. But it’s also very easy to make your own speculaas spice mix with my recipe.

Dutch pepernoten-3

Things you want to know about baking Dutch pepernoten

How long should you bake pepernoten?

If you make balls of dough the size of a large marble, 25 minutes should be long enough. This is how I have described it in the recipe below. But if you make the balls bigger or smaller, the baking time will vary by a few minutes. In any case, try to make them all the same size.

How long will the pepernoten keep?

In a sealed container you can keep your pepernoten for at least 2-3 weeks. In the freezer up to 3 months, but you can also freeze the dough. Have some leftovers? Why not add them to a dessert as well. They can be used just like any other kind of delicious cookie. I love adding them to my granola.

My pepernoten dough is crumbly, what can I do?

This should not happen, but you can add a little milk or make it easier to make the small balls by using wet hands.

Can I make these gingernuts lactose-free?

Of course you can. Just replace the butter with a plant-based margarine and the milk with a vegetable variety.


Dutch pepernoten recipe

Print Recipe

No votes yet

Dutch pepernoten recipe

Baking Dutch pepernoten is easy and fun! Also fun to do with children.
Prep Time10 minutes
Cook Time25 minutes
Total Time35 minutes
Servings: 70 pieces

Ingredients

  • 250 grams self-rising flour
  • 125 grams dark brown sugar
  • 4 teaspoons speculaas spice mix
  • Pinch of salt
  • 100 grams cold butter
  • 6 tablespoons milk

Instructions

  • This recipe is quick to make, so preheat your oven to 175°C (350˚F) for a conventional oven.
  • Add all the dry ingredients (self-rising flour, sugar, speculaas spice mix and salt) and mix. Then add the butter and milk and knead by hand until you have a firm ball.
  • The dough does not need to be cooled in the fridge, so you can start rolling the balls straight away. I make about 70 pepernoten from this recipe. I then make balls the size of a large marble.
  • When the baking tray is full, put it in the oven for about 25 minutes. So within an hour you can be snacking on delicious warm Dutch pepernoten!
authentic dutch speculaas -1

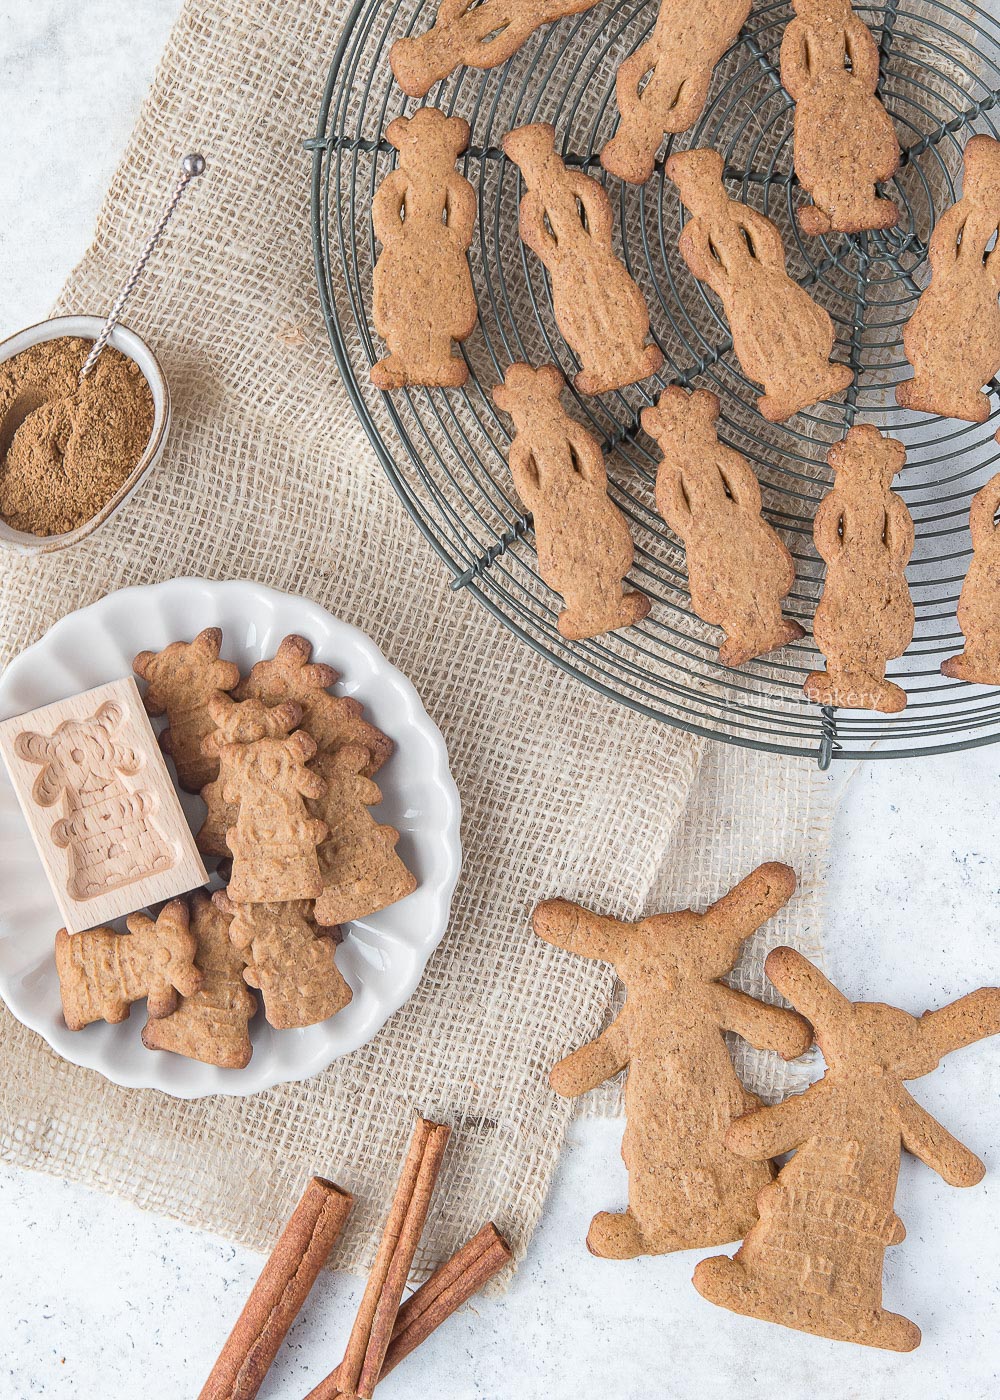
Are you familiar with those pretty Dutch windmill cookies? That’s speculaas! We love those cookies in the Netherlands, and I’ll share my recipe and a lot of tips and tricks with you.

Traditionally speculaas cookies are made in wooden molds that give it the specific shape. But no worries if you don’t have one, you can still enjoy an authentic Dutch speculaas cookie without it. For the best experience use my speculaas spice blend or – alternatively – go for the pumpkin pie spice blend. They are absolutely perfect for the holiday season.

We bake (and eat) a lot of them in the Netherlands especially during the feast of st. Nicholas (or Sinterklaas) but you can find them in the stores all year long. These traditional cookies are also perfect for Christmas season.

authentic dutch speculaas -3

Make your own speculaas cookies

You can use any other kind of cookie mold for making these or even a cookie stamp will do the trick. But if you can get your hands on the specific wooden mold used (check the photos to see how it looks!) it would be even more fun to make these cookies.

The weird thing is that I bought a couple of those speculaas molds a while back and then for some reason I never got around to actually using them. I think I thought it would be hard to use. We’re all so used to baking with lots of different kinds of molds but never really wooden ones.

​But whatever what was holding me back was unnecessary as it was actually quite easy to bake with them. I’ll explain how to do it below.

Speculaas tips

It all starts with the speculaas mold. You have to “prepare” it and there are several ways to do this. These range from soaking the board in cold water overnight to rubbing it with vegetable oil. I also read that the board would become greasy naturally through use. That sounded the easiest, so I went with that.

This might cause the first few speculaas cookies to fail though, but I didn’t really care. After all, making speculaas is a case of ‘practice makes perfect’. This will work equally well for any gingerbread cookies you want to make using a wooden mold. The ingredients for both speculaas and gingerbread cookies are fairly similar.

Below you will find a few photos that show how to use the wooden mold. The tips I will give you have to do with preparing the cookie dough.

authentic dutch speculaas -5

Make sure your dough is cold

For making these cookies, cold and firm dough is easiest to work with. It will hold its shape a little better when you are ‘cutting’ the speculaas and want to remove it from the mold. The longer you work with a piece of dough, the warmer it gets and the more pliable it becomes.

If this happens, just mix it with a fresh piece of (cold) dough and you will instantly find out it works a lot easier. Keep the dough in the fridge wrapped in plastic wrap until you’re going to be using it.

Use the imprint

When you’re making the speculaas cookies using the wooden mold, you want the imprint of the wooden board to be as visible as possible. I like to use self-rising flour for these delicious cookies. And since self-rising flour also rises slightly it enhances the print of the cookies.

You could replace the self-rising flour with all purpose flour, but that would obviously affect the texture too and not only the look of the cookies.

Another tip: put the unbaked cookies in the refrigerator (or briefly in the freezer) for a while, so that they go into the oven as cold as possible. This will also help with getting a clear print.

Of course it is a cookie so keep in mind that the print will always become less visible during baking. But as you can see from the photos you can still very clearly see the shape and imprint of the cookie. As with any cookie you place them on a cookie sheet or baking sheet placed on parchment paper. Once baked let them cool down completely on a wire rack.

If you want to go and buy a speculaas mold (like one of those windmill cookie cutter shapes), you can also check if the print itself is deep enough. If it is too shallow it won’t have a really good end result. So a lot to consider when you’re searching for one!

authentic dutch speculaas -4

Cookie cutters

Now if you don’t know where to find a traditional wooden mold or can’t be bothered but still want to make these delicious cookies? There is nothing wrong with using something as simple as a round cookie cutter or use other wooden moulds you can find.

Tips for working with a speculaas board

Dust with flour

Dust your speculaas board with flour and tap out the excess flour. Too much flour in the mold will result in your print not being properly visible. Too little flour will cause your speculaas to stick to the board more easily. It will take a few tries to find the right amount of flour.

How to place the dough in the mould

Take a ball of dough and shape it roughly into the shape of the cookie. Press the dough firmly into the mould and make sure there is enough dough. I personally like to have enough dough so it goes over the edges. I will cut the excess dough away but at least I know I have filled all the little nooks and crannies.

Cut the dough

Use a good sharp knife that is wider than the board. Hold it as flat as possible and carefully cut away the excess dough. During this step, you will find that it is especially nice to work with cool and firm dough. If the dough is warm and soft, your speculaas dough will easily deform.

Removing from the mold

Turn the wooden mold over and tap it firmly on the counter. Hold the mold as flat as possible over the counter or your hand. If only the edges of the cookie come off, you can gently help remove the dough from the mold.

More speculaas recipes

Like speculaas? I have many more delicious recipes online that are sure to please you. For all of them you will need my speculaas spice mix, which is SO delicious (and easy) to make yourself. Try the below recipes as well!


authentic dutch speculaas cookies

Print Recipe

No votes yet

Speculaas cookies recipe

Making your own Speculaas cookies with the Speculaas board is easier than you think! I share my recipe and all my tips for perfect speculaas cookies.
Prep Time10 minutes
Cook Time7 minutes
Cooling time2 hours
Total Time2 hours 17 minutes
Servings: 12 cookies

Ingredients

  • 100 grams self-rising flour
  • 50 grams dark brown sugar
  • 2 tsp speculaas spice mix
  • Pinch of salt
  • 40 grams unsalted butter
  • 2 tbsp milk

Instructions

  • Put all the ingredients in a bowl and knead into a firm dough. Wrap in cling film and refrigerate for at least two hours. I personally like to make the dough a day ahead.
  • Time to get out the speculoos boards! Know that the first few speculoos will probably fail, the mold needs to get a little greasy to work properly.
  • Dust the board with flour and knock out the excess flour. Too much flour in the mold will affect the print.
  • Take a ball of dough and gently shape it into the shape on the board. Press the dough well into the mold, lining the mold generously and slightly over the edges of the print.
  • Trim excess dough with a sharp knife. Hold the knife flat against the mold to prevent your speculaas from becoming too thin.
  • Tap the edge of the board on the countertop until the edges come loose. Carefully remove the figure, keeping the board as horizontal as possible and close to the counter or your hand. It is okay if you have to help the figure a little to get it loose.
  • Place the figures on a baking sheet lined with greaseproof paper and bake at 250°C (480˚F)(conventional oven). The small figurines (about 9 cm high) will bake for 6 minutes, the large ones (about 12 cm high) for 7 minutes. Are your molds larger or smaller than indicated? Adjust the baking time accordingly.
Dutch gevulde speculaas 1

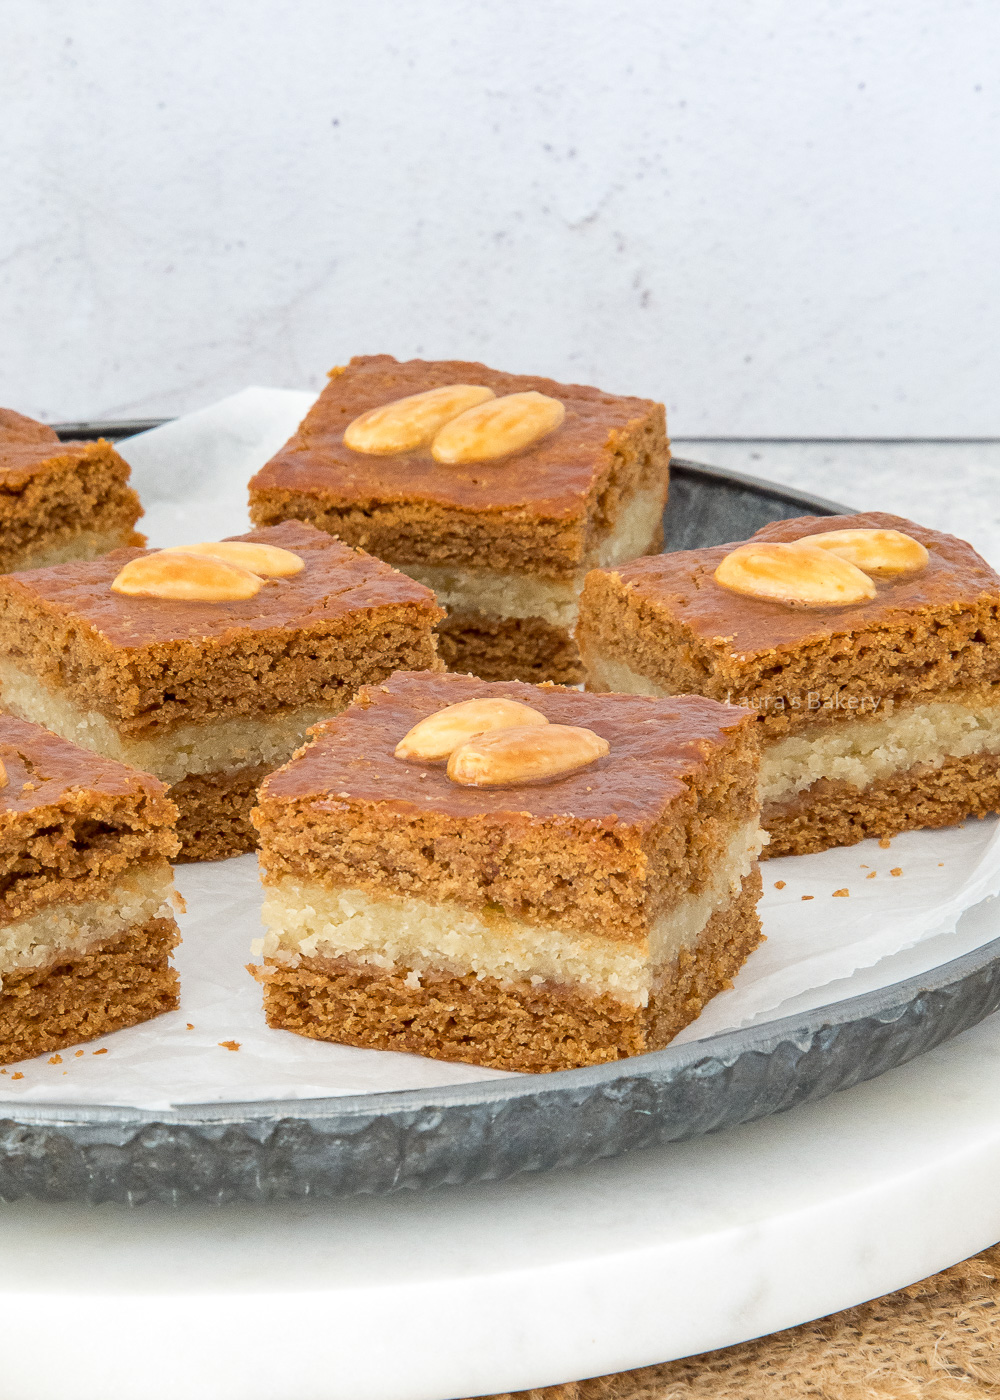
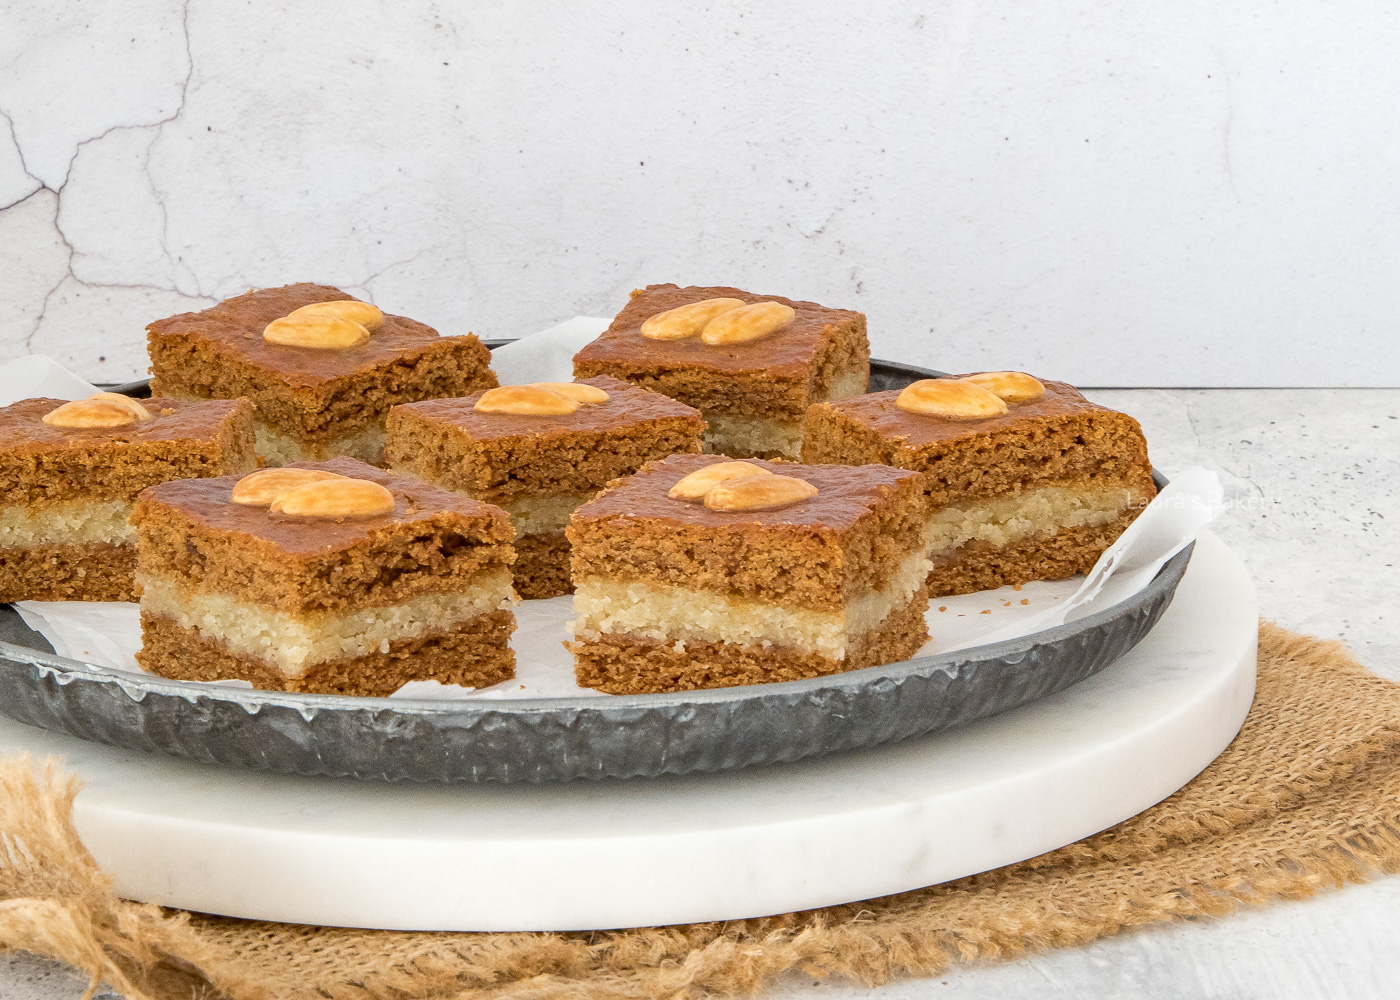
I love everything speculaas, it’s the Dutch version of gingerbread. Gevulde speculaas is a traditional Dutch pastry that most people make for Sinterklaas, a Dutch holiday. Is exists of 2 layers of speculaas cookie with a good layer of almond paste in between. It’s delicious!

About Gevulde speculaas

We love the combination of almonds and speculaas in The Netherlands. Filled speculaas is the most popular Dutch treat with these two flavors. The cookie layers are made with speculaas spices and the almonds are needed for the layer of almond filling.

December 5th is our holiday Sinterklaas (he is the Dutch Santa Claus), and the gevulde speculaas is one of the most popular snacks for this day. Other sweet treats that are popular for Sinterklaas are pepernoten (little spiced cookies), marzipan figures, banketstaaf (almond paste filled puff pastry log) and more!

If you want to buy this in store, you need to be in The Netherlands at the right time, because it’s not sold year-round. Most stores will start selling it in august or september and it’s available trough the beginning of december. Sinterklaas arrives by steamboat mid-November, and after that moment al Sinterklaas treats are becoming really popular. And after Sinterklaas, we’re getting ready for Christmas.

Dutch gevulde speculaas 2

Baking Dutch almond paste filled spice cookies

Unlike the gevulde speculaas in stores, I prefer a little more speculaas cookie and less almond paste. You can see in my pictures that there is a modest layer of almond paste in between. Just right for me.

That’s the beauty of homemaking, you make it just the way you like it. This recipe calls for filled speculoos with a modest layer of almond paste, but make it just the way you like it. Do you prefer a thick layer of almond paste? Just put more in between, it’s that easy!

About the ingredients

Most ingredients are easy to find, no matter where you live. But other are maybe a bit harder when you don’t live in The Netherlands. Speculaas spice mix for example, but I have my own recipe for that so you can make it yourself!

  • Flour: I just use self-rising flour, it’s perfectly fine for this recipe.
  • Sugar: If you live in The Netherlands or maybe even Belgium: use dark brown ‘basterdsuiker’. If that’s not available where you live, use another dark brown sugar.
  • Speculaas spices: THE key ingredient if you ask me. I always make my own spice mix because I think it better than the store bought ones. And it’s very easy to make this spice blend as well. I shared my recipe for speculaas spice mix before. I like to use a lot of speculaas spices in my recipes, but you can adjust the amount of spices to your liking.
  • Salt: No special salts needed for this recipe. And you only need a pinch for the cookie dough.
  • Butter: I use unsalted butter and add cubes of cold butter to the dry ingredients for the speculaas dough. No need for this ingredient to be on room temperature.
  • Milk: A little milk is enough to make sure you have a nice firm dough.
  • Almond paste: Key ingredient number two! This is the filling for between the two layers of cookie dough. I have a recipe for easy almond paste so you can make it yourself. You only need almond flour, sugar, eggs, a little lemon zest and maybe a food processor.
  • Egg: The egg is for two things: the first half is used for the almond paste, to make it a bit more creamy. The second half is for a simple egg wash before you put your speculaas in the oven. Just beat the egg and use a pastry brush for the egg wash.
  • Almonds: I use almond halves for decoration. It’s optional, but I think it makes the result really pretty. If you can’t find almond halves, whole almonds are fine too.
Dutch gevulde speculaas 3

Questions about gevulde speculaas

Can I use a different baking pan?

Absolutely. In this recipe, I use a 20 x 20 cm (8 x 8 inch) square pan, but you can also use a baking pan with a similar surface area. Want to convert the recipe to a round pan? Use my conversion calculator. If you use the button in my recipe card (below the small picture), all the ingredients will be filled in automatically for you.

Can I make gevulde speculaas without eggs?

Yes, you can. You can easily replace the egg processed through the almond paste with 20 ml of milk (dairy-free or otherwise) or applesauce. In this case, use (oat)milk instead of the egg wash as well.

Can I use marzipan instead of almond paste?

I suppose you can, but I don’t recommend it because marzipan is much sweeter and has a different structure.

My speculaas dough was very moist and sticky after sitting in the fridge, how is that possible?

Maybe you added too much milk or didn’t wrap the dough properly before putting it in the fridge and condensation formed on the dough.

How do you fix it? Simple: add a little extra flour to the dough and dust your countertop well with flour before rolling out.

Can I make speculaas cookies with this recipe?

Of course! I use it for smaller speculaas cookies often.

Dutch gevulde speculaas

Print Recipe

No votes yet

Gevulde speculaas (Dutch almond paste filled speculaas cookies)

The best filled speculaas are the ones you make at home! In my case, this should include a not too thick layer of almond paste, but this is up to you.
Prep Time15 minutes
Cook Time40 minutes
Total Time55 minutes
Servings: 16 portions

Ingredients

Cookie dough

  • 300 grams self-rising flour
  • 150 grams dark brown sugar
  • 5 tsp speculaas spice mix
  • Pinch of salt
  • 125 grams butter cold
  • 6-8 tbsp milk

Filling and decoration

  • 300 grams almond paste
  • 1 egg
  • Milk for brushing
  • Half almonds for garnish

Instructions

  • Mix the self-rising flour, sugar, speculaas spice mix and salt. Add the butter and milk and knead into a firm ball of dough. Start with 6 tablespoons of milk, if the dough is too stiff you can add more milk.
  • Wrap the dough in plastic wrap and refrigerate overnight. You can process and bake it immediately, but the flavor will be much better if you let it rest.
  • Mix the almond paste with half of the beaten egg and knead well. This makes it easier to work with and gives it a better and tastier texture.
  • Take half of the dough and roll it out to 20 x 20 cm. Place in a baking pan lined with parchment paper. Spread the almond paste mixture evenly. Roll out the remaining dough and place on top of the almond paste.
  • Brush the top with the remaining beaten egg. Garnish with almonds and top with another layer of egg wash.
  • Bake the filled speculaas for 40 minutes at 180°C/350℉ (conventional oven) or until done.
Dutch spiced breakfast bread 3a

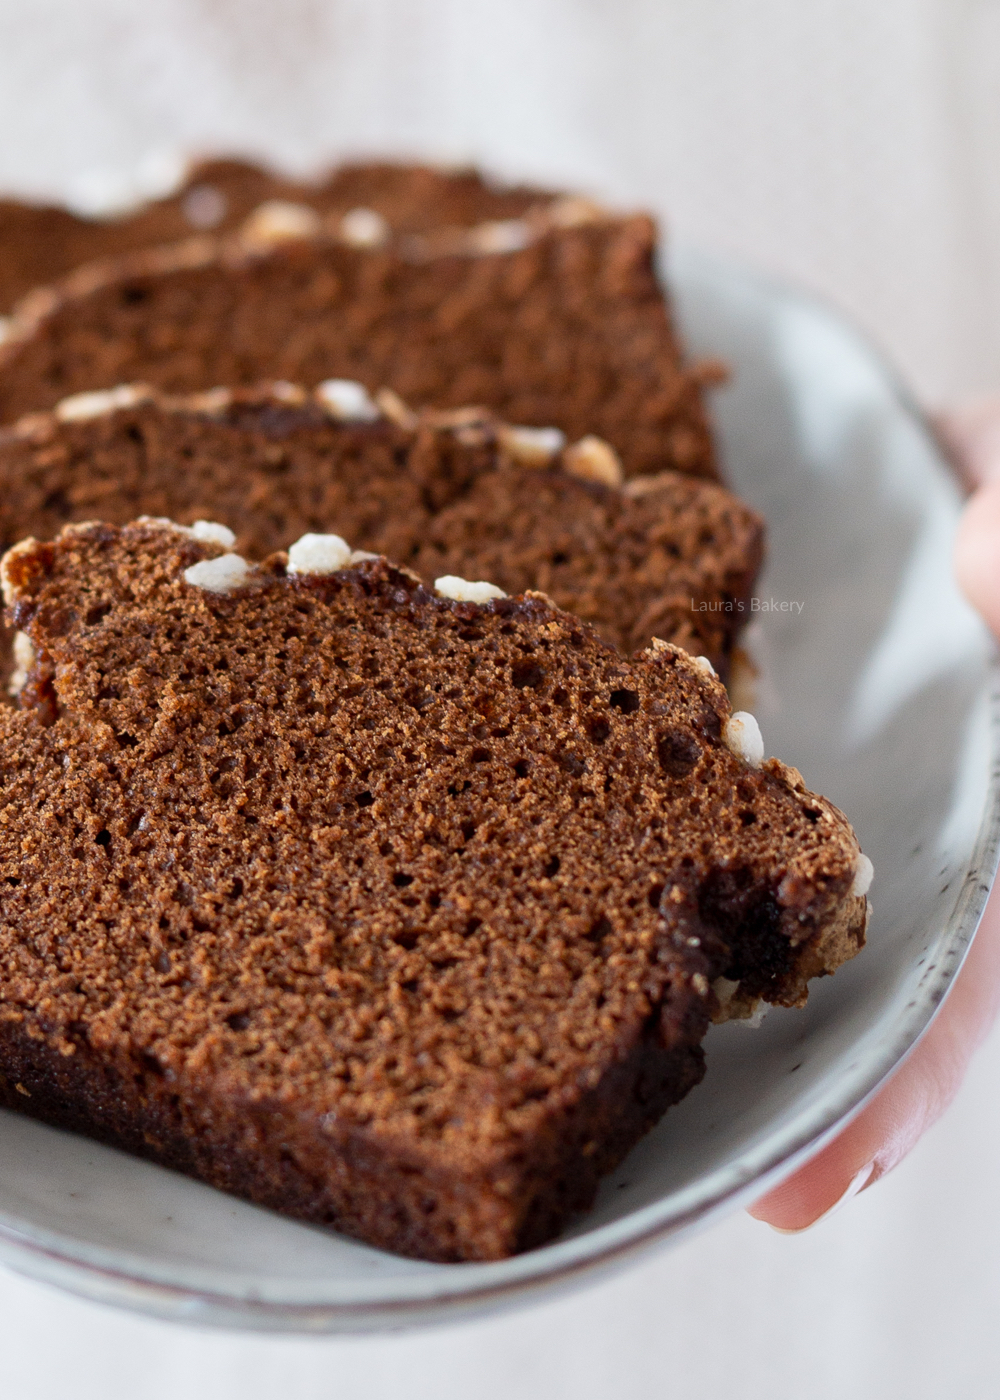
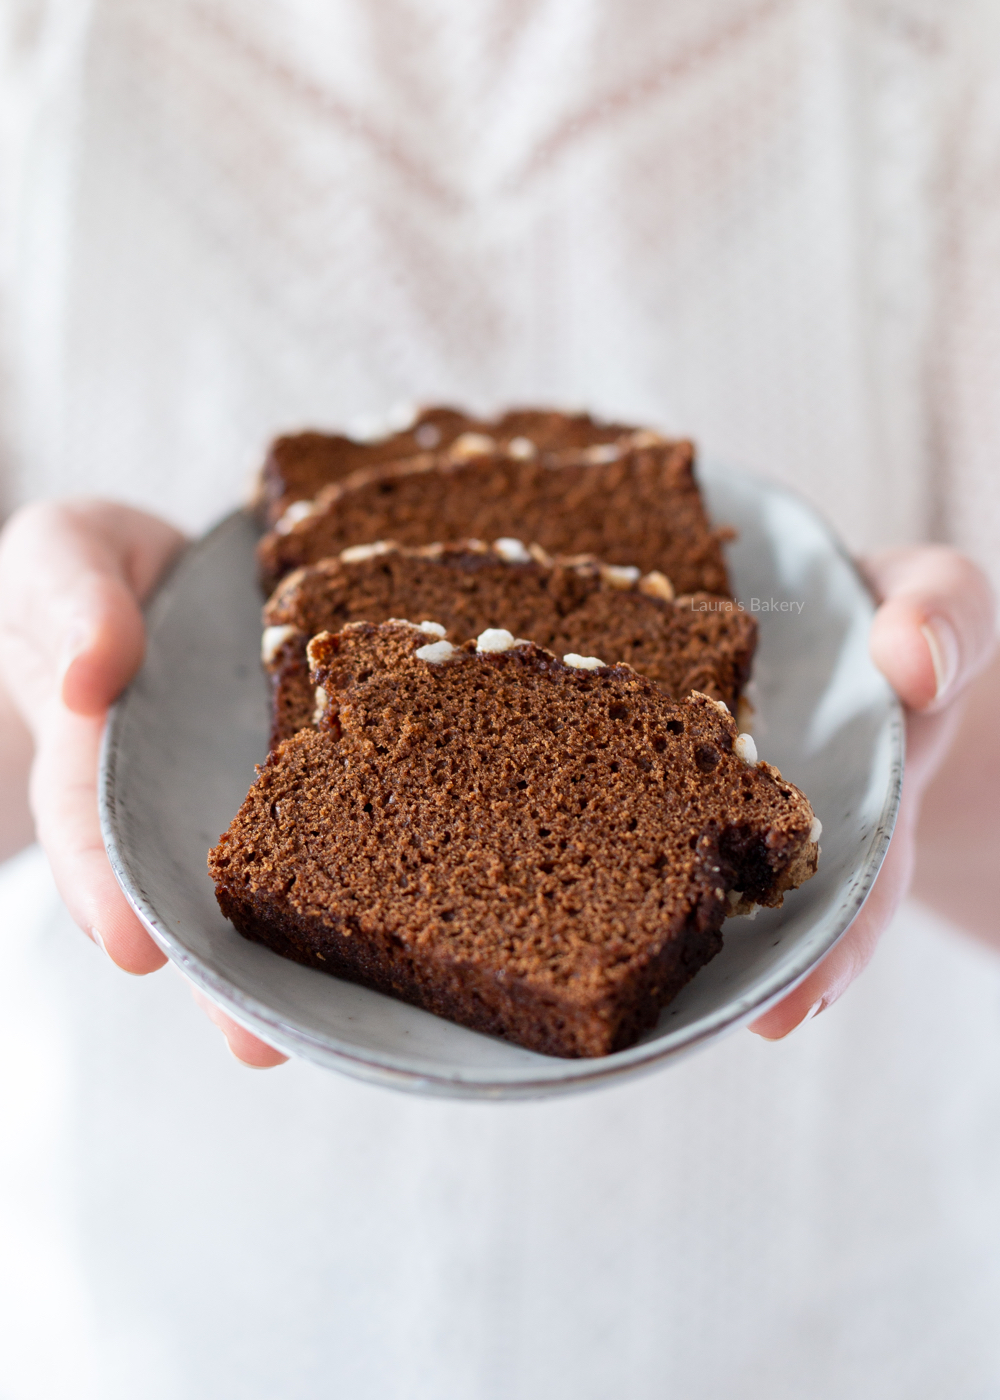
If you are familiar with the Dutch ontbijtkoek, you know it’s good! It translates to breakfast cake and is often eaten for breakfast or as a nice snack. The most traditional way to serve ontbijtkoek is to take a slice of the spiced breakfast cake and spread it with a thick layer of butter. I’ll share my recipe for authentic ontbijtkoek with you!

What is Dutch breakfast cake?

The literal translation of ‘ontbijtkoek’ is breakfast cookie. But in English, that seems a bit weird and is not fitting. Breakfast cake or breakfast bread suits this recipe better. I prefer spiced breakfast cake due to the structure of the cake.

Ontbijtkoek is a very quick bread you make in a loaf pan. You can even make them smaller in mini loaves or even cupcake cases. This sweet bread has a wonderful moist, but dense texture. Especially homemade dutch spice cake! The flavors are amazing due to all the added spices and appelstroop. If you don’t have access to this Dutch product, you could also use molasses.

The breakfast cakes you can buy in a grocery store are usually a bit drier. Although they often have a sticky crust, just like a homemade loaf. If you are in The Netherlands and want tot buy one to take home: you’ll find it in the breakfast section. Usually next to crackers and ‘beschuit’ (another Dutch breakfast product).

Dutch spiced breakfast bread 1a

How to serve Dutch breakfast cake?

A slice of this breakfast cake is the perfect sweet treat for me. I think my recipe is so good that it doesn’t need anything to go with it. But it is certainly possible if you want to. I will share my tips on how I serve my slice of store-bought breakfast cake (I admit, I still buy one from time to time).

Most Dutch people just take a slice and spread it with butter. It’s the most traditional way to eat it. Although ‘koekhappen’ is possibly even more traditional, I’ll tell you all about it after my serving suggestions!

I like to spread a slice with peanutbutter and if I’m in the mood for a real treat: I add some chocolate sprinkles. It’s amazing and you should really try it sometime. Another option I hear often is a nice layer of chocolate spread.

The Dutch tradition of ‘koekhappen’

Time for some more Dutch traditions: koekhappen! It’s a popular thing to do on Kingsday, but you’ll see it at other festivities as wel. To explain what koekhappen is: you tighten a string from A to B just above your head and hang slices of spiced cake on it.

Participants must eat the ontbijtkoek with their hands behind their backs. It is a fun activity and usually not a competition. Although you could make it a competition to see who finishes their gingerbread first.

Dutch spiced breakfast bread 4a

The difference between honey cake and spiced breakfast cake

Ontbijtkoek is known by different names in The Netherlands, from honey cake to pepper cake (no, there’s no pepper in the recipe). The original name is ‘honingkoek’ which translates to honey cake. A long time ago, the recipe was made with honey. The honey was an expensive ingredient and was replaced with sugar. Which made it a spiced breakfast cake.

There are a lot of variations of breakfast cake. You could add nuts, ginger or a different spice mix. The recipe below is how I like my homemade breakfast cake best, for me it’s the real thing. But feel free to vary a bit.

Questions about Dutch breakfast cake

​Which flour should I use?

I use all purpose flour, but you could also use whole wheat flour. With this alternative you don’t have to adjust the recipe. There are more options (rye flour for exemple), but I haven’t tested this yet. If you want to use rye flour, the recipe should be adapted.

What is appelstroop?

Appelstroop is a key ingredient in ontbijtkoek. It is a (thick spreadable) dark syrup or jelly made from apples and sugar. It is most commonly used as a spread on bread, but can also be used as an ingredient in recipes for both hot and cold dishes.

If you are looking for a place to buy Dutch ingredients, I have a list of (web)shops that sell Dutch ingredients.

I don’t have speculaas spice mix, what should I use?

You can make it yourself with my recipe for speculaas spice mix. But you could also use gingerbread spice mix. It’s fine to leave out the ginger powder or use less than stated in the recipe. Most important is to have a variety of spices in you breakfast cake for the best result.

Is this a healthy breakfast cake?

No, it isn’t. I love a slice of ontbijtkoek as a snack, but it’s definitely not a healthy snack.

Dutch spiced breakfast bread 2a

More authentic Dutch recipes

As a Dutchie myself, you won’t be surprised I have many more Dutch recipes on my blog. Here are a few of my (and your!) favorites:

If you are missing any Dutch recipes, please let me know! I have many more Dutch recipes on my Dutch blog to translate. Here you can find all of my Dutch baking recipes in English.

Dutch spiced breakfast cake

Print Recipe

5 of 1 vote

Dutch breakfast cake recipe

Do you like Dutch ontbijtkoek? With this easy recipe you can make a homemade version of this Dutch spiced breakfast cake.
Prep Time20 minutes
Cook Time1 hour
Total Time1 hour 20 minutes
Servings: 12 servings

Equipment

Ingredients

  • 250 grams all purpose flour
  • 1 tsp baking soda
  • Pinch of salt
  • 200 grams dark brown sugar
  • tsp speculaas spice mix
  • 1 tsp ginger powder
  • 250 ml milk
  • 50 grams appelstroop or molasses
  • 60 grams pearl sugar optional

Instructions

  • In a large mixing bowl, combine flour, baking soda, salt, sugar, speculaas spice mix and ginger.
  • Heat milk and apple syrup in a saucepan on low heat. Stir until the appelstroop (or molasses) is completely dissolved.
  • Pour the wet ingredients into the dry ingredients and mix on low speed until the dry ingredients are completely incorporated and you have a smooth batter.
  • Pour the batter into a cake pan lined with parchment paper and spread evenly in the pan.
  • Sprinkle with pearl sugar on top. Bake at 160°C/320℉ (conventional oven) in the middle of the oven for about 60 minutes or until done (a cake tester should come out clean).
Cranberry thumbprint cookies

Christmas cookies, I love them. And although I bake gingerbread at least once a year, I also like to come up with new recipes for Christmas cookies. For this holiday season I made cranberry orange thumbprint cookies.

Orange and tangy cranberries go really well together. In this case, the orange zest went in the cookie dough and I spooned some cranberry filling into the center of each cookie before putting them in the oven. The result: delicious jam-filled cookies. Crispy on the outside thanks to the layer of sugar and soft on the inside. Perfect for this time of year.

​Ingredients for the thumbprint cookies

As with most cookies these cranberry orange thumbprint cookies use pretty basic and simple ingredients.

You will need the following:

  • unsalted butter 
  • granulated sugar
  • vanilla extract
  • all purpose flour
  • orange zest – you need about 1.5 orange for this recipe
  • cane sugar – you will need this to roll the balls of cookie dough in. That will give it a lovely extra crunch
  • cranberry compote – you can also use cranberry jam or any other jam of your choice. Or if you have leftover cranberry sauce that will work too if it’s not too liquid.

Preparation method of the cookies

As always make sure you have all the ingredients at room temperature. Starting by creaming the butter and sugar in the food processor or hand mixer for a few minutes on medium speed until nice and creamy. Add the flour, salt and orange zest and knead into a firm dough. You can keep using the food processor if you set it to a low speed.

Now wrap the dough (form dough into a disc first) into some plastic wrap and let it chill in the fridge for at least an hour. Want to know why you need to chill your dough?

Once the dough is chilled enough you form balls with around 40 grams (1.5 ounce) per ball of dough. They should be roughly 1-inch balls. Roll each ball through the cane sugar and place on a prepared baking sheet. Make sure to leave enough space between the cookies.

Now press a thumb in the center of the cookie and use a small spoon to add some cranberry compote. I use about 1 teaspoon of cranberry sauce or compote per cookie. Bake the cookies in the center of the oven until golden brown.

Let them cool a little on the baking sheet and then transfer to a wire rack to cool completely. You can keep the cookies in an airtight container for up to one week.

Cranberry compote

cherry pie filling

Things to know about thumbprint cookies

Do I fill the thumbprint cookies before or after baking?

It depends what you use to fill the cookies with. Jam or compote are typically added before baking, but if you fill them with a chocolate ganache or cream cheese you would do that after baking. For a classic thumbprint cookie the filling is usually added before baking.

Can I use a different filling?

Sure! You could use any kind of jam and even cherry pie filling is an option.

Can I use a different flour?

If you want to make substitutions to the recipe, for instance by adding almond flour or oat flour or changing the sugar to brown sugar, all the other elements will likely have to change as well. I have not tested this myself but you could probably make several changes by testing it thoroughly.

How do I make the thumb impressions without the dough cracking?

Press gently into the cookie dough balls and it usually helps if you use the back of a spoon or the back of a cookie scooper for making the indent.

My cookies spread out, what did I do wrong?

You likely did not chill the dough enough, used butter that is too soft or not enough flour.

How do I prevent the jam from bubbling over the edge of the cookie?

Most importantly is not to add too much of your filling to the cookie indent. It also helps using a thicker jam or compote.

Can I decorate the cranberry thumbprint cookies?

You can! You can sprinkle a little bit of icing sugar over the top just before serving or sprinkle some nuts over the top before baking. A drizzle of white chocolate just before serving is also delicious.


cranberry thumbprint cookies

Print Recipe

No votes yet

Cranberry thumbprint cookies

These cookies are not only pretty to look at, they are also very tasty. Use the recipe to make your own cranberry thumbprint cookies
Prep Time10 minutes
Cook Time15 minutes
Chilling1 hour
Total Time1 hour 25 minutes
Servings: 16 cookies

Ingredients

  • 225 grams unsalted butter
  • 150 grams white sugar
  • 2 tsp vanilla extract
  • 280 grams flour
  • Pinch of salt
  • 1.5 oranges grated zest
  • cane sugar
  • cranberry compote

Instructions

  • Cream the butter and sugar for a few minutes. Add the vanilla extract and mix well.
  • Add the flour, salt and orange zest and knead into a firm dough. Wrap in cling film and refrigerate for at least an hour.
  • Form balls of about 40g (1.5 ounce) of the dough. Roll in the cane sugar and place on a baking tray lined with baking paper. Leave plenty of space between the cookies.
  • Press a thumb into each ball of dough. Spoon in some cranberry compote, I used about a teaspoon of compote per cookie.
  • Bake the cookies for 15 minutes at 190°C/375˚F (conventional oven).
Chocolate chip sugar cookies 4

If you love baking cookies, you might want to know why chilled cookie dough is essential for a perfect cookie. You might feel the need to skip that all important chilling step, but let me explain why it is a good idea to place your dough in the fridge before baking.

Why you should chill cookie dough

Chilling the dough is essential for both cookie dough as well as the base of a short crust pastry. If you’re the kind of person who skips this step, this post is for you!

It’s not hard; the only thing you need to do is to have patience for an hour or so. During that time you can start tidying up the kitchen and make any other preparations for your finished product.

Resting the dough is essential for chocolate chip cookies, sugar cookies and almost any other type of cookie you can think of. I know resting the dough can be a bit of pain. You want to just get on with the recipe and skipping the resting part is so easy to do. You want to just place those cookies on the cookie sheet, plop them in the oven and get it over and done with. The sooner you can start eating that freshly baked batch of cookies!

But for the most delicious cookies you do need to have that little bit of patience. I’ll explain why that is.

Chill cookie dough

Firm dough

One of the reasons for chilling your dough is that having used soft butter also means that your dough is quite soft. It will be stickier because of this and if you want to use it right away the cookies will expand and spread a lot more. So let’s say you are trying to make cute Christmas cookies and have used a cookie cutter. You want the shape of those cookies to stay intact, but baking the cookies right away will probably make the shapes less pronounced.

Once the dough is chilled (and the butter is once again cold butter) it is much firmer and will be less likely to ruin the shape of your cookies. You will have less spread of the cookie dough. This also depends on the recipe you use, I have a special cut out sugar cookie recipe for perfectly shaped cookies!

Now if you take your dough from the fridge after the chill time, it might still be too hard to roll out. It will crack and crumble. So when I take the cold dough out of the fridge I quickly and briefly knead it by hand before rolling it out and place the cookies on the baking sheet. The short kneading is enough to make the dough pliable again.

Tastier cookies

Yes, chilling your dough also means your cookies will have a better flavor! Cookies and shortcrust pastry actually taste better if you leave the dough in the fridge. The flavors will be absorbed and the final cookies and crusts will have a better texture. If that is not enough reason to give your dough time to chill!

The longer the dough is left in the fridge, the better the result. Personally, I like to make the dough the day before when I make cookies with spices. That way I know the dough has had a sufficient chilling time. Especially with gingerbread or speculaas, the flavor is so much better. You can even freeze most cookie doughs. Obviously frozen dough needs to defrost first, but it’s the ideal way to always have delicious baked cookies in no time at all.

Relaxed gluten = crispy cookies

Do you have a love for crispy cookies? Then make sure you let them cool. It will make a huge difference. Most cookies contain gluten, which makes them tougher. But when you let the dough rest, the gluten relaxes. Relaxed gluten makes for crispy cookies. And we all want delicious chewy cookies with lovely crispy edges right?

So as you can see, for the best cookies you just need to have a little patience and give the dough enough resting time. You will be rewarded with a delicious cookie.

My favorite cookies

Before I answer some questions on this topic, I would love to share a few recipes that definitely need a chilled dough for the very best results:

Some questions on chilling cookie dough

How long should I let my chocolate chip cookie dough rest?

For resting cookie dough the times are the same for all kinds of cookies and for all kinds of basic cookie dough. Around an hour should be enough. If you have large balls of dough you might need just a bit more so the cold can get all the way through the dough. For small dough balls it might be quicker but to be on the safe side you can use a longer amount of time for the chilling process.

Can I skip the chilling if I have no shaped cookies?

For best results you should always chill your cookie dough. It will give you more flavor, crispier and a chewier cookie and overall the best results. So for next time, don’t skip the chilling. It’s not impossible to bake the cookies right away, but know the result will be different.

Should I freeze my cookie dough?

You can leave your cookie dough in the fridge for up to one week. Any longer and you will need to freeze it. It will be good to use for up to 2-3 months. Freezing is not necessary, but it sure is easy. Especially if you want to serve freshly baked cookies at any time.

Do I have to defrost my frozen cookie dough?

It depends. If you want to shape it using cookie cutters, you definitely need to defrost. If you’ve already shaped the cookies into balls you can just bake them straight from the freezer. Keep in mind that the baking time might vary if you do. Usually you should add 2-3 minutes baking time to the recipe.

cream cheese frosting 1

This easy recipe for cream cheese frosting is perfect for a carrot cake, red velvet cake, and really any kind of cake or pastry. What about cinnamon rolls with a creamy layer of homemade cream cheese icing?

Making Cream Cheese Frosting

The first time I made my own cream cheese frosting was, of course, for a carrot cake. I was an instant fan of this delicious cream cheese icing and use it regularly for all kinds of other recipes.

This frosting is made with a few simple ingredients: a combination of butter, powdered sugar, vanilla extract and, of course, cream cheese. The butter adds firmness and the vanilla extract and powdered sugar add flavor and sweetness.

cream cheese frosting 3

Level of sweetness

I intentionally didn’t make the frosting too sweet, so you can make it a sweeter frosting if you like by adding more powdered sugar. If you add more icing sugar, the structure will be somewhat firmer.

This recipe is my absolute favorite frosting and a lot of my family and friends really love it as well. I recently made red velvet cupcakes for them with a nice swirl on top and they were gone before I knew it.

Cream cheese frosting as a filling

As you can see from the carrot cake in the photo, you can use this frosting to fill a layered cake. If your frosting is still a little on the soft side after you make it, just put it in the refrigerator for a while until it is firm enough. You can also pipe swirls of cream cheese frosting, but not as high or tight as you are used to with my buttercream recipe.

I like to use room temperature butter for this recipe as it’s easier to mix it until light and creamy. I do use cold cream cheese, because it will make sure the frosting isn’t getting too thin. The brand of cream cheese I use is Philadelphia, I like the structure and it works every time. Make sure you use a full-fat cream cheese, I noticed the cheaper ones are an other type of cream cheese and are often too thin and watery.

BAKING TIP: Read more about the difference between cream cheese frosting and buttercream.

cream cheese frosting 2

How to combine easy cream cheese frosting

I already named a few of my favorite recipes which are going really well with this frosting recipe. I will make a small list of baked goods that are perfect for this frosting. And after that I will list some ingredients that pair very good with the frosting as well.

​Recipes that go well with cream cheese frosting:

  • Carrot cake (cupcakes)
  • Red velvet cake (and cupcakes)
  • Cinnamon rolls
  • Spice cake
  • Pumpkin cake

Ingredients that pair well with cream cheese frosting:

  • Fresh fruit
  • Chocolate
  • Spices (like cinnamon, gingerbread spice mix, etc.)

As you can see, this frosting is perfect for fresh and fruity summer recipes, but also for the warmer flavors of fall. That makes it the best cream cheese frosting recipe ever if you ask me.

cream cheese frosting 4

Questions about cream cheese frosting

Can I make frosting without butter?

Yes, you can, but your frosting will be much less firm. This is because the butter makes the frosting firm in the refrigerator, making it suitable for filling cakes and piping swirls. Without the butter, you can still use the frosting on a sheet cake or spread a little on a cupcake. And it’s perfect for more of a glaze-like topping on cinnamon rolls.

Can I add flavor to the frosting?

You absolutely can! For example, you can mix orange or lemon zest (just the colored part of the zest, not the white-that’s bitter) into the cream cheese frosting, or replace the vanilla extract with another flavor extract. You could even add melted chocolate for a chocolate cream cheese frosting, it’s delicious!

Help, my frosting is grainy!

This is almost always because the ingredients were not at the same temperature. You can try heating the mixture a little and mixing until smooth (don’t heat the frosting too long, you don’t want the butter to melt). Another reason this happens is adding wet ingredients all at once instead of in smaller portions. I always add a little bit, mix it well and then add the rest (in 1 or 2 parts).

Can I use mascarpone instead of cream cheese?

I never do this myself, but it is theoretically possible. You can also make mascarpone frosting if you like.

Help, my frosting is really thin!

You may have mixed the frosting too long. If you put your frosting in the refrigerator for (at least) an hour, the butter can set and your thicker frosting should be usable again.

​Does it have a strong cream cheese flavor?

For anyone wondering if this frosting tastes like cream cheese: yes, you can still taste the cream cheese. It could hardly be otherwise when it is the main ingredient. The taste is more subtle because of the other flavor additives.

What can you do with this icing?

This is a softer frosting. You can pipe small swirls and frost a cake just fine. You can’t use it to frost a cake and then cover it with fondant or marzipan though. The frosting is too wet and will make fondant or marzipan melt.


easy cream cheese frosting

Print Recipe

4.95 from 20 votes

Cream Cheese Frosting Recipe

Make your cake even more delicious with my favorite cream cheese frosting recipe. Easy to make and use it for a layer cake, cinnamon rolls and more pastries.
Prep Time5 minutes
Cook Time5 minutes
Total Time10 minutes

Ingredients

  • 200 grams unsalted butter
  • 300 grams cream cheese
  • 1 tsp vanilla extract
  • 200 grams powdered sugar

Instructions

  • Beat the butter with a stand mixer for a few minutes until light and creamy, using the paddle attachment. Add the cream cheese and vanilla extract and mix until incorporated. Make sure you scrape the sides of the bowl.
  • Finally add the powdered sugar. Mix this into the cream on low speed (or use a spatula) in a large bowl. Once the confectioners’ sugar is incorporated, you can mix on high for a short time to get an airy and creamy result. Again: scrape the sides and bottom of the mixing bowl.
  • Taste the homemade frosting, if you like it sweeter you can add more powdered sugar. This will also make your cream firmer (with lots of extra sugar).
  • You can use the cream cheese frosting right away, or let it set in the refrigerator until it gets even firmer (or until you need it).
Cut out sugar cookies 3

Cut out sugar cookies are the perfect cookies to use as a base and for decorating. They hold their shape and are delicious!

What are cut out sugar cookies?

When I decorate cookies, these cut out sugar cookies are really my go-to recipe. They are my absolute favorite. I specifically choose this cookie recipe because they hold their shape so well while baking. Nothing is more annoying than when you’ve put a lot of effort into cutting cookies into a nice shape only to find out after baking that the cookies have deformed.

Cookies that hold their shape

So you don’t have to worry about that with this recipe, this is really a recipe for making cookies that hold their shape. The reason that sugar cookies hold their shape so well is because of the amount of flour in the recipe; a relatively large amount of flour goes into the sugar cookie dough. Therefore, these cookies taste best with a layer of royal icing or some other fun cookie decoration.

BAKING TIP! Want to know why you should chill your cookie dough? In this article I will explain everything about why chilled cookie dough works best.

Cut out sugar cookies 1

More sugar cookies recipes

If I deviate from this basic vanilla sugar cookie recipe at all, it is usually for a different flavor variation. For example, it can be really fun to make chocolate sugar cookies by replacing 10% of the flour with cocoa.

And in the fall and winter, of course, gingerbread cookies are a favorite. Each of these variations holds its shape just as well as the basic recipe below. So you can enjoy different flavors as you get started with cookie decorating!

Decorating cut out sugar cookies

The nice thing about baking sugar cookies is that you end up decorating them, of course. This can be done with a simple powdered sugar and liquid (milk or water) glaze, melted chocolate, or royal icing. Actually, I always go with royal icing and occasionally chocolate.

If you want to melt a small amount of chocolate for decorating, check out my hack for melting chocolate in a piping bag.

Don’t feel like decorating? Try adding chocolate chips in the dough and make chocolate chip sugar cookies!

Cut out sugar cookies 2

Best cut out sugar cookies - Frequently asked questions

What type of flour do you use for cookies?

I prefer to use all-purpose flour for cookies, but wheat flour works well too. Some cookie recipes call for a specific type of flour, in which case, of course, you use the flour called for in the recipe.

How will I know when the cookies are done?

Cookies always come out of the oven soft. So you cannot rely on touch to determine when they are done. With cookies, you basically have to rely on the recipe and your own judgement. With natural cookies that are light in color (no cocoa powder or spices), you will see that they get golden brown edges.

What cookie cutters do you like to use?

Ha, I have an unbelievable amount of cookie cutters in the house. All shapes and sizes, you name it, it’s in my drawer. One thing that comes in handy is a set of round cutters with different diameters. I also have this set of 101 Wilton cutters, which is a nice base to have around the house.

Can I store the cookie dough?

Sure you can. Wrapped in an airtight container, you can store cookie dough in the refrigerator for up to a week. In the freezer, you can keep it much longer, up to three months.

Can I substitute vanilla sugar?

Personally, I prefer to use vanilla sugar. If you want to replace it with vanilla extract or paste, you can (2 teaspoons), but you will have to replace the 50 grams of vanilla sugar with caster sugar.

cut out sugar cookies recipe

Print Recipe

No votes yet

Cut Out Sugar Cookies recipe

Sugar cookies are the perfect cookies to use as a base and to decorate. That's because they hold their shape well and, of course, they're delicious!
Prep Time10 minutes
Cook Time10 minutes
Total Time20 minutes
Servings: 30 cookies

Ingredients

  • 150 grams caster sugar
  • 50 grams vanilla sugar
  • 200 grams unsalted butter
  • 1 egg M
  • 400 grams all purpose flour

Instructions

  • Cream together the sugar, vanilla sugar and butter. Add the egg and mix until completely incorporated.
  • Add the flour and mix to a firm dough. Wrap the dough in foil and refrigerate for at least an hour.
  • On a floured work surface, roll out the dough to about 5 mm thick. Don't use too much flour: since the recipe already contains a lot of flour, the cookies will taste too "floury".
  • Cut out the cookies with a cookie cutter of your choice. Place the cookies on a baking sheet and bake at 180°C/350℉ (conventional oven) for about 10-12 minutes. Small cookies will bake a little faster, so it is best to bake the same size cookies per sheet.
  • Remove the cookies from the oven when the edges are golden brown. The cookies will still be a little soft when they come out of the oven, so let them cool a bit before placing them on a wire rack.
  • When the cookies are completely cool, you can decorate them with royal icing or melted chocolate.