Avoid greasy cupcake liners-3

Do you bake cupcakes on a regular basis? If so, you have probably noticed that the paper bottoms of your cupcakes have wet or greasy bottoms. Fortunately, the solution for avoiding greasy cupcake liners is super simple! Your lifesaver? Uncooked rice! I will tell you all about it in this blog.

Help, my paper cupcake bottoms are moist/greasy! How can this happen?

It’s really annoying when the cupcake papers of your freshly baked cupcakes feel greasy or wet after baking a batch of muffins or cupcakes.  It can also make it harder to peel your cupcakes out of their paper liners. I am often asked how this can happen and if there is an easy solution to this annoying problem. Part of this is also due to the high butter content of the cupcakes.

If you do have greasy paper liners, it could also be that the quality of the paper is less than perfect. This will cause the butter from your cupcake batter to seep through the cupcake wrappers. If you do suffer from damp cupcakes, excess moisture is always the culprit. Of course making sure you have good cupcake liners is also handy. Trying out different liner brands will make a world of difference to the end result.

If, like me, you bake your cupcake batter in paper molds in stainless steel muffin tins, leaving the cupcakes in there to cool after baking will cause condensation to form in the mold and wet your cupcake paper. Of course, I am assuming that you have used a good basic cupcake recipe.

Avoid greasy cupcake liners-2

Perfect cupcakes

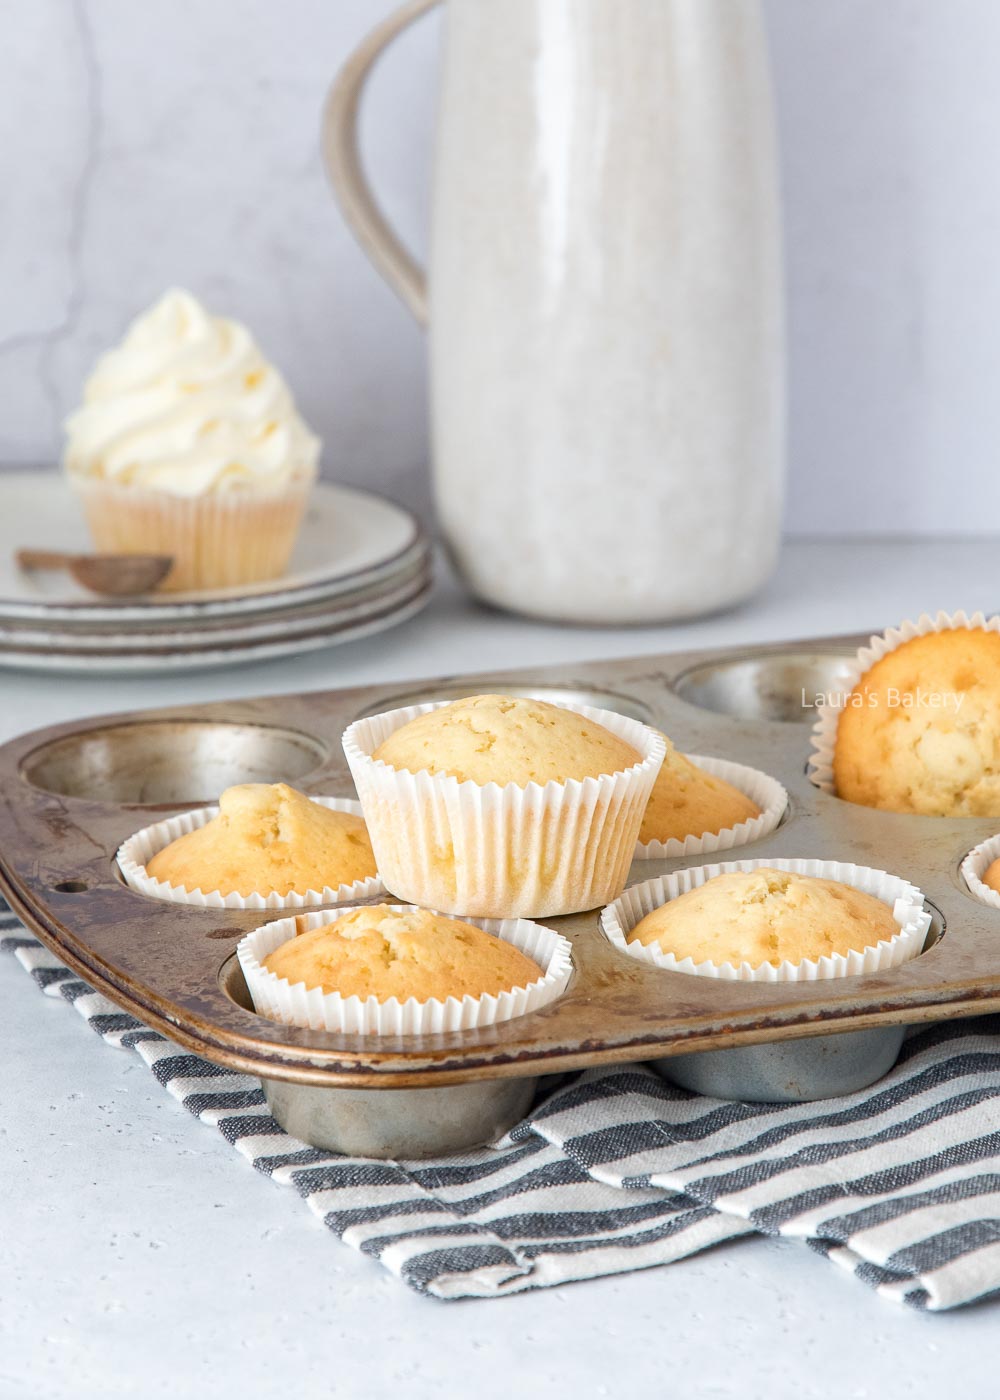
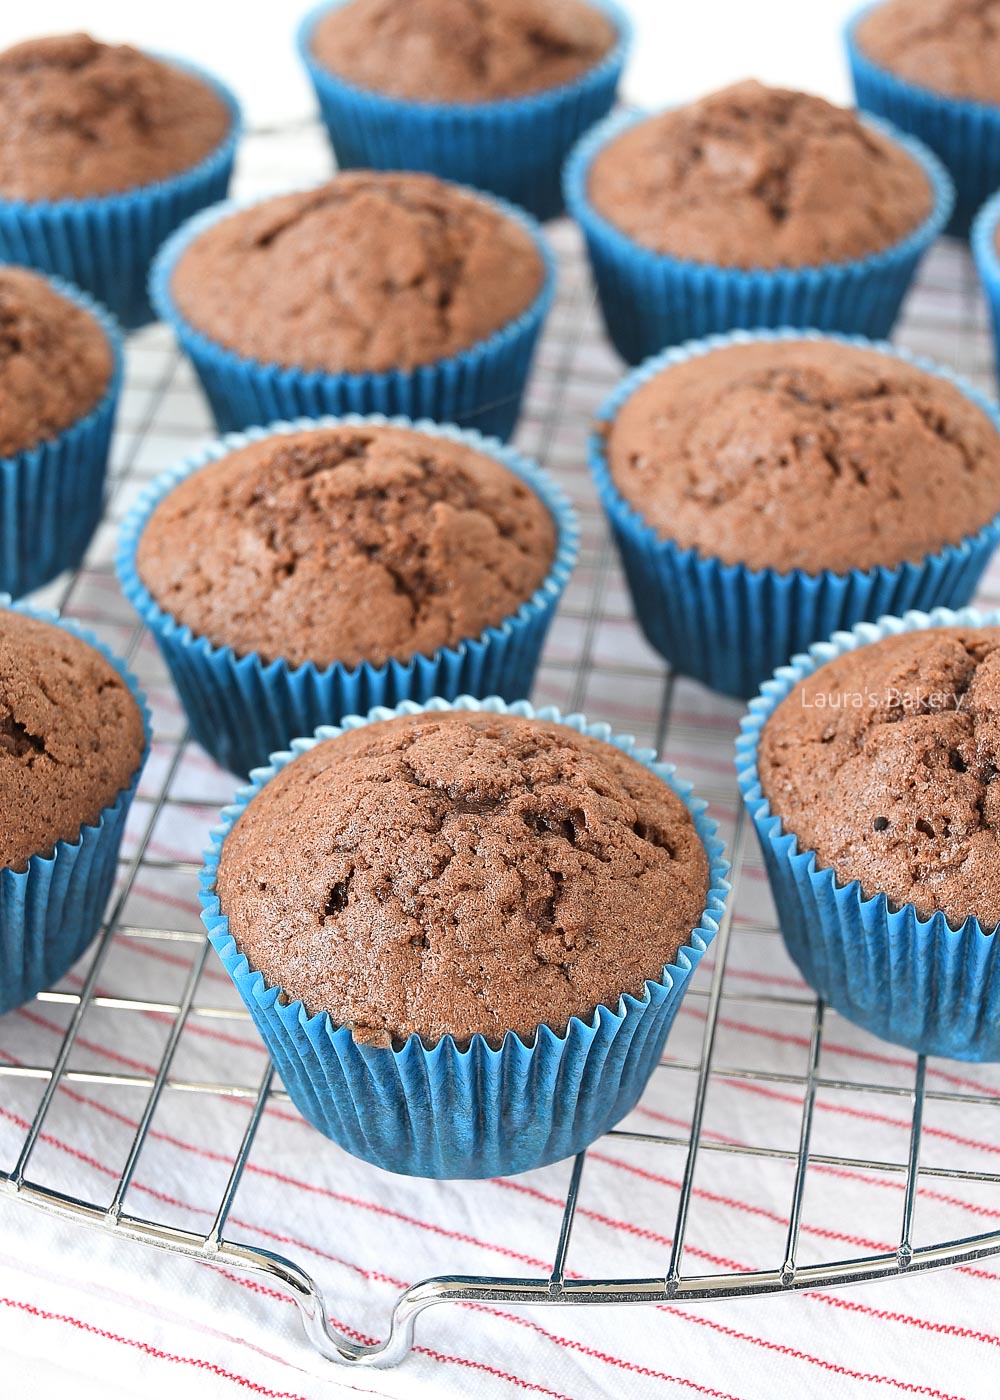
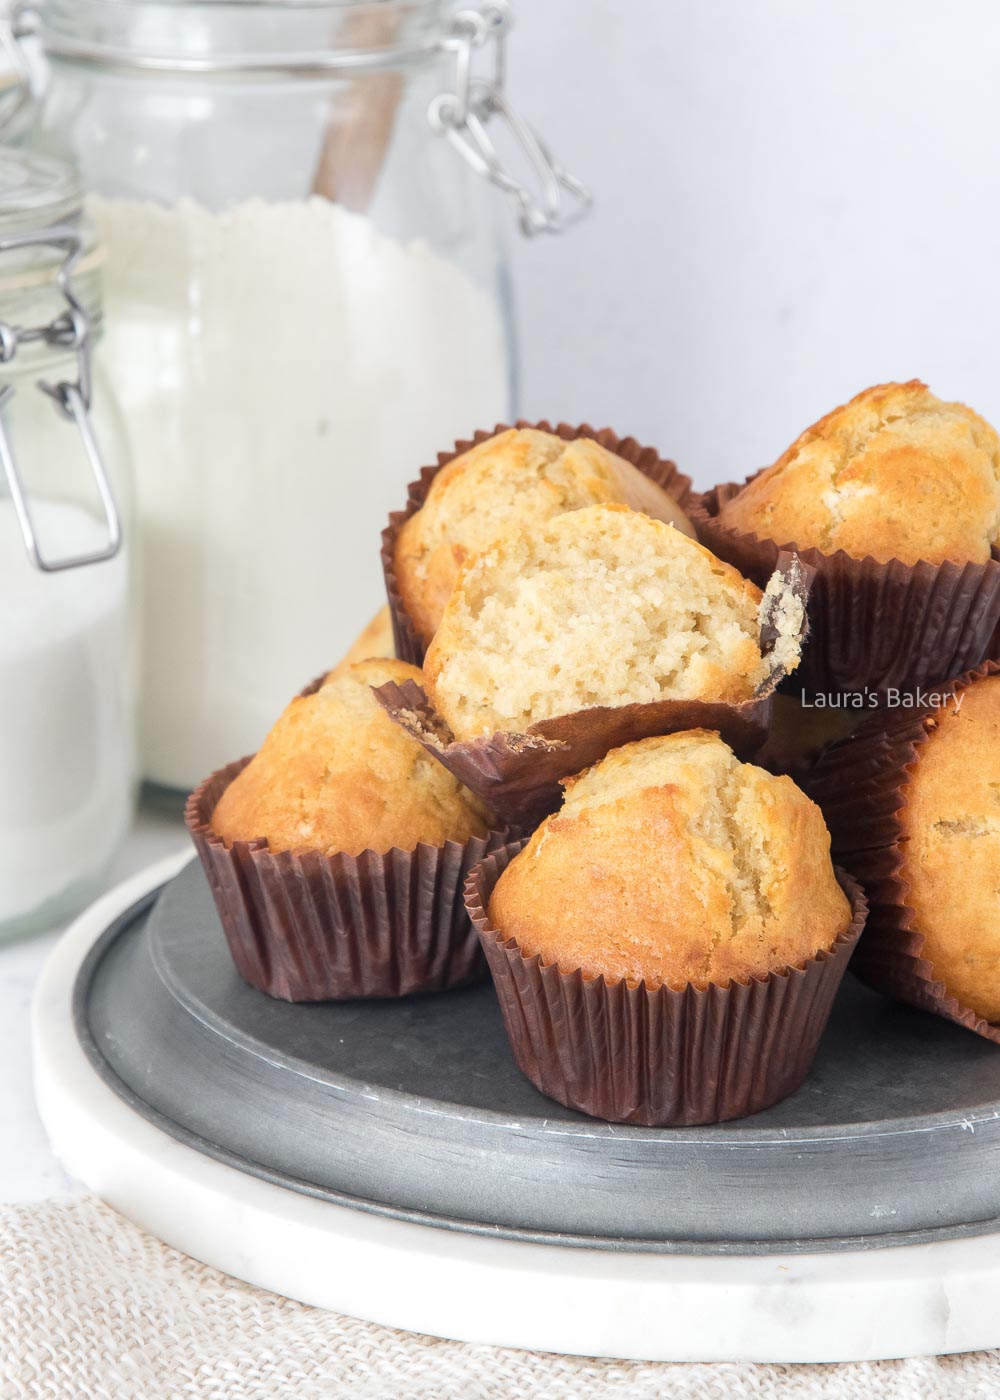
Luckily, there is an super easy way to get perfect cupcakes every single time. I love this little baking hack as it will make for smoother baking adventures! Sprinkle a thin layer of uncooked rice in the stainless steel muffin tin and place the paper cupcake liners on top. During and after baking, the moisture and/or fat will be absorbed by the rice and the bottom of your cupcake liners will stay perfectly dry. The simple act of a little sprinkle of rice will make a big difference to your end result. Also use the cooling rack or wire rack to let the cupcakes cool down completely, that will also help.

In this video, I will clearly show you how to use this handy kitchen hack. Of course, you won’t be able to eat the rice you used in the muffin pan, but you don’t have to throw it away. You can use it for this purpose until the rice starts to look glassy. Then it’s time to “refresh” the rice.

WATCH THE VIDEO

Now the good news is that if you love cupcakes and muffins I have plenty of mouth-watering recipes for you to try. I’ll highlight a few below, but there will be more published in the next months so be sure to check out all of them. So for next time make sure to sprinkle rice on the bottom of the pan and your cupcakes will come out absolutely perfect.

Strawberry jam cupcakes

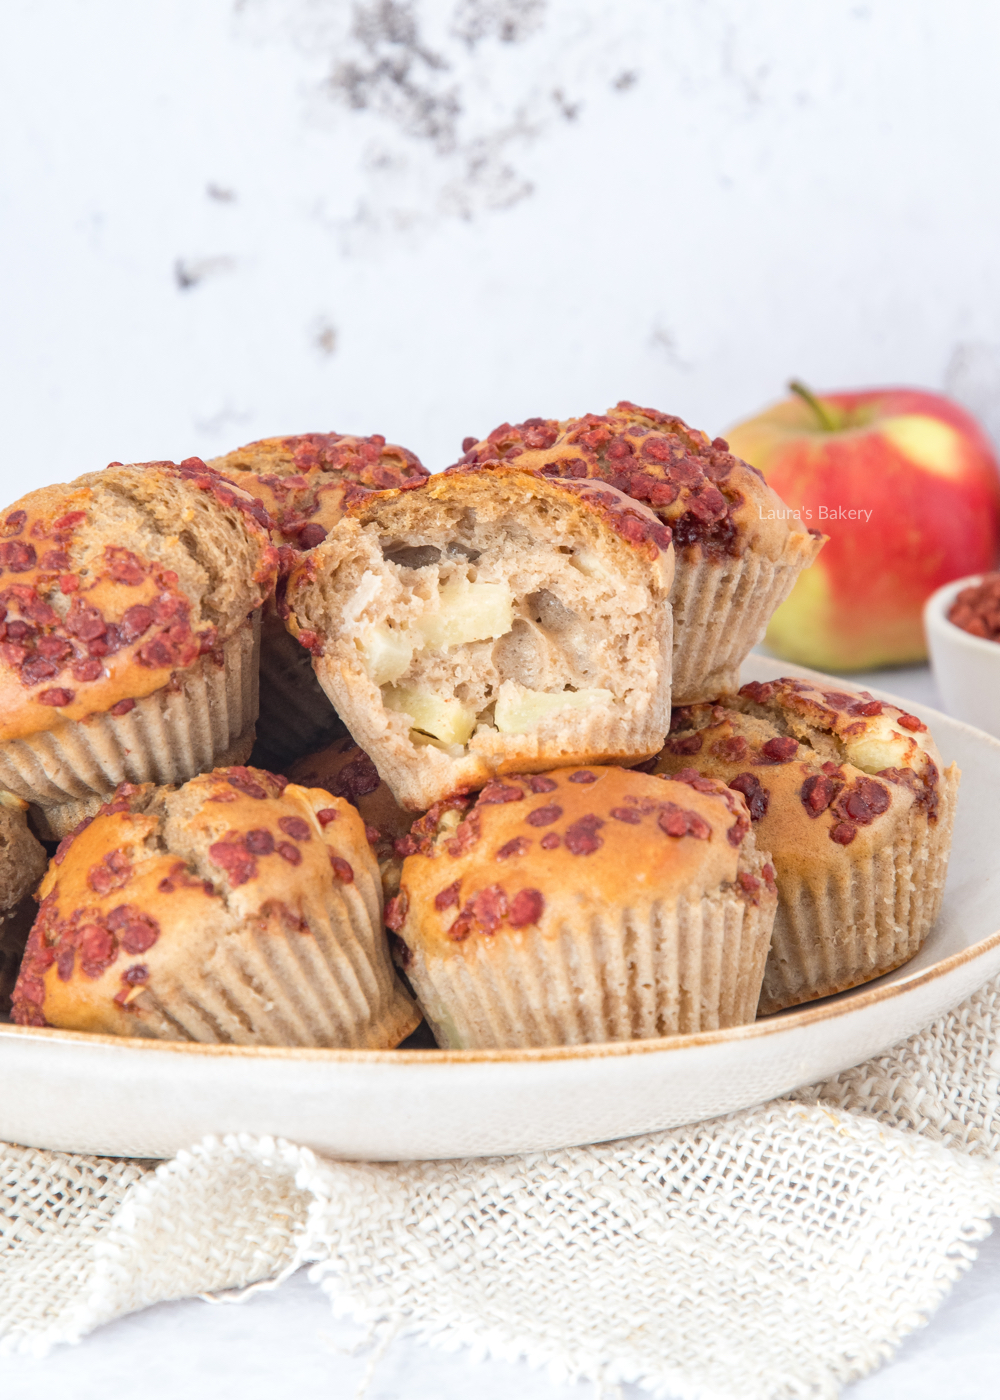
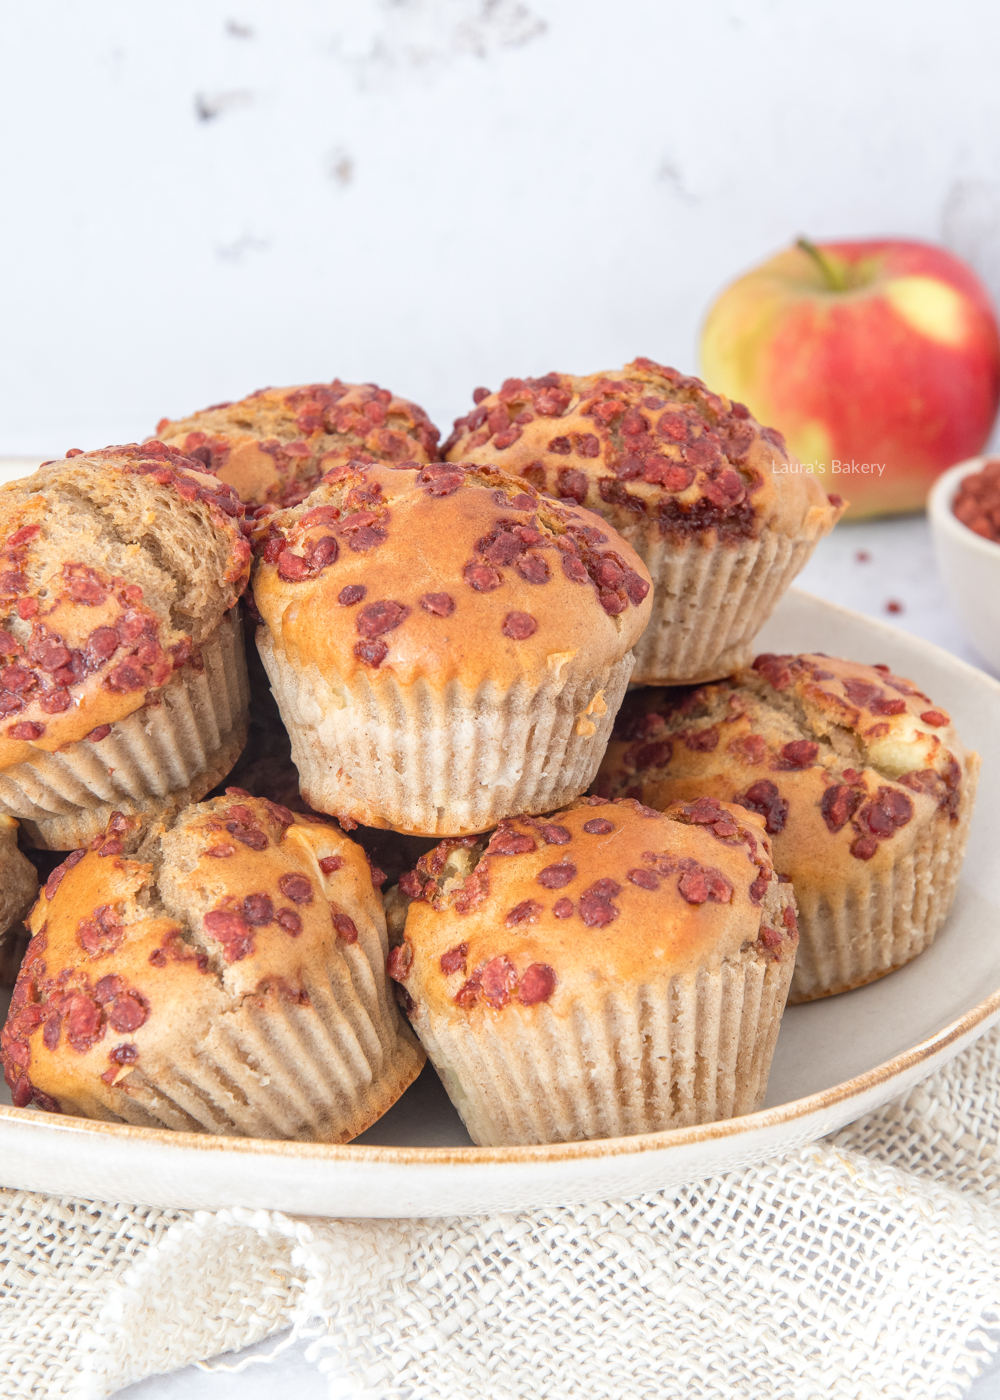
Apple cinnamon yogurt muffins

Check out these cupcake recipes too:

Or check out all the cupcake recipes or all the muffin recipes too. And be sure to come back on a regular basis for more delicious recipes.

Vanilla cupcakes no milk -3

The perfect base recipe for vanilla cupcakes. With this easy cupcake recipe you have the perfect starting point for all your cupcakes. Add a vanilla frosting or any other kind of topping to your liking.

What are cupcakes?

Cupcakes are simply small (one-person) cakes baked in cupcake liners or in a cupcake tin. In the past, cupcakes were served at high tea and baked in teacups, which is probably where the name ‘cupcake’ comes from.

Instead of a scale most people also used a measuring cup, which is another reason for the name. While a lot of people still use cups for measuring dry and wet ingredients, for the most accurate result I would always suggest using a weighing scale instead.

Cupcakes are the perfect little treat to bake for many different occasions. From baby showers to birthday parties and whenever you feel like having a small treat. Decorating them in a variety of different ways is also great and a fun activity with kids (or adults!) as well.

Remember, cupcakes and muffins are not the same. You can read al about the difference between cupcakes and muffins here.

Vanilla cupcakes no milk -2

How to make cupcakes?

Making a basic vanilla cupcakes recipe is a good start if you want to learn how to make the perfect cupcake. This cupcake recipe makes exactly 12 cupcakes in a regular cupcake tin. I used my vanilla loaf cake recipe as the base of this recipe but I have adjust the quantities to match the tin and changed some of the proportions.

Another change is the fact that these vanilla cupcakes use less sugar. While you will eat your regular loaf cake usually without frosting, most cupcakes will contain a frosting like a vanilla buttercream frosting or a chocolate frosting. Since those are also quite sweet, it makes sense to make the cupcake batter less sweet.

What ingredients do you need?

The recipe calls for simple ingredients which you will be able to find in most grocery stores. I list them below for easy reference:

  • Self-raising flour – This is essentially all purpose flour combined with baking powder.
  • Granulated sugar – I like to use a superfine sugar.
  • Vanilla extract – can be replaced by vanilla bean paste or vanilla sugar.
  • Unsalted butter – at room temperature.
  • Eggs – 4 medium sized, which weighs about 50 grams each.

Other than that you need a large mixing bowl or use a stand mixer to mix the batter. An electric mixer will work as well.

Vanilla cupcakes no milk -4

The process

You start by adding the butter, sugar and vanilla together in the bowl of the stand mixer or whatever other large bowl you’re using. Mix this together until the color starts to get light and the texture creamy.

Now add the eggs one by one and make sure to mix the batter in between until the egg is fully absorbed into the batter. Now add the self-raising flour and the salt bit by bit until fully mixed. And that’s it. Batter is ready!

Now all you have to do is to add the vanilla cupcake batter into the cupcake liners. You can scoop the batter into the liners with a spoon but an ice cream scoop is a handy accessory to use for equal measured cupcakes.

Pop them into the preheated oven (350˚F or 175˚C. Top and bottom heat/conventional oven) for around 20 minutes and they are ready! Keep the oven door closed until they are baked.

Make sure to place them on a cooling rack before adding buttercream or another frosting.

What other cupcake flavors can I make?

As far as cupcake recipes go, this is the perfect base recipe with which you can create endless flavors. Think about adding some chocolate chips to the batter or a tablespoon of cocoa powder for a chocolate batter.

Or vary the flavor by adding a different kind of sugar, like brown sugar or coconut sugar. The fluffy texture of these cupcakes is perfect for many different variations. I will soon be sharing lots of different flavors.

Decorating the cupcakes

Baking the vanilla cupcakes is step 1 of the process. Step 2 – and the most fun – is to decorate them. You don’t need to decorate them if you don’t want to. They are delicious just as they are but any cupcake will look better with a pretty frosting on top. How the frosting looks is also greatly depending on which frosting tip you use. So you can definitely vary that as well.

And who doesn’t love a pretty decorated cupcake? You can decorate with buttercream, vegan buttercream or with fondant or marzipan. You can fill them with jam or fruit or decorate them in another way.

The most basic frosting is simply a glaze of icing sugar combined with a little bit of lemon juice (or water). Takes no time at all and is always tasty. Just drizzle it over the cooled cupcakes Or try and make these strawberry cupcakes. Adding some fresh fruit on top of the frosting is delicious and looks good too!

Vanilla cupcakes no milk -1

Some easy tips for the perfect vanilla cupcakes

Which cupcake tin should I use?

This recipe makes exactly 12 cupcakes, so it is handy to use a muffin & cupcake tin that holds 12 cupcakes at a time. Of course if you have other cake pans you can use those as well. Keep in mind that different shapes of cake pans or cupcake pans might mean that the total baking time can vary.

How do you get the cupcakes nice and flat?

The rule I always follow is to fill the moulds two-thirds with batter, this way I always get a good height. However, I usually have a little dome on top of my cupcakes. If you don’t want this, you can put a cutting board on top of the cupcakes after baking. This only works if you have baked them in a cupcake tin.

Why is there a crack in my cupcake?

The oven temperature was too high. Due to the temperature being to high, the batter will rise too fast causing it to crack. I will explain more about this in a future article.

Where can I buy the best cupcake liners?

You can buy cupcake liners just about anywhere. From the grocery stores to specialty baking stores. Both online and offline. I have an enormous amount of colorful cupcake liners in stock. I like my paper liners to be a bit firmer than the really cheap ones. I do always place them in a muffin tin to make sure they don’t fall apart when baking in the oven.

Why does my cupcake collapse?

Baked cupcakes are supposed to sag (or shrink) a little as they cool. But if they collapse too much, it could be because you over-mixed the batter, the batter was too moist, or the cupcakes just weren’t ready. Make sure to always test if they are done before taking them out of the oven.

How long should cupcakes be left to cool?

When your cupcakes are done (always check that a skewer or cake tester comes out clean), you can remove them from the oven. Leave them to cool in the tin for a few minutes, then take them out and place them on a wire rack to cool completely. This also works for cakes and biscuits.

How long to cool cupcakes before frosting?

If you want to add a buttercream to the vanilla cupcake it is essential that the cupcakes are completely cooled. Imagine adding butter(cream) to a warm cupcake. You can probably see what would happen.

Can you put cupcakes in the fridge?

The environment in the fridge is not ideal for cupcakes. It is best to keep them outside of the fridge in an airtight container for up to a week. If you have ‘wrapped’ your cupcake in fondant you can keep them even longer, as the wrapping ensures the cupcakes stay moist and delicious for longer.

How long are cupcakes good for?

As per above you can keep cupcake for about a week. But you can also add 3 to 4 cupcakes together in a freezer bag and freeze them. That way you can keep them for three months. Check this article on how to store cupcakes.

How can I make the vanilla cupcakes dairy free?

If you want to make dairy-free vanilla cupcakes you can simply replace the unsalted butter for a plant-based alternative. Since these are already vanilla cupcakes without milk that is an easy fix. The flavor of the final cupcakes will be slightly different but no less delicious.


Vanilla cupcakes no milk

Print Recipe

5 from 2 votes

Basic Vanilla Cupcake Recipe

The perfect basic recipe for vanilla cupcakes. With this cupcake recipe you can vary the flavors endlessly and with or without buttercream!
Prep Time15 minutes
Cook Time20 minutes
Total Time35 minutes
Servings: 12 cupcakes

Equipment

Ingredients

  • 180 grams unsalted butter
  • 135 grams (superfine) granulated sugar
  • 8 grams vanilla sugar
  • 4 eggs
  • 180 grams self-raising flour
  • Pinch of salt

Instructions

  • Cream together the butter, sugar and vanilla sugar in a bowl. Add the eggs one at a time, beating until well incorporated.
  • Gradually add the salt and self-raising flour, beating until the dry ingredients are incorporated.
  • Pour the mixture into the tins and bake for 18-20 minutes at 175°C/350℉ (conventional oven) until cooked through. Use a cake tester to check that the muffins are cooked before removing from the oven.
Ferrero rocher cupcakes-2

These Ferrero Rocher cupcakes will steal the show, that’s for sure. Not only that, they are delicious too. Not surprising, as I love chocolate cupcakes on their own, but add a chocolate buttercream and Ferrero Rocher chocolates and they literally take my breath away. It’s just the perfect match. I am very curious to hear what you think.

I would like to add that these cupcakes are a big bite and not light by any means. There is a Ferrero Rocher hidden in the center of each cupcake cupcake, and of course, as you can see, there is one on top of the buttercream for decoration. Delicious, but something to keep in mind if you are planning to make other tasty snacks.

What do you need to make these Ferrero Rocher cupcakes?

The basis of this cupcake recipe is a chocolate cupcake batter and you will need the following ingredients to make them. In addition you will also need cupcake liners, a piping bag and a muffin pan to place the cupcakes in. Also keep in mind that it helps to have all ingredients at room temperature before starting.

  • unsalted butter
  • granulated sugar
  • vanilla extract
  • large eggs
  • all purpose flour
  • cocoa powder
  • baking powder
  • And of course Ferrero Rocher candies – you will need a total of 16 for these 8 cupcakes

And for the Nutella buttercream you also need Nutella and extra cocoa powder. For making the Nutella frosting I used this basic buttercream recipe.

Ferrero rocher cupcakes-3

Making the cupcakes

The process for making the Ferrero Rocher cupcakes starts with creaming the butter and the sugar until light and airy. You can do this the easiest way in a stand mixer with the paddle attachment. Or use a large bowl with a hand mixer. Takes a little more effort but totally do-able.

Once the butter and sugar mixture is creamy you add the vanilla extract and the eggs one by one. Make sure that the first egg is fully incorporated before adding the next one! Lastly you add the flour, baking powder, cocoa powder and salt and mix until all the dry ingredients are incorporated into the wet ingredients and you have a smooth batter.

Now divide the batter over the 8 cupcake liners (placed in the cupcake tin) and place a Ferrero Rocher candy in all cupcake cases. Just press one in the center of the cupcake and cover with a little bit of batter on top. You can make a small hole with a small spoon before doing so but the batter should fold around the Ferrero Rocher chocolate easily.

Bake the Ferrero Rocher cupcakes in the oven in about 18 minutes. Once golden brown and cooked through let them rest in the tin for a little bit before taking them out of the muffin tray and letting them cool completely on a cooling rack.

Ferrero rocher cupcakes-1

Finishing and decorating

While the cupcakes are cooling down you can make your Nutella buttercream. Once the cupcakes are cooled completely you can make a lovely swirl on top of each cupcake and place an extra Ferrero Rocher chocolate on top of the cupcake. The perfect cupcakes for all special occasions. For an extra festive look you can add some gold sprinkles as well.

If you don’t want to add another Ferrero Rocher to the cupcake you can add some chopped chocolate instead. They also taste good with just a bit of chocolate ganache or whipped heavy cream.

Undecorated cupcakes can be kept in an airtight container. Keep in mind that you should keep it outside of the fridge. Placing them in the fridge will result in dry cupcakes.


Ferrero rocher cupcakes

Print Recipe

No votes yet

Ferrero Rocher cupcakes

Put these Ferrero Rocher cupcakes on the table for a festive chocolate treat with a surprise inside!
Prep Time10 minutes
Cook Time20 minutes
Total Time30 minutes
Servings: 8 cupcakes

Ingredients

CHOCOLATE CUPCAKES

  • 90 grams unsalted butter
  • 70 grams fine granulated sugar
  • 1 tsp vanilla extract
  • 2 eggs M or L
  • 80 grams all purpose flour
  • 10 grams cocoa powder
  • 1 tsp baking powder
  • Pinch salt

CHOCOLATE BUTTER CREAM

  • 0.5 portion buttercream according to recipe
  • 5 tbsp Nutella hazelnut paste
  • 1.5 tbsp cocoa powder

EXTRA

  • 16 Ferrero Rochers

Instructions

  • Cream together the butter and sugar. Add the vanilla extract and the eggs one by one. Do not add the next egg until the first one is fully incorporated.
  • Finally add the flour, cocoa powder, baking powder and salt and mix until the dry ingredients are incorporated into the batter.
  • Take a stainless steel muffin tin and place cupcake liners in the baking pan, divide the batter between the moulds. Press a Ferrero Rocher into each cupcake and place a little of the batter on top to cover it. The batter will continue to rise in the oven.
  • Bake for about 18 minutes at 180°C/350˚F (conventional oven).
  • Leave the muffins to rest in the tin for a while, then place them onto a wire rack to cool completely.
  • Make the buttercream according to the instructions. Mix in the Nutella spread and cocoa powder at the last minute. Taste to see if the chocolate flavor is strong enough, if not you can add more cocoa powder.
  • Take an icing bag with a star nozzle (I used a Wilton 2D) and pipe nice low swirls onto the cupcakes. Press a Ferrero Rocher onto each swirl and your cupcakes are ready to steal the show.
stroopwafel muffins

Do you know the difference between cupcakes and muffins? I get asked a lot about this subject so I thought it was time for an article that explains the difference for you!

Cupcakes vs Muffins

Friends, family and colleagues: they all love my baking. But when I say that I have made them delicious muffins, they call them cupcakes again. “No, they are muffins,” I say. This is almost always followed by the next question: What is the difference between cupcakes and muffins? Well, dear colleagues, friends, family and blog readers (yes, I do get this question in my emails on a regular basis). So pull up a chair, because I am going to tell you in detail about each discipline: from their origin and appearance to the recipe and preparation. What is the main difference between cupcake recipes and muffins recipes?

Where do cupcakes come from?

I am not much of a history buff, and failing grades on the subject is on my list of achievements. I only remember the fun side facts that my teachers thought were unimportant. I do like the history of cupcakes and muffins, and it plays an important part in the difference between these two delicious baked goods.

The very first recipe for a cupcake came from a cookbook by Eliza Leslie in 1828. What I personally find surprising is that Eliza was an American writer, I always thought that cupcakes came from England. At that time, cupcakes were often served at high tea. In those days, cupcakes were baked in a cup rather than the familiar paper liners. This is probably where the name ‘cup’ comes from. (source)

Where do muffins come from?

The Americans and the British still disagree about who ‘invented’ the muffin. Samuel B. Thomas complicated matters. He was an English baker who lived in America. So an English recipe, as the British say, you can understand how the Americans feel about it. Actually, there is no point in discussing this, because the Germans and French knew about muffins much earlier. Here it was called ‘Mufflet’ (Germany) or ‘Moufflet’ (France). (source)

Vanilla cupcakes no milk

Difference between cupcakes and muffins

Above is a picture of my basic vanilla cupcake recipe on the left and my basic muffin recipe on the right.

Now we know a bit more about the history of the cupcake and the muffin. But what exactly is the difference, you may ask? If we analyse the appearance of these two treats, we have a good starting point.

The physical difference between cupcakes and muffins

Cupcakes are small cakes that actually have the structure of a cake. They are baked in (often brightly colored) paper baking cups and their flat tops barely rise above the paper. After baking, a cupcake is decorated with fondant/marzipan or a nice swirl of some sort of cream. It can also be filled with a delicious filling.

Muffins have a different structure to cupcakes, which are more like bread and are also often called quick bread. Unlike cupcakes, muffins rise quite high out of their paper cups. Muffins are also not decorated – as soon as they come out of the oven, they are ready.

Difference cupcakes vs muffins

Difference cupcakes vs muffins

Above is a picture of my ferrero rocher cupcakes on the left and my chocolate pretzel muffins on the right.

The ingredients in a cupcake and muffin recipe are also different. And when the ingredients in a recipe are different, the preparation is usually different too. You may have guessed it: the same goes for cupcakes and muffins.

How to make cupcakes

In a cupcake recipe you will always see the following ingredients: butter, sugar, eggs and flour. When you use these ingredients to make cupcakes, you always mix the butter and sugar until creamy. Then you add the eggs until they are well mixed and finally you add the flour until you have a nice cupcake batter. This is the basis of a cupcake recipe. Of course, baking powder, salt and any flavorings are added. The final batter will have a smooth texture.

How to make muffins

A muffin recipe often contains less sugar and butter than a cupcake recipe, and milk is added. Butter must be melted and is often replaced by oil. Muffins are much quicker to make than cupcakes. The mixing method is very different to cupcakes. You simply take two bowls, one for the dry ingredients and one for the wet ingredients.

Put the contents of the two bowls together and mix to a muffin batter in about 12 strokes. You need to stir as little as possible, which means there can still be some lumps in the dough. This is the right thing to do, because if you stir longer you will end up with a tough muffin and a much denser texture.

Difference between cupcakes and muffins

Difference cupcakes vs muffins

Above is a picture of my stroopwafel cupcakes on the left and my stroopwafel muffins on the right.

Finally, some baking tips for both cupcakes and muffins. Because yes, even the baking tips are different for the two recipes, as the preparation is quite different. And when you get into the kitchen to bake, you want a perfect result.

Baking tips for cupcakes

My tips for perfect cupcakes:

  • Fill the baking cups about 2/3 full with the mixture.
  • Use good, sturdy paper cupcake liners; if you use cheap/thin paper, you will see that they get very greasy as they absorb all the fat and moisture from the cupcakes. Oh, and don’t forget about my tip to prevent greasy cupcake liners!
  • Cupcakes can also be filled. Use an apple corer to remove the centre of the muffin and fill with jam, chocolate spread, cream, etc.

Baking tips for muffins

And here are some of my tips for delicious and perfect muffins:

  • You don’t need a mixer. Mix the ingredients separately and use a spatula to mix them together.
  • Don’t stir for too long! You should see lumps.
  • You can fill the muffin cups almost to the brim.
  • Sprinkle some of the ingredients (like chocolate chips) over the muffins before they go into the oven, it looks nice when they come out.
  • Always add melted butter (in the case you don’t use an oil)

Now that you’ve read this article, I think you’ll agree that cupcakes and muffins are not the same thing. Hopefully you can now tell the difference, or maybe you already knew, but now you have ammunition to convince others 😉 .

So which is your favorite? The muffin or the cupcake?

Strawberry cupcakes 1a

It doesn’t happen often that I have made a recipe many times before, but it hasn’t been online at Laura’s Bakery at all. Time to change that I thought, because these strawberry cupcakes are way too delicious not to share!

Strawberry cupcakes recipe

So I recently stocked up on a whole load of fresh and flavorful strawberries that are now in season. Way more than I needed for this cupcake recipe, but I just love strawberries. During strawberry season I eat some of this red fruit almost every day. For breakfast, dessert or just in between.

Strawberry cupcakes 2a

Vanilla cupcakes with strawberry filling

For this cupcake recipe, I bake simple but oh-so-delicious vanilla cupcakes as a base. With an apple corer I take out some cake to fill with strawberry jam. Small pieces of strawberry can also be used by the way, but I personally like the jam very much.

If you like, you can also fold small pieces of strawberry through the batter. Keep in mind that the cupcakes might need some extra time in the oven. This is because with this fresh red fruit, you are also adding extra moisture to the batter.

TIP: If you clean your strawberries, do so before removing the crowns. This is because otherwise the strawberries will suck up the water and then your strawberries will have less flavor.

Strawberry cupcakes 5a

Mascarpone frosting

You can also make the topping several ways. I have made strawberry cupcake with buttercream before, but these days I often choose mascarpone frosting as the topping.

In this case, I also flavor this mascarpone cream, with strawberry jam. This not only makes it very tasty, but also gives it a nice color right away. You can choose to give the frosting more color with some red or pink food coloring. I never do this, I like the subtle color.

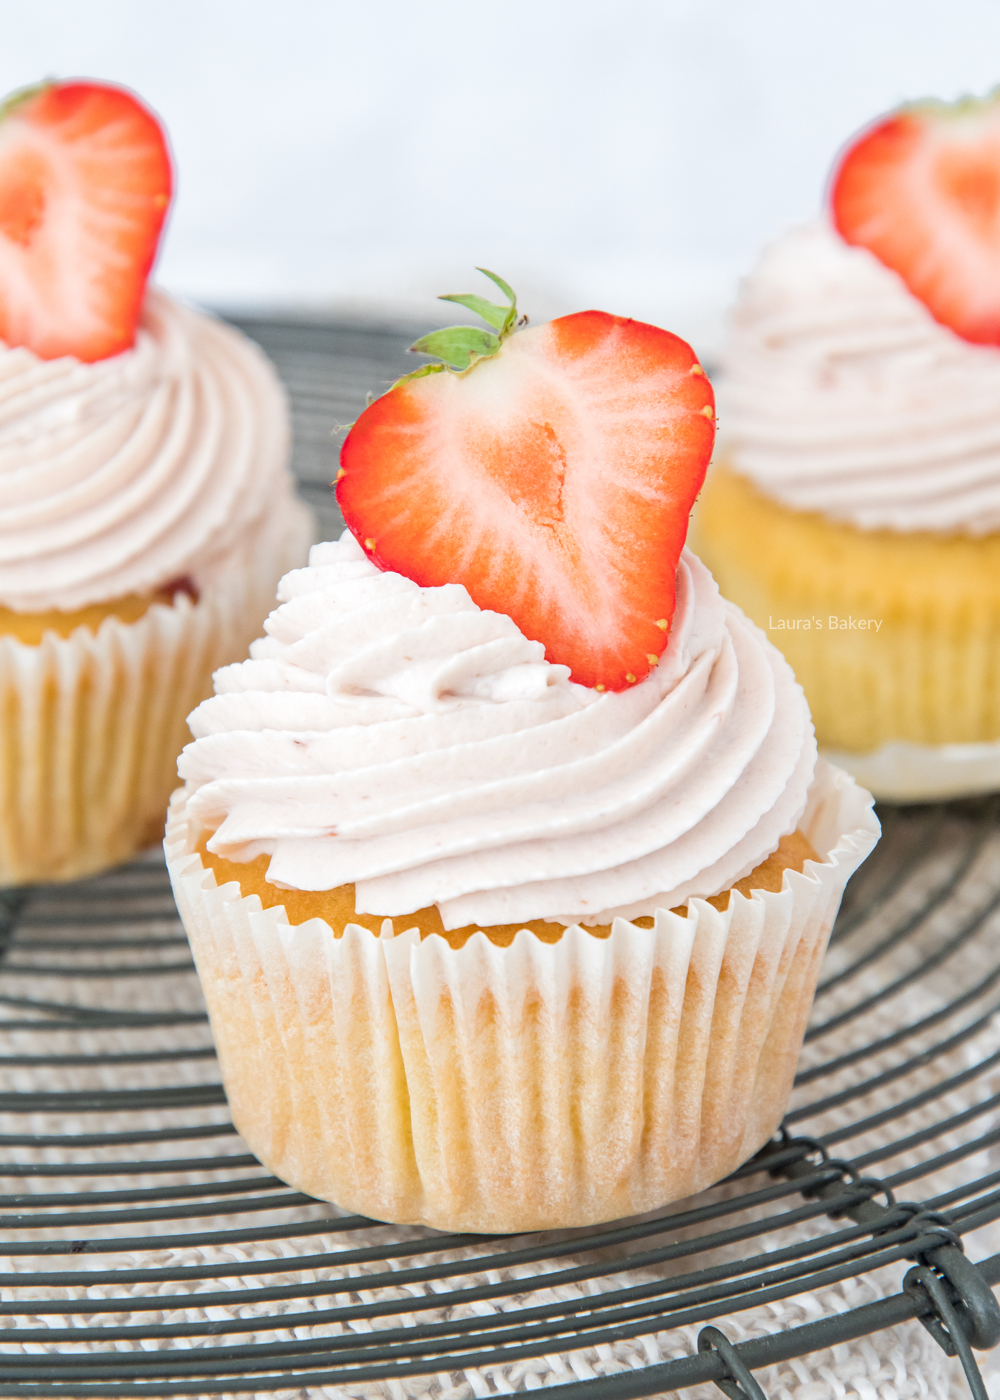
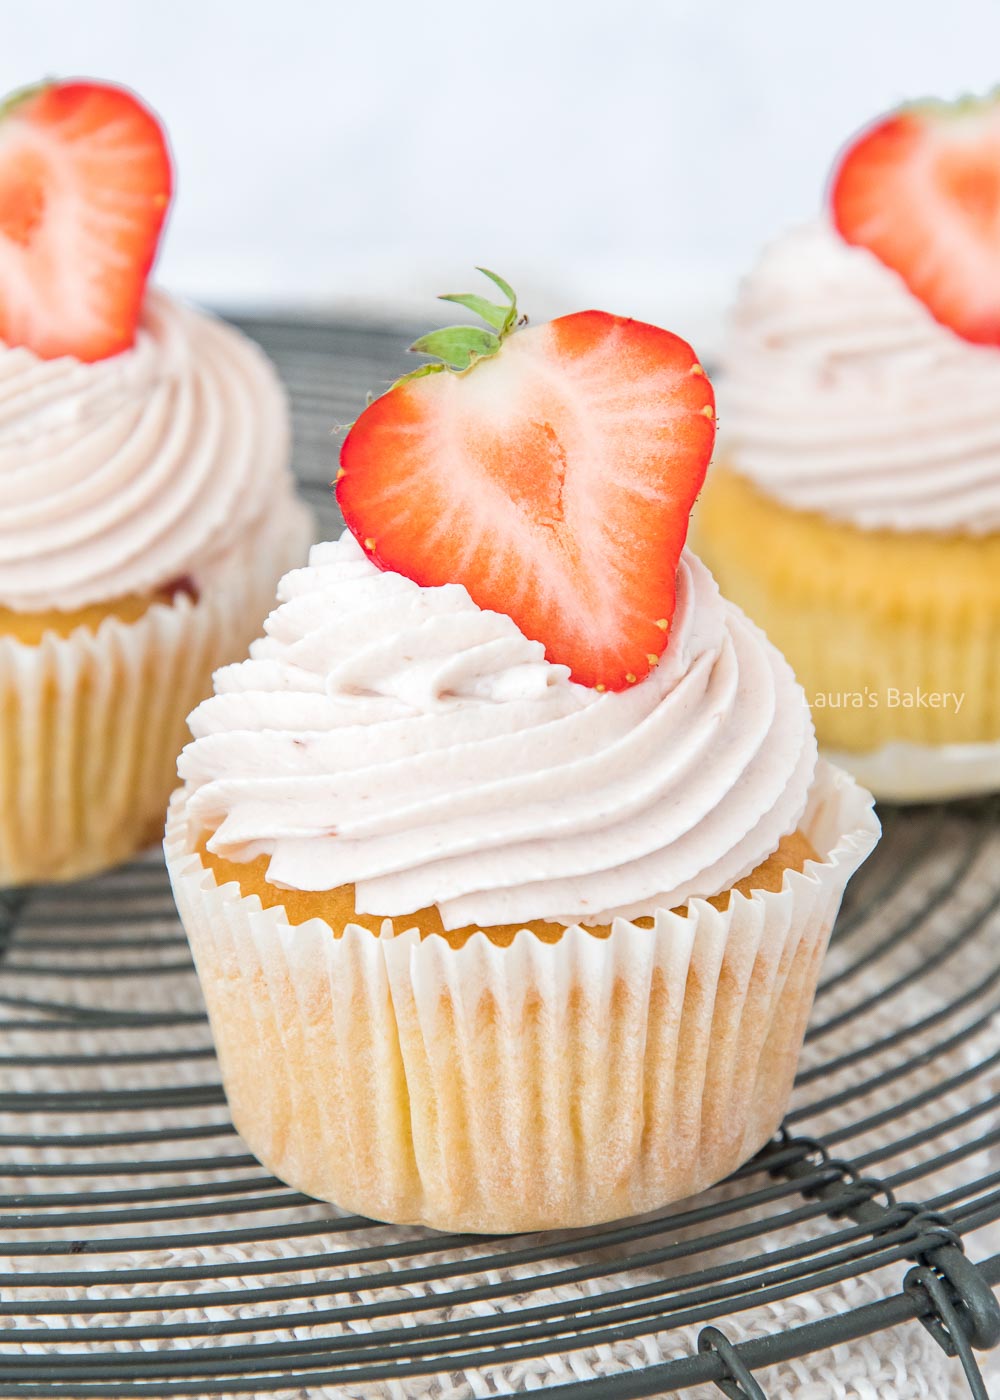
On top of the frosting, place half a strawberry. Gorgeous cupcake, isn’t it? You can go a little further with the decoration and add sprinkles, or chocolate sprinkles. Ooh, now I have an idea for chocolate chip cupcakes with strawberries. Now you know how I come up with my new recipes. Often they just pop into my head. Out of the blue, or because I am working on another recipe.

Strawberry cupcakes 4a

More strawberry recipes

If, like me, you always have strawberries in the house at the moment, you probably want to bake with them. Lucky for you, I’ve made many more recipes with strawberries; these are a few favorites:

Want to make cupcakes in a different flavor? Then you should try these Ferrero Rocher cupcakes!

Strawberry cupcakes

Print Recipe

4.60 from 5 votes

Strawberry cupcakes recipe

Now that strawberries are back in season, I love making all kinds of recipes with them. These strawberry cupcakes are a favorite around here.
Prep Time20 minutes
Cook Time18 minutes
Total Time38 minutes
Servings: 12 servings

Ingredients

  • 180 grams of unsalted butter
  • 135 grams of fine granulated sugar
  • 1 tbsp vanilla extract
  • 4 eggs
  • 180 grams of self rising flour
  • Pinch of Salt

Filling and topping

  • 12 tsp strawberry jam cupcake filling
  • 180 ml whipping cream
  • 3 tbsp vanilla sugar
  • 375 grams of mascarpone
  • 150 grams of strawberry jam mascarpone frosting
  • 6 strawberries

Instructions

  • Mix butter and sugar until creamy. Add the vanilla extract and eggs one at a time. Do not add the next one until the first egg is fully incorporated.
  • Then add self-rising flour and salt, mix until these dry ingredients are incorporated into the batter.
  • Take a cupcake baking pan and place the cupcake liners in the cavities, divide the batter between the cups. I personally do this with an cookie scoop/ice cream scoop. It works easily and you can distribute the batter nicely evenly this way.
  • Bake the cupcakes for about 18 minutes at 180 °C/ 350 ℉ (conventional).
  • Let them rest in the baking tin for a while before letting the cupcakes cool completely on a wire rack.
  • Use an apple corer to remove some cake from the center of each cupcake. Do not make the hole all the way to the bottom.
  • Fill each cavity in the cupcakes with strawberry jam.
  • To make the mascarpone frosting put whipping cream, vanilla sugar and mascarpone in a bowl. Mix briefly on a low setting and then on a high setting until the mixture is firm.
  • Lastly, add the strawberry jam and mix it into the mascarpone frosting on a low setting.
  • Fill a piping bag with star shaped nozzle with the strawberry mascarpone frosting and pipe nice swirls on the cupcakes.
  • Decorate each cupcake with half a strawberry to complete your strawberry cupcakes.
How to store and freeze cupcakes 5

I’m not the only one that enjoys homemade cupcakes. Are you wondering what’s the best way to store cupcakes? Look no further, you’ve come to the right place. I will tell you everything about how to store and freeze cupcakes. I’ll share my tips voor frosted and unfrosted cupcakes, and even tell you a bit more about cupcakes decorated with fondant or marzipan. This way, you always have fresh cupcakes.

What are cupcakes?

For those just starting out in baking, you may not immediately know what cupcakes are. They are actually small one-person cakes that used to be baked in a “cup,” hence the name. If you’re looking for a nice recipe: these strawberry cupcakes are one of my favorite cupcake recipes.

Although I myself always thought that cupcakes came from England, the very first cupcake recipe can be found in a cookbook written by the American Eliza Leslie in 1828. By the way, cupcakes were eaten in England at the same time as they were at tea parties.

You can fill cupcakes, decorate them with marzipan or fondant, or just spray a nice clump on them. In fact, you can do anything, but a plain vanilla cupcake is still delicious.

Cupcakes are little cakes, so they are stored in the same way as a loaf cake most of the time. This only changes if you have decorated your cupcakes with a nice swirl or perhaps fondant or marzipan. You are probably wondering what’s the best way to store your (un)decorated cupcakes? And where is the best place to store cupcakes? We’re going to cover all of that today so you will know how to store and freeze cupcakes.

How to store and freeze cupcakes 1

Storing unfrosted cupcakes

I like to prepare plain cupcakes this way and bake them in a large batch, so I can be sure the cupcakes will be at room temperature by the time I want to decorate them. And actually, cupcakes are so delicious on their own that decorations are not necessary at all. Especially when you flavored the batter of the cupcakes.

Undecorated cupcakes are always stored in an airtight container outside the refrigerator. This is because they will dry out in the fridge. You can only store them in the fridge if they are frosted. More on that later.

The cupcakes will keep for a couple of days (about 4-5 days). Plenty of time to prepare cupcakes for a birthday, bake sale, wedding or another special occasion. If you really want to prepare your baked goods in advance, you can also freeze cupcakes. Wrap them in freezer bags before putting them in the freezer. I prefer to do this in small portions of 3 or 4 cupcakes. They will keep in the freezer for 3 months.

Freezing cupcakes is ideal for preparing a lot of cupcakes, but also for those leftover cupcakes. It’s always a good idea to have some cupcakes in storage if you’ll ask me.

How to store unfrosted cupcakes

​Store at room temperature

After you baked the cupcakes in their cupcake liners in a baking tray, place the warm cupcakes on a wire rack and allow them to cool completely. After that, store them in an airtight container or wrap them in aluminum foil, they will keep for 4-5 days.

Store in the fridge

Can you put cupcakes in the fridge? I wouldn’t do that with unfrosted cupcakes. It’s not necessary and the fridge will dry out your cupcakes.

Store in the freezer

Use a freezer bag for freezing cupcakes. They will keep for 3 months. Make sure they are packaged air tight, because air (and moisture) can cause freezer burn. Freeze them in small portions so you’ll always can take out some frozen cupcakes to enjoy.

How to store and freeze cupcakes 2

Storing frosted cupcakes

I always wait with piping swirl just before serving. It’s the best option and gives the best results for frosted cupcakes in my experience. To make your baking life easier, I prepare the cupcakes and frosting in advance. it varies by frosting how I store them. Here are some examples of my most used frostings:

  • Buttercream frosting: outside the fridge, in a (dark and) cool spot. I only do this when I make the buttercream at the end of the day and need it the next day, preferably in the morning. Use a plastic container or plastic wrap to store the frosting. Storing it this way reduces the chance of the buttercream splitting. If it does split (mostly after storing in the fridge or freezer), you can just whip it again until it is smooth.
  • Cream cheese frosting: In the fridge in an airtight container
  • Ganache frosting: In a plastic container in the fridge.

After the cupcakes are frosted, I alway try to serve them within hours and store them in a cool place outside of the fridge in the meantime (only with buttercream frosting). If that’s not possible for you or you live in a warmer climate, you can store them in the fridge. I would do this for 1-2 days. Remember: frostings like cream cheese frosting should always be stored in the fridge.

I would not freeze cupcakes with a swirl whole. When the buttercream thaws, there is a chance that the cream will split, which is not a good look. It is better to freeze the buttercream separately so you can whip it when it thaws. Or make the buttercream fresh just before you’ll need it.

How to store frosted cupcakes

Store at room temperature

If you have a large and high storage container: use it! There are also special (reusable) cupcake carriers available, which are ideal if you bake cupcakes often. They are available as single layer or double layer carriers.

Depending on the frosting (and temperature), it’s okay to store them for a few hours outside the fridge. But also: when transporting your cupcakes, this will mostly be at room temperature.

Store in the fridge

Most cupcakes with a nice (buttercream) swirl on top are stored in the fridge, especially during summer or if you live in a warmer climate. You can use the cupcake carrier and place that in the fridge as a whole.

I would advice to wrap them before you store them in the fridge. Proper storage is important. Remember: cake will dry out in the fridge. Storing them right will prevent this as much as possible.

Store in the freezer

I never freeze frosted cupcakes. Due to space, but also because the frosting can easily split when thawed. It just has too many risks. I would not advice to store frosted cupcakes in the freezer.

How to store and freeze cupcakes 3

Storing fondant and marzipan cupcakes

Many years ago, I decorated a lot of beautiful and delicious cupcakes with fondant and marzipan. Their shelf life is longer because you seal the cupcake completely with the fondant or marzipan. You are actually wrapping it very well.

You can’t store these cupcakes completely airtight, otherwise there is a chance that the fondant and marzipan decorations will become soft and sticky. Decorated cupcakes will keep outside the refrigerator for about 5-7 days.

You can also freeze these cupcakes. Place them in a cake box and wrap a plastic bag or saran wrap around them to protect them from moisture. The cupcakes will keep for 3 months in the freezer.

Although I do not recommend storing cupcakes in the refrigerator, it is best to let them thaw here after you take them out of the freezer. Defrosting “slowly” in the refrigerator reduces the cold/hot differential, which also reduces the chance of condensation. This condensation could cause your fondant decorations to melt. Also, the cupcake is sealed from the outside air by the decorations, which reduces the risk of drying out.

How to store fondant and marzipan cupcakes

Store at room temperature

​Place them in a container and don’t place the lid completely tight on it. Otherwise, the decorations could become sticky.

Store in the fridge

I don’t recommend to store decorated fondant or marzipan cupcakes in the fridge. The moisture can cause the decorations to melt.

Store in the freezer

Wrap them airtight and you can freeze them for up to 3 months.  Defrost them ‘slowly’ in the fridge, it the best option due to condensation. Note: there will be condensation, but this way it’s minimal. After defrosting, place them on the counter and remove packaging so the dryer air can ‘remove’ the condensation.

How to store and freeze cupcakes 4
Apple cinnamon yogurt muffins 1a

Looking for a tasty snack? Look no further! These apple cinnamon yogurt muffins are just what you need.

Apple cinnamon yogurt muffins recipe

For snacks I like to try some things out, this time I wanted to make little yogurt-based muffins. For flavor I chose apple and cinnamon, one of my favorite flavor combinations that I love to bake with during the colder months.

Because just using yogurt as a base makes your batter very thick, I also used semi-skimmed milk. That made the batter just a little nicer to work with.

TIP: I love baking with yogurt, if you do too, you might like this easy yogurt cake!

Apple cinnamon yogurt muffins 4a

Maple syrup muffins

I decided I didn’t want to use granulated sugar for these muffins, so I decided to reach for the bottle of maple syrup. To be clear, that’s still sugar and not necessarily a “healthy” choice. Regardless, these muffins are more responsible than I normally make them, though. Especially if you leave out the cinnamon sugar on top 😉 .

No maple syrup in stock? You can also use honey or just granulated sugar. You can also vary in the amount. I used very little syrup, feel free to add more if you want sweeter muffins.

Tips for yogurt muffins

Use silicone cupcake liners

These silicone cupcake liners make it a lot easier to release your muffins. I always use them when I make muffins as a snack.

Use a cupcake pan

Even though silicone cups are sturdier than the paper variety, I still like using a cupcake baking pan. It’s easier to move your cupcakes around and they hold their shape well.

Pack by piece

I always pack snacks by the piece and then store them in the freezer. That way I always have a supply of delicious homemade snacks.

Apple cinnamon yogurt muffins 3a
Home made yoghurt muffins with apple

Print Recipe

4.88 from 8 votes

Apple cinnamon yogurt muffins

A delicious snack, these apple cinnamon yogurt muffins were very popular here and the stash quickly disappeared.
Prep Time10 minutes
Cook Time20 minutes
Total Time30 minutes
Servings: 16 servings

Ingredients

  • 300 grams of all purpose flour
  • 2 tsp baking powder
  • 1 tsp baking soda
  • Pinch of salt
  • 2 tsp cinnamon
  • 275 grams of yogurt
  • 175 ml milk
  • 2 eggs
  • 60 grams of sunflower oil
  • 50 grams of maple syrup
  • 1 apple
  • Optional: cinnamon sugar

Instructions

  • In a bowl, add flour, baking powder, baking soda, salt and cinnamon together. Stir to combine.
  • In a second bowl add yogurt, milk, eggs, sunflower oil and maple syrup. Whisk together with a whisk.
  • Peel the apple, remove the core and cut into small cubes.
  • Pour the yogurt mixture into the bowl of flour and use a spatula to make it into a batter. It does not matter if there are still some lumps of flour in it.
  • Add the diced apples and fold them evenly through the batter.
  • Pour the yogurt mixture into the bowl of flour and use a spatula to combine into a batter. It does not matter if there are still some lumps of flour in it.
  • Optional: sprinkle some coarse cinnamon sugar over the muffins.
  • Bake the yogurt muffins for 20-22 minutes at 200 °C/400 ℉ (conventional) or until golden brown.
Vanilla muffins -1

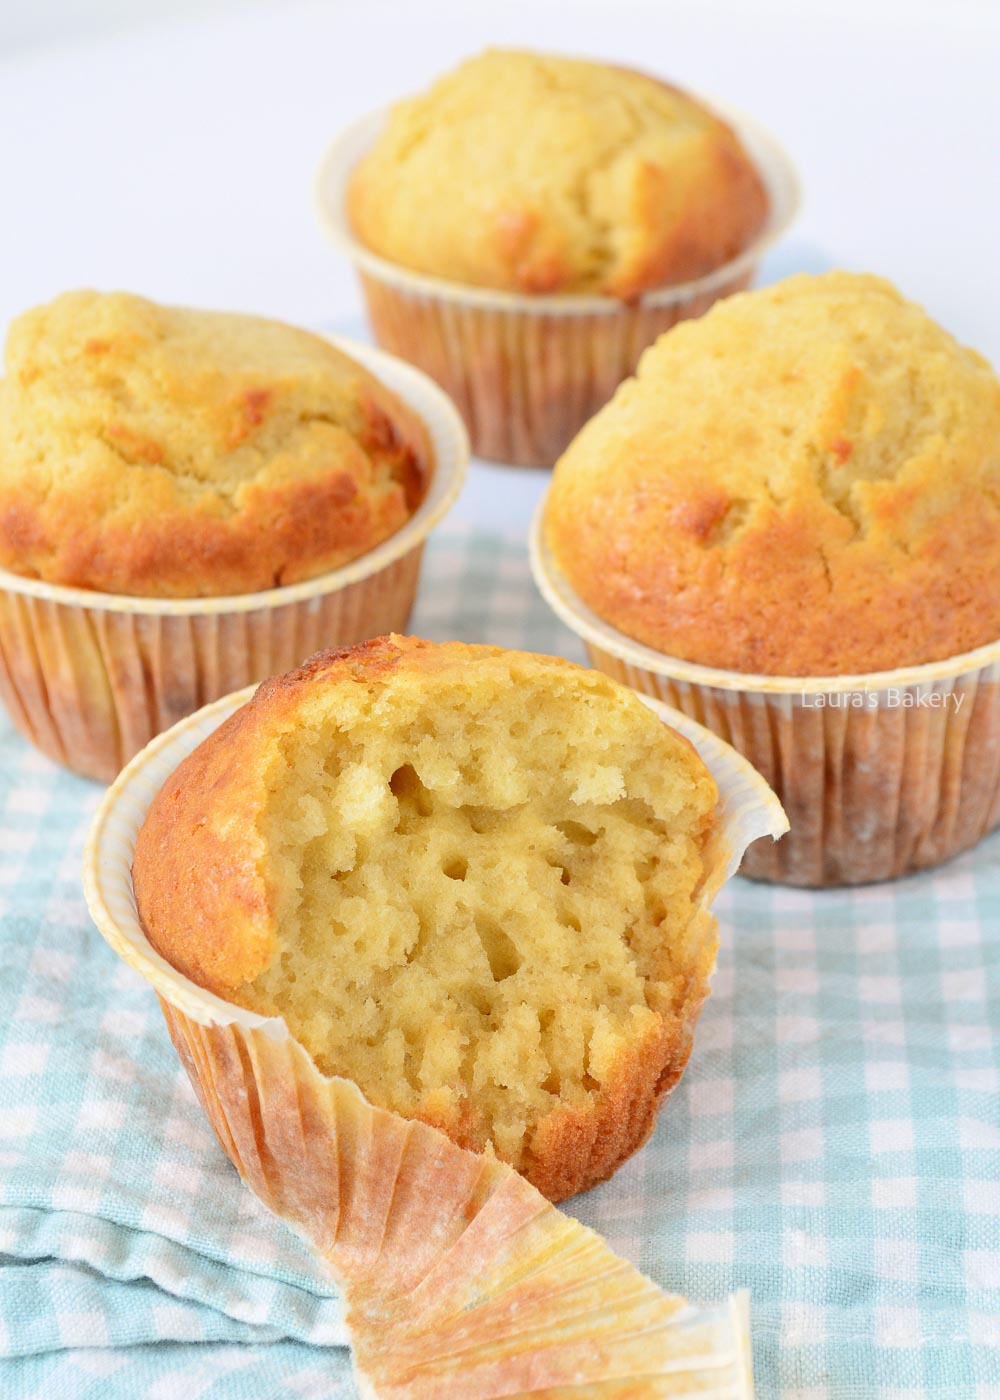
Want to start making your own muffins? Then this easy vanilla muffins recipe will come in handy! After all, a good start is half the battle, even with a perfect base muffin recipe.

Making vanilla muffins

In the Netherlands, we are used to a very different kind of muffin from the original American variety, which is often firm and bread-like. Dutch muffins are light and creamy, more like cakes. This difference tends to cause confusion, as I have noticed from the questions that accompany my muffin recipes. I have written an extensive explanation on the difference between muffins and cupcakes which is probably a good start if you’re confused.

So I set about creating a good basic muffin recipe that would suit Dutch tastes, and here it is: a delicious vanilla muffin recipe. You can’t really go wrong with this recipe as it is super easy and will result in delicious fluffy muffins ever time.

And you know what the great thing about basic recipes is? Exactly, you can vary them. Read on and you’ll find a tasty list of my favorite muffins (and much more of my personal favorites coming up soon!)

Vanilla muffins -2

How to make fluffy vanilla muffins

As with a lot of recipes it helps if all the ingredients are at room temperature. For this basic recipe you first mix all the dry ingredients together, followed by the wet ingredients. Then just combine the two together in a large bowl. Make sure not to overmix the muffin batter. It is fine if it is not completely smooth. If you overmix the muffins will become tough and dry. Not what you want! If you follow the recipe you will have a delicious fluffy texture. Check the full recipe in the recipe card.

Once the batter is made you line a muffin pan with some cupcake liners and scoop the batter into the liners. I like to use an ice cream scoop for even distribution of the batter. Now place the muffins in the preheated oven and bake for about 20 minutes or until golden brown and cooked through.

Place them on a wire rack to cool down completely before you add a topping. Now the thing about muffins is that – compared to vanilla cupcakes for instance – they don’t really need a topping to be delicious but you could absolutely add a simple vanilla glaze or something similar to the cooled muffins. Or just serve them plain with a cup of coffee. Which is in my opinion the best way to enjoy them.

Muffin recipes

Baking muffins is really my thing, I can’t deny that. I have developed dozens of muffin recipes over the years and shared them with you on (the Dutch)Laura’s Bakery and I will soon add them all here as well. Not just sweet muffins, but savory muffins too. I love them! Most of them use pretty simple ingredients making it the perfect quick to make treat.

Try some of my favorites too!

Vanilla muffins -3

Baking muffins: Tips

Mini muffins

You can easily make 48 mini muffins with this recipe. You can also halve the recipe to make 24 mini muffins. You will need:

  • A mini muffin tin
  • Mini paper muffin/cupcake cases

Bake the mini muffins for 12-15 minutes at 200 degrees celsius (top and bottom heat) until cooked through and golden brown.

Jumbo muffins

You can also use this recipe to make jumbo muffins. You will need larger paper muffin cups to hold more batter. Otherwise, you can follow the recipe below, but you will get fewer muffins and the baking time will be longer. I haven’t tested it with jumbo muffins yet, so I can’t give an exact baking time. Be sure to let me know in the comments below this recipe if you have tried it (successfully)!

Muffin toppings

A plain muffin is already very tasty, but it becomes even tastier if you sprinkle a tasty mix on top of the muffins before you put it in the oven. You can think of many toppings, but these are my favorites:

  • Crumb topping
  • Coarse cinnamon sugar
  • Shaved almonds

Fillings

As with the toppings, the choice of fillings is huge! Think blueberries, other red fruits, apple or pear pieces, chocolate chips, chopped nuts, cinnamon or speculoos spices, small caramel cubes, Oreo or treacle wafer pieces and so on. Or use your favorite jam to add to the muffins.

With muffin recipes, I never have to worry about fillings sinking to the bottom.

Substituting sunflower oil

It is possible to substitute sunflower oil if you like, you can read more about sunflower substitutes here.


Vanilla muffins

Print Recipe

No votes yet

Vanilla muffins

Take this basic vanilla muffin recipe and add your own twist. The result is delicious, fluffy muffins that are sure to go down a treat!
Prep Time10 minutes
Cook Time20 minutes
Total Time30 minutes
Servings: 8 muffins

Equipment

Ingredients

  • 120 grams caster sugar
  • 300 grams all purpose flour
  • 1 tsp baking powder
  • 1 tsp baking soda
  • Pinch of salt
  • 2 eggs M
  • 250 ml whole milk
  • 120 ml sunflower oil or another vegetable oil
  • 2 tsp vanilla extract

Instructions

  • Put the sugar, flour, baking powder, baking soda and salt into a large bowl and mix together briefly with a spatula.
  • In another bowl, whisk together the wet ingredients: eggs, milk, sunflower oil and vanilla extract.
  • Add the contents of both bowls together and mix with a spatula until combined, this may be a bit lumpy. Do't over mix!
  • Take a muffin tin lined with cupcake liners. Use an ice-cream scoop to scoop the mixture into the muffin tins. If you're making muffins, you can fill the muffin tray as much as you like – I personally like to fill it to about half an inch below the rim.
  • Bake the muffins for 20 minutes at 200°C/400˚F (conventional oven) until cooked through and golden brown.
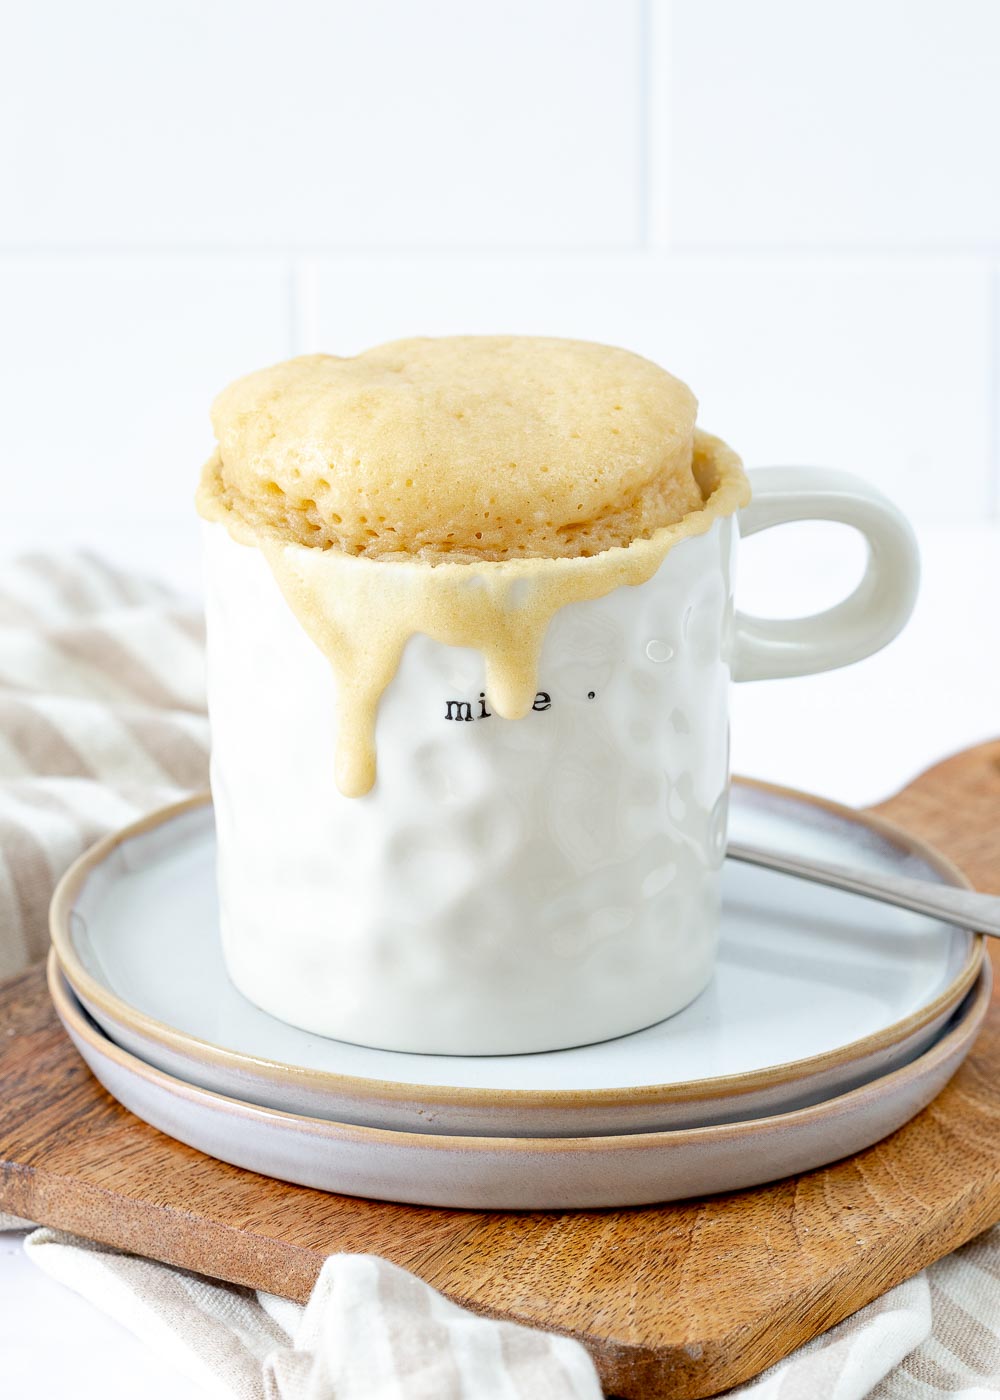
vanilla mug cake-1

In the mood for homemade cake, but in minutes instead of an hour? Make this easy vanilla mug cake recipe in the microwave!

What is a mug cake?

In a nutshell, a mug cake is nothing more than cake in a mug from the microwave. Truth be told, a real baker will now turn his nose up at even the mention of making a cake in the microwave, but it can be a real bonus if you know how to make this well. It’s the fastest way for making single serving desserts.

Cake in a mug

We all know this one. You’re in the mood for a nice piece of cake, but the thought of having to wait another hour for it to be done keeps you from getting into the kitchen. That’s why this easy microwave vanilla mug cake is ideal. With this recipe, you can enjoy a delicious serving of vanilla cake in a cozy mug in just five minutes.

Those five minutes include both the prep time ánd the baking time for this recipe. To prepare, all you need to do is stir the ingredients together in the mug. And then the real magic begins, because a mug cake takes about two minutes of microwave time. Yes, a microwaveable cake. And the best part?  It tastes delicious!

Baking tip: I usually use 250-300 ml (1 cup or a little more) large mug for my mug cakes. Make sure the mugs are microwave safe

Of course I already made a couple of different versions for you to try:

vanilla mug cake-3

Making a Mug Cake

Once you’ve mastered making the best vanilla mug cake recipe it is super easy to vary and make any kind of mug recipes you want. You can add pieces of fruit, chocolate, spices or nuts. Serve it with whipped cream or a scoop of vanilla ice cream and you have an individual serving of a very easy dessert. Pretty close to the perfect dessert or a sweet treat if you ask me!

What you need to make this mug cake

Making this you need pretty simple ingredients and you can add wet ingredients and dry ingredients together at the same time. It just requires a bit of stirring in your mug and you have the best mug cake you’ll ever need.

You will need:

  • self-rising flour
  • sugar – I use fine granulated sugar for this
  • salt
  • whole milk – you can even make this vegan by swapping the milk for plant based milk
  • vanilla extract – or use vanilla bean paste for even more vanilla flavor
  • oil – I use sunflower oil

Can you bake this cupcake in the oven?

After many questions, I have tested this extensively for you and yes, it is possible by adding some extra baking powder to make the cake rise sufficiently. This is because the microwave makes the cake rise explosively in a short amount of time, while eggs combined with baking powder make the cake rise in a normal cake recipe. I prefer not to use eggs in this case because it becomes a complicated calculation for a mug cake.

If you want to make this moist cake in the oven you do the following:

You add 2 grams of baking powder (a little less than half a teaspoon) to the recipe.

Bake this cupcake in the oven at 180°C (350˚F, conventional oven) for 20-25 minutes until done. Test with a cake skewer to make sure the cake is done, otherwise leave it in the oven for a few more minutes.

Want to bake more than one cupcake in the oven? Take my recipe for vanilla cupcakes and divide it in half or four for a smaller portion. After all, this is the best recipe for baking delicious cupcakes in the oven.

vanilla mug cake-2

Mug cake tips

Which mugs do you use?

The most important thing is to use a mug that is microwave-safe and roughly a little more than one cup in size (250-300ml).

Does this taste like a cake from the oven?

No, it will not taste the same because the ingredients are different. If I were to compare my recipe for vanilla cake and this cake in a microwave mug, I would prefer the vanilla cake from the oven. The addition of butter and eggs and the baking process in the oven gives me the best taste experience. However, that said, I can truly enjoy one of my mug cakes and make them on a regular basis.

Can I make this recipe without self-rising flour?

You can make this recipe with a combination of all purpose flour and baking powder if you don’t have self-rising flour at home.

My cupcake failed. Why did it fail?

It could be a number of things:

  • Was your microwave set to the correct wattage?
  • Didn’t you change any of the ingredients?
  • Did you use official tablespoons to measure the ingredients?

When cooking in the microwave, 30 seconds (or even 10 seconds!) can make a big difference. Has your cake become a bit too hard? You might want to lower the wattage or shorten the baking time next time.


vanilla mug cake

Print Recipe

3 of 1 vote

Mug Cake Recipe

Making a mug cake is not only delicious, it’s also incredibly quick. This easy vanilla mug cake recipe can be made in minutes in the microwave!
Prep Time2 minutes
Cook Time3 minutes
Total Time5 minutes
Servings: 1 portion

Ingredients

  • 6 tbsp self-rising flour
  • 2 tbsp sugar
  • Pinch of salt
  • 6 tbsp milk
  • 1 tsp vanilla extract
  • 2 tbsp oil

Instructions

  • Place all the ingredients in your mug and stir well. If you find it difficult to stir the base well, you can mix everything together in a separate bowl. Then simply pour the batter into your mug.
  • Place the mug in the microwave at full power for 140 seconds (2 minutes and 20 seconds). In my case, that’s 800 watts. The time may vary from one microwave to another.
  • Pierce your cake with a skewer to see if it is done; if the skewer comes out dry and clean, it is done.
  • You can top your cup cake with a dollop of whipped cream, but it tastes delicious plain!
Laura Kieft   I

Easy and delicious; these healthy banana oatmeal muffins are your new favorite muffins for sure! I love them as an easy breakfast or quick on the go treat. I already shared my favorite vanilla muffin recipe earlier this week and this is another favorite!

Banana oatmeal muffins

I don’t know what it is, but when I want to bake something more responsible, I often end up with recipes that include bananas. I am not at all a fan of eating bananas on their own, but I do like them in baking. This time I combined banana with oats and walnuts to make these banana oatmeal muffins.

I expected to have to make a few attempts before I had a successful version, but to my surprise they were good straight away. Really, these oatmeal muffins are delicious! And if you love banana flavor you’re gonna really love this banana oatmeal muffin recipe.

Oatmeal banana muffins-1

What do you need to make banana oat muffins

For making these I used pretty basic ingredients but I’ll give a few substitutes below. I will list the most important ingredients and possible substitutes. Make sure all ingredients are at room temperature when you start baking:

  • bananas – it’s best to use overripe bananas as they will give the most natural sweetness. Brown bananas are best.
  • self rising flour – if you don’t have any, check this article to find out how to substitute with regular all purpose flour. You can also substitute for whole wheat flour if you want
  • granulated sugar – you can replace this with coconut sugar or brown sugar. Keep in mind that coconut sugar has a pretty specific taste, almost a bit like caramel.
  • oatmeal – I used regular store-bought quick oats. You can definitely substitute for gluten-free oats. If you want to replace for steel cut oats the rest of the recipe will also need to be adjusted and I have not tested this myself.
  • walnuts – you can easily replace these with another kind of nut like almonds
  • milk – I used regular whole milk, but you can replace for almond milk or another non-dairy milk
  • sunflower oil – you can also use coconut oil or another vegetable oil if you prefer. If you do make sure the oil is melted (and cooled) before adding to the mix

You don’t need any fancy equipment for these healthy banana muffins either. No need for a food processor although I do sometimes like to mix the bananas with a stick blender but you can absolutely just use a fork to mash them. And a few bit and pieces is delicious anyway so no need for a machine for best results.

Making the healthy muffins

Now to make this healthy snack it is as simple as mixing the dry ingredients with the wet ingredients and using a spatula to mix the two together. Don’t overmix the batter as that will not do the muffins any good. Line the muffin pan with cupcake paper liners and scoop the muffin batter in. I like to use an ice cream scoop for ease of use but of course you can also just use two spoons or whatever else you find easy to use.

Place them in the preheated oven and bake them until golden brown and cooked through. Let them cool down on a wire rack and keep them in an airtight container or freeze them in individual portions for an easy snack. I also find they make for a perfect breakfast whenever I’m stressed for time. I take them out of the freezer to bring with me and by the time it is snack time they will be defrosted.

Laura Kieft   I

More baking with banana

As I said, I don’t eat bananas on their own, but I love incorporating them into recipes. Here are a few recipes from the blog that include bananas. Both responsible and not so responsible 😉 but all really delicious.


Oatmeal banana muffins

Print Recipe

No votes yet

Oatmeal Banana Muffins

These oatmeal muffins with banana and walnuts are quick to bake and very tasty. Make sure you try them!
Prep Time10 minutes
Cook Time20 minutes
Total Time30 minutes
Servings: 10 muffins

Equipment

Ingredients

  • 90 grams self-rising flour
  • 1 tsp baking powder
  • 1.5 tsp cinnamon
  • 40 grams fine granulated sugar
  • 50 grams oatmeal
  • 50 grams walnuts coarsely chopped
  • Pinch of salt
  • 1.5 ripe bananas about 200 grams
  • 90 ml whole milk
  • 1 egg M
  • 40 ml sunflower oil
  • 1 tsp vanilla extract
  • Optional: extra walnuts for decoration

Instructions

  • Make sure your bananas are ripe.
  • Put all the dry ingredients into a bowl: self-rising flour, baking soda, cinnamon, sugar, oats, walnuts and salt. Mix together.
  • Take a separate bowl for the wet ingredients. Add the banana first and blend until smooth. Add the milk, egg, sunflower oil and vanilla extract and mix until smooth. Pour this mixture into the dry ingredients and mix with a spatula until you have an even batter.
  • Divide the dough between the tins, filling them about ¾ full. You can fill them more, but remember that these are big muffins. I used silicone moulds so they come out easily.
  • Bake the oatmeal muffins in the oven for 18-20 minutes at 200°C/400˚F (conventional oven).
Candied lemon slices-5

To be honest, I had never made candied lemon slices or lemon peel before, so it was time to try. The result was these delicious candied lemon slices for my limoncello tiramisu. It’s the perfect topping for a cupcake, a lemon meringue pie, ice cream, a frosted cake or a dessert. Also a great gift for a lemon lover!

How to make candied lemon slices

Making candied lemon is a very simple process and an easy recipe but it is time consuming. You start by making the citrus slices. Slice lemons either with a very sharp knife or a mandoline. You’re aiming for uniformly thin slices.

Then you need to blanch the lemon several times in a pot of water (a large saucepan or a large skillet will work as well), and it is important to change the water after each boil. You do this because it removes the bitterness from the peel; after all, nobody likes the bitter part of the lemon peel.

Next step is to turn sugar water into a sugar syrup. In the sugar mixture you bathe the lemon slices so that they are soaking up the sugar. You repeat this process several times while the lemon slices drain in a single layer on a rack to let the excess syrup drip away and the sugar syrup continues to thicken.

This is not something you do in one evening, but you can keep the slices for a long time. The drying process also takes some time so keep that in mind. They will still be a little sticky but that’s normal.

Which lemons should I use?

Are you going to make this candied lemon recipe? If so, I would recommend using organic lemons. I know they are a lot more expensive, but when you know what nasty chemicals are sprayed on regular lemons, the organic lemons will be worth the money.

Some time ago there was a documentary on Dutch tv showing where that shine from the regular lemons comes from! Not what you want! Depending on where you live you can use meyer lemons or another type of fresh lemons.

Candied lemon slices-2

What is candying?

In a nutshell, candying is a way of preserving food. By cooking edible products in fat or sugar at a low temperature for a long period of time, they can be preserved for much longer. This applies not only to lemons, but also to candied duck (confit de canard), candied peel and candied ginger.

The method of candying with a sugar syrup not only makes it last longer, it also instantly transforms what you are candying into a kind of candy.

How does candying work?

When you first start candying fruit, you will usually use the sugar syrup method as described in the recipe below. In fact, you can candy many types of fruit. In general, harder fruits are the easiest to candy. Soft fruits cook too easily in the sugar syrup and become mushy.

You can use this recipe not only with lemon slices, but also with other citrus fruit such as lime or orange slices. It is also very nice to just grate the peel of a lemon and then candy-coat it, this gives a more subtle effect (and flavor) for a lemon candy decoration. No matter if you’re using citrus peel, orange peel or lime this will make for beautiful toppings on so many baked goods.

Candied lemon slices-3

Frequently Asked Questions about Candied Lemon slices

What temperature should the syrup be at?

Officially, the sugar syrup should be between 105 and 110 ˚C (220-225˚F). I personally have a sugar thermometer, but sometimes I do it myself without a thermometer. That’s fine as long as you’re careful not to turn the heat up to the highest setting. You want a low simmer or medium heat at most.

Is there a quicker way to make candy lemon slices?

Yes, there is. And I like quick recipes, so I tried this method first. Instead of soaking the slices in the sugar syrup several times, you can make one sugar syrup and cook the slices in it on a low heat for about 30-35 minutes. The syrup is equal parts water and sugar.

The risk here is that the hot syrup will damage the flesh of the lemon slices or cause them to boil to pieces. Unfortunately, this happened to me the first time (see the first photo) and I think it’s a shame, so I haven’t described this method in the recipe.

The quick method works very well for candying citrus zest or julienned peel. Here you use a cheese slicer to scrape off the yellow part of the lemon peel and then cut it into thin strips. After blanching and cooking in the sugar syrup, the strips are stored in a jar with the sugar syrup. That’s a great way to quickly make a sweet treat to go on your desserts.

Can you eat the slices whole?

Yes. By blanching (thin) lemon slices and then candying them, the slices fill up with sugar and become sweet. However, I should point out that the lemon peel is at its best when it has become translucent, and this is best achieved by cooking it as described above. So take your time. And because you can keep it for such a long time just use extra lemons and make a lot. It’s a delicious treat that goes so well with loads of different dessert recipes.

How should candied lemon peel be stored?

The best way to store them is in an airtight container in the fridge. Candied Lemon Slices will keep for months.

Can you use frozen lemon slices?

I have no experience with this, I never have them in the house. Again, I would recommend trying an organic version. If you do try it, I would love to hear if it works with frozen lemon slices!


candied lemon slices

Print Recipe

5 of 1 vote

Candied Lemon slices

Candied lemon slices are a beautiful and delicious decoration for cakes and desserts.
Prep Time10 minutes
Cook Time1 hour
Drying time6 hours
Total Time7 hours 10 minutes
Servings: 1 portion

Equipment

  • Sugar thermometer

Ingredients

  • 2-3 lemons
  • 250 ml water
  • 350 grams sugar

Instructions

  • Cut the lemons into thin slices, 0.5 cm thick. Do not use the top and bottom of the lemon.
  • Bring the lemon slices (or zest) to the boil in a pan with plenty of water, boil for about a minute and then drain. Repeat twice more and then place the lemon slices in a bowl of cold water. Drain.
  • In a saucepan, add the water and 250 grams (9 oz) of sugar. Bring to the boil (officially the sugar syrup should be between 105 and 110 ⁰C/220-225˚F) and leave to simmer for a minute.
  • Carefully place the lemon slices in the pan (with the heat off) and leave until the syrup has cooled completely. Place the slices on a wire rack.
  • Add another 50 grams (1.7 oz) of sugar to the syrup, bring to the boil and leave to simmer for a minute. Carefully place the lemon slices back into the thicker sugar syrup (with the heat off under the pan). Leave the slices to stand until the syrup has cooled, then repeat the process.
  • Once the slices have dried on a wire rack for 5-6 hours, you can dip them in extra sugar for a festive effect if you like. Let them dry again for a while and then dip them in the sugar again.
Ermine frosting -4

This delicious vanilla ermine frosting recipe is a must if you bake regularly! This airy buttercream does not taste of butter and is silky smooth, making it perfect for many different uses.

What is ermine frosting?

You’ve probably all heard of buttercream but might not be so familiair with ermine frosting. It is still a cream made mainly from butter and sugar. When you’re working with fondant you might want to use a 1:1 ratio of butter and sugar. This recipe for ermine frosting is essentially a flour buttercream. I’ll explain the difference with American buttercream below. Ermine frosting uses a thick paste of a milk-flour mixture in addition to the regular butter and sugar. This makes for a smoother end result and a much less buttery taste.

What is the difference between ermine frosting and buttercream?

In general a traditional frosting used in the US is made up of butter and sugar. That sometimes gets quite a grainy result due to the large amounts of sugar used. It also is quite heavy and the butter mixture tastes of butter. Due to the different method used ermine frosting is sometimes called a German buttercream or a French buttercream and it is more widely used in Europe, as compared to the United States. It’s sometimes also called a roux frosting as you first make a roux.

It’s made with less sugar and it has a lovely smooth texture. It is without a doubt the best frosting if you ask me!

TIP: Do you want to know more about the difference between cream cheese frosting and buttercream, I’ve got you covered!

Ermine frosting -2

This ermine frosting or buttercream recipe is very easy to make and very versatile. And the best thing about it for me is the taste. I completely dislike (butter) creams in which you can taste the butter, even though I am not particularly averse to butter. Thanks to the method I use in this recipe, the result is a silky, airy and delicious frosting. I highly recommend this vanilla ermine frosting!

What do you need to make the ermine frosting?

The ingredients used for this flour frosting are pretty simple and you will most likely have everything you need at hand.

  • All purpose flour
  • Milk – I like to use whole milk for making this
  • Unsalted butter – at room temperature
  • Icing sugar
  • Vanilla extract

Before you start making your ermine frosting make sure all ingredients are at room temperature for the best results.

How to make the ermine icing

For making the ermine buttercream frosting you start by making your flour-milk mixture first. For that you use a small saucepan and place it on medium heat. Whisk it so there are no lumps and keep whisking while you bring it slowly to the boil. Let it boil gently and lower the heat once it boils. The mixture will now thicken which should take roughly 5 minutes or so. You know the mix has the right pudding-like consistency if a wooden skewer will stay upright if you stick it in the middle.

Now place it in a bowl and cover with plastic wrap. Leave to cool to room temperature. Make sure there are no lumps and the mixture is smooth. If you do have lumps, press them through a sieve to get rid of those.

Ermine frosting -3

While the mixture is cooling, in another bowl, beat the butter and icing sugar until light and fluffy. Scrape down the sides of the bowl in between. You can also use the bowl of a stand mixer for this. Lastly add the vanilla extract and mix until smooth.

Once the flour mixture has cooled, add it to the butter mixture. Continue to beat at medium speed for five minutes. Then put the bowl back in the fridge for about half an hour. Your vanilla ermine frosting is now ready to use!

Recipes using buttercream

I use this recipe as a base for almost all the toppings in my cupcake recipes, and many cake fillings also use this ermine frosting as a base. So it can be used in many recipes.

Whenever I make my recipe for vanilla cupcakes, I add a nice swirl of ermine frosting.

Storing buttercream

This buttercream will keep for up to a week in the fridge. Remember that the cream will be much firmer if it has been in the fridge for a while. That also means that in order for the best results you should allow the ermine frosting to warm up an hour or so before using it. Stir of mix it well before using.

You can also store buttercream in the freezer for up to three months. In this case, defrost the cream in the fridge to avoid large temperature differences. Then follow the same steps as above.

Personally, I make my buttercream no more than 1 day before I want to use it, and in that case I do not store it in the fridge, but in a cooler place in the house. Obviously depending on the weather conditions at the time.

Vanilla butter cream requirements

As well as the ingredients, you will need a few other things to make buttercream. A pan and a mixer (with a whisk attachment), of course, to make the cream. But when your buttercream is ready, you will want to use it. You might want to fill and frost a cake, or pipe pretty rounds on a cupcake. With the following baking items you have everything you need to work with buttercream in general and this ermine frosting as well:

Spatula – you can use this to fill and frost your cake. I can’t live without my palette knives in different sizes.

Metal cake scraper – the 90-degree angle of the scraper makes it really easy to spread frosting on your cake evenly. You place the spatula against the cake on a cake turntable and turn it around. Your cake is quickly iced.

The turntable (for cake) – in my opinion essential when icing a cake. I have done it without, but the results are not as smooth.

Nozzles – You don’t need a lot of different nozzles, but I use about four specific ones all the time. For making clusters, filling cakes and one to get a head start on icing a cake. Wilton 1M is my absolute favorite.

Disposable piping bag – I prefer to use disposable piping bags. Not only do I find them more comfortable to work with, but they are also much more hygienic. You can also use re-usable piping bags if you prefer.

Colors – If you want to add color to your buttercream you will need gel based colors. I personally find the result with gel colors the most beautiful. They come in all the colors of the rainbow, so just pick your favorites.

Ermine frosting -6

How to flavor your buttercream

The great thing about this ermine frosting buttercream recipe is that you can vary it endlessly. I have given it many different flavors: cinnamon, caramel, blueberry, hazelnut, chocolate, strawberry and many more. In fact, anything is possible with this buttercream!

If you want to add other flavors to the vanilla buttercream, add them little by little and taste in between. It’s a shame if you add too much because you can’t take it back. Also, your buttercream can turn sour and split if you add too much liquid at once.

For a different kind of frosting check out this delicious cream cheese frosting too.

Tips and tricks for ermine frosting

How do you make gluten-free ermine frosting?

You might not think about gluten when you’re making a buttercream but for a beautiful smooth and fluffy buttercream you need flour. And flour does contain gluten. I haven’t tried making a gluten-free ermine frosting myself, but luckily the readers of Laura’s Bakery have! I read in the comments that you can replace the flour 1:1 with a gluten-free alternative, or with 28 grams of corn flour, for example. So you can make a gluten-free ermine frosting by using the recipe below but swapping out the all purpose flour.

My buttercream is split, how is that possible?

This is usually due to the ingredients being at different temperatures. That’s why making sure all ingredients are at the same temperature is important.

You can read more about how to fix split buttercream here.

Can I pipe flowers and decorations?

You can, but I still recommend using a ‘buttercream icing’. This is a typical American recipe based on vegetable fat. It is thicker so the flowers hold their shape well. There is no recipe for this on the site as of this moment.

Can I color this buttercream?

Of course you can! You can use gel based food coloring for the best results. Make sure to be careful. It’s easy to overdo it with a color. So add little drops and add more once it’s completely mixed.

Can I use this ermine frosting when I want to cover a cake with fondant?

I wouldn’t, as there is a chance that your fondant will melt due to the amount of moisture in the cream. Especially if you intend to store the cake for a while. For the icing, it is better to use a 1:1 ratio buttercream (butter and icing sugar). Of course, if you are not going to cover the cake with fondant, you can definitely use this ermine frosting for icing the cake. Even if you want to turn it into a drip cake afterwards.


Ermine frosting

Print Recipe

No votes yet

Ermine frosting (flour buttercream)

This recipe for airy ermine frosting is easy to make and gives a delicious result. A delicious vanilla buttercream that doesn't taste of butter and goes well with other flavors.
Prep Time20 minutes
Total Time20 minutes
Servings: 20 portions

Ingredients

  • 45 grams flour
  • 240 ml milk
  • 200 grams unsalted butter
  • 200 grams icing sugar
  • 1 teaspoon vanilla extract

Instructions

  • Sift the flour into a saucepan with the milk and whisk the flour into the milk to make sure there are no lumps. Put the saucepan on the heat and bring to the boil gently, stirring all the time. When it comes to the boil, lower the heat.
  • The mixture will now thicken, after about five minutes it will be thick enough. You can check this by sticking a wooden skewer into the mixture; it will stay upright if the mixture is good.
  • Put the mixture in a bowl, cover with cling film and leave to cool to room temperature. It is important that the mixture is smooth and free of lumps. If there are any lumps, it is best to press them through a sieve.
  • While the mixture is cooling, in another bowl, beat the butter and icing sugar until fluffy. Then add the vanilla extract and continue to mix until everything is incorporated.
  • Once the flour mixture has cooled, add it to the butter mixture. Continue to beat well for about five minutes. Then put the bowl back in the fridge for about half an hour. Your vanilla ermine frosting is now ready to use!