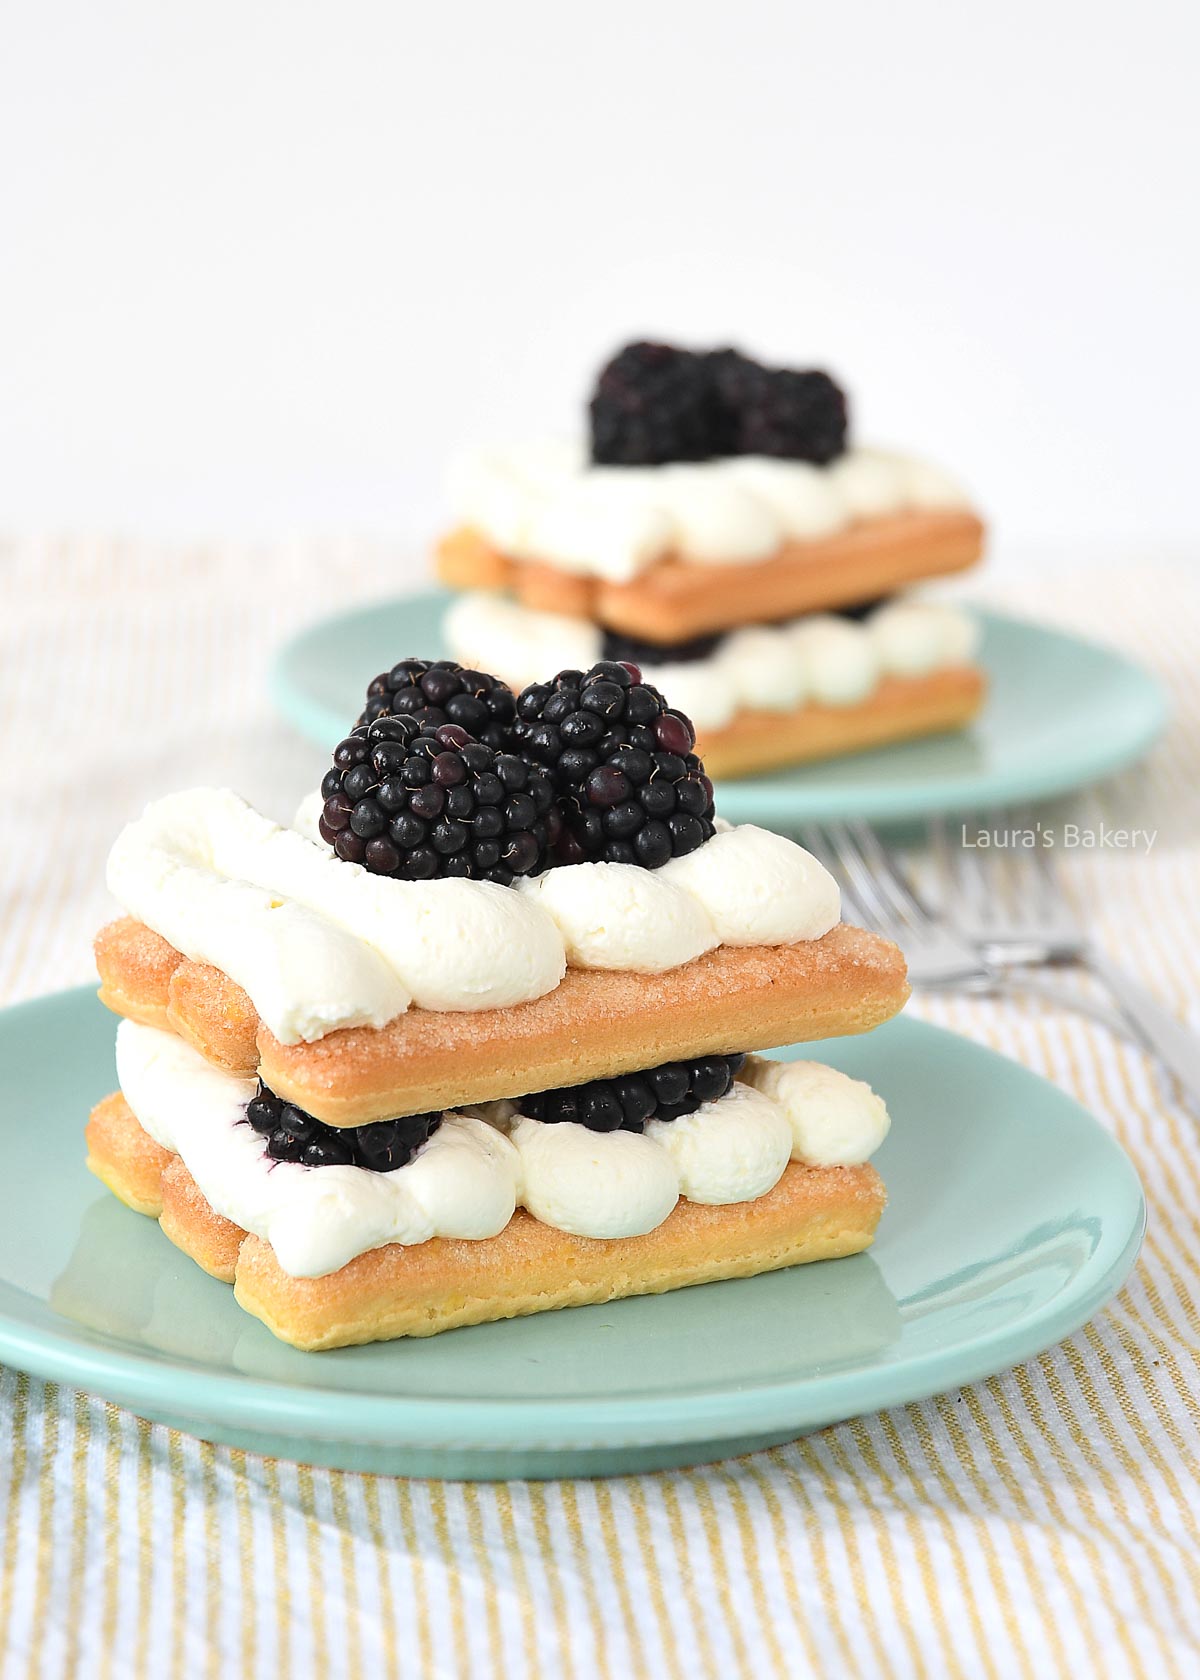
Blackberry trifle-3

Blackberry season is in full swing, which means you should enjoy them while you can. This blackberry trifle recipe is the perfect way to do just that. It’s incredibly easy to make, and the blackberries steal the show!

Juicy Blackberries and Crunchy Cookies

This easy trifle recipe is perfect for those times when you want a quick dessert with blackberries.

  • Super easy – this is one of those desserts that is super easy to make, but looks like you spent a lot of time making it. Perfect for parties.
  • Single serve – Serve every guest their own glass of blackberry trifle, how fun is that!

Recipe ingredients

  • Mascarpone cream – this is one of the elements that give the blackberry trifle it’s richness. But you can also use another kind of cream cheese if you want.
  • Heavy cream – I combine the mascarpone with just a little bit of sugar and some heavy cream whipped to soft peaks
  • Fresh blackberries – I used about 24 blackberries but it depends on the size of the fruit.
  • Cake – I used ready-made cake for an extra easy dessert, but you can of course bake your own. This delicious vanilla cake is perfect for this easy dessert, but any tasty pound cake will do.

Make sure to double check the recipe instructions and quantities needed in the recipe card below.

Blackberry trifle-2

How To Make Blackberry Trifle

First, a tiny bit of background; the trifle is originally a very English dessert, and a trifle dish is always several layers of cake, custard, fruit and sometimes jam. It is usually presented in a trifle bowl. I chose to use single-serving portions, but you can make it in one larger bowl as well. Up to you.

Making it is simplicity itself. You take the bowl of a stand mixer (an electric mixer will work just as well) and add the heavy cream, sugar and mascarpone. Mix this together and then mix until the mixture has stiff peaks. Grate a bit of lemon zest through the mixture and your filling is done.

Building the trifle

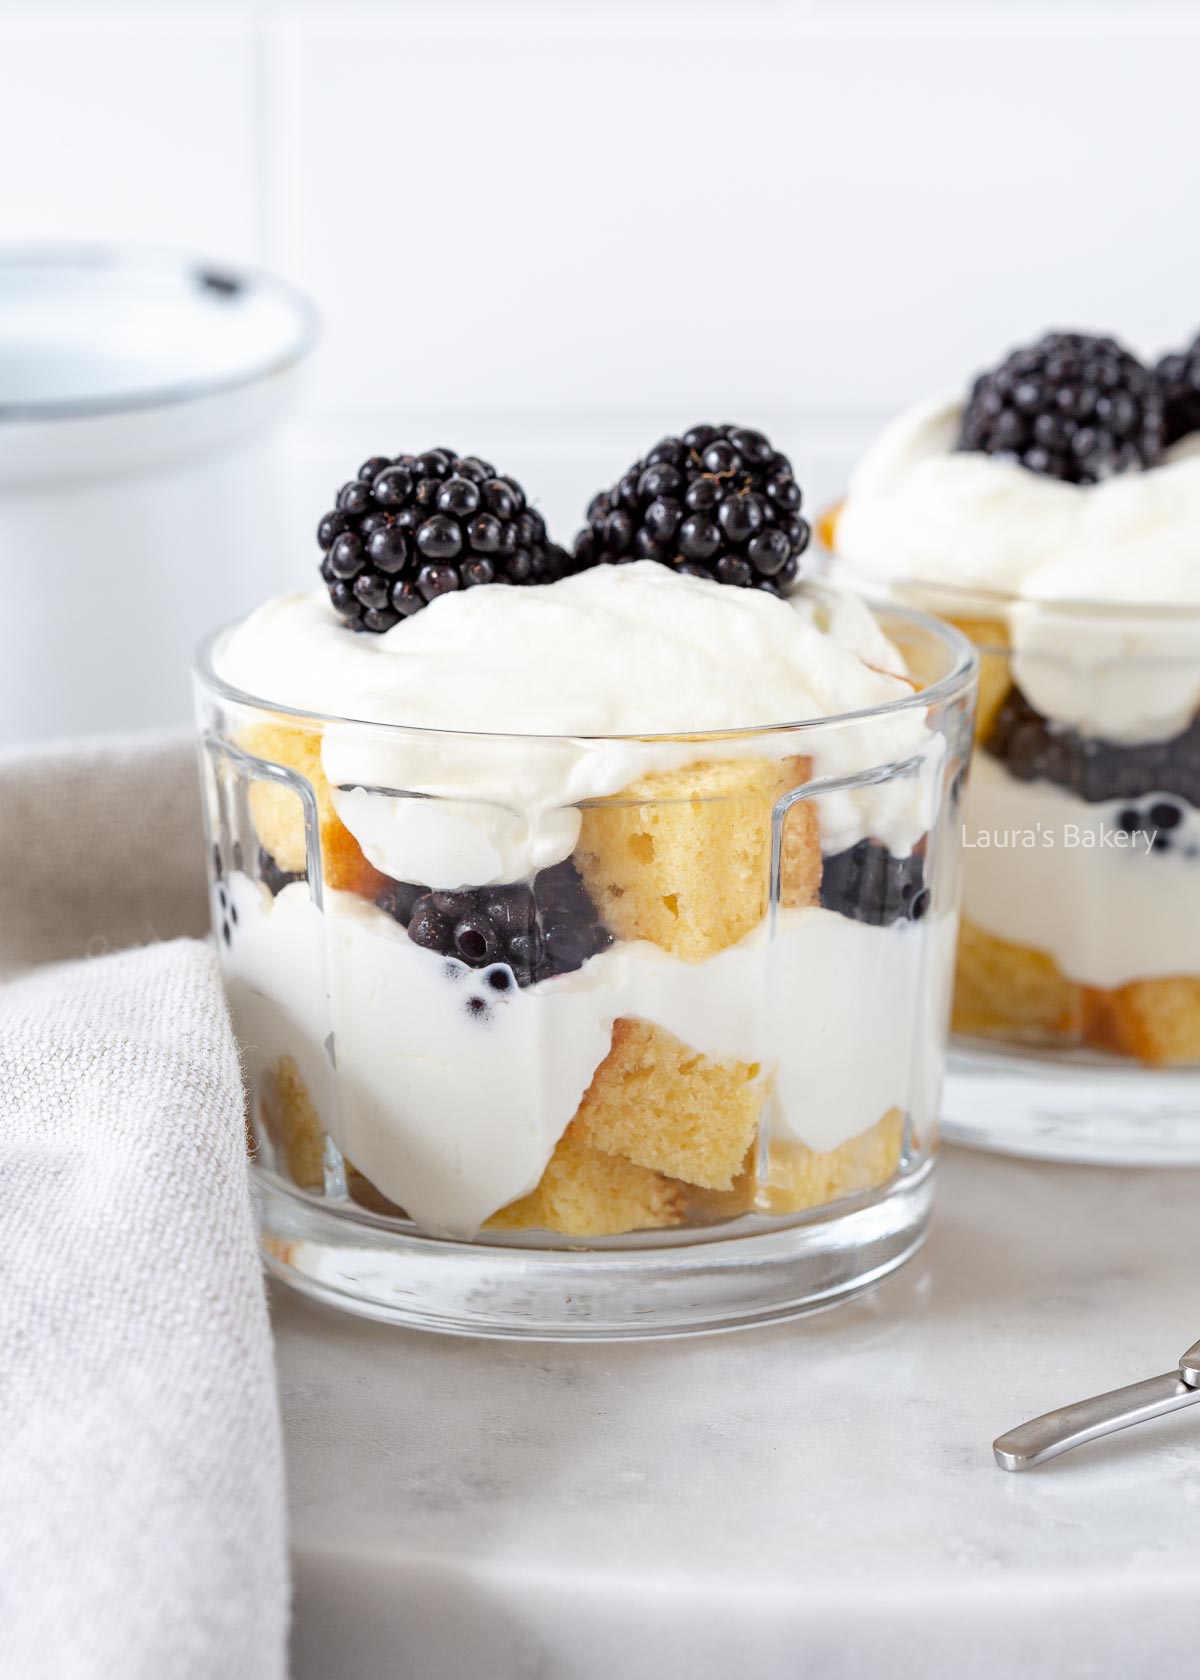
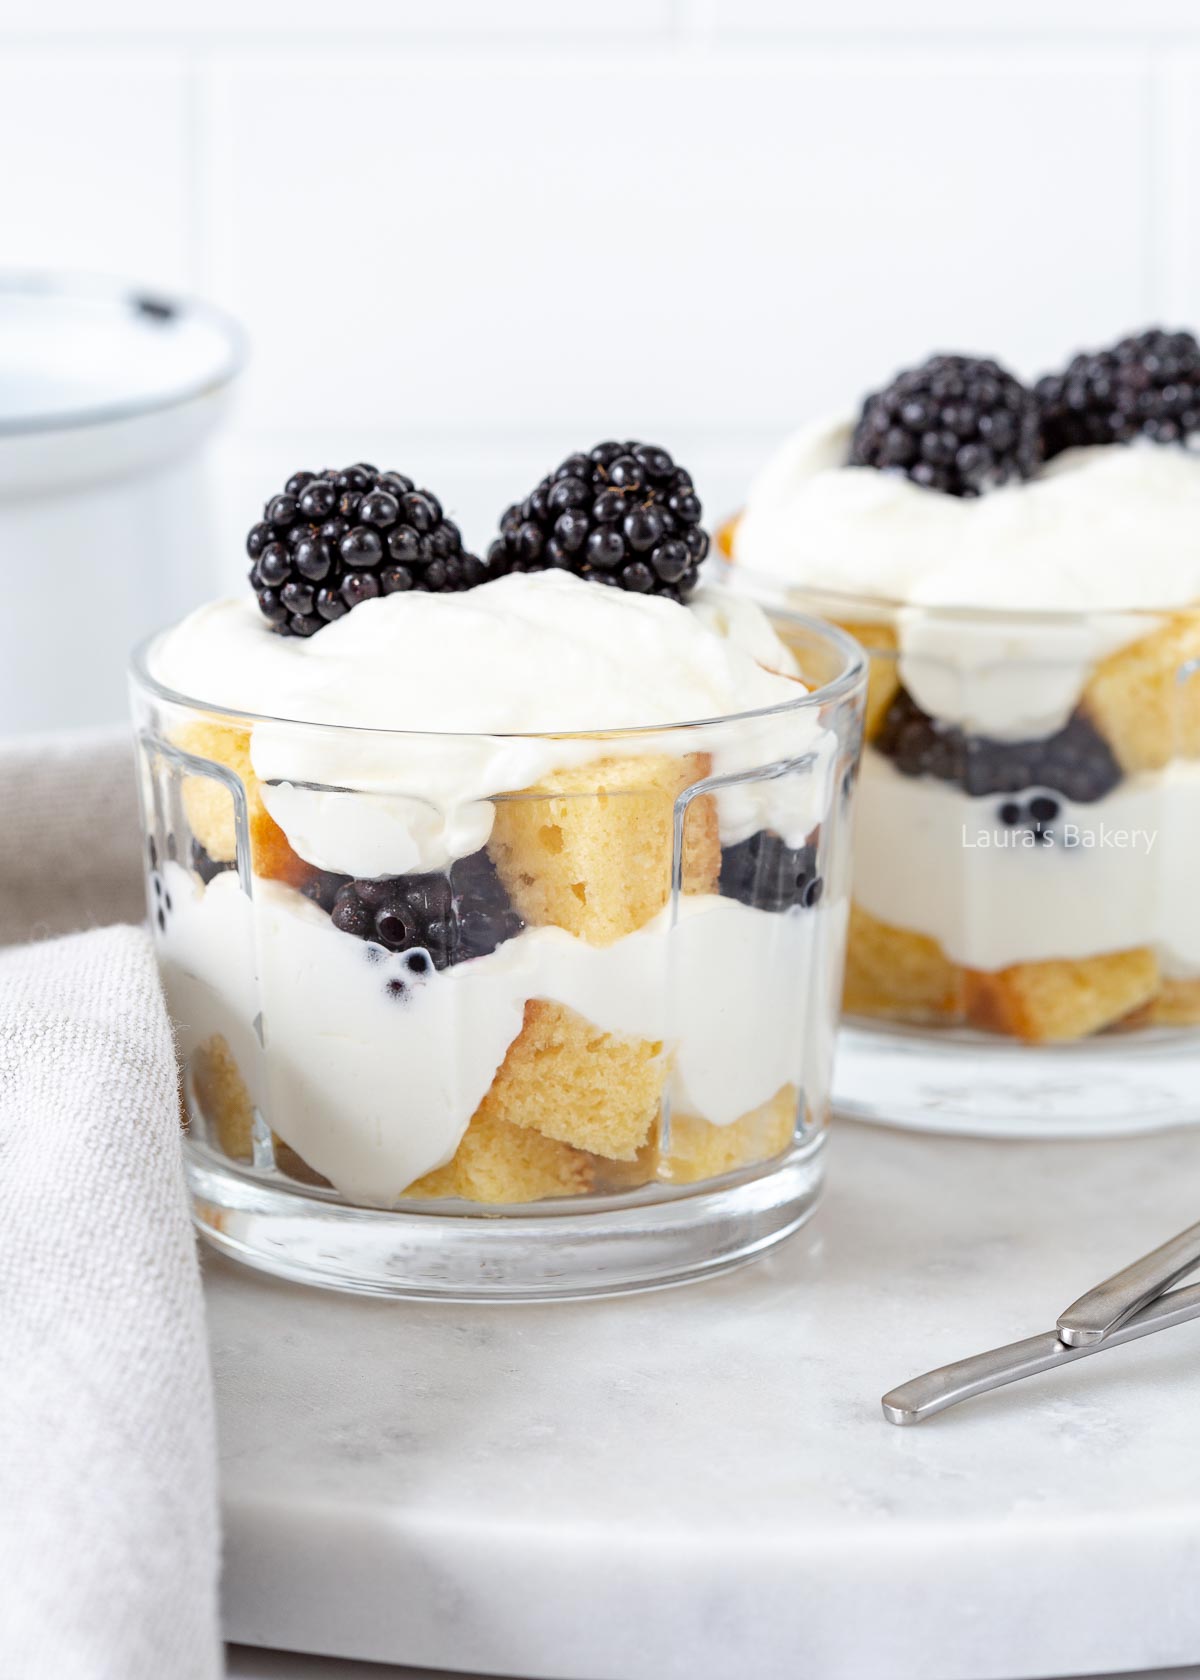
Now the fun part is to build the trifle inside your serving glasses. I first make a single layer of the cake at the bottom of each glass.

This works easiest if you cut the cake into cubes. Another option is to use a round cookie cutter and cut out a piece of cake out of a cake slice the same size as the glass. You will have left over pieces of cake if you do this.

Now add half of the cream mixture and top with blackberries. Add more cake, more filling and finish with two blackberries on top. It’s more or less similar to an Eton Mess actually.

Storing Blackberry Trifle

Trifle is easy to prepare in advance, making it the perfect dessert for a large group. You can assemble the desserts and store them in the refrigerator for a few days, or prepare the different components ahead of time.

How long does a trifle keep?

Once assembled, these blackberry trifles can be stored in the refrigerator for 2-3 days. You can also choose to store the components separately and assemble the trifles just before serving.

The mascarpone cream can be stored in the refrigerator for two to three days, and a homemade vanilla cake can be stored for about week outside the refrigerator, well wrapped. With a store bought cake, check the packaging.

Can you freeze a trifle with blackberries?

I do not recommend freezing trifles with fresh fruit. Frozen fruit releases a lot of moisture when thawed, which makes the dessert very moist. And more important: it doesn’t look as pretty when freshly made.

However, you could freeze the mascarpone cream and cake separately and assemble the trifles with fresh blackberries. Another option is to replace the fresh blackberries with blackberry curd, which allows you to freeze the dessert more easily.

More Delicious Blackberry Recipes

I love blackberries so whenever they are in season I try and make the most of it, with some of these delicious recipes:

FAQ Blackberry Trifle

How can I make a lighter version of the blackberry trifle?

You can make an extra light trifle by replacing the mascarpone (or cream cheese) entirely with whipped cream. Another tasty option is to replace the mascarpone with pastry cream and mix in the whipped cream.

Can I use blackberry jam?

Want to add another blackberry element to your trifle? Create an extra layer with blackberry jam! You can easily make it yourself.

If that seems too sweet, mash a few blackberries and spoon them on top of the cream. The purple color of the mashed berries or jam will look beautiful in the trifle.

Can I substitute the vanille cake?

Of course! You could use any flavor cake, a chocolate cake sounds amazing as well. Another perfect option is to bake this lemon loaf.


Blackberry trifle

Print Recipe

No votes yet

Blackberry Trifle Dessert

Are blackberries in season? If so, then you really must try this trifle dessert with blackberries. It’s incredibly easy to make, and the blackberries steal the show!
Preparation10 minutes
Cooking5 minutes
Total15 minutes
Servings: 4 people

Equipment

  • 4 dessert glasses

Ingredients

  • 200 ml heavy cream
  • 100 grams mascarpone or other cream cheese
  • 2 tbsp fine granulated sugar
  • 1 lemon
  • 24 blackberries washed
  • 4 slices vanilla cake

Instructions

  • In a bowl, combine the whipping cream, mascarpone, and sugar. Mix on low speed until the mascarpone is fully incorporated and there are no lumps. Then, mix on high speed until the mixture is stiff.
  • Grate a quarter of the lemon zest (note: only use the yellow part; the white part is bitter) and mix it into the cream with a squeeze of lemon juice.
  • Taste the cream mixture to see if it is to your liking.
  • Cut the cake slices into equal cubes, then divide half of the cubes between four dessert glasses. Spoon half of the lemon cream over the cake cubes in the glasses and top with four blackberries per dessert glass.
  • Divide the remaining cake cubes and lemon cream between the glasses. Finish each dessert with two blackberries and a sprinkling of powdered sugar, if desired.
Laura Kieft   I

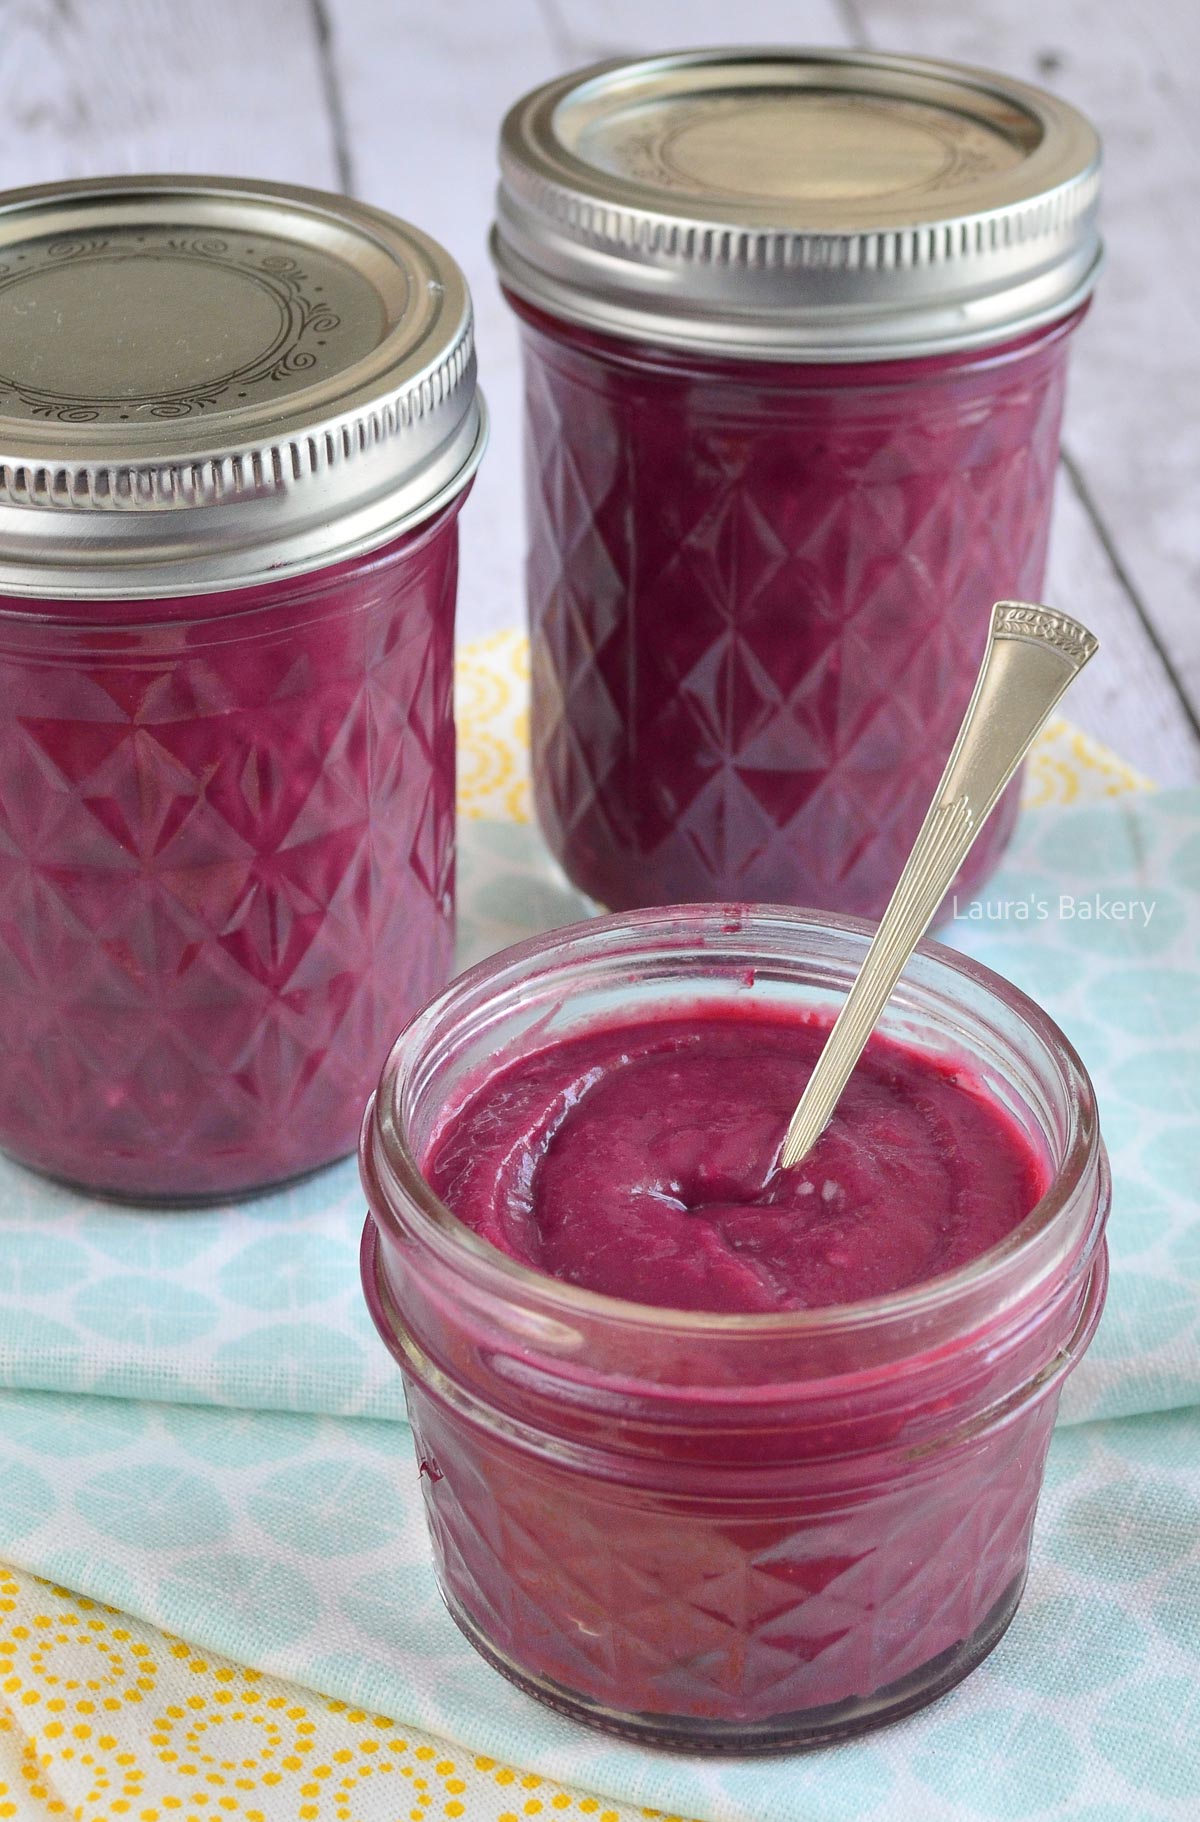
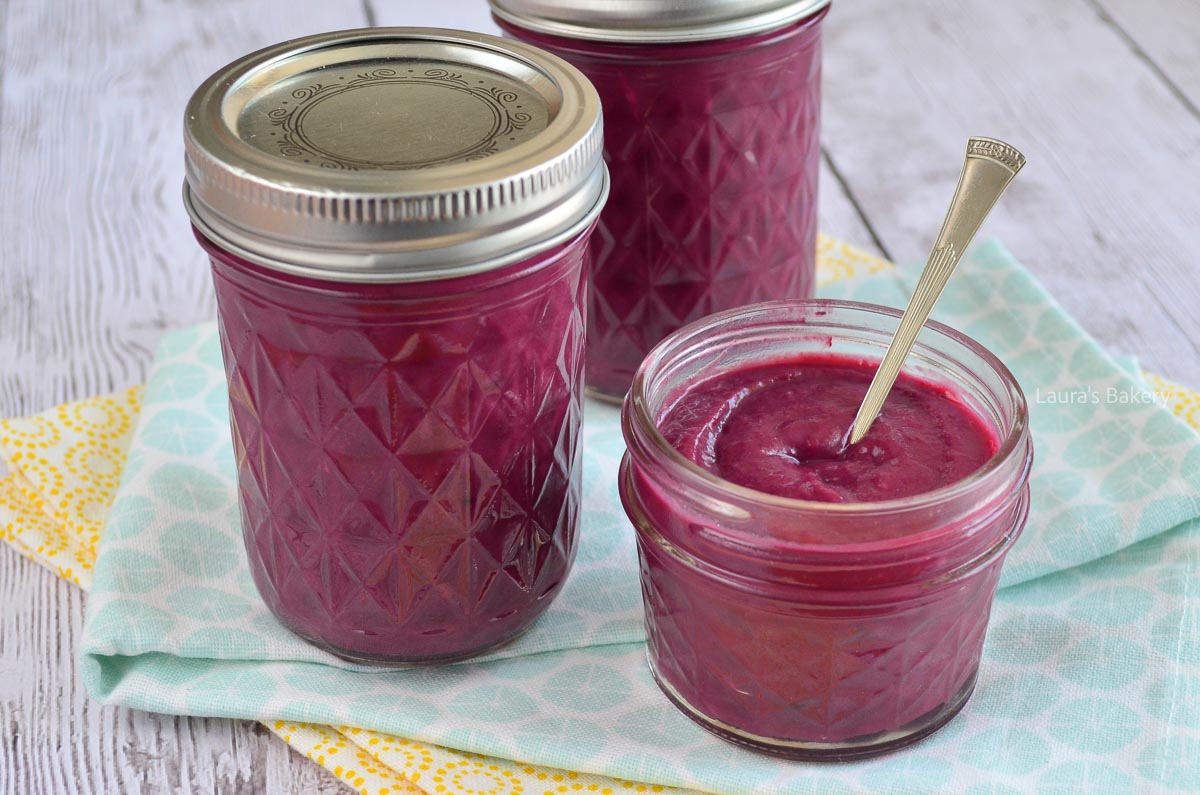
A few years back during blackberry season I had a enormous bowl of blackberries and made all kinds of recipes with them. One of my favorites was this delicious blackberry curd. Perfect for pies, desserts and much more!

Homemade blackberry curd

For a long time, I thought you could only make curd with citrus fruits. For example, lemons for lemon curd and limes, grapefruits, and oranges for other types of curd.

But then I discovered that you can make curd from many different fruits! That opened up a whole new world of possibilities! My mind went into overdrive, and I came up with all kinds of curds and recipes to make with them.

The first variation I tried was blackberry curd. My first attempt wasn’t quite what I had hoped for, so I tried again. Fortunately, I had picked quite a few blackberries and had enough to experiment with.

The second time, everything went well, and I made a delicious blackberry curd. You can use curd in many recipes, such as replacing lemon curd in lemon meringue pie. You can also just spread it on bread, serve it with ice cream, or add it to yogurt. There are plenty of delicious ways to use it! Or try it in this blackberry trifle or blackberry tiramisu.

Why this recipe works

  • Make the most of blackberry season – nothing better than to use those fresh berries!
  • Great twist on a classic – if you love lemon curd you’re going to want to try this variation!

Recipe ingredients

  • Blackberries – you will need quite a bit so make sure you have enough blackberries. You can also use raspberries and make a raspberry curd!
  • Eggs – I use the whole eggs, so both egg yolks and egg whites.
  • Lemon – you need roughly 1-2 lemons, depending on the size, for 4 tablespoons of lemon juice
  • Butter – make sure to use unsalted butter

Check the recipe card for full instructions.

Blackberry curd-3

How to make the blackberry curd

Making the blackberry curd is very similar to making a lemon curd. And since there is also lemon juice in this recipe, you might even consider this a blackberry lemon curd.

Step 1: Make a blackberry puree

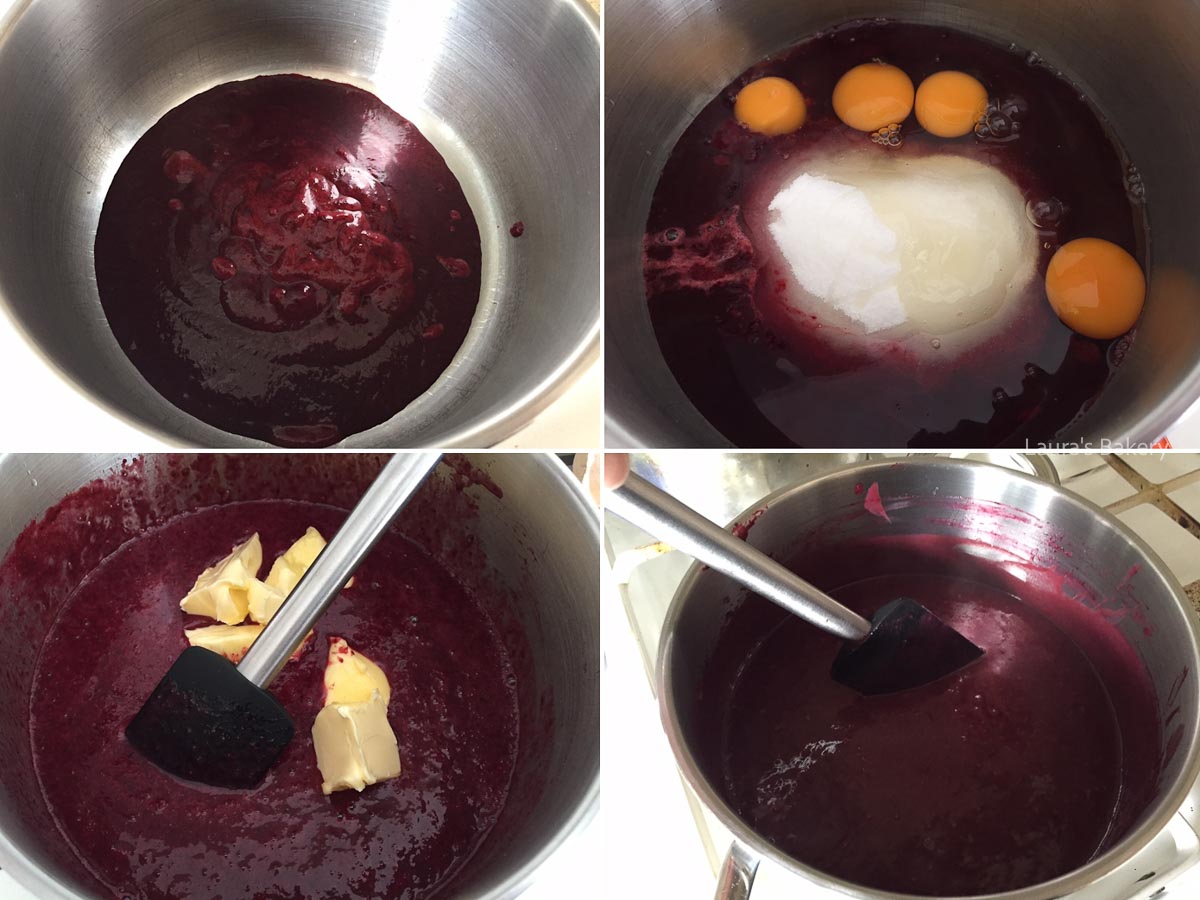
The first step is to puree the blackberries and, using a fine mesh sieve, strain out all the seeds. If you can get your hands on a store bought blackberry puree that’s fine as well.

Step 2: Saucepan or double boiler

Now, combine the blackberry puree with the lemon juice, sugar, salt, and the eggs in a small saucepan. You can also use a double boiler to prevent the heat from being too high and cooking the eggs.

In that case use a clean bowl and place the bowl on the saucepan filled with a small layer of water. Make sure that the water doesn’t touch the bowl.

Step 3: Add butter

Next, you add the butter and gently stir your mixture until the butter has completely melted and dissolved into the mix. Now, continue stirring until the mixture resembles the thickness of yogurt.

You can also test it on the back of a spatula. Coat the spoon with the blackberry mix and run a finger through it. If the line doesn’t close immediately, your blackberry curd is ready.

Step 4: Fill the jars

If you want to be able to store the blackberry curd for a longer time pour the hot curd into clean jars, screw the lids on and turn them upside down. Leave for at least 5 minutes before turning them upright again.

This will vacuum seal the lids on top of the jars. If you’re planning on using the curd right away, you can simply add some plastic wrap on top of the curd to prevent a skin from forming on the surface of the curd and let it cool that way.

Storing the blackberry curd

Unopened jars of blackberry curd can be kept for up to a year. If kept in the fridge, it can be kept for about two weeks.

More blackberry recipes

  • Blackberry popsicles
  • Blackberry tiramisu
Laura Kieft   I

FAQ: making blackberry curd

Will the curd still be smooth using whole eggs?

It can be very smooth if made carefully. To avoid curdling or bits of cooked egg, cook the curd over gentle heat and strain it through a fine mesh sieve after cooking to remove any cooked egg solids.

What will help as well: beat up the eggs before you add them.

How do whole eggs affect the taste and texture?

Whole eggs make the curd a bit firmer and less silky than a yolk-only version. The taste remains bright and fruity, but the richness is slightly reduced. It isn’t that big of a difference though.

Do I need to adjust the cooking time or technique?

Yes. When using whole eggs, cook the curd slowly over medium-low heat, whisking constantly to prevent scrambling. It may take a few extra minutes to thicken compared to yolk-only curd.


Blackberry curd

Print Recipe

No votes yet

Blackberry Curd

Lemon curd is the best known, but other ingredients also lend themselves well to curd. Blackberries, for example! Here’s the recipe for blackberry curd.
Preparation10 minutes
Cooking10 minutes
Total20 minutes
Servings: 600 ml

Ingredients

  • 300 grams blackberries
  • 4 tbsp lemon juice
  • 200 grams sugar
  • Pinch of salt
  • 4 eggs
  • 60 grams unsalted butter

Instructions

  • Puree the blackberries and strain out all the seeds.
  • Combine the puree, lemon juice, sugar, salt and eggs in a saucepan and stir until smooth. Place the pan over low heat and add the butter. Continue stirring gently until the butter has completely dissolved.
  • Then, continue stirring for about 10 to 15 minutes, until the mixture has the consistency of yogurt.
  • Pour the blackberry curd into clean jars, screw on the lids, and turn them upside down. Leave them like this for at least five minutes before turning them upright again. You will hear the lids click when they are vacuum sealed.
Vegetarian couscous salad-2

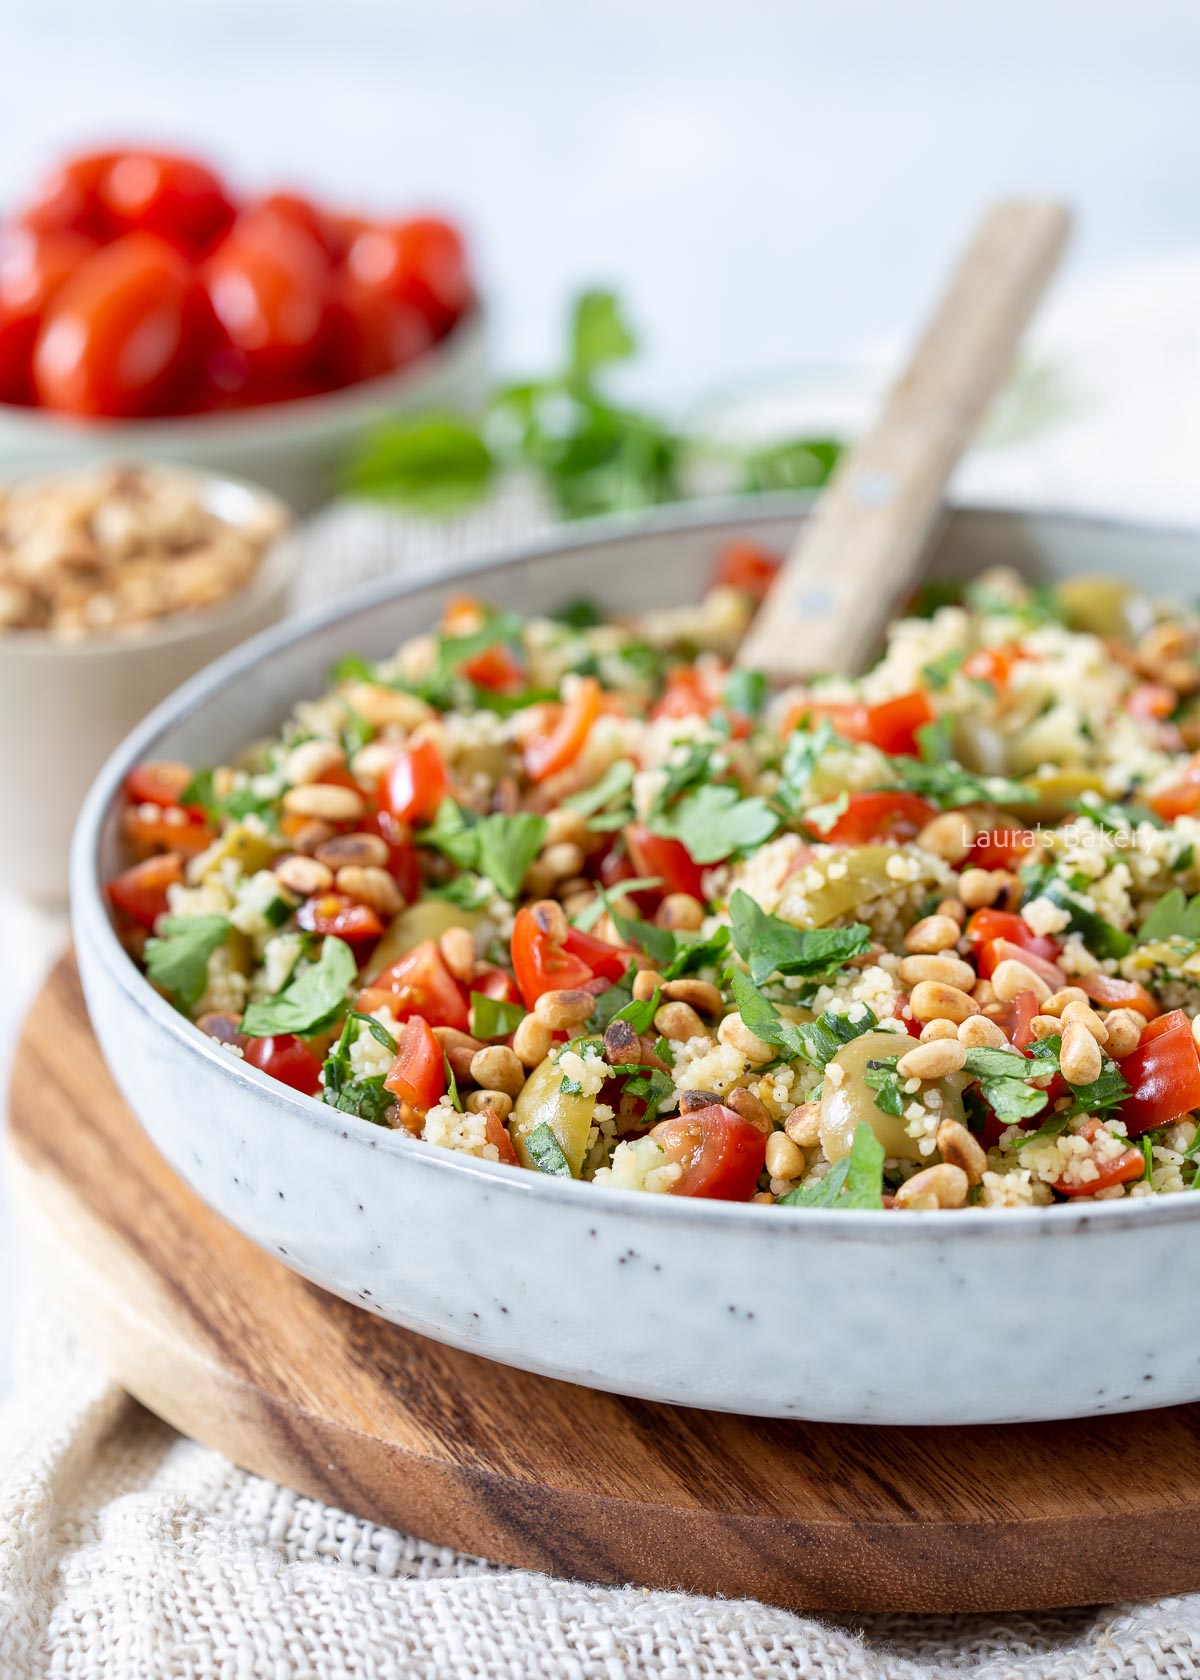
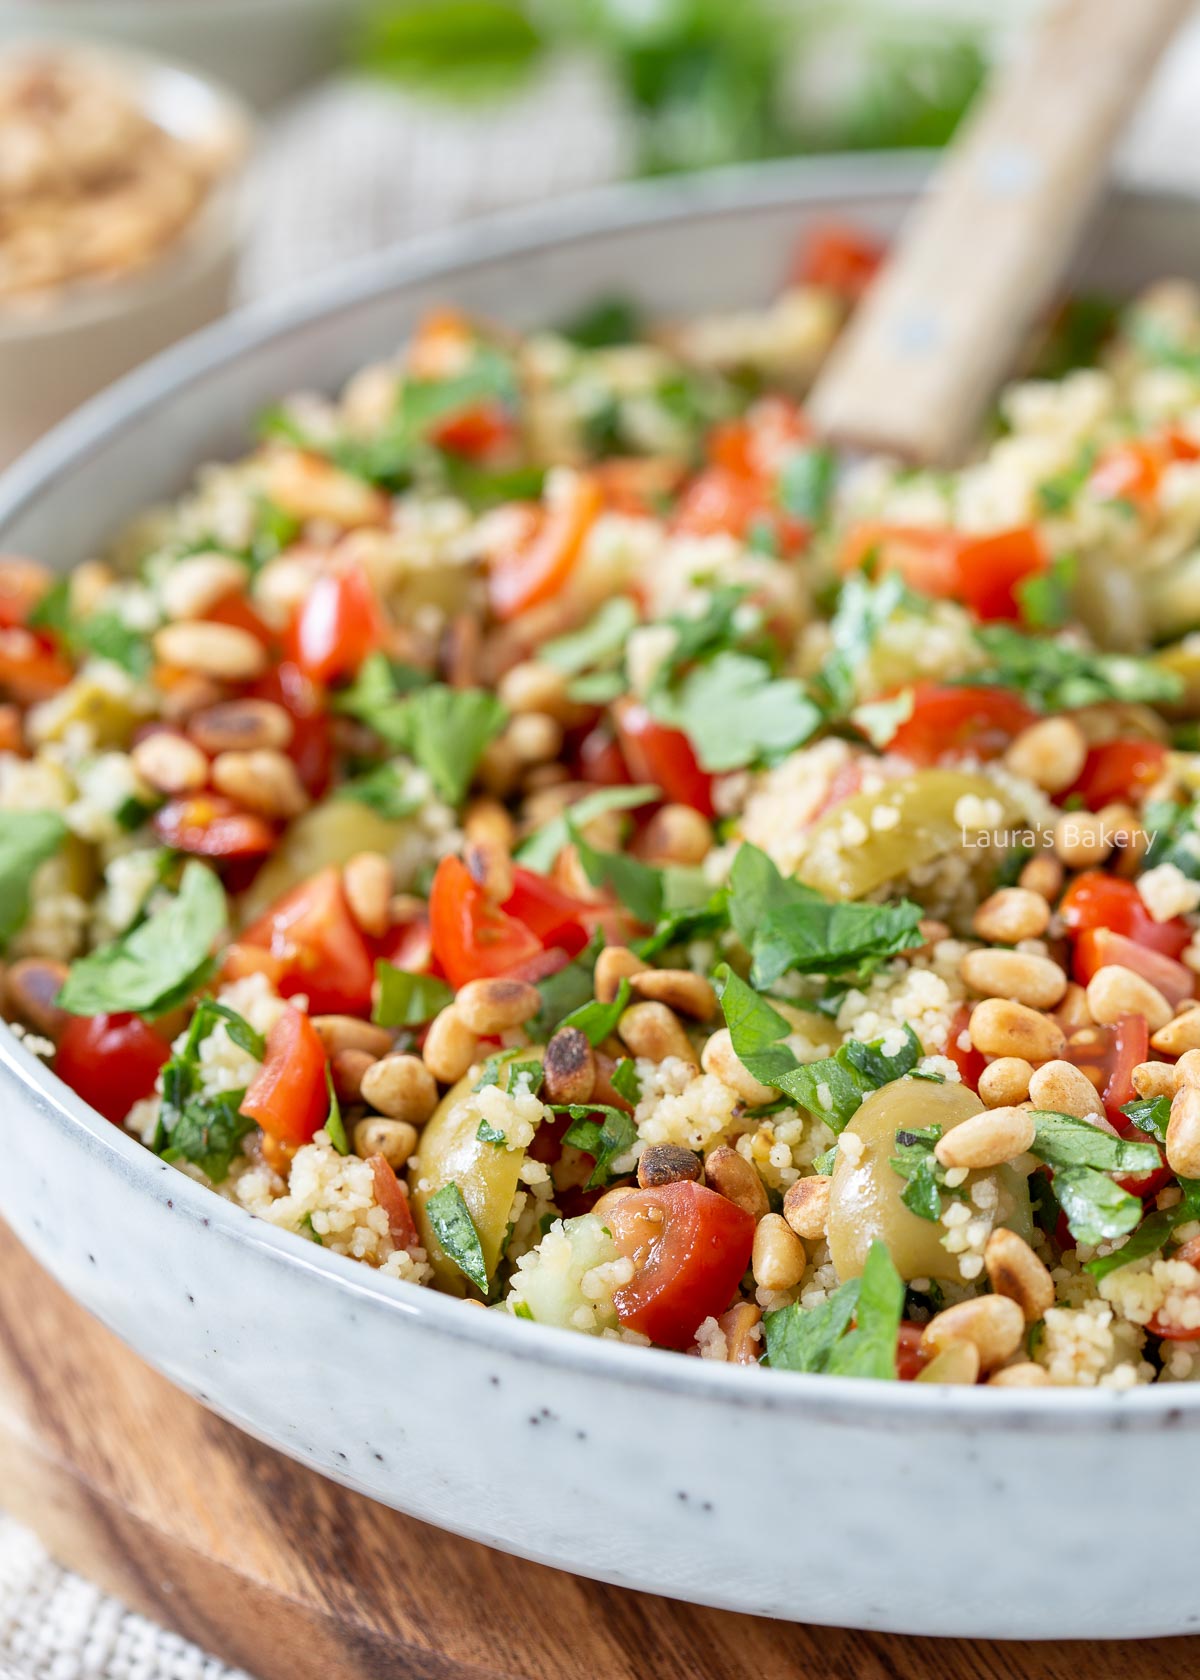
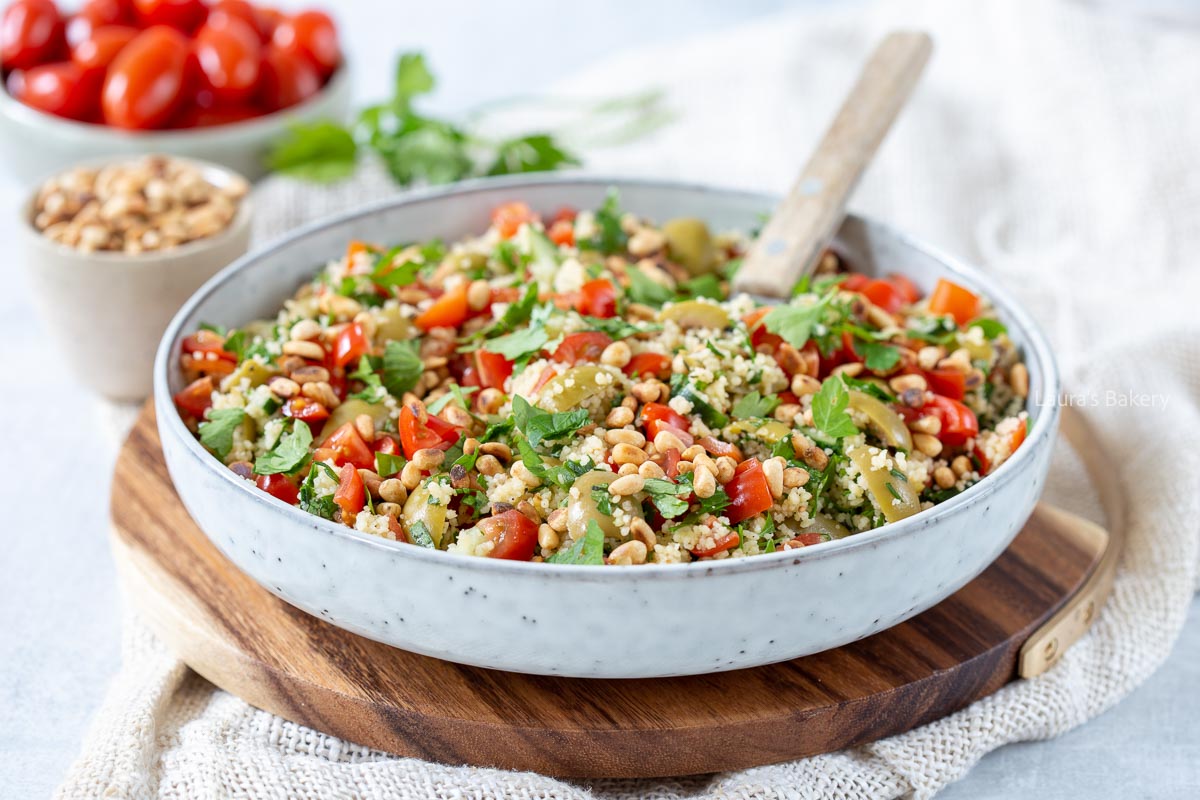
This delicious vegetarian couscous salad is similar to tabbouleh and makes a great side dish. This recipe is also suitable for vegans and can easily be adjusted to your liking.

Why this recipe works

  • Perfect for summer – wether it’s for your next BBQ, a quick lunch or even as a main dish for a light dinner, this couscous salad is super versatile
  • Easy – virtually no cooking is needed (except of course for the couscous itself) so perfect for hot summer days.

Recipe ingredients

  • Couscous – you can make this easy salad with both regular couscous and pearl couscous
  • Cherry tomatoes – make sure to use sweet and ripe tomatoes. Any kind will work as long as they are flavorful
  • Olives – I used the olives that have garlic inside of them, which I love in this salad, but you can use any kind of olive you like. Kalamata olives are also a favorite here.
  • Fresh parsley and fresh mint – of course, you can use other fresh herbs but parsley and mint are essential for this mediterranean couscous salad recipe. I sometimes also add a bit of fresh basil.
  • Pine nuts – I love the crunch of some additional roasted pine nuts. The nutty flavor really works great with this dish.

In addition, you can add some red onion, red bell pepper, or other fresh veggies. Cucumber is also a great addition and if you’re not looking for anything vegan you can add feta or goat cheese.

As always make sure to check the recipe card for full ingredients, quantities and step-by-step instructions.

Vegetarian couscous salad-3

How to make the vegetarian couscous salad

Making this vegan couscous salad is really the easiest ever. You just need to soak the instant couscous (if using the regular kind) for about 5-10 minutes according to package instructions.

Chop all the vegetables and add them to the couscous once it is at room temperature. And that’s all there is to it!

Because there are no salad leaves in this recipe it is also very easy to take with you for lunch. Just place in an airtight container and keep in the fridge until ready to use. Ideal salad for meal prep as well. Do make sure to add the fresh herbs at the last minute to make sure it has all the flavor.

Serve the couscous salad as a main course

You can serve this couscous salad as a main course by combining it with falafel, hummus, chickpeas, baba ganoush, and a boiled egg. With a few small additions, you have a complete evening meal.

What I like most about it is that, on a hot day, you can leave the oven off when making this salad. I often make a large portion so I can enjoy it for lunch the next day. Absolutely one of my favorite salad recipes.

Storing the couscous salad

If you want to store the couscous salad in the fridge, it is best to leave the fresh herbs out of the salad until you’re ready to eat it. You can add the herbs but after a day they will start to wilt and loose flavor. So adding those last minute is the best option.

The couscous salad wil keep in the fridge in an airtight container for about 2 days.

Vegetarian couscous salad-1

FAQ: Making Couscous

Can I also make this with pearl couscous?

You certainly can. Pearl couscous has a slightly thicker grain, so the salad’s texture will be different, but it will taste just as good.

Can I add other vegetables to the salad?

Yes, you can add your favorite veggies to the easy couscous salad. Try roasted bell peppers, grilled eggplant or zucchini, or cucumber pieces. They all taste great. However, I wouldn’t make it too colorful or throw in five different kinds of vegetables. Otherwise, you won’t be able to taste any of them.

I don't like parsley or mint. Can I substitute them?

Yes, but it will give the couscous salad a completely different flavor. A good substitute is fresh cilantro. It also tastes very good with the ingredients in the recipe below.

What can I use as a dressing for this vegetable couscous salad?

I generally use just a splash of extra virgin olive oil combined with some lemon zest and lemon juice. That’s all it really needs. It’s a simple lemon dressing and the best way to highlight all the fresh flavors of the dish.


Vegetarian and vegan couscous salad

Print Recipe

No votes yet

Vegetarian Couscous Salad

This vegetarian couscous salad is a delicious dish similar to tabbouleh. It’s also suitable for vegans!
Preparation10 minutes
Cooking5 minutes
Total15 minutes
Servings: 4 people

Ingredients

  • 250 grams couscous
  • 300 ml vegetable broth
  • 400 grams cherry tomatoes
  • 200 grams green garlic olives including the oil
  • 4 stalks spring onion or green onions
  • 1 small lemon juice and zest
  • 50 grams flat-leaf parsley
  • 20 grams mint
  • 100 grams roasted pine nuts

Instructions

  • Place the dry couscous in a large bowl and pour the hot stock over it. Cover and let sit for 5-10 minutes. Stir with a fork, then let it cool completely before adding the other ingredients.
  • Cut the cherry tomatoes into small pieces, quarter the olives, and add them to the couscous along with the olive oil (up to three tablespoons). If you are using olives without oil, add extra virgin olive oil.
  • Clean the spring onion and slice the usable part into rings. Add them to the couscous with the lemon juice and zest (only use the yellow part of the peel), and mix everything together.
  • Finally, finely chop the herbs and mix them into the couscous salad. Taste it and add salt and pepper to taste. Serve in a bowl and sprinkle the roasted pine nuts and parsley, if desired, over the top at the last minute.
Blackberry tiramisu-1-2

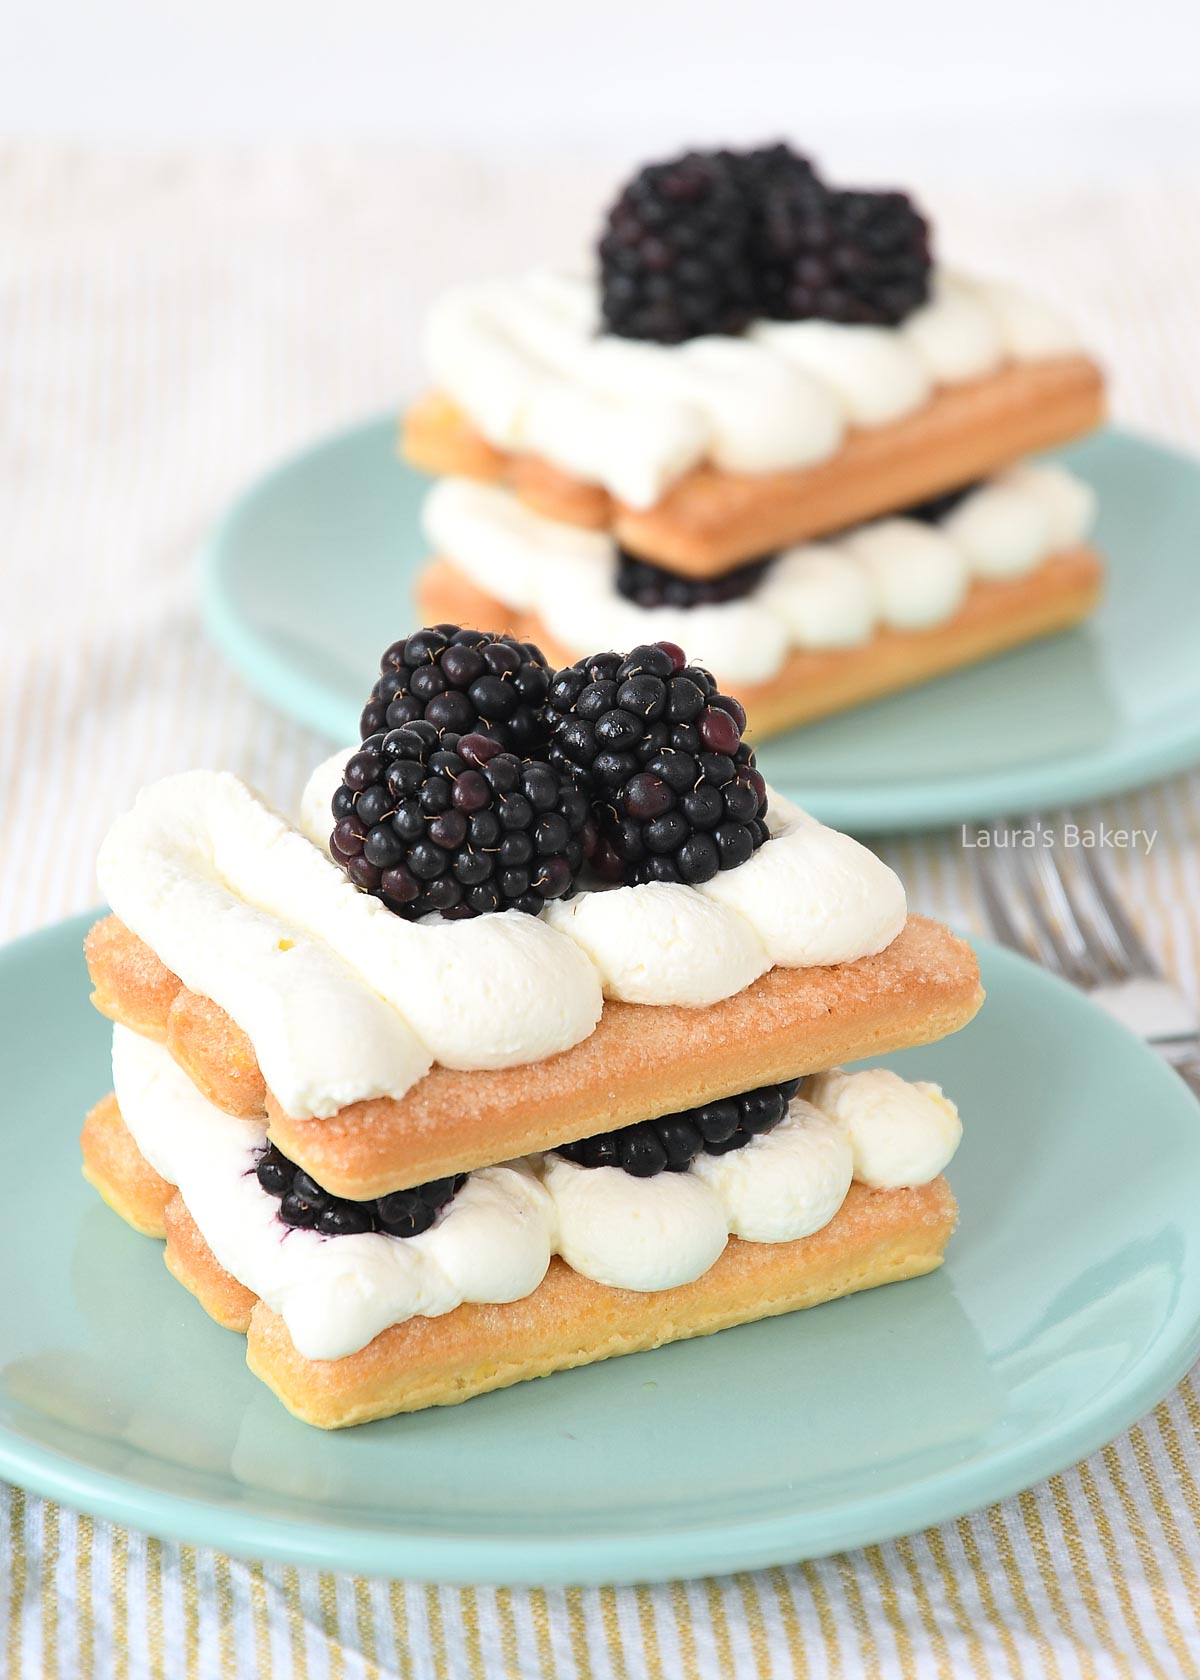
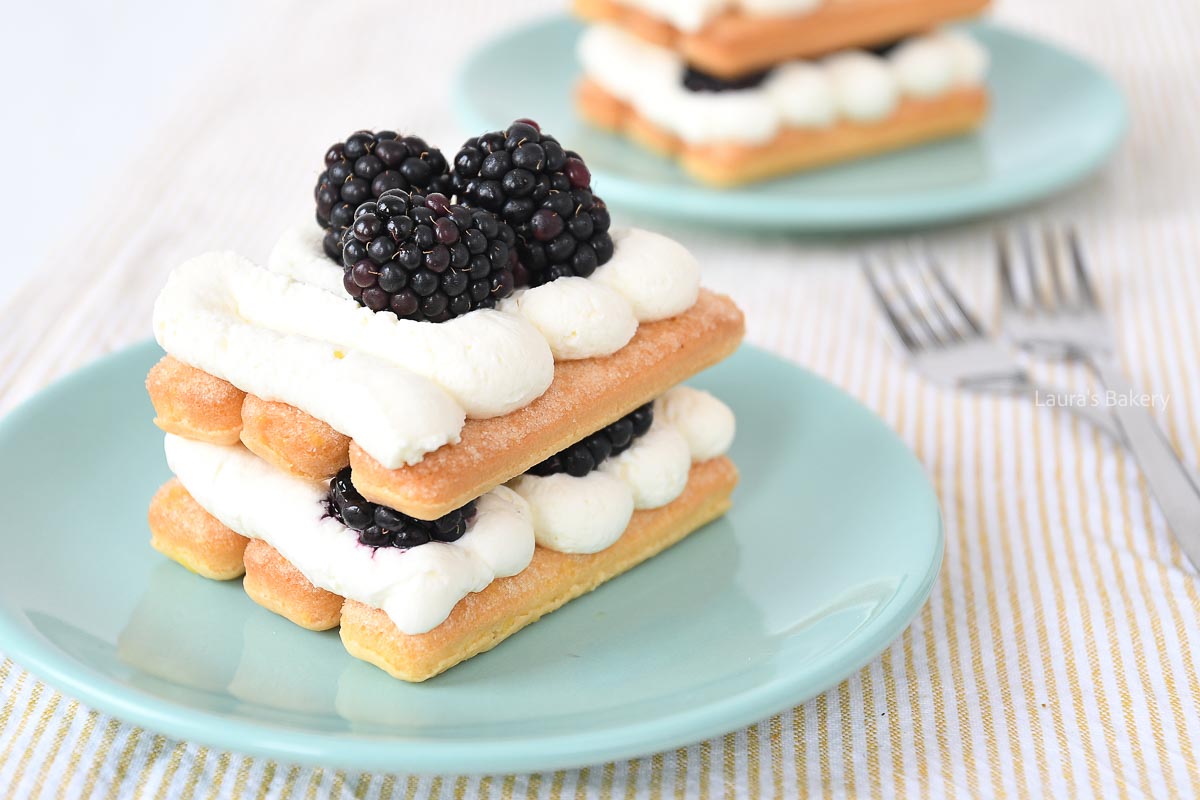
Since it is now blackberry season, I wanted to share my favorite blackberry tiramisu recipe. I initially made this twist on a classic tiramisu when a friend came over for dinner.

I usually make a large dish of tiramisu like in this limoncello tiramisu recipe but in this case, I figured it would be a bit silly to make a large batch for just two people. So I switched my idea to make individual blackberry tiramisu.

Of course, you can also make this in a larger dish. I find this the ideal no-bake dessert for when you’re entertaining and with the fresh blackberries, this is really a treat. Looks pretty cool too! And if you have any blackberries leftover? Make these delicious moist lemon and blackberry muffins too.

Why This Recipe Works

If you love an easy tiramisu recipe, this is the recipe for you!

  • Easy – Making these on small plates, it is super easy to adjust the number of servings to the number of guests you will be entertaining
  • No raw eggs – I like to make all my tiramisu recipes like this strawberry tiramisu without eggs. That makes it the perfect dessert for everyone.

Recipe Ingredients

You do not need a lot of fancy ingredients to make this pretty tiramisu. Make sure to always check the exact ingredients and quantities in the recipe card below.

  • heavy cream – you can also use whipping cream for this
  • mascarpone cream – I love mascarpone, and it is essential in all tiramisu recipes
  • sugar – I use only one tablespoon of sugar in this recipe, as the sponge fingers in combination with the mascarpone are already sweet.
  • orange juice – for dipping the ladyfingers, I use orange juice instead of coffee, as that works much better if you have a fruit-based tiramisu
  • blackberries – of course, the star of this tiramisu is lots of sweet blackberry
Blackberry tiramisu-3

How To Make Blackberry Tiramisu

Making the blackberry tiramisu is super easy. You start by making the cream filling by whipping the cream and the sugar to stiff peaks.

Fold the mascarpone and lemon juice through the cream with a rubber spatula. Make sure the cream cheese mixture stays firms. You don’t want it to be too runny.

Now it’s time to build your tiramisu. It might look a little bit complicated but you simply place three lady fingers (first dipped in a bit of orange juice) on a plate.

Add the cream to a piping bag and pipe one single layer of the cream on top of the ladyfingers. Slice the blackberries in half with a sharp knife and add them to the cream layer. Pressing just ever so slightly.

Dip the remaining ladyfingers and place the second layer of ladyfingers on top of the filling. Add another cream layer and finish with three blackberries on top. And that’s it!

You can optionally give it a little dusting of cocoa powder if you want.

Storing Blackbery Tiramisu

If you cover the blackberry tiramisu with plastic wrap and place in the fridge you can prepare it in advance and store for up to a day in advance. So you can still serve it the next day. Keep in mind that the juice of the sliced blackberries might transfer a bit into the cream.

Baking tip: You can prepare this tiramisu in a baking dish, assemble it in small glasses, or serve it individually on a plate.

Blackberry tiramisu-2

FAQ Blackberry Tiramisu

Can I make this with other fruits instead?

Sure. You can make this into a raspberry tiramisu or a strawberry tiramisu without any changes.

If I make this in a large dish can I use the same quantities?

If you use a square baking dish of around 20 x 20 cm (8 x 8 inches) you can use the same quantities as in the below recipe. But if you want more double the recipe or as needed.

Can I add something to the top of the tiramisu?

Absolutely. This is delicious with some grated dark or white chocolate and a small dusting of cocoa powder.


Blackberry tiramisu

Print Recipe

No votes yet

Blackberry Tiramisu

Tiramisu with a twist. And a very tasty one at that! This Blackberry Tiramisu is perfect for four people.
Preparation5 minutes
Cooking15 minutes
Total20 minutes
Servings: 4 people

Ingredients

  • 125 ml heavy cream
  • 1 tablespoon fine granulated sugar
  • 250 grams mascarpone cheese
  • 1 tablespoon lemon juice
  • 24 ladyfingers
  • Orange juice
  • 200 grams blackberries

Instructions

  • Whip the cream and sugar together until stiff. In another bowl, gently and carefully stir the lemon juice into the mascarpone. Fold the whipped cream into the mascarpone mixture. Fold gently so that the cream remains firm. Spoon the mixture into a piping bag, then place it in the refrigerator.
  • Prepare four small plates, gather the ladyfingers, and measure out the orange juice. Dip half of the ladyfingers in the orange juice and place three on each plate. Cut off the tip of the piping bag and pipe a layer of cream onto the ladyfingers.
  • Cut about half of the blackberries in half with a knife and spread them over the cream, pressing them in very slightly. Dip the remaining ladyfingers in the juice and place them on top of the filling.
  • Add another layer of cream, then finish with three whole blackberries on top.
Laura Kieft   I

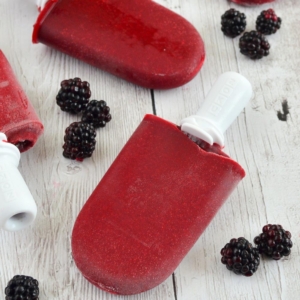
Now that the weather is getter warmer and hot summer days are just around the corner, it is time to share these easy blackberry popsicles. I love making popsicle recipes as they are so easy and you need just a few simple ingredients to get going. You basically just need fresh fruit and a simple sugar syrup.

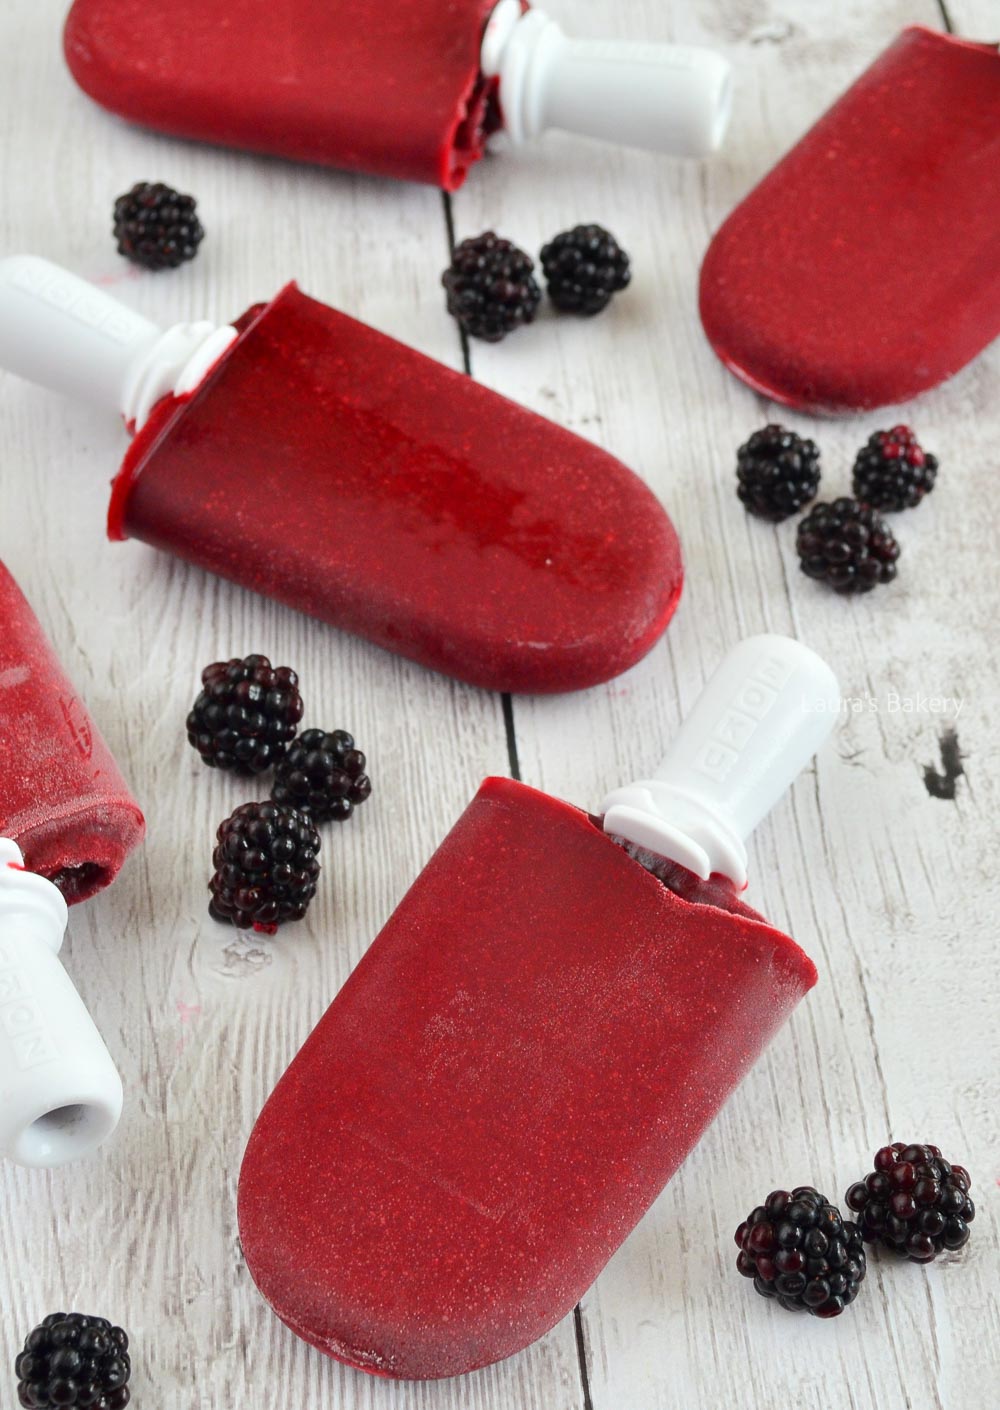
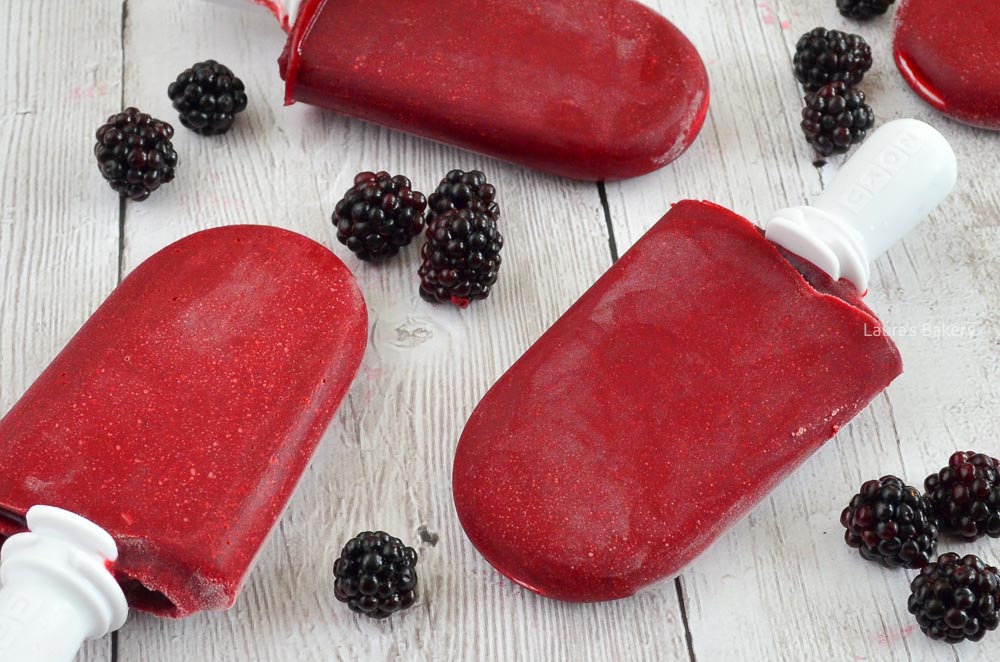
Blackberry popsicles

On the day I went looking for fresh blackberries, the weather was beautiful. There was no wind, and the bushes were bathing in sunshine. Perhaps it was even a little too warm. Because of the thorns on the bushes, I wore long jeans, closed shoes, and a T-shirt. It wasn’t ideal, but wearing shorts among those bushes didn’t seem practical either.

As I picked, I thought about what I wanted to make. The warm sunshine inspired me to come up with refreshing recipes. In the end, I decided on blackberry popsicles, which I made the very next day.

Since I didn’t want my ice cream to be full of seeds, I strained the puréed blackberries through a fine mesh strainer. This isn’t strictly necessary, but it gives the popsicles a smooth texture and prevents seeds from getting stuck between your teeth.

Laura Kieft   I

What you need for making the popsicles:

The first thing you need is either popsicle molds or a quick pop maker and popsicle sticks. I went with the latter this time and used a Zoku ice cream maker.

I’ve had this little device for a couple of years and it is fun to be able to create different popsicles in no time at all. You can also create fun effects with layers, fillings and adding pieces of fruit to the popsicles.

  • fresh blackberries – the fun part is that you can use any kind of soft fruit or fresh berries for making these popsicles. Raspberries, strawberries, melon and more.
  • water – if you want to switch to another flavor you can also replace the water with things like full-fat coconut milk for a more creamier result
  • sugar – can be replaced by honey
  • lemon juice – the lemon juice makes the flavor of the blackberries fresher and brings out the natural sweetness.

And that’s all you need.

How to make blackberry popsicles

I start by pureeing the blackberries with an immersion blender or food processor. Strain the blackberry mixture through a sieve and use a wooden spoon to press it through so you will have a smooth mixture.

For making the simple syrup you use warm water to dissolve the sugar. Or you can use a small saucepan on medium heat. Heat the water until the sugar dissolves which shouldn’t take too long.

You can now add the sugar syrup to the blackberries in a mixing bowl and add them to the molds. If you use a quick pop maker the popsicles will be ready in about 6-7 minutes and if you use regular popsicle molds it takes around 6 hours.

Also try these popsicles, you will love them: Strawberry cheesecake popsicles.

FAQ about blackberry popsicles

Can I make these without sugar?

Yes you can make the blackberry popsicles without sugar, but they will be harder and not so smooth. You can replace the sugar with honey if you prefer. If you want a sweeter popsicle feel free to add more sugar.

How can I store the blackberry popsicles?

If you want to store the popsicles I prefer to pack them separately into little plastic bags. That way they are easy to take out of the freezer and they don’t stick together. Ideal if you’re using a ice pop maker. You can also use plastic wrap for this

Can I use other fruit for making these popsicles?

Absolutely! They’re my favorite sweet treats so you can make them with almost any kind of soft fruit.


Blackberry popsicles

Print Recipe

No votes yet

Blackberry popsicles

During blackberry season, you can pick these berries to your heart’s content and use them in recipes like this one for blackberry ice cream. It’s not complicated, and it tastes delicious!
Preparation10 minutes
Cooking10 minutes
Total20 minutes
Servings: 5 pieces

Equipment

  • Quick pop maker or regular popsicle mold

Ingredients

  • 300 grams blackberries
  • 75 ml water
  • 25 grams sugar
  • 1 tbsp lemon juice

Instructions

  • Puree the blackberries with an immersion blender. Place the blackberry purée in a sieve and press it through to remove the seeds.
  • Dissolve the sugar in water. Add the sugar mixture to the blackberry puree along with the lemon juice. Stir until smooth.
  • Pour the mixture into popsicle molds. If using a quick pop maker, the ice cream will be ready in about 6-7 minutes. If using freezer molds, the ice cream will need to be frozen for at least 6 hours.
Tomato tart recipe-2

It’s time to share my latest savory creation, a delicious tomato tart recipe. Many of my quiches or tarts contain tomatoes, but this is the first time I am making a tart with only tomatoes.

I felt that would be really delicious, and to make it look even prettier, I included small and colorful tomatoes. Of course, if you only have red tomatoes, that is fine too.

I used about half a kilo (a bit more than a pound) for this easy fresh tomato tart recipe. It’s the perfect recipe to make the most of the summer tomatoes.

Why this recipe works

  • Tomato season – what better way to celebrate tomato season than to make this delicious tomato tart?
  • Side dish or main – depending on how you use the tart you can serve it as a light lunch with a green salad or even as a main dish if you want.

Recipe ingredients

  • short-crust pastry – for the pie crust, I used short-crust pastry, which is my favorite, but you can absolutely use store-bought (puff) pastry as well. I prefer the flaky pastry so I choose short-crust but even that can be found in the grocery store.
  • breadcrumbs – for soaking up some of the liquid of the juicy tomatoes, I use a few tablespoons of breadcrumbs
  • Fresh tomatoes – I went for cherry tomatoes in various colors, but any kind of tomato will do
  • Parmesan cheese – other cheese will be fine to use too
  • eggs
  • crème fraîche – I like using crème fraîche in this recipe, but you can also use sour cream if you want
  • fresh herbs – you can use fresh basil, chives, or oregano here

A few optional additions would be something like dijon mustard, red pepper flakes or creamy goat cheese or feta.

Tomato tart recipe-1

How to make the tomato tart recipe

Dough and tomatoes

Start by making the dough, and while this is chilling in the fridge, you move on to the filling. I cut most of the tomatoes in halve.

If you use large tomatoes like grape tomatoes or plum tomatoes you can slice them smaller. Beat the eggs with the crème fraîche, salt and black pepper. Now roll out the dough with a rolling pin and line your tart pan (one with a removable bottom is easiest) with the dough.

Pastry and filling

Make sure to prick a few holes with a fork in the bottom and generously sprinkle the breadcrumbs over the bottom. If you prefer to blind bake the crust, that is also an option. In that case, make sure to use parchment paper on the dough and add pie weights or use uncooked rice or uncooked legumes.

​I didn’t blind bake the tomato tart and found it wasn’t necessary. Now, once you’ve rolled out your dough, place some of the tomato slices on the bottom of the pie plate. Sprinkle the grated cheese on top and add the egg mixture and the remaining tomatoes.

You can add a bit more cheese on top if you want. Bake your tomato quiche in the oven in about 30-35 minutes.

Storing the tomato quiche

If you’re not serving the tomato tart right away, you can store it in the fridge in an airtight container for 3-4 days. If you wrap it well it will keep in the freezer for up to three months.

Reheating the quiche

Reheat a slice in the oven for about 15 minutes at 350˚F/180˚C. You can place multiple slices at once on a baking sheet or in a pie dish, leave some room between the pieces.


FAQ tomato tart recipe

How do I prevent the tart from getting soggy?

Fresh tomatoes are juicy, which can lead to a soggy crust. To avoid this:

  • Slice and salt the tomatoes, then let them sit for 15–30 minutes to draw out moisture.
  • pre-bake the crust (blind bake) and sprinkle a thin layer of cheese, breadcrumbs, or mustard on the bottom to create a barrier.


What kind of crust works best for a tomato tart?

  • Puff pastry gives a flaky, crisp base and is great for a quick tart. It handles moisture not as well as shortcrust pastry
  • Shortcrust pastry (pâte brisée) offers a sturdier, buttery texture.
  • You can also use a store-bought pie crust

Can I use heirloom or cherry tomatoes?

Absolutely. Heirloom tomat​oes add color and flavor depth, while cherry tomatoes (which I used) are sweet and less watery. Just make sure to halve or slice them and remove excess moisture.

Should I serve the tomato tart hot or cold?

Either works! It’s delicious:

  • Hot – right from the oven
  • Room temperature – ideal for picnics or brunch
  • Cold – great as leftovers the next day


Tomato tart recipe

Print Recipe

No votes yet

Tomato tart

A tart filled with tomatoes. You’re sure to love it!
Preparation15 minutes
Cooking30 minutes
Total45 minutes
Servings: 4 people

Equipment

  • Tart pan 26 cm/10 inch

Ingredients

  • 1 savory shortcrust pastry according to the recipe
  • 2-3 tablespoons breadcrumbs
  • 500 grams small tomatoes in different colors
  • 100 grams Parmesan cheese grated
  • 4 eggs
  • 200 grams crème fraîche
  • Salt and pepper
  • Fresh basil

Instructions

  • Make the dough according to the recipe. While it is in the refrigerator, prepare the filling.
  • Halve almost all of the tomatoes. In a bowl, beat the eggs with the crème fraîche, salt, and pepper.
  • Roll out the dough and line the pan with it, pricking a few holes in the bottom. Sprinkle some breadcrumbs over the dough.
  • Spread two-thirds of the tomatoes over the bottom. Sprinkle the grated cheese on top.
  • Pour the egg mixture over the tomatoes and add the remaining tomatoes.
  • Bake the tomato tart for 30 to 35 minutes at 200 °C/400˚F (conventional oven), or until it is golden brown and cooked through. Serve with fresh basil and a salad, if desired.
Almond cookies-1

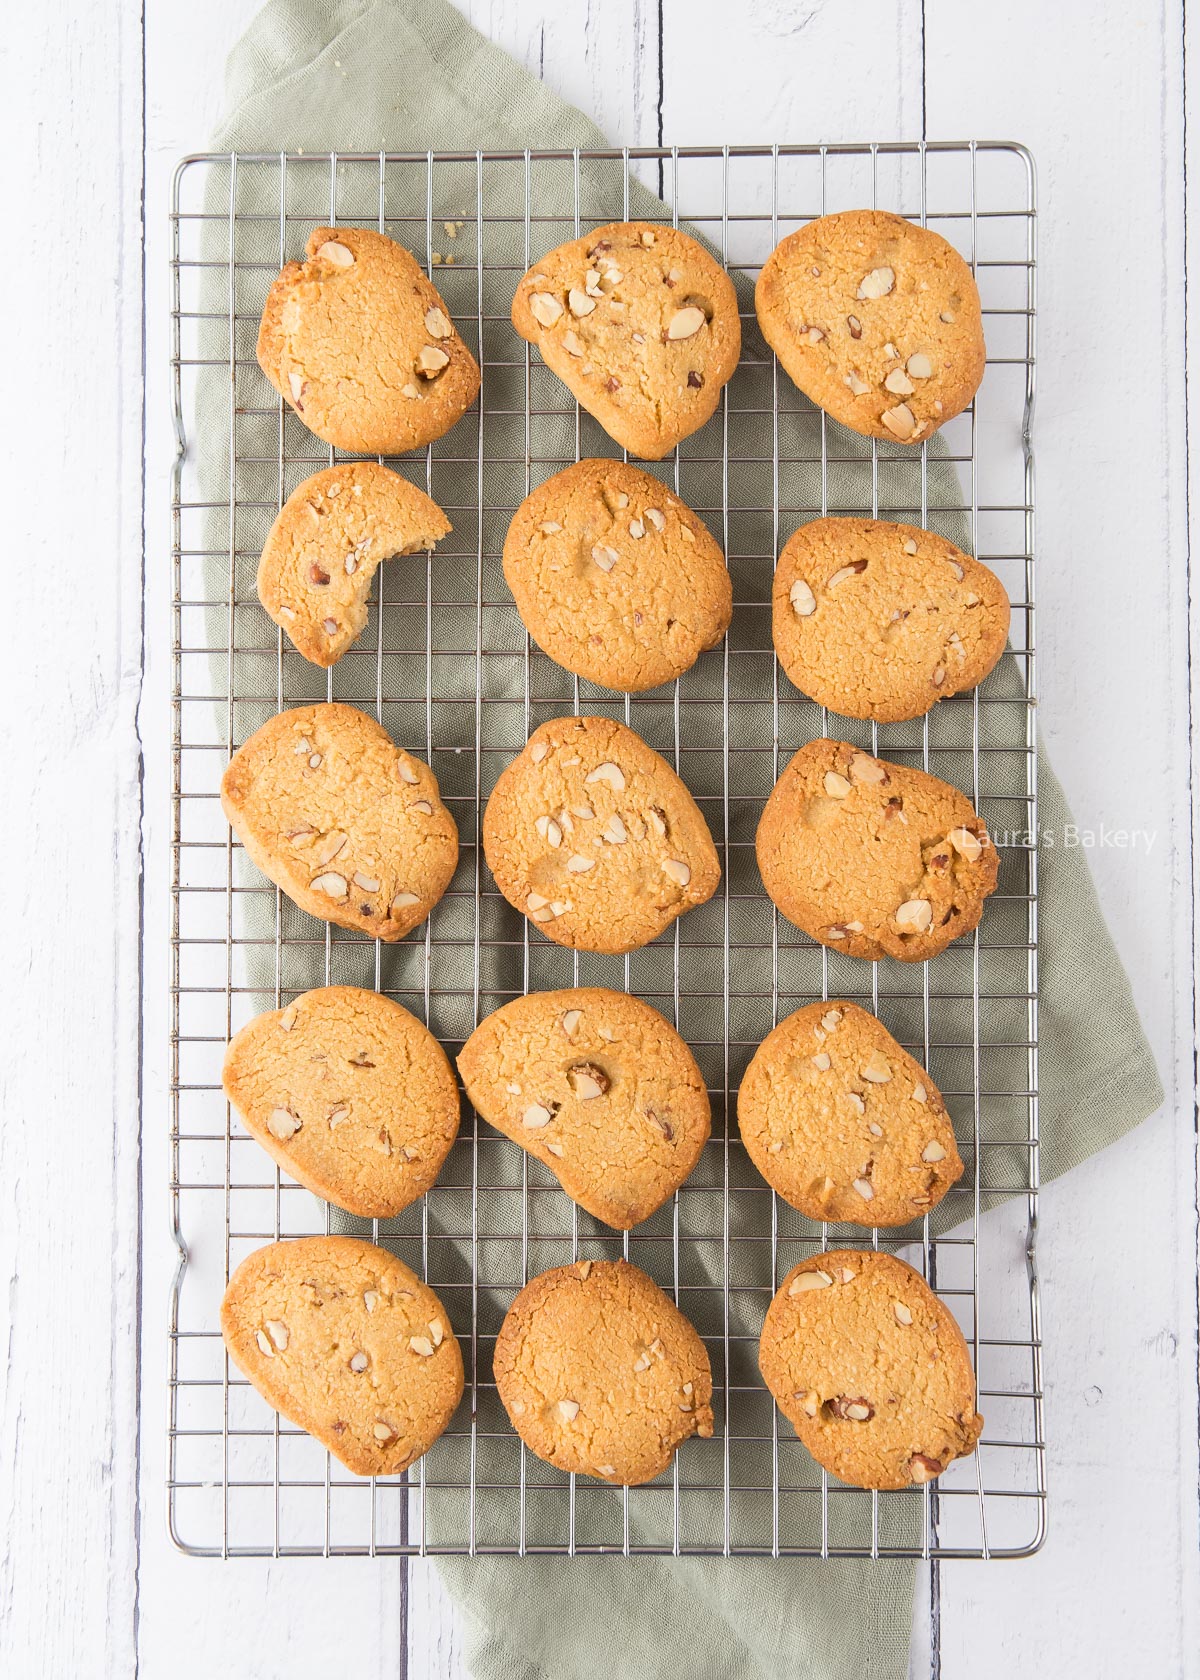
These almond cookies disappeared within three days of baking them. And no, I didn’t get any help eating them. These cookies are delicious!

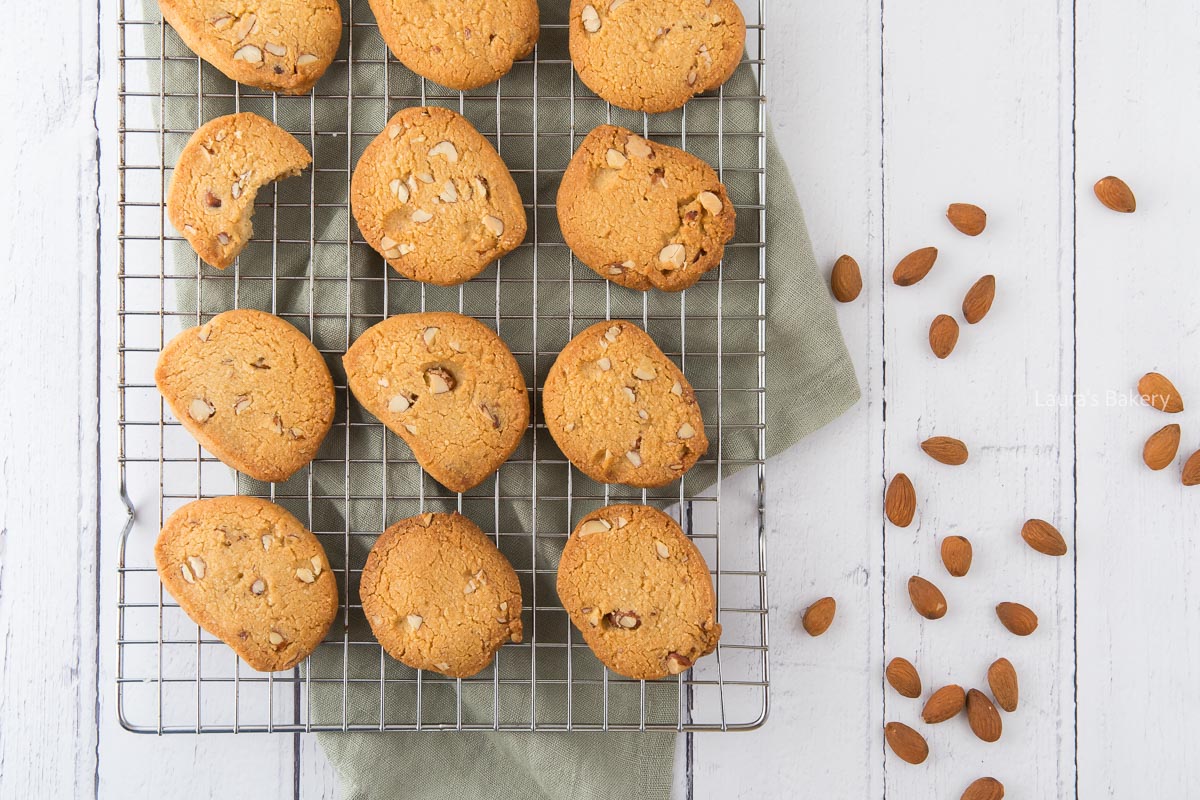
I love almond cookies anyway, but these are especially tasty because of the almond pieces in the dough, which give them a delicious crunch. Place me on the couch with a plate of these cookies and a cup of tea, and the cookies will be gone before you know it while I watch a movie.

Another idea that sounds delicious is dipping the cookies in melted milk chocolate. I think I’ll have to try that next time. Will you be making these cookies?

Why this recipe works

  • Tasty – I know all cookies should be tasty, but these almond cookies are especially good!
  • Easy – Just a little mixing is all it takes to make this almond cookie recipe

Recipe ingredients

  • butter – I use unsalted butter
  • vanilla extract – will also be tasty with almond extract
  • almond flour – I love the combination of almond flour with regular flour in cookies. It makes them extra tasty!
  • all-purpose flour
  • almonds – the crunch in these cookies is due to the whole almonds used

As usual make sure the ingredients are at room temperature and check the recipe card below for full instructions.

Almond cookies-2

How to make the almond cookies

As I said the only thing you really need for making these easy cookies is a large bowl. The first step of the recipe is to mix butter, sugar and vanilla until creamy. That is usually handy with a stand mixer or hand mixer.

Next is to add the almond flour, regular flour and salt and mix/knead it into a firm dough. Last step is to add the almond and knead them into the dough evenly.

Roll the dough into a log and wrap it tightly in foil. Let it rest in the fridge for at least an hour. Check here if you want to know why you should chill your dough.

Baking tip: You can use a dough cutter to easily slice the dough and gather any leftover dough.

Storing the almond cookies

I guarantee you these cookies will not last for very long, but if you do want to store them use an airtight container or a cookie jar and keep them for two to three weeks. You can also freeze them for up to three months.

More cookies with almonds

FAQ Almond Cookies

Can I replace the almond flour?

You can replace the cookies with hazelnut flour or another nut flour. Another option would be to use chufa or tigernut flour. But the flavor will be very different! It’s also possible to replace it with regular flour, taste and texture will be different.

Can I use almond extract instead of vanilla extract?

Yes! Almond extract has a strong flavor, so use it sparingly. A little goes a long way, usually 1/4 to 1/2 teaspoon is enough.

How do I keep almond cookies from spreading too much?

Chill the dough before baking. This solidifies the fat and helps control spread. Also, make sure your baking sheet isn’t warm when placing dough on it.


Almond cookies

Print Recipe

No votes yet

Almond Cookies

These delicious, crumbly almond cookies have an extra crunch from the whole almonds in the dough.
Preparation15 minutes
Cooking20 minutes
Chilling time1 hour
Total1 hour 35 minutes
Servings: 16 cookies

Ingredients

  • 120 grams unsalted butter
  • 70 grams light brown caster sugar
  • 1 teaspoon vanilla extract
  • 100 grams almond flour
  • 100 grams all purpose flour
  • pinch salt
  • 60 grams almonds

Instructions

  • Mix the butter, sugar, and vanilla extract until creamy. Then, add the almond flour, flour, and salt, kneading everything together into a firm dough. Finally, knead the almonds evenly into the dough.
  • Roll the dough into a log and wrap it in foil. Place the log in the refrigerator for at least one hour to rest. My log was about 6 cm in diameter.
  • Cut the dough log into slices and place the cookies on a baking sheet lined with parchment paper.
  • Bake for 12-15 minutes at 180˚C/350 °F (conventional oven) until the edges are golden brown.
Oreo ice cream-1

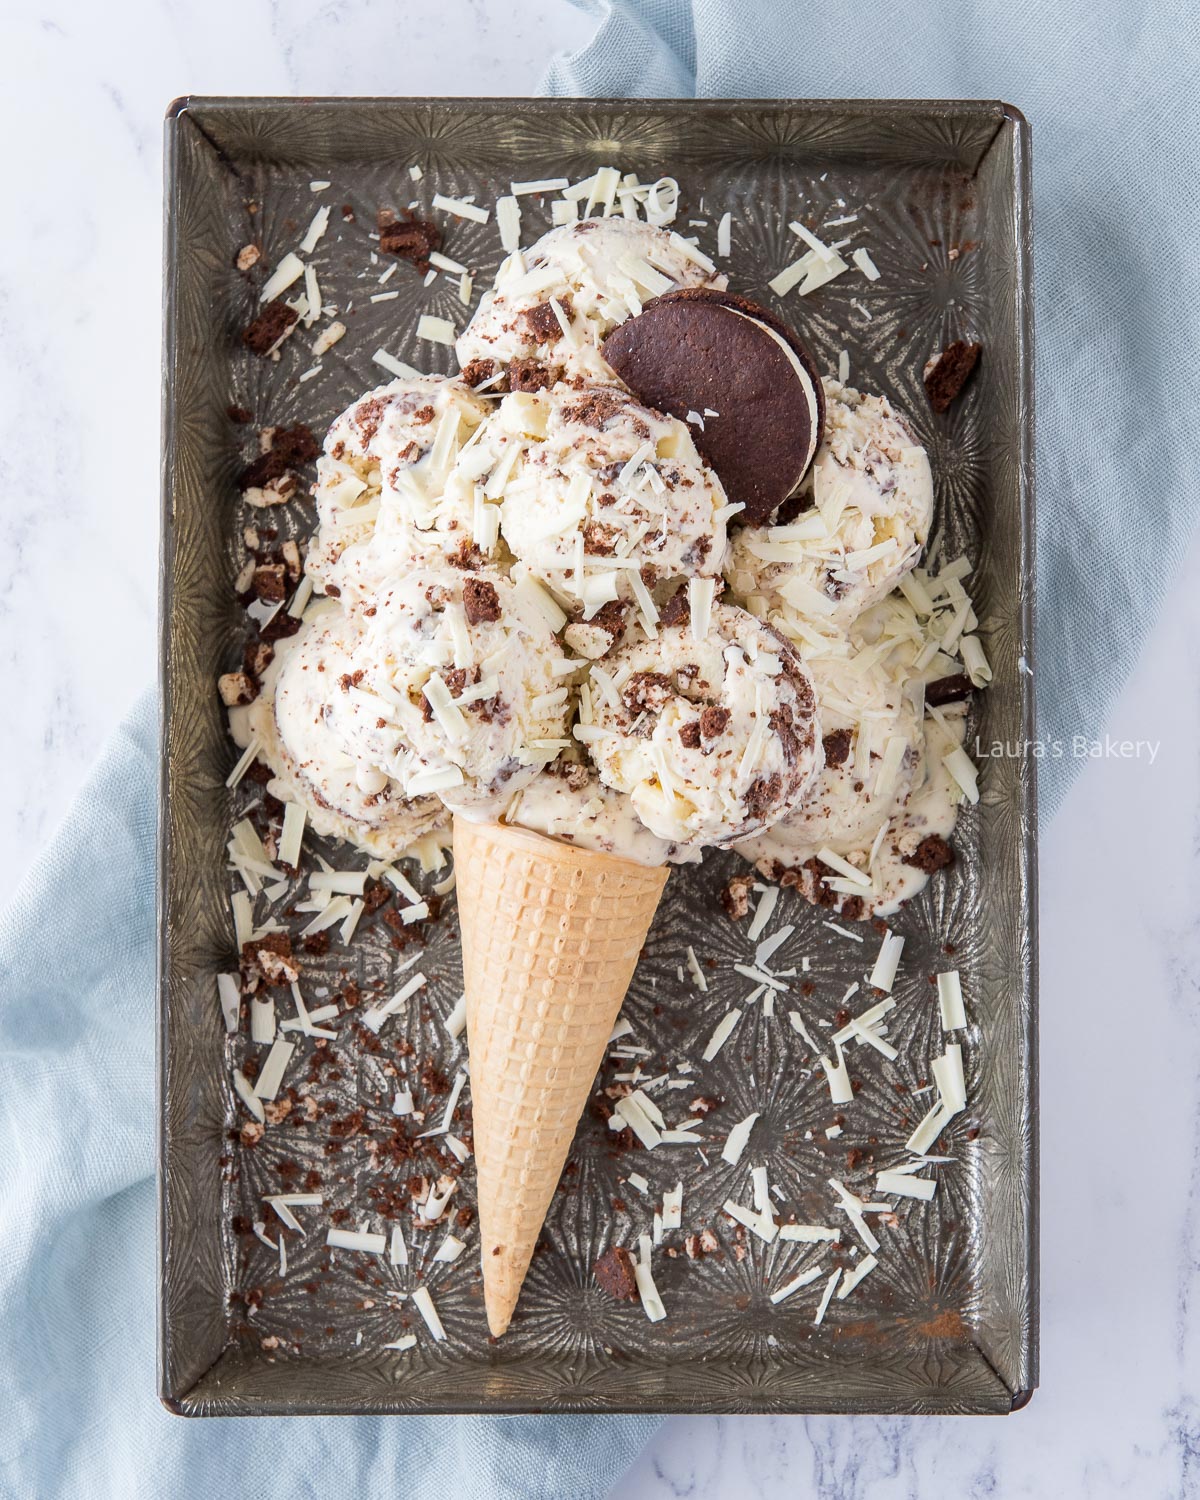
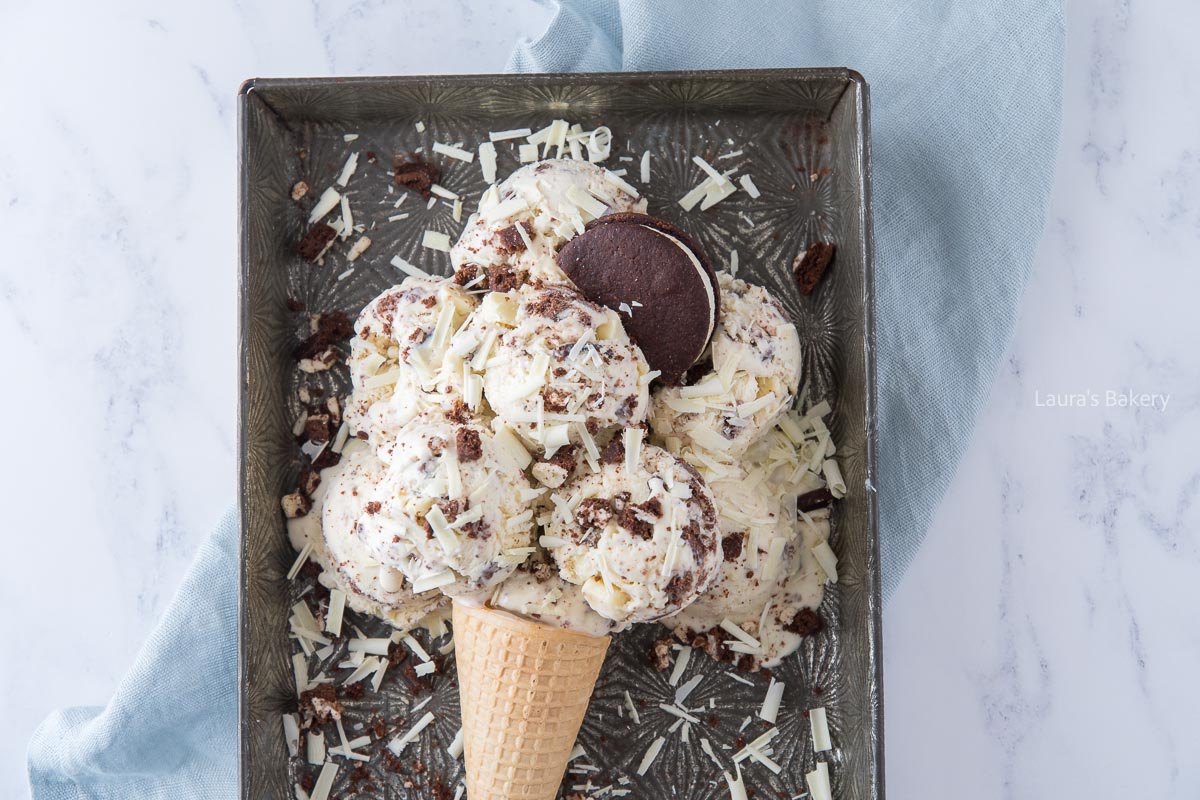
I once made homemade Oreo’s and had this fantastic idea for an Oreo ice cream recipe. It’s basically my three favorite ingredients for an ice cream base with extra Oreo’s as well as white chocolate. Super easy to make and so ridiculously delicious!

Of course if you’re not planning on making your own Oreo cookies, you can totally use store-bought oreo cookies (I’ll share my recipe for these cookies soon). Make sure to get some extra cookies as well, as they are also great for garnishing your ice cream.

You can make this ice cream with an ice cream machine but as I’m fond of no churn ice cream recipes (like this delicious pistachio ice cream or this stroopwafel ice cream), this one is another great example of an easy recipe.

Why this recipe works

  • Easy – making homemade ice cream does not get any easier than this delicious Oreo ice cream
  • No machine needed – you can make this with or without an ice cream maker

Recipe ingredients

  • Heavy cream – you will need to whip the cream to stiff peaks
  • Condensed milk – this will make the ice cream deliciously sweet and creamy
  • Oreos – I used 200 grams (7 oz) in the ice cream and also a few extra cookies for decorating
  • White chocolate – you can also use dark (or milk) chocolate if you prefer
Oreo ice cream-3

How to make the Oreo ice cream

Making the Oreo ice cream is – as mentioned – simplicity itself. You start by whipping your heavy cream. Add some vanilla paste or use vanilla extract and the condensed milk. Fold it all in using a spatula.

Add the crushed Oreo cookies and the chopped white chocolate and stir through your ice cream mix. Pour into a freezer-safe container or an airtight container and place in the freezer between 4 to 6 hours.

If you’re ready to eat the ice cream, take it out of the freezer about 15 minutes before serving so it scoops more easily.

Storing the Oreo ice cream

You can store the ice cream in the freezer for up to 3 months in an airtight container.

More Oreo Recipes

FAQ Oreo Ice cream

I don't like Oreo cookies can I use other cookies?

Absolutely. Use any kind of cookie you feel like adding to the ice cream

If I make this in a machine how long should it churn?

Use the manufacturer’s instructions for how long to churn ice cream. I have not made this in a machine.

Can I use low-fat or non-dairy ingredients

I haven’t tried a low fat version myself, but remember: low fat options give different results. It’s not impossible, but you might want to adapt the recipe a bit.

For a dairy-free version, use full-fat coconut cream and sweetened condensed coconut milk, but expect a slight change in texture and flavor.


Oreo ice cream

Print Recipe

No votes yet

Oreo Ice Cream

It’s summer, which means it’s ice cream time! What could be better than Oreo ice cream? Oreo cookies are perfect for making delicious ice cream.
Preparation10 minutes
Freezer4 hours
Total4 hours 10 minutes
Servings: 1 container

Ingredients

  • 500 ml heavy cream
  • 1 can condensed milk 397 grams
  • 3 tsp vanilla paste or extract
  • 200 grams Oreos broken into small pieces
  • 100 grams white chocolate in small pieces

Instructions

  • Whip the heavy cream in a bowl until stiff, then add the condensed milk and vanilla paste or extract to the whipped cream.
  • Gently fold everything together until smooth. Add the Oreo pieces and white chocolate. Gently stir them into the ice cream mixture.
  • Pour the mixture into a sealable container, cover it, and place it in the freezer for at least six hours. Remove the ice cream from the freezer 15 minutes before serving to make scooping easier.
  • Remove the ice cream from the freezer 15 minutes before serving to make scooping easier.
lemon rosemary scones-2

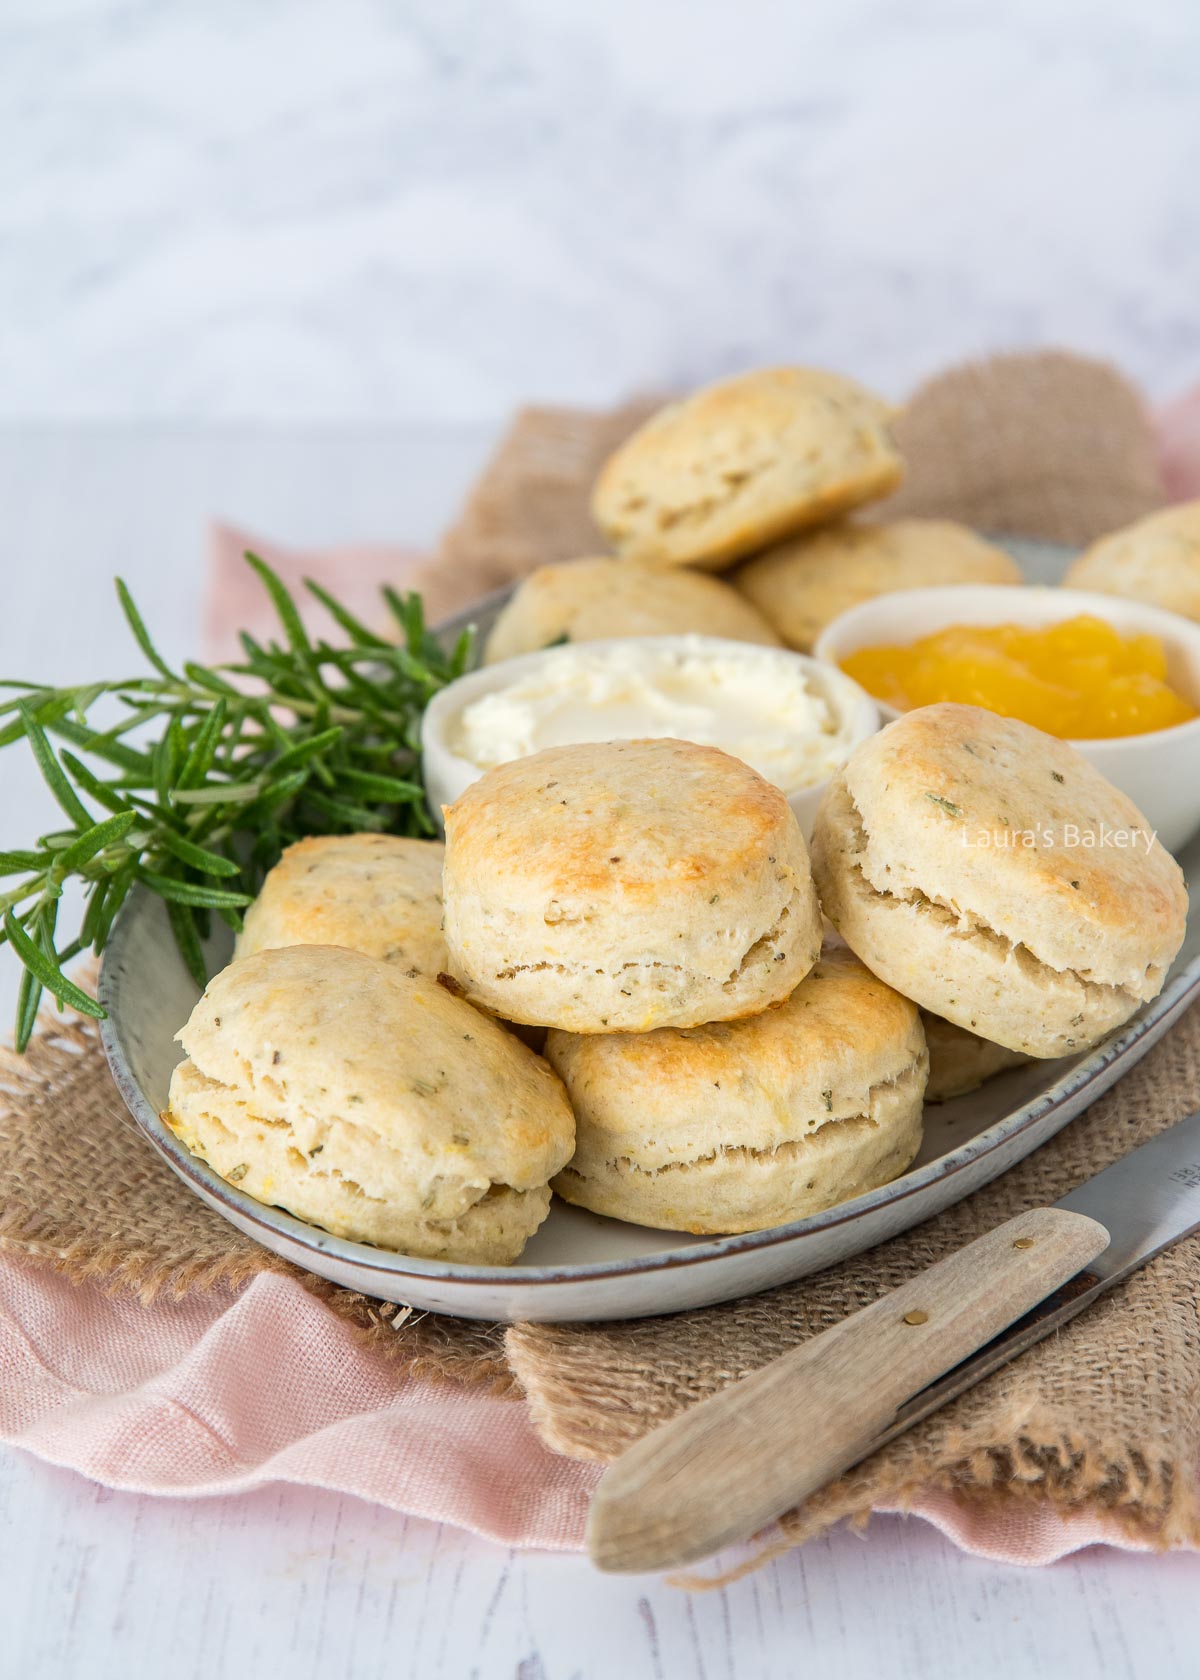
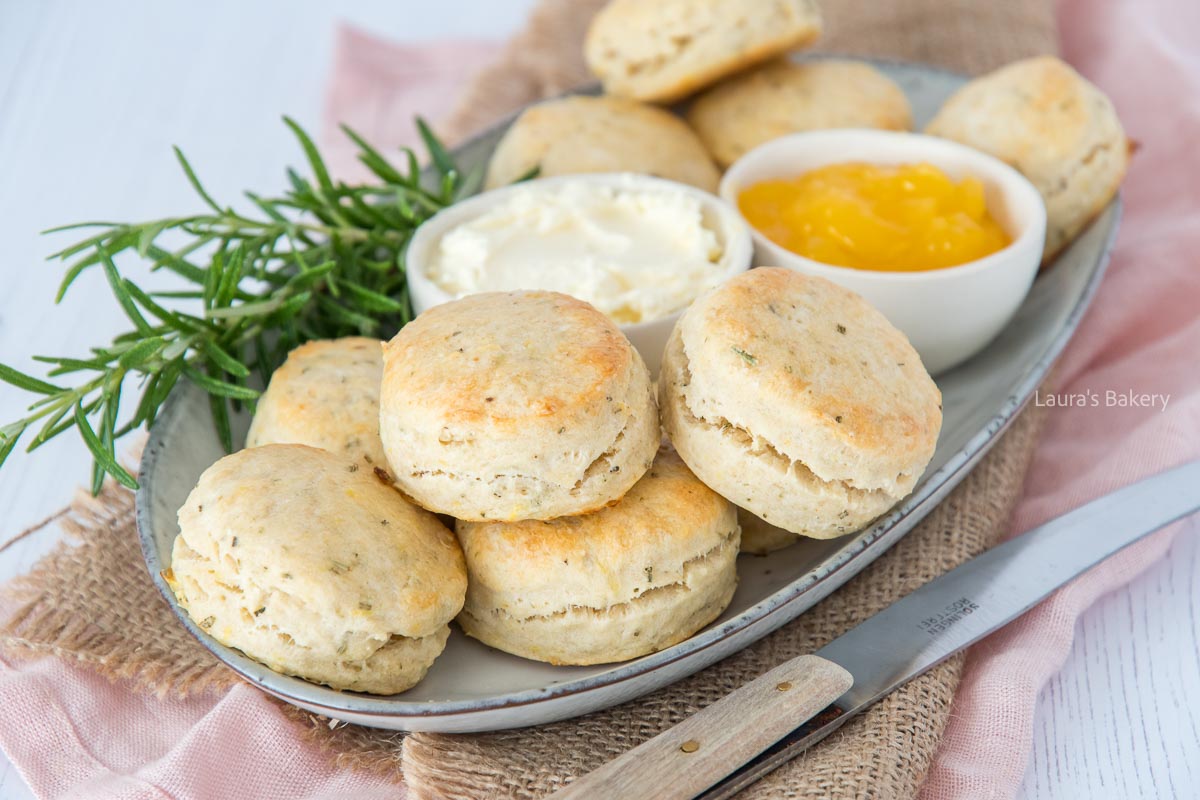
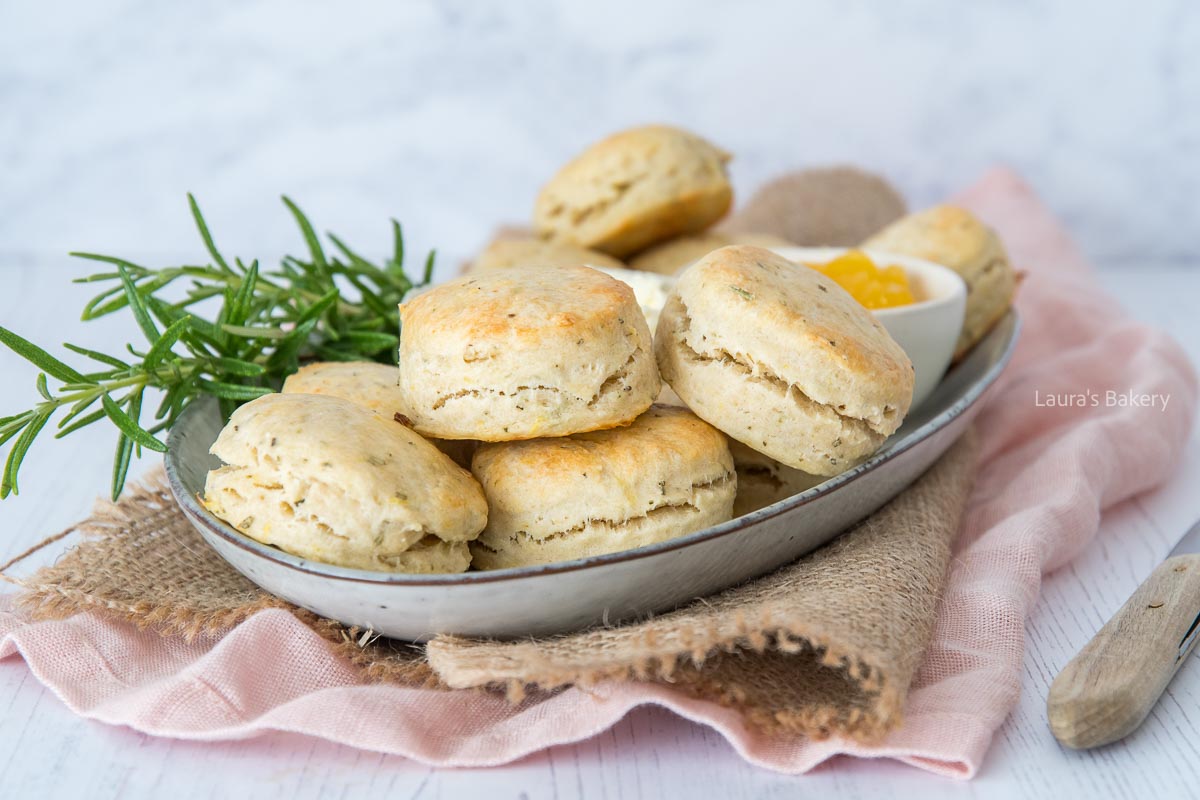
I make scones quite often. The last scones I made were lemon and rosemary scones. I usually make the basic recipe (these delicious English scones), but I also like to experiment with different flavors.
I wouldn’t call this version entirely sweet or entirely savory. They’re somewhere in between. The spiciness of the rosemary combines perfectly with the freshness of the lemon. I served them with clotted cream and homemade lemon curd. Overall, these scones lean slightly towards the sweet side.

Either way, they’re perfect for brunch or high tea. I’m sure you’ll impress everyone with these delicious scones.

Why This Recipe Works

  • Delicious! – if you love scones you might want to try this twist on the classic as it is just so delicious and surprising too!
  • Easy – despite popular belief, making scones is not that hard and these rosemary lemon scones are easy!

Recipe Ingredients

  • Fresh rosemary – make sure only to use the needles and chop them very finely. Using dried rosemary is also an option.
  • Self-rising flour – if you do not have self-rising flour you can use all-purpose flour and add a bit of baking powder. Check this article on how to substitute all purpose flour and self rising flour.
  • Lemon – you use the lemon zest here
  • Milk – I use regular full-fat milk
lemon rosemary scones-3

How To Make The Lemon Rosemary Scones

Making the rosemary lemon scones is easy. You need a large bowl in which you combine the dry ingredients. Give it a bit of a mix and add the cold butter to it.

Use your fingers rub it together until it creates a coarse crumbs. At which point you add the milk and knead it by hand until you have a firm dough. You can use a food processor if you prefer but it’s not really necessary.

Place the dough on a lightly floured work surface. Now roll the dough out using a rolling pin. You want it to be roughly 3 cm thick or 1.2 inches.

Using a pastry cutter or a cookie cutter cut out the scones and place them on a lined baking sheet. Brush the top with a little milk and bake in the preheated oven for around 12 to 15 minutes.

You want them to be lightly browned but they don’t need to be golden brown.

Storing The Scones

You can store the scones outside of the refrigerator for 3-4 days in an airtight container. You can reheat them when you’re ready to eat. They will lose some of their crispness but will still be delicious!

Freezing the scones

You can freeze the scones if you wrap them well. They can be kept for up to three months that way.

More lemon recipes

lemon rosemary scones-1

FAQ Lemon Rosemary Scones

Can I use dried rosemary instead of fresh?

Yes, but use less—about 1/3 the amount—since dried herbs are more concentrated.

Why are my scones too dry or crumbly?

You may have overmixed the dough or added too much flour. Use cold butter and minimal handling.

How do I get scones to rise properly?

Make sure your self rising flour (or flour with baking powder) is fresh and don’t overwork the dough—keep it cold and press lightly when shaping.

Why are my scones spreading out instead of rising?

The butter may have been too warm. Chill the dough before baking to help them keep their shape.


Lemon rosemary scones

Print Recipe

No votes yet

Lemon rosemary scones

The combination of spicy rosemary and fresh lemon is incredible in these scones. They’re perfect for brunch or high tea!
Preparation15 minutes
Cooking25 minutes
Total40 minutes
Servings: 10 pieces

Ingredients

  • 275 grams self-rising flour
  • pinch salt
  • 40 grams unsalted butter
  • Zest of one small lemon
  • 1.5 teaspoons fresh rosemary needles only and chopped finely
  • 150 ml milk plus extra for brushing

Instructions

  • In a bowl, combine the self-rising flour, salt, lemon zest, rosemary, and butter. Rub the butter between your fingers to create a slightly crumbly mixture.
  • Pour in the milk and stir briefly. Knead by hand until you have a firm ball of dough.
  • Roll the dough out to about 3 cm thick and cut out the scones with a pastry cutter. Place the scones on a baking sheet lined with parchment paper, then brush them with a little milk.
  • Bake for 12-15 minutes at 220°C/430˚F (conventional oven), or until they start to brown slightly.
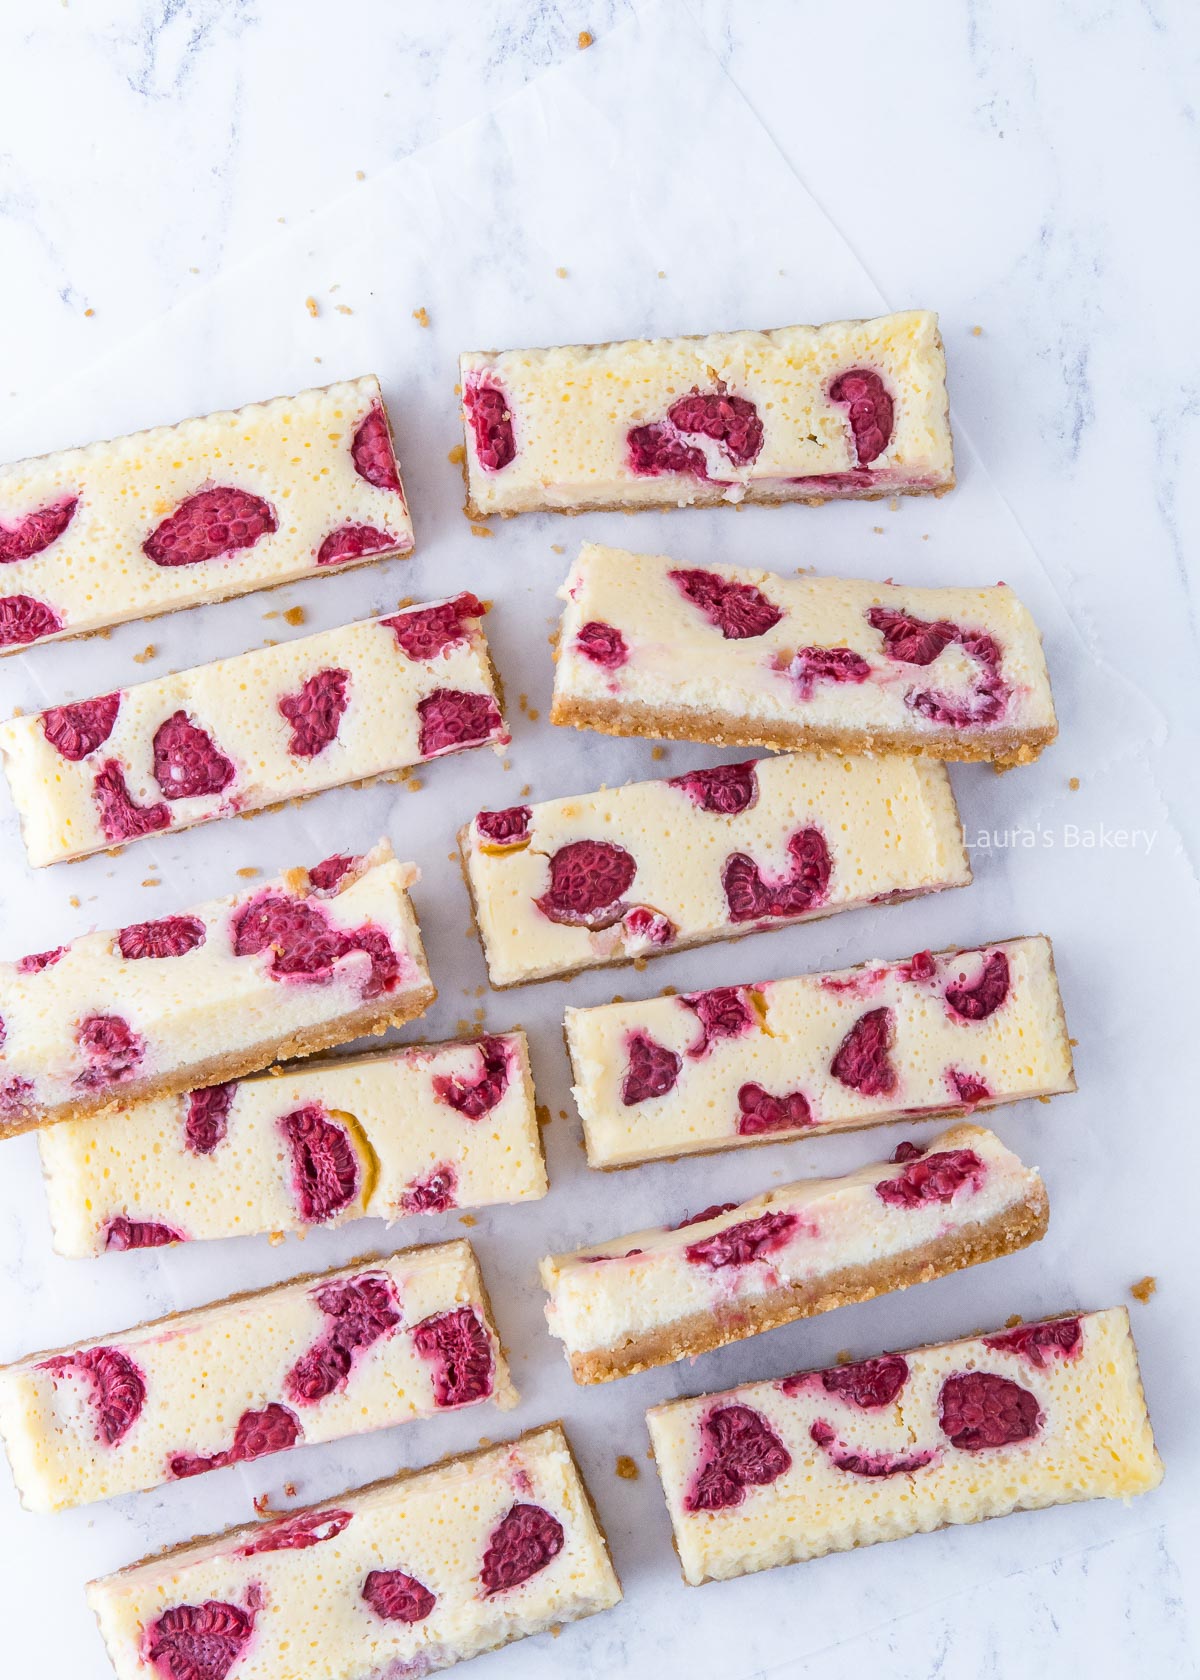
Raspberry cheesecake bars-1

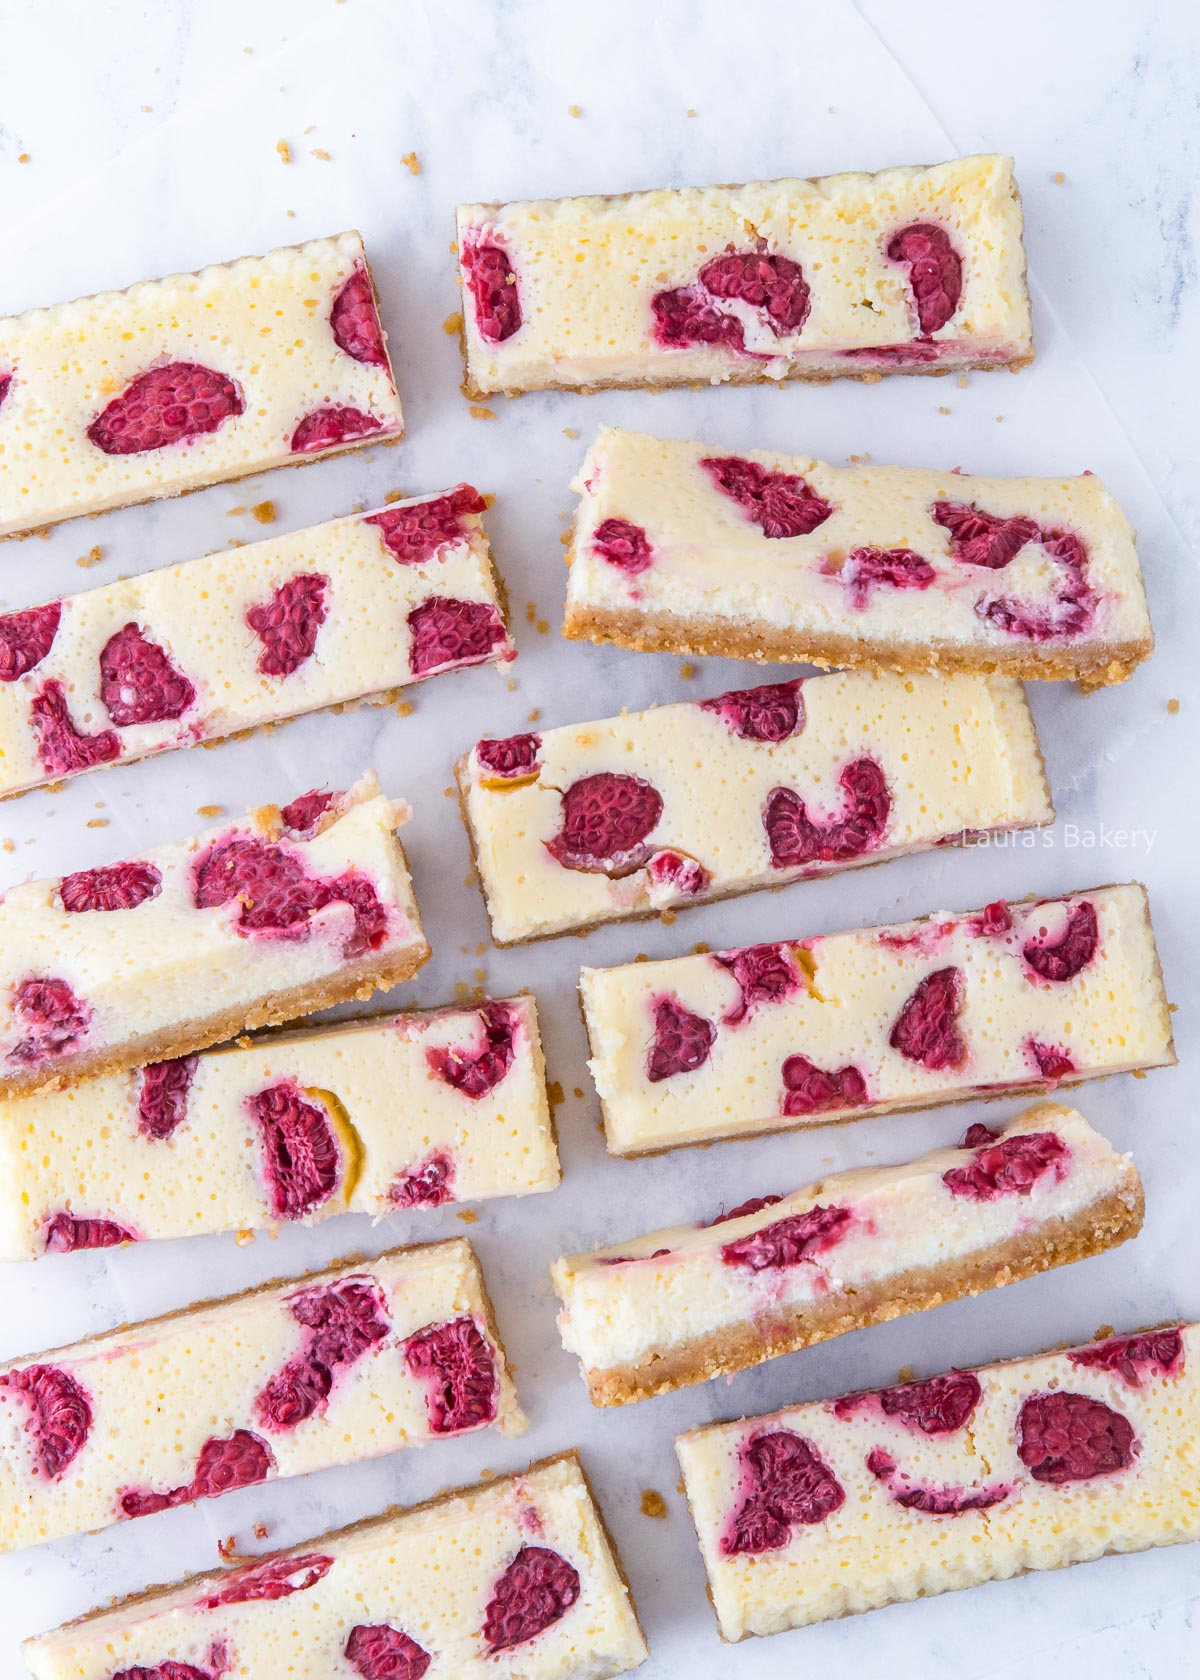
I always enjoy these raspberry cheesecake bars. They’re incredibly easy to make and absolutely delicious.

Please note that baked cheesecake always needs to be refrigerated for several hours. The preparation time is short, but unfortunately, you will need to be patient before you can dig in or share them. Although, these cheesecake bars will be ready a lot sooner than a regular baked cheesecake.

I’ve compiled all my tips for the perfect cheesecake in a blog post. Are you a cheesecake expert yet?

Why this recipe works

  • Sharing – these easy cheesecake bars are perfect for sharing!
  • Snack – they’re also the perfect little snack to enjoy

Recipe ingredients

  • Cookies – you can use graham crackers as the cheesecake base or use your favorite cookies
  • Cream cheese – for the cheesecake filling you will need a firm full-fat cream cheese
  • Sugar – I never use brown sugar for these bars as the look will change if you do
  • Eggs – the eggs provide stability to the cheesecake mixture once baked
  • Sour cream – the sour cream makes the filling a bit fresher
  • Fresh raspberries – I chose to place the raspberries in the cheesecake batter but you can also make a raspberry swirl if you prefer. You can do that by puree some raspberries or use a raspberry jam.

You can optionally add vanilla extract or use different fresh fruit, like strawberries.

Raspberry cheesecake bars-2

How to make the raspberry cheesecake bars

Making this creamy cheesecake is super easy to do. This cheesecake bars won’t need a water bath. The cheesecake layer is thin, so it’s not needed tot prevent cracks and it bakes even easily.

Step one: Make the crust

Mix the graham cracker crumbs with melted butter and combine the two well. Add to the bottom of your baking pan lined with parchment paper. Press down firmly with the back of a spoon.

Step two: Make the filling

Next step is to make the cream cheese mixture. For that, you can use a food processor with a paddle attachment or just use a large bowl. Add cream cheese and sugar and mix till creamy.

Add eggs, sour cream and a little bit of all purpose flour. Mix on low speed until you have a smooth mixture, then pour into your prepared pan.

Step three; Bake the cheesecake

The total bake time should roughly be around 40 minutes at 150˚C/300˚F but be sure to check how it looks. It can still be a little wobbly in the middle but it should be lightly colored and starting to firm up.

Leave to cool in the oven with the door ajar. Next let it cool down completely in the refrigerator. Three to four hours is usually enough to make it firm enough to slice into bars. Regular cheesecakes need longer though.

Storing the raspberry cheesecake bars

You probably will not eat this cheesecake in one sitting, so here are my tips for storing these yummy cheesecake bars.

Storing in the fridge

You can store the bars in the fridge for about 2 to 3 days. Place them in an airtight container or wrap them in plastic wrap.

Freezing the cheesecake

You can freeze the cheesecake in bars making it also easy to enjoy just a portion by taking out one of the bars and letting it get to room temperature. Use an airtight container.

More cheesecake

Love cheesecake? Then make sure to check the below cheesecake recipes as well!

FAQ raspberry cheesecake bars

Can I use frozen raspberries for these cheesecake bars?

Yes! Frozen raspberries work well. Don’t thaw them first—use them straight from the freezer to avoid extra moisture in the batter.

Do I need to use a water bath for cheesecake bars?

No water bath is necessary. Because these are bars and not a traditional cheesecake, they bake evenly in a standard baking dish without cracking.

How do I know when they’re done baking?

The edges should be set, and the center should have a slight jiggle (like Jell-O). They will continue to set as they cool. Overbaking can lead to a dry texture.

Can I use another fruit besides raspberries?

Yes—blueberries, blackberries, strawberries, or even a swirl of lemon curd can be delicious substitutes.


Raspberry cheesecake bars

Print Recipe

No votes yet

Raspberry Cheesecake Bars

These raspberry cheesecake bars are irresistible! Will you eat them all yourself, or will you share them?
Preparation15 minutes
Cooking40 minutes
Total55 minutes
Servings: 12 bars

Ingredients

  • 150 grams graham crackers
  • 80 grams unsalted butter
  • 300 grams cream cheese
  • 90 grams fine granulated sugar
  • 2 eggs
  • 60 grams sour cream
  • 10 grams all purpose flour
  • 125 grams raspberries

Instructions

  • Crush the biscuits and melt the butter. Combine the two, stirring well, then spread the mixture over a baking pan lined with parchment paper. Press down firmly with a spoon.
  • In a bowl, mix the cream cheese and sugar until creamy. Add the eggs, sour cream, and flour. Stir until smooth, then pour the mixture into the baking pan.
  • Spread the raspberries over the cheesecake. I cut the raspberries into smaller pieces myself.
  • Bake the cheesecake for 40 minutes at 150°C/300˚F (conventional oven). Leave it to cool in the oven with the door slightly ajar. Then, place it in the refrigerator for at least 3-4 hours.
  • Cut it into 12 bars and enjoy!
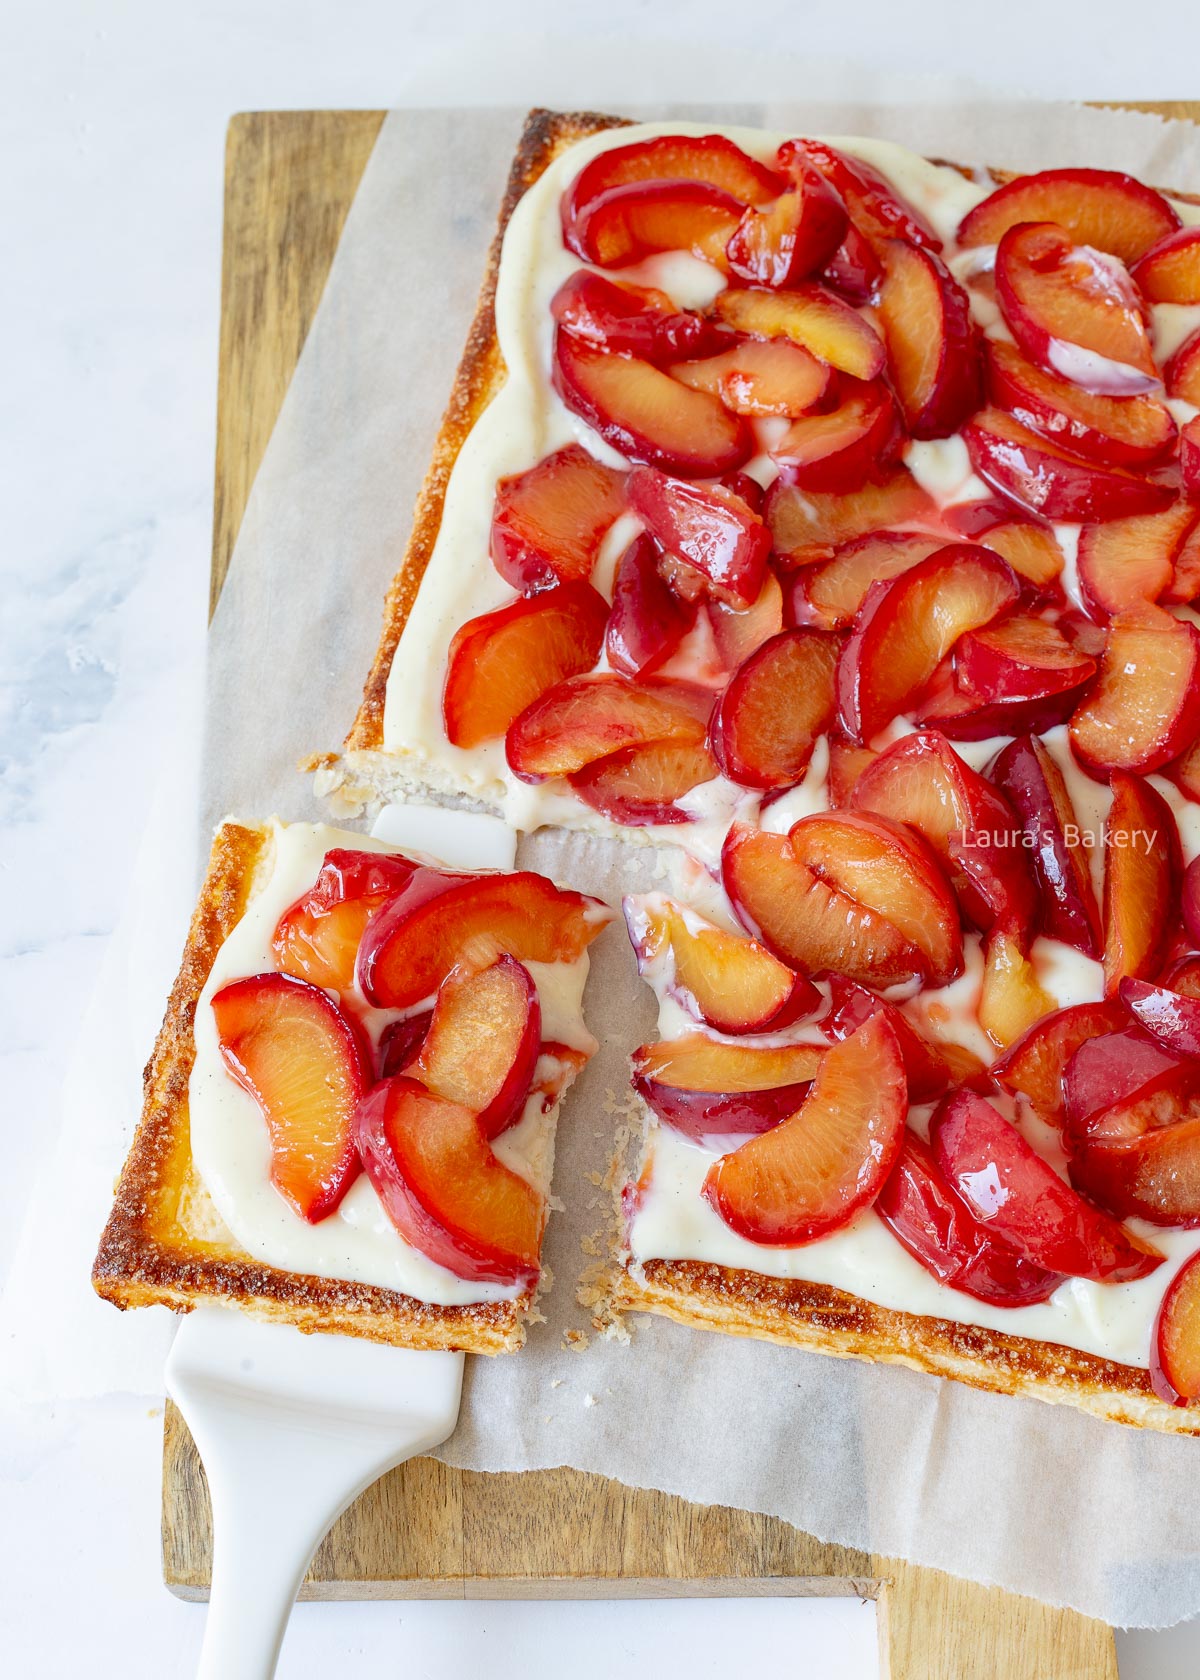
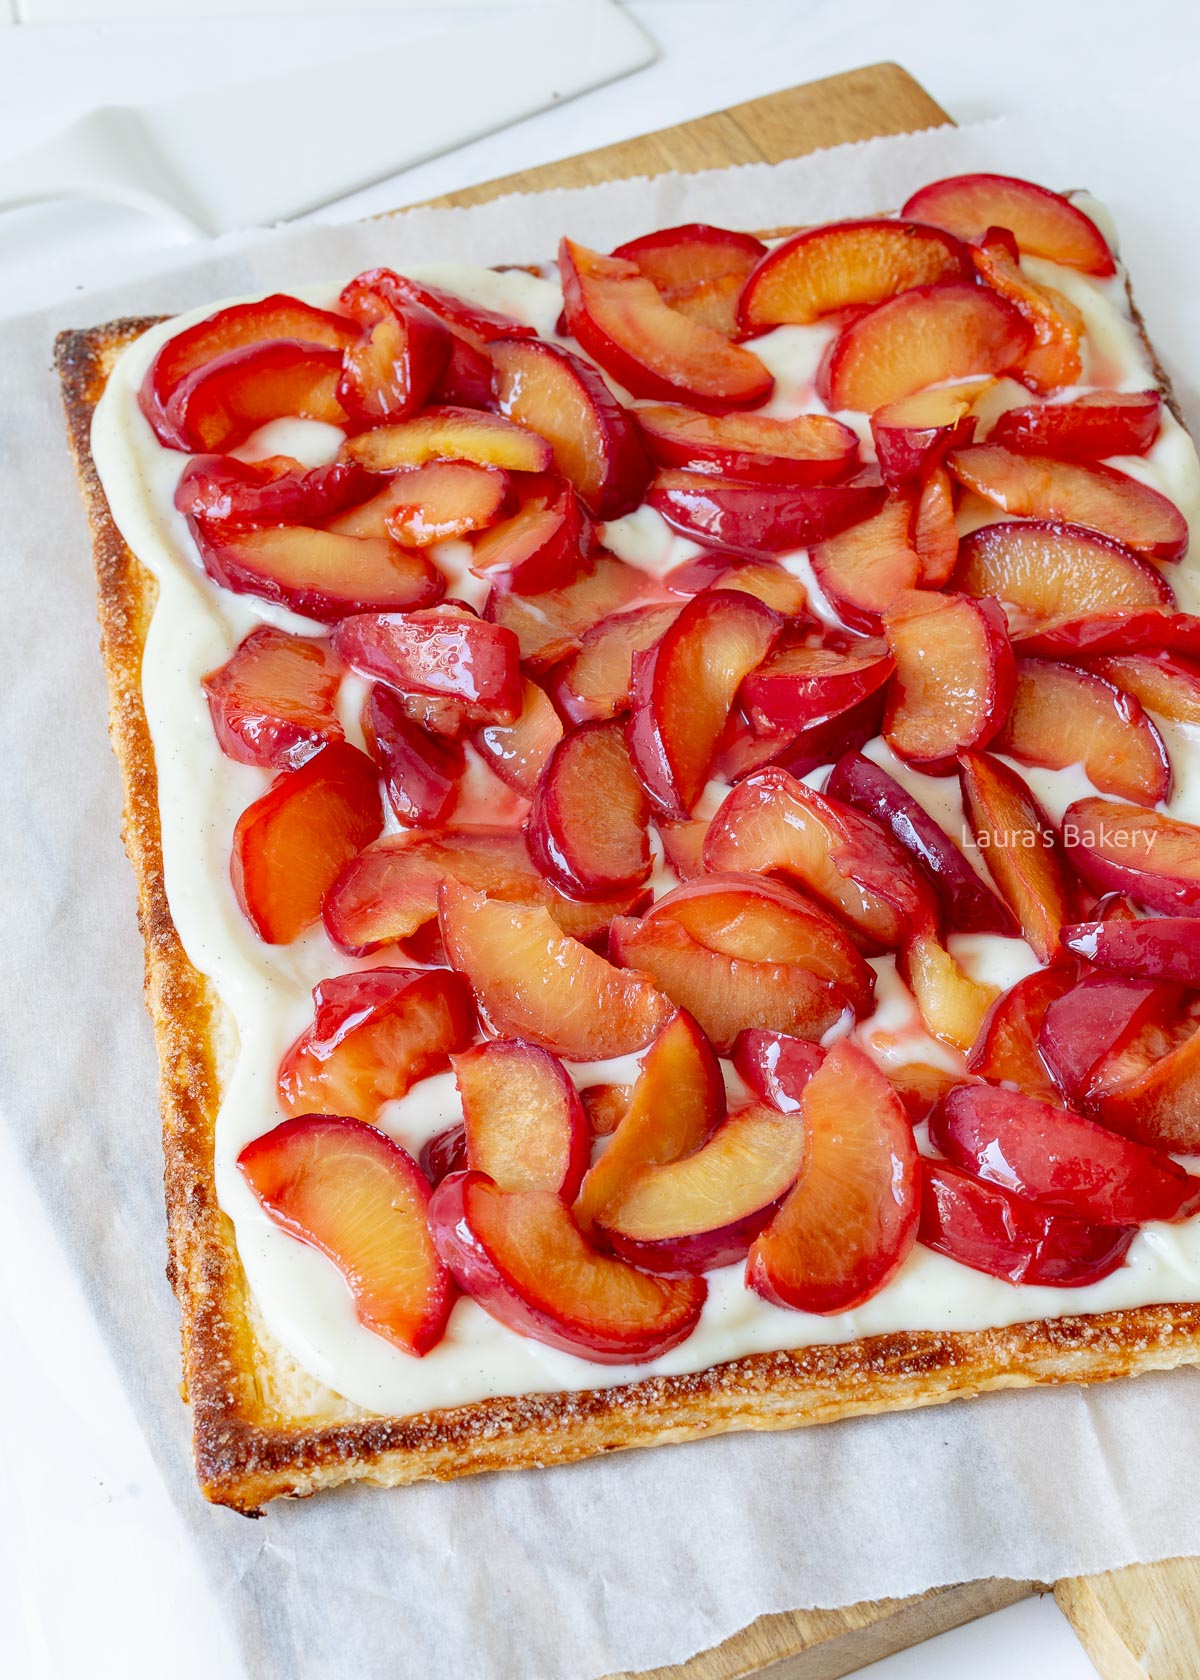
Plum pie with puff pastry-7

Plums are delicious on their own and wonderful in a pie. You must try this fantastic plum pie with puff pastry. It’s easy to make, and it’s sure to leave you licking your fingers. It is one of my favorite stone fruits to use in baking too.

Why this recipe works

  • make the most of the plum season – this plum pie is pretty basic and easy to make, but so good! Once plum season hits, you want to make as much with plums as you can and this is a great choice.
  • easy crust – using puff pastry in combination with the plum filling is just so good and crunchy!

Recipe ingredients

  • Pastry cream – this is easy to make yourself with my recipe for pastry cream
  • Puff pastry – use about one roll, and depending on the size of your plum pie, use either a rectangular one or a round one. Both are fine.
  • Egg – you will only need the egg yolk, so a good idea to find another recipe for the egg whites. Maybe an Italian meringue?
  • Plums – of course, the heroes of this dish are the plums. If you have a plum tree, that is perfect, but if not, make sure you use ripe plums.

I used a rectangular sheet of puff pastry, but as mentioned, it is fine to use another shape. You could even make the pie in a pie dish.

Plum pie with puff pastry-5

How to make the plum pie

Step 1: Make the pastry cream

The first step for making the plum pie is to make the pastry cream. That is the most time consuming element even though it is very easy to make. So do that first before you preheat the oven.

Step 2: Bake the bottom crust

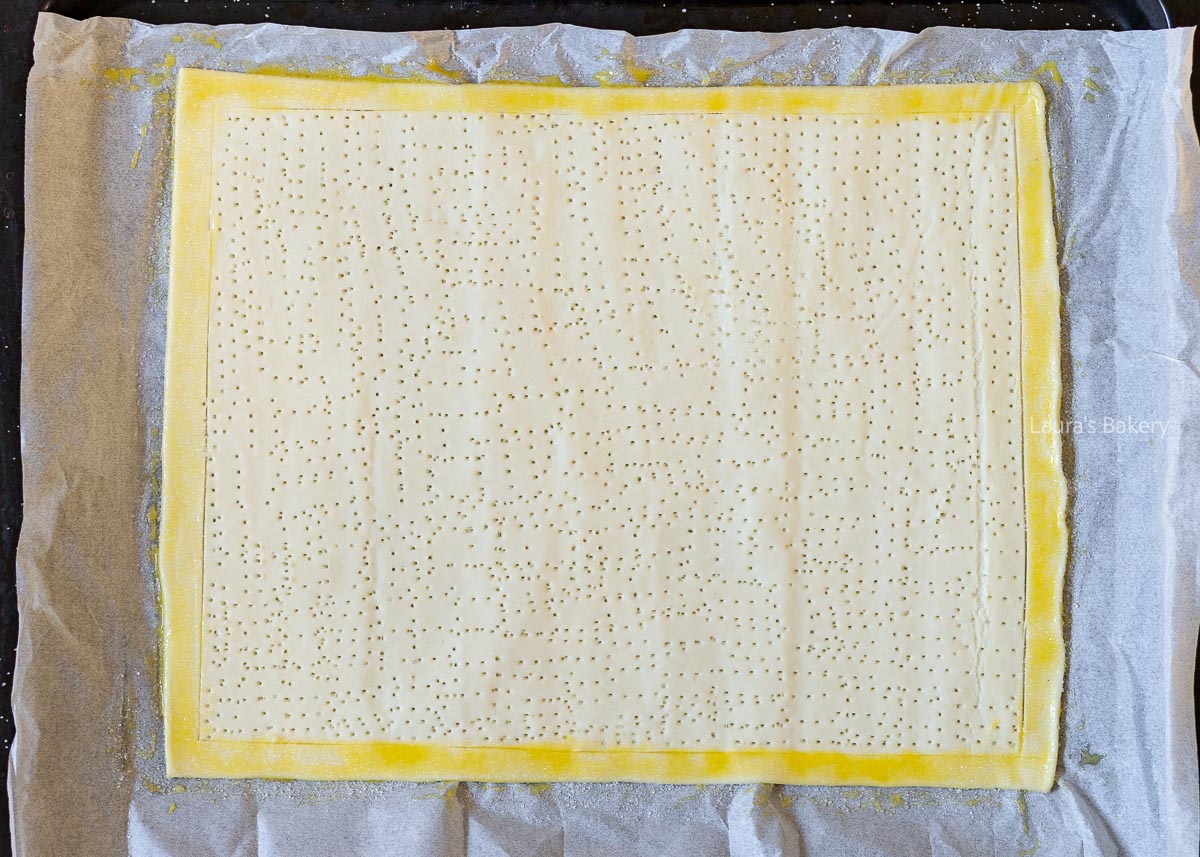
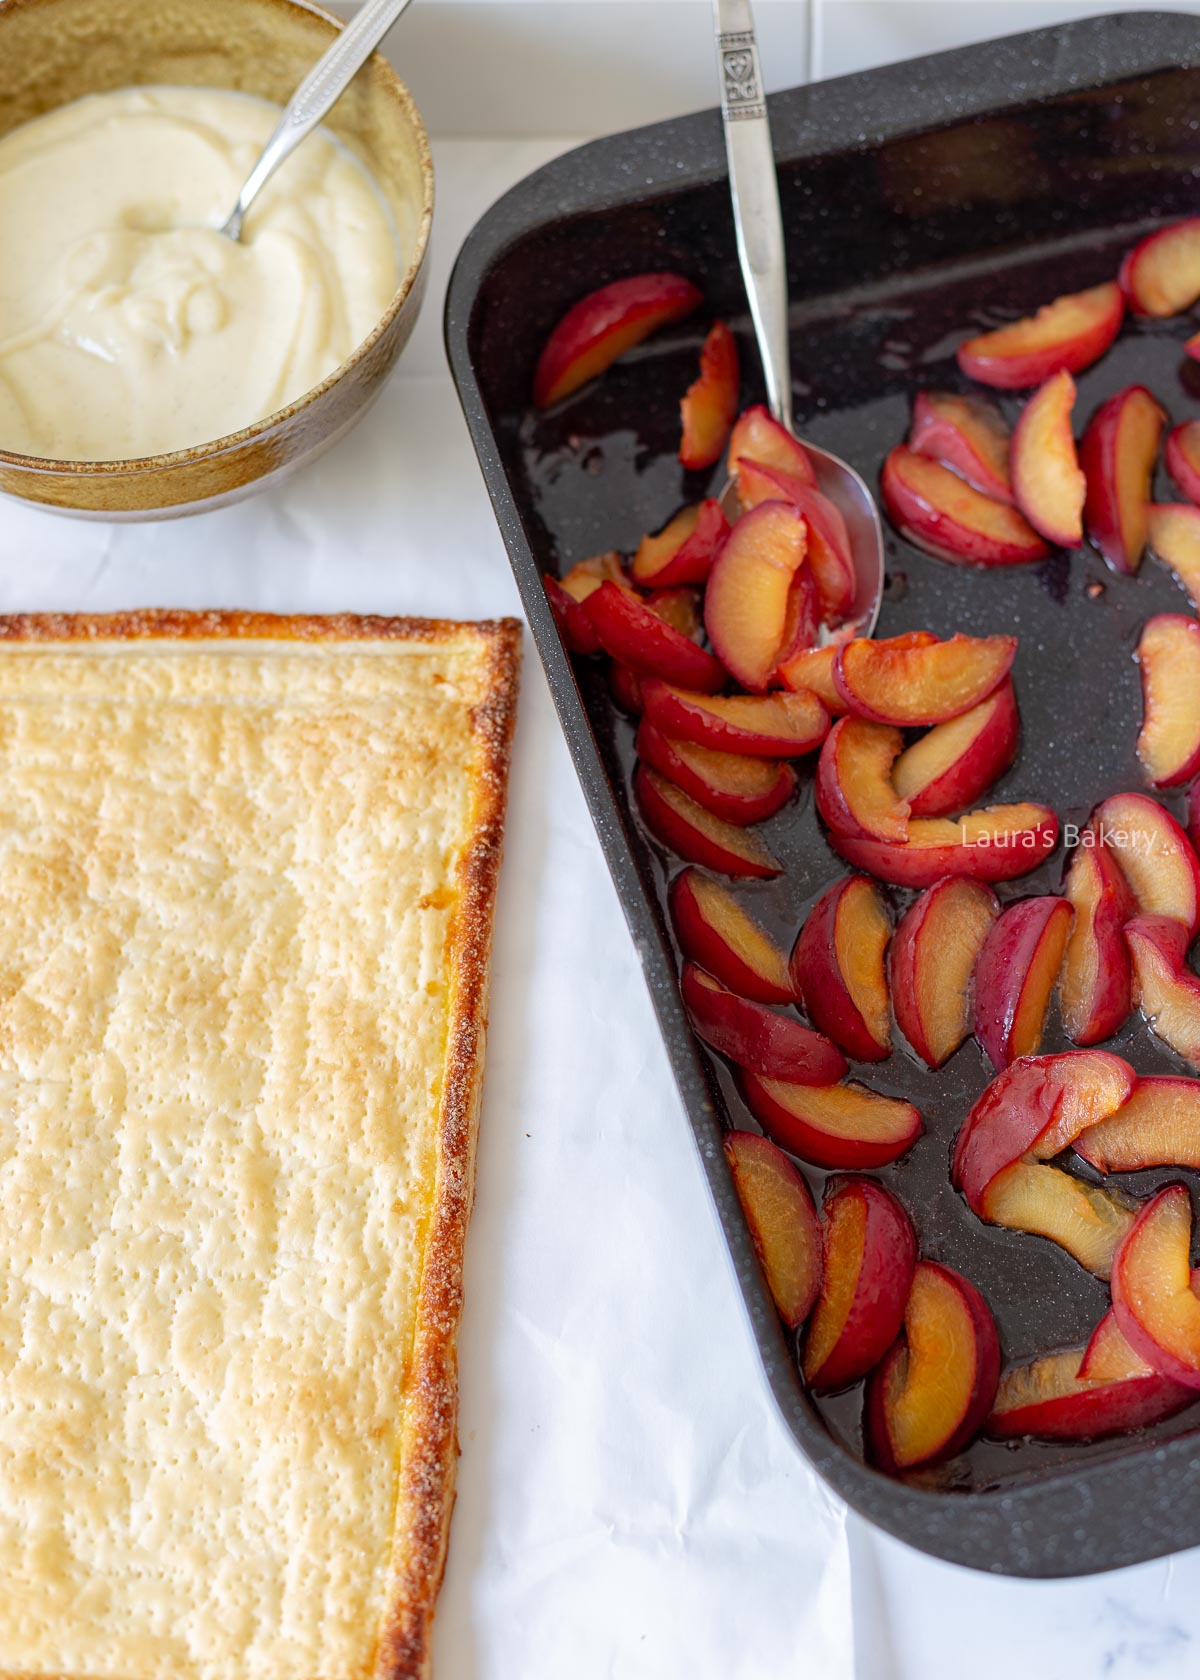
The plum mixture is baked separately from the flaky crust so you want to first bake the pastry. Make sure to line your pie pan with the puff pastry and prick the pastry with a fork. This should prevent it from rising too far.

I sprinkled the pastry with a bit of sugar for additional crunch. Bake in the oven until golden brown in about 20 minutes. Let it cool while you move on to step 3.

On a side note; if you’re not a fan of puff pastry you can also make this delicious pie with shortcrust pastry if you prefer.

Step 3: Slicing the plums

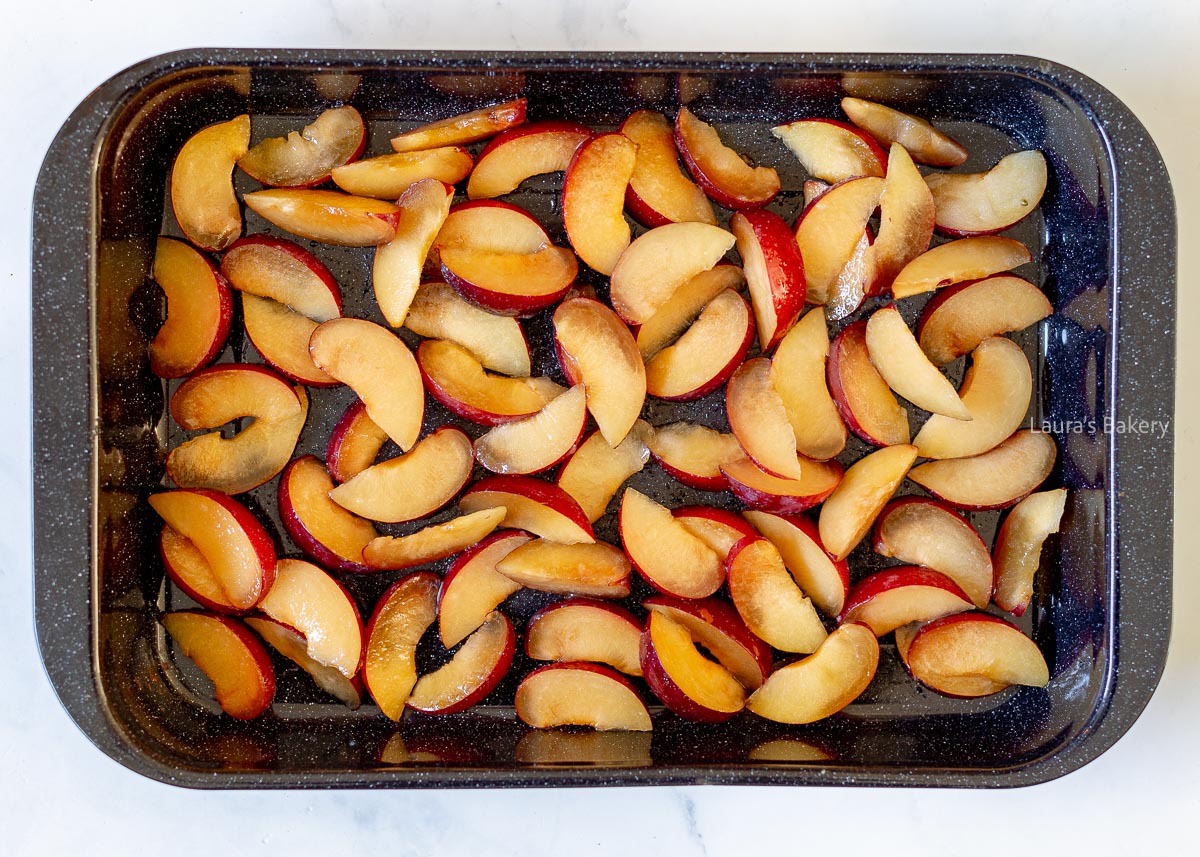
Not my favorite job in the world but the plums need to be cleaned and de-stoned. Combine the sliced plums with a bit of sugar and briefly bake them in the oven. That’s your pie filling done.

If you do happen to have plums that are not perfectly ripe, you can leave them in the oven for about 5 minutes longer.

Step 4: Finish the plum pie

Make sure all elements are cooled before you assemble the final tart. Add a generous layer of the pastry cream on top of the puff pastry and spoon the plum filling on top. Serve right away.

Pricking the puff pastry with a fork

Roasting the plums in the oven

Which plums do you need?

Good news! You can use any plum to make this tart. Plums are usually available from spring to early fall, but each season has its own variety of plums.

These varieties have different flavors and colors, ranging from green-yellow and slightly tart to purple-red and deliciously sweet. They all taste great with crispy puff pastry and pastry cream, even when they are not fully ripe. This is because you bake them in the oven with a little sugar first, which caramelizes them nicely.

Storing plum tart with puff pastry

Ideally, you should not store this tart once it has been assembled. Make sure your guests eat it all in one afternoon. That shouldn’t be a problem. 😉

The individual components are easy to prepare and store, as explained below.

How long can you store a puff pastry plum tart?

As soon as the baked puff pastry base comes into contact with the pastry cream, the base will absorb the moisture and lose its crispness.

You can prevent this by coating the base with a layer of melted white chocolate. This prevents the moisture from the cream from coming into contact with the base.

You can store the tart in the refrigerator for a day this way, but there’s a good chance the base will become chewy due to the refrigerator’s moisture.

Storing individual components

The baked puff pastry base can be stored for three to four days, well covered with aluminum foil. On the day of serving, bake it again in the oven for about 5 minutes at 225˚C/437˚F to make it crispy. Be careful not to burn the sugar rim; cover it with aluminum foil if necessary.

Keep the pastry cream in the refrigerator, where it will remain fresh for 4 to 5 days if covered.

Baked plums do not improve with storage; however, they can be kept for up to two days in a sealed container in the refrigerator.

Making a Tart with Plums

One of the best things about this plum tart is that the recipe is incredibly easy. You can’t taste that in the end result.

The baked puff pastry base and plums both take just five minutes in the oven. This leaves you with plenty of time to prepare the pastry cream.

Just before serving, assemble the tart, and voilà—a delicious, easy plum tart!

Recipes with puff pastry

Puff pastry is a real all-rounder in the kitchen. Whether you want a savory snack, a festive appetizer, or a sweet dessert, you can whip up something delicious with puff pastry in no time.

It’s quick, easy, and always a success. Below, you will find a few of our favorite puff pastry recipes. And if you’re feeling adventurous you can even make the puff pastry from scratch:
Plum pie with puff pastry

Plum pie with puff pastry

Tips for making a plum tart with puff pastry:
What if plums are not in season?

You can freeze ripe, fresh plums. Halve them, remove the pits, and store them in freezer bags for up to three months. This way, you can enjoy this tart even when plums are out of season!

Can I use other fillings?

This plum tart is made with pastry cream, but there are other delicious fillings to choose from. Consider:

Frangipane is a filling that has to be baked with the puff pastry before you can eat it.

Pitting a kilo of plums can be quite a chore if you regularly harvest that many from your own garden. Did you know that there are handy plum pitters available? I don’t think a pitter is necessary for this plum tart, but I’m curious to try one.


Plum pie with puff pastry

Print Recipe

No votes yet

Plum Pie with Puff Pastry Recipe

This plum tart/plum pie with puff pastry recipe is easy to make and absolutely delicious!
Preparation30 minutes
Cooking30 minutes
Total1 hour
Servings: 12 people

Equipment

  • Rectangular baking sheet, at least 30 x 17.5 cm. (12 x 7 inch)

Ingredients

  • 1 recipe for pastry cream
  • 1 roll of fresh puff pastry
  • 1 egg yolk
  • 750 grams of plums
  • 3 tablespoons sugar

Instructions

  • Roll out the fresh puff pastry on a baking sheet lined with parchment paper. Use a sharp knife to cut a 1.5 cm/0.5 inch border around the edges without cutting all the way through the pastry. Prick the pastry within the border to prevent it from rising.
  • Brush the edges with beaten egg yolk and sprinkle with sugar for extra crispiness. Bake at 200°C/400˚F (conventional oven) for 20 minutes until golden brown.
  • Meanwhile, halve the plums, remove the pits, and cut each half into four to six pieces, depending on the size of the plums. In a mixing bowl, combine the plums and sugar until they are fully coated. Place the plums in a large baking dish and bake for 10 minutes in the oven on the same temperature once the crust is ready.
  • Allow the base and plums to cool completely before assembling the tart.
  • Spread the pastry cream over the puff pastry base, keeping the edges free, and spoon the plums on top.
Marinated chicken skewers 3

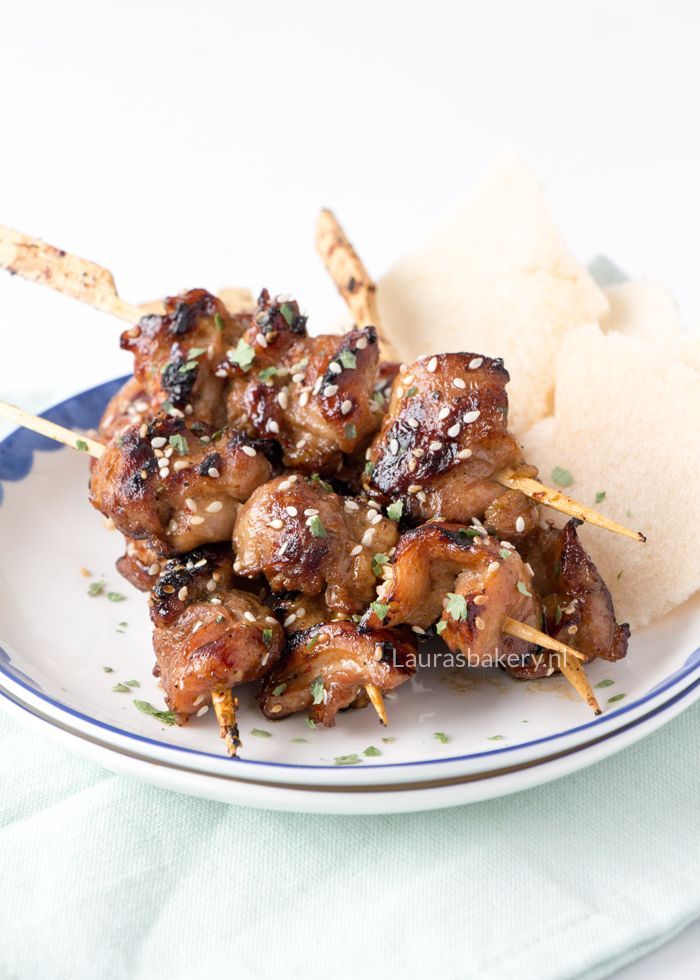
Make your own quick and easy marinated chicken skewers to enjoy on those sunny summer days while enjoying a barbecue with friends and family.

Easy barbecue recipes

Now that summer is in full swing, it is time for a few more barbecue recipes this year. One thing I really enjoy about barbecue is the fact that there is so much you can make yourself.

From delicious and easy side salads, such as a coleslaw recipe or this cold pasta salad. It’s much cheaper than buying ready-made packages, even though they are very convenient.

Last week I already shared my favorite chicken rub, and today I have these delicious marinated chicken skewers. They are essentially satay skewers, but since I am not a big fan of peanut sauce, I make them without that element. Feel free to add if you do like satay sauce, though! Also make sure to check my recipe for crunchy chicken and Mexican shredded chicken too.

Why this recipe works

  • Easy – this is one of the easiest marinades, quick and very tasty
  • Subtle – the satay flavor is subtle and will work with both peanut sauce or another sauce of your choice

Recipe ingredients

  • Chicken – I use chicken thighs as they are fattier and can take the heat better than skinless chicken breasts but you can use both if you prefer
  • Oil – I use a combination of sunflower oil and sesame oil. You can also use olive oil or another vegetable oil if you prefer.
  • soy sauce – I use both sweet soy sauce and regular soy sauce in the marinade ingredients
  • sambal – or another hot sauce like harissa or gochujang
  • garlic – I used fresh garlic but you can use ground garlic as well

In addition to that, you will also need bamboo skewers. It helps to soak the skewers in a bowl of water for about half an hour before adding the chicken pieces. That way they will not burn as easily.

Of course using metal skewers is also a good option. I made the skewers using only the chicken but you can also alternate the chicken with bell peppers and red onion if you want. Or use your favorite vegetables.

Marinated chicken skewers

How to make the marinated chicken skewers

For making the marinated chicken you start by chopping your chicken into bite-sized pieces of course. Once that is done take a large bowl and add all the marinade ingredients. Add the chicken and mix it through. Cover with plastic wrap and let it marinade for at least 30 minutes in the fridge.

Once done, add them to your skewers. How many chicken you add to one skewer depends on the size of your skewers. I usually do three pieces of chicken on each skewer, but I like to use a smaller kind. Easier to handle!

Storing the marinated chicken skewers

You can absolutely make the skewers hours or even a day in advance. You can store the raw chicken in the fridge for a maximum of two days. Once cooked I would not store the grilled chicken as that will get dry and unappealing.

You can however use the leftover chicken in a salad recipe. So don’t throw it away, but if it has been left outside the fridge for too long, it’s better to toss the chicken as a precaution.

You can store the chicken marinade in an airtight container if you want to make more. The remaining marinade can be used as a sauce, but only if you cook it for a couple of minutes or if you store the marinade before adding it to the chicken.

FAQ marinated chicken

How long should I marinate the chicken?

At least 30 minutes, but ideal is 3-4 hours so the flavors can really soak in the meat.

What kind of cut of chicken should I use?

For juicy chicken, it is best to use chicken thighs. For a leaner result you can use chicken breasts but they can dry out quicker.

How do I know when the chicken is cooked?

  • Internal temperature should reach 165°F (74°C). Using a meat thermometer is ideal to make sure.

  • Juices should run clear, not pink.

Generally if the chicken is golden brown and has been on the grill for long enough, it should be cooked through.

How do I prevent the chicken from sticking to the grill?

Make sure the grill is hot and clean, and lightly oiled before adding skewers.


Marinated chicken skewers

Print Recipe

No votes yet

Marinated chicken skewers

These tasty skewers are a must-have during barbecue season.
Preparation40 minutes
Cooking20 minutes
Total1 hour
Servings: 4 portions

Ingredients

  • 500 grams chicken thigh fillets
  • 2 tbsp sunflower oil
  • 1 tbsp sesame oil
  • 2 tbsp sweet soy sauce
  • ½ tbsp soy sauce
  • 1/4 tbsp sambal or more if you like it spicy
  • 1 clove garlic finely chopped
  • 1/4 tsp cumin seeds
  • ½ tsp ground coriander
  • Pepper
  • Sesame seeds

Instructions

  • Wash your hands with soap. Cut the chicken thigh fillets into pieces of about 3 cm each on a separate cutting board. If you don’t like the white pieces, cut them away. Wash your hands thoroughly with soap again.
  • Make the marinade by mixing sunflower oil, sesame oil, sweet soy sauce, soy sauce, sambal, garlic, cumin seeds, and ground coriander in a medium bowl with a fork or small whisk. Make sure the oil is well mixed.
  • Pour the chicken thighs into the marinade, add some pepper, and stir. Stir with a spoon or fork until all the pieces are covered with the marinade. Cover with plastic wrap and refrigerate for at least half an hour. For best results, marinate for a few hours.
  • Thread the marinated chicken thighs onto wooden skewers that have been soaked in water. Three or four pieces per skewer is sufficient.
  • Sprinkle the skewers with sesame seeds, if desired. Grill the skewers on a hot barbecue or in a hot pan for 15 minutes, turning regularly. Turn regularly for even browning. If using a pan, turn down the heat once the meat has sealed. On a grill, check the skewers for doneness after 10 minutes.
  • Serve the marinated barbecue skewers with satay sauce and prawn crackers, or keep it simple. Finely chopped spring onions also taste great on freshly grilled satay skewers.