
How many cupcakes can I decorate with this?
With this chocolate buttercream you can pipe 16-20 nice full swirls.
This easy basic recipe for chocolate ermine frosting is perfect as a filling for a chocolate cake or piped on top of freshly baked cupcakes. It’s my go to recipe for chocolate frosting.

By now my basic recipe for ermine frosting has already won over many hearts. The buttercream is light and airy and even loved by home bakers who don’t usually enjoy a buttery flavor.
This chocolate version is based on that same recipe, but with a rich chocolate taste thanks to the combination of cocoa powder and dark chocolate. You won’t taste the dark chocolate as a separate element, but it makes the ermine buttercream incredibly full and creamy!
Make sure that all the ingredients are at room temperature before you start making the chocolate ermine buttercream.
The biggest difference between traditional buttercreams and ermine frosting is the use of flour in the mixture. This make the frosting much more stable and easy to work with.
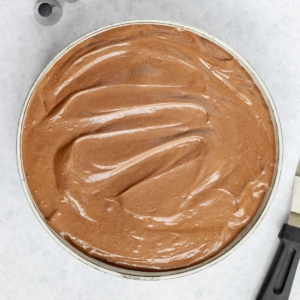
For making it you start by sifting the flour and the cacao powder together. Add with the milk to a small saucepan on medium heat and whisk to make sure you have no lumps. Bring it to a gentle boil and reduce the heat.
It will thicken after about 5 minutes. If you insert a wooden skewer it should stand upright. So yes, it has to be quite thick. Transfer the mixture to a bowl and let it come to room temperature. It should have a velvety smooth texture. If there are lumps, press it through a sieve to remove them.
Once the mixture is fully cooled I add the butter and powdered sugar into another bowl and mix until light and fluffy. Add the vanilla and combine.
In the meantime melt 2/3 of the chocolate over a double boiler. Once melted remove from the heat and add the rest of the chocolate. Stir until all is melted and let the chocolate cool down.
You’re essentially tempering the chocolate the easy way. You can read this article on how to temper chocolate without thermometer for more information.
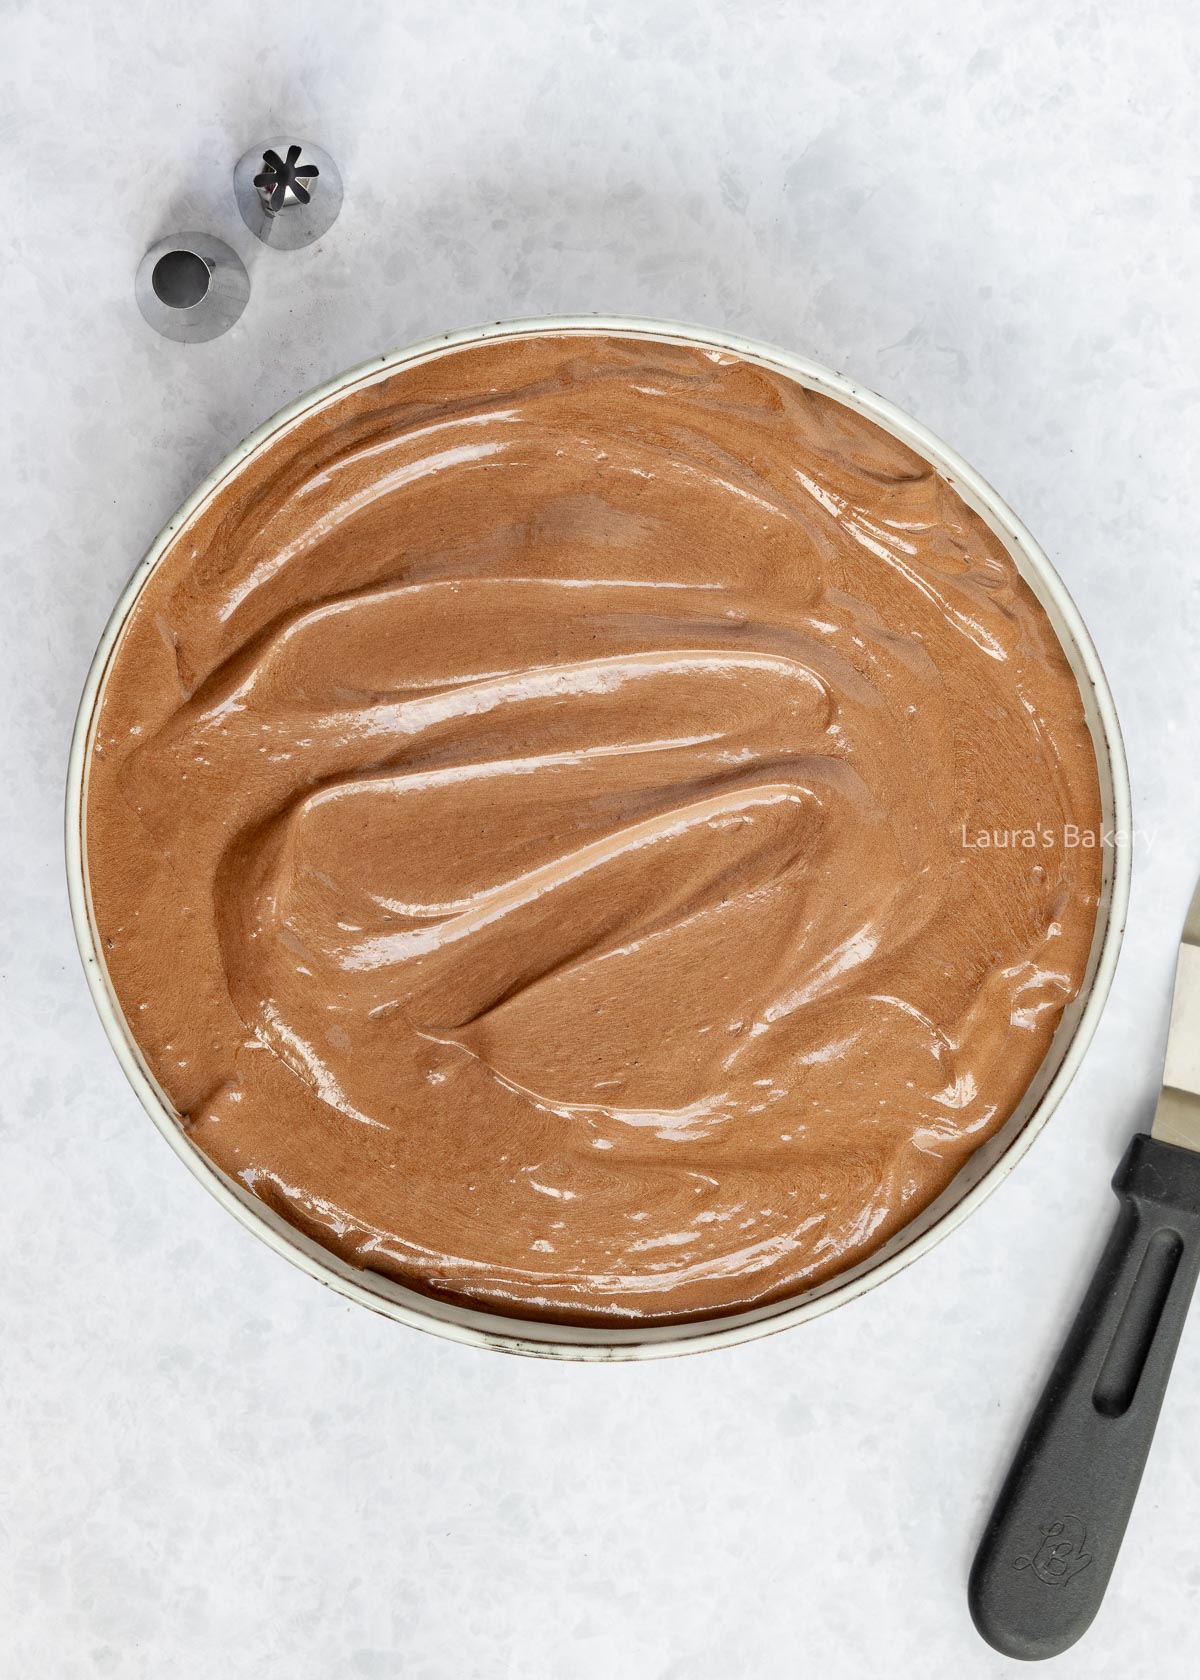
Once the chocolate and the flour mixture are at room temperature it is time to bring it together. Add the flour mix to the butter mixture and whisk until it is creamy. This should take around 5 minutes.
Now add the chocolate but do this in portions and mix well between each addition. Your chocolate ermine frosting is now ready to use!

If I’m planning to use the chocolate ermine frosting later the same day, I don’t store it in the fridge, but in a dry and relatively cool place.
This keeps the cream easy to work with and prevents you from having to bring it back to room temperature again. I always store it in an airtight container.
In the fridge, buttercream keeps for up to a week. Keep in mind that the butter and chocolate will firm up in the refrigerator, so you won’t be able to use the cream straight away.
Take it out several hours before use and stir well. There is a chance the cream might split due to the temperature difference. Read more here about how to fix split buttercream.
Yes! This chocolate ermine frosting can be stored airtight in the freezer for up to 3 months. Remove the buttercream from the freezer a day before using and let it thaw in the refrigerator.
A few hours before using, place it at room temperature. This prevents drastic temperature changes and reduces the risk of splitting.
If you want to know more about all sorts of frostings and toppings I have on the site check these favorite recipes of mine as well:
With this chocolate buttercream you can pipe 16-20 nice full swirls.
A 20 cm (8-inch) cake can be generously filled twice. You’ll likely have some left to crumb coat the cake.
Absolutely! The easiest and least risky way is to mix in a flavor extract. Almond or coffee extract both taste great with chocolate. Adding chopped hazelnuts will taste amazing too.
You can read more here on how to flavor buttercream.
Your buttercream is split when you see tiny white specks appearing in what was previously a smooth cream. That means the ingredients have separated instead of emulsified.
Split buttercream usually happens when ingredients weren’t at room temperature when combined. You can read on how to fix split buttercream here.
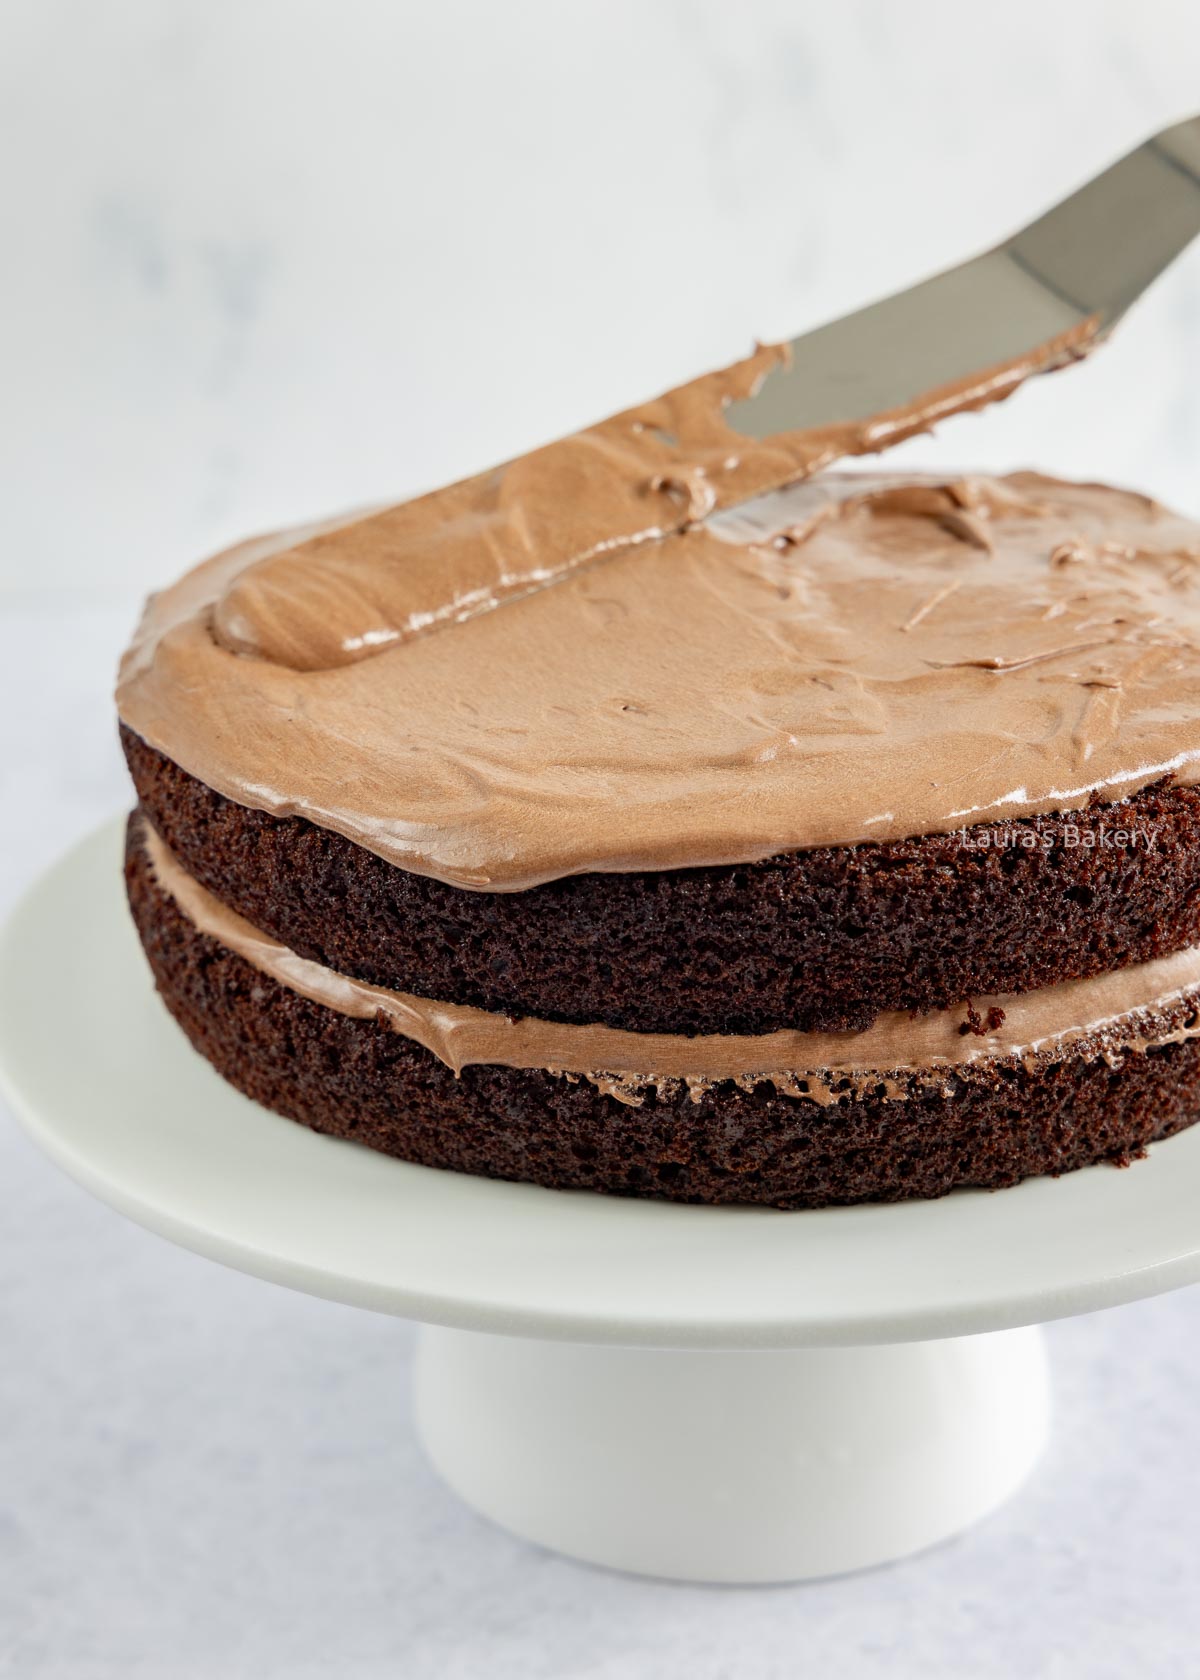
I usually like to use a star tip (1M) because you can pipe so many kinds of swirls with it. My golden rule: always hold the piping bag straight above the cake or cupcake.
In my opinion, this is the most flavorful chocolate ermine frosting, but for fondant or marzipan it contains too much moisture. In that case, use a 1:1 buttercream (equal parts butter and powdered sugar). Add cocoa powder if you want a chocolate version.
You can still use this chocolate ermine frosting as a filling. Pipe the 1:1 frosting along the outer edge first, fill the cake with the chocolate ermine buttercream inside that edge, then crumb coat and frost the cake with the 1:1 regular buttercream, which you can safely cover with fondant or marzipan.
Links in this article may be affiliate links. If you purchase something through such a link, I will receive a small commission, without you paying anything extra.


Welcome to Laura’s Bakery! You’ve come to the right place for the most delicious baked goods and appetizers. With my easy recipes for home bakers I will show you that baking is fun and delicious.
Have fun baking!