Carrot cake muffins-3

If you love carrot cake, you’re going to love these carrot cake muffins. The recipe is super easy and in less than an hour you have delicious fluffy muffins.

Why This Recipe Works

  • Easy – these carrot cake muffins are a perfectly easy way to make a tasty snack or something to serve over coffee.
  • Adjustable – if you want to add more spices or different flavors, that is super simple to do.

Recipe Ingredients

  • carrots – while you can use ready grated carrots, it is always best to do this fresh for the best flavor. With a box grater, it’s easy to do.
  • all purpose flour – that works best for these carrot cake muffins.
  • milk – I use regular whole milk but you can substitute for a plant-based alternative.
  • spices – I use a mix of cinnamon, ginger, cloves and nutmeg but you can easily add other spices like cardamom or use a spice mix like my gingerbread spice mix or speculaas mix.
  • oil – I use sunflower oil but you can use another neutral vegetable oil.
  • sugar – I used regular white sugar but you can also use brown sugar if you prefer. The flavor will be subtly different.

As always make sure to check the full details on ingredients and quantities in the recipe card below. In addition to the ingredients, you will also need a muffin tin with paper liners.

Carrot cake muffins-1

How To Make Carrot Cake Muffins

Muffins are super easy to make and always tasty. The same is true for these carrot cake muffins. Grating the fresh carrots is probably the most time-consuming part.

As mentioned you can use pre-cut carrot julienne for the muffins, but freshly grated carrots will contain more moisture and will keep the muffins tasty and moist for much longer. It will give the best results!

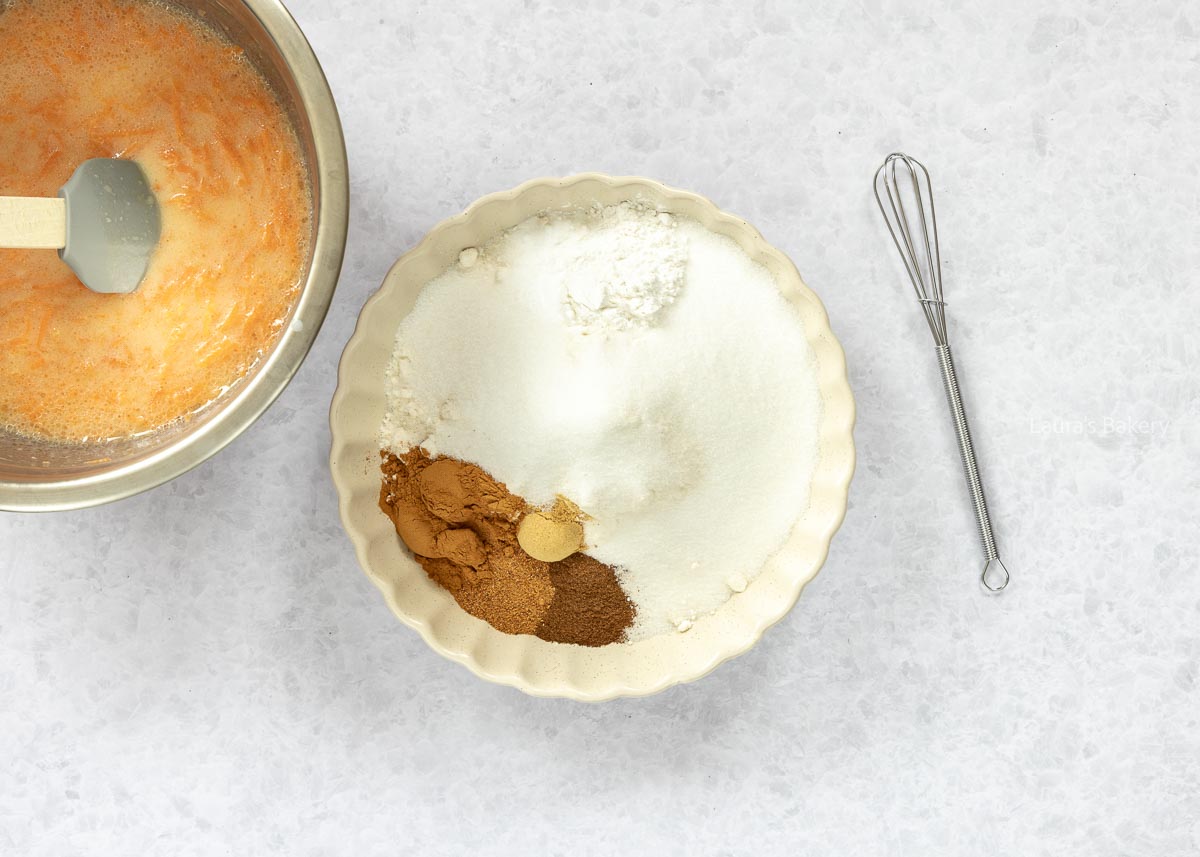
To make the muffins, combine the dry ingredients in a large mixing bowl. In a separate bowl, add the wet ingredients and mix them through. Combine the wet mix with the flour mixture to create your muffin batter.

It’s fine if the mixture is still a little lumpy. It’s easiest to add the batter to the muffin tin using an ice cream scoop. You can add some toppings before baking to the muffin top if you want. Think about adding some chopped nuts for instance.

I also prepared a carrot cake in the air fryer and I’m sure you can make these carrot cake muffins in the air fryer as well!

Carrot Cake Toppings

For an even stronger carrot cake flavor, finish the muffins with a delicious cream cheese frosting. Of course, there are loads of other toppings you can choose from, like the selection below:

Carrot cake muffins-2

Storing Carrot Cake Muffins

Muffins can be stored in the freezer or outside the refrigerator. If you have opted for a creamy topping, add it just before serving. This makes them easier to store.

How long do carrot cake muffins keep?

They can be stored outside the refrigerator for a week. You can store them in a food storage container, a Ziploc bag, or wrapped in plastic wrap.

Can carrot cake muffins be frozen?

If you want to store them for a longer period of time, it is best to freeze them. Wrap them tightly, and they will keep for three months. One extra tip: If you freeze them individually, it will be easier to defrost the desired amount.

Carrot cake muffins-5

Carrot Cake Muffin Tips

Can I make mini muffins with this recipe?

With this recipe, you can make 48 mini carrot muffins or 24 if you halve the recipe. Bake the muffins for 12-15 minutes at 200°C/390°F (conventional oven) until golden brown and cooked through. You will need:

  • Mini muffin pan
  • Mini paper muffin cups

Can I add toppings?

In the above blog post, I described some delicious toppings that you can spread or pipe onto the muffins after baking. Alternatively, you can sprinkle them on top before baking. Here are a few tips that go well with these spicy carrot muffins:

  • Crumble Topping
  • Coarse cinnamon sugar
  • Chopped walnuts or pecans

Help! My muffins weren't moist or fluffy.

You may have mixed the batter for too long. A quick stir is enough. It’s also possible that the muffins were in the oven for too long or at too high of a temperature. Muffins are best when made with freshly grated carrots.


Carrot cake muffins

Print Recipe

No votes yet

Carrot Cake Muffins Recipe

The best of both worlds, this easy recipe combines the flavors of carrot cake and muffins into one delicious treat.
Preparation10 minutes
Cooking25 minutes
Total35 minutes
Servings: 6 muffins

Equipment

  • Muffin pan
  • Cupcake liners (paper)

Ingredients

Dry Ingredients:

  • 120 grams fine granulated sugar
  • 300 grams all purpose flour
  • 1 teaspoon baking powder
  • 1 teaspoon baking soda
  • 2 teaspoons cinnamon
  • 1/2 teaspoon ground cloves
  • 1/2 teaspoon ground ginger
  • 1/2 teaspoon nutmeg
  • Pinch of salt

Wet Ingredients:

  • 2 eggs medium
  • 225 ml milk
  • 1/2 cup sunflower oil
  • 2 teaspoons vanilla extract
  • 150 grams of grated carrots

Instructions

  • Make sure all ingredients are at room temperature. Combine the sugar, flour, baking powder, baking soda, spices, and salt in a bowl. Stir briefly with a spatula.
  • In another bowl, whisk together the wet ingredients: eggs, milk, sunflower oil, vanilla extract, and grated carrots.
  • Add the contents of both bowls together and stir with a spatula until combined. It’s okay if the mixture is a little lumpy.
  • Line a muffin tin with paper muffin cups. Use an ice cream scoop to divide the batter among the cups. You can fill the cups almost to the top; I fill them to about half an inch below the rim.
  • Bake the muffins for 20 minutes at 200°C/390˚F (conventional oven) until golden brown.
Quiche Lorraine-3

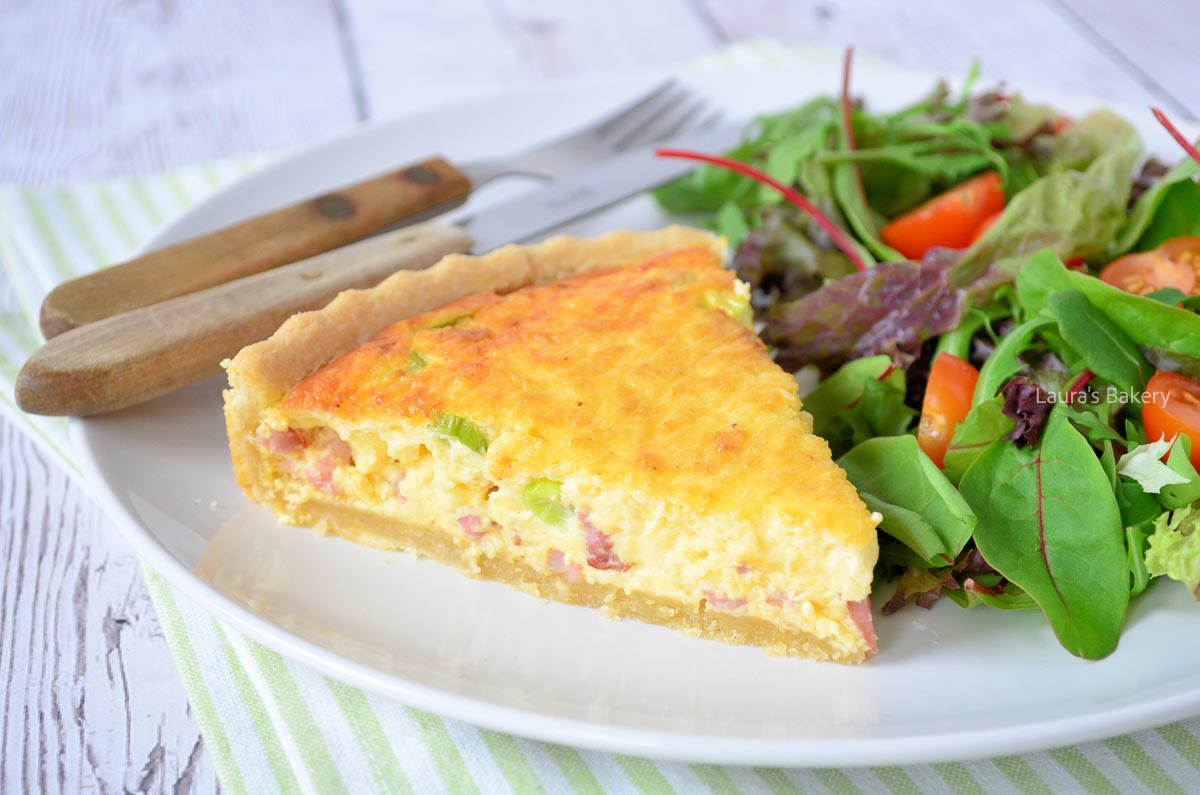
Quiche Lorraine is one of those famous classic quiche recipes that almost everyone has heard of. I have made this so many times that I have lost track, so time to place the recipe online as well.

You might think this is a complicated recipe to make but nothing could be further from the truth. It is a very quick recipe, which of course needs to bake in the oven but in terms of active time? There is really very little.


Why This Recipe Works

This recipe for a quiche lorraine is super easy and so versatile!

  • Easy to adjust: the base of this recipe is simple with nothing more than cheese and eggs (and a few other things). Adding additional flavors is super simple. Add some green peas, cooked ham, broccoli or bell peppers. Those would all work very well.
  • Great side dish: Add a big green salad to a slice of quiche Lorraine and you have a delicious and simple meal.

Recipe Ingredients

For making the quiche Lorraine you need the following ingredients. Make sure to double-check the exact quantities in the recipe card below. Make sure all ingredients are at room temperature.

  • shortcrust pastry – I have the sweet version for making shortcrust pastry here and here are the instructions on how to make the savory short crust pastry. Shortcrust gives it a lovely flaky crust. Of course you can also use ready made pie dough.
  • cheese – no Quiche Lorraine is complete without a substantial amount of melty cheese. You can use Swiss cheese, gruyère cheese or basically any kind of cheese you like in the quiche filling. I mostly use Gouda cheese.
  • eggs – the eggs are what binds the quiche together and gives it that lovely creamy consistency.
  • bacon – I added quite a bit of bacon to the quiche Lorraine and that is delicious but also totally optional
  • crème fraîche – you can replace the crème fraîche with heavy cream, but if you do I would add another egg to be safe on a good structure.
Laura Kieft   I

How to Make a Quiche Lorraine

In addition to the ingredients, you will need a pie pan or a tart pan and some pie weights to blind bake the crust before adding the filling. You don’t want a soggy bottom, so blind baking is highly recommended here.

Step 1: make the dough and fry the bacon

You start by making the dough and chilling this in the fridge while you prepare the rest. Next, fry the bacon in a dry skillet until crispy. Let it drain on a paper towel and set aside. Finely chop the spring onions and mix with the bacon

Step 2: Make the filling.

For making the filling you take a large bowl and add the eggs, crème fraîche and the grated cheese. Add pepper and salt to your taste and a bit of grated nutmeg.

Step 3: Prepare the dough and quiche

Once the dough is chilled long enough you take it out of the fridge and roll it out. Line the pie shell with the dough and poke a few holes in the dough with a fork.

For a really nice flaky pie crust I would advise to blind bake the crust first. To do that you line the pan with parchment paper and add pie weights. Bake in the preheated oven for around 15-20 minutes. Take out of the oven and add the filling.

Step 4: Bake the quiche

Bake the quiche for 30-35 minutes in the oven until golden brown and the filling is set.

Storing the quiche

I really love to make a big quiche for myself and store some pieces for another time.

Store in the fridge

You can store the baked quiche Lorraine in the fridge for 3-4 days. Make sure you wrap it tightly or use an airtight container for storing it.

Store in the freezer

Freezing is also an option; wrap tightly in plastic wrap before adding it to the freezer.

Reheating is best done at 325˚F/160˚C for about 10-15 minutes. Depending on the size of the pieces.

More Easy Quiche Recipes

If you love a good quiche or savory tart, make sure to check out these recipes as well:

Laura Kieft   I

Tips for making quiche Lorraine

Do I need to blind bake the crust first?

Yes – blind baking is essential to prevent a soggy bottom. Bake the crust for about 10–15 minutes with pie weights (or dried beans) before adding the filling. This keeps it crisp even after baking the quiche.

What’s the best ratio of eggs to cream?

A classic custard base uses 1 egg per ½ cup of cream. For a standard 9-inch quiche, 3-4 eggs and 1½-2 cups of cream usually work well for a silky, set texture. Because we have used a slightly different filling with creme fraiche instead of heavy cream this is a different combination.

What kind of cheese should I use?

Traditional quiche Lorraine uses Gruyère, known for its nutty flavor and meltability. Swiss or Emmental also work. Avoid very oily cheeses like cheddar if you’re aiming for classic flavor.

How do I know when the quiche is done baking?

It’s ready when the center is just set – slightly jiggly, but not liquid. A knife inserted an inch from the center should come out clean. Over baking can lead to cracks or a rubbery texture.


Quiche lorraine

Print Recipe

No votes yet

Quiche Lorraine

The Quiche Lorraine recipe is probably the most classic quiche recipe. It’s easy to make and tasty, of course.
Preparation20 minutes
Cooking30 minutes
Total50 minutes
Servings: 4 people

Equipment

  • 24 cm quiche pan 9.45 inch

Ingredients

  • 1 sheet savory shortcrust pastry
  • 250 grams bacon
  • 1-2 spring onions
  • 4 eggs medium
  • 200 ml crème fraîche
  • 150 grams grated cheese
  • Salt pepper, and nutmeg

Instructions

  • Make the dough according to the recipe. While the dough is in the refrigerator, prepare the filling.
  • Fry the bacon bits in a pan until crispy. Drain all of the fat and set the bacon bits aside. Finely chop the spring onions and mix them into the bacon.
  • In a separate bowl, mix the eggs, crème fraîche, and grated cheese. Add salt, pepper, and nutmeg.
  • Roll out the dough and line the pan with it. Prick a few holes in the dough.
  • Line the dough with parchment paper and add pie weights. This can be official baking beans or use dried rice or dried beans. Bake blind in the oven for about 20 minutes. Remove the parchment paper with the weights and bake the crust again for about 5 minutes until just lightly golden. Take out and add the filling.
  • Spread the bacon and spring onions over the bottom of the crust. Pour the egg mixture over the bacon and onions, using a spatula to spread the cheese more evenly, if necessary.
  • Bake the quiche for 30 to 35 minutes at 200°C/390℉ (conventional oven) until golden brown.
  • Serve with a tasty salad. Enjoy!
Laura Kieft   I

If you enjoy baking savory pies, a basic quiche and savory pie dough recipe is an absolute must-have in your repertoire. Crispy dough makes a savory pie (like this quiche lorraine) even more delicious. That’s why I’m sharing an easy, basic recipe for a shortcrust pastry with you today.

Why this recipe works

  • Easy recipe – making this shortcrust pie recipe is super easy to do and super versatile too.
  • Endless options – once you know how to make a buttery quiche crust, the possibilities are endless.
  • Freeze the pastry – if you love baking savory pies and quiches, make the quiche dough in advance and freeze in portions so you’re never without.
  • Superior flavor – compared to a store-bought version a homemade quiche crust is so much better. It’s flaky, delicious and always the better option.

Ingredients for shortcrust pastry

The ingredients for the perfect quiche crust are very basic.

  • flour – I use regular all-purpose flour for making the crust
  • butter – it helps to use cold butter. Always unsalted by the way
  • egg – I use one egg which binds the pastry together
  • water – you need about 2-3 tablespoons of ice water

It helps to bake the quiche crust with a pie dish with a removable bottom.

Savory pie crust how to-1

The difference between quiche and savory pie

Both quiche and savory pie are savory, not sweet. The difference between these two savory pies is in the crust. A quiche is always made with a non-sweet shortcrust pastry crust and filled with a cream and egg mixture (+ additional ingredients).

A savory pie can be made with either shortcrust or puff pastry. This gives you more variety and allows you to experiment with different ingredients.

I previously shared the sweet shortcrust pastry, which you can find here. The biggest difference between the two is that one uses sugar and the other one doesn’t. If you’re looking for easy quiche recipes try this tomato quiche or this easy asparagus quiche.

The difference between puff pastry and savory pie dough:

The recipe below is for a quiche with savory pie dough, which is a shortcrust pastry. Almost everyone is familiar with its sweet counterpart, which is used for instance for these cute little mini lemon meringue tartelettes.

This savory version results in a crispy, crumbly base and is easy to make. Simply mix all the ingredients and knead them into a ball. You don’t need a food processor to do this, although you can if you want to.

Puff pastry is a different story. For example, it contains a lot more butter. This gives it a different taste and texture. Puff pastry is lighter because it flakes when baked.

To make puff pastry, you have to laminate it by folding the butter into the dough several times. This technique is more labor-intensive and requires more resting time in between.

I never use puff pastry for large savory pies, but I do use it for small savory tarts and flat tarts.

More reading:

Pizza salami quiche

Tomato quiche

Storing the shortcrust pastry

Storing in the fridge

You can store the short-crust pastry in the fridge for up to 3 days. Make sure to wrap it tightly in plastic wrap to prevent drying out.

Storing in the freezer

Storing the pie crust in the freezer is a great way to make sure you always have supply. You can even freeze the crust in tin, place it in a freezer bag, and bake the frozen pie crust straight away from the freezer. Otherwise defrost it first and roll dough so it can fit into a pie plate or tart pan.

In the freezer, the dough keeps up to 3 months.

Quiche crust and shortcrust pastry: tips

How do I prevent a soggy bottom?

There are several tricks to ensure that the base of your savory tart is cooked through. One method that always works is blind baking the base, which gives it a head start before the quiche filling goes in. The filling always cooks faster than the base. You can read more about blind baking here. You can use pie weights or dry beans to blind bake the quiche.

If you often have trouble cooking the base, it helps to cover the top of the quiche and place it as far down as possible on a closed baking sheet (to conduct heat). After the specified baking time, remove the quiche from the tin and bake it again for 10–15 minutes so that both the top and bottom are browned and cooked through.

This last step always works very well for me. I usually bake a quiche well in advance, and this is how I reheat it. I bake it without the pan, directly on the baking tray with parchment paper underneath. The result is always an evenly browned quiche with a delicious flaky crust.

What kind of quiche pan do you use?

I prefer not to use a ceramic quiche pan, even though I think they’re beautiful, because they take longer to conduct heat, making it more challenging to cook and crisp the crust.

One last tip is to use a quiche pan with holes in it. This allows the crust of your quiche to bake better and become crispier. A removable bottom is always a bonus.

Can I freeze this savory pie dough?

Absolutely! Just wrap it tightly in an airtight container, and store it in the freezer for up to three months.

How should I reheat a savory pie?

I prefer to reheat it without a baking tin, placing the tart directly on a baking sheet lined with parchment paper. Once the top is browned, cover it with aluminum foil. Bake the quiche for 10–15 minutes at 180˚C/350˚F.

How should I reheat a frozen savory tart?

If you choose to defrost the tart first, do so in the refrigerator or using the defrost setting on your microwave. Then, follow the steps above. The same applies to a frozen quiche or savory pie, but bake it for 10 minutes longer.


Savory pie crust - shortcrust pastry

Print Recipe

No votes yet

Quiche crust (shortcrust pastry) recipe

Ready-made tart shells are a thing of the past. With this basic recipe for savory shortcrust pastry, you can make the most delicious quiche and tart crusts yourself!
Preparation15 minutes
Cooling time30 minutes
Total45 minutes
Servings: 1 pie

Equipment

  • 28 cm quiche pan (11 inch)

Ingredients

  • 300 grams all purpose flour
  • 150 grams unsalted cold butter
  • pinch salt
  • 1 large egg
  • 2-3 tablespoons cold water

Instructions

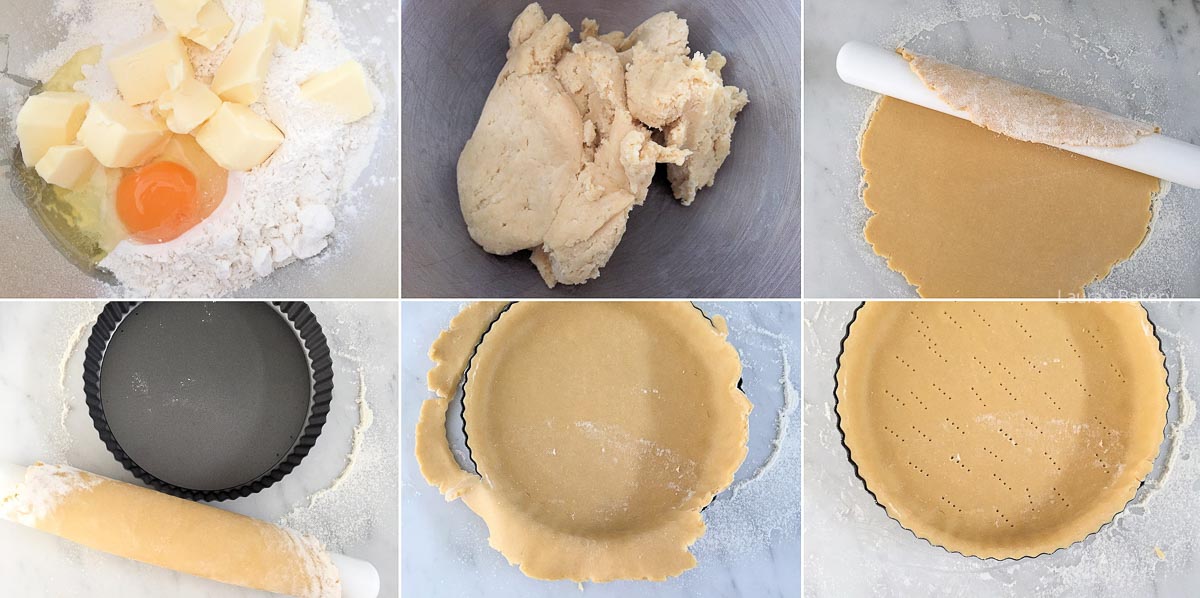
  • Combine the flour, butter, salt, egg, and two tablespoons of water in a bowl. Mix until a smooth dough forms. If the dough is still crumbly, add a third tablespoon of water. The dough should be firm but not too dry.
  • Wrap the dough in plastic wrap and let it rest in the refrigerator for half an hour. In the meantime, start preparing the filling for your quiche.
  • Roll the dough out on a floured surface until it is slightly larger than your quiche pan. To line the pan, I roll the dough around my rolling pin and then place the pan on top, carefully rolling the dough out over the pan.
  • Press the dough firmly into the corners of the pan, then trim off the excess edges. Prick the bottom of the dough with a fork. Always do this, even if you are blind baking the quiche.
  • Baking time and temperature can vary depending on the quiche. However, you can use this basic recipe for any quiche or savory tart filling. After pricking holes in the bottom, follow the recipe steps for your quiche or savory tart.
  • As a general rule, I usually bake a quiche with a crème fraîche and egg filling for 30-35 minutes at 200°C/392˚F (conventional oven).
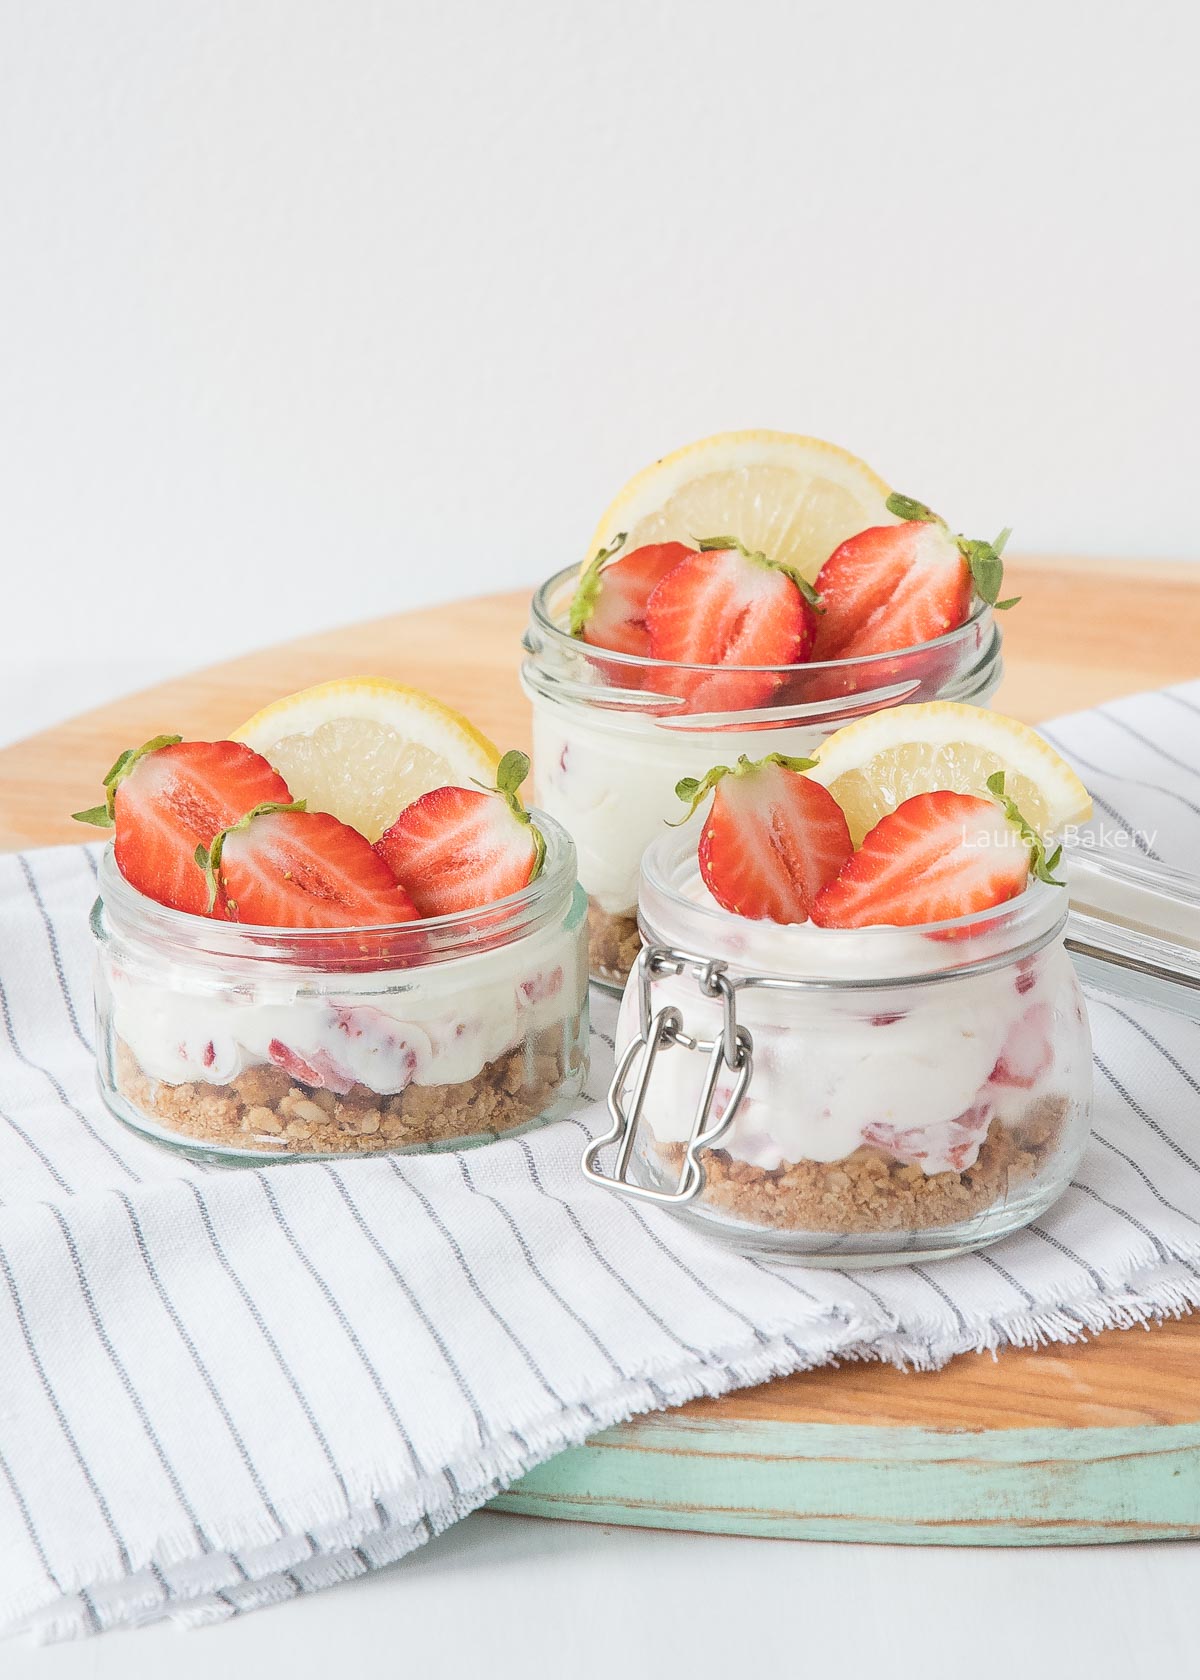
No bake strawberry lemon mini cheesecakes-3

Looking for a delicious refreshing and super quick summer recipe? These no bake strawberry lemon mini cheesecakes are perfect for that summer season when fresh strawberries are everywhere.

Adding a bit of lemon makes the strawberries shine even more. I could eat this no bake cheesecake recipe every day.

Why this recipe works:

  • Super quick: it literally has all the flavor but without the work. Ready and on the table in less than 10 minutes
  • No bake: I don’t know about you but putting on the oven when the temperatures are rising is not always fun. No bake cheesecakes are perfect for still enjoying the taste!

Recipe ingredients

For making this easy recipe you will need the following ingredients:

  • cookies – I like using graham crackers for this, but really you can use just about any cookie you like. I actually used pumpkin spiced oat meal cookies for the version you see in the photos as that is what I had on hand
  • cream cheese – use your favorite brand for this
  • sugar – I use regular white sugar. You can use brown sugar but keep in mind that looks change if you use darker sugar
  • lemon – I use both the juice and the zest for extra lemon flavor. You can replace this with lime if you want.
  • whipped cream – adding a bit of heavy cream whipped to stiff peaks makes the end result even more delicious!
  • strawberries – of course the heroes of this simple dish are deliciously sweet strawberries, but you can replace them with any kind of seasonal fresh berries
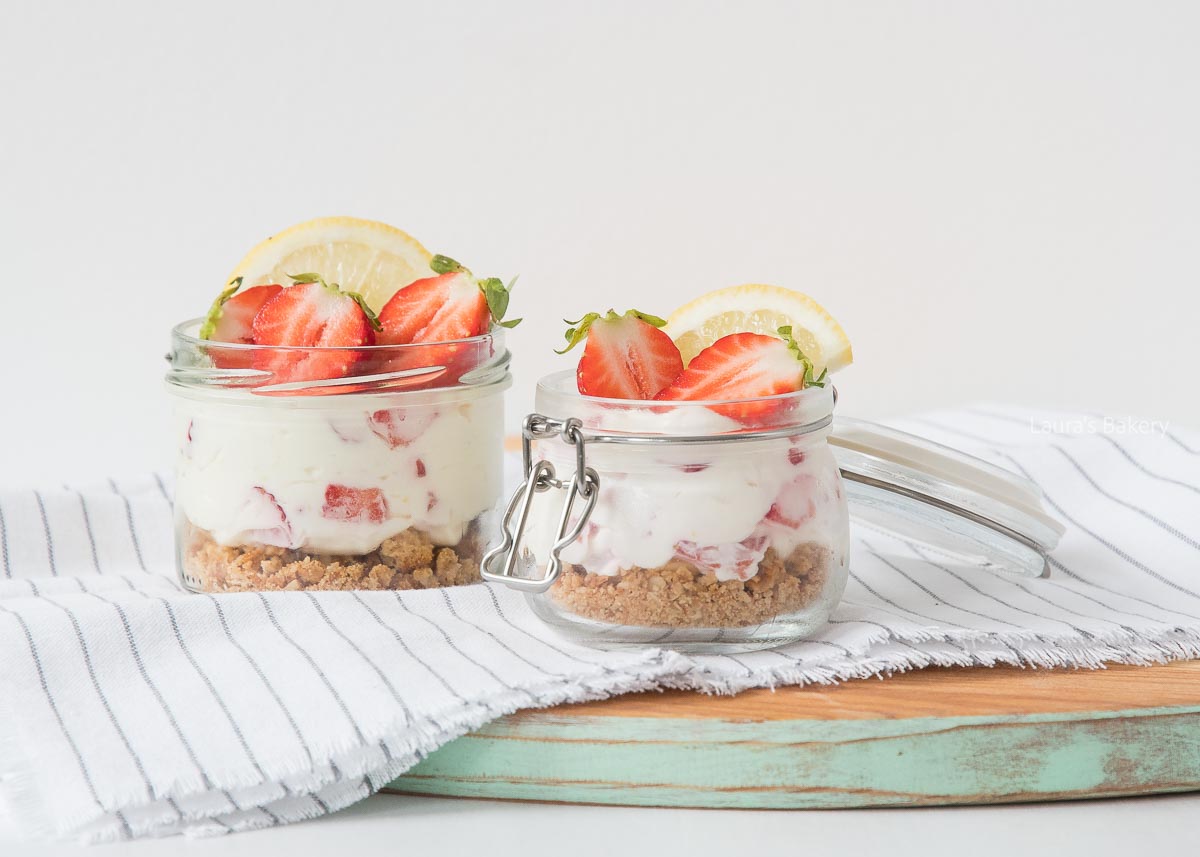
No bake strawberry lemon mini cheesecakes-1

How to make no bake strawberry lemon mini cheesecakes

Making these mini cheesecakes cannot be easier. It’s a matter of crumbling your digestive biscuits, adding them to a few cute glasses or small bowls and making your cheesecake mix.

For that you take a medium bowl and add cream cheese, sugar, lemon juice and lemon zest. Spoon the heavy cream in once whipped and fold it through.

Keep mixing until you have a smooth mixture. The last step is to add the strawberry pieces in.

The strawberry mixture is then divided over the glasses. I place it in the fridge for at least an hour. That firms the mixture and will make it taste even more like real cheesecake, but it is not an absolute necessity.

So if you’re stretched for time and want to dive right in? You can.

EXPERT TIP: When cleaning your strawberries with water, do so before removing the crowns. Otherwise, the strawberries will absorb the water and lose some of their flavor. You can then easily remove the crowns with a strawberry crown remover or a small pairing knife.

Storing the cheesecake

This is one of those recipes that is perfect to prepare in advance. You can store them in the fridge for about 3-4 days but they are still best served the day you make them.

If you want to prepare for a dinner party, make them in the afternoon or morning and enjoy in the evening.

Looking for more strawberry recipes?

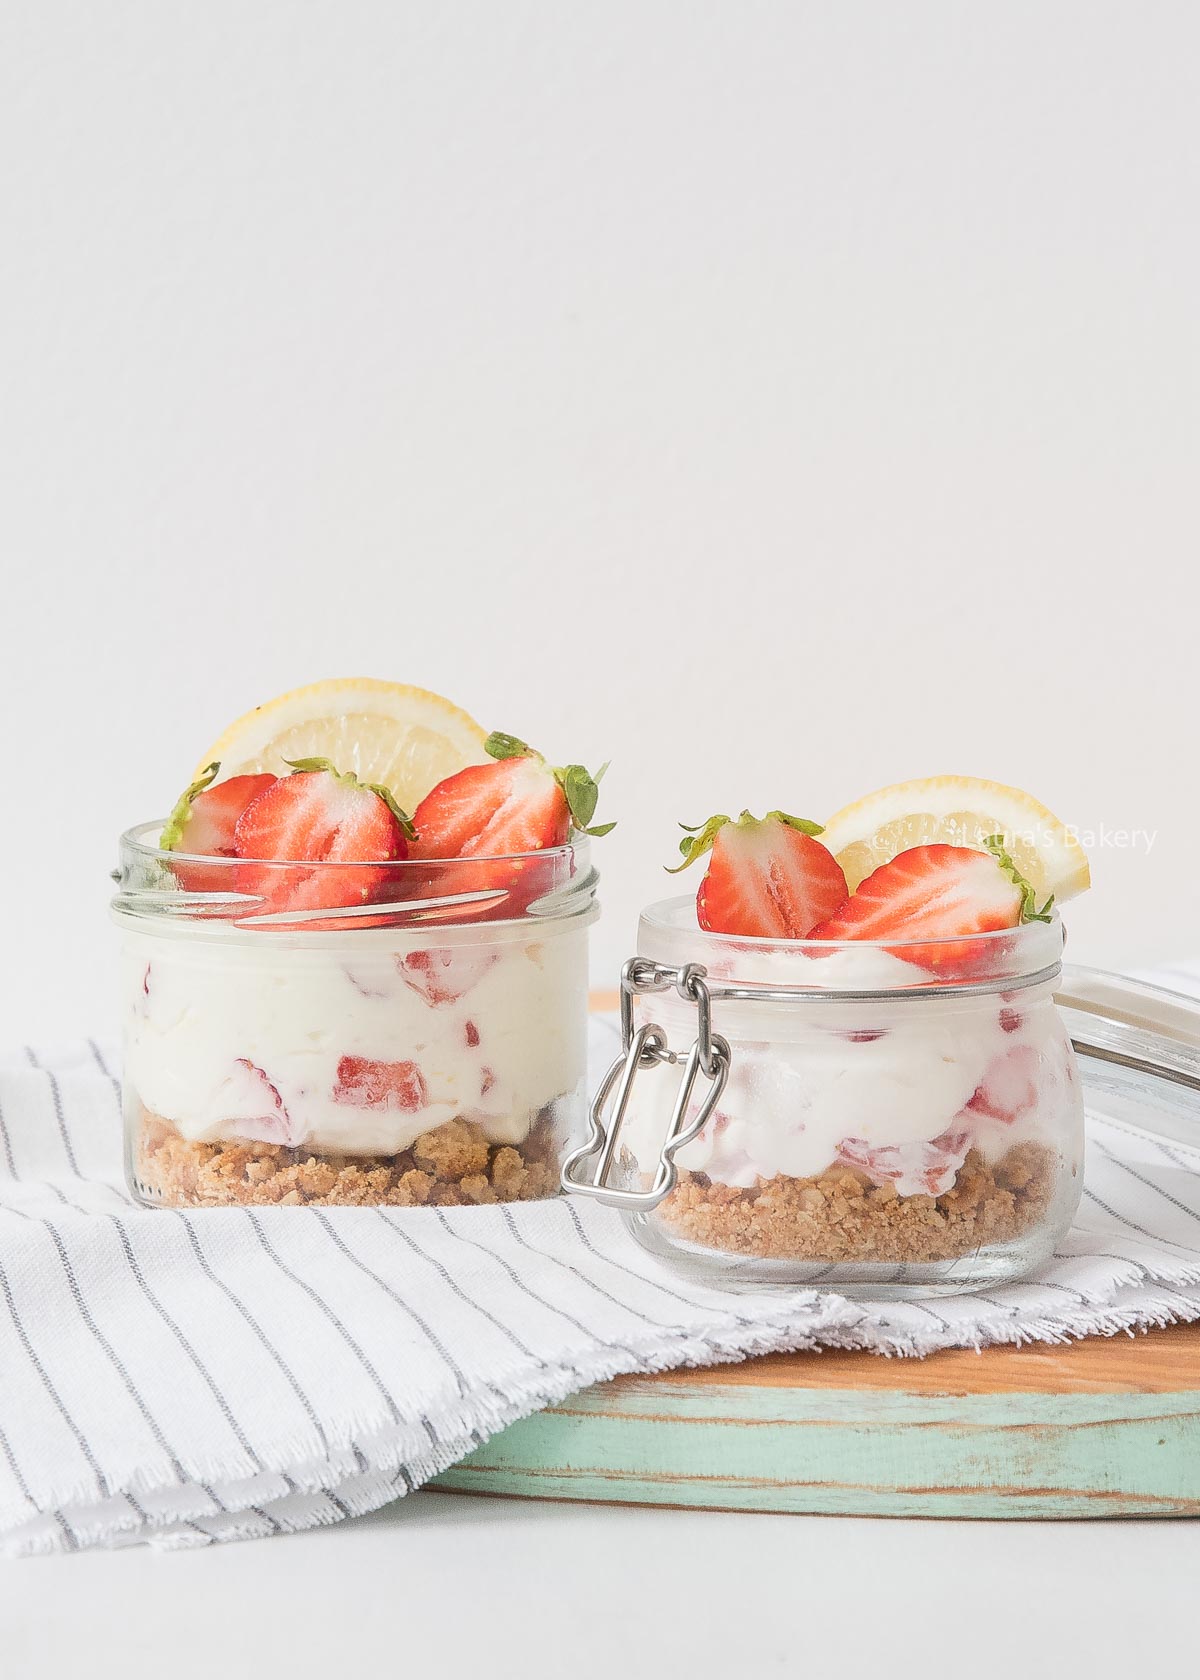
No bake strawberry lemon mini cheesecakes-2

No bake strawberry mini cheesecakes FAQ

Can I use frozen strawberries?

Absolutely. In order to do so it is best to let them defrost completely and drain excess fluid. Frozen strawberries are soft and much more wet. You can also use a strawberry compote or combine strawberries with other fruits.

Can I replace the cream cheese?

If you want to make the strawberry mini cheesecakes a bit lighter you can replace the cream cheese partially with a bit of Greek yogurt. Or switch the heavy cream to sour cream. The flavor will absolutely change if you do that so make sure to taste test before serving.

Do I need a food processor for this recipe?

No, you don’t need any equipment although a hand mixer might come in handy for mixing it into a smooth filling, but folding it with a spatula usually works fine.


No bake strawberry lemon cheesecake thumbnail

Print Recipe

No votes yet

No-Bake Strawberry-Lemon Mini Cheesecakes

These mini cheesecakes are incredibly delicious and very easy to make. After making the quick cheesecakes, simply put them in the fridge to set and enjoy a delicious dessert.
Preparation5 minutes
Cooking5 minutes
Total10 minutes
Servings: 4 portions

Equipment

  • 4 jars

Ingredients

  • 125 grams graham crackers or use your favorite; oatmeal cookies were used this time
  • 200 grams cream cheese
  • 50 grams fine granulated sugar
  • 3 teaspoons lemon juice
  • Zest from half a lemon
  • 125 ml heavy cream
  • 150 grams strawberries cut into small cubes

Decoration:

  • Strawberries
  • Lemon slices

Instructions

  • Crumble the cookies into fine crumbs or pieces. I do this by hand. Divide the cookie crumbs among the ramekins or bowls you want to use.
  • In a small bowl, stir together the cream cheese, sugar, lemon juice, and lemon zest. Whip the heavy cream until stiff and fold it into the cream cheese mixture. Gently fold until the mixture is smooth. Finally, fold in the strawberry pieces evenly.
  • Divide the mixture between the glasses, then place them in the refrigerator for at least one hour.
  • You can add the decorations just before serving or after the hour is up, then return them to the refrigerator.
  • To make the decorations, cut a lemon into thin slices. Then, cut a small piece off each slice so they are easier to place on the cheesecakes. Finish with half strawberries, and you’re done!
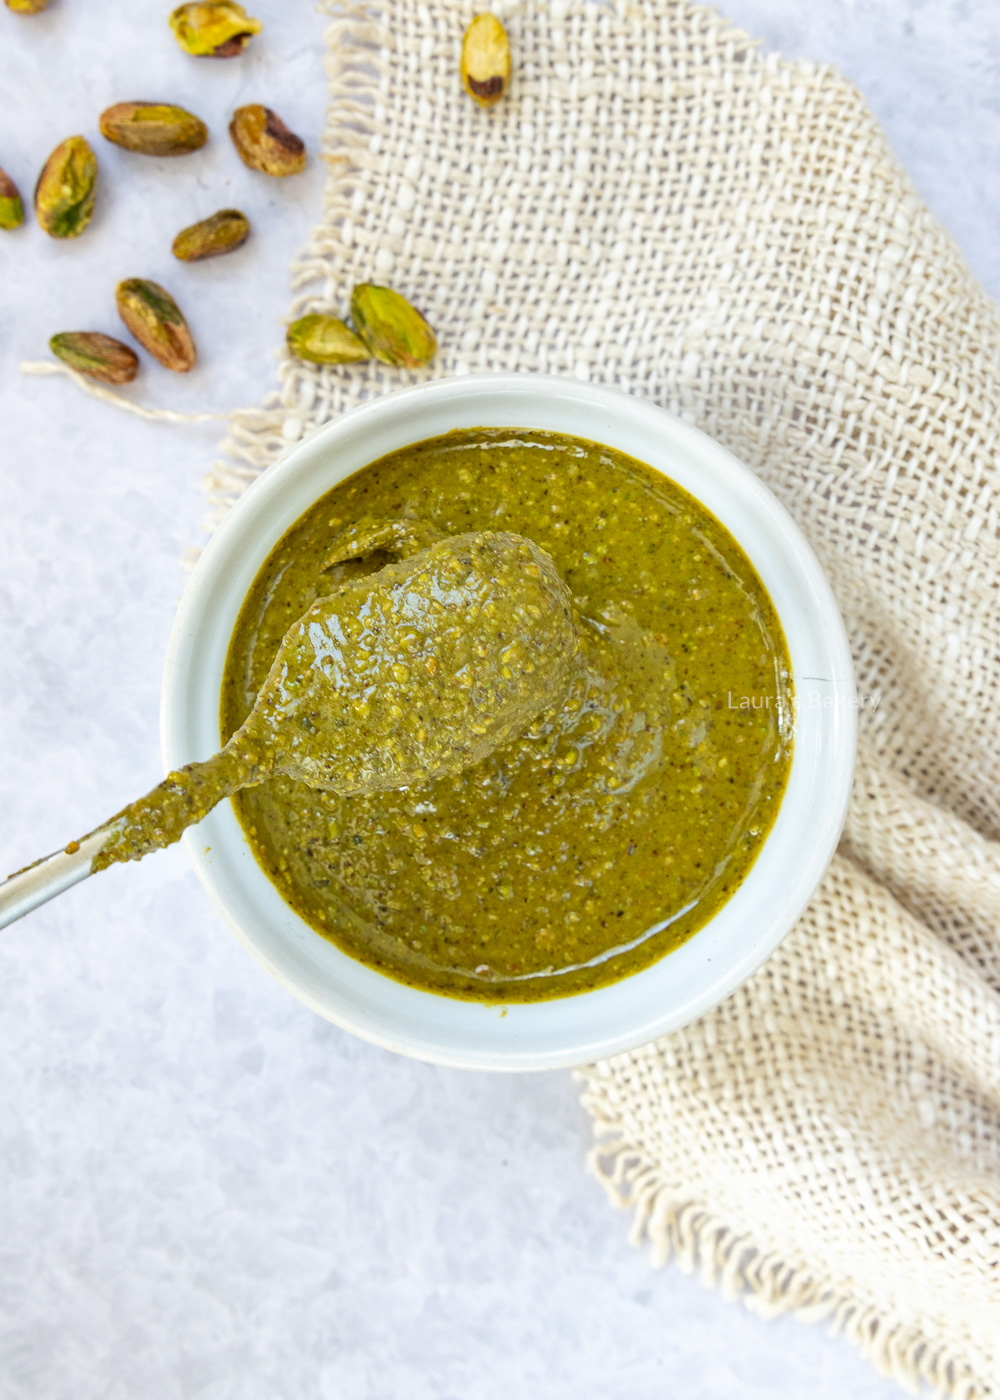
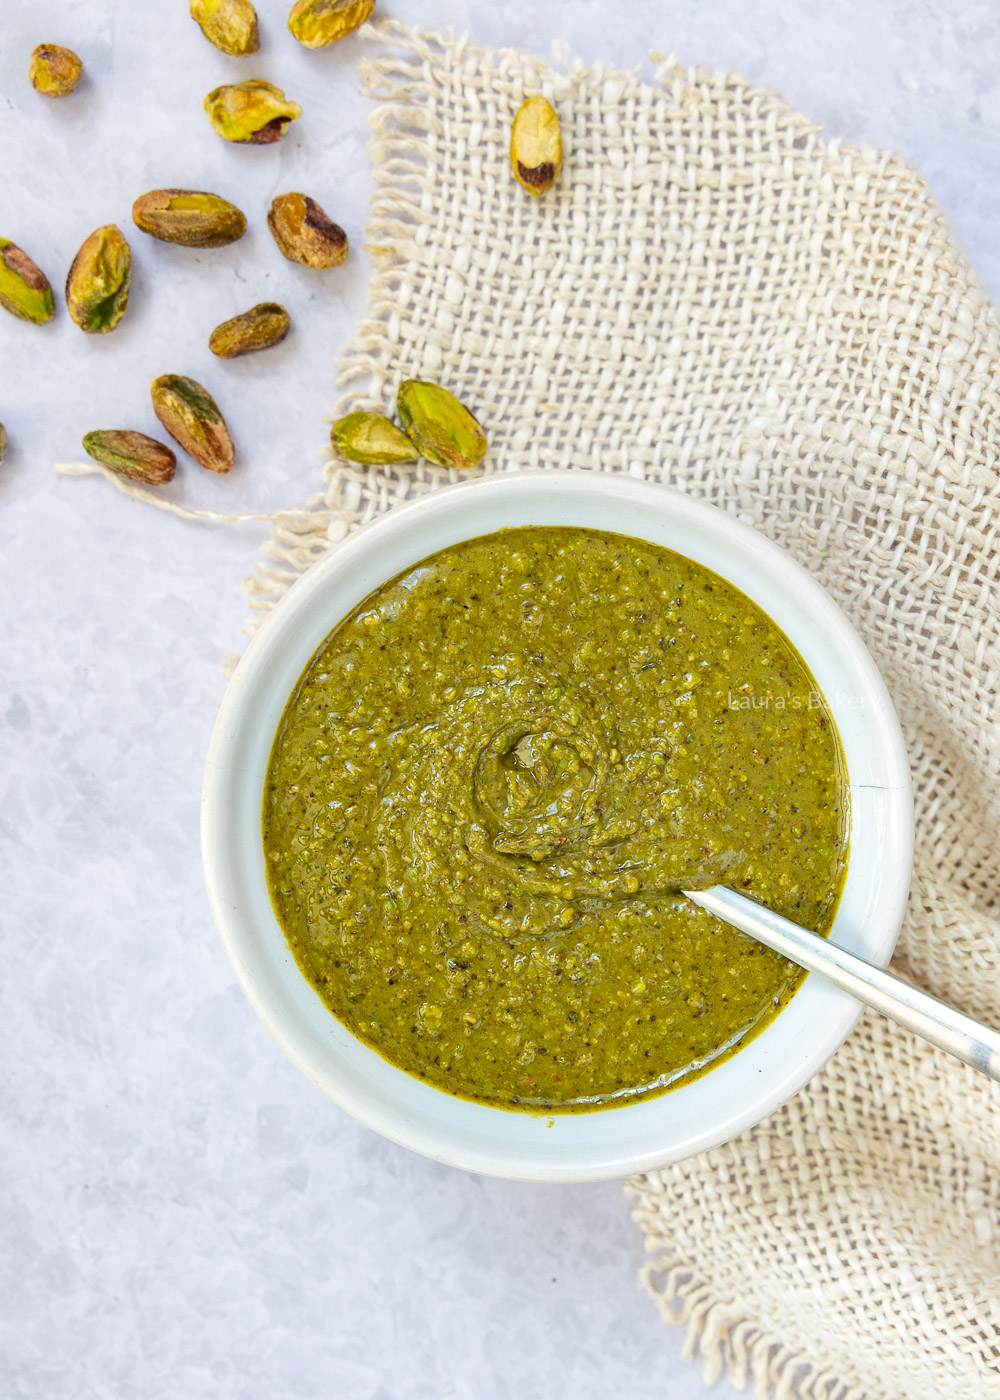
Pistachio paste 2

If you’ve ever fallen in love with the rich flavor of pistachio cream in French pastries or trendy Dubai-style pistachio chocolate bars, you’re not alone.

Pistachios have become the darling of the baking world — and with good reason. Their unique, buttery flavor elevates everything from cakes to breakfast bowls.

The good news? You can make your own easy homemade pistachio paste right at home with just one ingredient and a food processor. It’s a great replacement for things like peanut butter, almond butter or any other nut butters in general.

Why This Recipe Works

Homemade pistachio paste is:

  • Free from additives, oils, and sweeteners

  • Customizable in texture (chunky or silky smooth)

  • Cheaper than store-bought versions

  • Incredibly versatile in baking and everyday use

Plus making it yourself is just so satisfying!

Making your own pistachio butter is easy to do by grinding shelled, unsalted pistachios in a food processor. You can decide what is your ideal texture and go for either a smooth or a more coarse version. Depending on your intended use you can add a pinch of salt or do that at a later stage.

It is important to check the quality of your food processor, immersion blender or high speed blender. The nuts need to be processed for about 5 to 10 minutes in order to form a smooth paste.

If you have a food processor that is not up to the task it might overheat and basically not do the job required.

Pistachio paste 6

Step-by-Step: How to Make Pistachio Paste

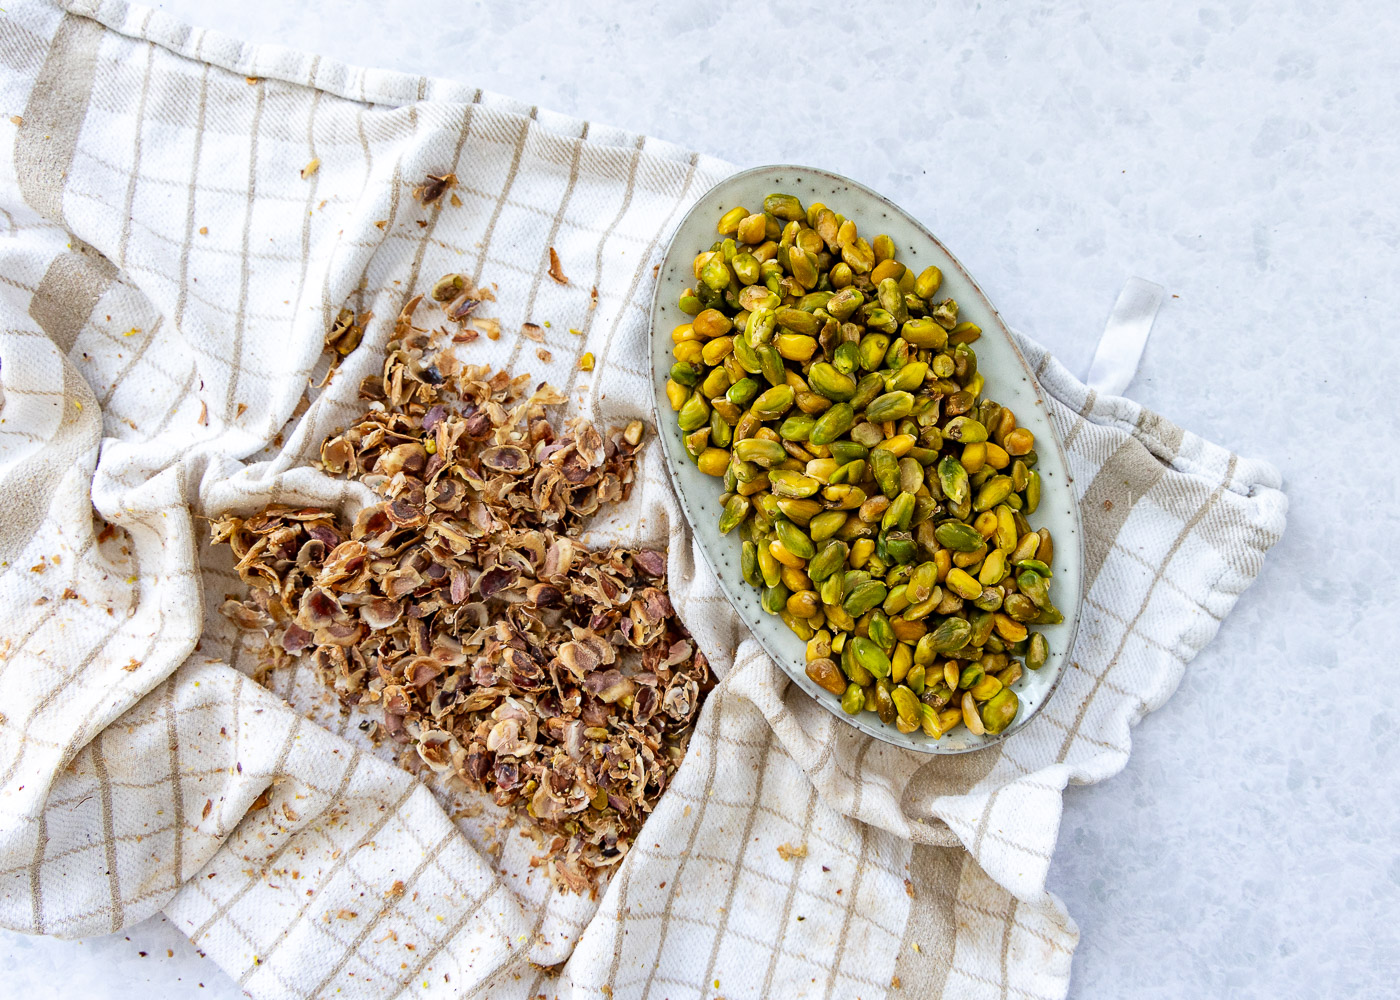
1. Optional: Blanch and Peel the Pistachios

If a bright green color is important for your recipe (like in buttercream or macarons), removing the skins is worth the extra step.

  • Boil: Soak shelled pistachios in boiling water for 1–2 minutes.
  • Peel: Drain and gently rub the pistachios with a clean kitchen towel. The pistachio skin should slip off easily.
  • Dry: Let the skinned pistachios air-dry or roast at 150°C (300°F) for 15–20 minutes until dry and aromatic.

💡 Tip: Skipping the peeling step is totally fine for everyday use — it won’t affect flavor, only color.

2. Roast Pistachios (Optional but Recommended)

Roasting enhances the flavor and helps release natural oils:

  • Spread pistachios on a baking sheet and roast at 150°C (300°F) for 15–20 minutes.
  • Stir halfway through to prevent uneven roasting.
  • Let cool slightly before processing.

3. Process into Paste

  • Add roasted pistachios to your food processor.
  • Start grinding — this may take 5 to 10 minutes depending on your machine.
  • Stop occasionally to scrape down the sides of the food processor and prevent overheating.

At first, the mixture will resemble a crumbly flour, then a thick clump, and finally transform into a smooth, shiny paste.

If your processor struggles, try:

  • Adding a teaspoon of neutral oil (like grapeseed or sunflower)
  • Increasing the batch size so the blades are fully engaged

Pistachio

Pistachio shelled

What Can You Make With Pistachio Paste?

The pistachio flavor is fantastic and you can use the paste in your favorite pistachio recipes, such as pistachio cheesecake, pistachio buttercream, or pistachio ganache.

I have some more delicious pistachio recipes (like a pistachio gelato and pistache cake) on the site! Pistachio paste is also surprisingly versatile for everyday use.

  • Stir some into your yogurt
  • Spread it on a cracker.
  • Mix it into (or over) homemade ice cream.
  • Spoon a little onto your oatmeal for breakfast or, why not, sprinkle some over your french toast.

If you decide to make this paste yourself, you’re probably hoping for a beautiful bright green pistachio paste. However, pistachios are not always as green as you might think.

They tend to be brownish-green, especially when you grind them with the skin on. Here are a few tips for achieving the greenest pistachio butter.

  • Remove the skins from the pistachios. The skins won’t affect the taste, but they will affect the color.
  • Look for green pistachios at a specialty store or online. Ideally, the nuts should already be shelled to save time and hassle.
  • Give them a light roast and don’t let them get too brown in the oven.

Also, keep in mind that the pistachio butter you buy in the grocery store might have some food coloring that gives it that vibrant green hue. Your homemade version is likely way more natural.

Storing Pistachio Paste

This paste, made from 100% pistachios, can be stored for a few weeks. But, let’s be honest, once you taste how delicious it is, the jar will be empty in no time.

How long does pistachio paste keep?

Store it in the refrigerator in an airtight container. It will keep for about 2-3 weeks.

Can you freeze pistachio paste?

If you want to store it for longer, it’s best to freeze it. Packaged in an airtight container, it will keep for up to three months.

Pistachio paste 5

Tips: Pistachio Paste

Which pistachios do I need?

  • Unsalted
  • Unroasted
  • Preferably shelled.
  • Without the skin
  • As green as possible, purely for appearance.

Why do the pistachios get stuck at the bottom of the food processor?

Your food processor is probably too big for the amount of nuts you are using. Ideally, the blades should be covered with nuts before you start grinding. Turn off the processor, scrape the paste from the sides, and continue grinding.

I can't grind the nuts into a paste!

After grinding for 10 minutes in your food processor or blender, are you still unable to achieve a creamy nut paste? This could be due to a few things.

  • The blender or food processor is not powerful enough.
  • The nuts may have been roasted too long and have become dry. Add a spoonful of neutral oil and grind again.
  • The nuts may have been roasted for too short a time, so the oils haven’t released sufficiently. In this case, add a spoonful of neutral oil and grind again.

Can I make pistachio cream with this?

Certainly! To make it, add ingredients like white chocolate and/or condensed milk to create a creamy texture. Before I can share an exact recipe with you, I need to experiment with the proportions. Please share your successful tips in the comments.

Can I buy pistachio paste?

Yes, but make sure it’s made from 100% pistachios. Check the ingredients on the packaging so you know where that vibrant green color is coming from. You want a pure pistachio paste.


Pistachio paste

Print Recipe

No votes yet

Pistachio Paste Recipe

Making your own pistachio paste is super easy! With this simple recipe, you’ll never want to buy the store-bought version again!
Preparation10 minutes
Cooking10 minutes
Cooling time30 minutes
Total50 minutes
Servings: 1 jar

Equipment

  • Food processor

Ingredients

  • 400 grams pistachios

Instructions

  • Roast the pistachios for 9-10 minutes at 150 degrees/300˚F with conventional oven.
  • Allow the nuts to cool completely before continuing.
  • Blend the nuts in a powerful food processor until smooth. This process takes about 10 minutes. Store in a clean jar.
Homemade egg salad

Today I am sharing one of my all-time favorite recipes; a homemade egg salad. It’s one of those recipes that are so simple and versatile.

You can make delicious egg salad sandwiches for instance. Serve it on toast or lettuce wraps. And the only things you need are hard-boiled eggs and mayonnaise. Of course, a few other items will make it even better but more on that below. It’s absolutely perfect for a summer picnic. It would go well with – for instance – this easy spinach and feta hummus as well.

Ingredients

Now if you want to make this easy egg salad recipe you will need the following:

  • eggs – large eggs are easiest but you can use smaller eggs and increase the quantity if you want
  • mayonnaise – I love using full-fat mayo for this but you can replace this with a low-fat version
  • Greek yogurt – to counterbalance the mayonnaise I love adding a bit of Greek yogurt for freshness
  • dijon mustard – or any other yellow mustard
  • chives – can also be replaced by other fresh herbs such as fresh dill, fresh parsley or fresh basil. I love adding plenty of fresh herbs and it’s a great way to vary the flavor of the egg salad.

In addition to the above, you can add red onion, green onions, dill pickles, capers, or other ingredients you may prefer. Check the recipe card for full quantities and ingredients

How to make the egg salad

Step 1 is of course to cook the eggs in a pot with cold water. Cook them however you like them and take them out of the hot water with a slotted spoon. Drop them into an ice bath so they will peel easier and let them cool down a bit while you prepare the other elements. Which is mostly the creamy dressing you want to add.

Step 2 is peeling the eggs and chopping them. The chopped eggs are added to a mixing bowl. Add enough of the dressing to make it nice and creamy and add the remaining ingredients.

And that’s all there is to this easy salad.

Egg salad FAQ

How do I hard-boil eggs so they peel easily?

Start eggs in cold water, bring to a boil, then simmer for 9–12 minutes. After cooking, immediately place them in an ice water bath for at least 5 minutes – this helps the shells peel off cleanly. Fresh eggs can be a bit harder to peel.

What ingredients can I add to make egg salad more flavorful?

Classic additions include mustard, celery, chopped pickles or relish, green onions, dill, paprika, or a dash of hot sauce. Fresh herbs like chives or parsley can add a bright, fresh touch.

Can I use something other than mayonnaise?

Yes! Greek yogurt, sour cream, mashed avocado, or even hummus can be used as substitutes for mayo, depending on your taste or dietary needs.

How long does egg salad last in the fridge?

Egg salad stays fresh for 3 to 5 days when stored in an airtight container in the refrigerator. Be sure to refrigerate it promptly after making it.

What's the best way to serve egg salad?

Egg salad is delicious on a simple sandwich, lettuce cups, or scooped onto crackers. It also works well in pita pockets or on a bed of greens for a lighter option. You can even serve it with french fries.


Homemade egg salad

Print Recipe

No votes yet

Homemade egg salad

The best egg salad is homemade, and it’s not difficult at all. Delicious on toast or for lunch!
Preparation10 minutes
Cooking5 minutes
Total15 minutes
Servings: 4 portions

Ingredients

  • 4 hard boiled eggs
  • 45 grams mayonnaise
  • 60 grams Greek yogurt
  • 1 teaspoon mustard
  • 2 tablespoons chopped chives
  • Pinch of paprika powder
  • Pinch of curry powder
  • Salt and pepper to taste

Instructions

  • Peel and chop the eggs to whatever size you want them to be.
  • Make the dressing of the other ingredients and add to the eggs. Stir it through and have a taste. Add more spices or herbs to taste.
  • Enjoy!
Vlierbloesem siroop (WM)-7

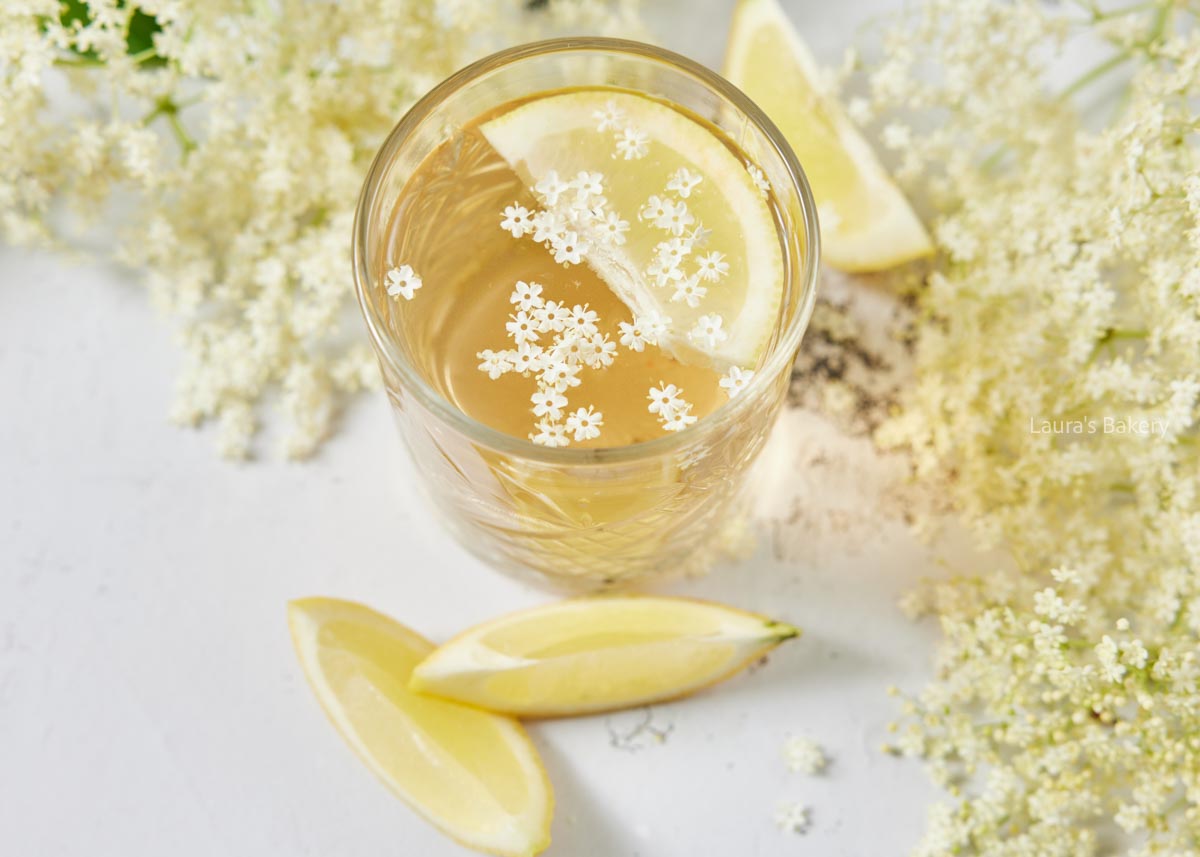
If you want to make the most of the elderberry flowers then why not make this delicious and very easy elderflower syrup recipe? It’s my favorite go-to recipe in late spring and early summer when the elder trees are in full bloom.

Why You Want To Make This Recipe

  • Simple syrup: elderflower syrup or elderflower cordial as it is also sometimes called, is a delicious and fragrant drink. It provides a sweet floral base to many different recipes. You can use it in delicious drinks, add it to ice cream, bake with it or even use it in savory dishes.
  • Almost free: rather than go into the stores and buy elderflower syrup making your own elderflower syrup is free! Well, except for the sugar and lemon you also need. It grows abundantly around North America.

​Ingredients For Elderflower Syrup

  • Elderflower – make sure you use fresh flowers and that the flower heads are in bloom. They should not start to yellow or still be in the budding stage.
  • Sugar – the amount of sugar to water is quite high, but keep in mind that this is a syrup and you don’t drink it as is.
  • Lemon – Adding lemon will balance the flavor and act as a preservative at the same time

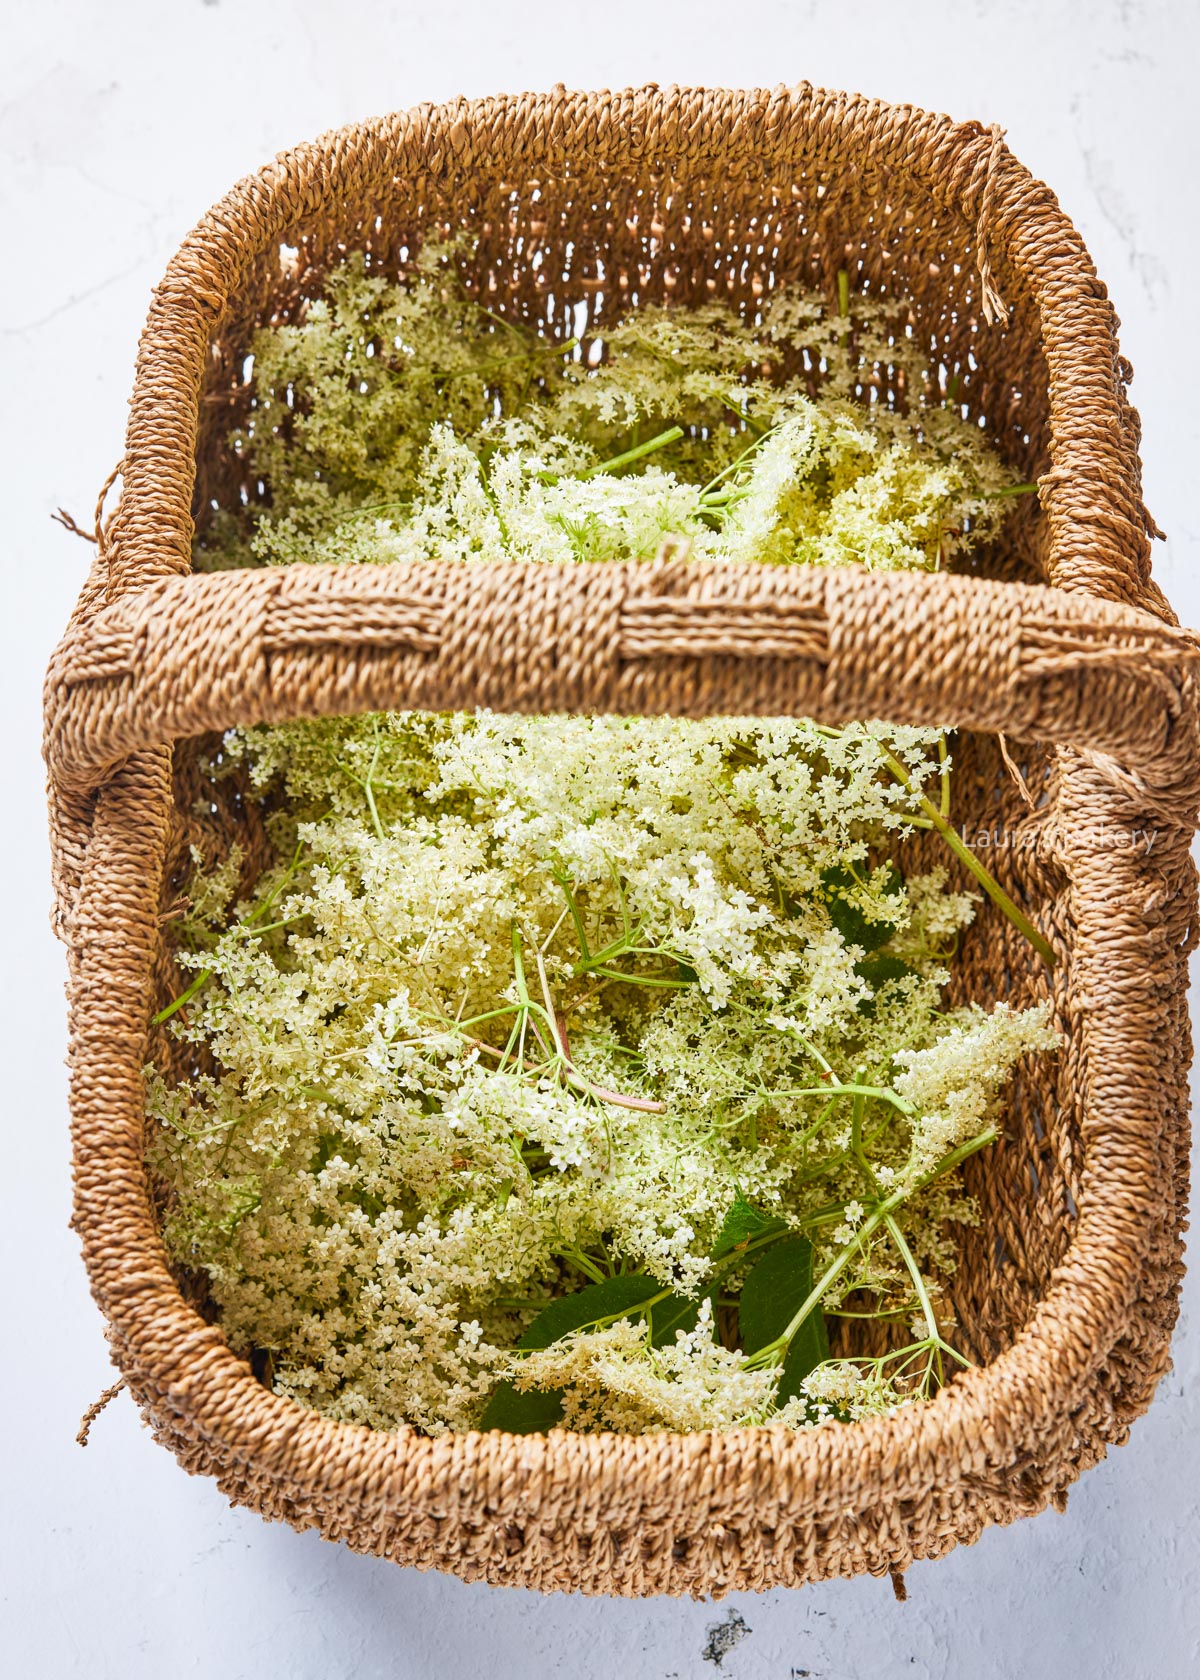
Basket with elderflower

Bowl with soaking elderflower

How to Make Elderflower Syrup

Step 1: Assemble the flowers

Your first step is to pick the flowers once the elderflower blossoms. You will need around 20-25 flower heads for 1 liter (4,25 cups). Make sure to choose elderberry bushes that are in a park or somewhere without a lot of traffic.

Once the flowers are picked shake them gently to remove any little bugs that are hiding in the flowers (and don’t worry you will remove them anyway once you strain the syrup).

Take a large bowl and cut most of the main stem away from the flower heads. You don’t need leaves or green stems, you want just the flowers.

Step 2: Soak the flowers

Once you’ve cleaned them add the cold water to the flower heads and slice one lemon roughly in pieces or into lemon slices. Add to the bowl and make sure all flowers are submerged in the water.

You can weigh it down with a plate to make sure it stays underwater. Now you will need to let it soak for 12-24 hours in a cool place. No need to put it in the fridge unless it is soaring hot outside.

Step 3: Remove the flowers and add sugar

After 24 hours the syrup is about ready. Drain the flowers and of course, make sure you collect the liquid. For the first step I use a fine mesh strainer which will remove all the flowers and most of any bugs if they are still in the water.

Once you have removed those you take a clean tea towel and repeat the process using the towels. That will get rid of any impurities from the flowers.

Add the liquid to a large pot and add 750 grams (1.65 pounds) of sugar to 1 liter of water (4,25 cups). That sounds like an awful lot of sugar and it is, but again keep in mind that you’re making a syrup.

Step 4: Heat the syrup

Now the last step is to heat the elderberry syrup until all the sugar is dissolved. You don’t need to cook it, you can just heat it until the sugar is gone and that’s when the syrup is ready.

If you want to store the elderflower syrup for longer make sure to sterilize the bottles properly and add the syrup when it is hot. It needs to be at 70˚C or 158˚F or above in order to sterilize properly. Seal the bottle and keep in a cool and dark place.

Vlierbloesem siroop (WM)-4

Dishes that Work with Elderflower Syrup

The fun part is that it’s a super versatile syrup. You can add a little bit to popsicles like this strawberry cheesecake popsicle, the Greek yogurt and mango popsicles or add it to a simple vanilla cake.

A bottle of elderflower syrup is easy to use on so many different things! From your favorite drink (try adding a bit to white wine!) to adding it to a sweet tea. There are so many culinary uses for elderflower syrup. For me it is the essence of spring!


How Long Can You Store Elderflower Syrup?

If you sterilize the bottles properly before adding the syrup it can be stored for up to a year in a dark and cool place. Once opened refrigerate the bottle and use within 4-6 weeks. You can also easily freeze the syrup. Using ice cubes trays for this is ideal as you can simply use one as needed.

Vlierbloesem siroop (WM)-8

Elderflower syrup FAQ

How do I safely identify elderflowers?

Elderflowers grow in large, flat-topped clusters of tiny, creamy-white blossoms. They have a sweet, floral fragrance. The most common edible species in North America is Sambucus canadensis. Avoid red-berried elder (Sambucus racemosa) and any lookalikes like hemlock, which are toxic. When in doubt, consult a local plant guide or expert.

When is the best time to pick elderflowers?

Late spring to early summer is ideal – when the flowers are fully open but still fresh and white. Pick on a dry, sunny day for best aroma and nectar.

Should I wash elderflowers before using them?

It’s best not to rinse them, as that can wash away the fragrant pollen. Instead, gently shake or tap the flower heads to remove insects or debris.

Do I need to add lemon or citric acid?

Yes, lemon or citric acid balances the sweetness, enhances the floral flavor, and acts as a preservative. Fresh lemon slices are often steeped with the flowers.

Why is my syrup darker than usual?

Common reasons:

  • Over-steeping the flowers
  • Including too many green stems
  • Using raw/brown sugar or dark honey
  • Caramelization from high heat
  • Oxidation from long exposure to air

Dark syrup is still safe to use but may have a stronger, more herbal taste.

How can I use elderflower syrup?

Elderflower syrup is incredibly versatile:

  • Mix into sparkling water or lemonade (you can also add a splash to this homemade lemonade for instance or a little bit in this ice tea and lemon drink!)
  • Add to cocktails (like gin, vodka, or Prosecco)
  • Drizzle over pancakes, yogurt, or desserts
  • Stir into fruit salads or glazes
  • Use in baking or frostings for a floral twist


Elderflower syrup

Print Recipe

No votes yet

Elderflower Syrup Recipe

Super versatile syrup that will be delicious over ice cream, in tea, with various baking recipes and so much more
Preparation15 minutes
Cooking10 minutes
Resting time12 hours
Total12 hours 25 minutes
Servings: 1 bottle

Ingredients

  • 25 heads elderflower
  • 1 lemon sliced
  • 1 liter cold water
  • 750 grams white granulated sugar

Instructions

  • Once the flowers are picked, gently shake them to remove bugs or other things. Cut the flowers from the stems. You want as little stem as possible.
  • Add to a large bowl, add the sliced lemon and pour the water over the flowers. Weigh down with a plate to make sure the flowers are submerged.
  • Let it soak for 12-24 hours. The longer the soak the flowers, the darker the syrup will become.
  • Using a fine mesh strainer remove the flowers and collect the liquid in another bowl. Using a clean tea towel repeat this with the towel to remove the last impurities.
  • Add to a large pot with the sugar. Heat until the sugar has dissolved. Heat it a bit higher if you want to store in sterilized jars or bottles.
Rhubarb compote 1

May is always the month of the year that I look forward to make lots of things with fresh rhubarb. It took a while for rhubarb season to arrive this year but it is finally here.

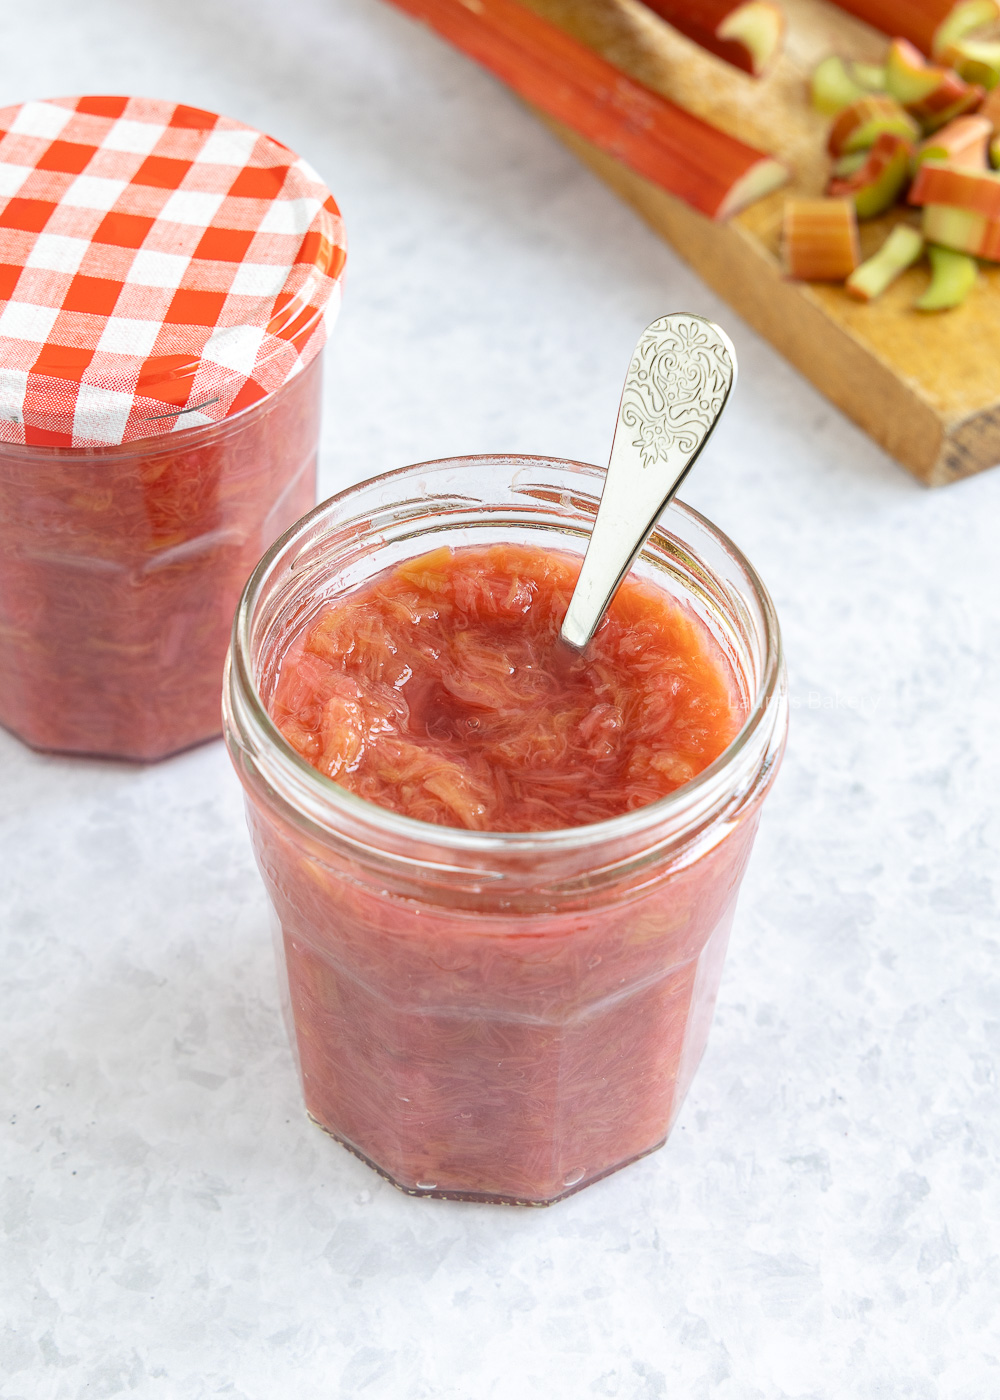
It’s the perfect timing to make this easy recipe for rhubarb compote. Delicious in a bowl of Greek yogurt in the morning, in your overnight oats but also wonderful in desserts or serve with vanilla ice cream or a little whipped cream. One of my favorite fruit compote recipes.

Is It A Fruit or a Vegetable?

Rhubarb compote is perhaps one of the most popular uses for rhubarb. Rhubarb is technically a vegetable but this dish is sweet so the use is more like a fruit. It’s a delicious way to use an abundance of rhubarb and definitely my favorite way to use it.

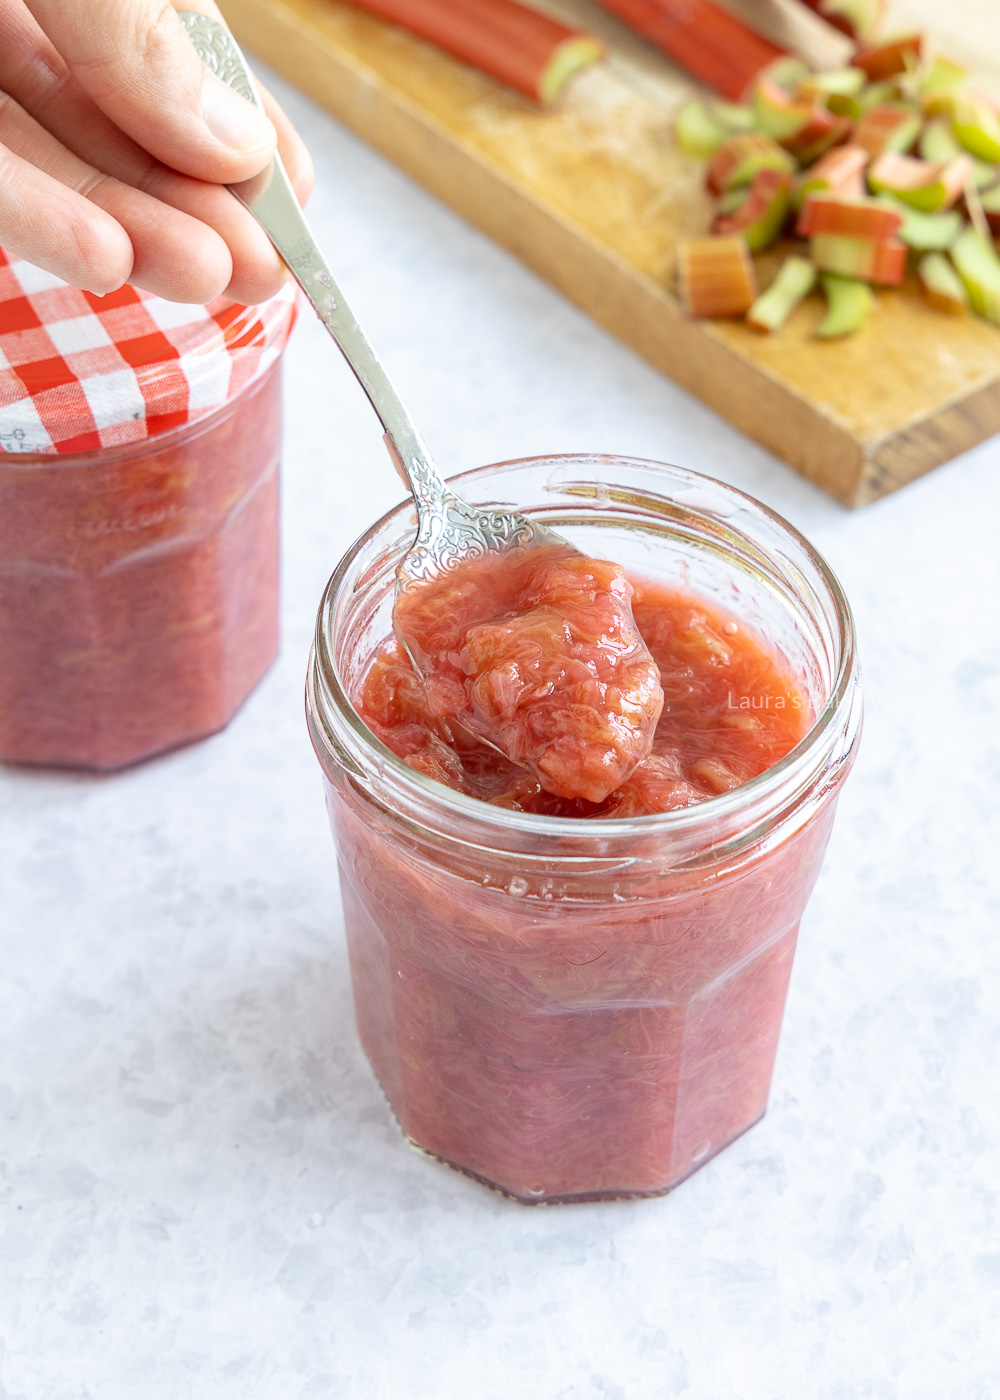
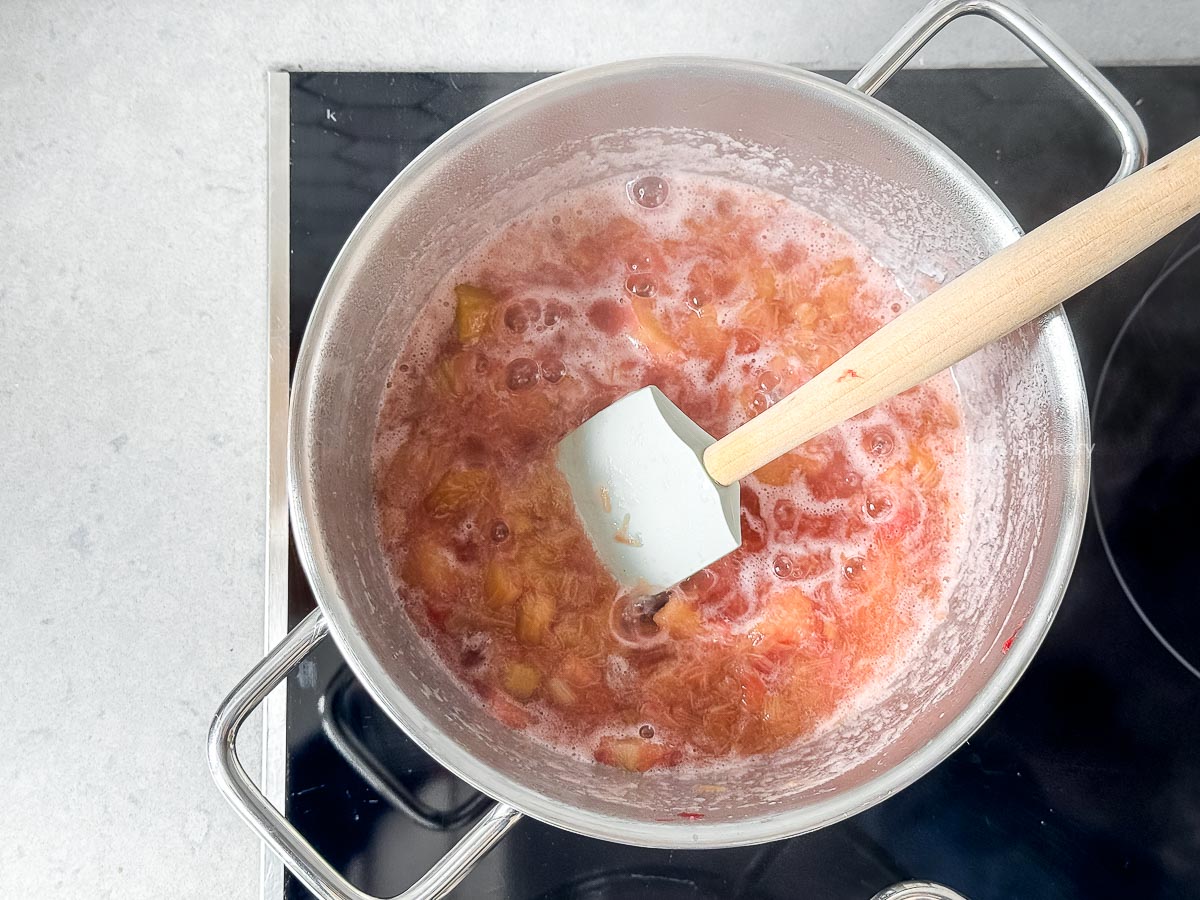
To make compote, all you need is sugar, water, and chopped rhubarb, which you bring to a boil until the rhubarb falls apart. That’s your compote! It’s very easy to make and, most importantly, very tasty.

Recipe Ingredients

Don’t wait too long to make your rhubarb compote, because before you know it, this delicious vegetable will be out of season. You only need a few ingredients, which I will explain in more detail below.

  • Rhubarb. For a sweet flavor and beautiful color, use red rhubarb stems. Green rhubarb stems are generally more acidic and just don’t look as pretty as the pink stalks in my opinion.
  • Sugar. Rhubarb is a vegetable and has a sour taste, so a little white sugar is recommended for a tasty compote. When using green rhubarb stalks, the compote may need a different amount of sugar. You can also use maple syrup or honey if you prefer. If you don’t like a tart compote you can add more sugar. You can also use brown sugar but keep in mind that the color of the compote will change slightly.
  • Vanilla. This makes everything taste better, including this compote. I use vanilla sugar, but you can use vanilla extract or vanilla paste.
  • Water. A little water is needed to bring the mixture to a boil, but be careful not to use too much. Otherwise, the compote will quickly become too thin. Replacing the water with orange juice is a great way to vary the flavor.

BAKING TIP: If you’re not going to use all of the compote, store it in sterilized Mason jars.

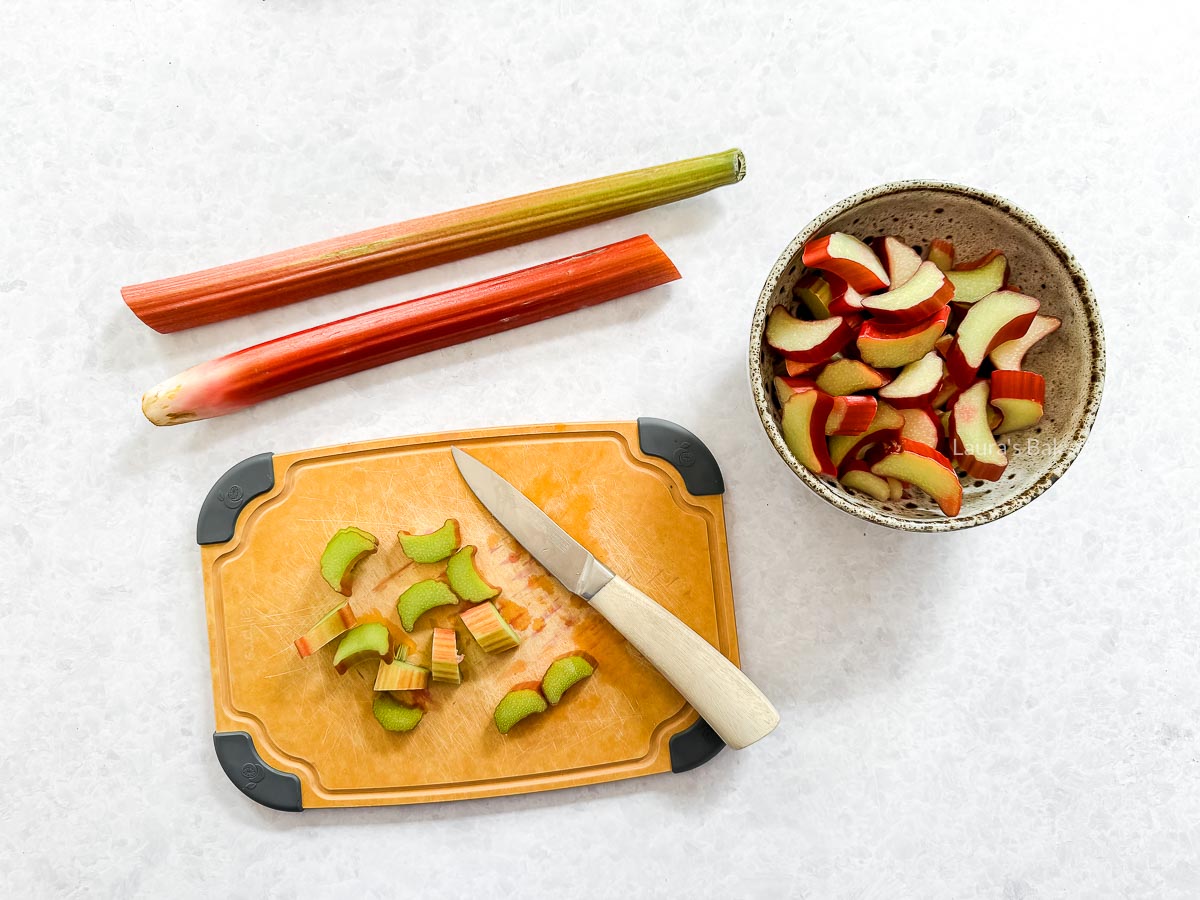
Once you’ve assembled all the ingredients you can cut the rhubarb into smaller pieces with a sharp knife and boil to the right consistency.

Making rhubarb compote

Rhubarb compote

How To Make Rhubarb Compote

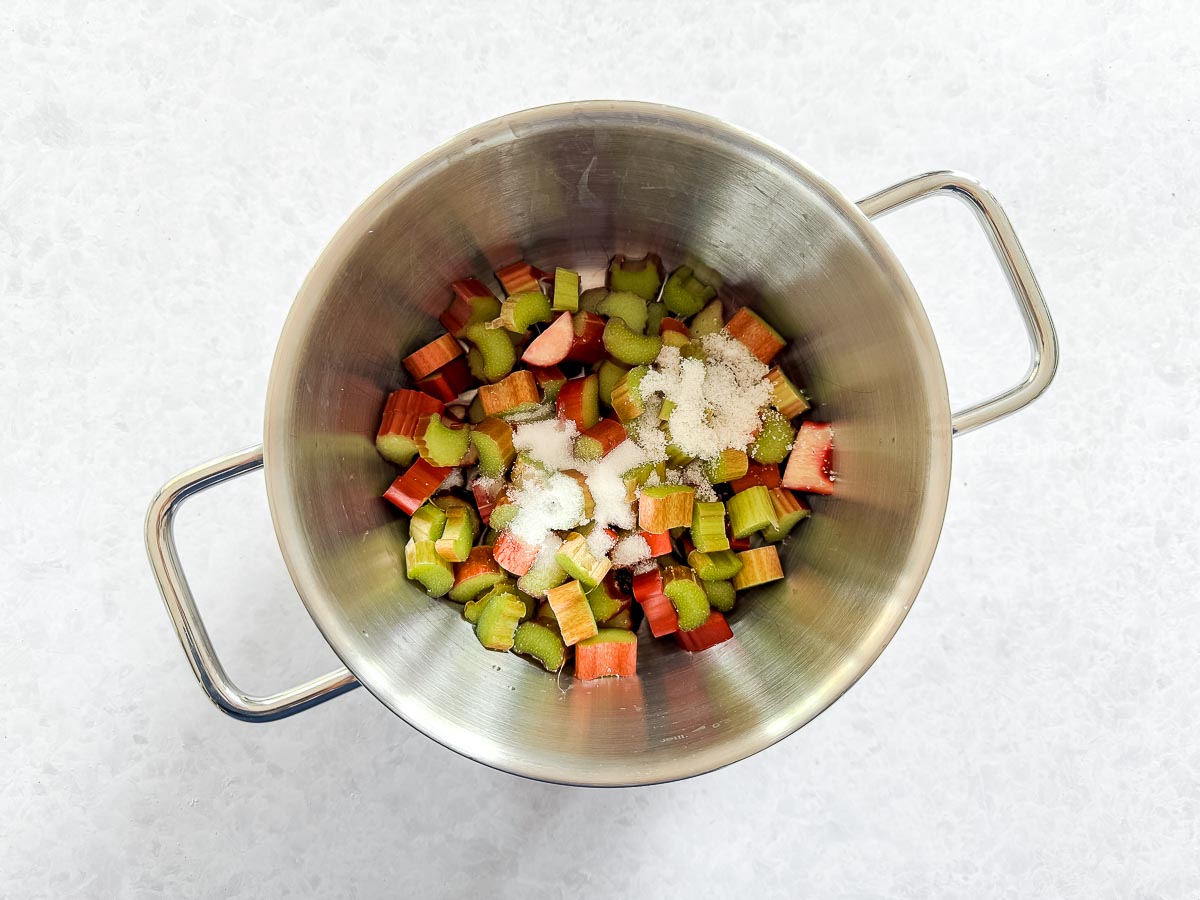
Add rhubarb and sugar into the pan
2

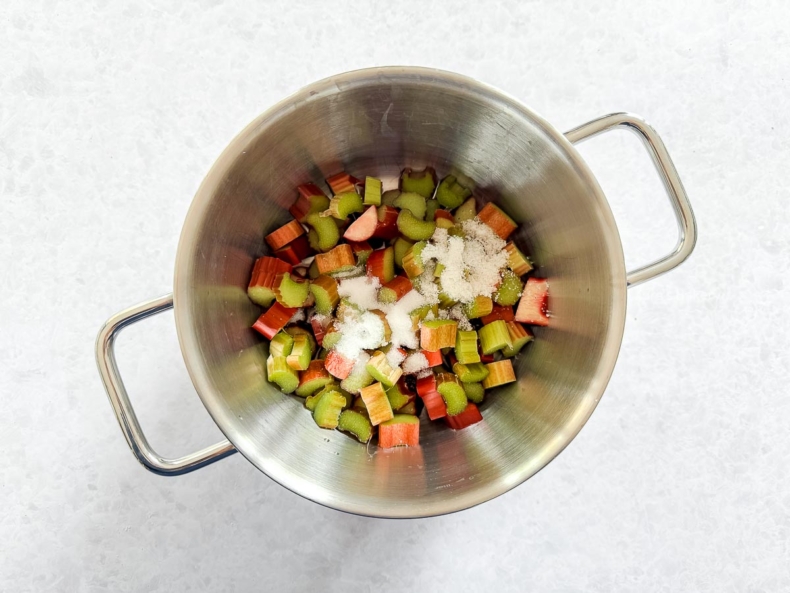
Add rhubarb, sugar, vanilla sugar and water into a pan

Open lightbox for image about Add rhubarb, sugar, vanilla sugar and water into a pan
Boil the rhubarb
3

Bring to the boil and let it simmer for about 20 minutes

Open lightbox for image about Bring to the boil and let it simmer for about 20 minutes
Rhubarb compote
4

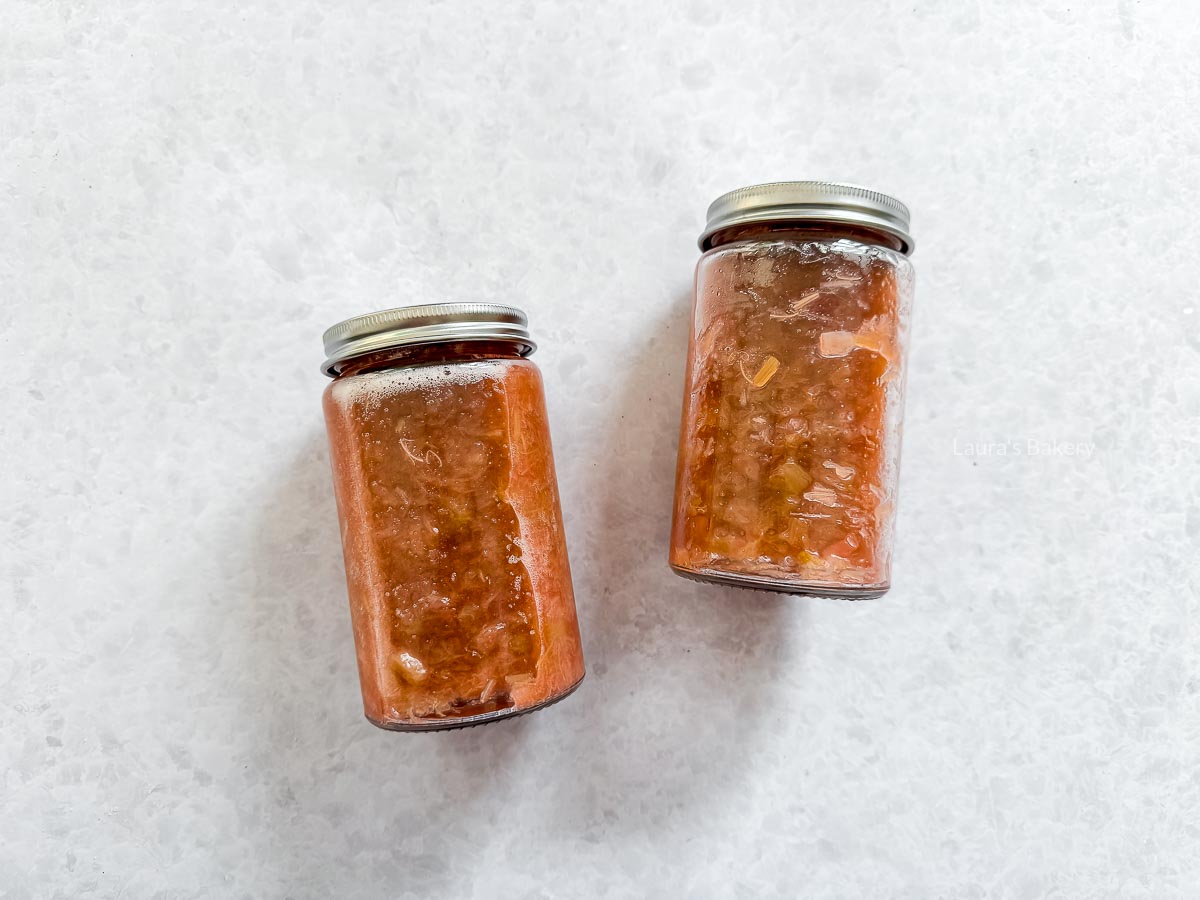
Pour the hot compote into sterilized jars, close them and let it cool down completely

Open lightbox for image about Pour the hot compote into sterilized jars, close them and let it cool down completely
1/4

Storing Rhubarb Compote

Unopened, rhubarb compote will keep in a sterilized jar in a dark, cool place for up to one year. Once opened, the compote will keep in the refrigerator for 1-2 weeks in an airtight container.

Can you freeze rhubarb compote?

Yes you can also freeze rhubarb compote. It will keep for longer in sterilized jars, but you can freeze it and keep it in the freezer for up to 3 months.

More Rhubarb Recipes

For a variation on this recipe, try the recipe for strawberry rhubarb compote.  Rhubarb Cake is also highly recommended and is especially delicious with a generous crumble topping. There are endless delicious recipes you can make with rhubarb:

The Difference between Rhubarb Puree, Rhubarb Compote and Rhubarb Jam

Rhubarb puree is similar to rhubarb compote. A compote often contains coarser pieces, while a puree tends to have a finer texture. The ingredients are almost identical.

However, jam is different because pectin and/or jam sugar are added. The gelling agent makes rhubarb jam nice and firm and easy to spread. In general, jams are also sweeter because more sugar is needed to make the jam last longer.

Rhubarb compote 4

FAQ Rhubarb Compote

What are additional flavorings

There are several flavors that go well with homemade rhubarb compote. You can add them to the compote or mix them together to your own taste:

  • strawberry – check the recipe for the strawberry and rhubarb compote too.
  • orange Flavor – add some orange zest and orange juice – a little lemon juice is also delicious to add
  • cardamom – cardamom gives a lovely flavor to the rhubarb
  • fresh ginger – rhubarb ginger compote is a bit spicier but also quite delicious

Sterilize the jars

To preserve your compote for an extra long time, it is important to sterilize the mason jars beforehand. Place the jars in a large pan of water, bring to a boil, and boil for a few minutes on medium heat. Remove them from the water with tongs and place them on a clean dish towel. Do not dry them as they are so hot that the moisture will evaporate by itself. Your jars are now sterilized and you can store the compote for a long time.

What can you use rhubarb compote for?

The uses of rhubarb compote are endless. In the most simplest form you can add it to your bowl of yogurt in the morning, but it also goes really well with some roasted meat or added into baking dishes.


Rhubarb compote

Print Recipe

No votes yet

Rhubarb Compote Recipe

Rhubarb compote is an ideal and easy recipe for using up a large amount of rhubarb in early summer. Delicious with yogurt or in a dessert.
Preparation10 minutes
Cooking20 minutes
Total30 minutes
Servings: 2 jars

Equipment

  • jam jars

Ingredients

  • 500 grams rhubarb washed
  • 40 grams granulated sugar
  • 1 package vanilla sugar 8 grams
  • 100 ml water

Instructions

  • Remove the ends from the rhubarb and cut into small pieces. Place in a saucepan with the water, sugar and vanilla sugar.
  • Bring to a boil, stirring occasionally, and cook for about 20 minutes, until the rhubarb has broken down.
  • Pour the rhubarb compote into (sterilized) glasses and allow to cool.
Italian tomato soup-5

Tomato soup is one of the soup recipes I make most often, I think many people do. I like to vary the ingredients and flavors, but I prefer Italian tomato soup. It’s about time I shared the recipe and all the tips that go along with it. Infinitely better than a can of soup!

Italian Tomato Soup

For starters, Italian cuisine is a big favorite in our house. So it’s no surprise that I make my tomato soup using an Italian recipe.

For inspiration, I used an Italian recipe that I wrote down somewhere years ago and adapted to my taste over the years.

In the article below, I will give you many tips on how to make the most delicious tomato soup. It’s up to you to make it your own personal soup.

Making the most delicious fresh tomato soup

You only need a few ingredients to make this soup, the most important of which are tomatoes. Below I will explain a little more about these ingredients. The full ingredient list can be found in the recipe card below.

  • Fresh tomatoes. Go for ripe and flavorful tomatoes, as these are the real flavor makers. I chose Roma tomatoes.
  • Olive oil is essential as a flavoring in the soup, but also delicious when served.
  • Stock cubes. I use the most neutral stock cubes. Be sure to read the amount on the package. You can also substitute salt to taste or use vegetable or chicken broth.
  • Brown sugar. Fresh tomatoes give soups and sauces a slightly acidic taste, which can be balanced with a pinch of sugar
  • White onions. These can also be substituted for shallots. Since I always have white onions in the house, I usually use them.
  • Fresh garlic clove, of course, is a must in Italian soup. A wonderfully flavorful condiment!
  • Italian Herbs. Choose one or two types of Italian herbs to use as seasoning. I use thyme and oregano in my soup.
Italian tomato soup-1
Italian tomato soup-2
Italian tomato soup-3

Tomato soup with fresh tomatoes

Italians are heroes when it comes to preparing dishes with fresh tomatoes. Whether it’s a Caprese salad, a tasty pasta sauce, or a delicious Italian tomato soup made with fresh tomatoes.

As far as I know, Italians prefer to make their traditional recipes for tomato soup with fresh tomatoes and fresh herbs. Within these limits, you can vary the flavors a bit. That way, you can enjoy a different soup every time, but always in the Italian style.

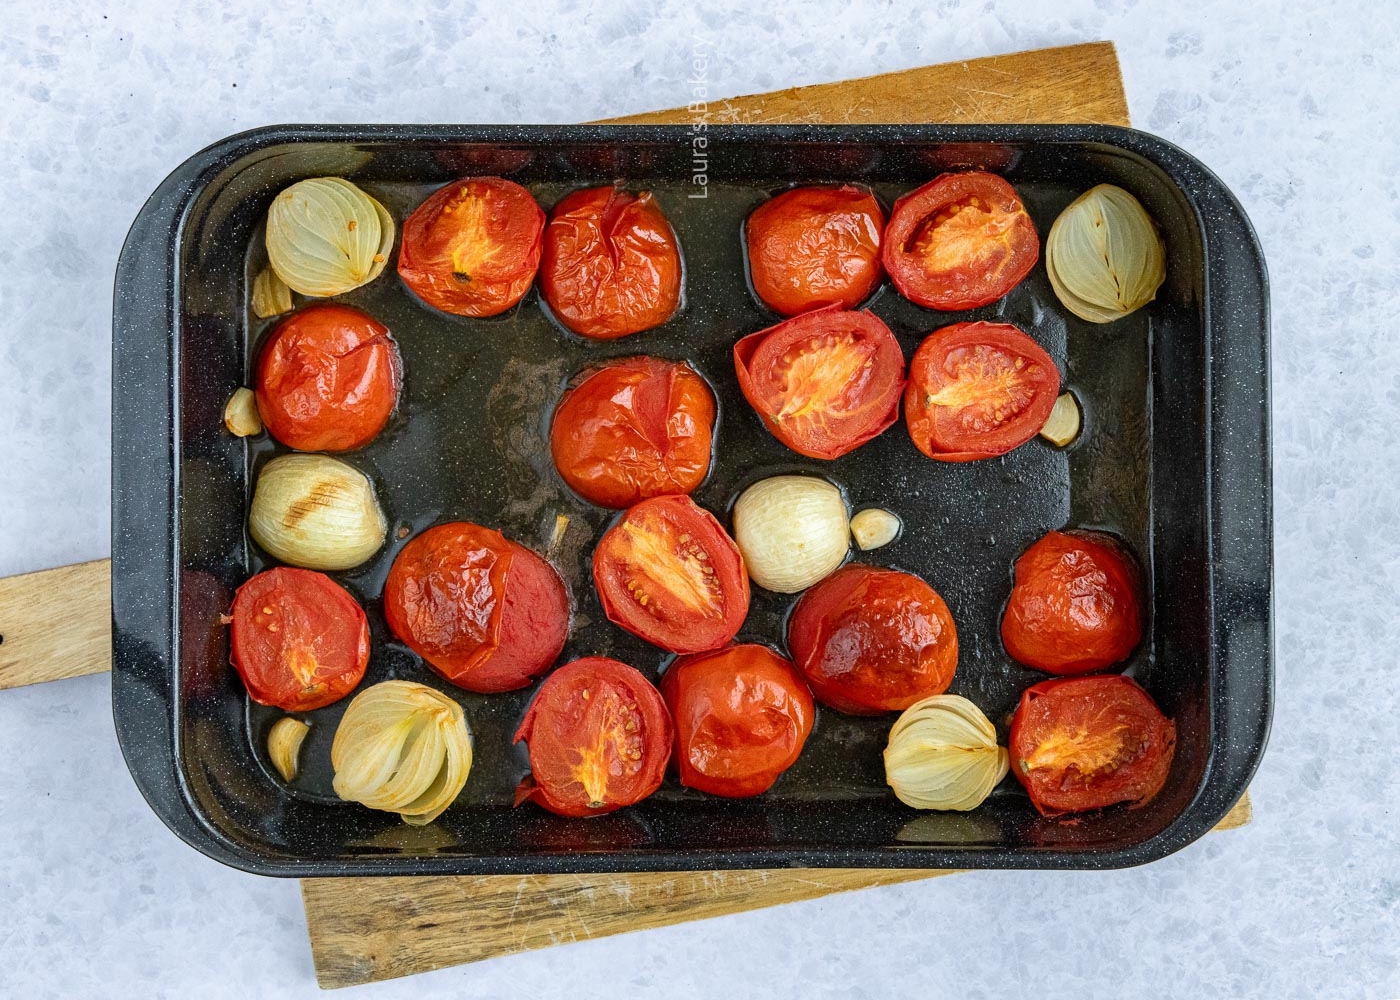
In this tomato soup recipe, the tomatoes are roasted in the oven, which brings out their sweetness and gives the soup a much richer flavor. It’s a pretty easy recipe.

Which herbs for tomato soup?

The most obvious herbs for tomato soup are fresh basil leaves, oregano, and thyme. But there are other Italian herbs to try.

Consider rosemary, marjoram, or sage. I prefer the combination of oregano and thyme, using dried oregano and fresh thyme. In principle, you can use either fresh or dried herbs.

Which tomatoes to use for fresh tomato soup?

If you choose fresh tomatoes, make sure they are ripe and preferably a flavorful variety. Tomatoes are the main flavor in this soup, so it definitely makes a difference which ones you buy.

Choose Roma, San Marzano tomatoes, Coeur de Boeuf, or vine tomatoes, for example. Of course this is best when it is peak season for the tomatoes

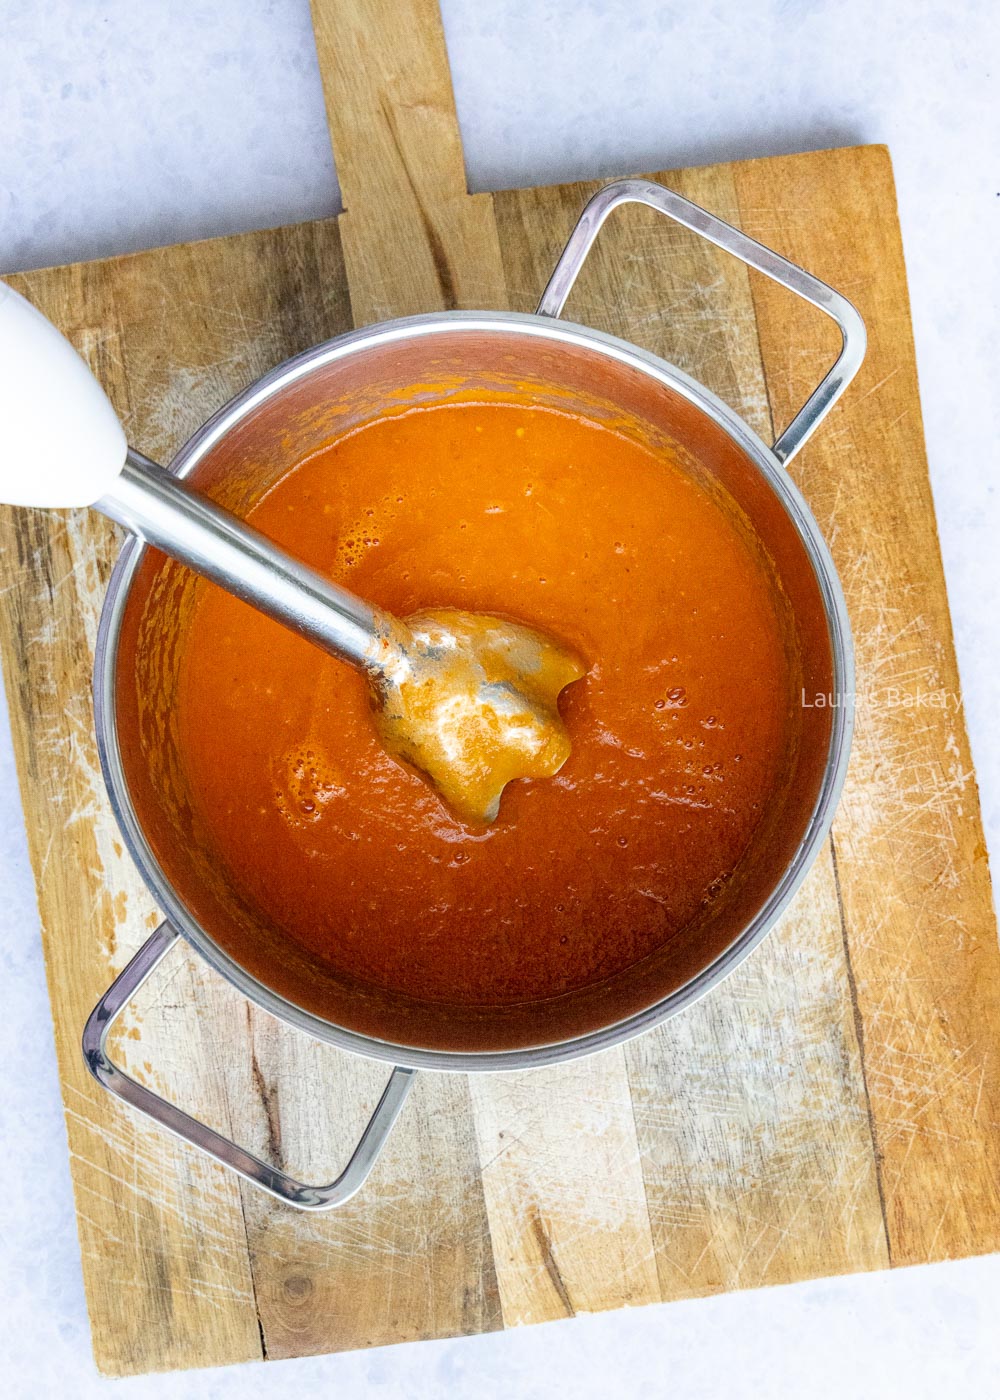
Blending the Italian tomato soup with an immersion blender

Italian tomato soup

Storing Italian Tomato Soup

Do you have a freezer? Do you want to make soup? If the answer to both questions is yes, then my advice is to make as much of this Italian tomato soup as you can.

I almost always double or triple the recipe because the soup freezes perfectly. So make as much soup as your pot and freezer will hold.

How long will Italian Tomato Soup keep?

You can keep this soup in the refrigerator for up to two days. I like to use these storage containers, which are also handy for the freezer.

Can I freeze Italian Tomato Soup?

You can freeze this Italian Tomato Soup for up to three months. Allow the soup to thaw in the refrigerator (take it out of the freezer the night before you want to use it).

When freezing, think about the portions you want to freeze. I often divide it into small and medium storage containers, good for 1-2 servings.

More Italian Recipes

Want to prepare a dinner with an Italian twist? Then these Italian dessert recipes will definitely come in handy.

Italian tomato soup-7

Italian tomato soup tips: Making Italian Tomato Soup

Can I add other vegetables?

Peppers, pumpkin, or carrots taste great in this soup. Add them in pieces to the baking dish and roast them with the tomatoes.

Can I have tomato soup as a main course?

Mixing tortellini into the soup makes it a delicious, filling main course. Another option is to serve it with savory rolls or quiche. Crusty bread will also make it more filling. Or serve with a delicious cheese sandwich. Making croutons to go along with it is also delicious.

What kind of pan should I use?

I like to use this big soup pot. It has enough capacity to make a lot of soup, so I can freeze plenty for busy days.

Can I make tomato cream soup with this recipe?

Absolutely. In this case, after blending with a hand blender, add 250 ml of cooking cream, heat briefly and serve.

Can I serve the soup with croutons?

Yes, that’s a good idea. Try making croutons out of ciabatta or focaccia bread.

How long can I store Italian tomato soup?

Up to 2 days in the refrigerator and up to 3 months in the freezer.


Italian tomato soup

Print Recipe

No votes yet

Italian Tomato Soup Recipe

Want to make Italian tomato soup? Use fresh tomatoes, roast them in the oven and season with your favorite herbs. Success is guaranteed!
Preparation40 minutes
Cooking15 minutes
Total55 minutes
Servings: 4 people

Equipment

  • immersion blender

Ingredients

  • 750 grams fresh tomatoes
  • 3 tbsp olive oil
  • 2 tbsp brown sugar
  • 2 white onions
  • 2 cloves garlic
  • Stock cubes to taste Maggi
  • 2 tsp thyme and/or oregano
  • 1 each Garnish optional
  • pepper cooking cream or mascarpone
  • coarsely grated Parmesan cheese or flakes
  • croutons
  • cooking cream or mascarpone

Instructions

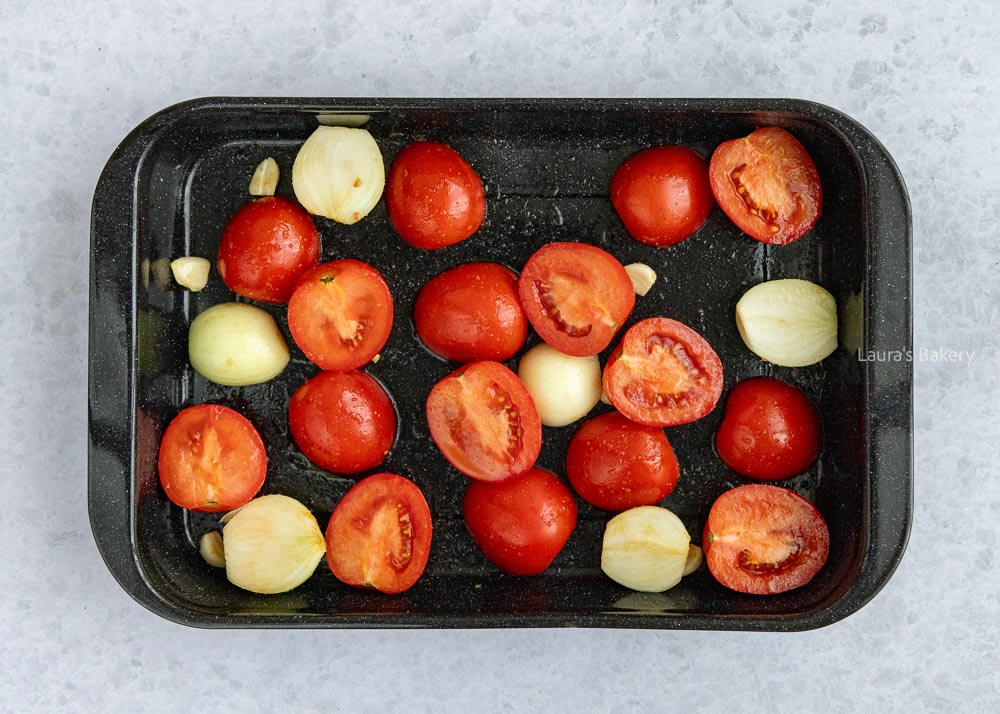
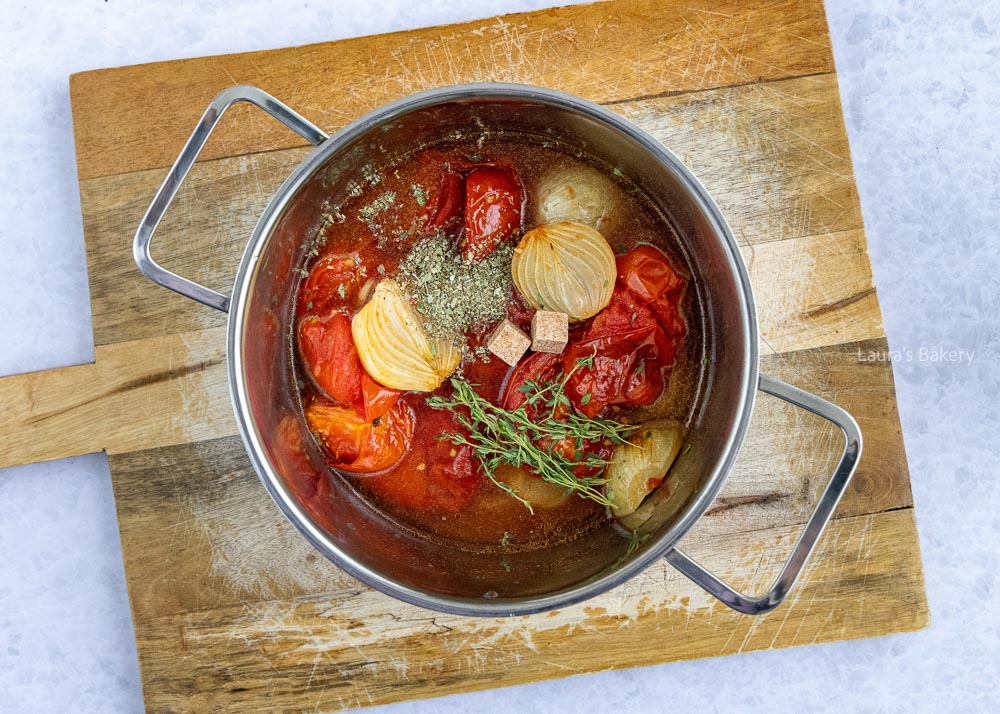
  • Cut the washed tomatoes in half and place in a baking dish. Clean and halve the onions and garlic and add to the baking dish. Mix with 3 tablespoons of olive oil and 2 tablespoons of brown sugar. Bake for 30 minutes at 200°C/390˚F (conventional oven).
  • Place the roasted tomato, onion, and garlic mixture from the baking dish (including the juices), 200 ml water (7 floz), thyme, oregano, and stock cubes in a soup pot on the stove. Simmer over low heat with the lid on for 15 minutes.
  • Blend until smooth or slightly chunky. Taste the soup and add more brown sugar, salt or pepper to taste.
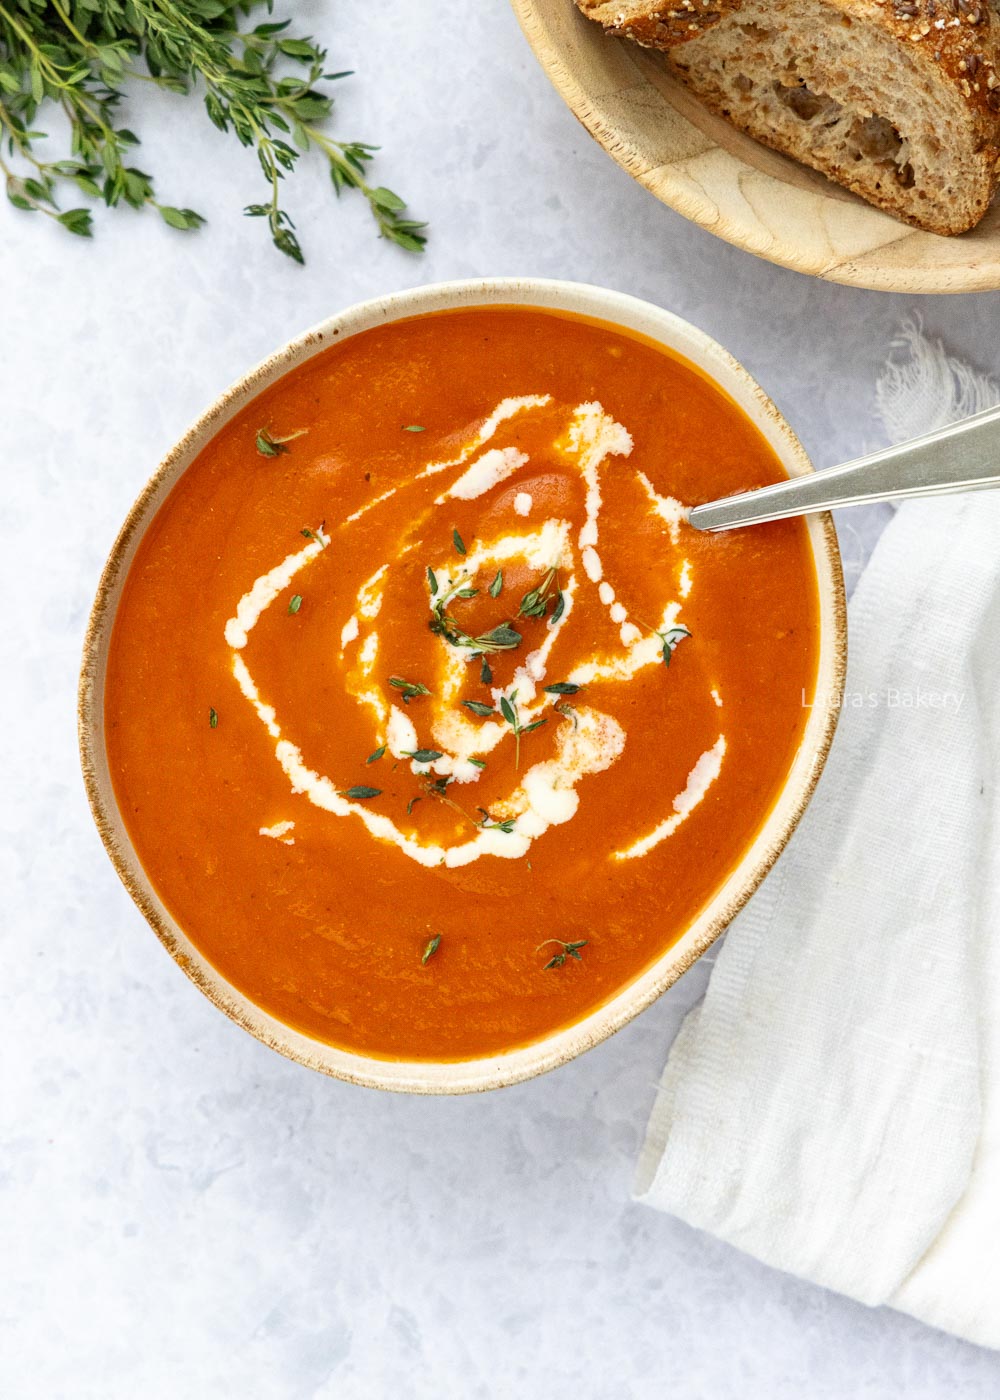
  • Serve the soup with a little freshly ground pepper, a dash of heavy cream or mascarpone, some grated Parmesan cheese, or croutons. A little drizzle of extra virgin olive oil is also delicious
  • Tip: Add an extra 100 ml (3.5 floz) of water if you prefer a thinner soup.
No bake mango pie recipe2

This delicious no bake mango pie combines my basic vanilla no bake pie recipe with one of my favorite fruits: mango. It’s the perfect no bake dessert for warmer weather.

Not only does it prevent turning on the oven (always a great option when the weather is hot) but it’s also super delicious and refreshing. Nothing better during mango season!

​No bake mango pie

Here’s how to make the most delicious no bake pie.

Making a no bake pie is easy, and you don’t need much to make an incredibly delicious pie. You can choose any type of fruit, but a creamy mango pie is especially good!

Ingredients for a mango pie:

  • Cookies – For the crust, I chose basic graham crackers because they go well with mango and many other fruits.You can also use other digestive biscuits.
  • Butter – Mix the butter into the crushed cookies so that they bind together when set.
  • Gelatin – Gelatin ensures the filling is firm. I like to use gelatine sheets but you can also use gelatin powder. If you don’t want to use gelatin you can replace it with agar agar powder.
  • Mango – This is the pies main flavor, so look for ripe, flavorful fresh mangoes. That is used for making the fresh mango puree.
  • Quark or thick Greek yogurt – See the notes below on the difference between the two.
  • Vanilla paste – This can be replaced at a 1:1 ratio with vanilla extract or other vanilla alternatives.
  • Heavy cream – Heavy whipped cream makes the pie extra creamy and light.
  • Sugar – I usually use fine granulated sugar. If the filling is sweet enough for you, you can leave out the sugar.
  • Milk – Skim, semi-skimmed, or whole milk—anything goes.
No bake mango pie recipe3

Making no bake mango pie recipe

Making the pie is absolutely not complicated. You might want to use a food processor for getting a smooth mango pie filling and for crushing the cookies, but if you don’t have one you can also use a handmixer or a whisk.

The buttery biscuit base is the first thing you make by crushing the cookies to a fine crumb.

Once that is done mix it with the melted butter and make sure to press it firmly into a lined springform tin. For pressing it I like to use the back of a straight glass but a spoon works fine too. Place your gelatin sheets in a bowl with cold water to soak.

What’s the difference between quark and Greek yogurt?
Quark and Greek yogurt look similar, but they’re quite different in taste, texture, and how they’re made — and that can slightly affect your mango pie. Quark is readily available in the Netherlands but can be harder to find in other countries.

Quark is a soft, creamy – very young – cheese with a mild, slightly tangy flavor. It’s made by warming soured milk and straining it, resulting in a smooth, thick dairy product that’s higher in protein and less tart than yogurt. It’s popular in many European countries and often used in cheesecakes or spreads.

Greek yogurt, on the other hand, is strained yogurt. It’s thicker and creamier than regular yogurt, with a more noticeable tang. It’s rich in protein and commonly used in both sweet and savory dishes.

Which to use in your mango pie?

Quark, if you want a milder flavor and a slightly richer, cheesecake-like texture.

Use Greek yogurt for a tangier taste and a lighter, more yogurt-forward filling.

Making the filling

Now it is time to make the filling mixture. You mix the yogurt with the vanilla paste and the mango puree until it is smooth. Use a separate bowl to mix the heavy cream with the sugar to stiff peaks and combine the two together.

Use a spatula to fold the two until they are properly mixed. Now heat the milk gently in a small sauce pan and squeeze any excess water out of the gelatin sheets. Add to the mix and stir until it is dissolved. Add the gelatin mixture to the filling and mix it well.

Pour the pie filling on the graham cracker crust and smooth the top with the back of a spoon or a spatula. Let it set in the fridge for at least three hours but preferably overnight.

No bake mango pie recipe1

Storing no bake Mango pie

In the past, no bake mango pie (or as we call it in the Netherlands; mango quark pie (‘mango kwarktaart’)) wasn’t one of my favorite cakes, but now I find it hard to stay away from. The same seems to be true for my friends and family because there are rarely any leftovers. However, you can easily store this pie in the refrigerator or freezer.

How long does mango pie keep?

You can store it in the refrigerator for up to three to four days, provided it is well sealed. This prevents moisture or odors from entering the cake.

Can you freeze mango pie?

Mango pie freezes well. If you wrap the pie (or slices) in an airtight container, it will keep for up to three months. Let the frozen pie thaw in the refrigerator the day before serving.

More cheesecake recipes:

No bake mango pie recipe4

Questions asked about no bake mango pie

Can I use a different crust?

You can use all kinds of cookies to make a delicious crust for your pie, combined with butter. The amount of butter needed varies by cookie. For example, it’s best to use a little less butter with Bastogne cookies because they are quite fatty.

Can the mango pie be made from frozen fruit?

Yes, you can. Just make sure to thaw the mango completely and drain off any excess moisture.

Can I make the pie without gelatin?

The gelatin helps the yogurt filling set, so it can’t simply be left out. A good alternative is agar-agar.
Can I use a springform pan of a different size?

In the recipe card below, you will find the “Convert Recipe” button. It will take you to the conversion tool, which you can use to easily convert any recipe to the size baking pan you want. Simply enter the current size of the baking pan and the size you want to convert to.

Storing no bake mango pie

A well-covered mango pie can be stored in the refrigerator for three to four days. Without decoration and in an airtight container, it can be frozen for up to three months.


No bake mango pie recipe thumbnail

Print Recipe

5 of 1 vote

No bake mango pie

My basic vanilla no bake pie recipe combined with one of my favorite fruits creates this delicious summer cake: a no bake mango pie
Preparation40 minutes
Cooling3 hours
Total3 hours 40 minutes
Servings: 8 people

Equipment

  • For a 20 cm springform pan (8 inch)

Ingredients

Base:

  • 150 grams graham crackers
  • 80 grams unsalted butter

Filling:

  • 10 sheets gelatin
  • 400 grams mango approximately 1.5 mangoes
  • 500 grams Greek yogurt
  • 2 tsp vanilla paste
  • 250 ml heavy cream
  • 4 tbsp sugar to taste
  • 100 ml milk

Instructions

  • Crush the cookies into fine crumbs. Melt the butter in a pan, then add the crumbs. Stir, then pour the mixture into a springform pan that has been lined with parchment paper. Spread the mixture evenly and press it firmly. Place the base in the refrigerator.
  • Soak the gelatin sheets in a bowl of cold water for at least 10 minutes. Peel and cut the mango into pieces, then puree it until smooth.
  • In a bowl, combine the Greek yogurt, vanilla paste, and mango pulp, stirring until smooth. In another bowl, whip the heavy cream and sugar together until stiff peaks form.
  • Heat the milk in a saucepan until lukewarm. Remove the pan from the heat and add the squeezed gelatin sheets. Stir until melted.
  • Pour the milk mixture into the yogurt mixture and stir. Fold the whipped cream into the yogurt mixture until everything is incorporated. Pour the mixture onto the cookie base and smooth the top of the pie.
  • Refrigerate the pie for at least 3 hours to set.
Tropical fruit crumble-1

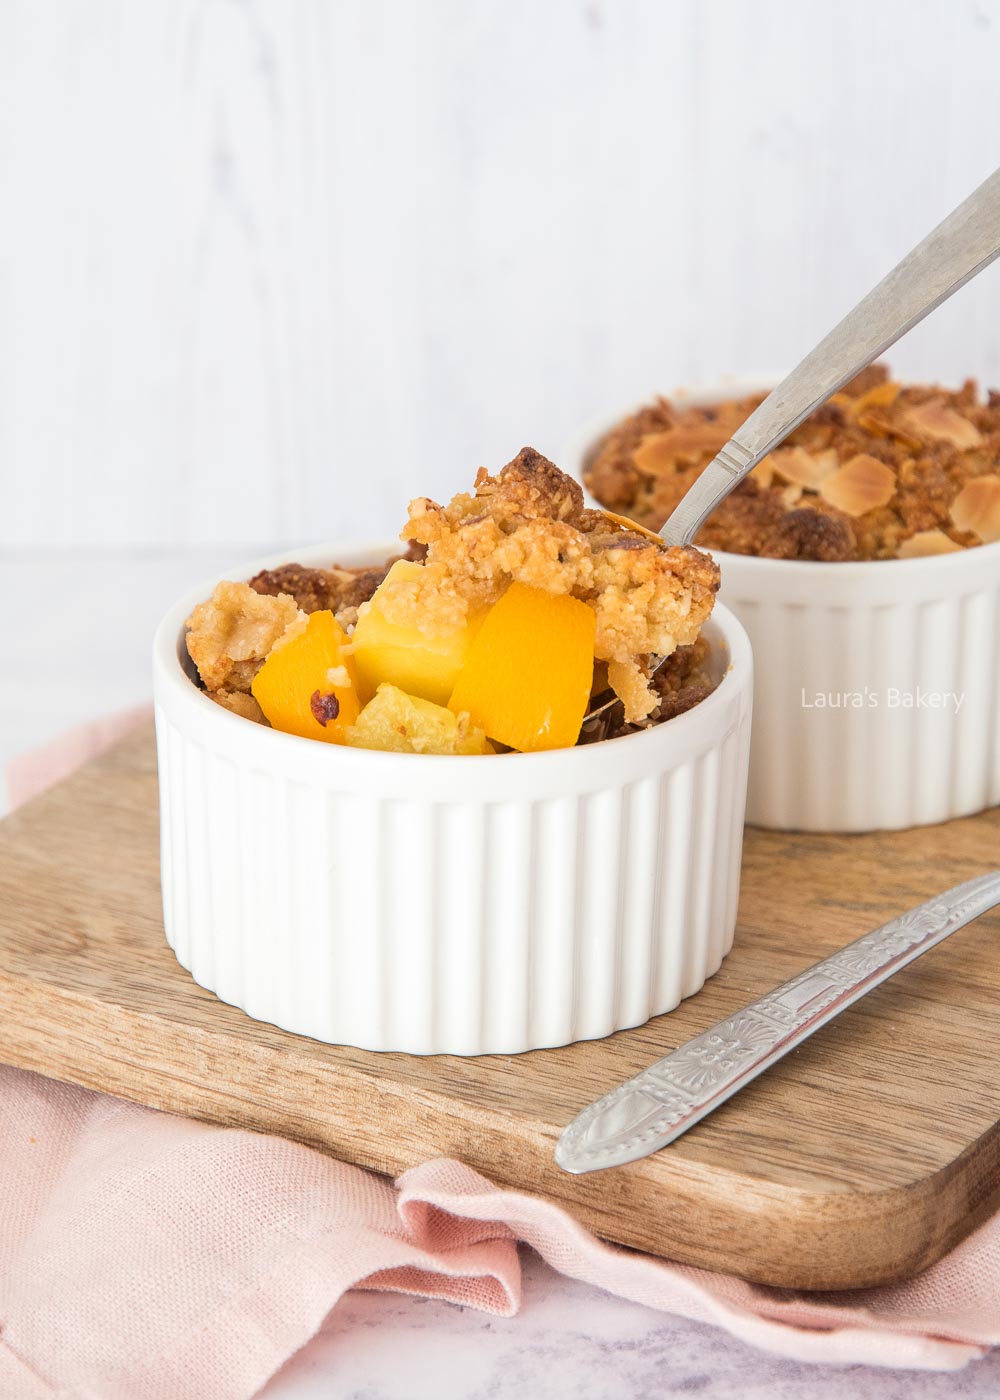
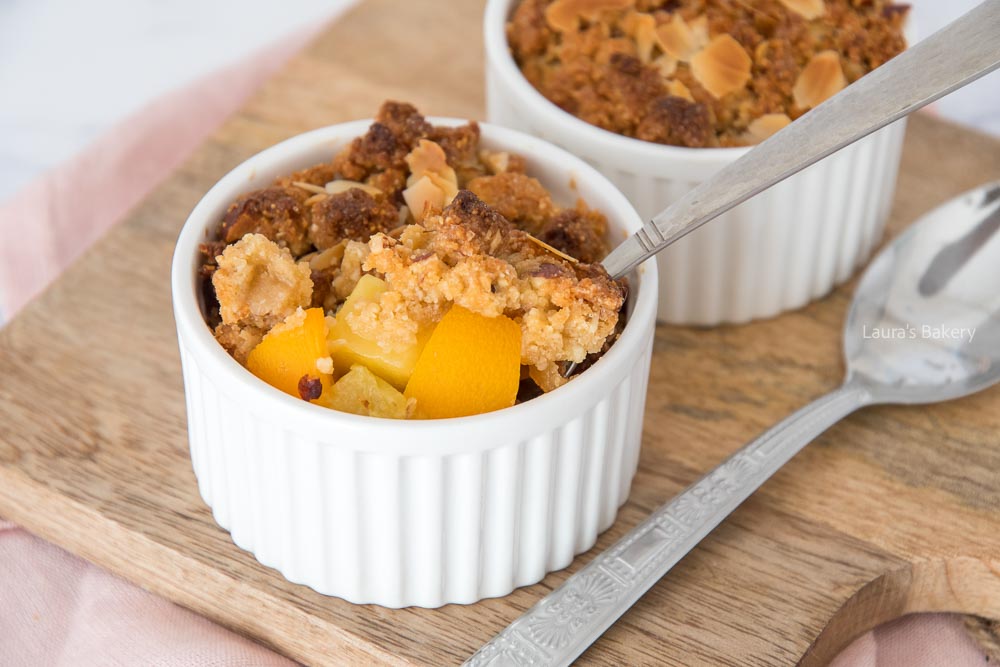
If you love a good crumble, this delicious tropical fruit crumble is going to be your new summer favorite. It’s delicious spooned over your morning yogurt or turn it into a dessert by adding a dollop of heavy cream or ice cream.

Tropical fruit crumble

Crumble is always a hit here, all year round. Of course, I adapt the flavors to the season and for summer, I wanted to give it a tropical twist. The result: Tropical Crumble with pineapple slices, mango, and peach.

And wow, I loved all those flavors together. Serve it with a scoop of ice cream and you have the perfect dessert that will make a lot of people happy.

I’ve already got quite a few crumbles on the site such as this delicious rhubarb crumble or more traditional fruit crumbles such as this apple crumble.

Ingredients needed

For making this you have two components. The fruit mixture and the crumble topping. I’ll tell you all about it.

Fruit mixture

For the fruit I used the following:

  • pineapple slices
  • mango pieces
  • peaches

Slice the fruit into thin slices and mix it together in a large bowl. You can add a bit of lime zest if you want to freshen things up.

Tropical fruit crumble-2

Crumble mixture

For the crumble mixture there are several options. I went with a pretty plain version but you can absolutely add different elements.

  • butter – I use unsalted butter
  • brown sugar – or use another kind of sugar you want
  • vanilla extract – it’s also possible to add a bit of vanilla sugar
  • all purpose flour
  • almond flour – adding almond flour gives the crumble a delicious taste!
  • chopped almonds – or other nuts if you prefer

In addition you can add other flavors too. Think about adding some fresh ginger, crunchy coconut or mix oats through the crumble.

Making the crumble

Now the crumble is easy to make. You just mix all the fruits together and divide it over smaller ramekins as I did here or use one larger oven dish. Both work fine.

The crumble is a matter of mixing the ingredients until you have a nice crumble (or some larger chunks) of dough and sprinkle over the fruit. Place in the preheated oven and bake in 20 minutes until golden brown.

​Tips for making tropical fruit crumble

Can I use frozen fruit for this tropical crumble?

Yes! Frozen mango, pineapple, and peaches work well. Just be sure to thaw and drain them first to avoid extra moisture making the crumble soggy.

Why use almond flour in the crumble topping?

Almond flour gives the topping a rich, nutty flavor and a slightly softer, melt-in-your-mouth texture compared to regular flour. Mixing the two together makes it the best of both worlds. You can substitute it for all purpose flour if you prefer.

Can I make the crumble ahead of time?

Definitely. You can prep the crumble topping and fruit mixture separately and store them in the fridge for up to a day. Assemble and bake when you’re ready to serve for the freshest results.

How should I serve tropical fruit crumble?

This crumble is delicious warm from the oven, especially topped with a scoop of vanilla ice cream, coconut whipped cream, or even a dollop of Greek yogurt for a lighter touch!


Tropical fruit crumble

Print Recipe

5 of 1 vote

Tropical fruit crumble

Tropical Fruit Crumble is incredibly easy to make and very tasty. This tropical crumble with mango, pineapple and peaches has a deliciously fresh flavor and is perfect for summer.
Servings: 4 portions

Equipment

Ingredients

  • 200 grams pineapple ripe
  • 1 mango
  • 2 peaches

For the crumble

  • 40 grams unsalted butter
  • 50 grams light brown sugar
  • 1 teaspoon vanilla extract
  • 50 grams flour
  • 50 grams almond flour
  • pinch of salt
  • 50 grams chopped almonds

Instructions

  • Cut the fruit into small cubes, about 2 x 2 cm.
  • Make the crumble by putting all the ingredients in a bowl. Rub together with your fingers until you have a coarse crumble texture.
  • Divide the fruit between four ramekins and top with a layer of crumble.
  • Bake the Tropical Crumble in the oven at 200°C/390˚F (conventional oven) for 20 minutes or until the crumble is golden brown.

Notes

  • You can make this Tropical Crumble in one large baking dish instead of four small ones. The baking time will be about the same, just make sure the crumble is nicely golden brown.
  • You can make the crumble ahead of time and spread it on the fruit just before you put it in the oven. Store all ingredients covered in the refrigerator until ready to bake.
Easy coleslaw recipe-2

Having a good easy coleslaw recipe is essential for every barbecue. This recipe is a twist on a classic coleslaw recipe and uses two colors of cabbage, making it look so much more appealing! Plus I give you plenty of options for delicious mix-ins.

Easy Coleslaw Recipe

I thought it was time to share my basic coleslaw recipe with you. I don’t just use mayonnaise, I use Greek yogurt as a base, which keeps it nice and fresh. In addition to white and red cabbage, I also use carrots, which look great and taste delicious!

You’ve probably eaten coleslaw while enjoying a pulled pork sandwich with barbecue sauce (or pulled jackfruit wraps, for vegetarians). That’s because a tasty layer of coleslaw is an essential base for these dishes. But this fresh coleslaw is also incredibly delicious as a perfect side dish to barbecue.

I like to add a few extra ingredients like raisins or apple pieces and some coarsely chopped walnuts. A generous handful of coarsely chopped fresh herbs such as cilantro or parsley also tastes great. This way, you can serve a special coleslaw that is incredibly easy to make.

Easy coleslaw recipe-1-2

Ingredients for homemade coleslaw

For making this homemade coleslaw recipe you need the following simple ingredients and as always make sure to check the full recipe in the recipe card

  • mayonnaise – use your favorite or make a homemade mayonnaise
  • Greek yogurt – this makes the dressing for the salad fresher
  • lime juice – can be replaced by lemon juice
  • purple cabbage – you can also get a pre-shredded coleslaw mix instead of the separate cabbages
  • green cabbage (or white cabbage) – again, you can chop your own cabbage or use a store-bought coleslaw mix
  • carrots – shredded carrots look great and taste fantastic!

Additions

Of course the basic ingredients above already make for a fantastic and simple coleslaw recipe, but you can add lots of different things to make this the best coleslaw recipe ever. Your options are:

  • apple – I love chopping up an apple and adding this to the salad
  • raisins – the raisins add just a touch of sweetness to the salad
  • walnuts – I find walnuts the best addition but you can use other nuts if you want
  • green onions – a few green onions look great added to the coleslaw
  • dijon mustard – I like to add a bit of extra kick to the creamy dressing with some spicy mustard

Making the coleslaw

Now for making this easy coleslaw recipe it does help to have a food processor if you’re shredding the cabbage yourself. Of course a sharp knife will do the trick as well, but it is a lot of chopping.

Also keep in mind that one head of cabbage makes a huge amount. So for 4 people you really don’t need the whole cabbage.

The good news is that the salad keeps fairly well, so if you do make a large bowl you’ll be enjoying it for days to come. Or if you’re entertaining guests at a barbecue party you can prepare the salad in advance. The flavors are best after a day in the fridge!

TIP: Another great recipe for your next barbecue: Garlic pull apart bread.

Questions on making coleslaw

How do I keep my coleslaw from getting watery?

To avoid watery coleslaw, lightly salt the shredded cabbage and let it sit for about 10–15 minutes. Then squeeze out the excess moisture before mixing it with the dressing. This step helps keep your slaw crisp and fresh for longer.

What kind of dressing is best for coleslaw?

It depends on your taste! A creamy dressing (made with mayonnaise) is the classic choice, offering a rich, slightly sweet flavor. For something lighter, a vinegar-based dressing with olive oil, vinegar, and a touch of sugar creates a tangy, refreshing slaw. Or use Greek yogurt as I did here.

Can I make coleslaw ahead of time?

Yes! In fact, coleslaw often tastes better after a few hours in the fridge, giving the flavors time to meld. Just keep it covered and chilled, and if you’re worried about it getting soggy, store the dressing separately and toss it together just before serving.

What can I add to customize my coleslaw?

There are lots of ways to jazz up coleslaw! Try mixing in extras like shredded apples, raisins, toasted nuts, green onions, fresh herbs (like cilantro or dill), or even a little hot sauce for a spicy kick.


Easy coleslaw recipe

Print Recipe

No votes yet

Easy Coleslaw Recipe

The perfect side dish for your next barbecue or use it as a topping for a delicious pulled pork sandwich or a pulled jackfruit sandwich.
Preparation15 minutes
Cooking5 minutes
Total20 minutes
Servings: 4 portions

Ingredients

  • 2 tbsp mayonnaise
  • 3 tbsp Greek yogurt
  • 1 lime
  • salt and pepper
  • 150 grams white cabbage chopped
  • 150 grams purple cabbage chopped
  • 100 grams carrots julienned

OPTIONAL ADDITIONS:

  • Cilantro, mint or parsley finely chopped
  • 1 handful raisins soaked
  • 1 apple chopped into small pieces
  • 100 grams walnuts coarsely chopped

Instructions

  • In a bowl, mix the mayonnaise, Greek yogurt, juice of one lime and a little salt and pepper.
  • Add the chopped white and purple cabbage and the julienned carrot to the mayonnaise-yogurt base. Mix together. Taste to see if you like it, otherwise add more lime juice, pepper and/or salt.
  • The base for your coleslaw is now ready and ideal for serving on a pulled pork sandwich.
  • If you want to serve this coleslaw as a side dish to a barbecue, for example, add some finely chopped herbs, a handful of raisins or a small apple cut into small pieces, and some coarsely chopped walnuts.