Can I use caramel waffle cookies instead of stroopwafels?
Yes! If you can’t find traditional Dutch stroopwafels, caramel waffle cookies are a great substitute. Just make sure they’re firm enough to chop into small pieces.
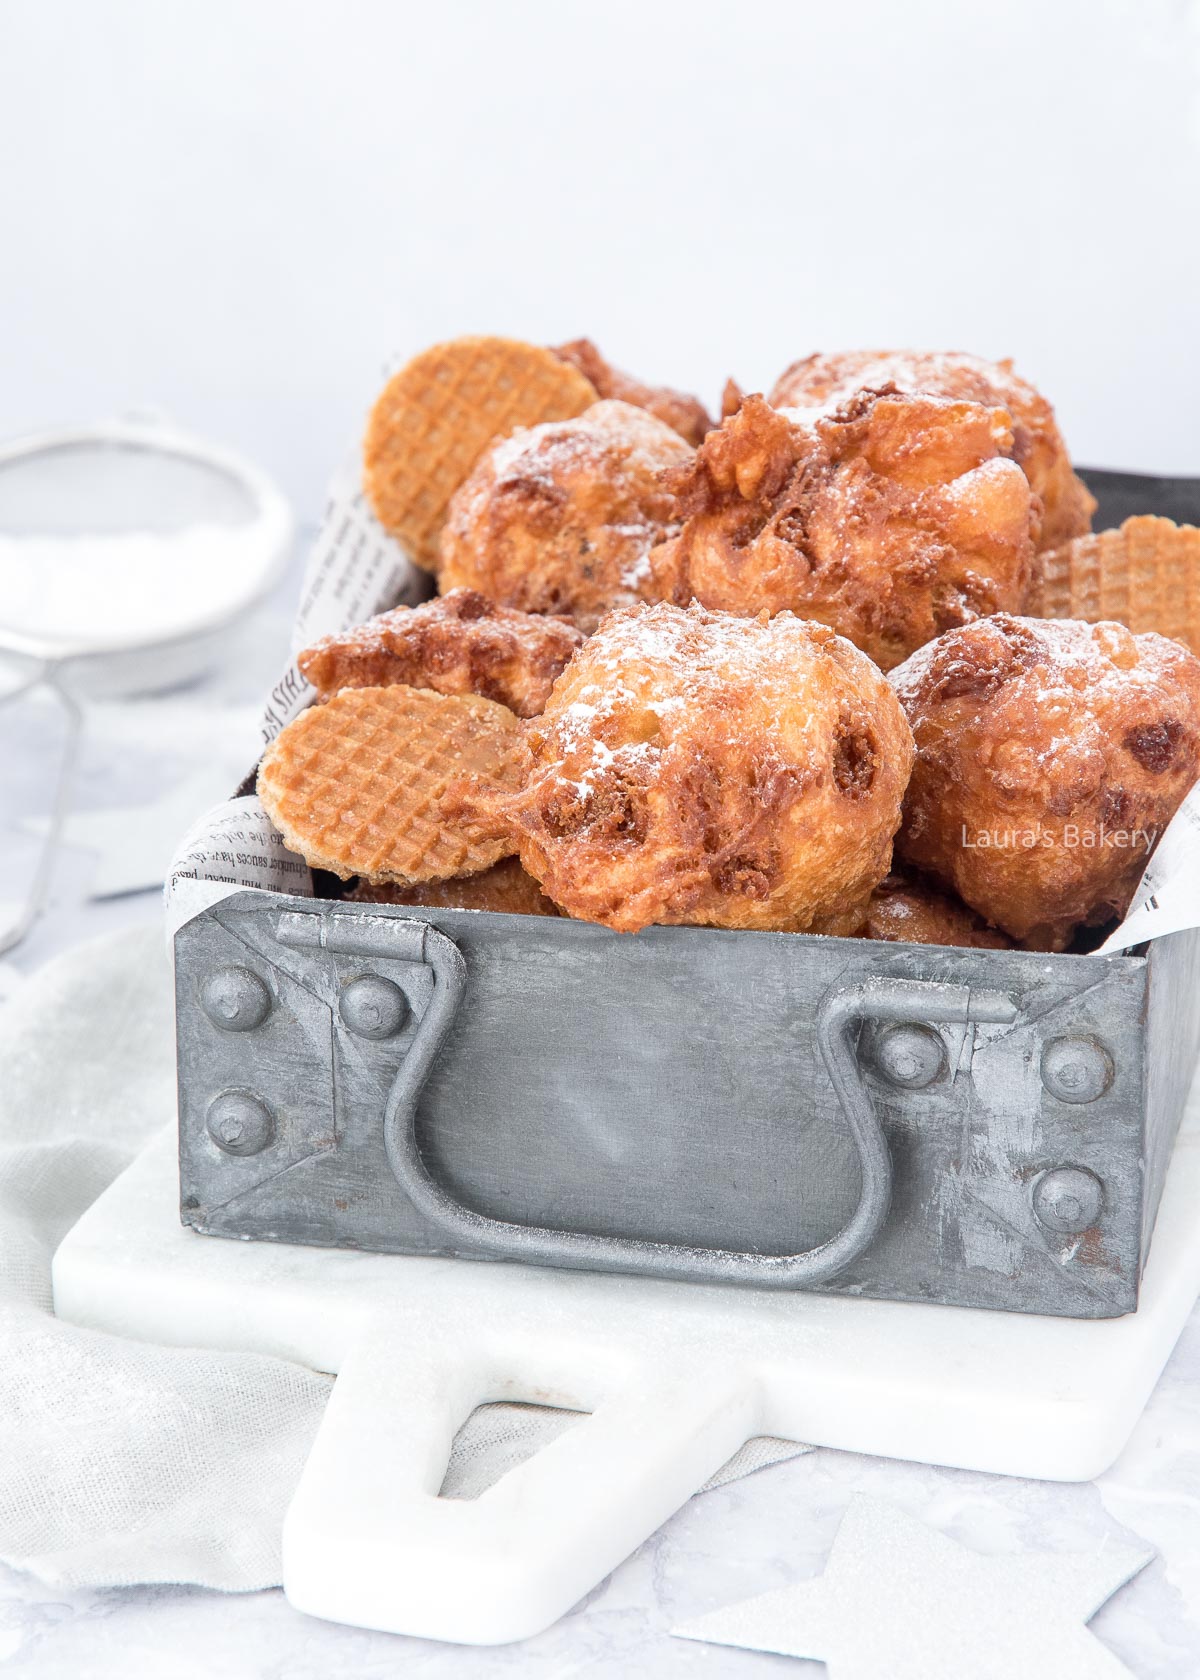
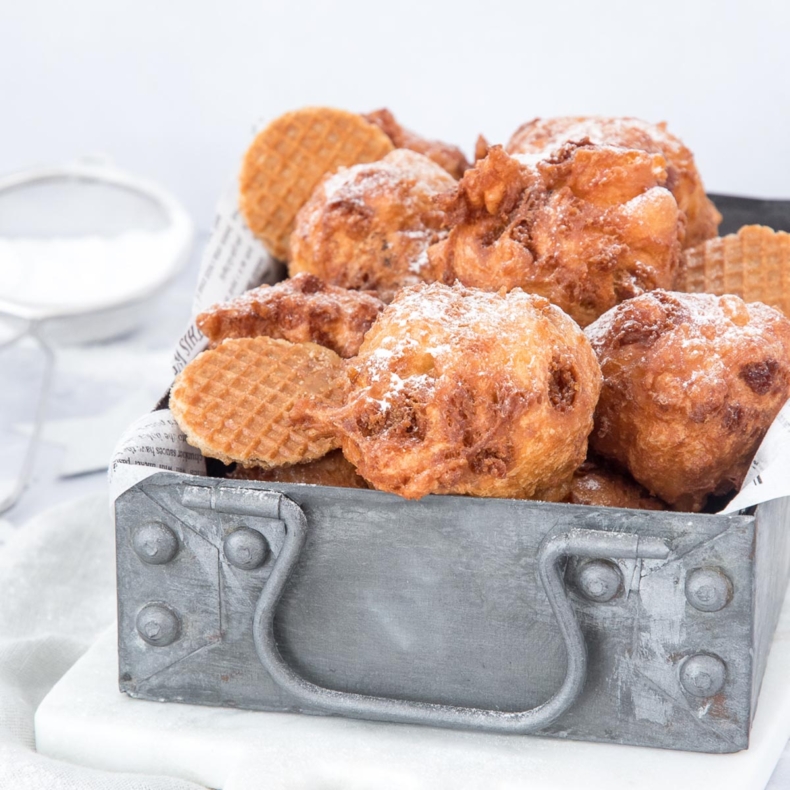
Last year I already shared my favorite recipe for oliebollen or Dutch Doughnuts. One of the most famous traditional Dutch foods. But today I am sharing a twist on the classic. I’ve combined these delicious oliebollen with another Dutch classic: stroopwafels. Here’s my recipe for Dutch doughnuts with stroopwafel!

As a ‘Dutchie’, I love myself some oliebollen! And I love to make several varieties as well. It’s always fun to give them a little twist. And I think this version with stroopwafels is possibly one of my all-time favorites.
If you’ve never heard of stroopwafels, they are a very specific cookie that is quite famous as a traditional Dutch pastry. I’ve included the photo below, as well as a photo of regular Dutch oliebollen.
Oliebollen are served during the festive season and most famous for being served around New Year’s Eve.
Apart from the ingredients used for the oliebollen, you will need stroopwafels or a similar cookie.
Make sure to double-check the quantities in the recipe card below for full details.


For making these stroopwafel oliebollen you will need a deep fryer or something that is suitable for frying food. We used a Dutch oven. Something similar works fine too.
You start by warming the milk and add the yeast and the sugar. Stir to combine and let it sit for about 5-10 minutes. You will see the yeast starting to form bubbles.
In a large bowl combine the flour and the salt. Add the egg and mix it through. Once combined, slowly pour in the milk mixture. Keep mixing it until you have a smooth batter.
Chop the stroopwafels into smaller pieces. Not too small and not too large. You should be able to distribute them evenly through the dough balls.
Now cover the bowl with plastic wrap and let the dough rise in a warm spot for about an hour. Or until roughly doubled in volume.
Now it’s time to start making the Dutch donuts. Heat the oil to 350˚F/180˚C
For forming the donuts I like to use an ice cream scoop. This is the easiest method, but you can also use two spoons. Dip the scoop or the spoons into the hot oil first. That way they will easily slide from the scoop into the oil.
Fry each doughnut for about 4-5 minutes or until golden brown. If they don’t flip on their own turn them halfway using a spoon or a fork.
Once fried make sure to place the oliebollen in a colander lined with paper towels. The paper will help absorb the excess oil and will crisp them up nicely. Be sure to replace the paper regularly as it will get soaked with the oil at some point.
You can store the Dutch Doughnuts once baked for 1-2 days. Keep them covered and outside of the fridge. You can eat them cold or reheat them.
You can reheat them in the oven for a few minutes at 350˚F/180˚C. Reheating in the microwave is an option too but they will become a bit softer if you do.
How long you’ll need with the microwave depends on how many oliebollen you want to reheat. For 3 pieces, I reheat them for about 40 seconds.
Freezing the Dutch doughnuts can be done too. You can keep them for three months once frozen. Once defrosted you can easily reheat them in the oven or microwave.

Yes! If you can’t find traditional Dutch stroopwafels, caramel waffle cookies are a great substitute. Just make sure they’re firm enough to chop into small pieces.
Most often this happens when the milk was too hot (which kills the yeast) or too cold (which slows activation). The milk should be lukewarm, about the temperature of a warm bath. Also check that your yeast is fresh and not expired.
This usually means the oil was too hot. Make sure it stays around 350°F (180°C). If the outside browns instantly while the inside stays raw, lower the heat slightly.
It’s best to fry the oliebollen right after the first rise. If you need to prep ahead, you can mix the dough and slow the rising process by placing it in the fridge for a few hours. Let it come back to room temperature before frying.
Links in this article may be affiliate links. If you purchase something through such a link, I will receive a small commission, without you paying anything extra.

Welcome to Laura’s Bakery! You’ve come to the right place for the most delicious baked goods and appetizers. With my easy recipes for home bakers I will show you that baking is fun and delicious.
Have fun baking!